

Page 1
User’s manual
SynJ SB67148
DECT 6.0 4-line expansion deskset
for use with AT&T model
SynJ SB67118/SB67138
Page 2
Congratulations
on your purchase of this AT&T product. Before using this AT&T product, please
read the Important safety information on pages 77-78 of this manual.
Please thoroughly read this user’s manual for all the feature operations and
troubleshooting information necessary to install and operate your new AT&T
product. You can also visit our website at www.telephones.att.com or
call 1 (888) 915-2007. In Canada, dial 1 (866) 288-4268.
Model number: SynJTM SB67148
Type: DECT 6.0 expansion deskset
Serial number:
Purchase date:
Place of purchase:
Both the model and serial numbers of your AT&T product can be found on the
bottom of the deskset.
Save your sales receipt and original packaging in case it is necessary to return
this product for warranty service.
Compatible with
Hearing Aid T-Coil
TIA-1083
© 2010 Advanced American Telephones. All Rights Reserved. AT&T and
the AT&T logo are trademarks of AT&T Intellectual Property licensed to
Advanced American Telephones, San Antonio, TX 78219. Printed in China.
TM
is a trademark of Advanced American Telephones.
SynJ
Telephones identified with this logo have reduced noise and interference when
used with most T-coil equipped hearing aids and cochlear implants. The TIA-1083
Compliant Logo is a trademark of the Telecommunications Industry Association.
Used under license.
T
The ENERGY STAR® program (www.energystar.gov)
recognizes and encourages the use of products that
save energy and help protect our environment. We
are proud to supply this product with an ENERGY
STAR® qualified power adapter meeting the latest
energy efficiency guidelines.
Page 3
Parts checklist
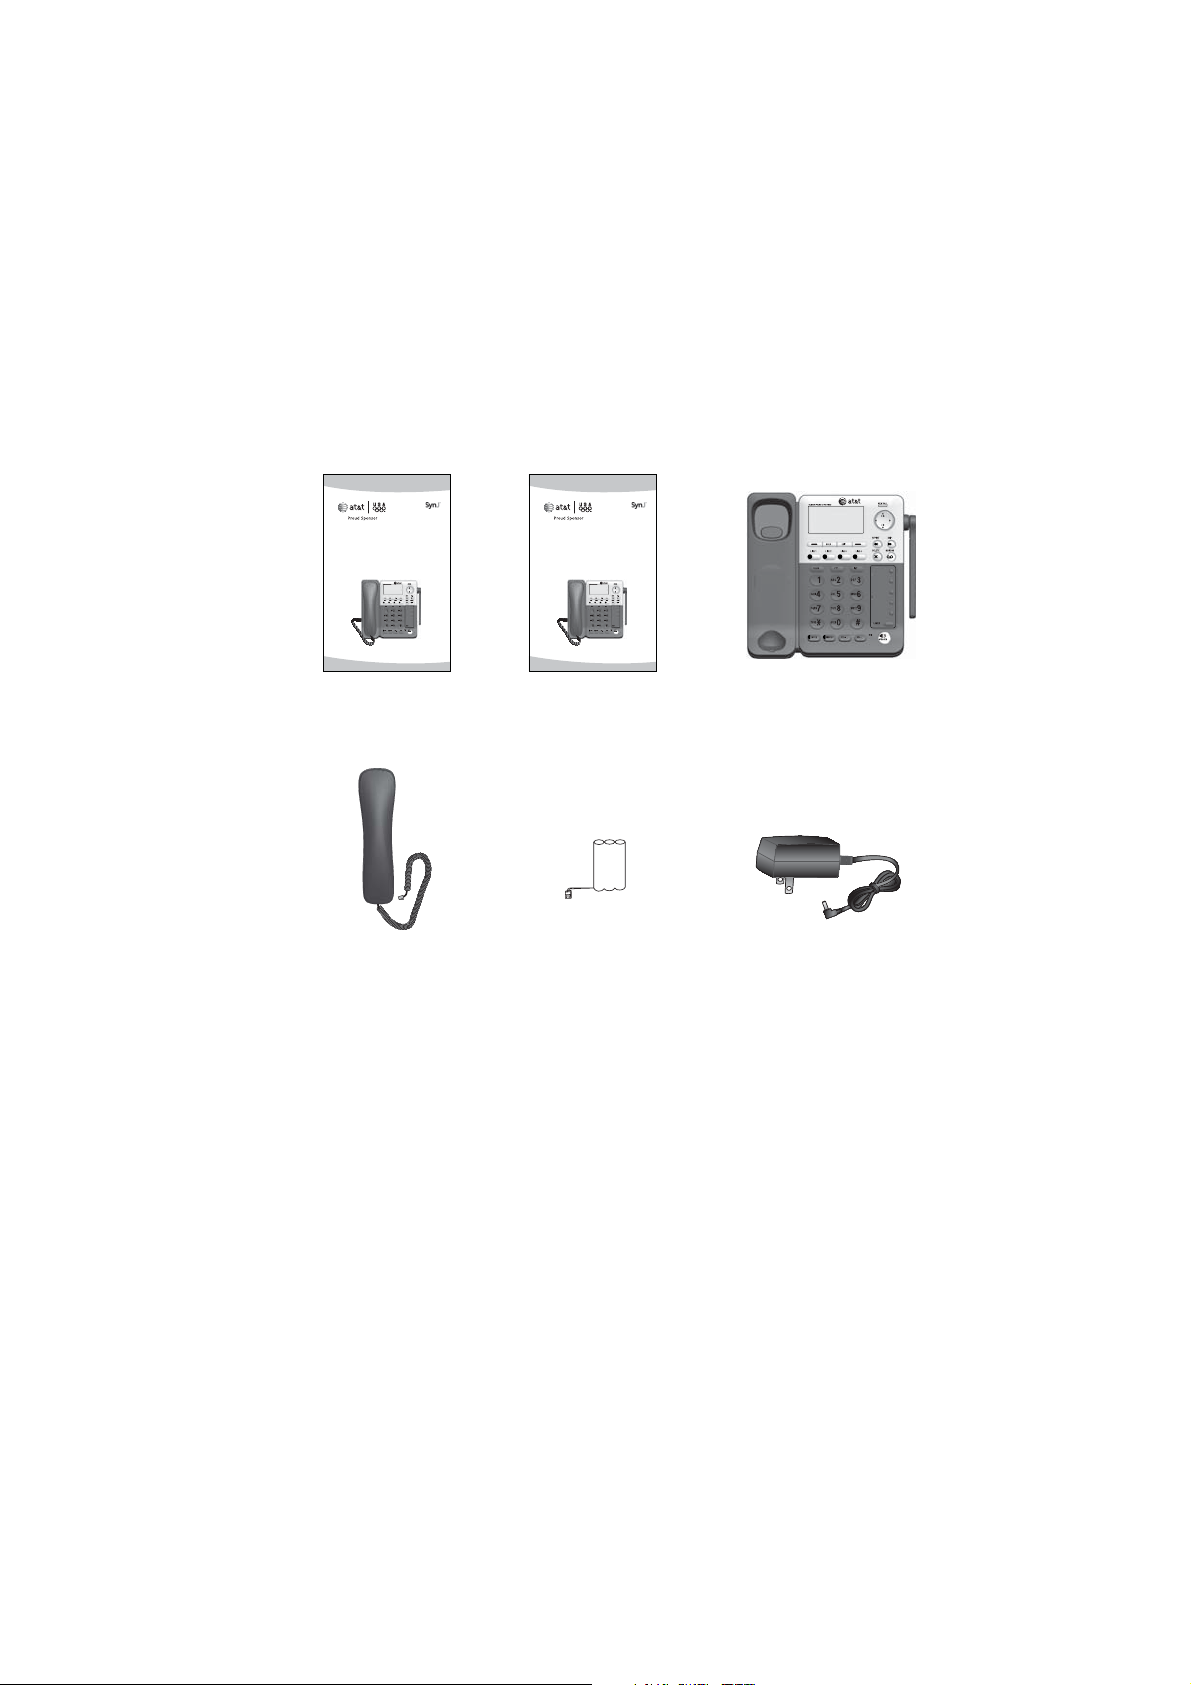
Check to make sure the telephone package includes the following items:
User’s manual
SynJ SB67148
DECT 6.0 4-line corded base
expansion deskset for use with
AT&T model
SynJ SB67118/SB67138
User's manual
Handset with coiled
cord installed
Quick start guide
SynJ SB67148
DECT 6.0 4-line corded base
expansion deskset for use with
AT&T model
SynJ SB67118/SB67138
Quick start guide
Backup battery
Deskset
Deskset power adapter
Page 4

User’s manual
SynJ SB67148
DECT 6.0 4-line corded/cordless
small business system
Table of contents
Getting started
Quick reference guide .............................. 1
Installation...................................................... 4
Deskset installation.................................... 5
Backup battery installation.................... 6
Backup battery charging......................... 7
Add and register a deskset.................... 8
Register a deskset to your SynJ
SB67118 telephone base.................... 8
Register the deskset to your SynJ
SB67138 telephone base.................... 9
Deregister the deskset ...........................10
Add a corded headset ............................11
Add a corded headset to the
deskset .......................................................11
Deskset operation
Deskset setup..............................................12
Menu settings..........................................12
Ringer volume.........................................12
Ringer tone...............................................13
LCD contrast............................................14
Key tone.....................................................14
Language...................................................15
Line selection ..........................................15
Deskset name..........................................16
Hold reminder .........................................16
Speed dial setup....................................17
Customer support .................................17
Deskset basic operation ........................18
Line indicators.........................................18
Make a call................................................18
To end a call............................................19
On hook dialing (predialing)............19
Switch between the speakerphone
and the corded handset ....................20
Switch between the speakerphone
and the corded headset ....................20
Switch between the corded
handset and the corded headset
Dial a speed dial number..................20
Answer a call...........................................21
Temporary ringer silencing...............21
Deskset basic operation ........................21
Last number redial................................22
Deskset basic operation ........................22
Options while on calls............................23
Volume control.......................................23
Call waiting...............................................23
Mute .............................................................23
Call privacy...............................................24
Record a call............................................25
Hold..............................................................26
Switch between lines ..........................26
Join a call in progress.........................26
Chain dialing............................................27
Three-way conference calls.............27
COVM (central office voicemail).....29
Intercom.........................................................30
Make an intercom call to the
SB67118/SB67138 telephone
base or a cordless handset..............30
Answer an incoming call during
an intercom call.....................................31
Answer an intercom call....................31
End an intercom call............................31
Call transfer using intercom................32
Push to talk (PTT) intercom .................34
...20
Page 5

PTT to a handset or
the main base.........................................34
PTT to all handsets and
the main base.........................................35
Answer a PTT call..................................36
Convert a PTT call to
an intercom call.....................................36
End a PTT call ........................................36
Directory
About the directory..................................37
Capacity .....................................................37
Exit the directory...................................37
Create directory entries.........................38
Create a new directory entry..........38
Store a pause in a directory entry
Store a flash in a directory entry
Review directory........................................40
Review directory entries....................40
Search directory.........................................41
Search by name .....................................41
Dial, delete or edit directory entries
Display dial ...............................................42
Delete an entry.......................................42
Delete all entries...................................42
Edit an entry ............................................42
...39
...39
...42
Caller ID
About caller ID ...........................................43
Information about caller ID
with call waiting ....................................43
Caller ID Information...............................44
How the caller ID information
(call log) works.......................................44
Caller ID operation...................................45
Memory match........................................45
Missed (new) calls indicator.............45
Review the caller ID information...45
View dialing options.............................46
Dial a call log entry..............................46
Delete the call log entries................46
Save a call log entry to
the directory............................................47
Reasons for missing caller
ID information.........................................48
Answering system
Answering system and voicemail......49
Answering system capacity..............50
Voice prompts.........................................50
Deskset mailbox setup ...........................51
Deskset mailbox overview ................51
New message indication....................51
Fast answer mode.................................51
Set access code (remote access
code) and mailbox security..............52
Notify alert................................................53
Deskset announcement setup ........55
Switch to general mailbox................56
Message playback.....................................57
Options during playback....................57
Transfer messages................................58
Call back to the mailbox
message caller........................................58
Delete all old messages.....................59
Record and deliver memos ..................60
Remote access............................................61
Appendix
Screen icons, indicator tones
and lights ..................................................63
Screen icons.............................................63
Indicator tones........................................63
Deskset display screen messages.....65
Troubleshooting.........................................68
Maintenance.................................................76
Important safety information..............77
FCC part 68 and ACTA............................79
FCC part 15..................................................80
Limited warranty........................................81
Technical specifications.........................83
Index
Index................................................................84
Page 6
Getting started
Quick reference guide
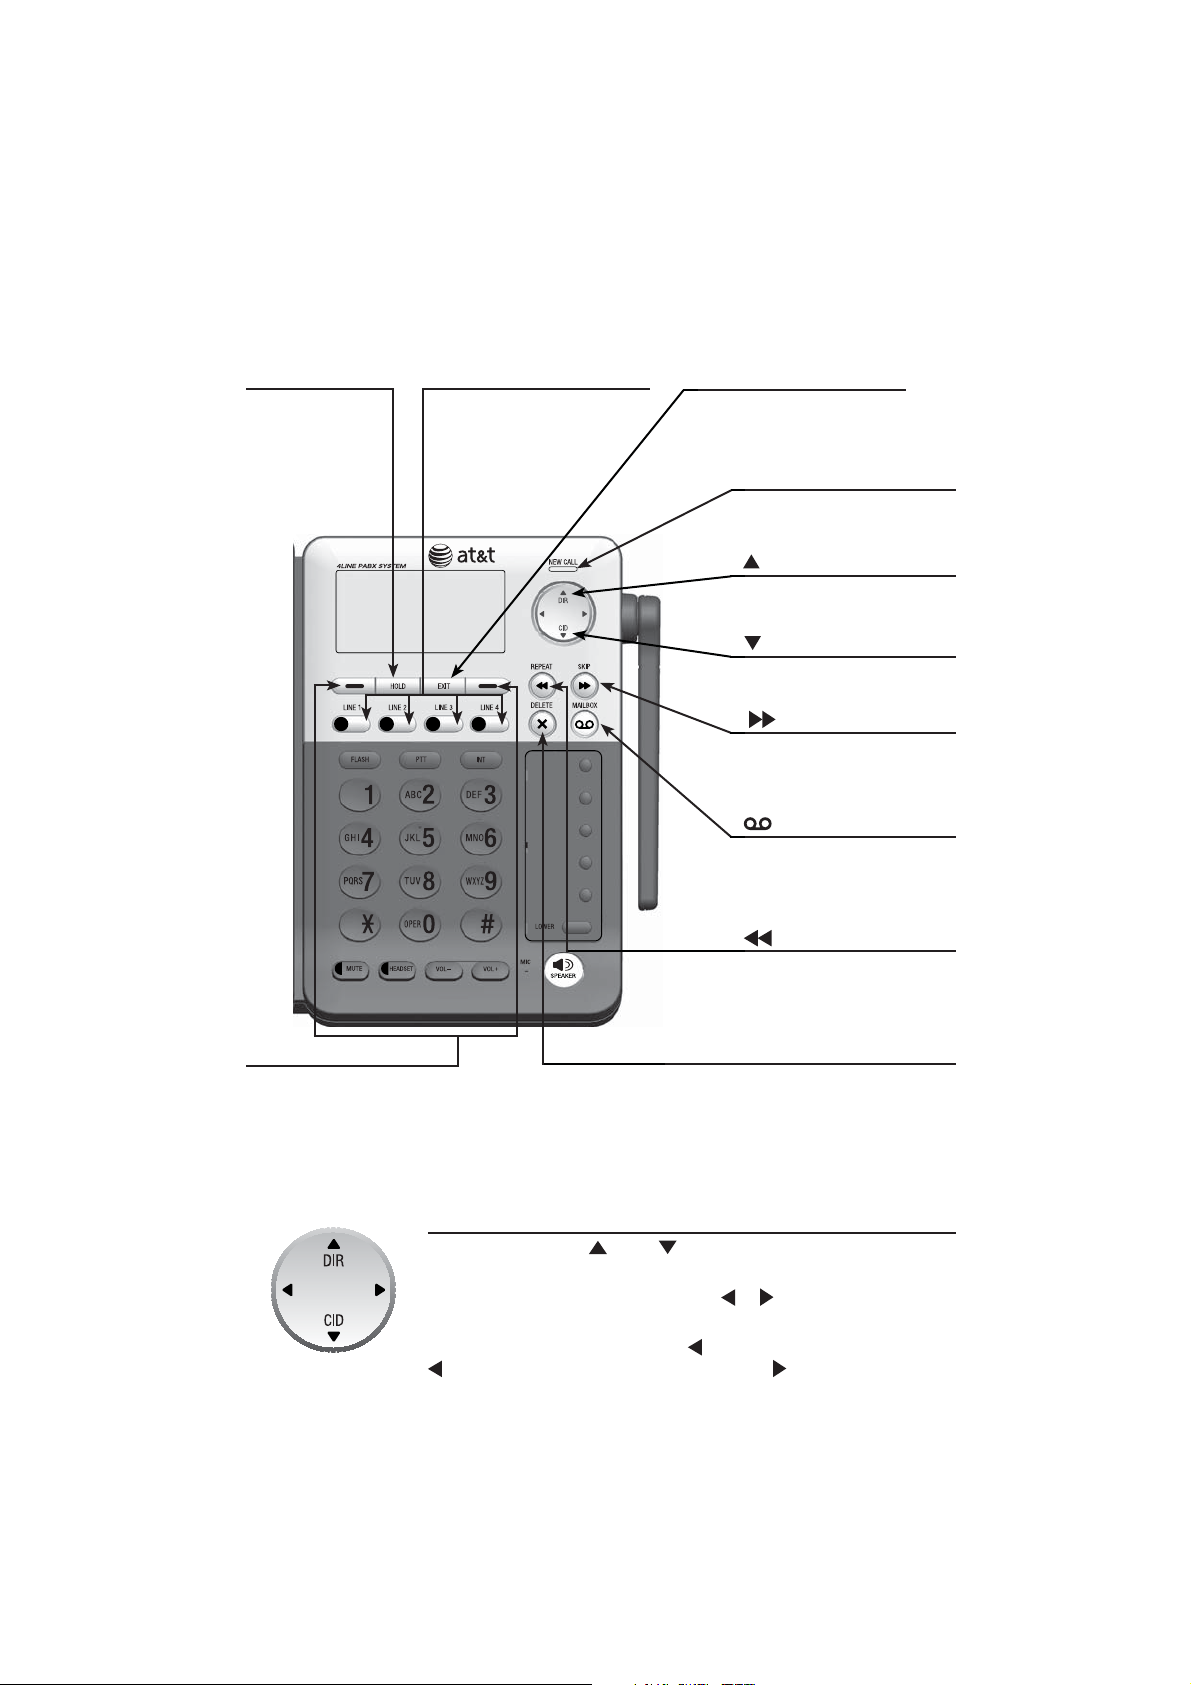
HOLD
Press to place an
outside call on
hold.
Softkeys (2)
Press to select a menu item
displayed above the key.
LINE 1-LINE 4 keys
Press to make or answer
a call on the desired line
(pages 18-19).
EXIT
While in a menu, press to
cancel an operation and exit
the menu display.
NEW CALL indicator
On when there are new or
missed calls (page 45).
DIR
Press to view directory
information (page 40).
CID
Press to view caller ID
information (page 45).
/SKIP
During message playback,
press to skip to the next
message (page 57).
/MAILBOX
When in idle mode, press
to enter the general or an
assigned mailbox menu
(page 57).
/Repeat
During message playback,
press to repeat a message,
or press twice to play the
previous message (page 57).
X/DELETE
Press to delete the message currently
playing (page 57).
Press to delete an entry while reviewing
the redial list, directory or call log.
While entering names or numbers, press
to delete a digit or character.
Navigation keys
While in menus, press DIR or CID to scroll through the menus,
highlight items or to change settings.
While entering names or numbers, press
the left or right.
While playing back messages, press
twice to hear the previous message, or press to skip to the next
message.
or to move the cursor to
to repeat the message, or press
1
Page 7
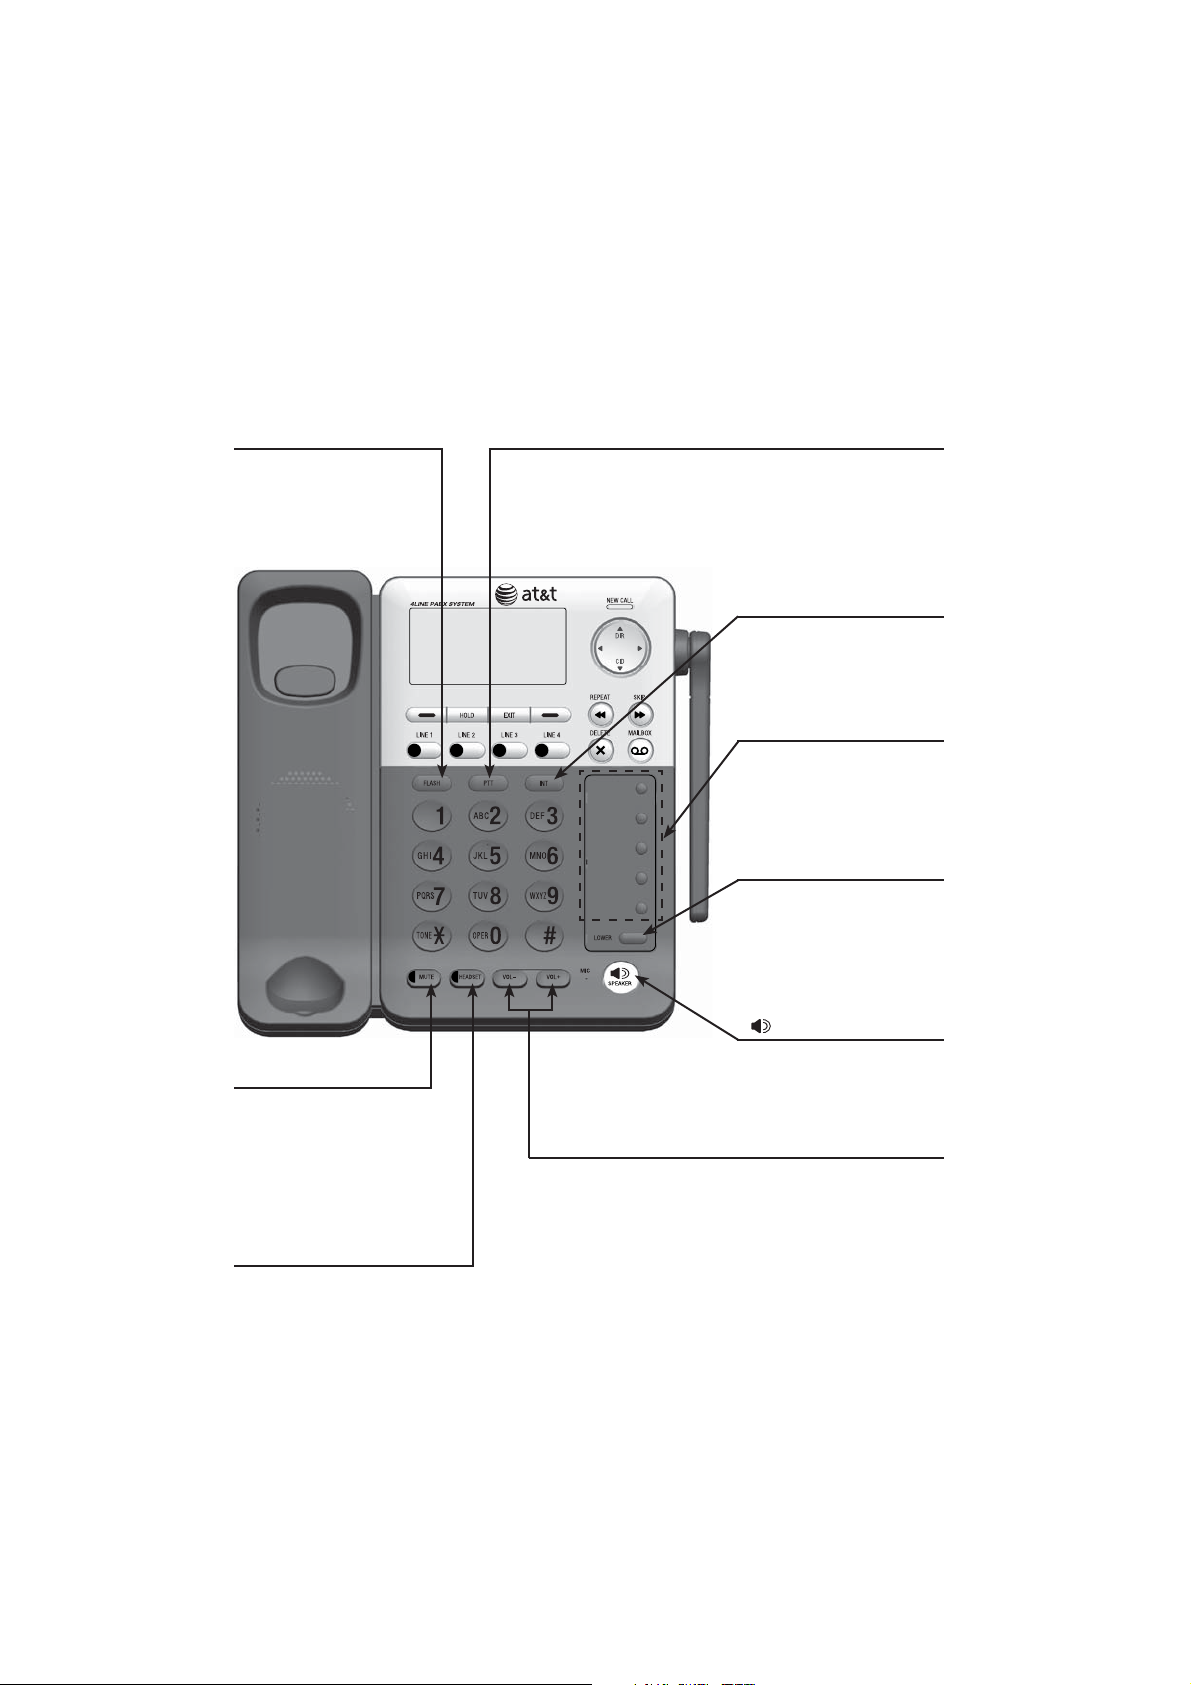
Getting started
Quick reference guide
FLASH
During a call, press to
answer an incoming call
when you receive a call
waiting alert (page 23).
PTT
Press to initiate a PTT call
(page 34).
Press and hold to
broadcast to all extension
(page 35).
INT
When in idle mode, press
to initiate an intercom call
(page 30).
Speed dial keys
Press to review or dial a
stored sped dial number
when the deskset is in idle
(page 20).
LOWER
Press to enter the lower
speed dial location.
(page 20).
MUTE
During a call, press to
mute the microphone
(page 23).
During an incoming call,
press to mute the ringer
(page 21).
HEADSET
When a corded headset is
connected to the deskset,
press to get a line, answer
a call or hang up (page 19).
The red indicator is on when
the headset is in use.
SPEAKER
Press to turn on the
speakerphone. Press again
to turn it off (page 20).
VOL+/VOL-
During a call, press to adjust
the listening volume
(page 23).
During message playback,
press to adjust the playback
volume (page 57).
Press to adjust the ringer
volume (page 12).
2
Page 8
Getting started
Quick reference guide
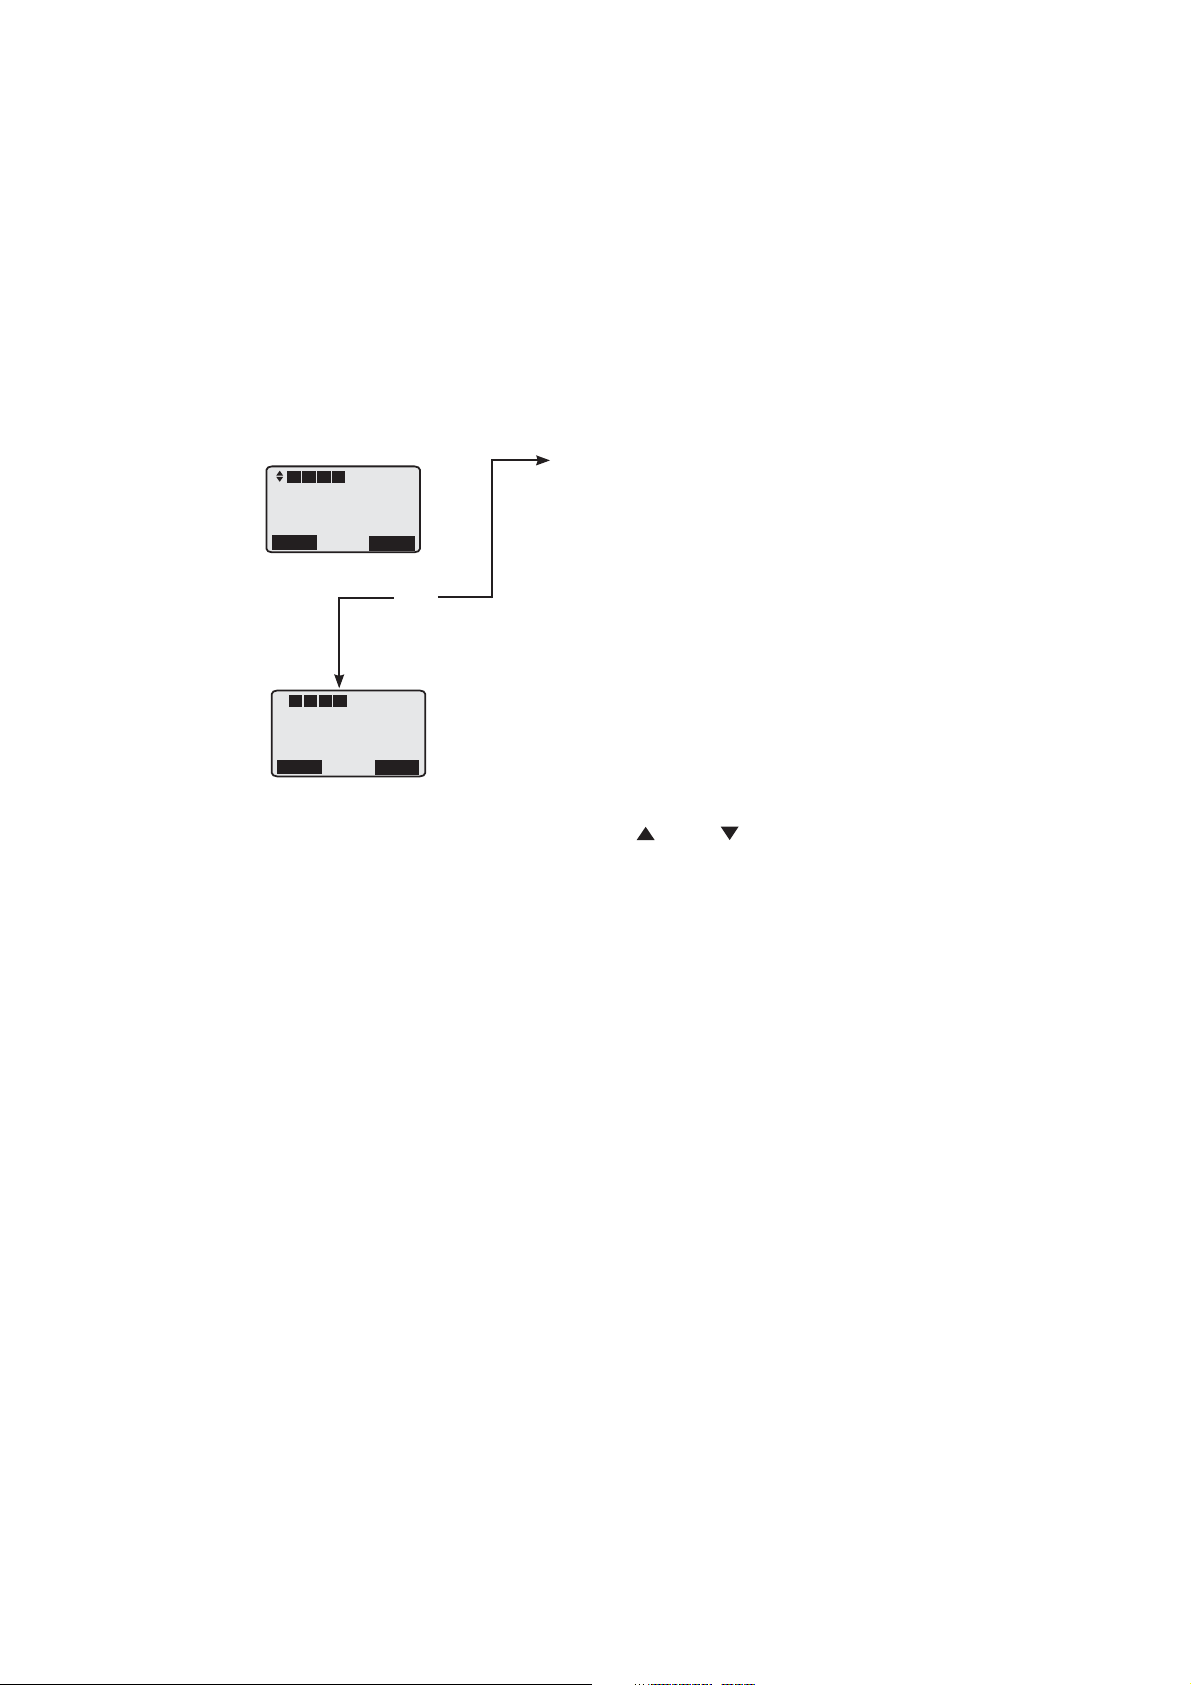
Main menu
The > symbol highlights a menu item.
L1 L2 L3 L4
>Directory
Call log
Ringer setting
Mailbox setup
Back
L1 L2 L3 L4
1:Deskset 1
0 Missed calls
10:01AM 11/23
Redial
Select
Menu
Menu
Main menu
Directory (page 38)
Call log (page 45)
Ringer setting (page 13)
Mailbox setup (page 51)
Deskset setup (pages 12-17)
COVM (page 29)
Speed dial setup (page 17)
Customer support (page 17)
Using menus
1.
Press the Menu softkey to show the first
menu item, Directory.
2.
Press
DIR or CID to scroll through
menu items.
3.
Press the Select softkey to select or
Save to save changes to a highlighted
menu item.
4.
Press Back to cancel an operation or
back up to the previous menu.
Directory card
To write names on the directory card,
follow the steps
1.
Remove the clear plastic cover by
inserting the tip of a small item such
as a paperclip into the hole at the top
edge of the cover.
2.
Pull out the directory card.
Write the information on the directory
3.
card.
4.
Replace the directory card and the
plastic cover.
3
Page 9

Getting started
Installation
Install the deskset close to a power outlet not controlled by a wall switch.
The deskset should be placed on a flat surface. For optimum range and
better reception, place the deskset in a central and open location.
Your product may be shipped with a protective sticker covering the deskset
display - remove it before use.
For customer service or product information, visit our website at
www.telephones.att.com or call 1 (888) 915-2007. In Canada, dial
1 (866) 288-4268.
Avoid placing the deskset too close to:
•
Communication devices such as television sets, VCRs, or other cordless
telephones.
•
Excessive heat sources.
•
Noise sources such as a window with traffic outside, motors, microwave
ovens, refrigerators, or fluorescent lighting.
•
Excessive dust sources such as a workshop or garage.
•
Excessive moisture.
Extremely low temperature.
•
Mechanical vibration or shock such as on top of a washing machine or
•
work bench.
4
Page 10
Getting started
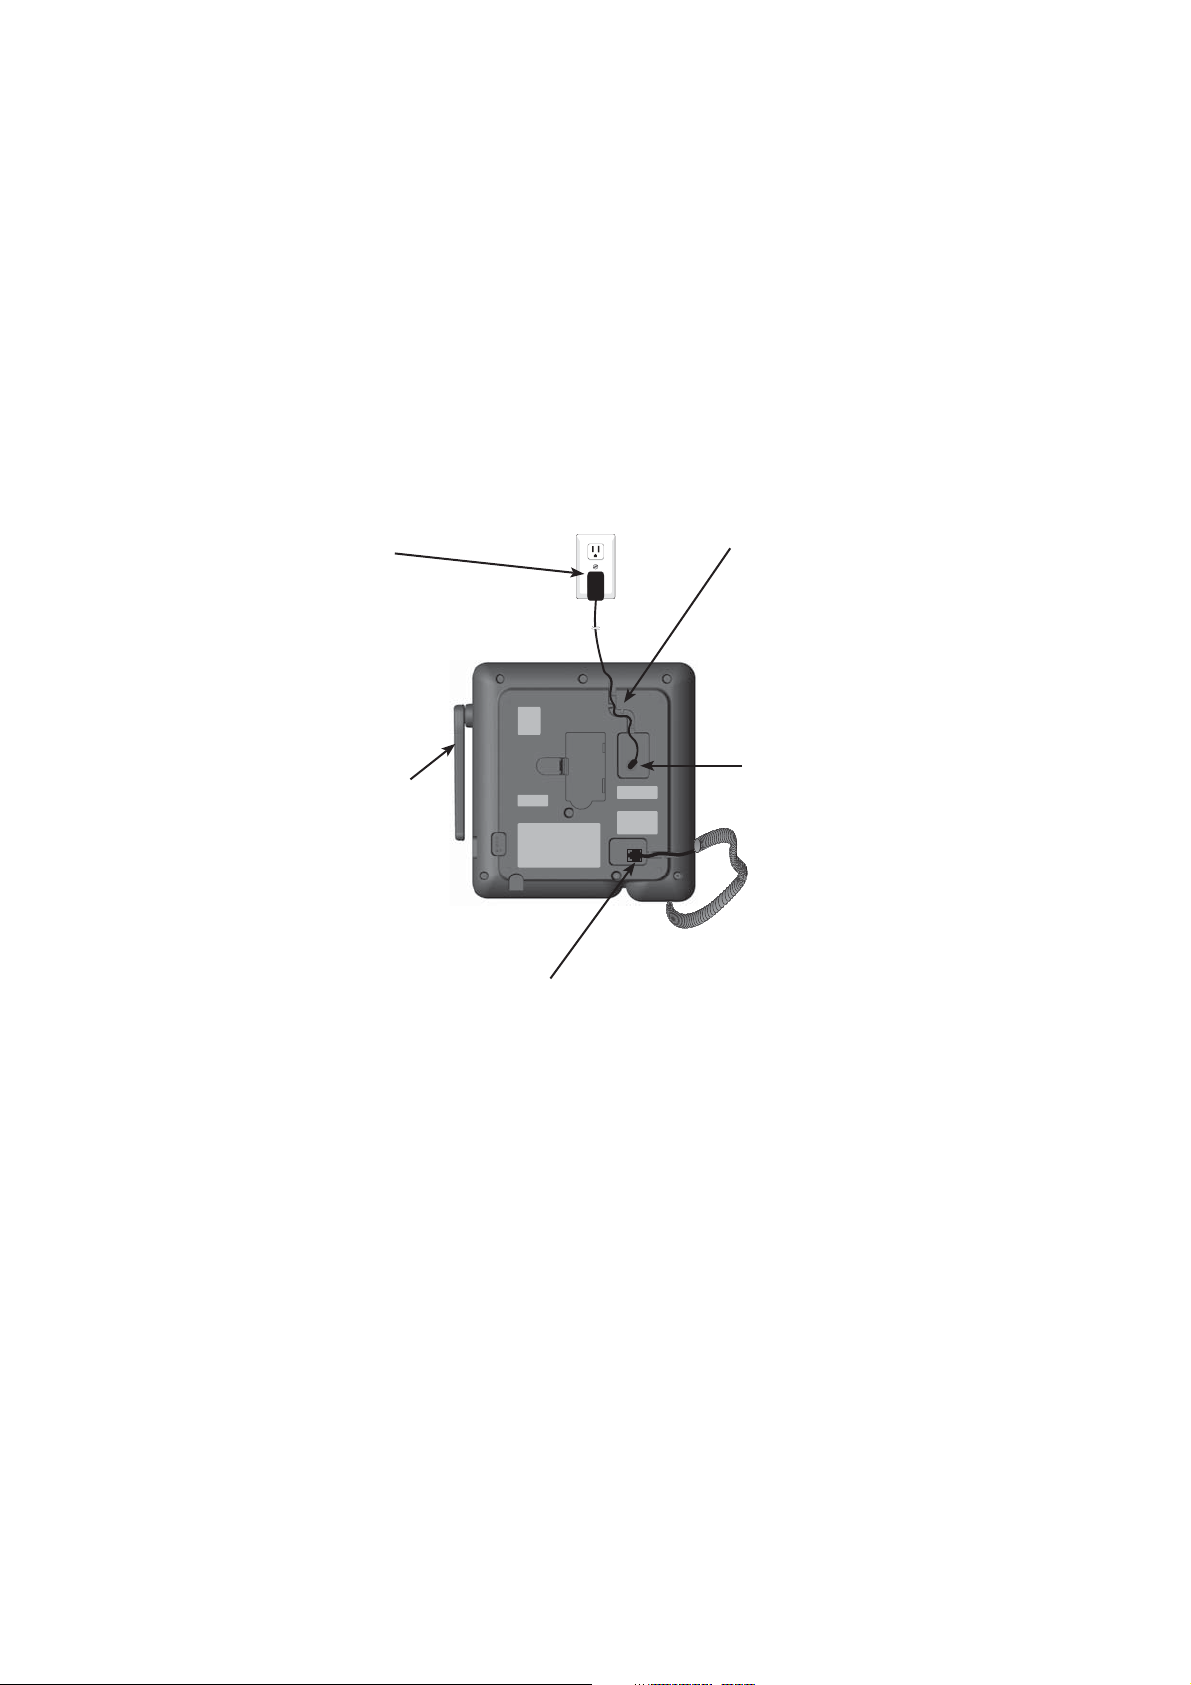
Deskset installation
Install the deskset as shown below.
Plug the large
end of the power
adapter into a
power outlet not
controlled by a
wall switch.
Raise the antenna
for optimum
wireless range and
performance.
Route the power
adapter cord through
the slot at the bottom
of the deskset.
Plug the small end of
the power adapter into
the power jack at the
bottom of the deskset.
Plug the end of the
coiled handset cord
into the jack at the
bottom of the deskset.
IMPORTANT INFORMATION:
Use only the power adapter supplied with this product. To order a replacement power adapter,
•
visit our website at
www.telephones.att.com, or call
1 (888) 915-2007. In Canada, dial 1 (866) 288-4268.
The power adapter is intended to be correctly oriented in a vertical or floor mount position.
•
The prongs are not designed to hold the plug in place if it is plugged into a ceiling,
under-the-table or cabinet outlet.
5
Page 11
Getting started
Battery Pack
89-1323-00-00
Model 27910
3.6V 600mAh NI-MH
WARNING: DO NOT BURN OR
PUNCTURE BATTERIES
MADE IN CHINA BY1029
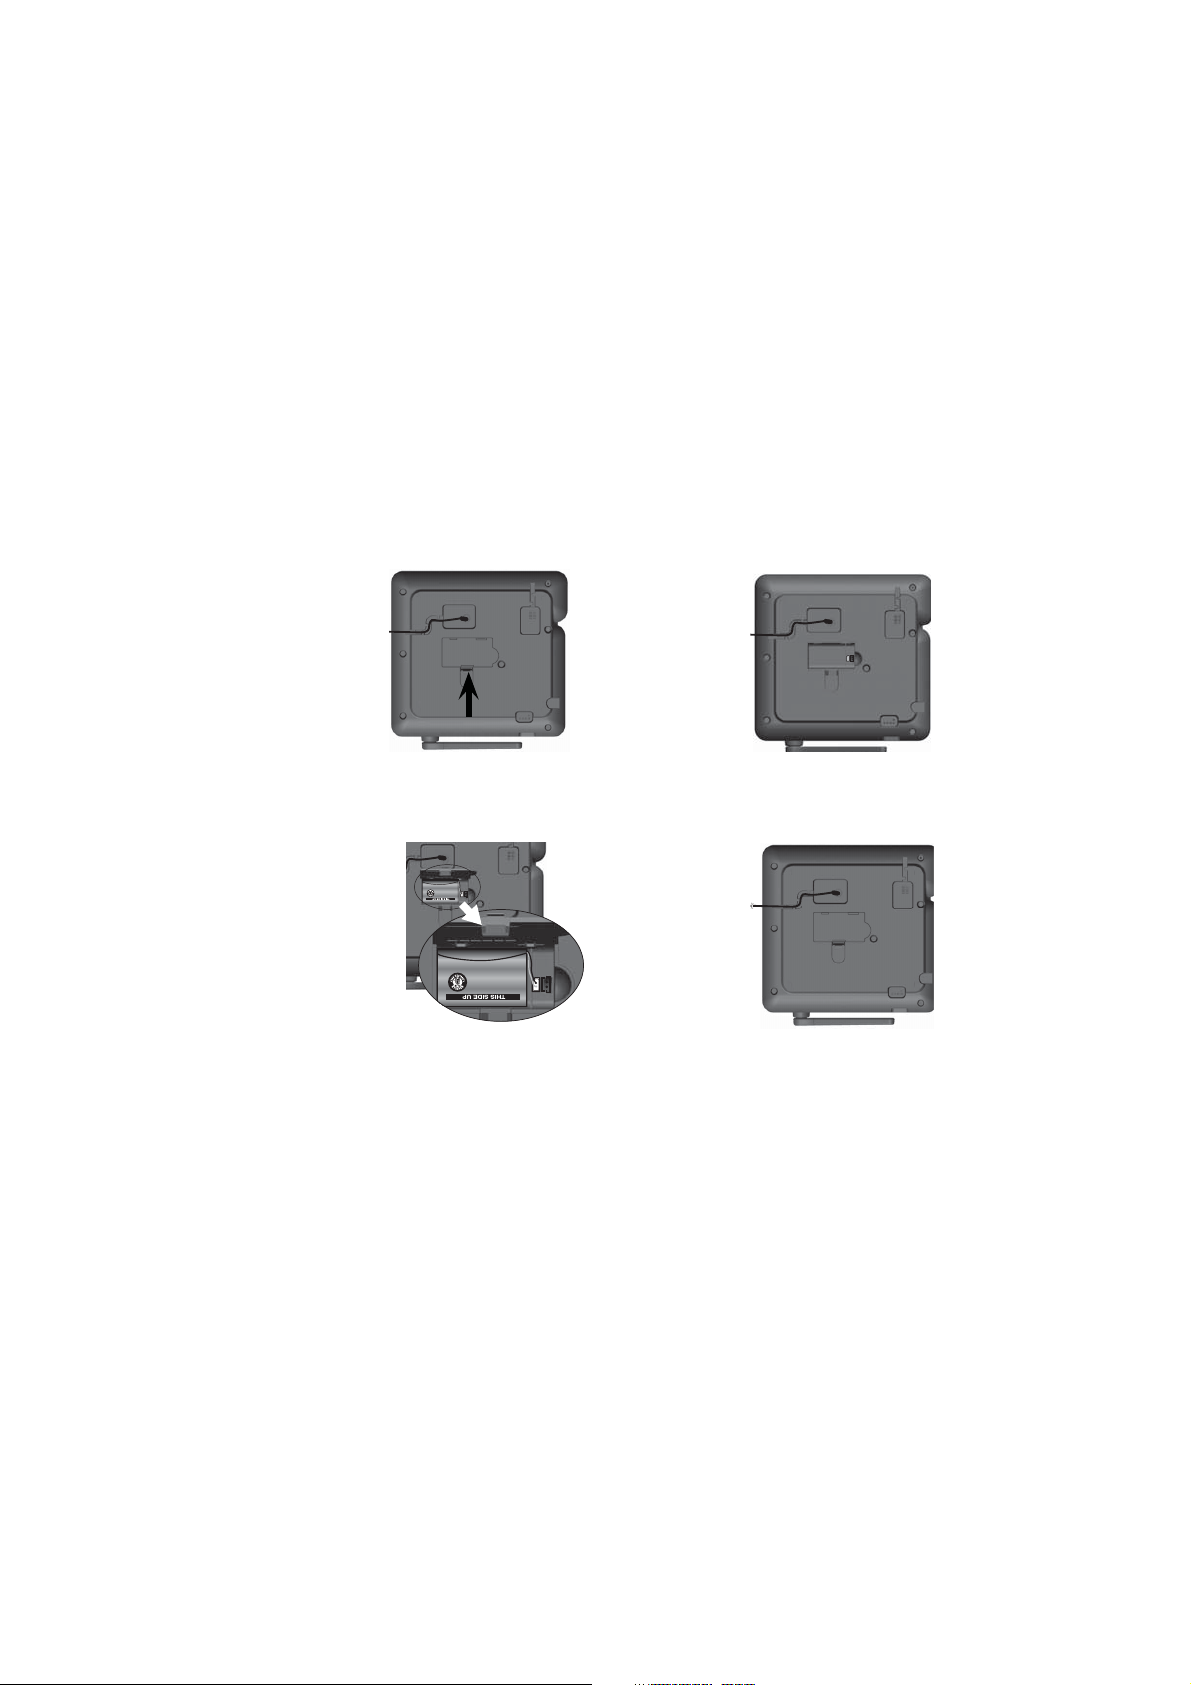
Backup battery installation
Install the backup battery as shown below. In the event of a power failure,
the charged backup battery allows the deskset operate. Plug in the AC
power adapter into the power jack at the bottom of the deskset to charge the
backup battery.
See the charging time on the previous page.
1
Step 1
Press the tab and
lift up the battery
compartment cover..
Step 2
Lift up the tab
to open the
backup battery
compartment cover.
MADE IN CHINA BY1029
PUNCTURE BATTERIES
WARNING: DO NOT BURN OR
Step 3
Place the battery in
the compartment.
Make sure the supplied
battery with the label
THIS SIDE UP facing
up as indicated.
3.6V 600mAh NI-MH
Model 27910
89-1323-00-00
Battery Pack
Step 4
Align the cover flat
against the battery
compartment, then
slide it to the left
until it clicks into
place to lock the
cover.
IMPORTANT INFORMATION:
Use only the supplied rechargeable battery or replacement battery. To order, visit our website at
www.telephones.att.com, or call 1 (888) 915-2007. In Canada, dial
1 (866) 288-4268.
6
Page 12
Getting started
Backup battery charging
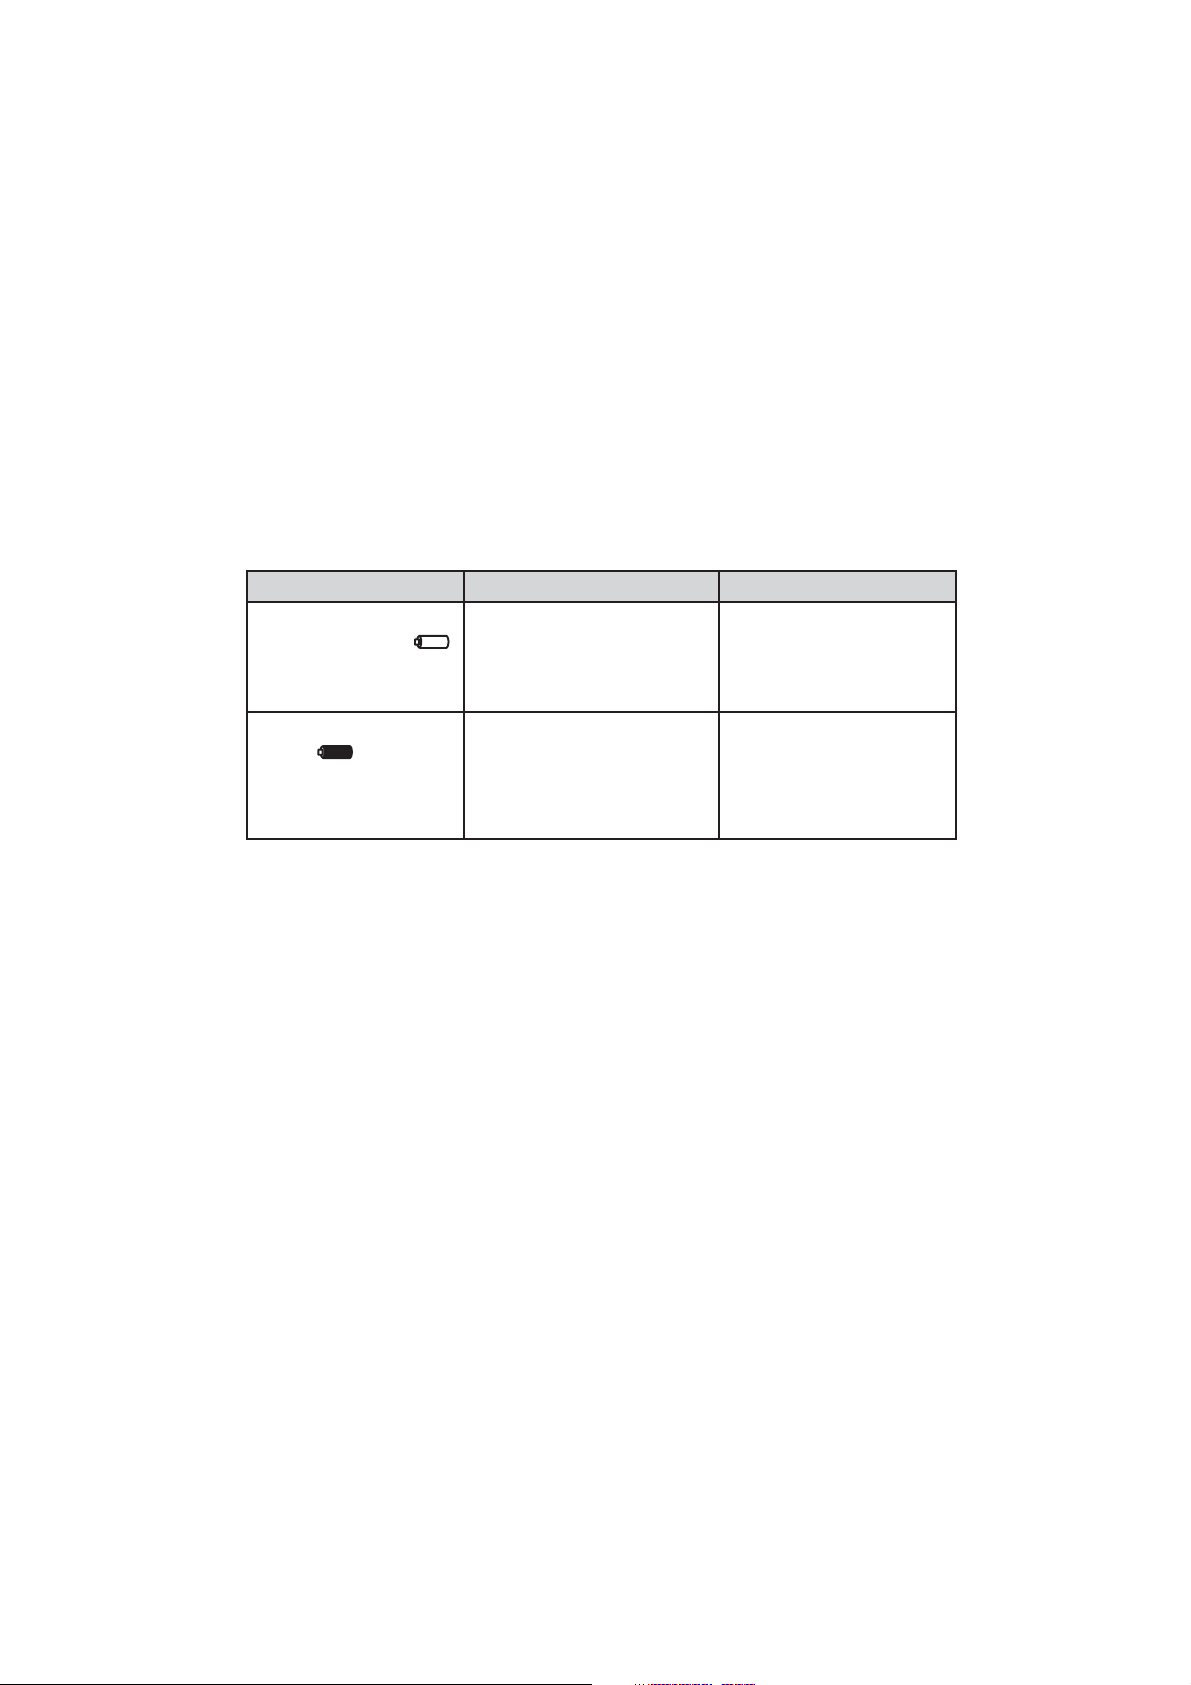
If the deskset loses power but you have installed the backup battery, the
screen indicates the battery status (see table below) and displays
Check AC power. Refer to the Deskset installation on page 5 for
reconnecting the deskset with the power adapter. If it is in low battery mode,
the screen displays Low battery. The backup battery is fully charged after 16
hours of continuous charging. See the table on page 83 for battery
operating times.
The following table summarizes the battery charge indicators and actions
to take.
Battery indicators Battery status Action
The screen shows
Low battery and
flashes.
Battery has enough
charge to be used for a
short time.
Charge without
interruption at least one
hour.
The screen
shows .
Battery is fully charged. To keep the battery
charged, keep the
adapter plugged into
the jack at the bottom
of the deskset.
7
Page 13
Getting started
Add and register a deskset
The handset provided with the SynJ SB67118/SB67138 is already registered
as Handset 1. Additional deskset is assigned numbers in the order they are
registered (Deskset 2 to Deskset 10). You can register a maximum of
10 desksets.
You can add desksets (SynJ SB67148, sold separately) to the SynJ SB67118/
SB67138 at any time, but each new deskset must be registered with the
main telephone base before use. The SynJ SB76148 is assigned as
X:Deskset X. Each deskset must be registered separately.
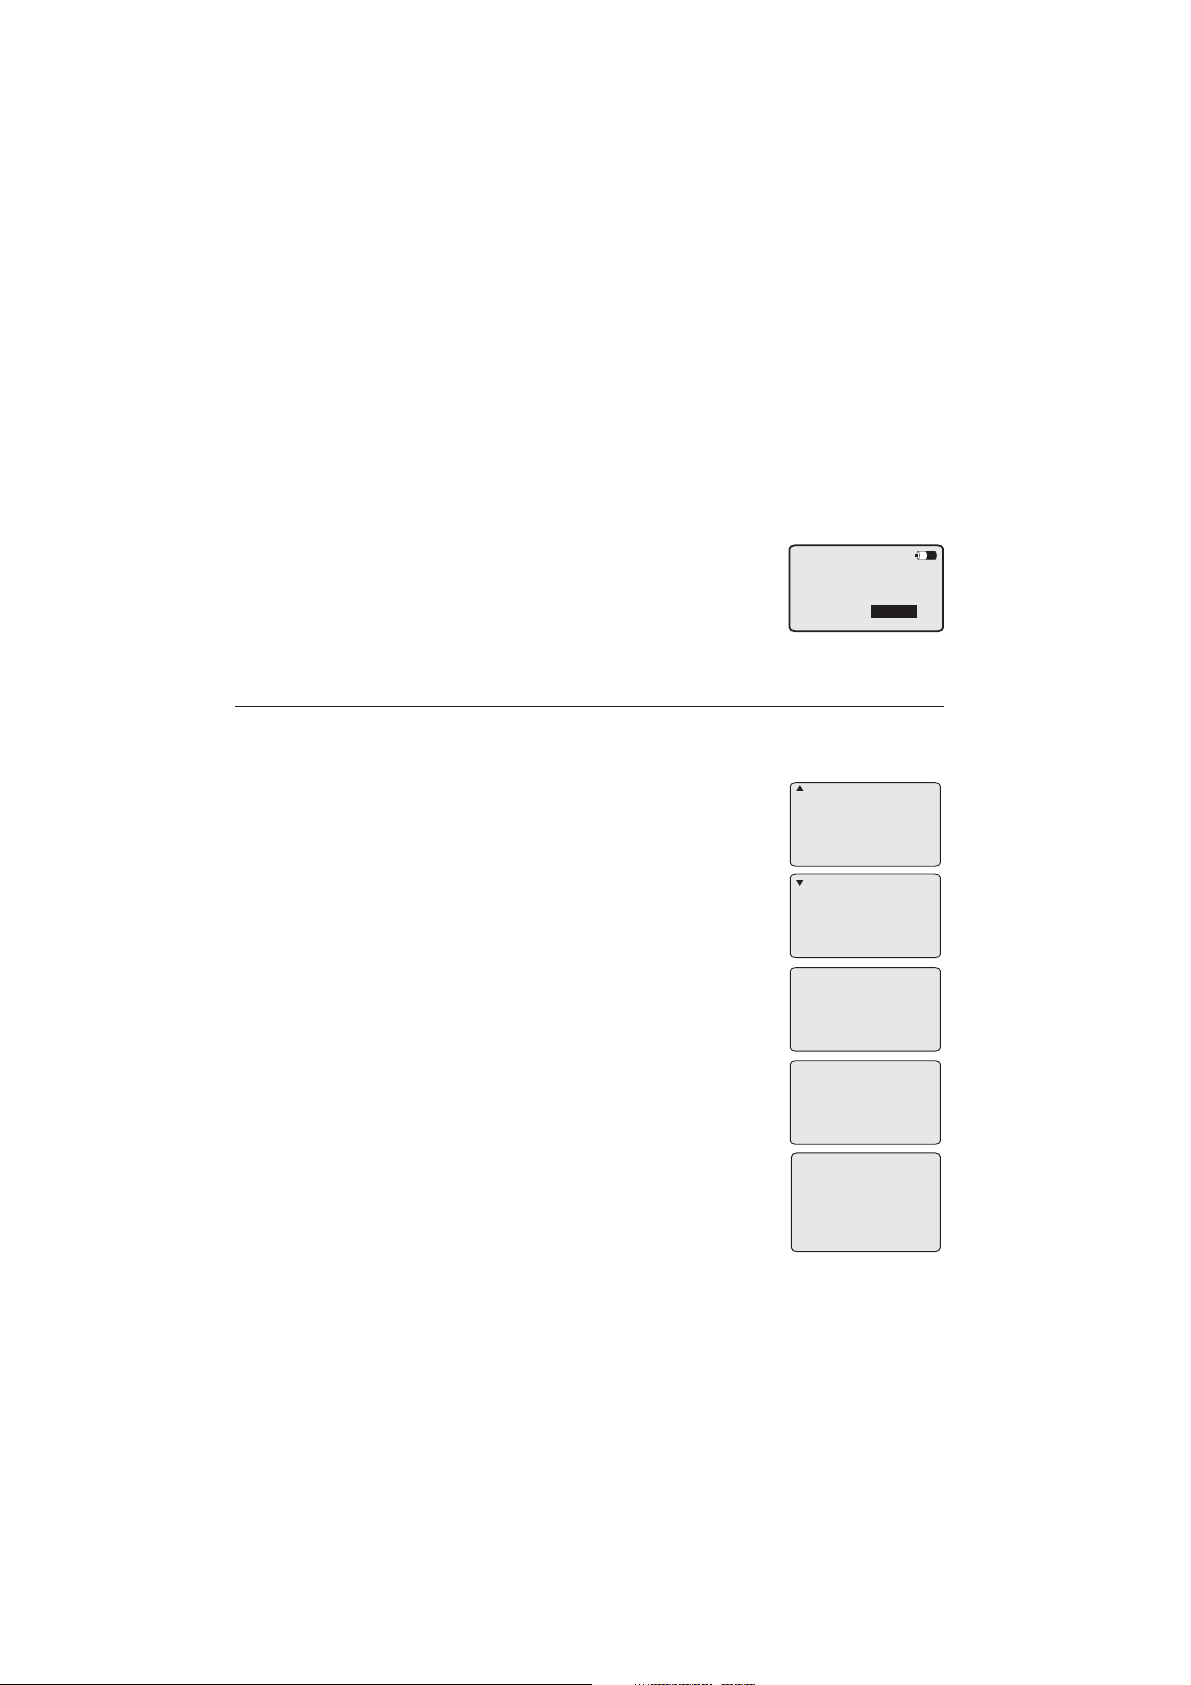
Before using a new SynJ SB67148 expansion deskset, you
must register it with the SynJ SB67118/SB67138 (sold
separately). Start registration when the deskset screen
shows Press MENU on BS, sel Registration & sel Register
HS. Then press Start.
Register a deskset to your SynJ SB67118 telephone base
On the SynJ SB67118 telephone base, press
1.
MENU/ENTER.
Scroll down to Registration and press MENU/ENTER.
2.
Press MENU/ENTER again to select Register HS. The main
3.
telephone base displays Handset registering.
Press the Start softkey on the unregistered deskset.
4.
The deskset shows Register...Please wait. It takes up
to 60 seconds to complete the registration. You hear a
beep when the registration is successful. The telephone
base shows Deskset registered. The deskset shows
Registered and then the deskset shows X:Deskset X
(X represents the extension number [1-0]; Deskset X
represents the default deskset name).
Press MENU on
MAIN base, select
Registeration &
then Register HS.
Then press Start
COVM
Speed dial setup
Customer support
Registration
>
Register HS
>
Cordless headset
Deregistration
Handset
registering
Deskset
registered
2:Deskset 2
8
Page 14
Getting started
Add and register a deskset
Register the deskset to your SynJ SB67138 telephone base
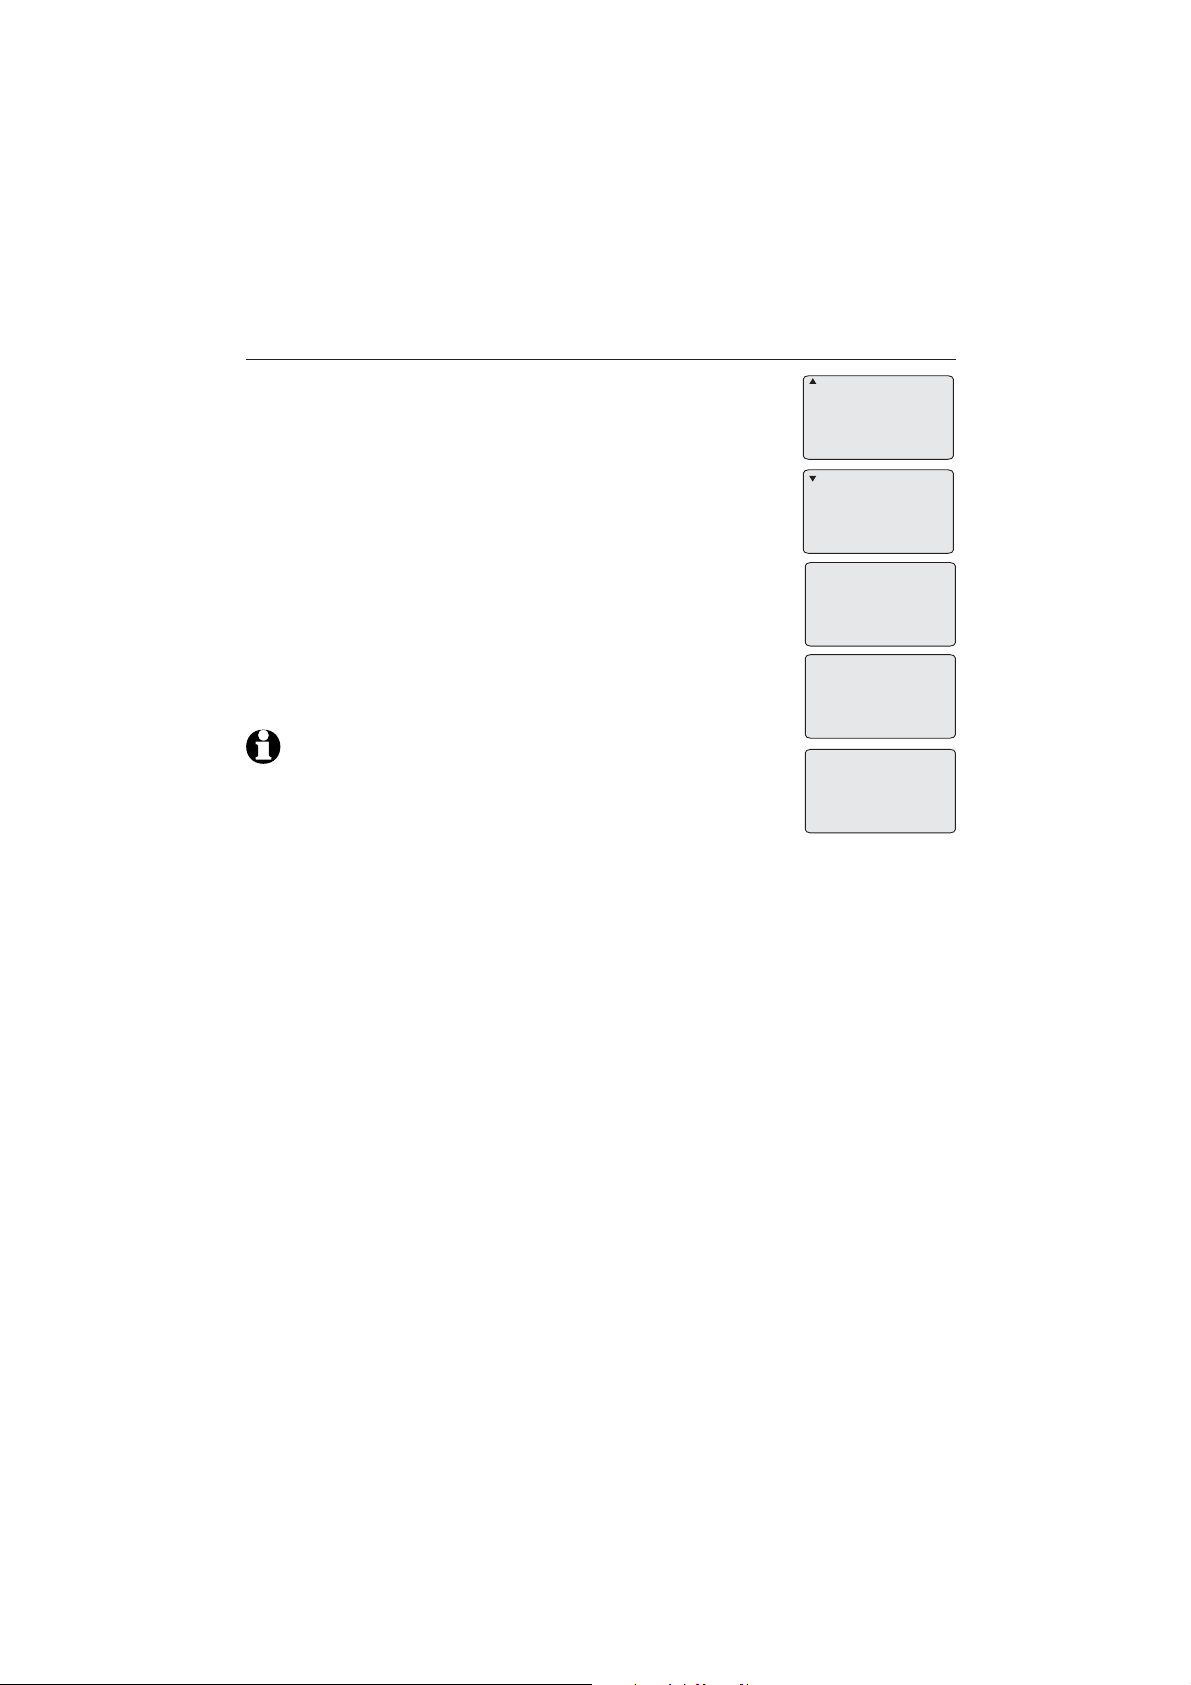
1.
On the SynJ SB67138 telephone base, press
MENU/
Scroll down to Registration and press MENU/ENTER.
2.
Press MENU/ENTER again to select Registeration. The
3.
telephone base screen shows Registering new device...
Press the Start sofkey on the unregistered deskset. The
4.
deskset shows Registering...Please wait. It takes up to
60 seconds to complete the registration. You hear a beep
sound when the registration is successful. The telephone
base shows Deskset registered. The deskset shows
Registered. Then the deskset shows
X:Deskset X (X represents the extension number [1-0];
Deskset X represents the default deskset name).
ENTER.
COVM
Speed dial setup
Customer support
Registration
>
Register HS
>
Deregistration
Registering
new device...
Deskset
registered
NOTE: If the registration is not successful, the screen shows Press
MENU on BS, sel Registration & sel Register HS. Then press Start.
Try the registration process again.
2:Deskset 2
9
Page 15
Getting started
Deregister the deskset
You may need to deregister the deskset from the telephone base if you
already have ten registered devices and need to replace a deskset, or if you
wish to change the assigned number of your registered devices.
You must first deregister ALL the registered devices, and then register each
deskset (or handset) that you wish to user again, one at a time.
Pleaes read carefully through all the instructions in this section before
beginning the deregistration process.
Please make sure the telephone system is not in use before deregistration.
Deregister a deskset does not remove the data saved on the device. For
details, see the Deregister handsets and headset in the user’s manual
of AT&T model SynJ SB67118 (sold separately) or SynJ SB67138 (sold
separately).
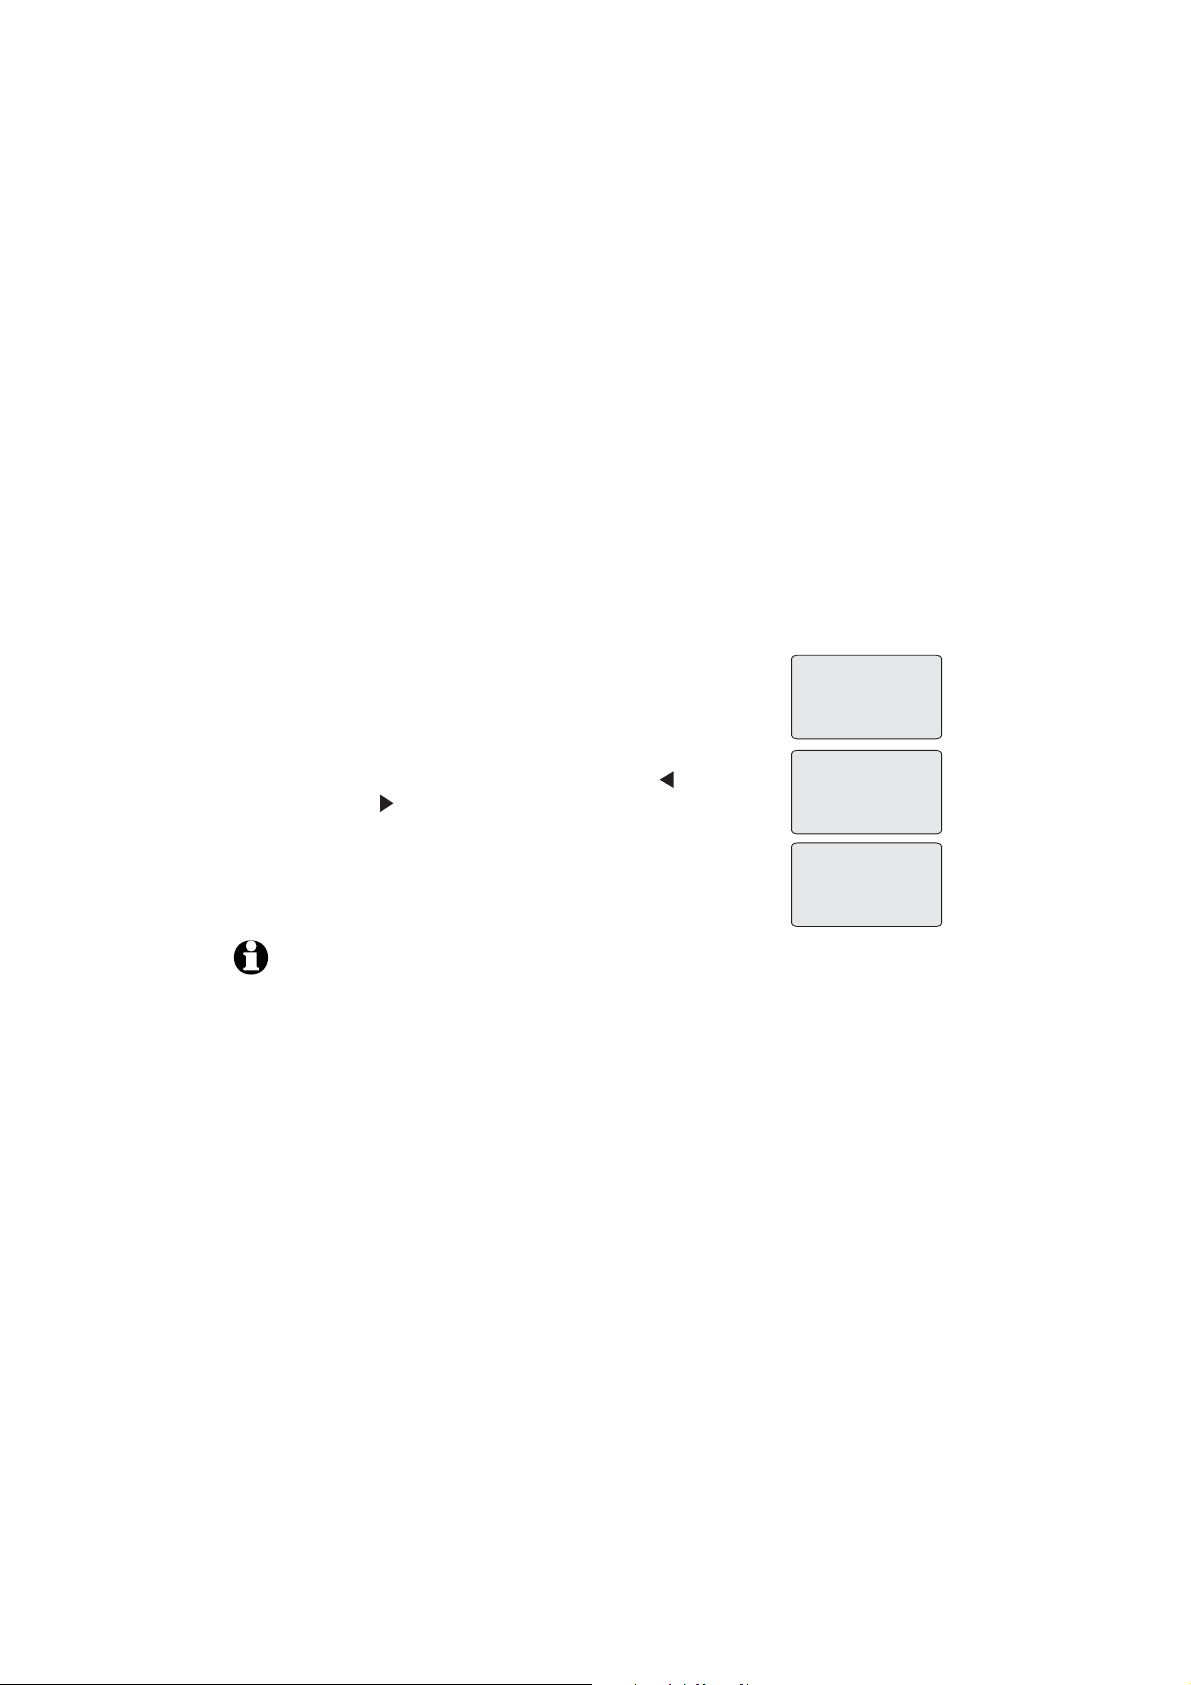
On the SynJ SB67118/SB67138 telephone base, press
1.
MENU/ENTER.
Scroll down to Deregistration and press MENU/ENTER.
2.
The telephone base shows
3.
Deregister all devices? <=No >=Yes. Press REP to exit
or press SKIP to continue the deregistration process.
The telephone base shows Deregistering. It takes up to
4.
10 seconds to complete the deregistration process. The
telephone base shows All handsets deregistered and
beeps when the deregistration is successful.
Deregister all
devices?
<=No >=Yes
Deregistering
All handsets
deregistered
NOTES:
If the deregistration process fails, you may need to reset the system and try again. To
•
reset, you can press EXIT on the telephone base. You can also reset the telephone base by
unplugging the power from the telephone base and plugging it back in.
To register a deskset again, refer to the registration information on page 8.
•
10
Page 16
Getting started
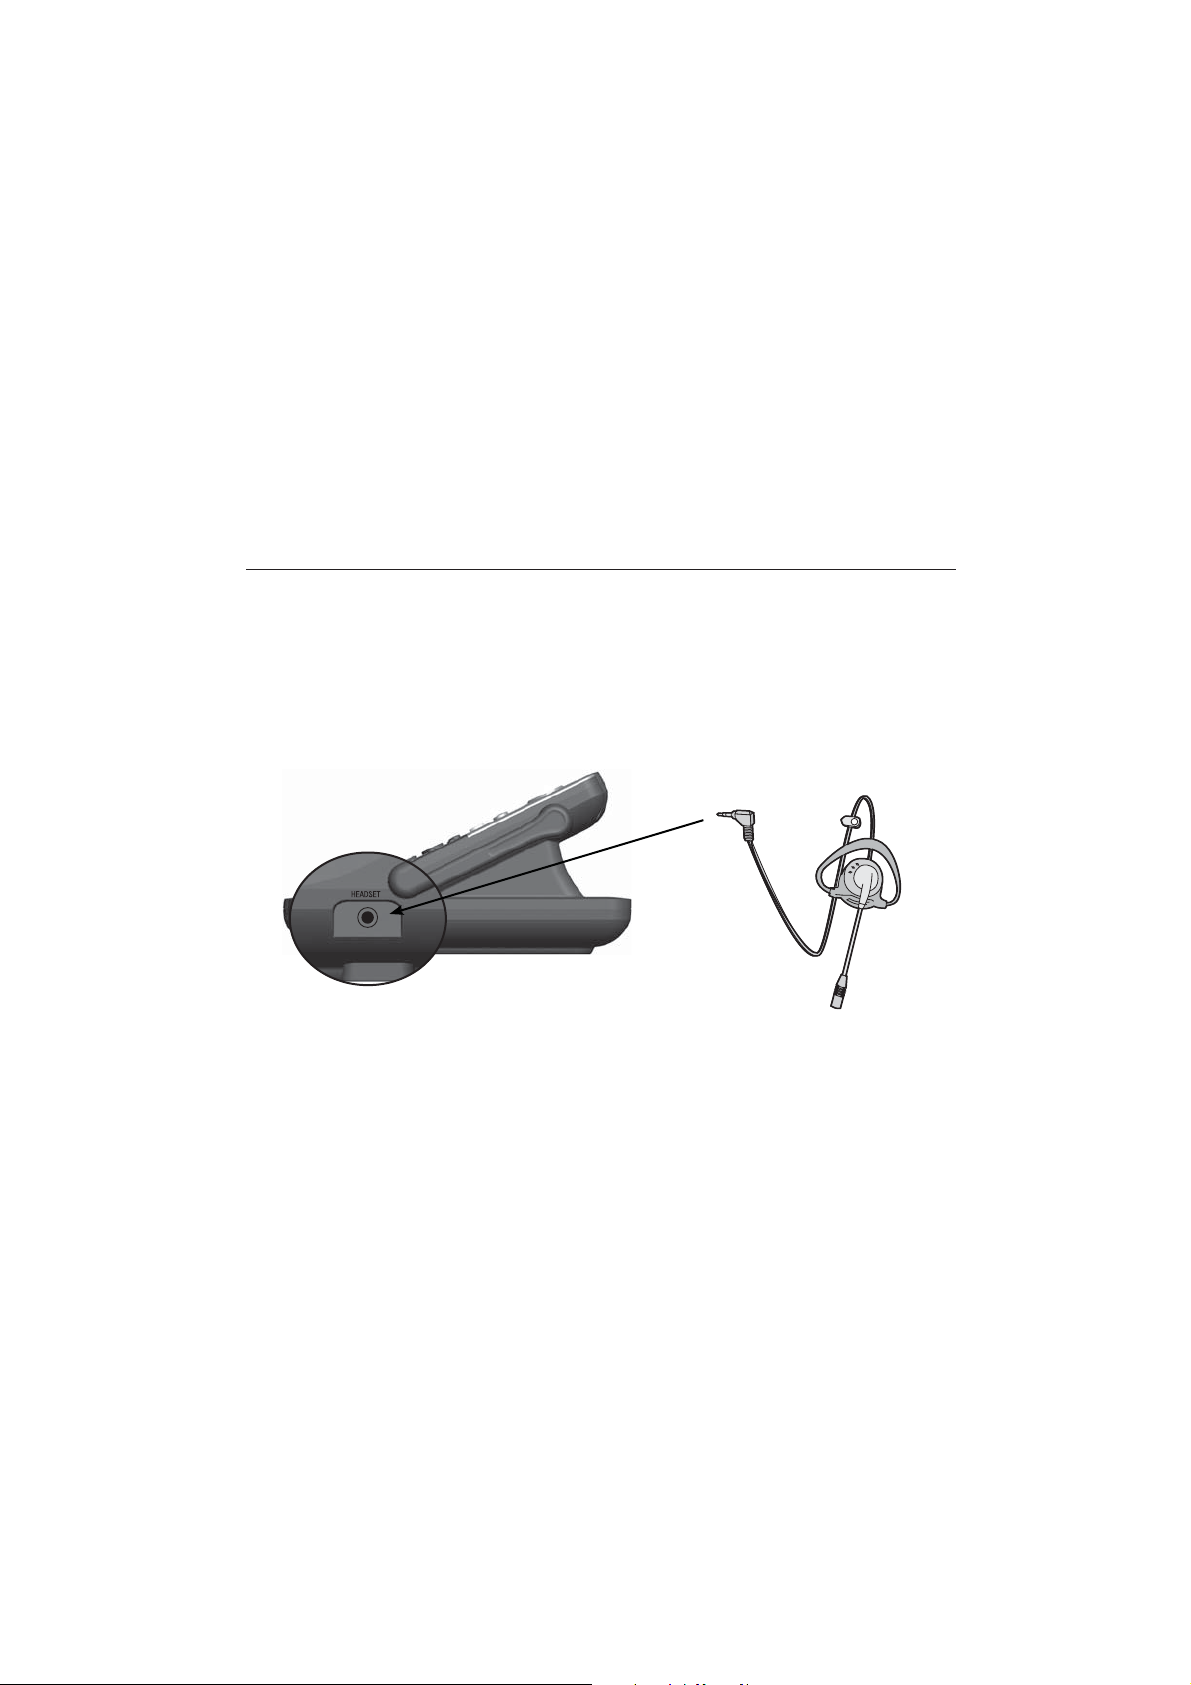
Add a corded headset
You can use this deskset handsfree when you install any industry-standard
2.5mm corded telephone headset (purchased separately). For best results,
use 2.5mm corded headset. To purchase a headset, visit our website at
www.telephones.att.com, or call 1 (888) 915-2007. In Canada,
1 (866) 288-4268. See page 19 for instructions on using the corded
dial
headset with this deskset.
Add a corded headset to the deskset
Side view of the deskset
Plug a 2.5 mm headset into
the HEADSET/AUX IN jack on
the side of the deskset.
11
Page 17
Deskset operation
Deskset setup
Menu settings
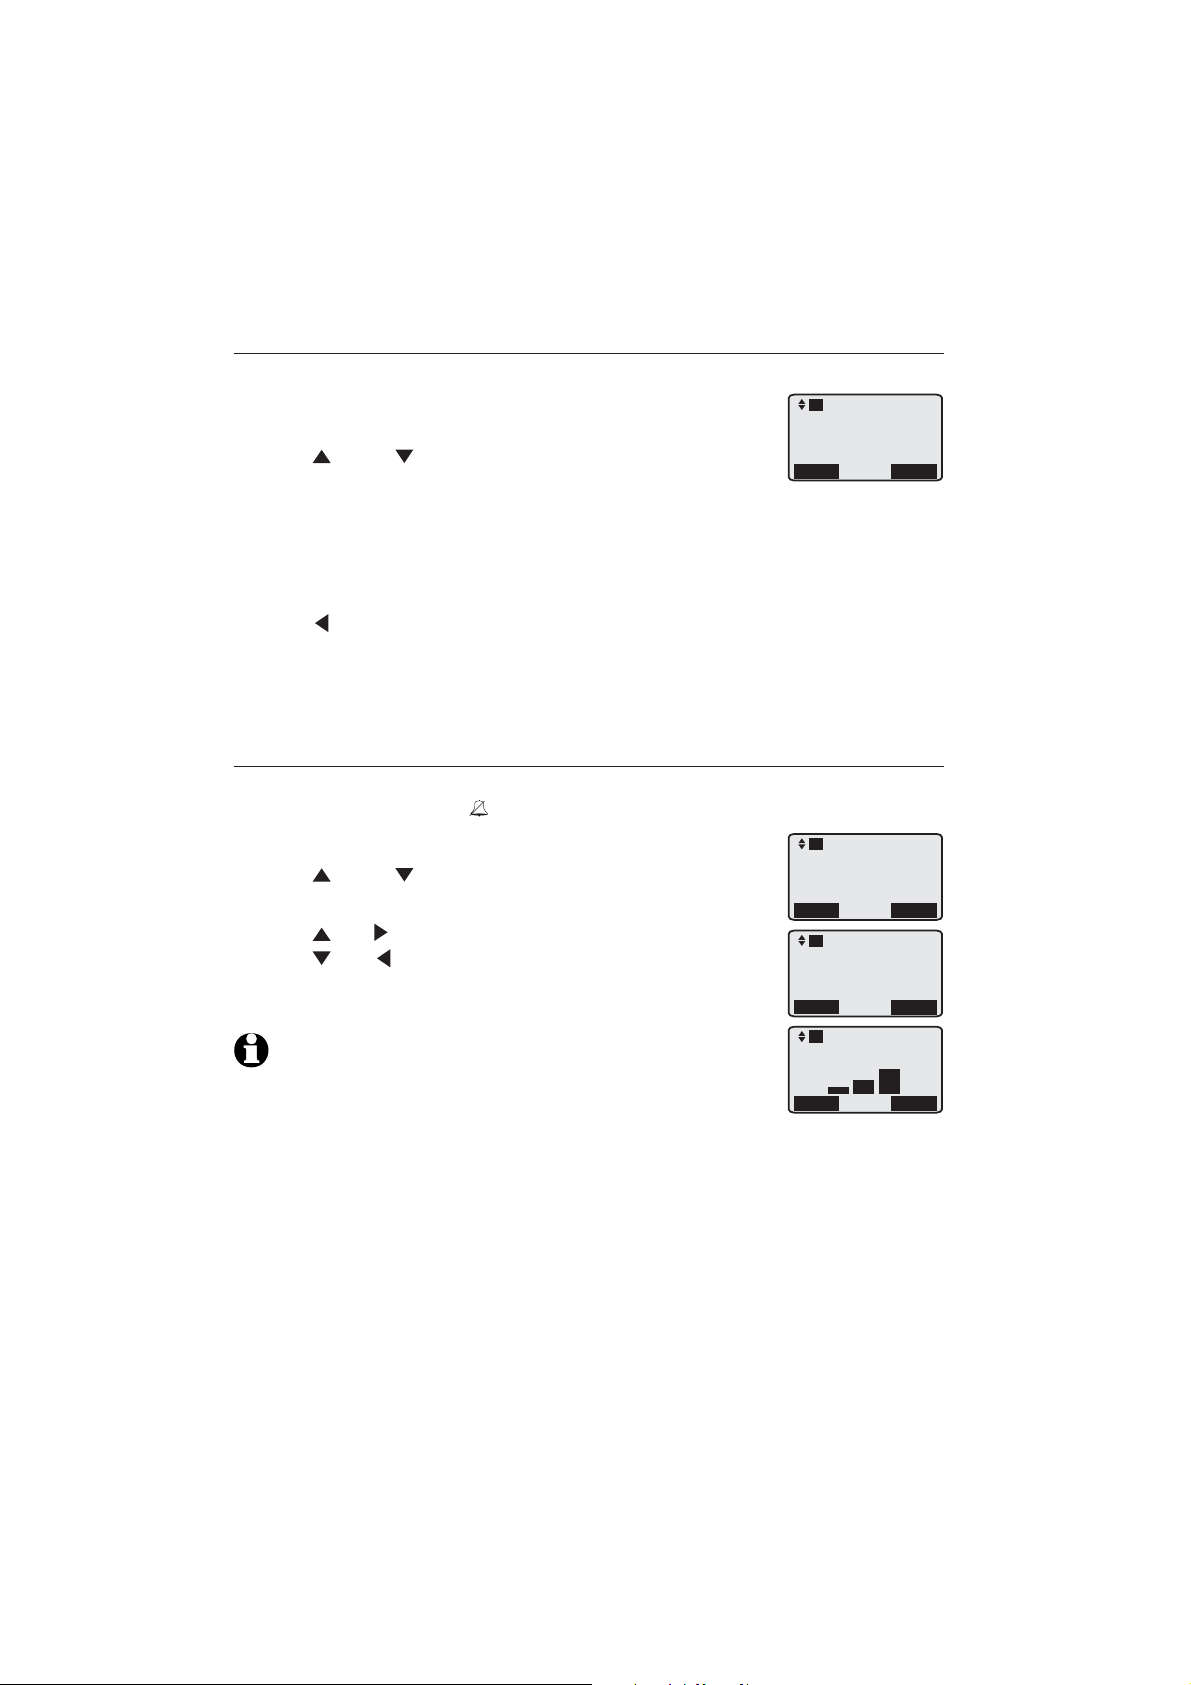
Use the menus to change the deskset settings.
Press the Menu softkey to enter the main menu when the
1.
deskset is idle.
Press DIR or CID to scroll to the feature to beto scroll to the feature to be
2.
changed. The > symbol indicates the selected menu item.
Press the Select softkey to select the menu item.
3.
Press the Back softkey to cancel an operation, exit the menu display, or
4.
return to the previous menu.
-OR-
Press to return to the previous menu.
-ORPress EXIT to exit to idle without making any changes
Ringer volume
Use this feature to set the ringer volume to one of three levels or turn the ringer
off. When the ringer is off, icon appears on the deskset.
When the deskset is idle, press the Menu softkey.
1.
Press DIR or CID to scroll to Ringer setting.
2.
Press the Select softkey twice to select Ringer volume.
3.
Press
4.
Press
Press the Set softkey to save the setting and return to
5.
DIR, or VOL+ to increase the ringer volume.
CID, or VOL- to derease the ringer volume.
the previous menu. There is a confirmation tone.
NOTE: The ringer volume also determines the ringer volume for
intercom calls (page 30). If the ringer volume is set to off, the deskset
is silenced for all incoming calls, including intercom calls.
L1
>Directory
Call log
Ringer setting
Mailbox setup
Back
L1
Directory
Call log
>Ringer setting
Mailbox setup
Back
L1
>Ringer volume
Ringer tone
Back
L1
Ringer volume
Back
Select
Select
Select
Set
12
Page 18
Deskset operation
Deskset setup
Ringer tone
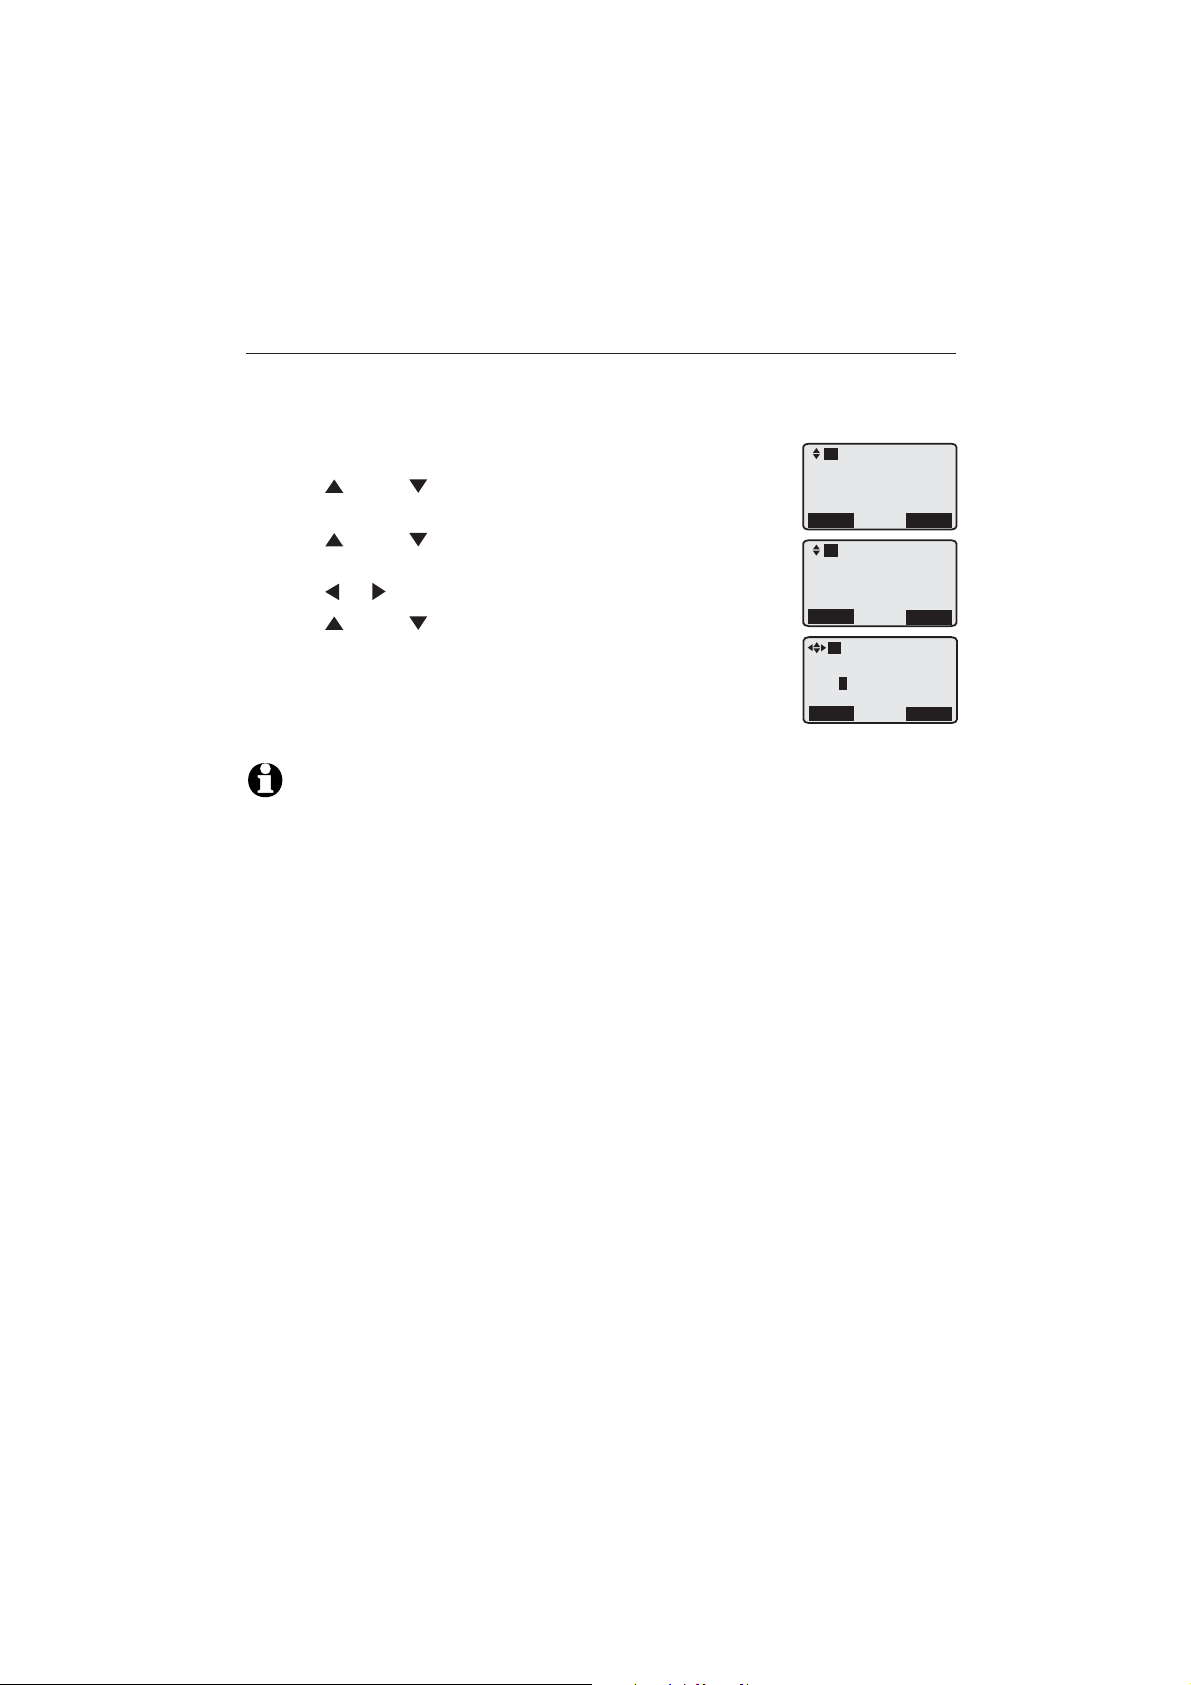
Use this feature to choose one of the seven ringer tones for incoming calls.
You can choose different ringer tones for different lines so you can easily
identify which line is ringing.
When the deskset is idle, press the Menu softkey.
1.
Press DIR or CID to scroll to Ringer setting. Press
2.
the Select softkey.
Press DIR or CID to scroll to Ringer tone. Press the
3.
Select softkey.
Press or to select a desired line (L1, L2, L3 or L4).
4.
Press DIR or CID to select a desired ringer tone.
5.
6.
Repeat steps 4-5 above to choose ringer tones for other
lines if desired.
7.
Press the Save softkey to save the setting and return to
the previous menu. There is a confirmation tone.
NOTE: If you turn off the ringer volume, you will not hear ringer tone samples.
L1
Directory
Call log
>Ringer setting
Mailbox setup
Back
L1
Ringer volume
>Ringer tone
Back
L1
Ringer tone
L1 L2 L3 L4
1 3 1 1
Back
Select
Select
Save
13
Page 19
Deskset operation
Deskset setup
LCD contrast
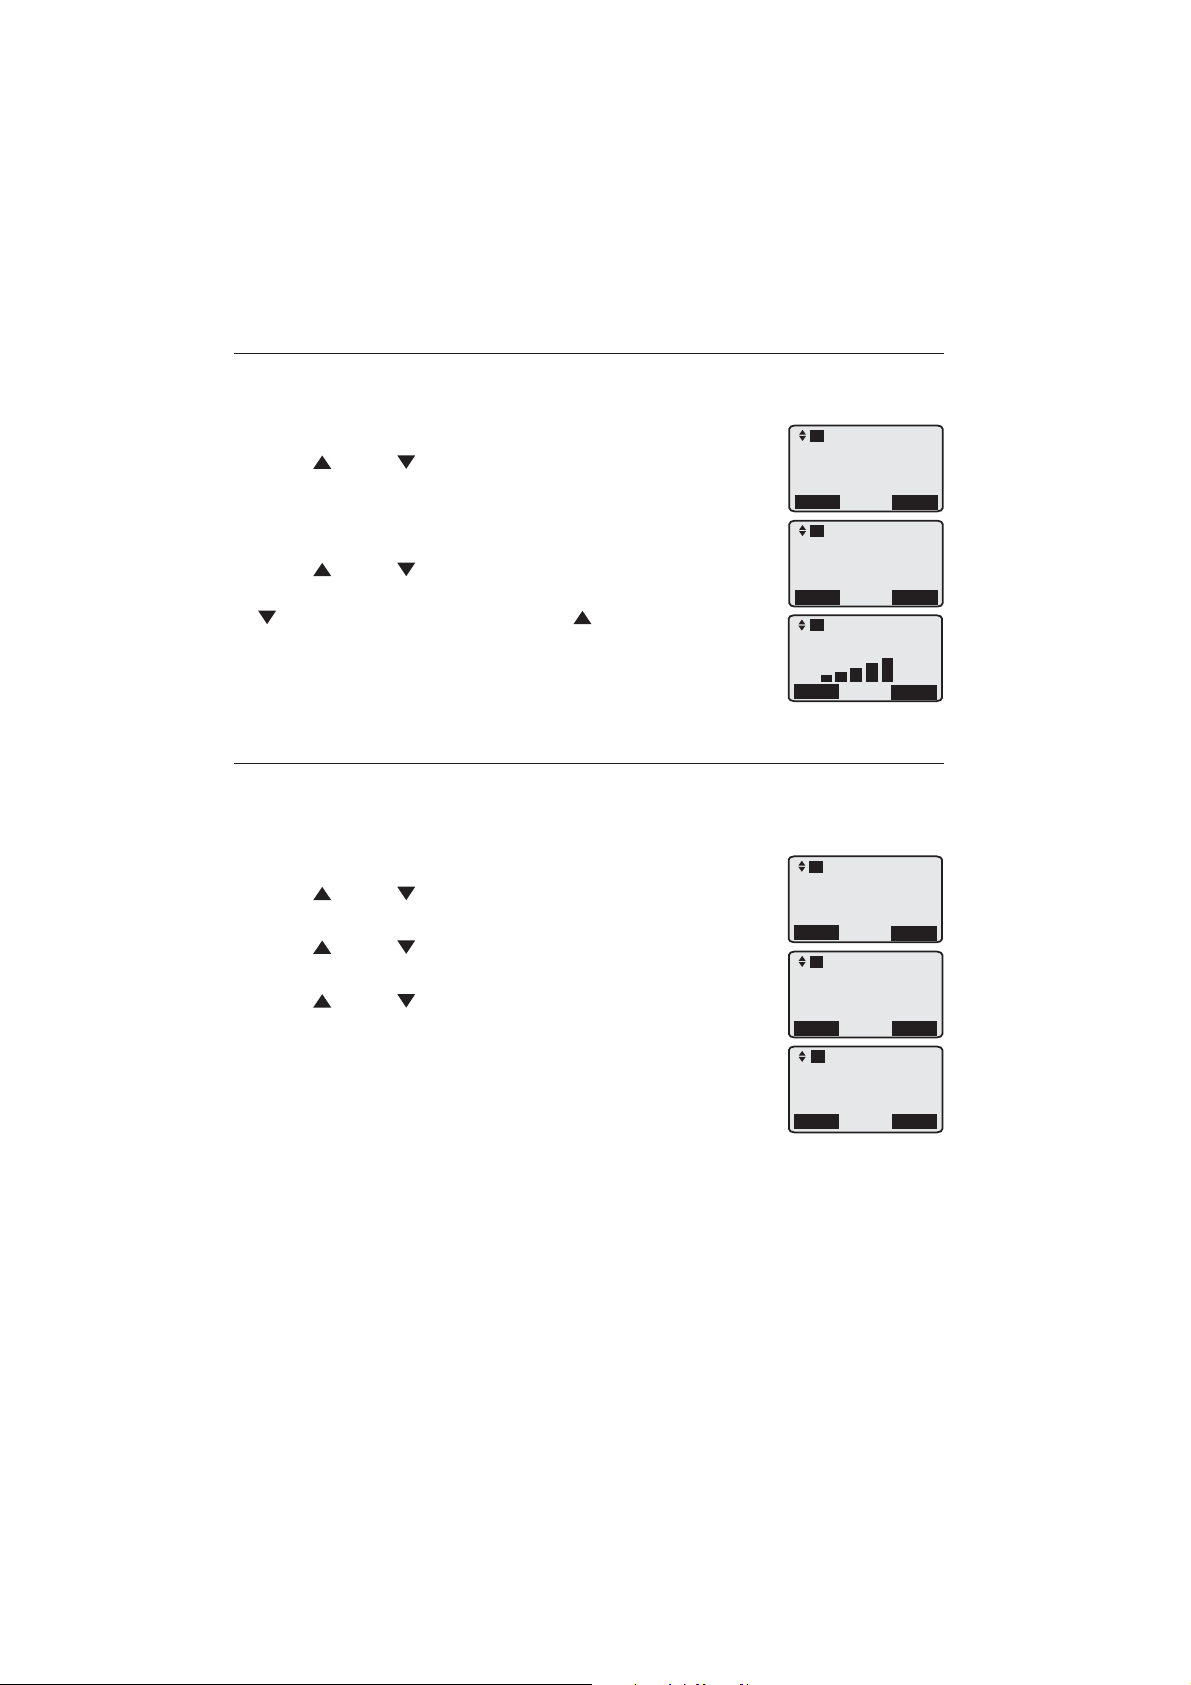
Use this feature to adjust the screen contrast to one of five levels to
optimize readability in different lighting conditions.
When the deskset is idle, press the Menu softkey.
1.
Press
2.
DIR or CID to scroll to Deskset setup. Press
the Select softkey.
3.
Press the Select softkey to select LCD contrast. Press
the Select softkey.
4.
Press
DIR or CID to adjust the screen contrast level.
The screen display temporarily fades away as you press
CID and reappears as you press DIR.
Press the Save softkey to save the setting and return to
5.
the previous menu. There is a confirmation tone.
Key tone
Use this feature to turn the key tone on or off. The deskset is factory
programmed to beep with each key press. If you turn off the key tone, there
are no beeps when you press keys.
When the deskset is idle, press the Menu softkey.
1.
Press
2.
DIR or CID to scroll to Deskset setup. Press
the Select softkey.
3.
Press
DIR or CID to scroll to Key tone. Press the
Select softkey.
Press DIR or CID to scroll to On or Off.
4.
Press the Save softkey to save the setting and return to
5.
the previous menu. There is a confirmation tone.
L1
Call log
Ringer setting
Mailbox setup
>Deskset setup
Back
L1
>LCD contrast
Key tone
Language
Line selection
Back
L1
LCD contrast
Back
L1
Call log
Ringer setting
Mailbox setup
>Deskset setup
Back
L1
LCD contrast
>Key tone
Language
Line selection
Back
L1
Key tone
:Off
Select
Select
Save
Select
Select
14
Back
Save
Page 20
Deskset operation
Deskset setup
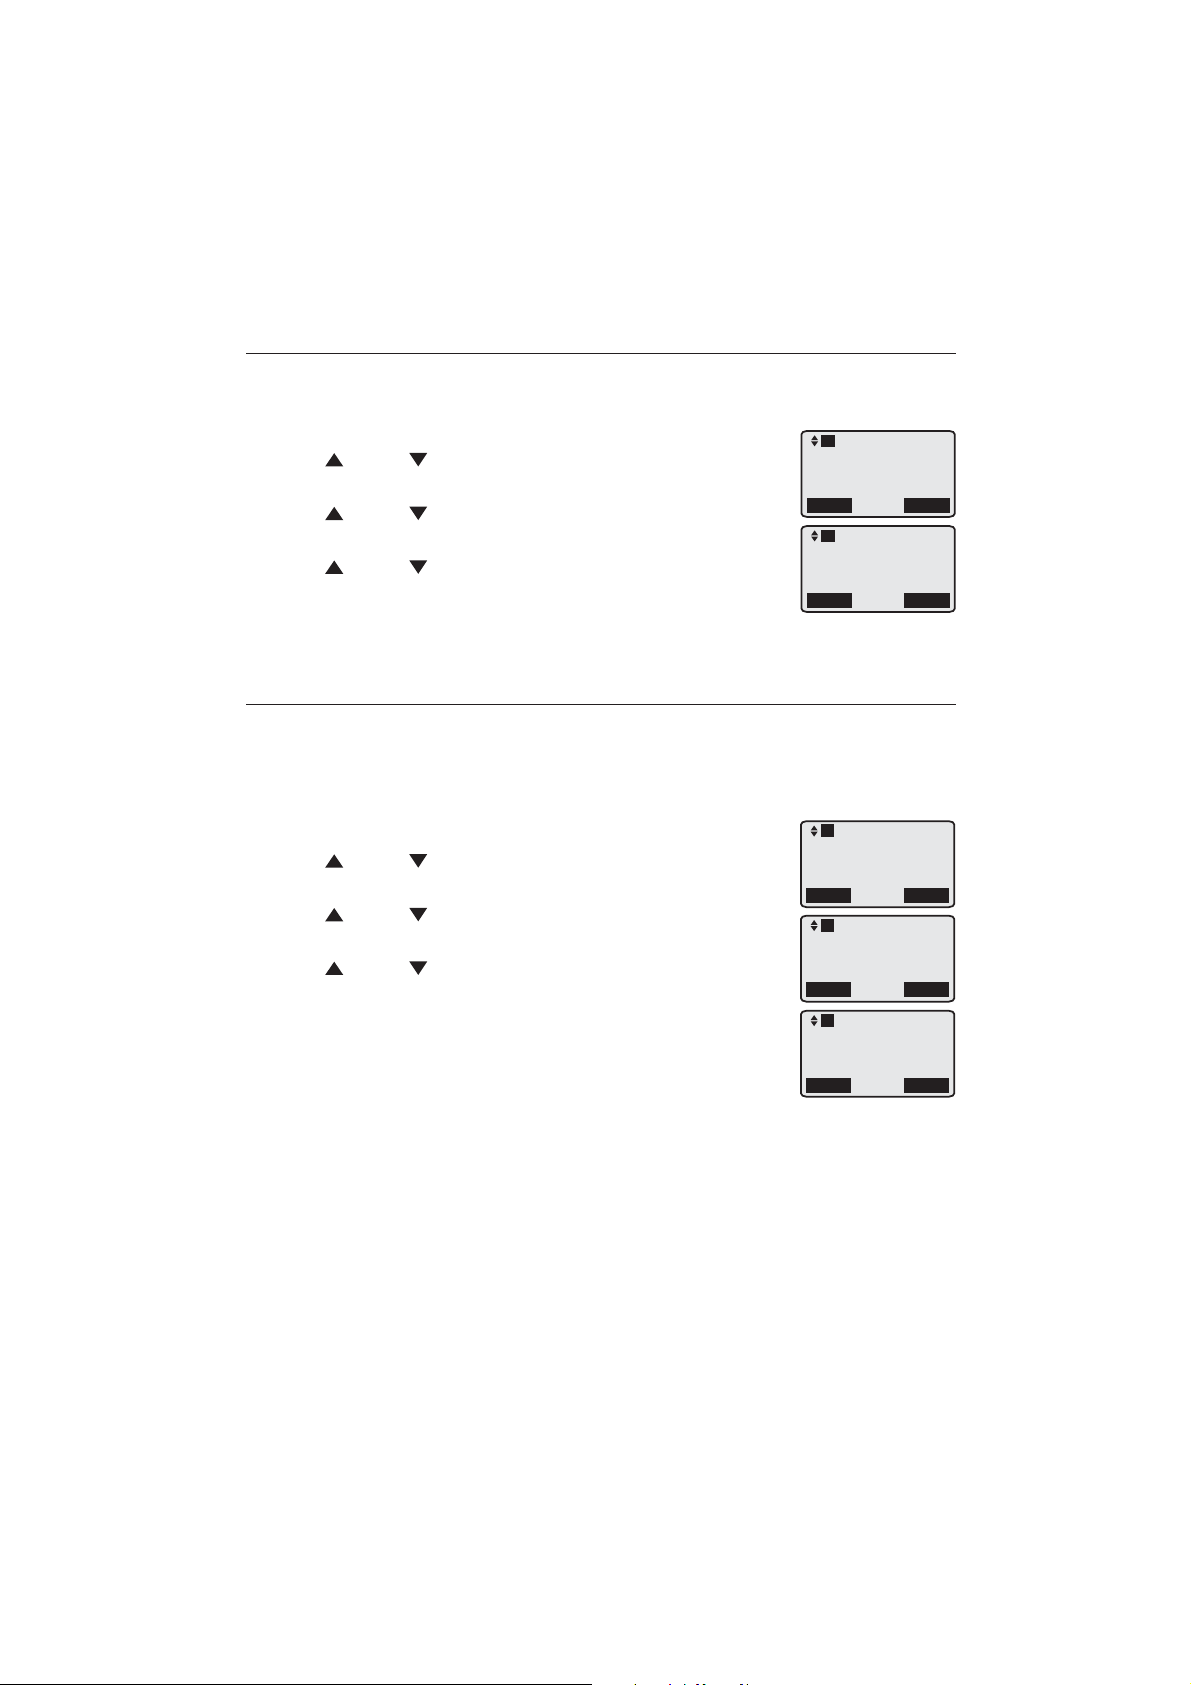
Language
Use this feature to change the display language that is used in all menus and
screen displays. This telephone comes factory set for English displays.
1.
When the deskset is idle, press the Menu softkey.
2.
Press
DIR or CID to scroll to Deskset setup. Press
the Select softkey.
Press DIR or CID to scroll to Language. Press the
3.
Select softkey.
Press DIR or CID to select English or Español.
4.
Press the Save softkey to save the setting and return to
5.
the previous menu. There is a confirmation tone.
Line selection
Use this feature to select the default telephone line to be used when you
make outgoing calls. The deskset comes factory set for Auto selectable line,
which chooses the first available line for making a call. To select a particular
line, choose Line 1, Line 2, Line 3 or Line 4.
When the deskset is idle, press the Menu softkey.
1.
Press DIR or CID to scroll to Deskset setup. Press
2.
the Select softkey.
Press DIR or CID to scroll to Line selection. Press
3.
the Select softkey.
Press DIR or CID to select Auto, Line 1, Line 2,
4.
Line 3 or Line 4.
Press the Save softkey to save the setting and return to
5.
the previous menu. There is a confirmation tone.
L1
LCD contrast
Key tone
>Language
Line selection
Back
L1
Language
:English
Back
L1
Call log
Ringer setting
Mailbox setup
>Deskset setup
Back
L1
LCD contrast
Key tone
Language
>Line selection
Back
L1
Line selection
:Auto
Select
Save
Select
Select
15
Back
Save
Page 21
Deskset operation
Deskset setup
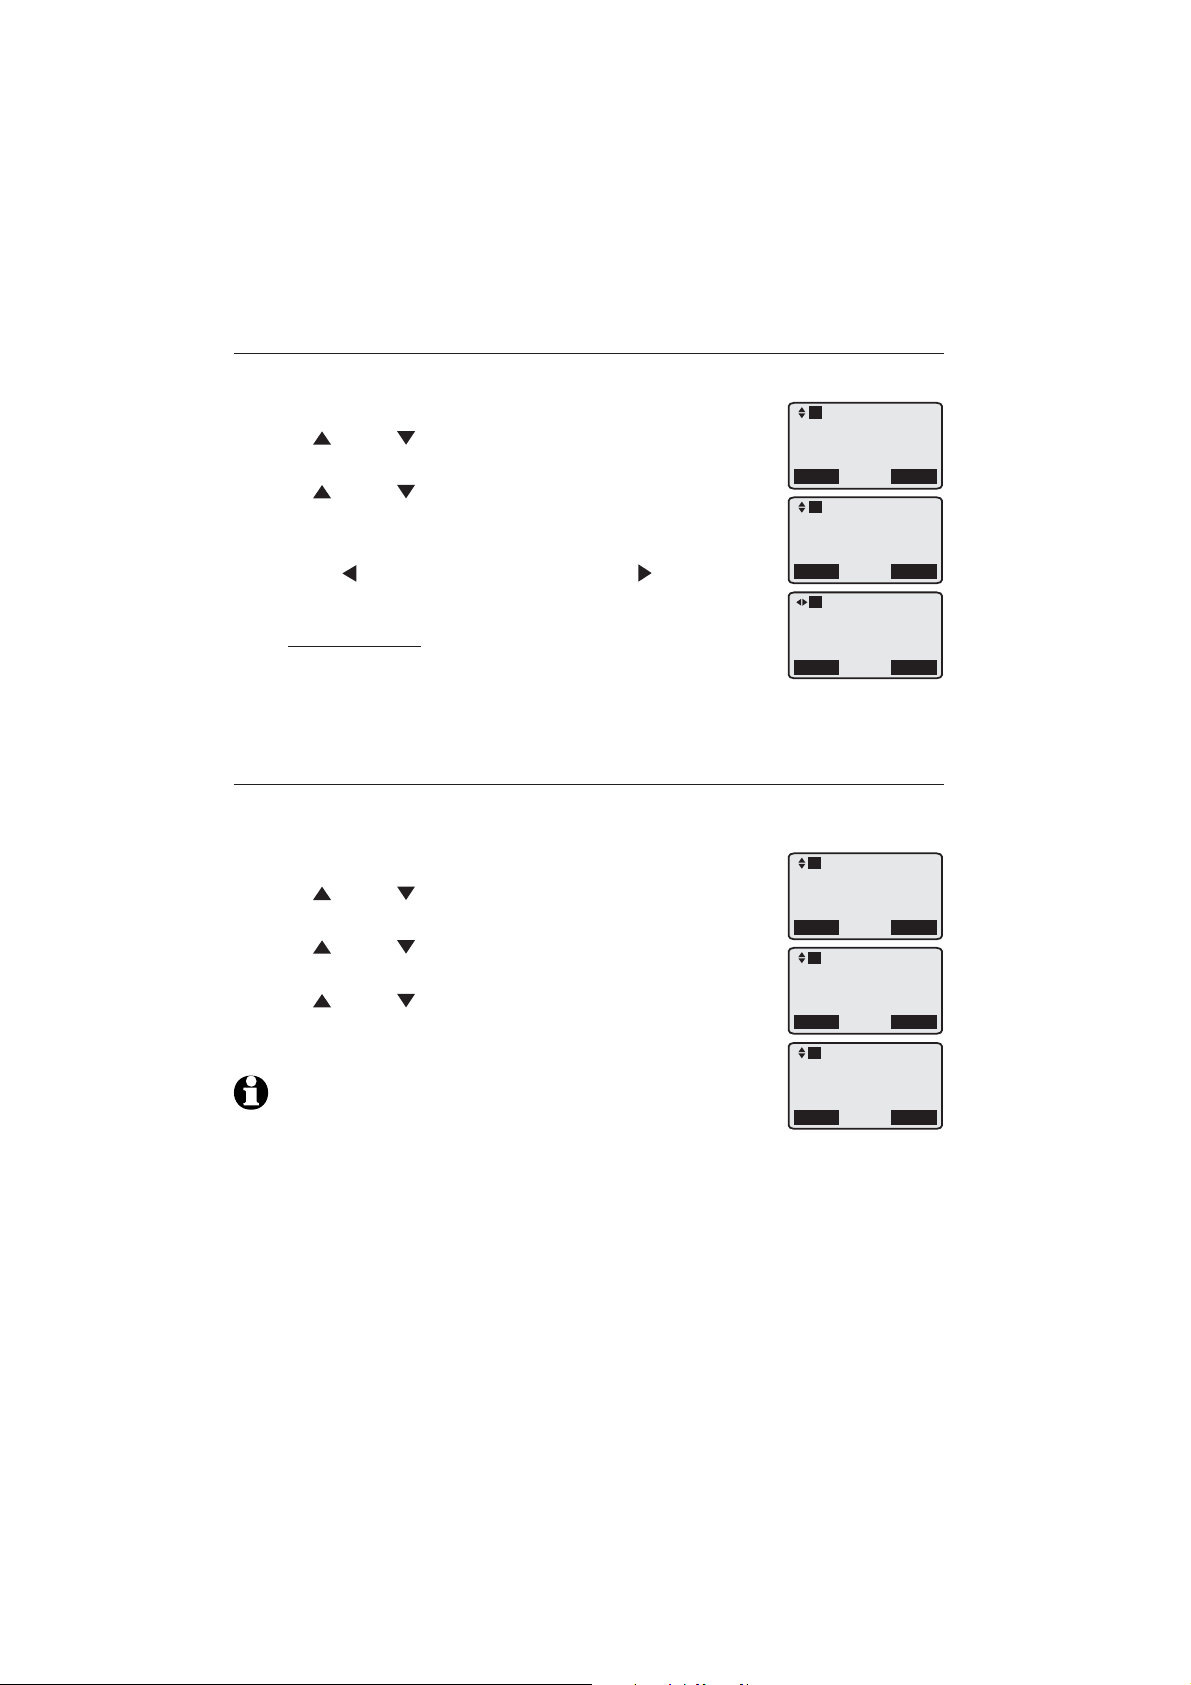
Deskset name
Use this feature to change the deskset name.
When the deskset is idle, press the Menu softkey.
1.
Press DIR or CID to scroll to Deskset setup. Press
2.
the Select softkey.
Press DIR or CID to scroll to Deskset name. Press
3.
the Select softkey.
Use the dialing keys (page 39) to enter a name.
4.
Press move the cursor to the left or to the right.
•
Press X/DELETE to erase a character.
•
Press and hold X/DELETE to erase all characters.
•
Press the Save softkey to confirm and return to the
5.
previous menu. There is a confirmation tone.
Hold reminder
Use this feature to play a beep tone every 30 seconds when there is a call
on hold.
When the deskset is idle, press the Menu softkey.
1.
Press DIR or CID to scroll to Deskset setup. Press
2.
the Select softkey.
Press DIR or CID to scroll to Hold Reminder. Press
3.
the Select softkey.
Press DIR or CID to scroll to On or Off.
4.
Press the Save softkey to save the setting and return to
5.
the previous menu. There is a confirmation tone.
NOTE: A call on hold after 10 minutes is automatically forwarded to
the auto attendant, even if the auto attendant is not activated. To
keep a call on hold longer than 10 minutes, release the held call within 10 minutes and
then place the call on hold again.
L1
Call log
Ringer setting
Mailbox setup
>Deskset setup
Back
L1
Key tone
Language
Line selection
>Deskset name
Back
L1
Enter name:
Deskset 1
Back
L1
Call log
Ringer setting
Mailbox setup
>Deskset setup
Back
L1
Language
Line selection
Deskset name
>Hold reminder
Back
L1
Hold Reminder:
:On
Back
Select
Select
Save
Select
Select
Save
16
Page 22
Deskset operation
Deskset setup
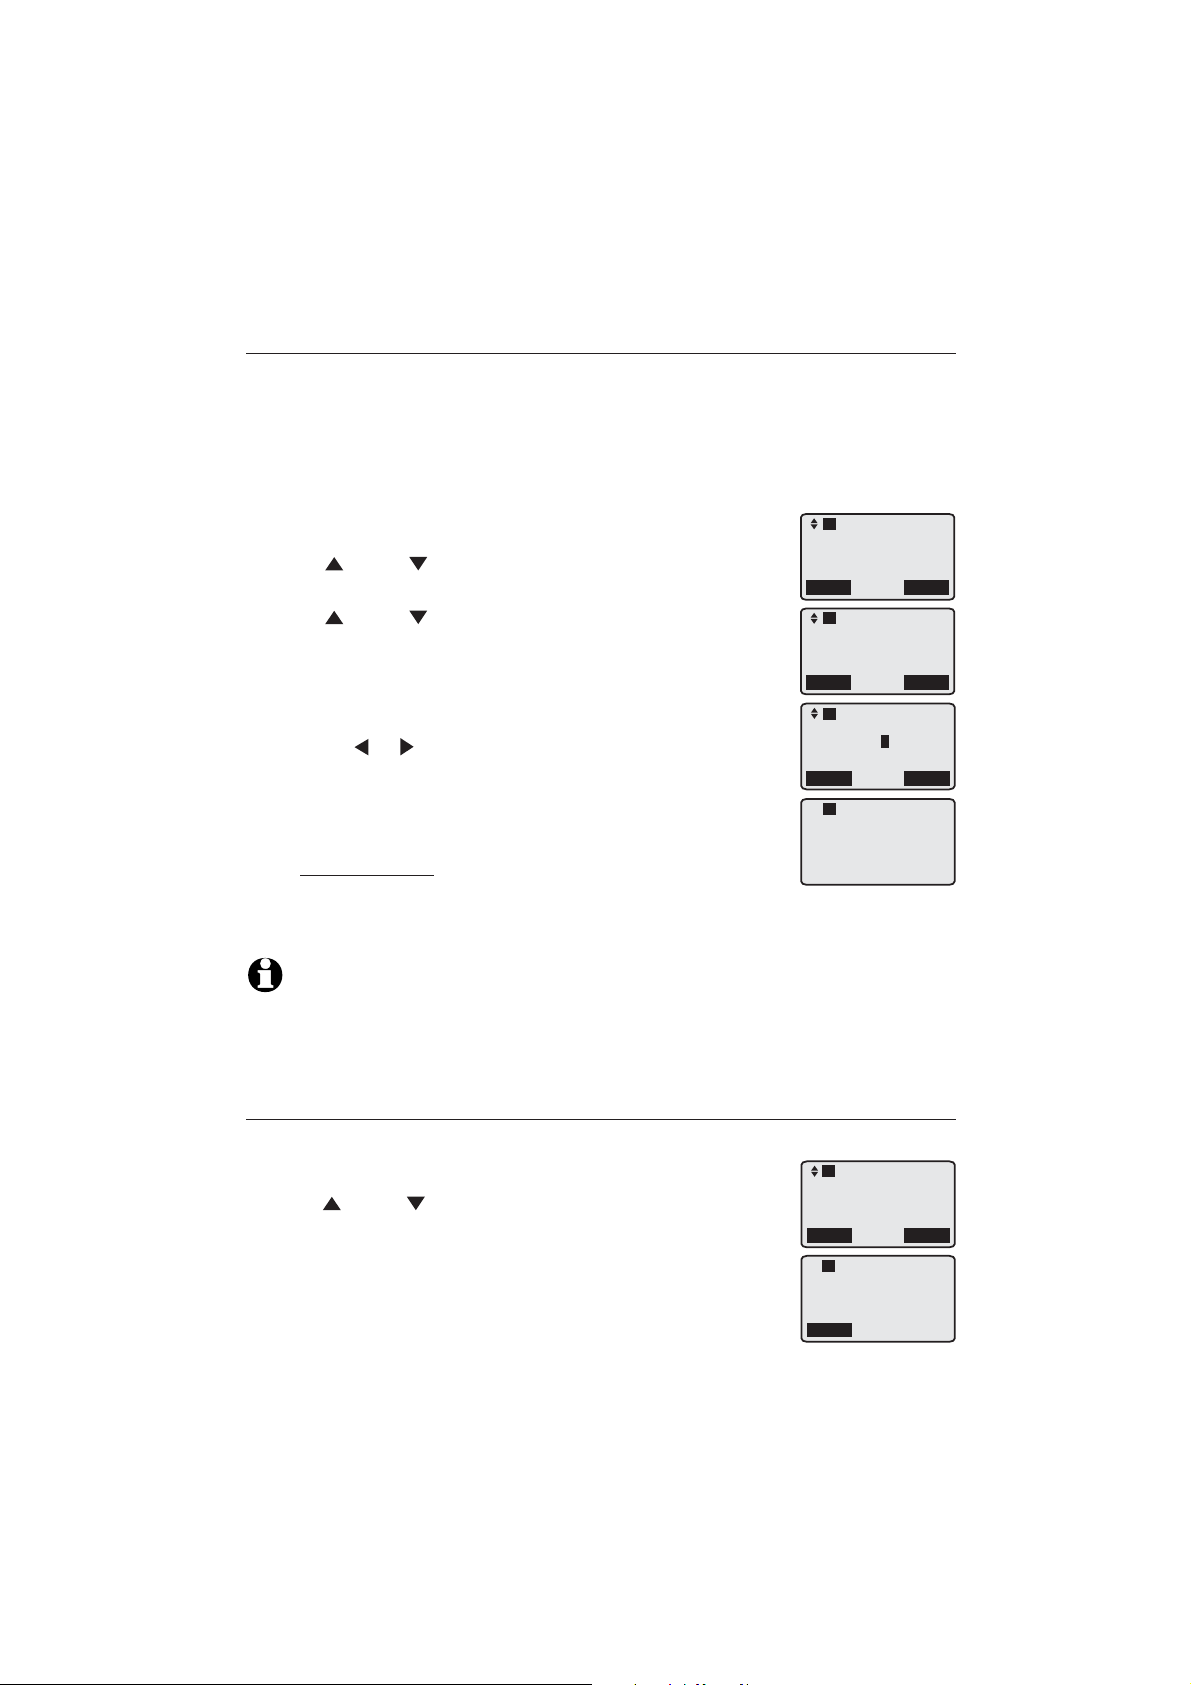
Speed dial setup
The deskset has 10 speed dial locations where you can store the telephone
numbers you wish to dial using fewer keys than usual. You can store up to 32
digits in each location. The first five locations can be accessed buy using only
the speed dial keys. To access the remaining five locations, press LOWER and
then the speed dial key for the desired location.
To enter, edit or delete a speed dial number:
1.
When the deskset is idle, press the Menu softkey.
2.
Press
DIR or CID to scroll to Speed dial setup. Press
the Select softkey.
Press DIR or CID to choose a desired speed dial
3.
location, then press the Select softkey.
Use the dialing keys to enter or edit the telephone
4.
number up to 32 digits. If you want to delete the entry,
erase all the digits.
Press or to move the cursor to the left or right.
•
Press the Pause softkey to insert a dialing pause (a P
•
appears).
Press X/DELETE to backspace and delete digits.
•
Press and hold X/DELETE to delete all digits.
•
L1
Mailbox setup
Deskset setup
COVM
>Speed dial setup
Back
L1
>Speed dial 1
Speed dial 2
Speed dial 3
Speed dial 4
Back
L1
Enter phone #:
8888832445
Pause
L1
Speed dial 1
8888832445
5. Press the Save softkey to save the setting. There is a
confirmation tone.
NOTES:
•
See page 20 for instructions on calling a speed dial number.
•
The speed dial memory and the directory are not the same, so setting up speed dial numbers
does not decrease your directory storage space.
Select
Select
Save
Customer support
Use this feature to display the AT&T website.
When the deskset is idle, press the Menu softkey.
1.
Press DIR or CID to scroll to Customer support. Press
2.
the Select softkey.
To exit, press the Back softkey.
3.
17
L1
Deskset setup
COVM
Speed dial setup
>Customer support
Back
L1
www.telephones
Back
Select
.att.com
Page 23
Deskset operation
Deskset basic operation
The telephone comes programmed to use line 1 (default primary line) for
outgoing calls when you do not press a line key. (To change the primary
line, see Line selection on page 15.) When you answer a call, the telephone
automatically selects the ringing line.
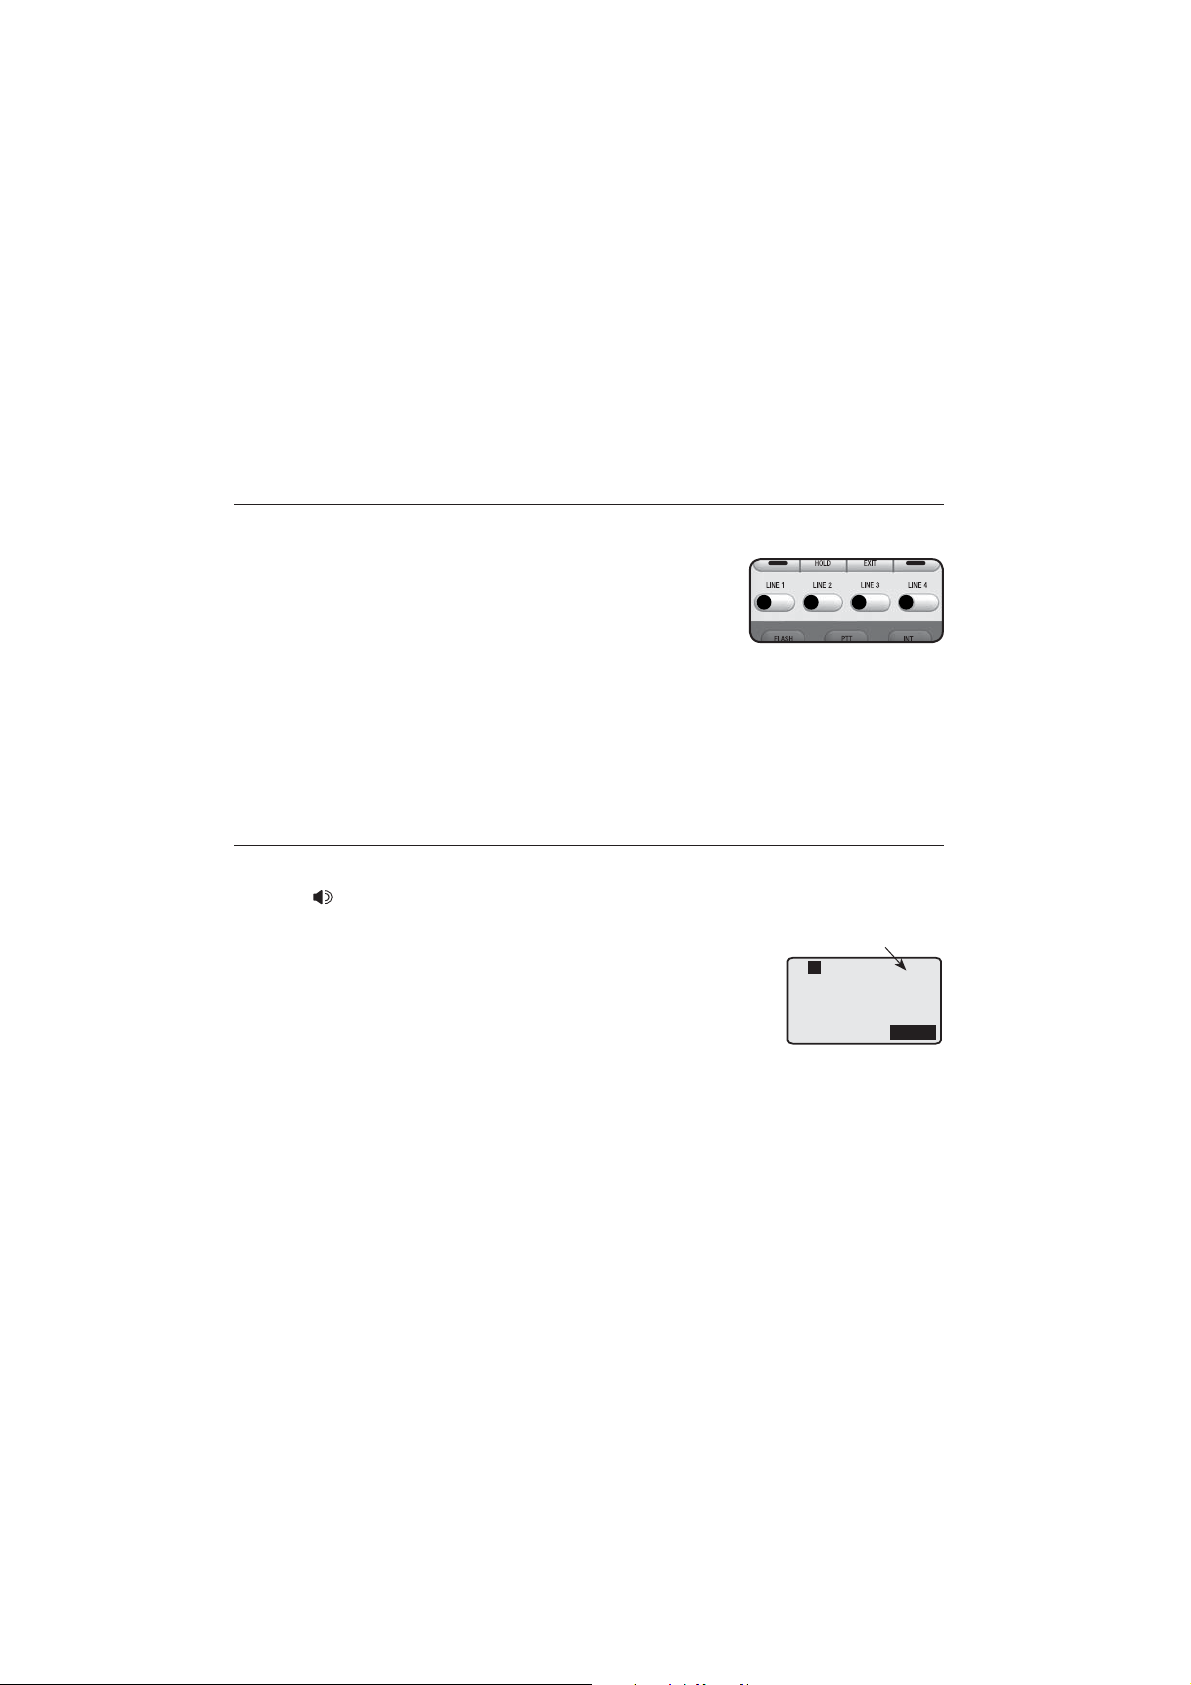
Line indicators
Each of the four indicators on LINE 1-LINE 4 indicates the status of the
corresponding telephone line.
On when the corresponding line is in use.
•
Flashes slowly when the line is on hold.
•
Flashes slowly when there is a transferred call on
•
the corresponding line.
Flashes slowly when there is an incoming auto attendant transferred call
•
on the corresponding line.
Flashes rapidly when there is an incoming call on the corresponding line.
•
Make a call
Using the speakerphone:
Press SPEAKER on the deskset.
1.
-OR-
To override automatic line selection, press LINE 1-LINE 4
for the desired line.
Wait for a dial tone, then enter the telephone number.
2.
Elapsed time
L1
Line1 00:00:30
8888832445
The screen displays the elapsed time as you talk (in
hours, minutes and seconds).
Using the corded handset:
Lift the corded handset.
1.
-OR-
To override automatic line selection, press LINE 1-LINE 4 for the desired
line, and then lift the corded handset.
Wait for a dial tone, then enter the telephone number. The screen displays
2.
the elapsed time as you talk (in hours, minutes and seconds).
18
Option
Page 24
Deskset operation
Deskset basic operation
Using the corded headset:
Make sure a corded headset is connected to the
deskset (page 11).
1.
Press HEADSET on the deskset.
2.
Wait for a dial tone, then dial the number.
To end a call
Using the speakerphone:
press
Using the corded handset:
Place the corded handset on the deskset to hang up.
Using the corded headset:
Press HEADSET on the deskset to hang up.
SPEAKER to hang up.
NOTE: The elapsed time is not affected by accessing services from your telephone
service provider, such as call waiting.
On hook dialing (predialing)
Using the speakerphone:
1.
Enter the telephone number. Press X/DELETE to make corrections when
entering the telephone number.
2.
Press SPEAKER to dial.
-OR-
To override automatic line selection, press LINE 1-LINE 4 for the desired
line.
Using the corded handset:
1.
Enter the telephone number. Press X/DELETE to make corrections when
entering the telephone number.
2.
Lift the corded handset to dial.
-OR-
To override automatic line selection, press LINE 1-LINE 4 for the desired
line, then lift the handset.
19
Page 25

Deskset operation
Deskset basic operation
Using the corded headset:
Enter the telephone number. Press X/DELETE to make corrections when
1.
entering the telephone number.
Press HEADSET on the deskset to dial.
2.
-OR-
To override automatic line selection, press LINE 1-LINE 4 for the desired
line, then Press HEADSET.
Switch between the speakerphone and the corded handset
Switch from speakerphone to the corded handset:
While you are using the speakerphone in a call, pick up the corded handset
to continue the call.
Switch from the corded handset to speakerphone:
While you are using the corded handset in a call, press SPEAKER to
switch and then put the corded handset back to the deskset.
Switch between the speakerphone and the corded headset
Switch from speakerphone to the corded headset:
While you are using the speakerphone in a call, Press HEADSET to continue
the call.
Switch from the corded handset to speakerphone:
While you are using the corded headset in a call, press
switch the call.
Switch between the corded handset and the corded headset
Switch from the corded handset to the corded headset:the corded handset to the corded headset: to the corded headset:
While you are using the corded handset in a call, Press HEADSET to continue
the call.
Switch from the corded headset to the corded handset:the corded handset::
While you are using the corded headset in a call, pick up the corded handset
to continue the call.
Dial a speed dial number
Press the desired speed dial key.
1.
-OR-
Press LOWER, then press the desired speed dial key.
20
SPEAKER to
Page 26

Deskset operation
Deskset basic operation
Lift the corded handset, press SPEAKER or HEADSET if
2.
you have plugged a corded headset into the deskset.
-OR-
To override automatic line selection, press
LINE 1-LINE 4 for the desired line. Lift the corded handset
if you want to switch the call to the corded handset, or
press HEADSET if you want to switch the call to the corded
headset.
NOTE: If there is no telephone number stored in the speed dial location,
No number displays.
Answer a call
Using the speakerphone:
press SPEAKER.
Using the corded handset:
Lift the corded handset.
Using the corded headset:
Press HEADSET.
Temporary ringer silencing
Press MUTE while the telephone is ringing to silence the
ringer temporarily on the deskset only. This turns off the
ringer without disconnecting the call. The next incoming
call rings normally at the preset volume.
21
Page 27
Deskset operation
Deskset basic operation
Last number redial
The last 10 telephone numbers dialed (up to 32 digits) are
stored in the redial memory of the deskset.
To view the 10 most recently dialed numbers:
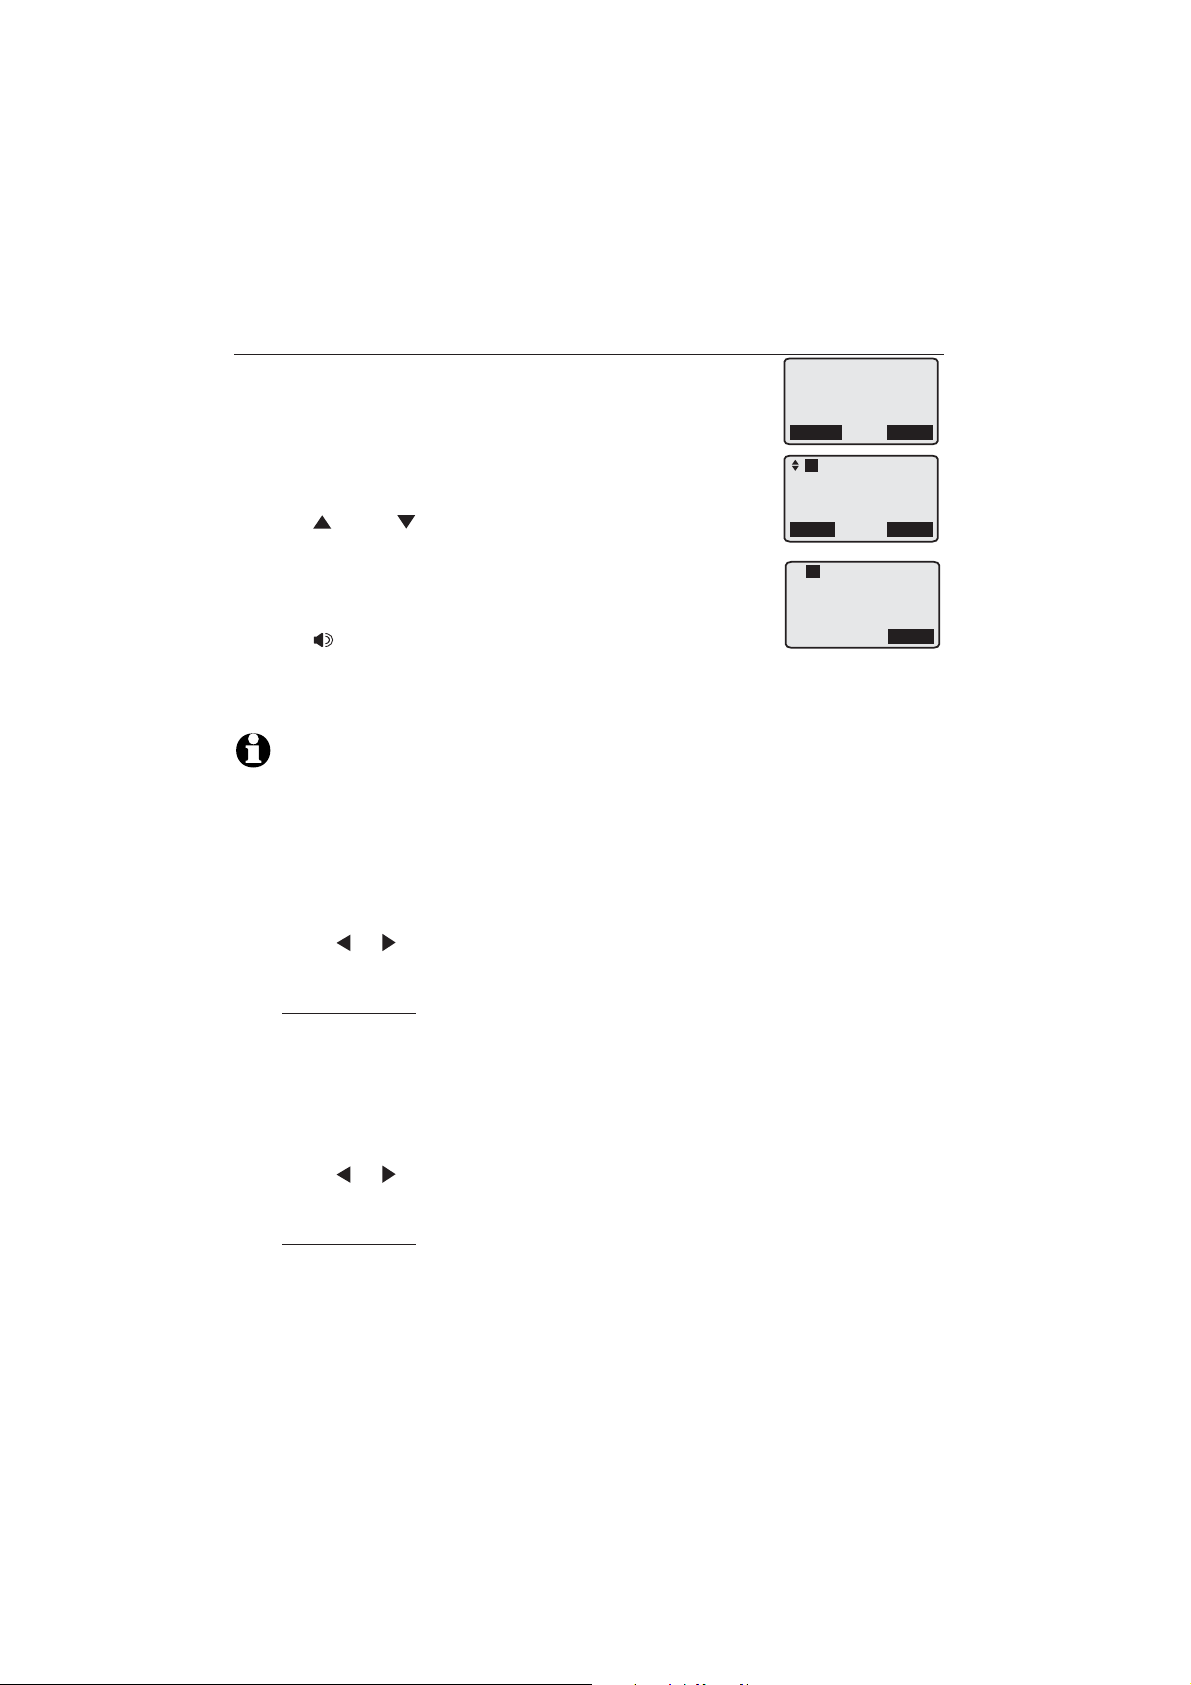
Press the Redial softkey to enter the redial list and
1.
display the most recently called number.
Press DIR or CID to browse.
2.
Press the Back softkey to exit the redial list.To redial a
3.
number:
To dial the displayed number, lift the corded handset, orlift the corded handset, or
•
press SPEAKER or HEADSET.
-OR-
To override automatic line selection, press LINE 1-LINE 4 for the desired
line.
NOTE: If there is no entry on the redial list, the deskset displays Redial list empty.
To save a redialed number in the directory:
When the desired number displays, press the Save softkey.
1.
The deskset displays Enter phone #.
2.
Use the dialing keys (page 39) to edit the number, if necessary.
•
Press or to move the cursor to the left or right.
•
Press X/DELETE to backspace and delete a digit.
•
Press and hold X/DELETE to delete all the digits.
•
Press the Pause softkey to enter a dialing pause (a P appears).
•
Press FLASH to enter a flash.
•
Press the Next softkey. The deskset displays Enter name. Use the dialing
3.
keys to enter a name.
Use the dialing keys (page 39) to enter a name.
•
Press or to move the cursor to the left or right.
•
Press X/DELETE to backspace and delete a character.
•
Press and hold X/DELETE to delete all characters.
•
Press the Save softkey to confirm. There is a confirmation tone.
4.
1:Deskset 1
3 Missed calls
New messages
11:30PM 12/31
Redial
L1
888 883 2445
Back
L1
Line1 00:00:01
8888832445
Menu
Save
Option
To delete a redialed number:
When the screen displays the desired number, press X/DELETE to delete
•
the number from the redial memory. The deskset displays Deleted. There is
a confirmation tone.
22
Page 28
Deskset operation
Options while on calls
Volume control
While on a call, press VOL+ or VOL- to adjust the
listening volume.
NOTES:
The corded headset and corded handset volume settings are the same, but the speakerphone
•
volume settings is independent.
You hear a triple beep when you have reached the minimum or maximum volume level.
•
Call waiting
If you subscribe to call waiting service with your telephone service provider,
you hear a beep if someone calls while you are already on a call.
Press FLASH to put your current call on hold and
1.
take the new call.
Press FLASH at any time to switch back and forth
2.
between calls.
NOTES:
•
If you miss a call while the line is in use, the caller ID of the missed call displays for 15
seconds after your current conversation ends.
•
For more information on caller ID with call waiting, see page 43.
Mute
Use this feature during a telephone conversation to silence the microphone.
You can hear the caller, but the caller cannot hear you.
To mute a call:
Press MUTE. When mute is on, the MUTE light flashes
•
and the screen flashes -MUTE.
To take a call off mute:
Press MUTE again and resume speaking.
•
NOTE: Transferring the call, changing lines or putting a call on
hold also cancels the mute function.
23
L1
Line1 00:00:10
-MUTE
Option
Page 29
Deskset operation
Options while on calls
Call privacy
For call privacy, you can also block all other system
handsets and the telephone base from joining a phone
conversation (see page 26 for instructions for joining a call).
To enable call privacy:
•
During a call, press the Option softkey and then press
the Select softkey to choose Privacy ON. The screen
displays -PRIV. Any other extensions are dropped and no
extensions can join the call. If another extension tries to
access the line you are using, its screen displays Privacy.
To cancel call privacy:
•
During a call, press the Option softkey and then press
the Select softkey to choose Privacy OFF. The message
-PRIV disappears from the screen. Other telephones can
now join the call by pressing the appropriate line key.
NOTES:
Call privacy is automatically canceled when you end or transfer a call.
•
You cannot set call privacy during intercom or conference calls.
•
Call privacy applies only to system telephones. It does not affect non-system phones using the
•
same line(s).
L1
>Privacy ON
Record call on
Back
L1
Line1 0:00:01
-PRIV
L1
>Privacy OFF
Record call on
Back
L1
Line1 00:00:10
Select
Option
Select
Option
24
Page 30
Deskset operation
Options while on calls
Record a call
Use this feature to record a two-way phone conversation during a call. The
recording is treated the same as memos and is always marked as a new
message in the mailbox. However, the message indicator does not flash
for new or missed recorded calls. You cannot record a conference call or an
intercom call. You cannot use another line while you are recording a phone
conversation.
To record a call:
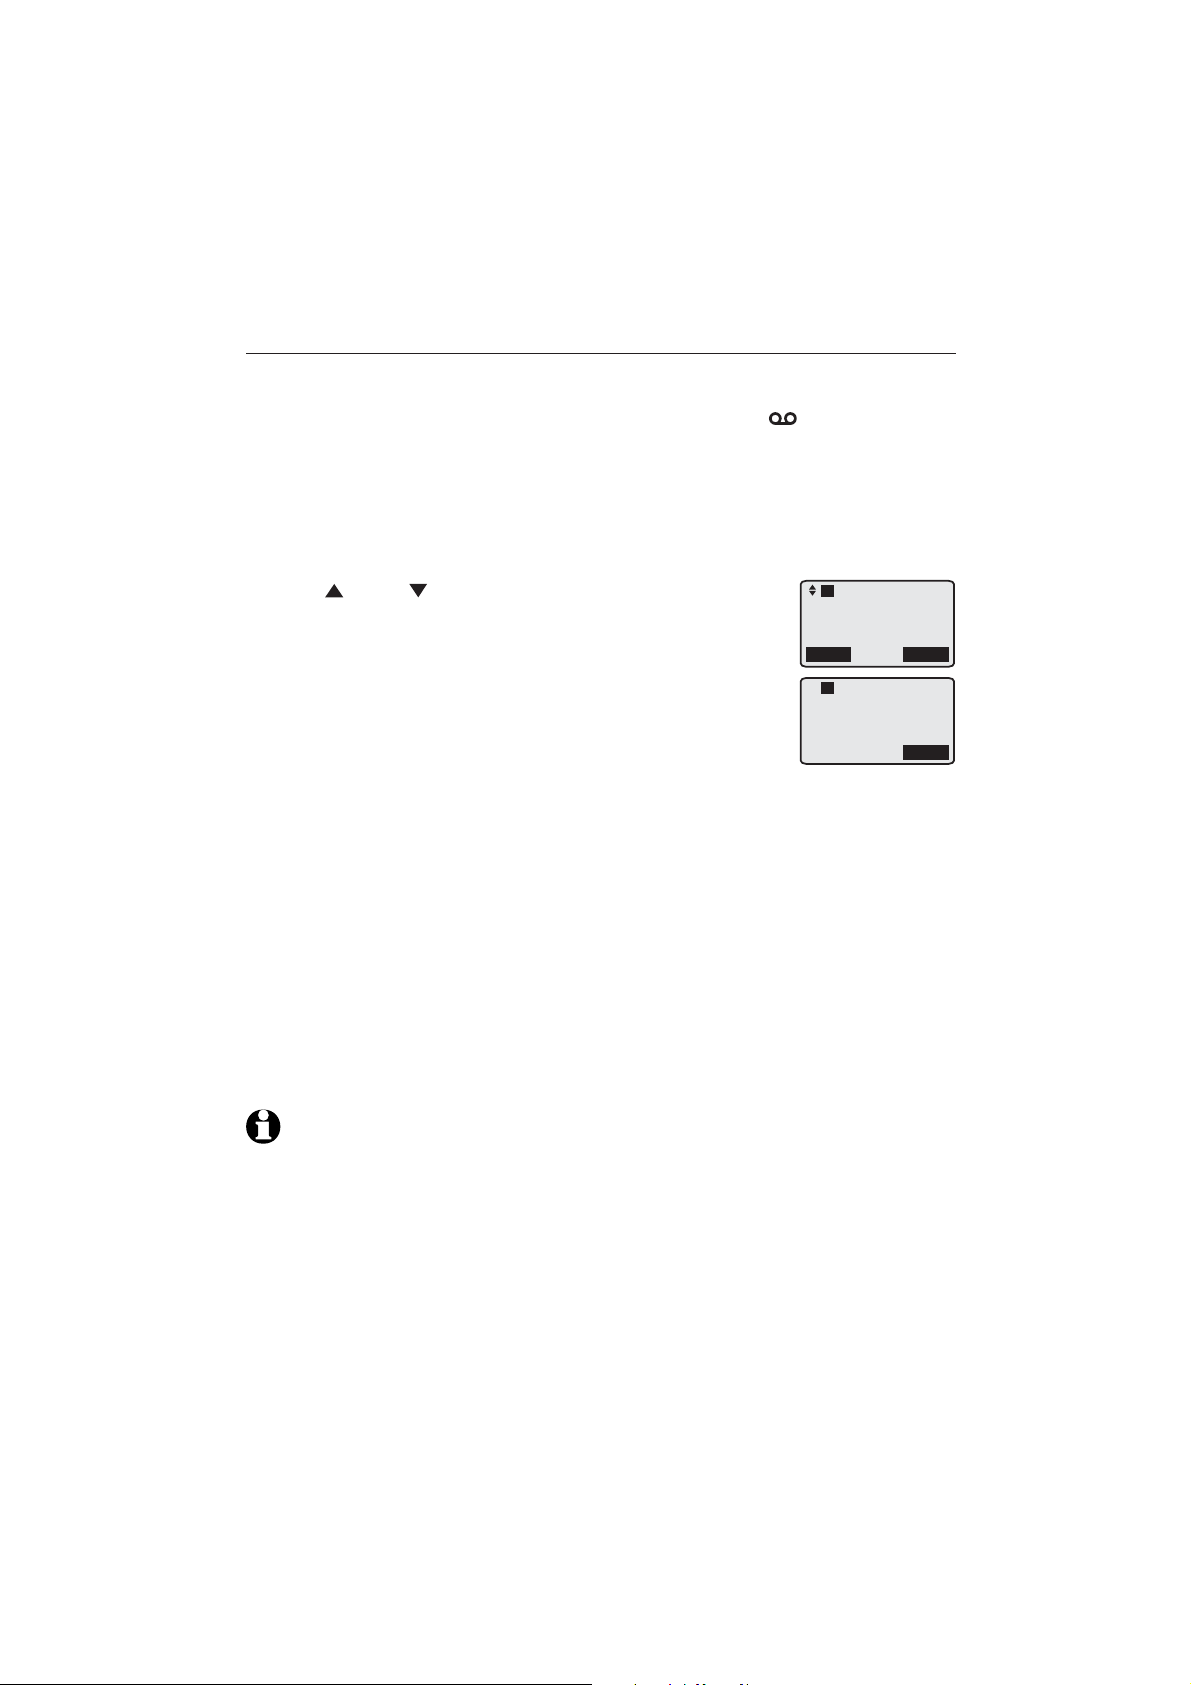
While on a call, press the Option softkey.
1.
Press DIR or CID to scroll toto scroll to Record call on. Press
2.
the Select softkey.
The recording starts and the system activates call
3.
privacy. The screen displays -PRIV and -REC, and the
timer starts counting while recording.
To stop recording and continue the call, press the
4.
Option softkey and then press the Select softkey
to choose Record call off. The system saves the
conversation into the personal mailbox.
-OR-
The recording ends when you disconnect the call.
L1
Privacy OFF
>Record call on
Back
L1
Line1 00:00:10
-PRIV -REC
Select
Option
While recording a phone conversation, the other party hears a short beep
when the recording begins and once each minute during the recording.
To ensure compliance with the state and federal regulations regarding the
recording of a telephone call, you should start the recording process and
inform the caller that you are recording the call.
To play back a memo or phone conversation:
Play memos or two-way phone conversations the same way as messages
(see Message playback on page 57).
NOTES:
Call privacy is automatically on when recording a call.
•
Calls that you record use the same memory as the answering system. Recording long
•
conversations uses up space available for recording normal messages. Please see
Remaining space in your SynJ SB67118/67138 user’s manual.
If the memory of the answering system is full, the screen displays Memory is full.
•
25
Page 31
Deskset operation
Options while on calls
Hold
Use this feature to hold one line while accessing
another, or as part of the conference and call transfer
features.
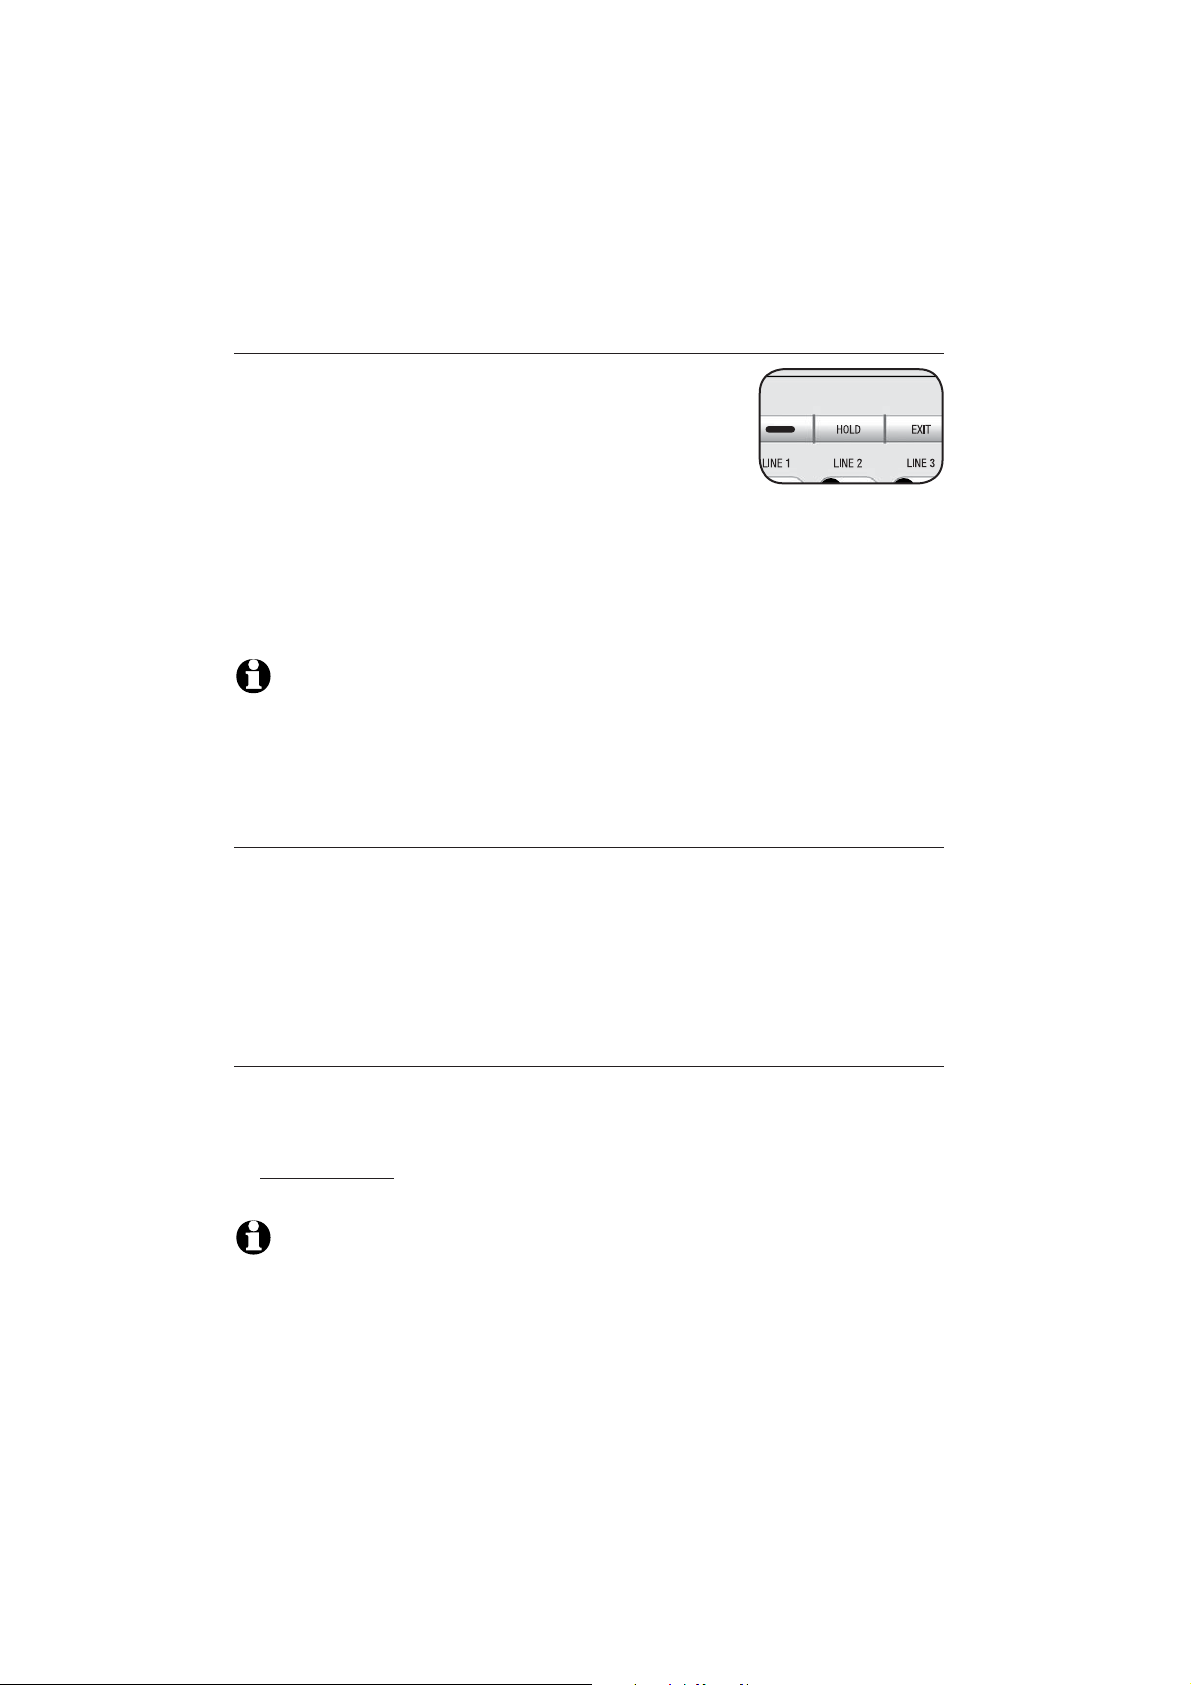
While on a call, press HOLD. The LINE 1-LINE 4
indicator for the line on hold flashes slowly in red. After
the call has been on hold for more than three minutes, a beep sounds every
30 seconds. (See Hold reminder on page 16 to turn off this feature).
If you are using the speakerphone, the speakerphone turns off automatically
when you press HOLD.
To resume the call, press LINE 1-LINE 4 of the call on hold.
NOTES:
•
A call on hold after 10 minutes is automatically forwarded to the auto attendant, even if the
auto attendant is not activated. To keep a call on hold longer than 10 minutes, release the
held call within 10 minutes and then place the call on hold again.
•
You cannot put an intercom call on hold.
Switch between lines
You can switch between lines during an outside call:
Press LINE 1-LINE 4 of another telephone line to make or answer another
1.
call. The current call is put on hold automatically.
To return to the first call, press the original LINE 1-LINE 4. The second line
2.
is put on hold automatically.
Join a call in progress
Use this feature to join in an ongoing call on any line that does not have
call privacy set (see Call privacy on page 24 for more information). The
corresponding line icon appears on the screen when the line is in use.
Press and hold the desired LINE 1-LINE 4 on the deskset to join in the call,
•
which becomes a three-way conference (page 27).
NOTE: When you try to join in an ongoing call on a line with call privacy on, the screen
displays Privacy and you hear four beeps tones.
26
Page 32
Deskset operation
Options while on calls
Chain dialing
While you are on a call, you can initiate a dialing
sequence from the numbers in the directory.
L1
Line1 00:00:01
Chain dialing can be useful if you wish to access other
numbers (such as bank account numbers or access codes)
Option
from the directory.
To access the directory while on a call:
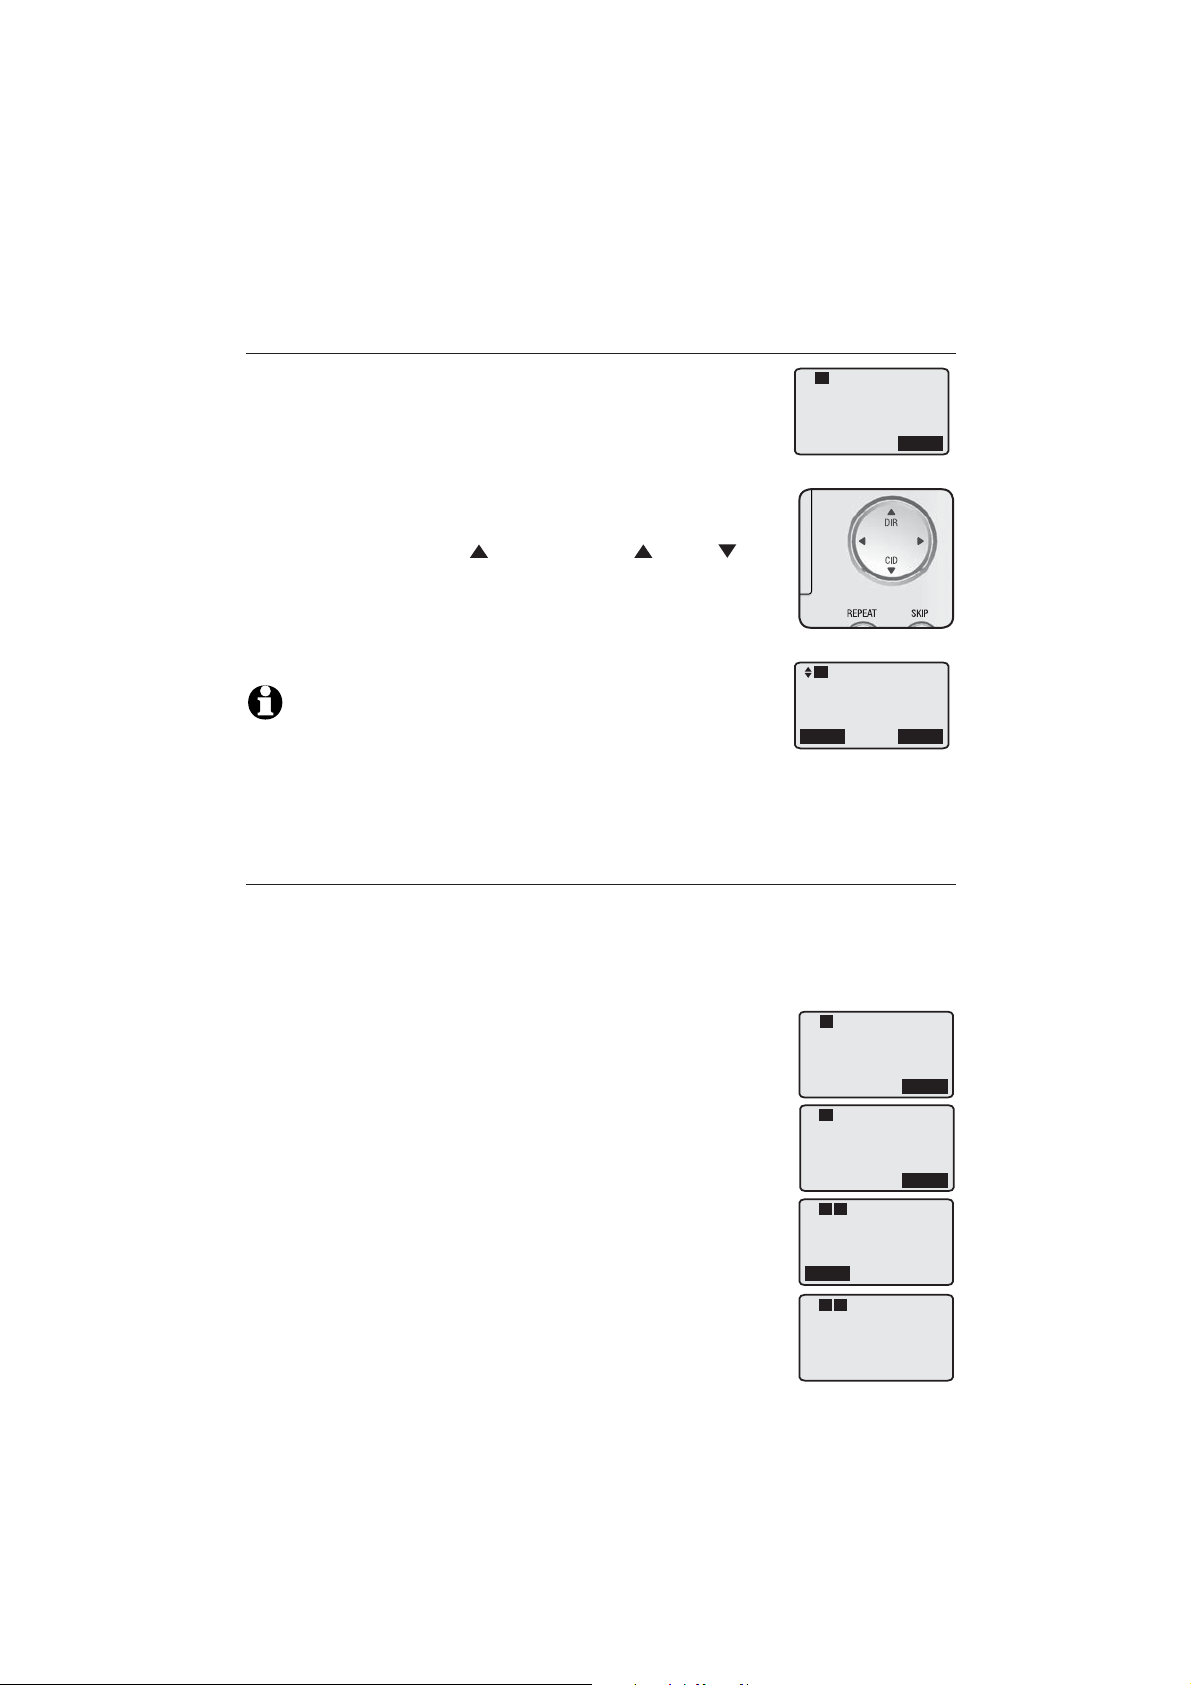
During the call, press DIR, then press DIR or CID
1.
to review the directory.review the directory.
To dial the displayed number, press the Call softkey. To
2.
exit without making changes, press the Back softkey
and continue the conversation.
L1
CHRISTINE SMITH
NOTES:
•
You cannot edit a directory entry while on a call. See page 42 for
more details about the directory.
•
If there is no entry in the directory, the screen displays Directory empty and you can continue
your call.
8888832445
Back
Call
Three-way conference calls
You can set up a three-party call by using two lines at the same time. You
can also join an intercom call with a call on an outside line. The outside line
call must be established first because an intercom call cannot be placed on
hold.
To make a three-way conference call:
Make or answer an outside call.
1.
Press HOLD and call someone on another line, or start
2.
an intercom connection.
-OR-
Call someone on another line, or intercom someone. The
first line is automatically put on hold.
Press the Conf softkey at any time to begin the
3.
three-way conference.
To talk privately on the outside call:
1.
Press HOLD to place both lines on hold.
2.
Press LINE 1-LINE 4 to talk privately with the person on
that line.
3.
Press the Conf softkey to resume the conference call.
27
L1
Line1 00:00:15
Option
L1
Hold Line1
L1 L2
Line2 00:00:01
Conf
L1 L2
Conf. 00:00:01
L1 L2
Menu
Page 33

Deskset operation
Options while on calls
To talk privately on the intercom call:
1.
Press HOLD to talk privately with the person on that intercom call. The
external line is automatically placed on hold.
2.
Press the CONF softkey to resume the conference call.
To drop one line:
1.
Press LINE 1-LINE 4 to activate the line you want to drop. Place the
handset on the deskset or press
put on hold automatically.
Press LINE 1-LINE 4 to retrieve the call on hold and lift the handset on
2.
the deskset.
To drop the intercom call:
Press LINE 1-LINE 4 to activate the external call. The intercom call
•
drops automatically.
To end a conference call:
Place the handset on the deskset to hang up or press SPEAKER. The
•
call does not terminate until all extensions hang up.
NOTES:
•
If an internal party hangs up, the ongoing call becomes a two-way conversation.
•
You cannot make any conference calls if all four telephone lines are in use.
•
If you are experiencing difficulty in using the conference features on this telephone, please
consider using AT&T’s complete line of teleconference services to find a solution that best meets
your needs. AT&T TeleConference Services reduces travel time and expense while increasing
productivity wherever people are located, enabling you to host truly virtual meetings and share
important information in real time. To sign up for AT&T TeleConference Services, go to:
www.att.com/orderconference for details.
SPEAKER to hang up. The other line is
28
Page 34
Deskset operation
COVM
COVM (central office voicemail)
If you subscribe to voicemail service with your telephone service provider,
and you want the deskset to indicate when you have new voicemail, turn the
COVM indicator on. When a phone line receives any new voicemail messages,
COVM LX (X is the telephone line number) displays on the screen.
If you do not subscribe to voicemail service or want to disable the indicator,
turn off the COVM feature.
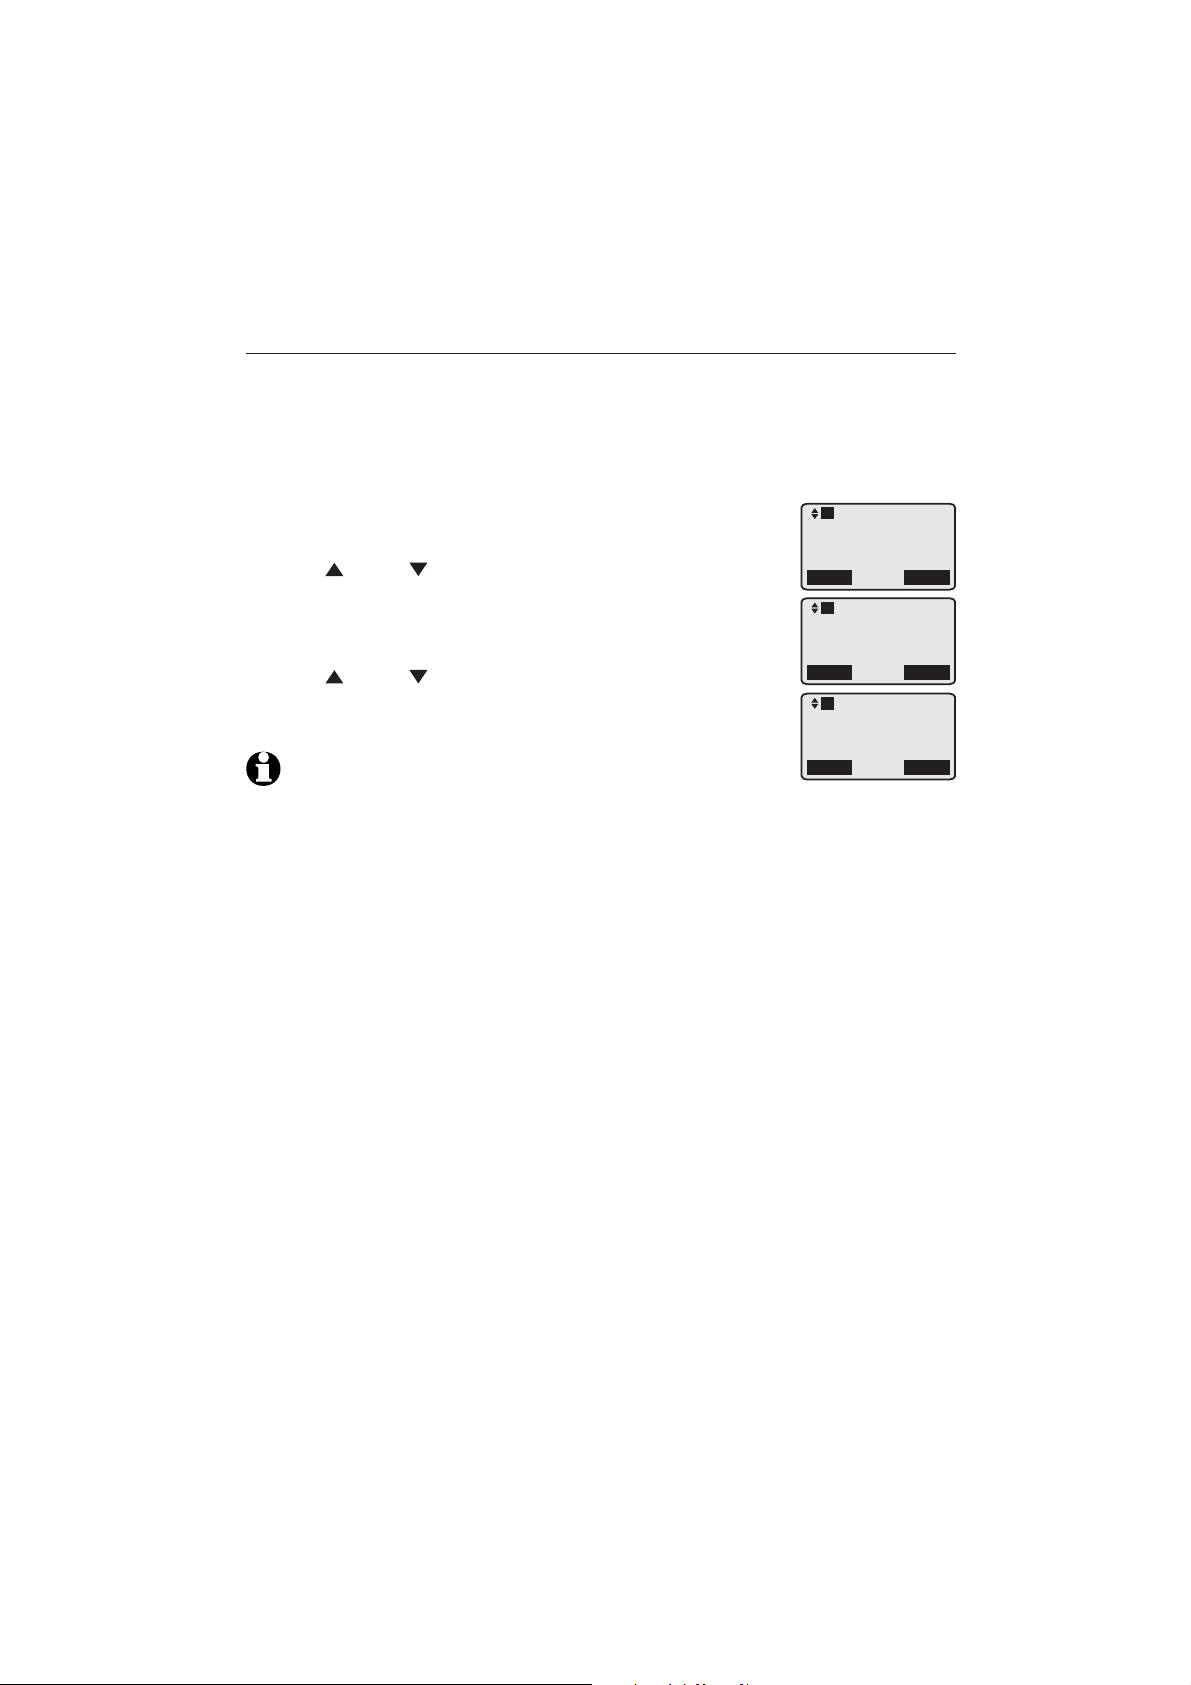
When the deskset is idle, press the MENU softkey.
1.
Press DIR or CID to scroll to COVM. Press the Select
2.
softkey.
The deskset displays >COVM on/off. Press the Select
3.
softkey again.
Press DIR or CID to select On or Off.
4.
Press the Save softkey to save the setting and return to
5.
the previous menu. There is a confirmation tone.
L1
Ringer setting
Mailbox setup
Deskset setup
>COVM
Back
L1
>COVM on/off
Back
L1
COVM
:Off
Select
Select
NOTE: If there are messages rom the telephone service provider when
you turn on this feature, the screen displays the COVM indicator.
Back
Save
29
Page 35
Deskset operation
Intercom
You can use the intercom feature for conversations with a cordless handset or
the SB67118/SB67138 main base. When the system is making one or more
external calls, the deskset can make intercom calls with a cordless handset or
the main base.
You can register up to 10 extensions to the main base. The extensions
are cordless handsets or desksets. The extensions are assigned sequential
numbers (1-0) as they are added. See pages 8-9 for information on adding
and registering a deskset. See SynJ SB67108 user’s manual for information
on adding and registering a cordless handset.
Make an intercom call to the SB67118/SB67138 telephone base or a
cordless handset
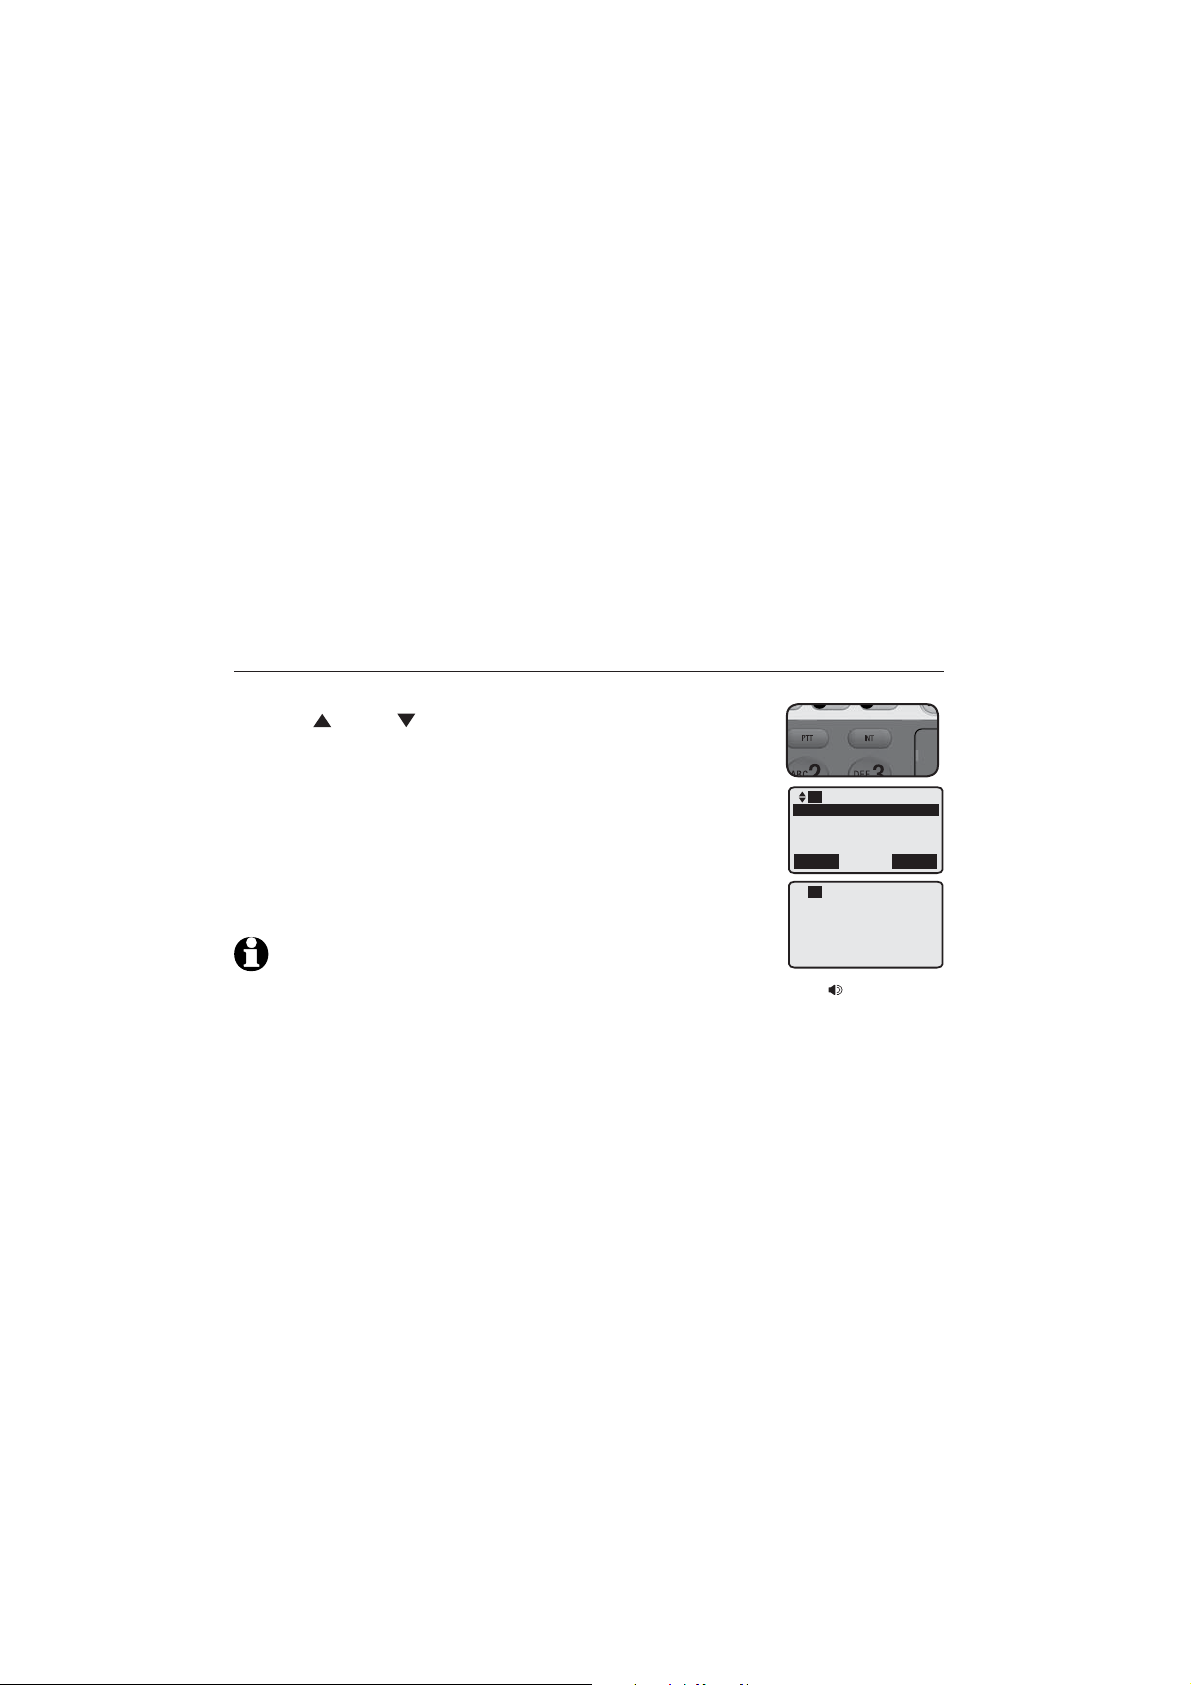
Press the INT key on the deskset.
1.
Press
2.
-OR-
Press * (star key) for the main base, 1-0 for extension 1-0,
and # (pound key) for all extensions.
3.
Press the Select softkey.
4.
The screen displays Calling X:Handset X (X represents
the extension number [1-0], Handset X represents the
handset name), Calling*:Base or Calling All.
DIR or CID to choose a destination device.
L1
*: Base
1: Handset 1
#: All
Back
L1
Calling
*:Base
Select
NOTES:
Before the intercom call is answered, you can cancel the intercom by pressing SPEAKER,
•
lifting and resetting the corded handset, or by pressing the corresponding LINE 1-LINE 4 to
resume a call.
The intercom call is automatically canceled if it is unanswered after one minute.
•
Press MUTE to temporarily silence the intercom ringer.
•
When you choose All in the menu, all extensions and the telephone base ring. The intercom
•
call is established with the first extension to answer.
If a line is in use, pressing INT places the line on hold and activates the intercom.
•
30
Page 36

Deskset operation
Intercom
Answer an incoming call during an intercom call
If you receive an incoming outside call during an intercom call, there is an
alert tone. To answer the call, press LINE 1-LINE 4. The intercom call ends
automatically.
Answer an intercom call
When you receive an intercom call, you hear a ringing tone and your screen
displays Call X: Handset X (X represents the extension number [1-0],
Handset X represents the handset name) or Call*:Base. Answer an intercomAnswer an intercom
call just as you would answer a normal call.
End an intercom call
End an intercom just as you would end a normal call.just as you would end a normal call.
31
Page 37
Deskset operation
Call transfer using intercom
You can transfer a call to any other system handset or the main base.
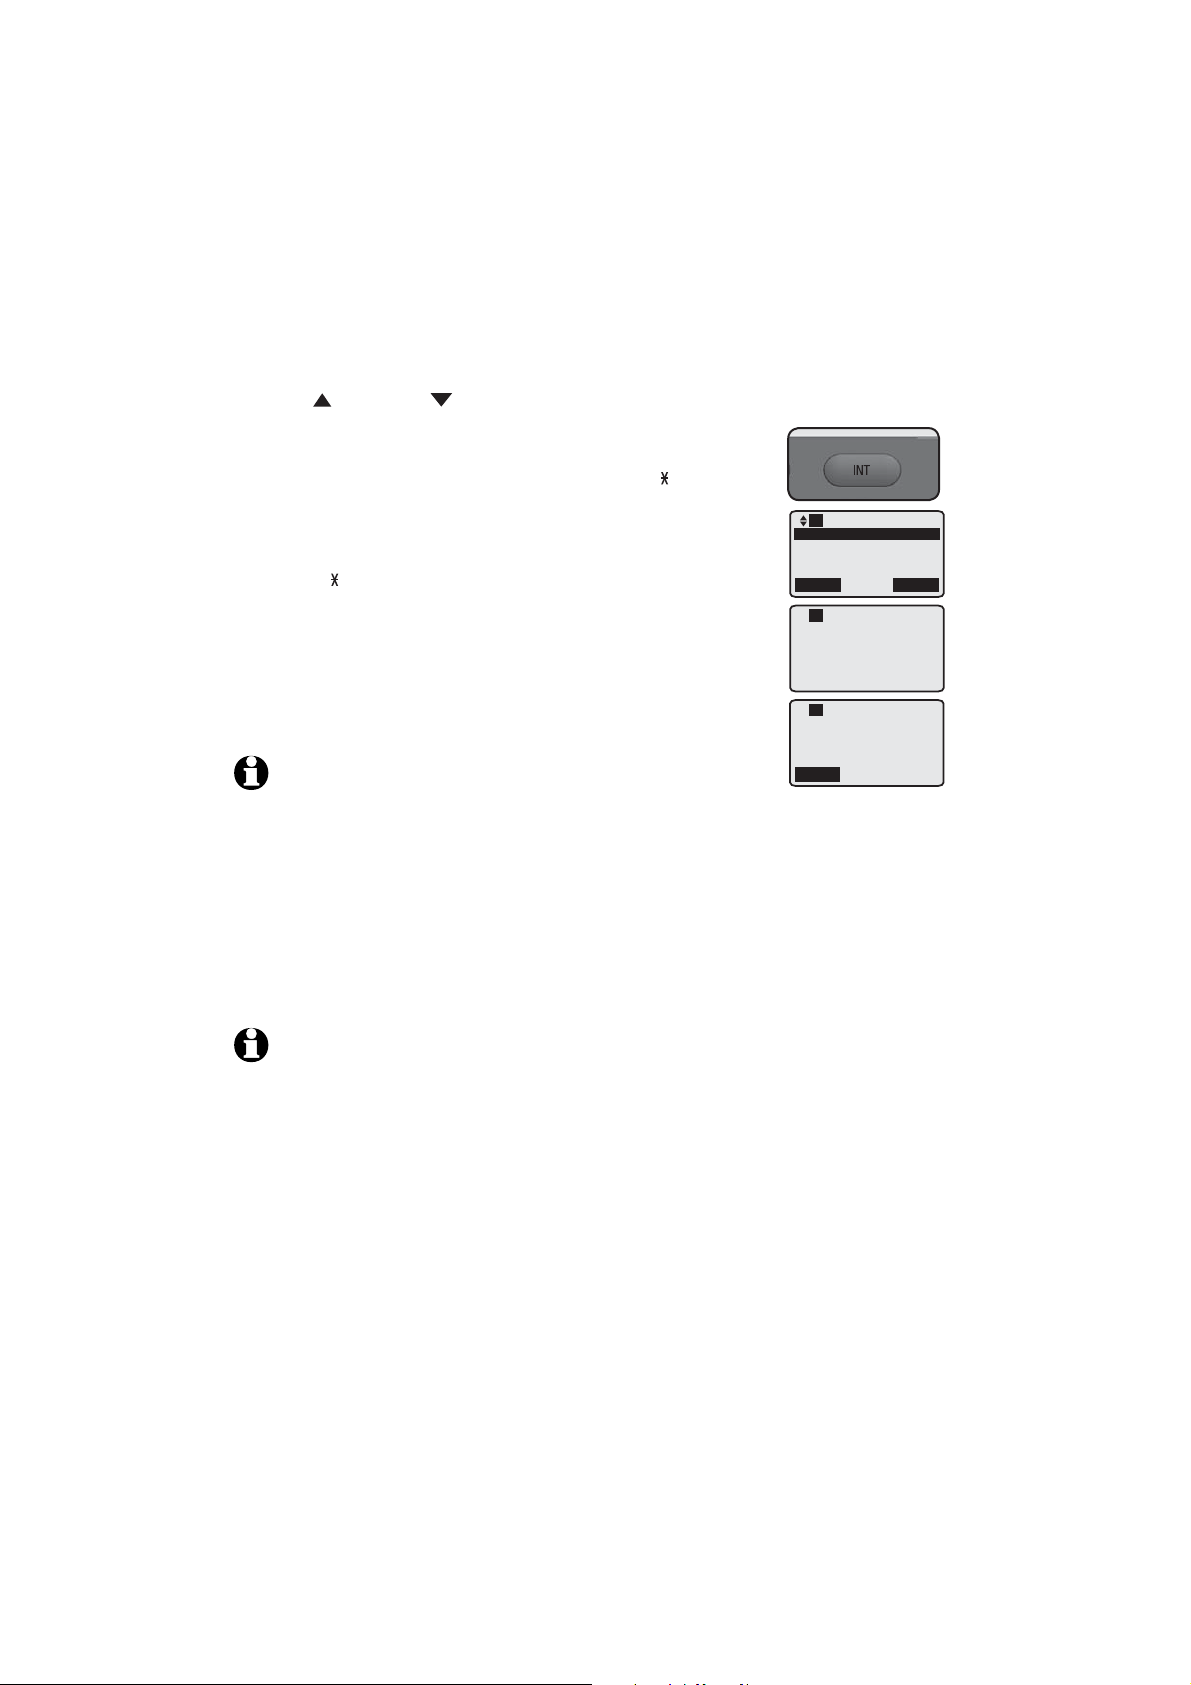
During a call, press INT.
1.
Press DIR or CID to scroll to the desired device. Press the Select
2.
softkey
-OR-
Press 1-0 for the desired extension number, (star key)
for the main base, or # (pound key) for all.
The outside call is put on hold and the deskset shows
3.
Calling X:Handset X Hold Line X,
Calling : Base Hold Line X, or Calling All Hold Line X.
The other handset or main base rings and its screen
4.
shows Call X:Deskset X.
Answer an intercom call just as you would answer a
5.
normal call, or press INT. The outside call is still on hold
and both screens now show Intercom. You can now
have a private conversation.
NOTE: Before the intercom call is answered, you can cancel the call
transfer and return to the external call by pressing the corresponding line key on the
deskset.
L1
*: Base
2: Handset 2
Mailbox
#: All
Back
L1
Calling
*:Base
Hold Line 1
L1
Intercom 00:00:01
Hold Line1
Conf
Select
From this intercom call, you have the following options:
6.
You can let the other handset or main base join you on the outside call
•
in a three-way conversation. Press the Conf softkey on the deskset.
You can release the outside call to the other extension before the
•
intercom call is answered (blind transfer). Place your corded handset back
in the deskset. cordless handset or the main base automatically connects
to the outside call.
NOTE: If a transferred call is not answered after 30 seconds, the transfer is canceled. The
external call returns to the deskset and is on hold. If the hold reminder is turned on, the
deskset beeps every 30 seconds. Press the LINE 1-LINE 4 key to answer the external call.
You can return to the outside call. Press the LINE 1-LINE 4 key on the
•
deskset.
The other person can end the intercom call by putting the corded
•
handset back to the deskset. Press the line key on the original extension
to resume the outside call.
32
Page 38

Deskset operation
Call transfer using intercom
You can also transfer a call to the general mailbox.
During a call, press INT.
1.
Press DIR or CID to scroll to Mailbox. Press the Select softkey.
2.
3.
The caller is prompted to leave a message in the general mailbox.
NOTE: For details of mailbox operation, see the SynJ SB67118/SB67138 user’s manual.
33
Page 39
Deskset operation
Push to talk (PTT) intercom
You can directly broadcast messages to the speakerphone of any extension.
The extension you called can respond by pressing the PTT key to begin a
two-way communication. Up to five pairs of PTT calls can exist at a time.
PTT to a handset or the main base
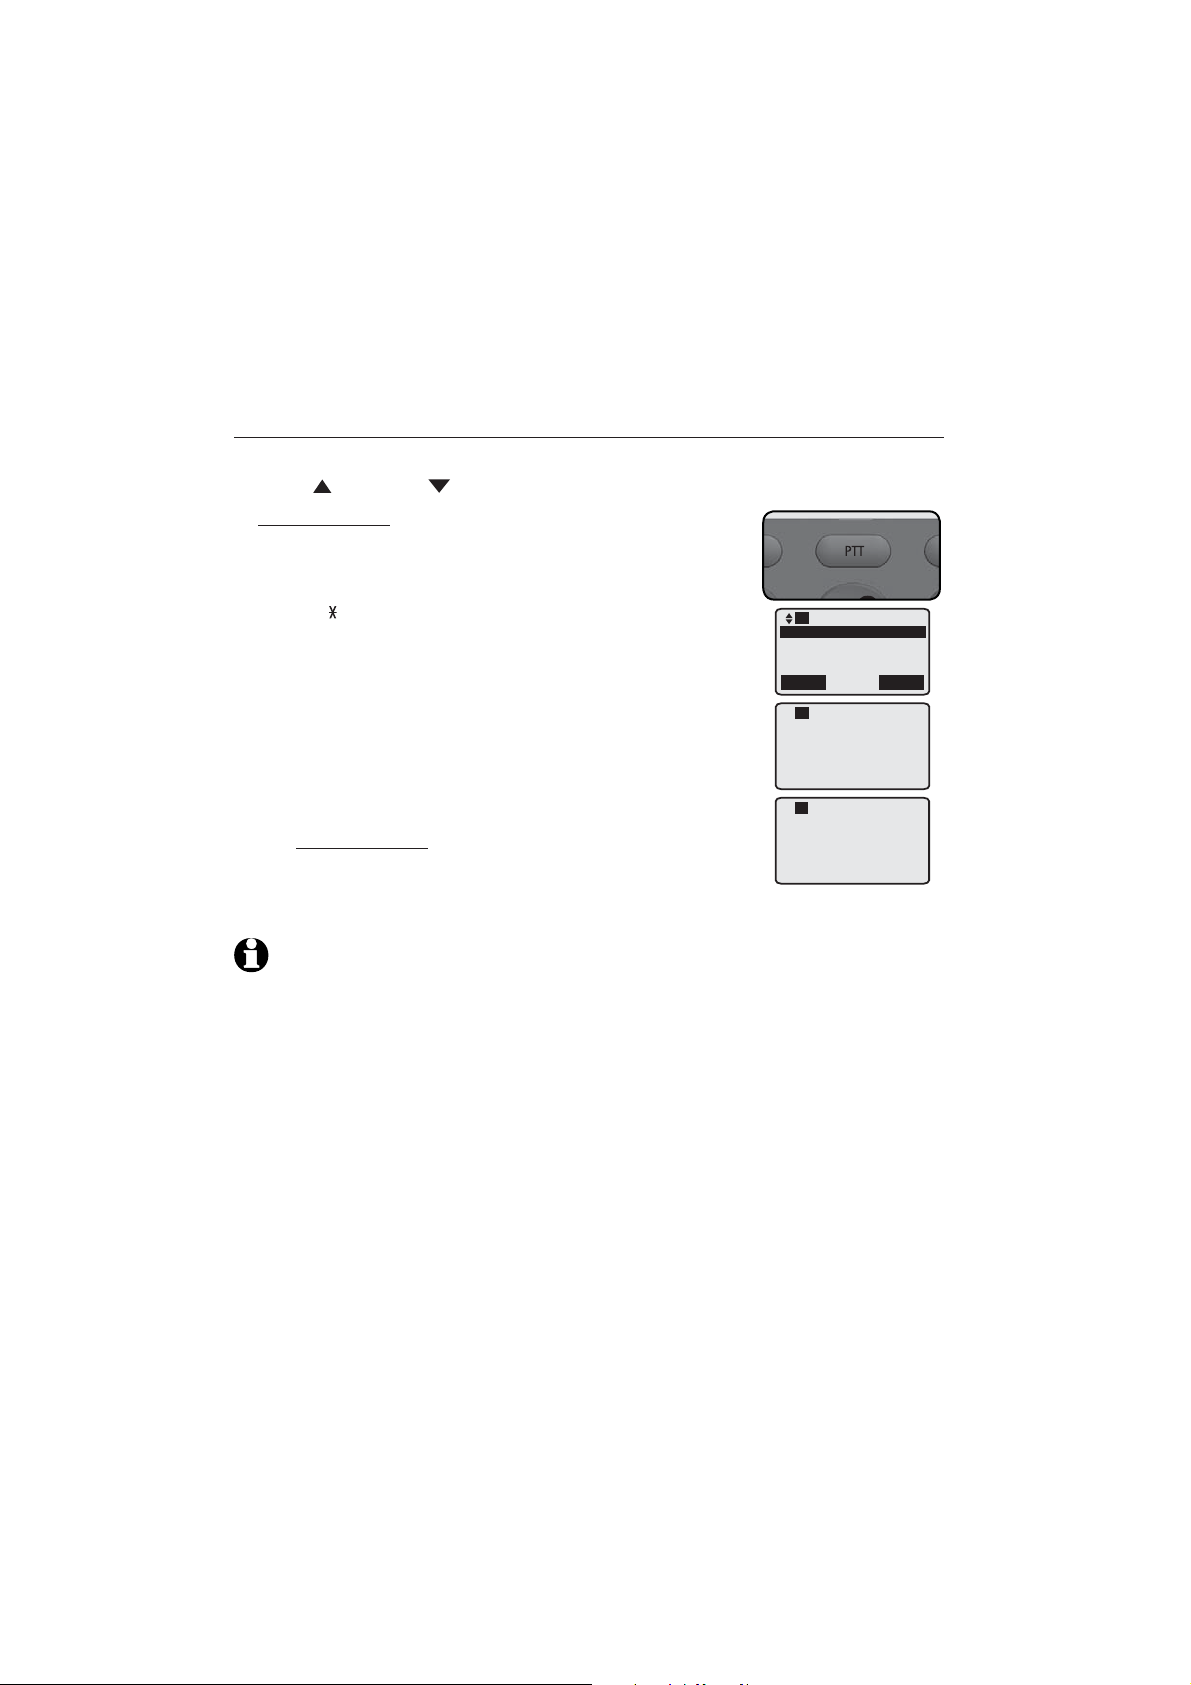
1.
When the deskset is idle, press the PTT key.
2.
Press DIR or CID to choose the desired device.
3.
Press and hold PTT until the deskset shows
PTT to: X:Handset X Release PTT key to stop (X
represents the extension number [1-0]; Handset X
represents the handset name) or
PTT to:
the connection is made, both the caller and the
destination party hear two beeps.
4.
Speak towards the deskset speakerphone while
continuing to hold down the PTT key. Your voice is
broadcast to the desired extension.
5.
Release the PTT key after speaking. There is a threesecond PTT wait state with -MUTE slowly flashing on
the screen. During the PTT wait state, if necessary, you
can press and hold the PTT key to continue speaking
towards the speakerphone.
6.
The destination party can now respond (see Answer
a PTT call on page 36).
:Base Release PTT key to stop. When
L1
*: Base
1: Handset 1
2: Handset 2
3: Handset 3
Back
L1
PTT to:
*:Base
Release PTT key
to stop
L1
PTT to:
*:Base
-MUTE
Select
NOTE: When the called handset or main base is on an intercom or outside call, you hear a
busy tone and the deskset displays Busy.
34
Page 40

Deskset operation
Push to talk (PTT) intercom
PTT to all handsets and the main base
When the deskset is idle, press the PTT key. Press DIR or CID to
1.
choose#: All. Then press and hold PTT until the deskset displays
PTT to: All Release PTT key to stop.
-OR-
When the deskset is idle, press and hold the PTT key until the deskset
displays PTT to: All Release PTT key to stop.
When the connection is made, both the caller and the destination parties
2.
hear two beeps.
Speak towards the deskset speakerphone. Your voice is broadcast to
3.
all extensions. Release the PTT key after speaking. There is a three-
second PTT wait state with -MUTE slowly flashing on the screen and the
MUTE indicator flashing. During the PTT wait state, if necessary, you can
press and hold the PTT key to continue to speak towards the deskset
speakerphone.
Any system device can reply. See Answer a PTT call in the user’s manual
4.
of SynJ SB67118, SynJ SB67138 or SynJ SB67108..
35
Page 41

Deskset operation
Push to talk (PTT) intercom
Answer a PTT call
When you hear two beeps, the screen displays PTT from: X:Handset X
1.
(X represents the extension number [1-0], Handset X represents the
handset name) or PTT from: *:Base.
To respond to a new PTT call, wait for the end of the three-second PTT
2.
wait state (the screen changes to idle mode). To respond to the main
base or a handset, see PTT to a handset or the main base or PTT to all
handsets and the main base on pages 34-35.
Convert a PTT call to an intercom call
You can convert the PTT call to a two-way intercom call on the deskset.
Press INT on the called extension to convert the call to a two-way
1.
intercom call.
Optionally, put the corded handset on the deskset or press SPEAKER to
2.
end the intercom.
NOTE: If the PTT call is sent to all handsets, the intercom call is established with the first
one who presses INT.
End a PTT call
Press EXIT to end the incoming PTT call.
36
Page 42

Directory
Directory
About the directory
Use the directory to store names and phone numbers. The directory in the
deskset is independent from the main base and all other registered handsets.
Changes made to the directory on the main base and other registered
handsets apply only to that particular device.
Capacity
The directory of the deskset can store up to 100 entries, with a maximum of
16 alphanumeric characters (including spaces) for names and 32 digits for
telephone numbers. A convenient search feature can help you quickly find
and dial numbers (page 41).
When there are already 100 entries, the screen sho
ws Memory is full. You
cannot store a new number until you delete one. If you try to view the
directory entries when there are no entries, the screen displays Directory
empty.
Exit the directory
On the deskset, press EXIT to cancel an operation and return to idle mode.
If you pause for too long while creating or reviewing an entry, the procedure
times out and you have to begin again.
37
Page 43
Directory
Create directory entries
Create a new directory entry
Use the following steps to store a name and number in the directory.
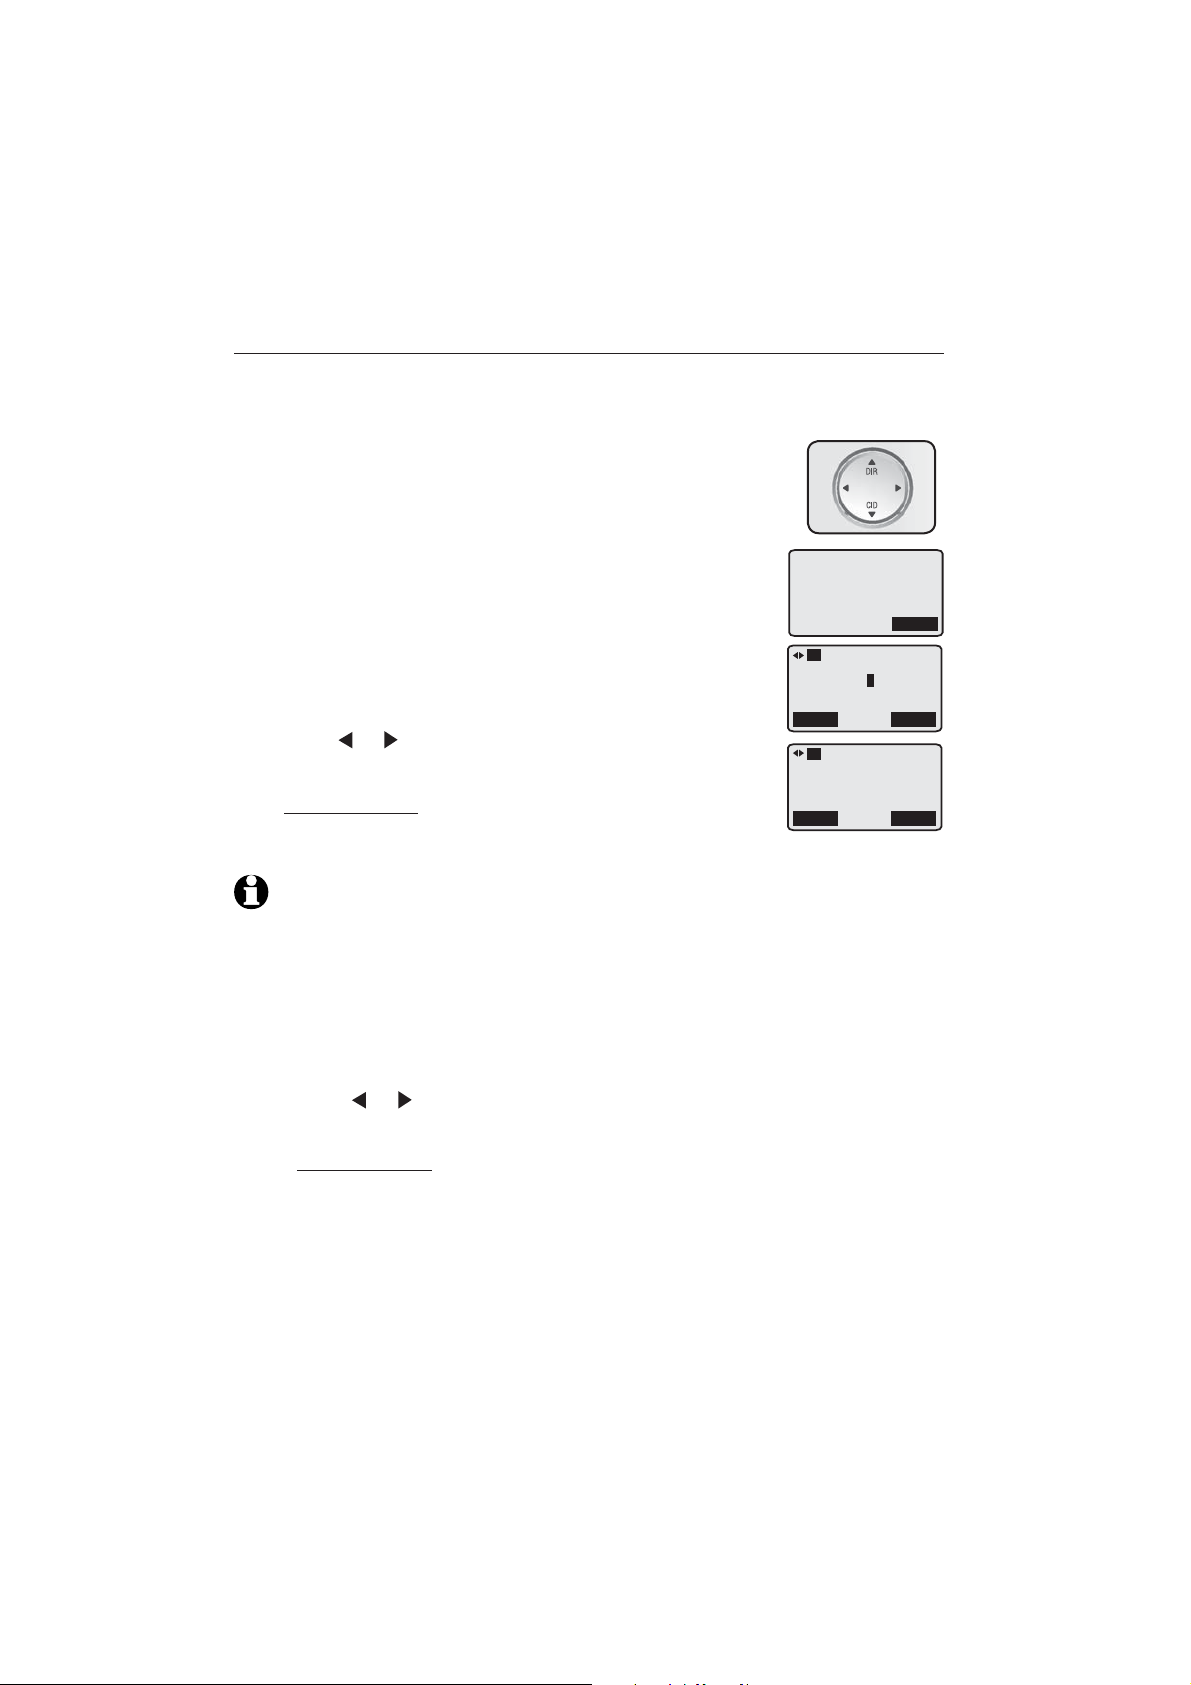
When the deskset is idle, press the Menu softkey and then press the Select
1.
softkey to choose Directory.
-OR-
Press DIR on the deskset.
The screen displays Directory empty if there is no entry
2.
in the directory.
-OR-
The screen displays Directory XX entries to show how
many entries are stored in the directory.
Press the Add softkey to add an entry.
3.
Enter a telephone number (up to 32 digits) using the
4.
dialing keys when prompted.
Press
•
Press X/DELETE to backspace and delete a digit.
•
Press and hold X/DELETE to erase all digits.
•
Press the Pause softkey to enter a 3.5 seconds dialing3.5 seconds dialingdialing
•
or to move the cursor to the left or right.
pause (a P appears) (page 39).
Directory empty
L1
Enter phone #
8888832445
Pause
L1
Enter name
Pause
Add
Next
Save
NOTE: If the telephone number in the directory exceeds 16 digits, < appears in front of
the telephone number. Press < to move towards the beginning of the telephone number
or press > to move towards the end of the telephone number.
Press the Next softkey to move on to the name. Enter the name when
5.
prompted.
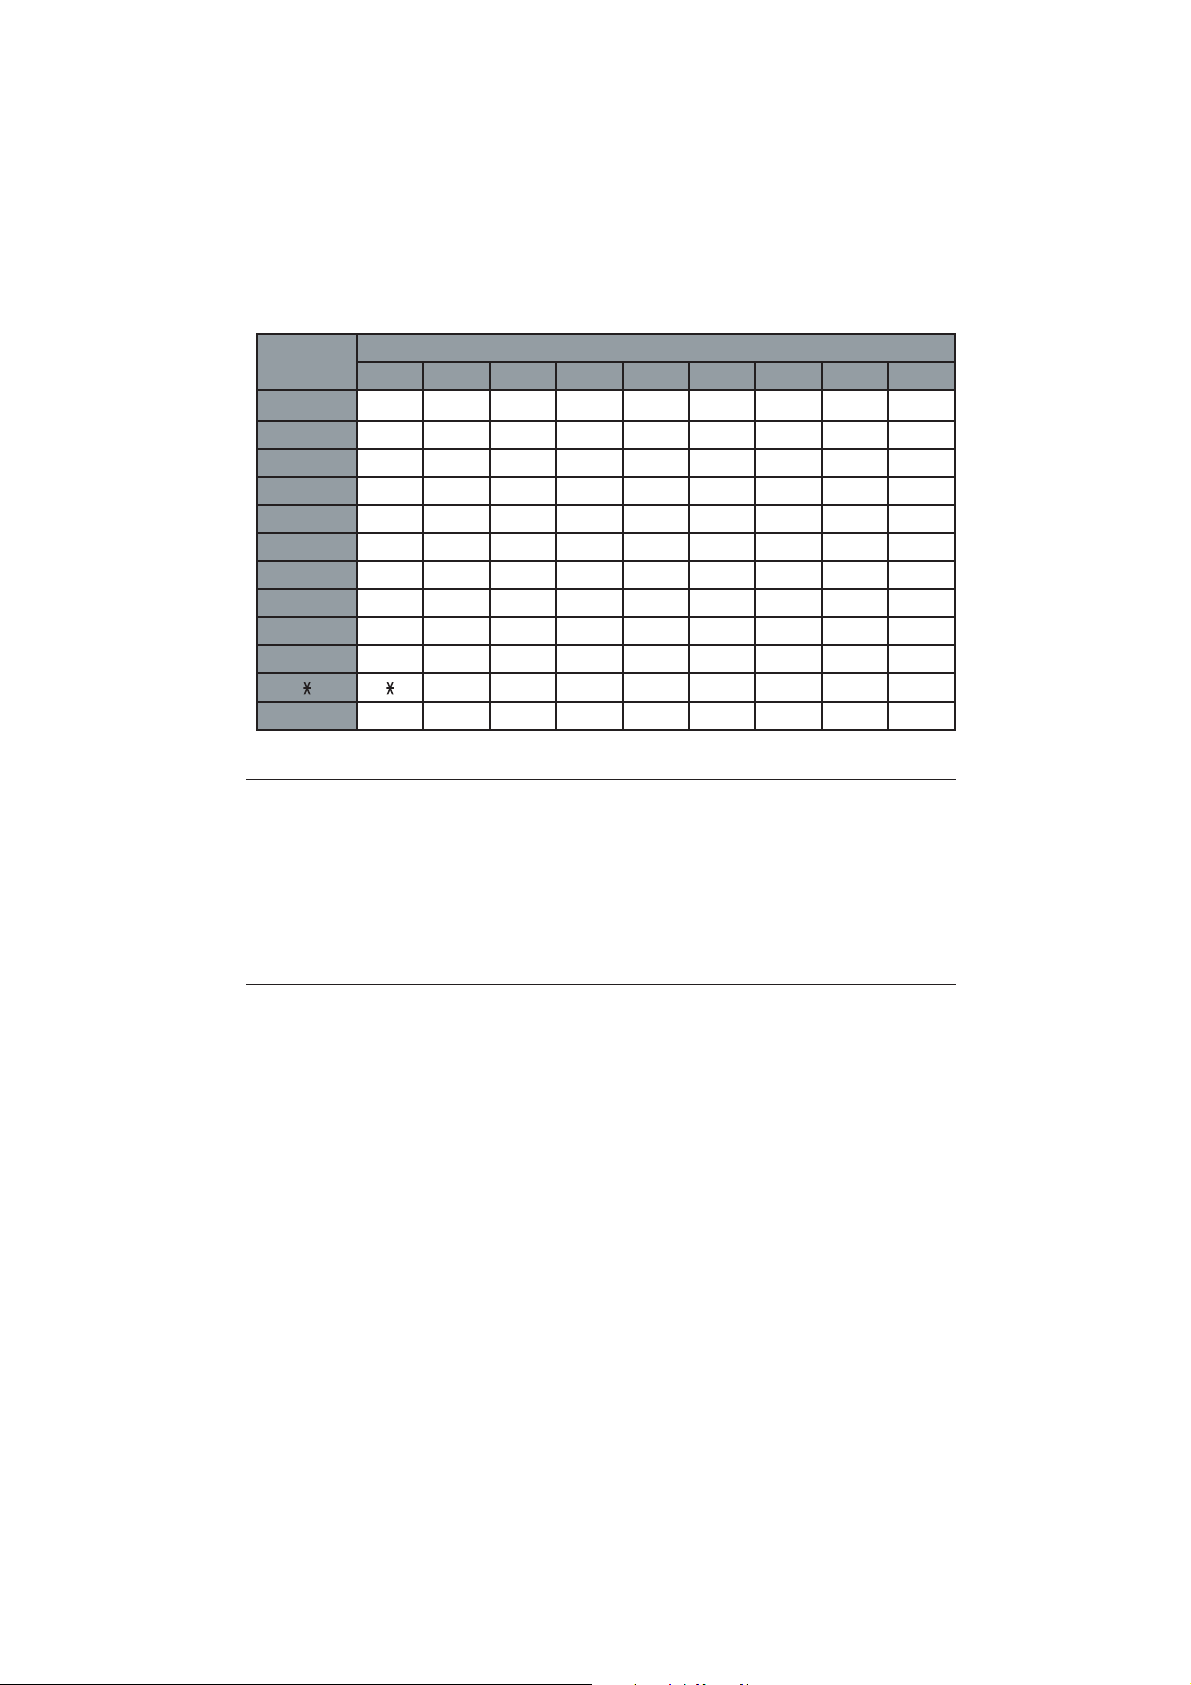
Use the dialing keys to enter a name (up to 16 characters). Each time you
•
press a key, the character on that key appears. Additional key presses
produce other characters on that key. See the chart on page 39.
- Press or to move the cursor to the left or right.
- Press X/DELETE to backspace and delete a character.
- Press and hold X/DELETE to erase all characters.
- Press 0 once to add a space.
Press the Save softkey to save the setting and return to the previous menu.
6.
There is a confirmation tone. The name and the telephone number appear
on the screen.
38
Page 44
Directory
Create directory entries
Number
key
1
2 abcABC2
3 defDEF3
4 gh i GHI 4
5 jklJKL5
6 mn oMNO6
7 pqr sPQRS7
8 tuvTUV8
9 wx y zWXYZ9
0 space 0
# #
123456789
&‘(),-./1
Characters by number of key presses
Store a pause in a directory entry
You may need to include a pause in a directory number to enable access to
automated telephone systems.
When you wish to enter a pause in the dialing sequence, press the Pause
•
softkey to store a pause (a P appears). Each pause counts as one digit. If
you want to save the number in the directory, press the Save softkey.
Store a flash in a directory entry
You may need a flash to access certain custom-calling services in a directory
number.
When you wish to enter a flash in the dialing sequence, press the Flash
•
key. An F appears in the telephone number. Each flash counts as one digit.telephone number. Each flash counts as one digit. number. Each flash counts as one digit.
If you want to save the number in the directory, press the Save softkey.
39
Page 45

Directory
Review directory
Review directory entries
When the deskset is idle, press the Menu softkey and
1.
then press the Select softkey to choose Directory.
-OR-
Press DIR on the deskset.
2.
The screen displays Directory empty if there is no entry
in the directory.
-OR-
The screen displays Directory XX entries to show how
many entries are stored in the directory.
3.
Press
alphabetically by the first letter in the name.
DIR or CID to browse through the directory. Entries appear
L1
Directory
9 entries
Del All
L1
Christine Smith
8888832445
Back
Add
Edit
40
Page 46
Directory
Search directory
Search by name
Follow the steps below to search for directory entries on the deskset.
When the deskset is idle, press the Menu softkey and then press the Select
1.
softkey to choose Directory.
-OR-
Press DIR on the deskset.
The screen displays Directory empty if there is no entry in the directory.
2.
-OR-
The screen displays Directory XX entries to show how many entries are
stored in the directory.
Press DIR or CID to browse through the directory. Entries appear
3.
alphabetically by the first letter in the name.
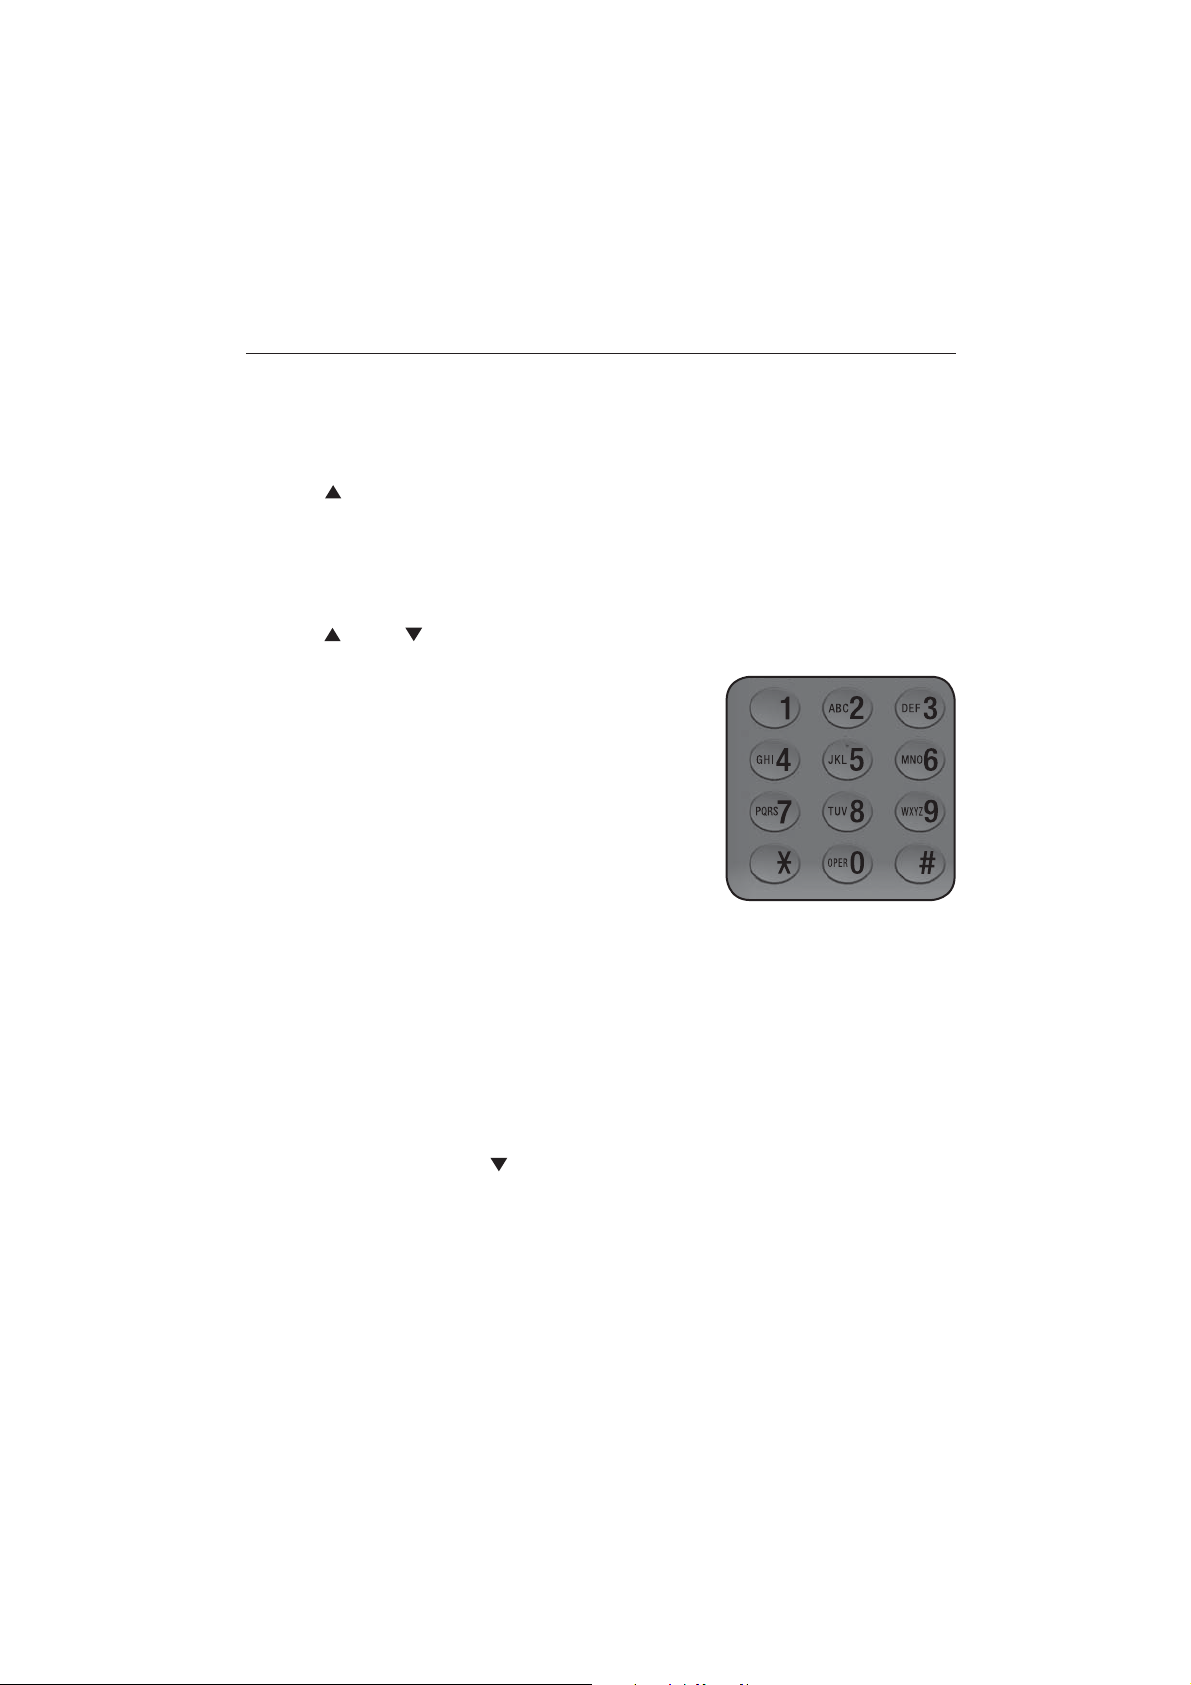
When a name appears, press the dialing keys (2-
4.
9) to start a name search.
The directory shows the first name beginning
•
with the first letter associated with the
dialing key if there is an entry in the directory
beginning with that letter. If there is no entry
matching the letter you pressed, it remains in
the current entry.
To see other names starting with the letters on
5.
the same dialing key, keep pressing the key. The
names appear in alphabetical order.
For example, if you have the names Jennifer, Jessie, Kevin and Linda in
your directory:
If you press 5 (JKL) once, you see Jennifer.
•
If you press 5 (JKL) twice, you see Kevin.
•
If you press 5 (JKL) three times, you see Linda.
•
If you press 5 (JKL) four times, you see Jennifer.
•
To view Jessie, press whilewhile Jennifer is displayed.
•
41
Page 47
Directory
Dial, delete or edit directory entries
You can dial, delete or edit a directory entry (name and number) when it
is shown on the deskset screen. You can use the directory review or name
search (pages 40-41) to show an entry.
Display dial
When a number is displayed on the screen, you can dial the number by
lifting the corded handset, pressing the Call softkey, SPEAKER or
LINE 1-LINE 4 for the desired line.
Delete an entry
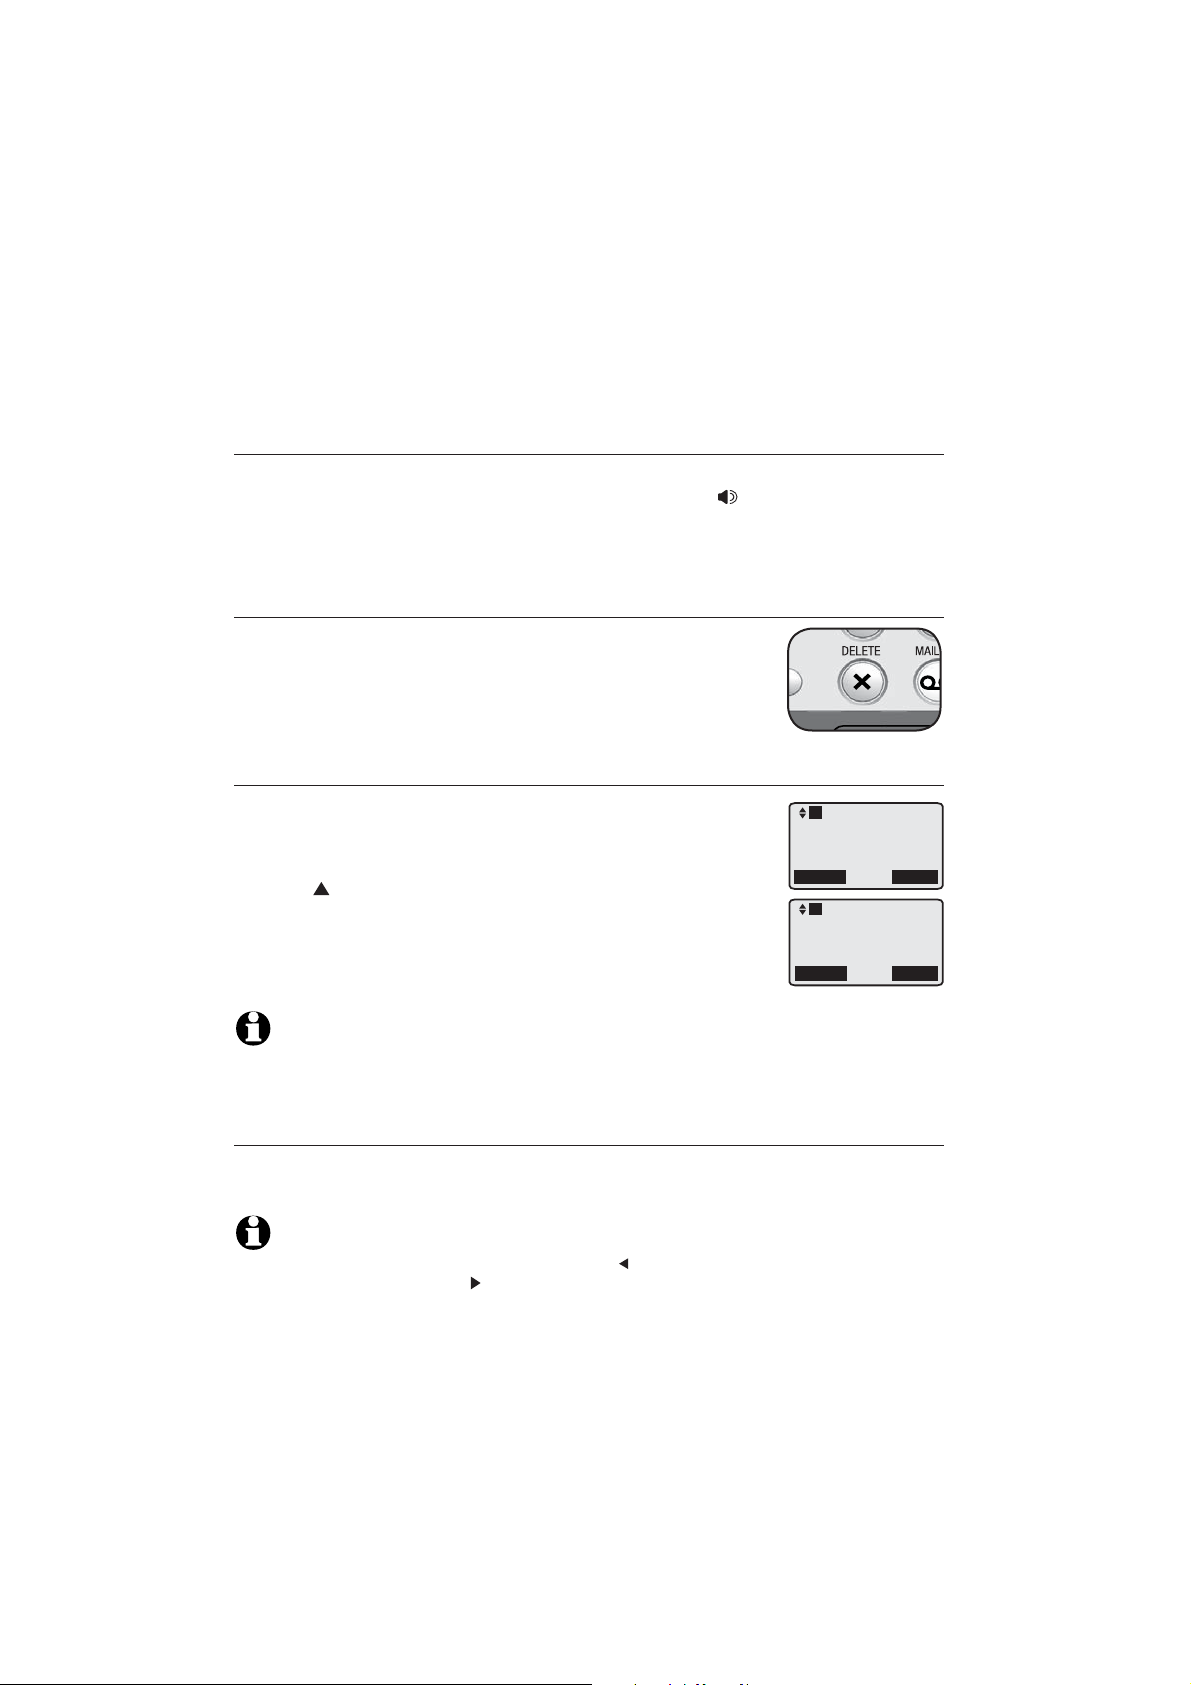
When a directory entry appears, press X/DELETE on the
deskset to delete the displayed entry from the directory.
You cannot retrieve a deleted entry.
Delete all entries
When the deskset is idle, press the Menu softkey and
1.
then press the Select softkey to choose Directory.
-OR-
Press DIR on the deskset.
When the screen displays Directory XX entries, press the
2.
Del All softkey.
When the deskset displays Delete entire directory? Press
3.
the Yes softkey to confirm, or the No softkey to exit.
L1
Directory
9 entries
Del All
L1
Delete entire
directory?
No
Add
Yes
NOTE: You cannot retrieve deleted entries.
Edit an entry
When a directory entry appears, press the Edit softkey.
1.
Follow steps 4 to Step 6 on page 38.
2.
NOTE: If the telephone number in the directory exceeds 16 digits, < appears in front of the
telephone number on the editing screen. Press to move towards the beginning of the
telephone number or press to move towards the end of the telephone number.
42
Page 48
Caller ID
Caller ID
About caller ID
This deskset supports caller ID services that most telephone service providers
offer. Depending on your service subscription, you might see the caller’s
number, or the caller’s name and number from the telephone service provider
after the first or second ring. Caller ID allows you to see the name, number,
date and time of calls.
Information about caller ID with call waiting
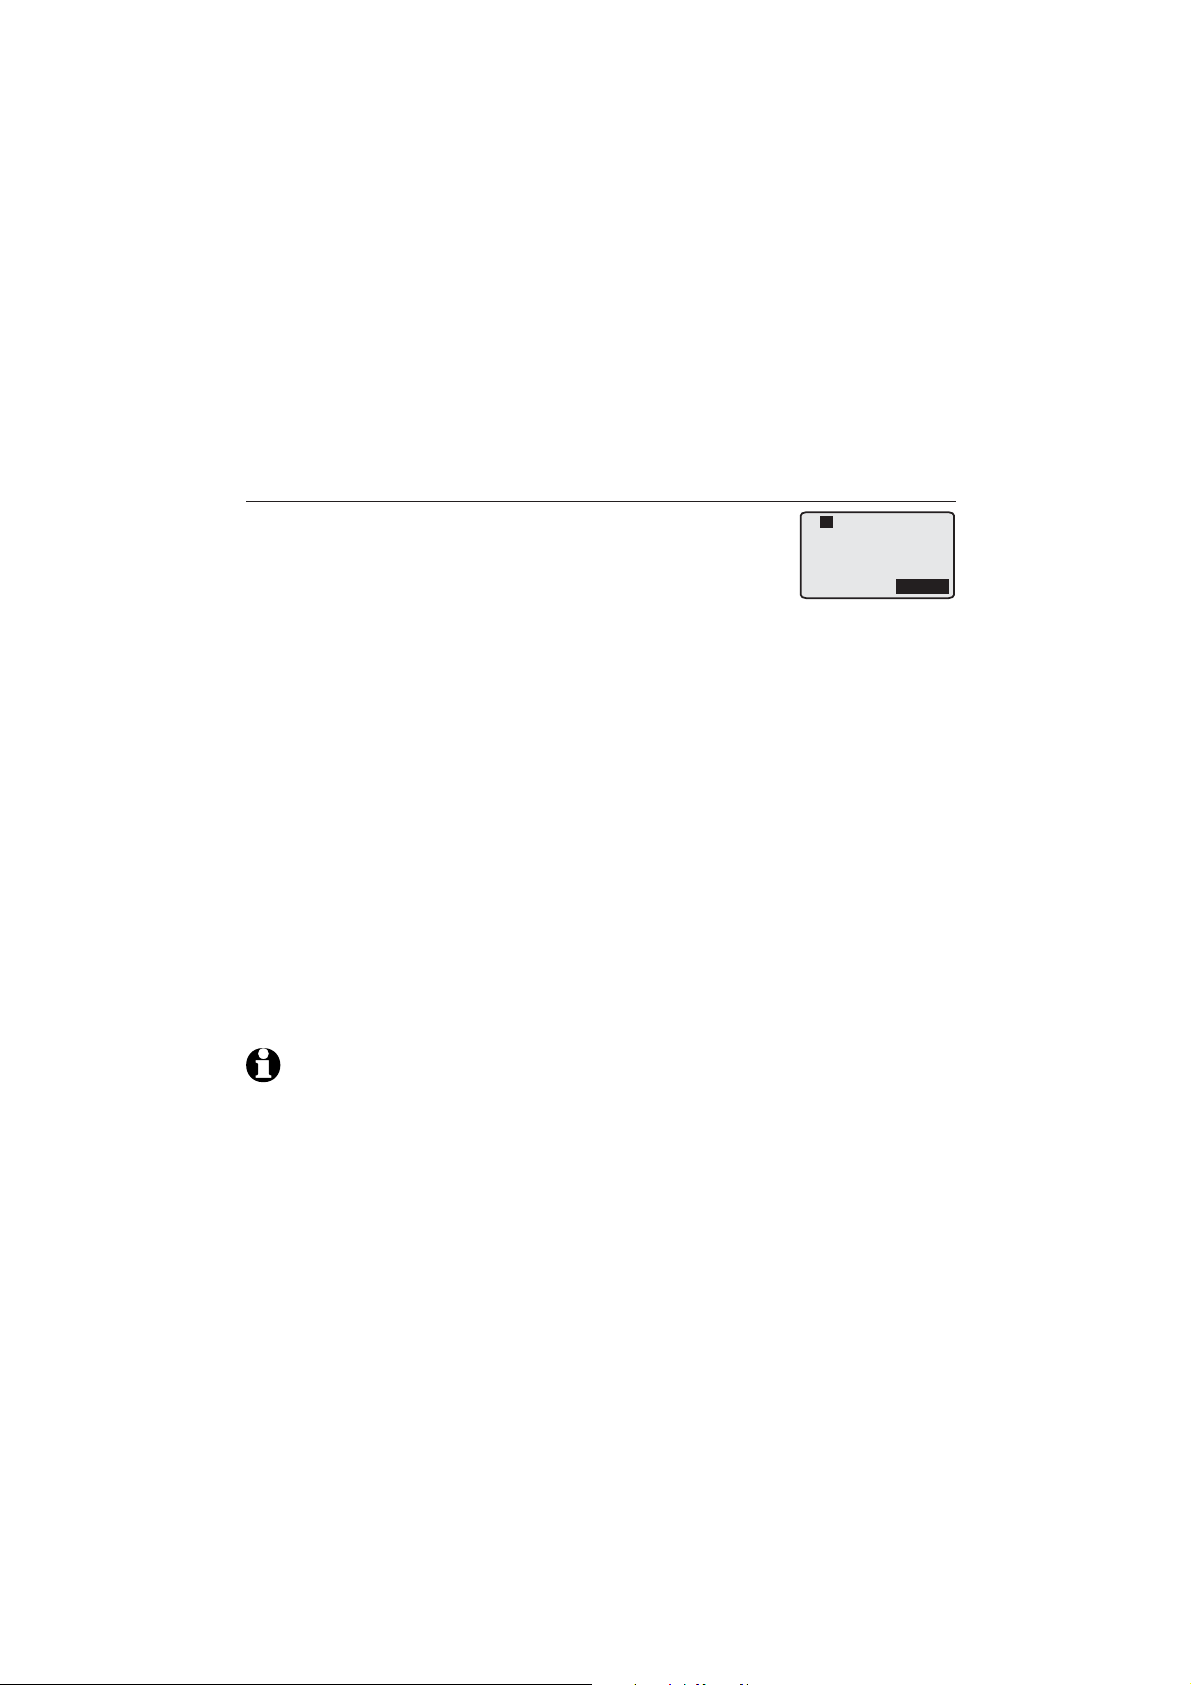
Caller ID with call waiting lets you see the name and
telephone number of the caller before answering the
telephone, and while on another call.
There are fees associated with caller ID services. In addition,
this service might be called by different names (such as caller ID with visual
call waiting) by different telephone service providers and might not be
available in all areas.
It might be necessary to change telephone service to use this feature.
Contact your telephone service provider if:
•
You have both caller ID and call waiting, but as separate services (you
might need to combine these services)
•
You only have caller ID service, or only call waiting service.
•
You do not subscribe to caller ID or call waiting services.
L1
-------Line 1-----Christine Smith
888 722 7702
Silence
This product can provide information only if both you and the caller are in
areas offering caller ID service and if both telephone service providers use
compatible equipment. The time and date are from the telephone service
provider along with the call information.
Caller ID information might not be available for every incoming call. Callers
may intentionally block their names and/or telephone numbers.
NOTES:
•
You can use this telephone with regular caller ID service, or you can use this telephone’s other
features without subscribing to caller ID or combined caller ID with call waiting service.
•
The format of telephone numbers displayed depends on the home and local area codes you
set (See Area codes in your SynJ SB67118/SB67138 user’s manual for explanations and
instructions for setting area codes).
43
Page 49
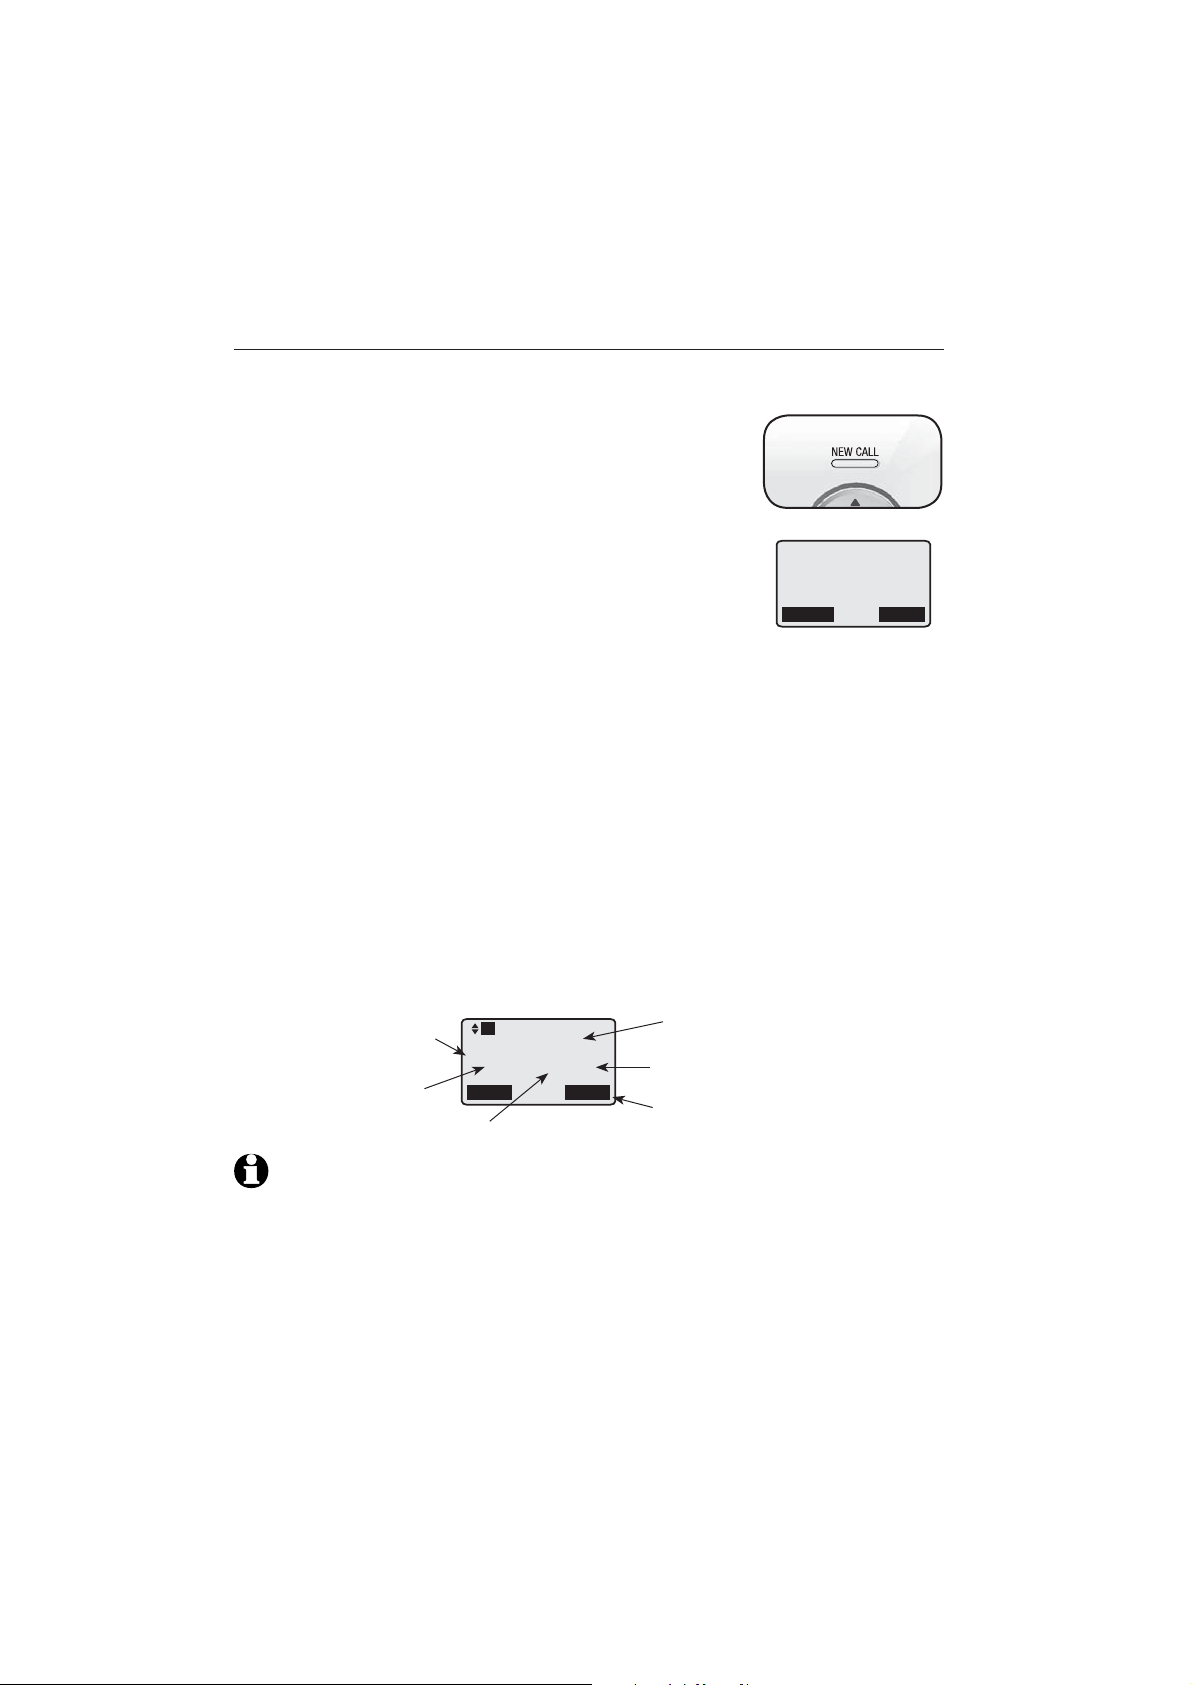
Caller ID
Caller ID Information
How the caller ID information (call log) works
The deskset stores caller ID information for the last 50 incoming calls. Entries
are stored in reverse chronological order. The telephone deletes the oldest
entry when the log is full to make room for a new call.
Each extension has an independent call log. Deleting
the caller ID information on any one extension does not
affect the caller ID information on other extensions.
If you answer a call before the information appears on
the screen, it will not be saved in the call log.
Review the caller ID information to see who called, to
easily return the call, or to copy the caller’s name and
number into your directory.
NEW CALL indicator turns on and XX Missed call(s) appears if there are new
call log entries (including new or missed calls).
Call log empty appears if there are no records in the call log.
The time and date of the call and the caller’s name and telephone number
are included in the display.
Caller ID information appears on the screen as the telephone rings, or until
the caller hangs up, or until the call has been answered at another extension,
or until the call ends.
If you subscribe to caller ID service, this phone automatically resets the
time and date each time new call information is received. You can also set
the time and date manually (see Set date and time in your SynJ SB67118/
SB67138 user’s manual).
Screen display of the deskset
Caller’s number
Time of call
L1
CHRISTINE SMITH
888 883 2445
5:30PM 8/9 new
Back
Date of call
Edit
Caller’s name
Appears when the call is
new or missed.
Softkey to save a call log entry
to the directory
1:Deskset 1
3 Missed calls
New messages
11:30PM 12/31
Redial
Menu
NOTES:
The caller ID information might not be available for every incoming call. Callers might
•
intentionally block their names and/or telephone numbers.
Each entry can store up to 32 digits for the telephone number and 16 characters for the
•
name. If the telephone number has more than 16 digits but less than or equal to 24 digits,
only the last 17 digits appear. If the telephone number has more than 24 digits, only the 8th
to 24th digits (17 digits) appear. In order to view the entire number, you must first save the
entry to the directory (see page 46). For instructions on viewing the digits, see page 44. If the
telephone number has more than 32 digits, it is not saved or shown in the call log.
44
Page 50
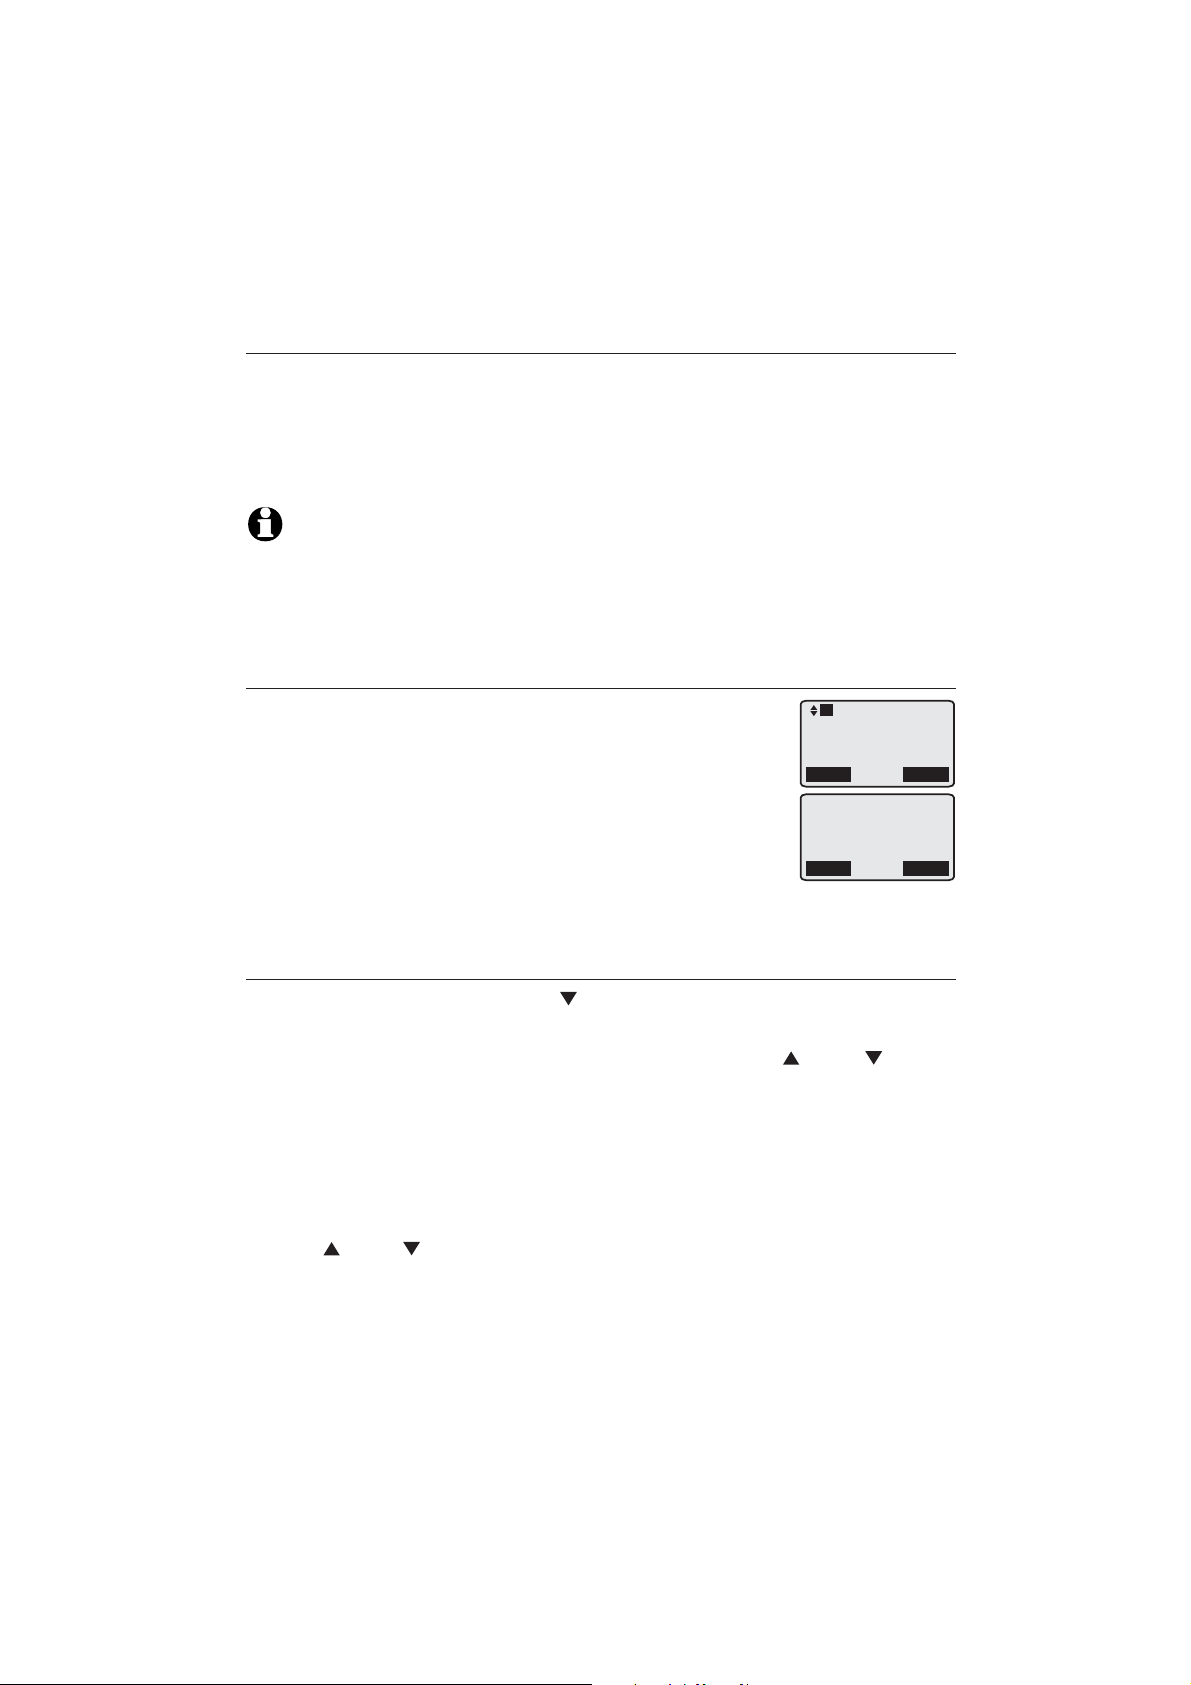
Caller ID
Caller ID operation
Memory match
If the incoming telephone number is an exact match with a telephone
number in your directory, the name that appears on the screen matches the
corresponding name in your directory.
For example, if Christine Smith calls, her name appears as Chris if this is how
you entered it into your directory.
NOTE: The number shown is in the format from the telephone service provider. It usually
delivers 10-digit telephone numbers (area code plus telephone number). The telephone
system ignores the area code when searching for a match and displays the name of the first
corresponding number from the directory.
Missed (new) calls indicator
When the deskset is in idle mode and has new missed calls,
its screen shows XX Missed call(s).
All new missed entries are counted as missed calls. Each
time you review a call log entry with the icon new, the
number of missed calls decreases by one. When all the
entries in the call log become old (have been reviewed), the
system removes the missed calls alert from the display, and
the NEW CALL indicator turns off.
L1
CHRISTINE SMITH
888 722 7702
5:30PM 8/9 new
Back
1:Deskset 1
0 Missed calls
6:00PM 8/9
Redial
Edit
Menu
Review the caller ID information
When the deskset is idle, press CID.
1.
-OR-
When the deskset is idle, press the Menu softkey. Press DIR or CID to
scroll to Call log. Press the Select softkey.
The screen displays Call log empty if there is no new missed calls in the
2.
call log.
-OR-
The screen displays XX Missed calls to show how many new missed calls
are stored in the call log.
3.
Press DIR or CID to review the caller ID information. The call log entries
are stored in reverse chronological order starting with the most recent entry.
To exit without making changes, press EXIT.
4.
45
Page 51
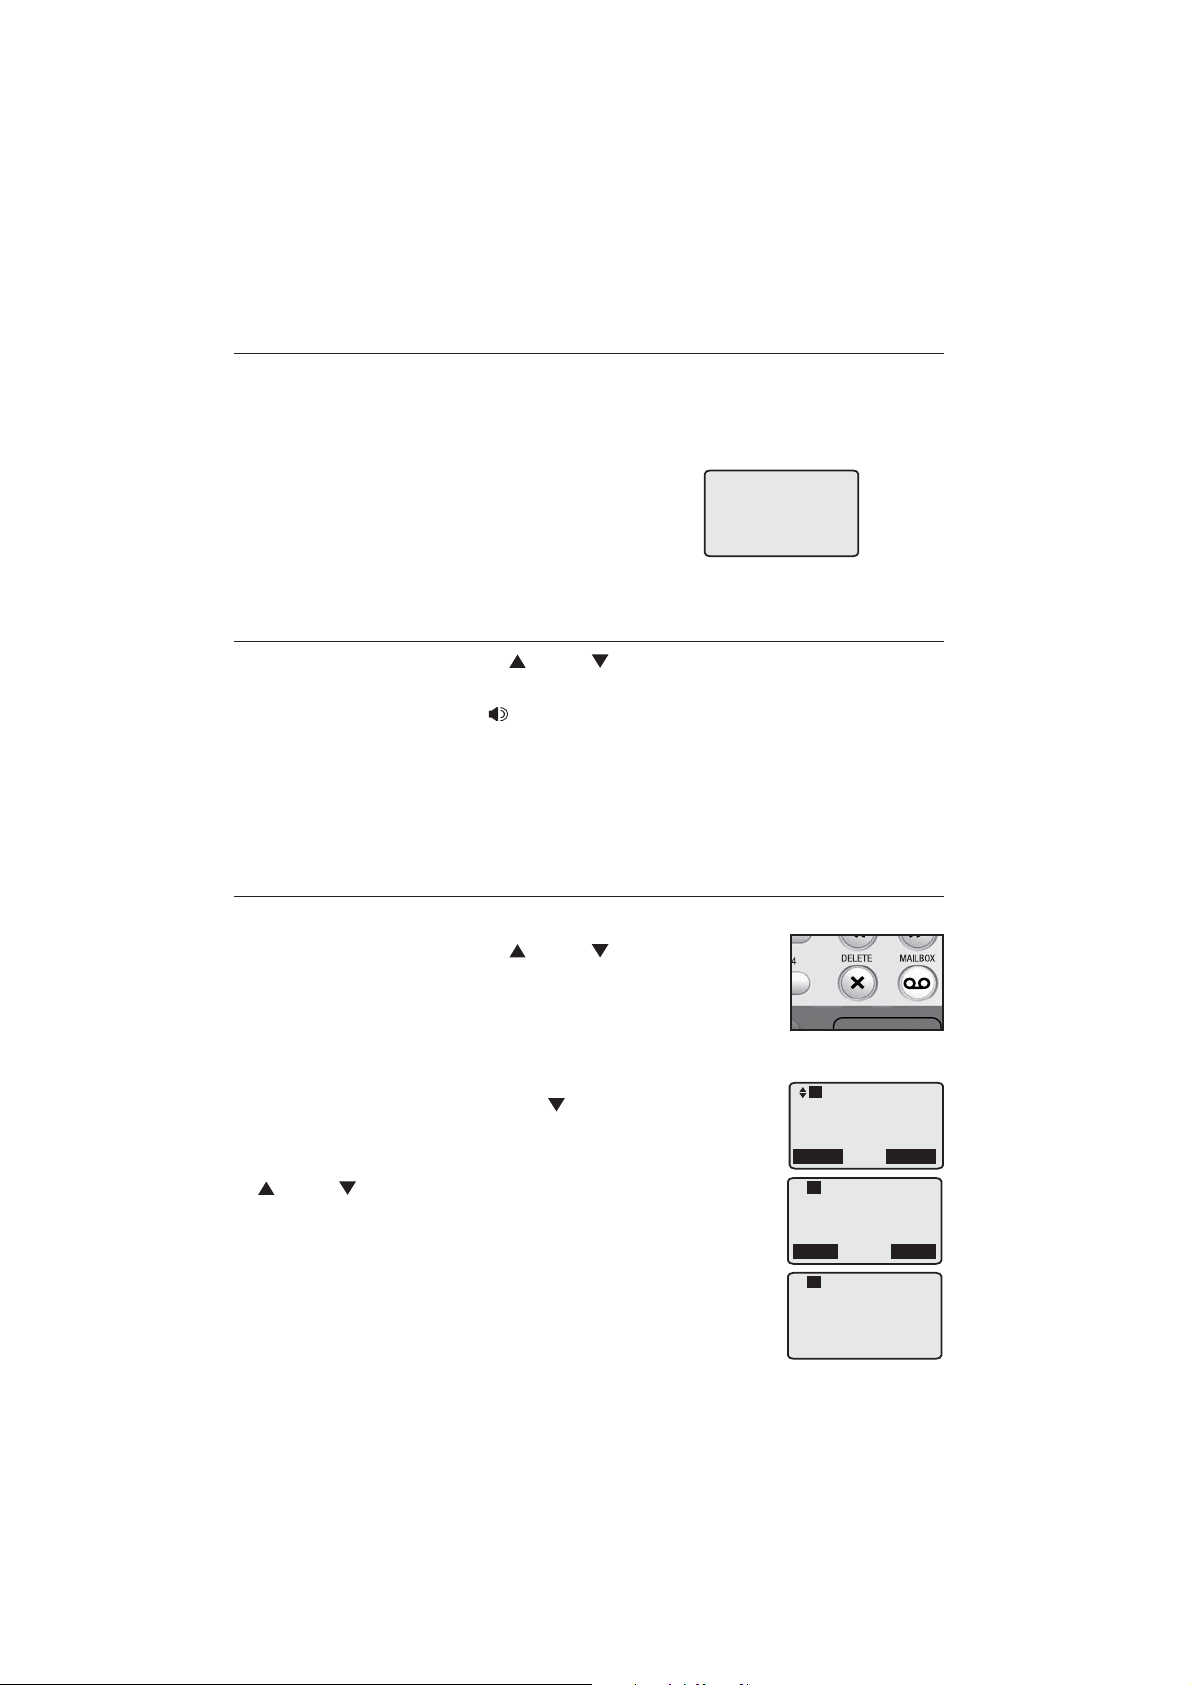
Caller ID
Caller ID operation
View dialing options
Although the incoming call log entries have 10 digits (the area code plus
the seven-digit number), in some areas, you may only need to dial the seven
digits, 1 plus the seven digits, or 1 plus the area code plus the seven digits.
You can change and store the number of digits that you dial in the call log.
While reviewing the call log, press #(pound key)
repeatedly on the deskset to show different dialing
options for local and long distance numbers
722 7702
1 722 7702
888 722 7702
1 888 722 7702
Press
before dialing or saving the telephone number in
the directory.
Dial a call log entry
When in the call log, press DIR or CID browse the number you wish to
1.
call.
Lift the handset or press SPEAKER.
2.
-OR-
To override automatic line selection, press LINE 1-LINE 4 for the desired
line, then lift the handset.
Delete the call log entries
Delete a call log entry:
When in the call log, press DIR or CID to browse to
1.
the number you wish to delete.
Press X/DELETE to delete the shown entry from the
2.
caller ID history.
#
Delete all call log entries:
When the deskset is idle, press CID.
1.
-ORWhen the deskset is idle, press the Menu softkey. Press
DIR or CID to scroll to Call log. Press the Select
softkey.
Press the Del All softkey. The deskset displays Delete all
2.
calls?
Press the Yes softkey to delete all call log entries. The
3.
deskset displays All deleted.
-OR-
Press the No softkey to exit.
46
L1
Call log
32 Missed calls
Back
L1
Delete all
calls?
No
L1
All deleted
Del All
Yes
Page 52
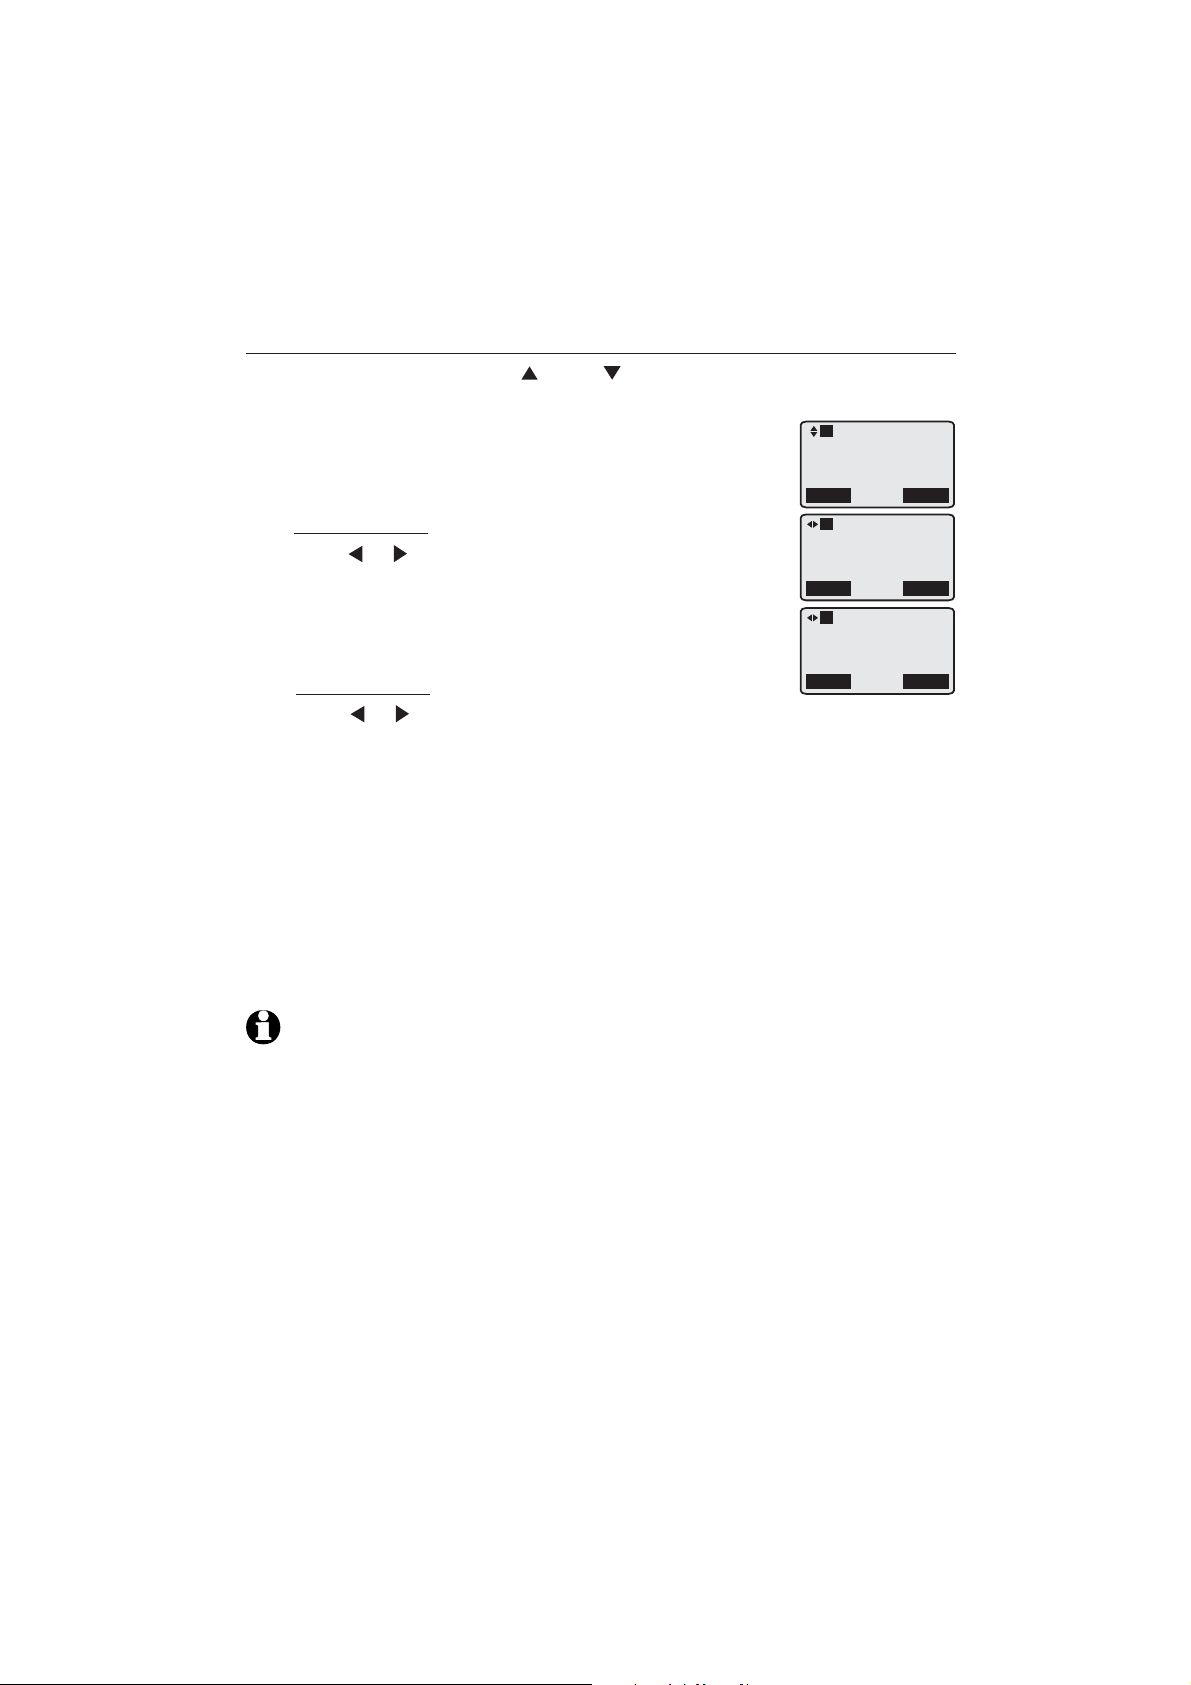
Caller ID
Caller ID operation
Save a call log entry to the directory
When in the call log, press DIR or CID to browse.
1.
When the desired entry displays, press the Edit softkey.
2.
When the telephone number appears:telephone number appears: number appears:
3.
Press the dialing keys to add digits (page 38).
•
Press X/DELETE to erase a digit.
•
Press and hold X/DELETE to erase all digits.
•
Press or to move the cursor to the left or right.
•
4. Press the Next softkey to move to the name.
Press the dialing keys to add characters (page 38).
•
Press X/DELETE to erase a character.
•
Press and hold X/DELETE to erase all characters.
•
Press or to move the cursor to the left or right.
•
Press 0 once to enter a space.
•
5. Press the Save softkey to save the new directory entry. There is a
confirmation tone. The name and the telephone number appear.
If the entry is already saved in the directory, the screen returns to the
•
call log.
If there is no caller ID information, you hear an error tone. The number
•
is unable to save.
-ORTo exit without making changes, press EXIT.
L1
CHRISTINE SMITH
888 722 7702
5:30PM 8/9 new
Back
L1
Enter phone #
8887227702
Pause
L1
Enter name
Chrinstine Smith
Back
Edit
Next
Save
NOTE: You will need to change how a caller ID number is dialed if the entry does not
appear in the correct format. Caller ID numbers might appear with an area code that might
not be necessary for local calls, or without a 1 that might be necessary for long distance
calls (see View dialing options on the previous page for more information).
47
Page 53

Caller ID
Reasons for missing caller ID information
Reasons for missing caller ID information
There are also occasions when other information or no information shows for
various reasons:
Screen message Reason
Private caller
Unknown caller
The caller prefers not to show the telephone number and name.
Your telephone service provider cannot determine the caller’s
name and telephone number.
Calls from other countries may also generate this message.
48
Page 54
Answering system
Answering system
Answering system and voicemail
The deskset has a private voicemail box that is different from the general
mailbox on the main base or handset. The voicemail messages for the
deskset can be accessed from the main base.
The deskset has separate indicators for two different types of voice
messages: those left on its built-in answering system and those left at your
service provider’s voicemail (fees may apply). Your
telephone’s built-in answering system messages and
voicemail messages are separate. Each alerts you to
new messages differently.
If you turn on the COVM feature (see COVM on
•
page 29 for more information) and the COVM icon
displays on the base screen, your telephone service
provider is indicating that it has new voicemail for
you. To listen to your voicemail, you typically dial an
access number provided by your telephone service
provider, followed by a security code or PIN.
To listen to messages recorded on your digital answering system, press
•
/MAILBOX on the deskset (page 60).
Some service providers bundle or combine multiple services like voicemail
and call waiting, so you may not be aware that you have voicemail. To check
what services you have and how to access them, contact your telephone
service provider.
To use your voicemail service rather than your answering system, turn off
your answering system. To use your answering system rather than your
voicemail service, contact your telephone service provider to deactivate
your voicemail service. You can also use your telephone answering system
and voicemail together by setting your built-in answering system to answer
before voicemail answers as described below. To learn how to program your
voicemail settings, contact your telephone service provider. Then, if you are
on a call, or if the answering system is busy recording a message and you
receive another call, the second caller can leave a voicemail message.
Set your answering system to answer calls at least two rings earlier than your
voicemail is set to answer. For example, if your voicemail answers after six
rings, set your answering system to answer after four rings. Some voicemail
providers may program the delay before answering calls in seconds instead
of rings. In this case, allow six seconds per ring when determining the
appropriate setting.
L1
1:Deskset 1
COVM L1
5:30PM 8/9 new
Redial
Menu
49
Page 55

Answering system
Set the answering system to answer automatically
You can set each of the four lines to automatically answer incoming calls on
the main base in two different ways. See the SynJ SB67118/SB67138 user’s
manual for more information.
General mailbox:
The called line rings on every extension for each incoming call. If there is no
answer, the caller is prompted to leave a message in the general mailbox, which
a person at any handset or the deskset can review. The general mailbox stores
incoming messages, memos and recorded calls.
Auto attendant:
The called line for each incoming call flashes on every extension, but does not
ring. Instead, the auto attendant answers. The caller can specify an extension
or leave a general mailbox message. When the auto attendant directs a call to
an extension but it is not answered, the auto attendant prompts the caller to
leave a message for that extension or try another extension.
Answering system capacity
The maximum recording time of all handsets and base is 180 minutes.
The actual recording time depends on individual message characteristics.
Individual messages can be up to three minutes. Messages remain available
for review until you delete them.
Each recorded announcement requires system memory, so we suggest
recording a brief announcement in order to leave more space for messages.
NOTE: You cannot record an announcement when the telephone system is out of space.
You will hear a two-beep alert tone and voice prompt “Memory is full.” Please refer to
Remaining space in the SynJ SB67118/SB67138 telephone base manual.
Voice prompts
The system provides voice prompts to guide you through the setup
procedures.
50
Page 56
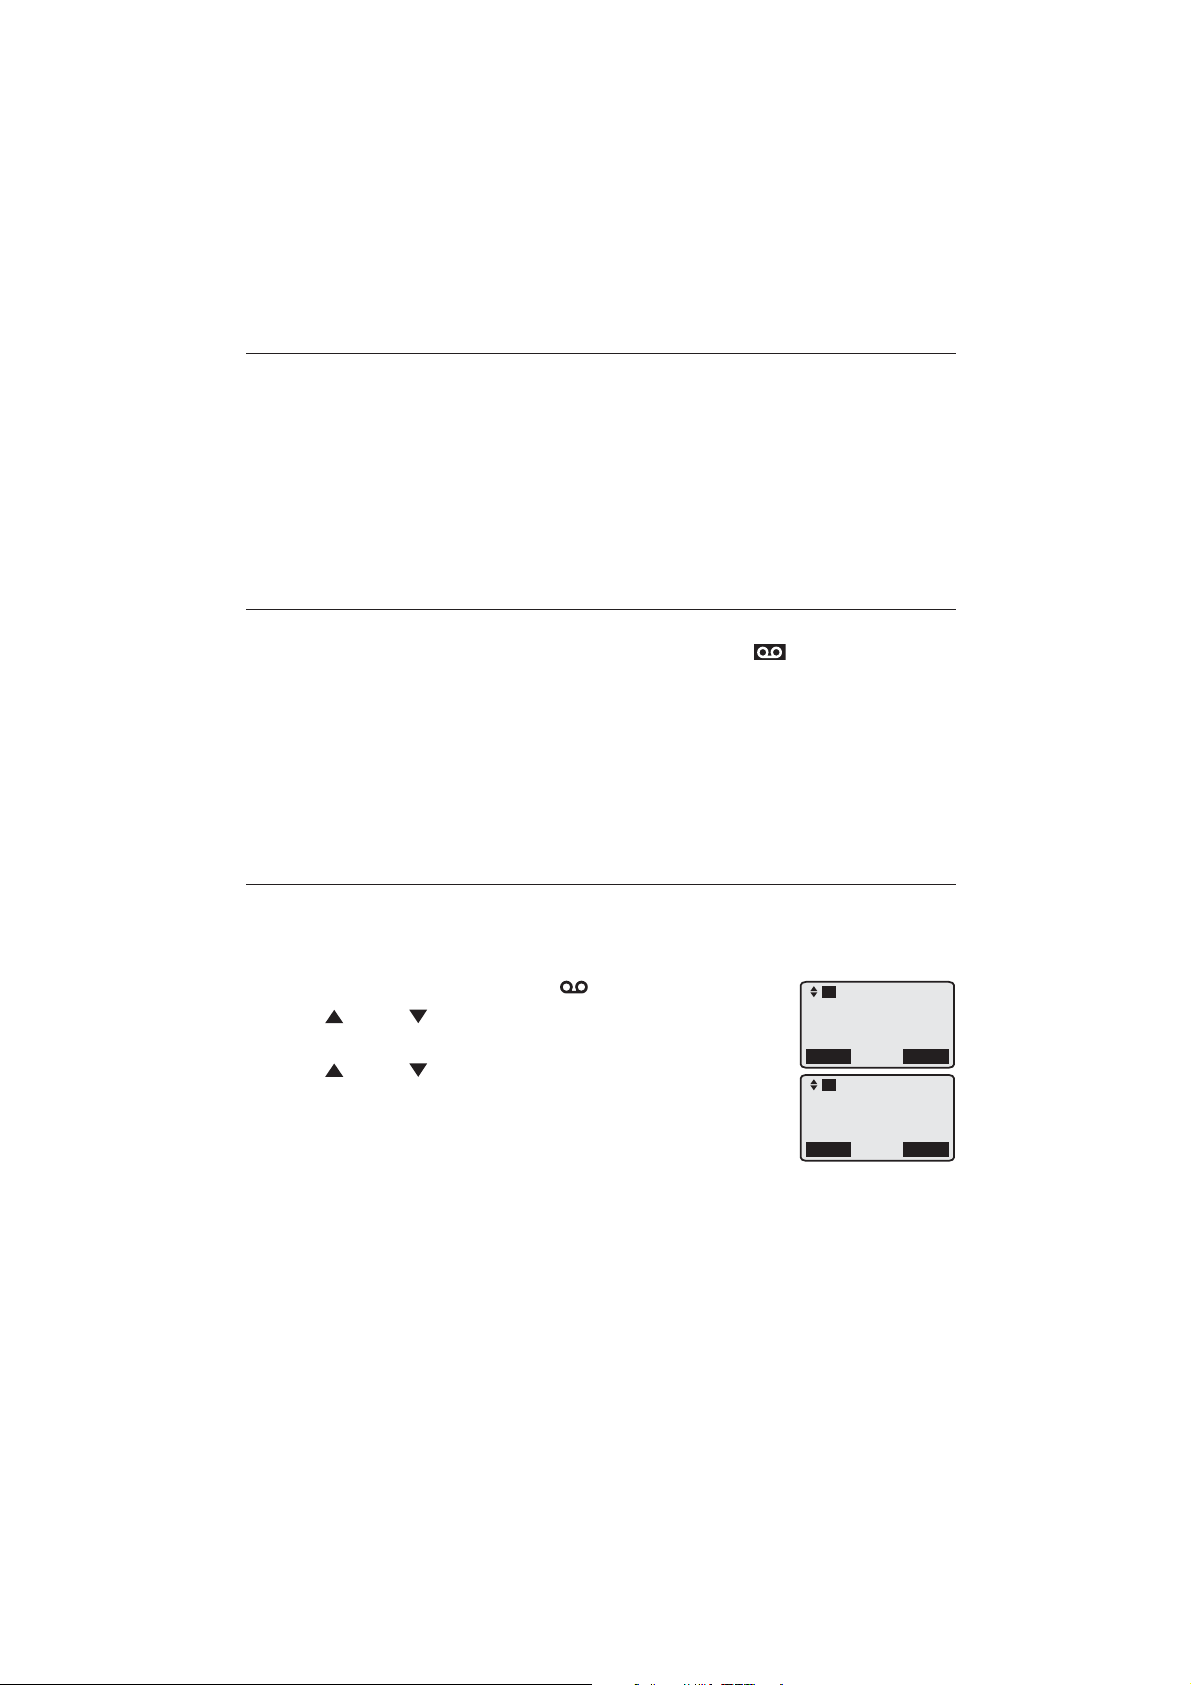
Answering system
Deskset mailbox setup
Deskset mailbox overview
Your deskset has its own mailbox which is different from the general mailbox
on the main base. If you turn on the auto attendant on the main base and
fast answer mode on the deskset, the caller is able to leave a message on
the deskset mailbox after two rings. If you do not turn on the fast answer
mode on the deskset, the answering system picks up the call after five
rings and allows the caller to leave a message on the deskset mailbox, call
another extension.
New message indication
When you have new messages in the deskset mailbox, the screen displays
New messages. In addition, the new message indicator flashes.
If the notify alert is turned on (pages 53-54), you will receive a phone call
at the telephone number you chose each time a new message has been
recorded.
There is no new message indication on the deskset when messages are left in
the general mailbox.
Fast answer mode
You can set the number of times your extension rings before auto attendant
asks the caller to leave you a message or choose another extension. The
number of rings can be two (on) or five (off). The default is five rings.
When the deskset is idle, press /MAILBOX.
1.
Press DIR or CID to scroll to Fast answer mode.
2.
Press the Select softkey.
Press DIR or CID to select On or Off.
3.
Press the Save softkey to save the setting and return to
4.
the previous menu. There is a confirmation tone. To exit
without making changes, press the Back softkey.
51
L1
3 New messages
Announcement
General mailbox
>Fast answer mode
Back
L1
Fast answer mode
:On
Back
Select
Save
Page 57

Answering system
Deskset mailbox setup
Set access code (remote access code) and mailbox security
You can enter a four-digit number (0000-9999) to allow remote access to
your deskset mailbox from any touch-tone telephone. Unless you change it,
the remote access code is 0000.
This access code is also used for mailbox security. If you enable mailbox
security, you must enter the access code each time you access the deskset
mailbox. If you do not want to enter the access code every time you access
the deskset mailbox, disable mailbox security.
When the deskset is idle, press the Menu softkey.
1.
Press DIR or CID to scroll to Mailbox setup.
2.
Press the Select softkey twice to select Set access code.
3.
Use the dialing keys to enter a four-digit number. Press X/DELETE to
4.
backspace and delete a digit.
Press the Next softkey. Press DIR or CID to scroll to On or Off.
5.
Press the Save softkey to save the setting. There is a confirmation tone.
6.
NOTES:
The access code must have four digits. You can only press the Next softkey after you have
•
entered the four digits.
You will hear an error tone if you enter an access code that is already assigned. Then the
•
deskset displays Please enter another access code..
52
Page 58
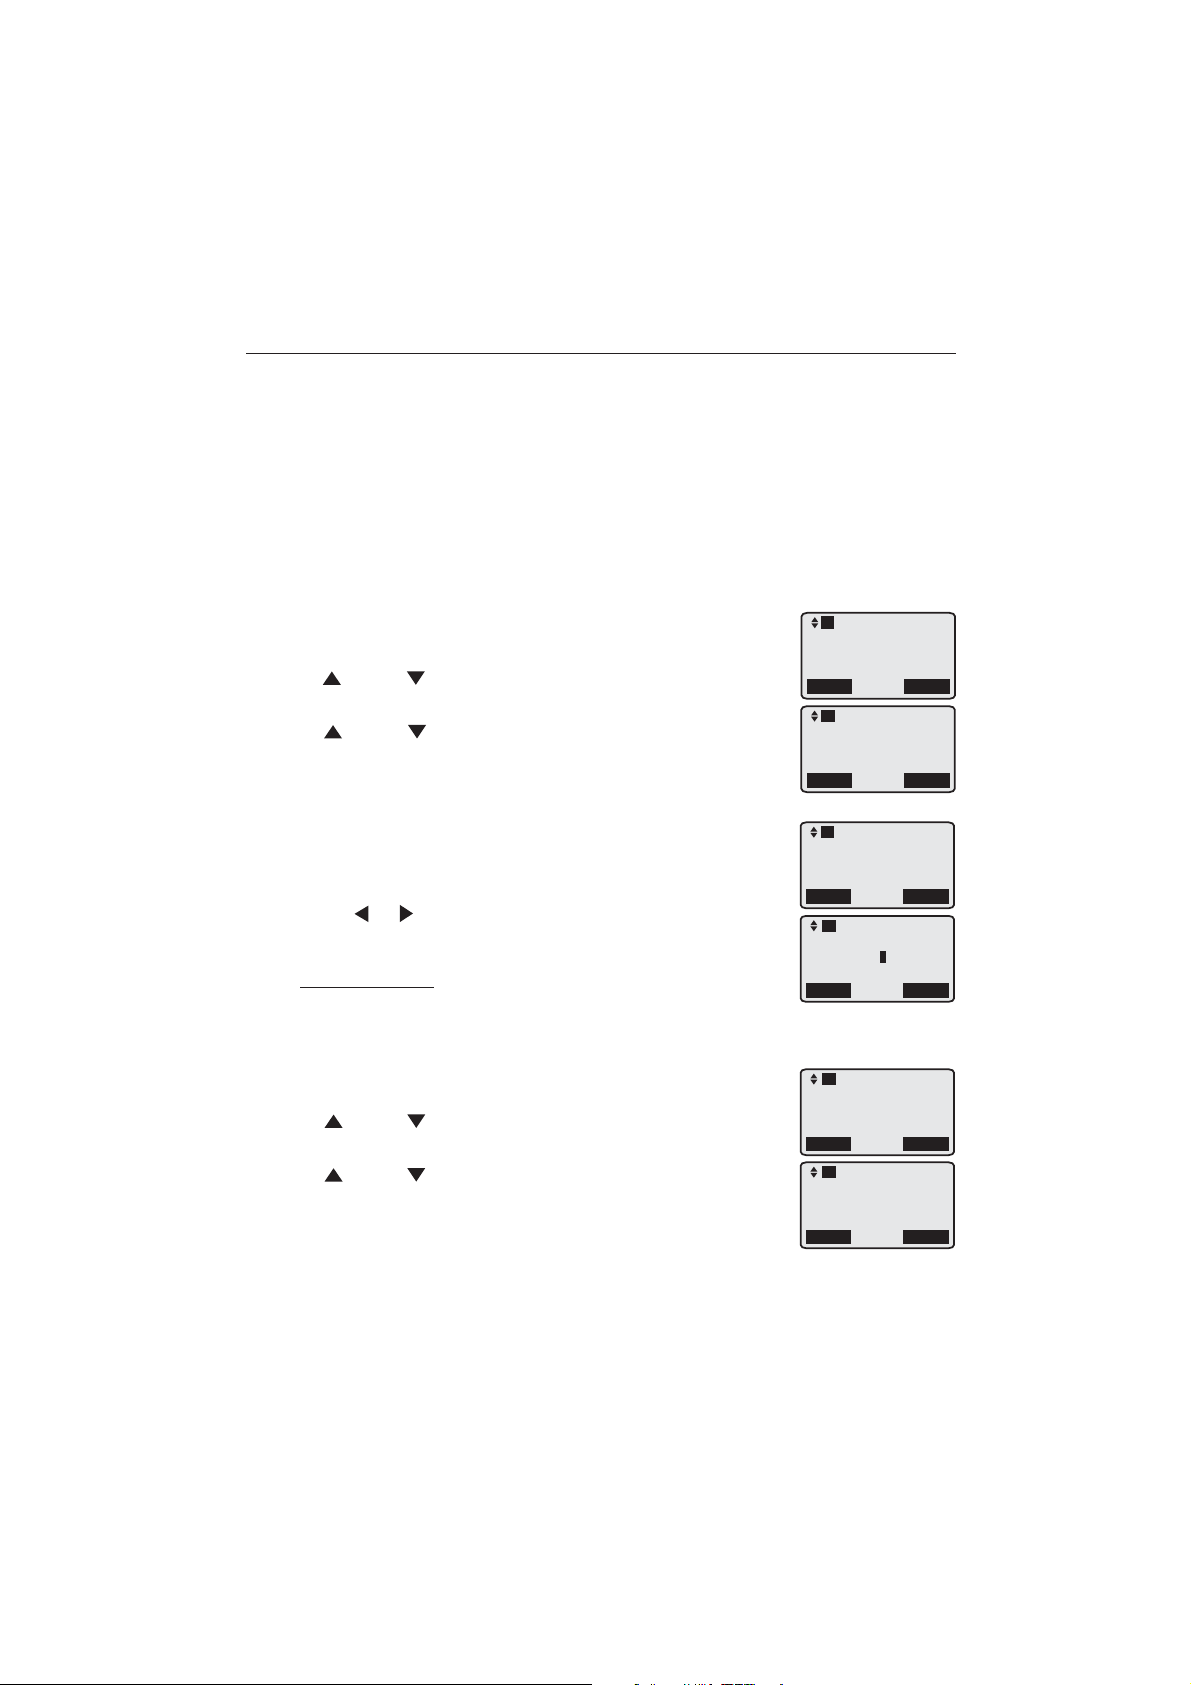
Answering system
Deskset mailbox setup
Notify alert
You can receive notification calls to your cell phone or paging device after
each new telephone call message has been recorded to the deskset mailbox.
You can remotely access the message from a touch-tone telephone
(page 61). To receive notification calls, you must save your phone number
on the deskset, and then set the system to call that number after it finishes
recording a message. It is better to enter a telephone number that has
caller ID service. The silence will last about 15 seconds and then the call
ends. If no one picks up the call within three rings, the deskset stops calling
it. The system only calls the alert number once. If your cell phone or paging
device is busy, not available or off during the call, you may not receive the
notification call.
When the deskset is idle, press the Menu softkey.
1.
Press DIR or CID to scroll to Mailbox setup. Press the
2.
Select softkey.
Press DIR or CID to scroll to Notify alert. Press the
3.
Select softkey.
Set an alert number:
Press the Select softkey again to select Alert call #.
1.
Use the dialing keys to enter the phone number (up to
2.
32 digits) you want to be notify.
Press or to move the cursor to the left or right.
•
Press X/DELETE to backspace and delete a digit.
•
Press and hold X/DELETE to delete all digits.
•
Press the Save softkey to save the setting and return to
3.
the previous menu. There is a confirmation tone. To exit without making
changes, press the Back softkey.
Turn alert on or off:
Press DIR or CID to scroll to Alert on/off. Press the
1.
Select softkey.
Press DIR or CID to scroll to On or Off.
2.
Press the Save softkey to save the setting and return to
3.
the previous menu. There is a confirmation tone. To exit
without making changes, press the Back softkey.
L1
Directory
Call log
Ringer setting
>Mailbox setup
Back
L1
Set access code
>Notify alert
Back
L1
>Alert call #
Alert on/off
Calling alert #
Back
L1
Enter alert #:
1234567890
Back
L1
Alert call #
>Alert on/off
Calling alert #
Back
L1
Alert on/off
:On
Back
Select
Select
Select
Select
Save
Save
53
Page 59
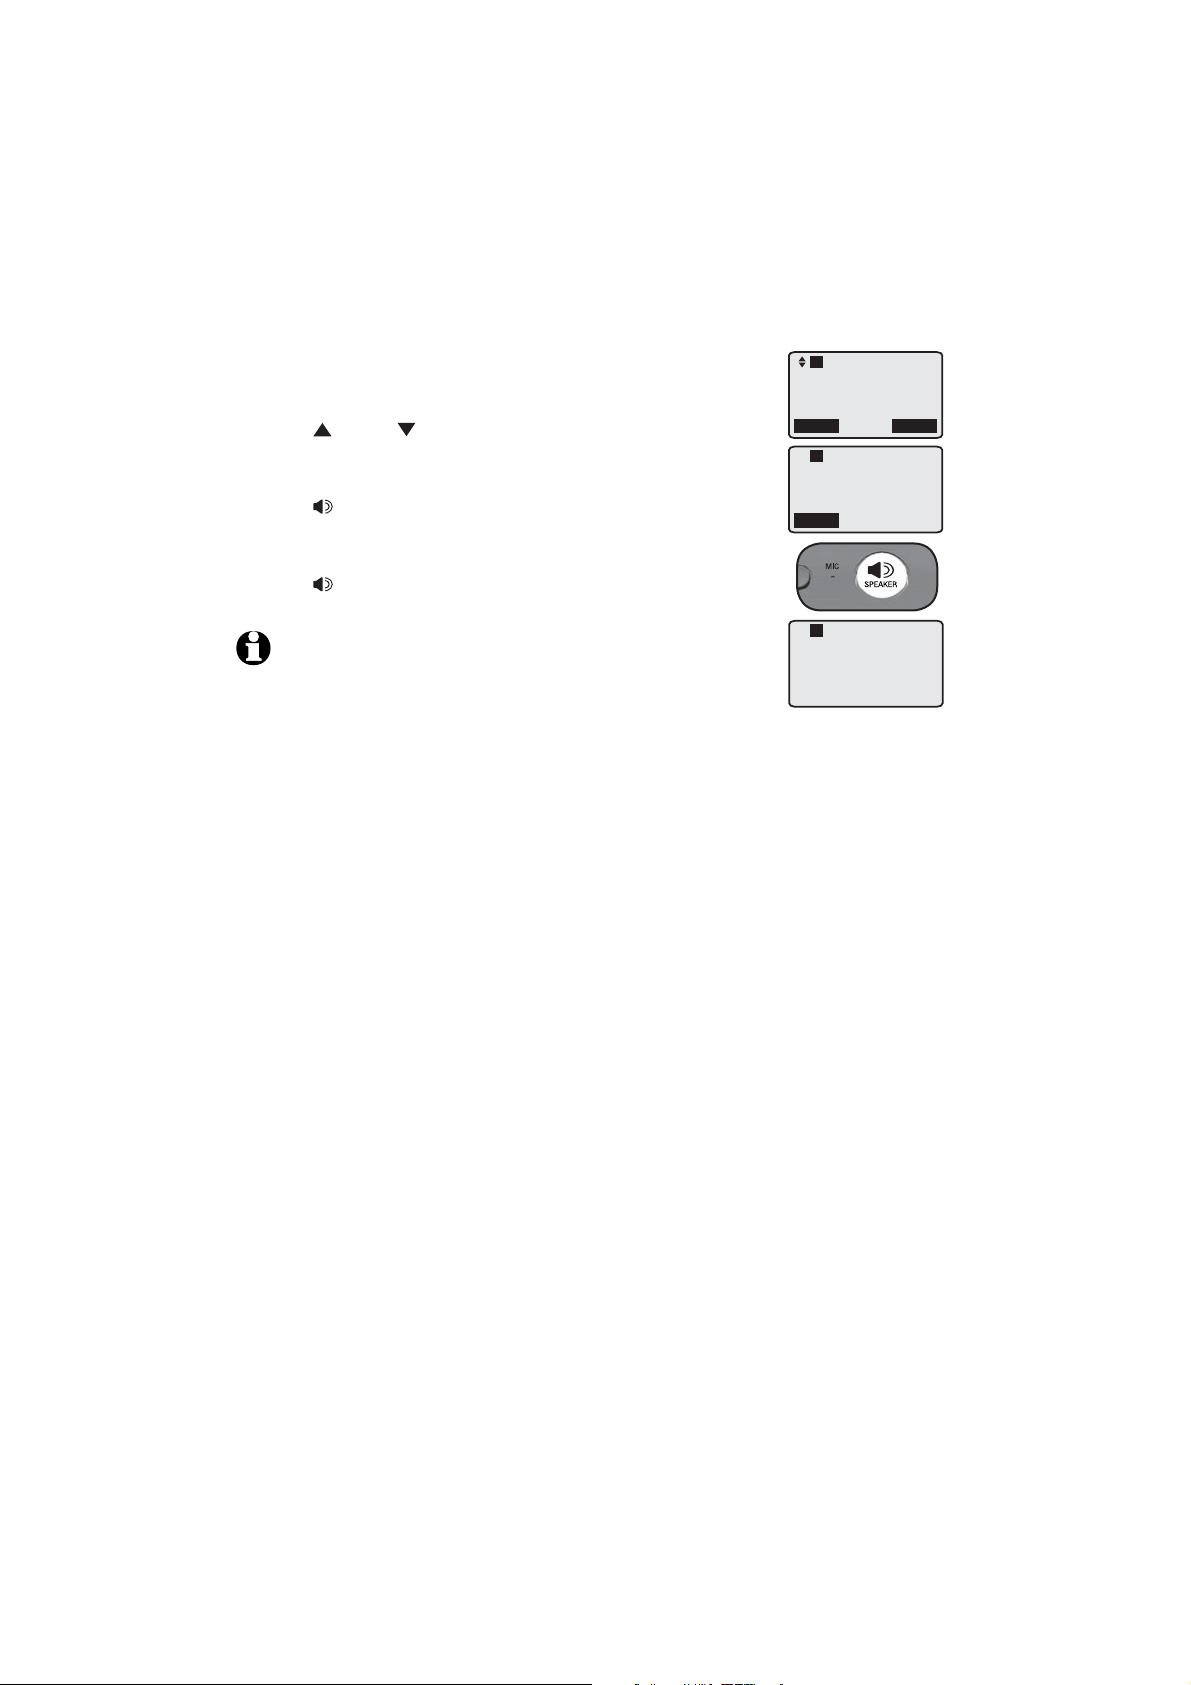
Answering system
Deskset mailbox setup
Call alert confirmation:
You can confirm whether the system can successfully call
the alert number that you entered.
1.
Press
the Select softkey.
DIR or CID to scroll to Calling alert #. Press
The screen displays Press SPKR to
confirm the alert call.
Press SPEAKER on the deskset. The deskset dials the
2.
number you set and the phone being notified rings. To
exit without making changes, press the Back softkey.
Press SPEAKER again to end the test. The screen
3.
returns to idle mode.
NOTE: If you turn on Notify alert before you enter the alert number,
Please set alert # appears on the screen.
L1
Alert call #
Alert on/off
>Calling alert #
Back
L1
Press SPKR to
confirm the
alert call
Back
L1
Calling alert
Select
54
Page 60
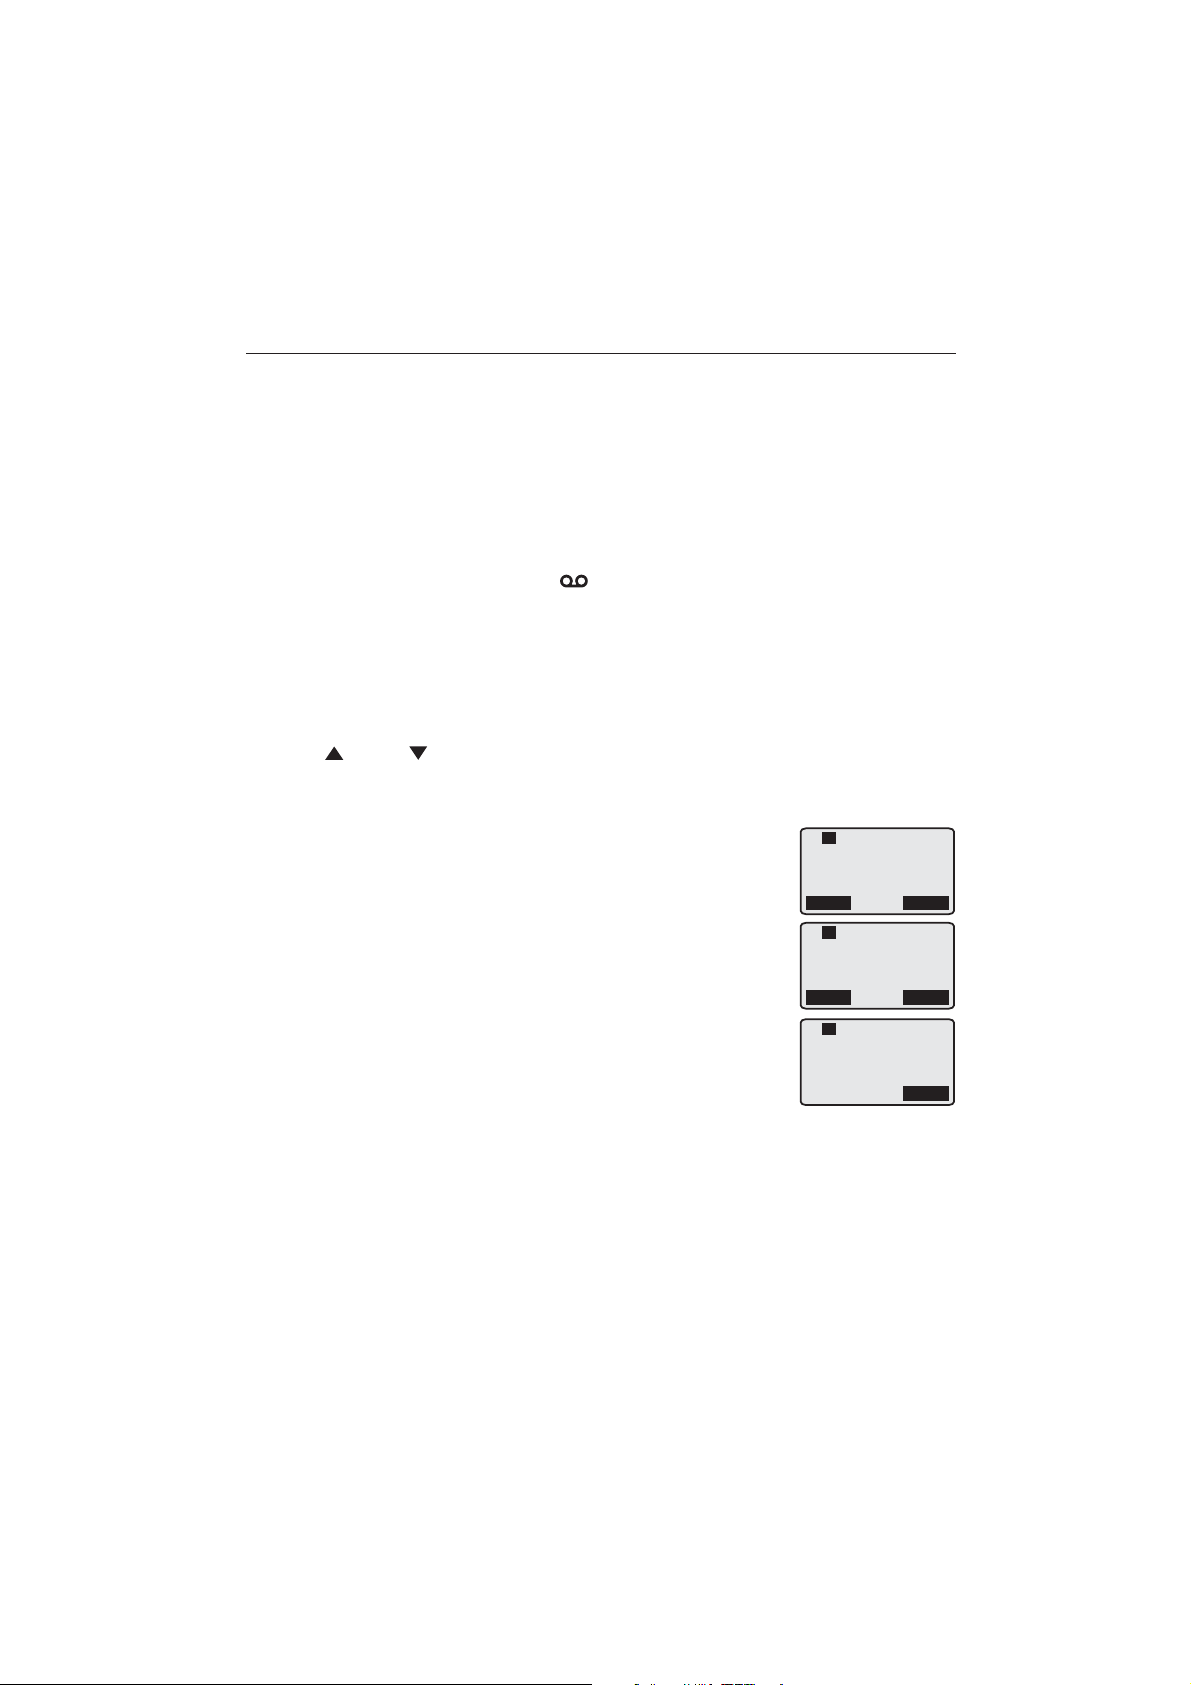
Answering system
Deskset mailbox setup
Deskset announcement setup
The announcement is the greeting callers hear when calls are answered by
the deskset mailbox.
The deskset has the default announcement “Hello, please leave a message
after the tone.” You can use this announcement, or replace it with your
own recording.
Your announcement can be up to two minutes.
Play the current personal announcement:
When the deskset is idle, press /MAILBOX.
1.
If you have new messages in the deskset mailbox, it announces
2.
“Mailbox X, you have X new messages“.
-OR-
If you do not have new messages in the deskset mailbox, it announces
“Mailbox X, you have no new messages.“
Press DIR or CID to select Anncemnt setup. Press the Select softkey
3.
and the current announcement plays. Press the Ok softkey to exit.
Record a new personal announcement:
Follow the steps in Play the current personal
1.
announcement above.
Press the Change softkey to record the announcement
2.
again. The screen displays Record anncemnt.
Press the Start softkey. The system announces “Record
3.
after the tone. Press Stop when you are done.” There is
a reminder beep. The timer starts counting.
Press the Stop softkey when finished. The timer stops
4.
and the deskset automatically plays the recorded
announcement.
5.
Press the OK softkey to use the newly recorded
announcement.
-OR-
Press the Change softkey to record the announcement again.
Press EXIT to exit without making changes.
L1
Play anncemnt
00:01
Change
L1
Record anncemnt
Back
L1
Record anncemnt
00:01
Ok
Start
Stop
55
Page 61

Answering system
Deskset mailbox setup
Switch to general mailbox
You can directly go to general mailbox from the deskset.
When the deskset is idle, press /MAILBOX on the deskset.
1.
Press DIR or CID to scroll to General mailbox. Press the Select
2.
softkey.
If you have new messages in the general mailbox, it announces “This is the
3.
general delivery mailbox. You have X new messages”. Then the deskset
starts to play the new messages.
-OR-
If you do not have new messages in the general mailbox, it announces
“This is the general delivery mailbox. You have no new messages.“
When a message is playing on the deskset:
Press VOL+ or VOL- to adjust the message playback volume.
•
Press to skip to the next message.
•
•
Press to repeat the message. Press twice to hear the previous message.
•
Press X/DELETE to delete the message. The system announces
“Message deleted.”
•
Press EXIT or the Back softkey to stop the playback.
56
Page 62

Answering system
Message playback
From the deskset, you can play the messages in the deskset mailbox and the
general mailbox.
If you have new messages, the system plays the new messages (oldest first)
automatically when you access the mailbox.
When playback begins, the total number of messages is announced. Before
each message, you hear the date and time of the recording. After the last
message, you hear “End of messages.”
Play new messages on the deskset:
•
When the deskset is idle, press /MAILBOX and the new messages play
automatically.
Play all old messages on the deskset:
1.
When the deskset is idle, press /MAILBOX.
2.
Press the Select softkey to choose Play all.
Play new messages on the general mailbox:
1.
When the deskset is idle, press /MAILBOX.
2.
Press DIR or CID to scroll to General mailbox.
3.
Press the Select softkey and the new messages play automatically.the new messages play automatically.
Play all old messages on the general mailbox:
1.
When the deskset is idle, press the /MAILBOX.
2.
Press DIR or CID to scroll to General mailbox.
3.
Press the Select softkey. Press the Select softkey again to choose Play all.
When you are in the general mailbox, press DIR or CID to scroll to
Go to HS MBox and press the Select softkey to return to the deskset
mailbox.
Options during playback
When a message is playing, you can adjust the playback volume, skip, repeat,
or delete the message.
When a message is playing on the deskset:
•
Press VOL+ or VOL- to adjust the message playback volume.
•
Press to skip to the next message.
•
Press
Press X/DELETE to delete the message. The system announces
•
“Message deleted.”
Press EXIT or the Back softkey to stop the playback and exit.
•
to repeat the message. Press twice to hear the previous message.
57
Page 63

Answering system
Message playback
Transfer messages
When a message is playing in the deskset mailbox, you can transfer the
message to a single extension, all extensions or the main base.
Press INT on the deskset while the deskset is playing a message.
1.
The deskset announces “Enter the mailbox number.“ Press DIR or CID
2.
to scroll to an extension, all extensions or the main base, then press the
Select softkey.
-OR-
Press
the registered extensions.
The deskset displays Msg transferred to mailbox X and announces
3.
“Message transferred to Mailbox X.“
A copy of the message automatically transfers to the desired extension, all
extensions or the telephone base. The general mailbox retains the original
copy of the message.
for main base, 1-0 for registered extension or # (pound key) for all
NOTE: The mailbox of the desired extension keeps only one copy if you send the same
message twice.
Call back to the mailbox message caller
During message playback, you can call back the message caller by pressing
Line 1-Line 4, SPEAKER, HEADSET, the Call softkey or lifting the corded
handset.
NOTE: If the incoming call of the playing message does not have caller ID information, you
hear a dial tone after pressing Line 1-Line 4, SPEAKER, HEADSET, thethe Call softkey or
lifting the corded handset.
58
Page 64

Answering system
Message playback
Delete all old messages
You can only delete old (reviewed) messages. You cannot delete new
messages until you review them. You cannot retrieve deleted messages.
Delete all old messages on the deskset mailbox:
When the deskset is idle, press /MAILBOX.
1.
Press DIR or CID to scroll to Delete all old. Press the Select softkey.
2.
The screen displays Delete all old messages? Press the Yes softkey to
3.
confirm or press the No softkey to return to the previous screen.
Delete all old messages on the general mailbox:
When the deskset is idle, press /MAILBOX.
1.
Press
2.
softkey.
Press
3.
The screen displays Delete all old messages? Press the Yes softkey to
4.
confirm or press the No softkey to return to the previous screen.
DIR or CID to scroll to General mailbox. Press the Select
DIR or CID to scroll to Delete all old. Press thethe Select softkey..
NOTE: If there are new missed messages in the deskset mailbox, the new message
indicator still flashes after you delete all old messages.
59
Page 65

Answering system
Record and deliver memos
Memos are messages you record into the deskset mailbox. You can save,
play back, and delete them like incoming messages. You can record a memo
as a reminder to yourself, or send a message to other extensions using the
answering system.
To record and deliver a memo to the general mailbox or a handset
mailbox:
1.
When the deskset is idle, press
Press DIR or CID to scroll to Deliver. Press the Select softkey.
2.
-OR-
Press
DIR or CID to scroll to General mailbox. Press the Select
softkey. Press DIR or CID to scroll to Deliver and press the Select
softkey.
The system announces “Enter the mailbox number.”
3.
Press DIR or CID to scroll to select the main base or a desired
4.
registered extension, or select all the registered extensions.
-OR-
Press * for main base, 1-0 for registered extension or # (pound key) for all
the registered extensions.
Press the Select softkey.
5.
The deskset displays Record message. Press the Start softkey to record a
6.
message. The deskset announces “Hello! Please leave a message after the
tone. Press Stop when you are done.“ You can record a memo up to three
minutes. The system does not save memos shorter than three seconds.
Speak facing the deskset microphone to record.
7.
Press the Stop softkey to stop recording. The recorded memo plays
8.
automatically.
/MAILBOX.
NOTE: If you record a memo when the memory is full, the screen displays Message is full.
60
Page 66
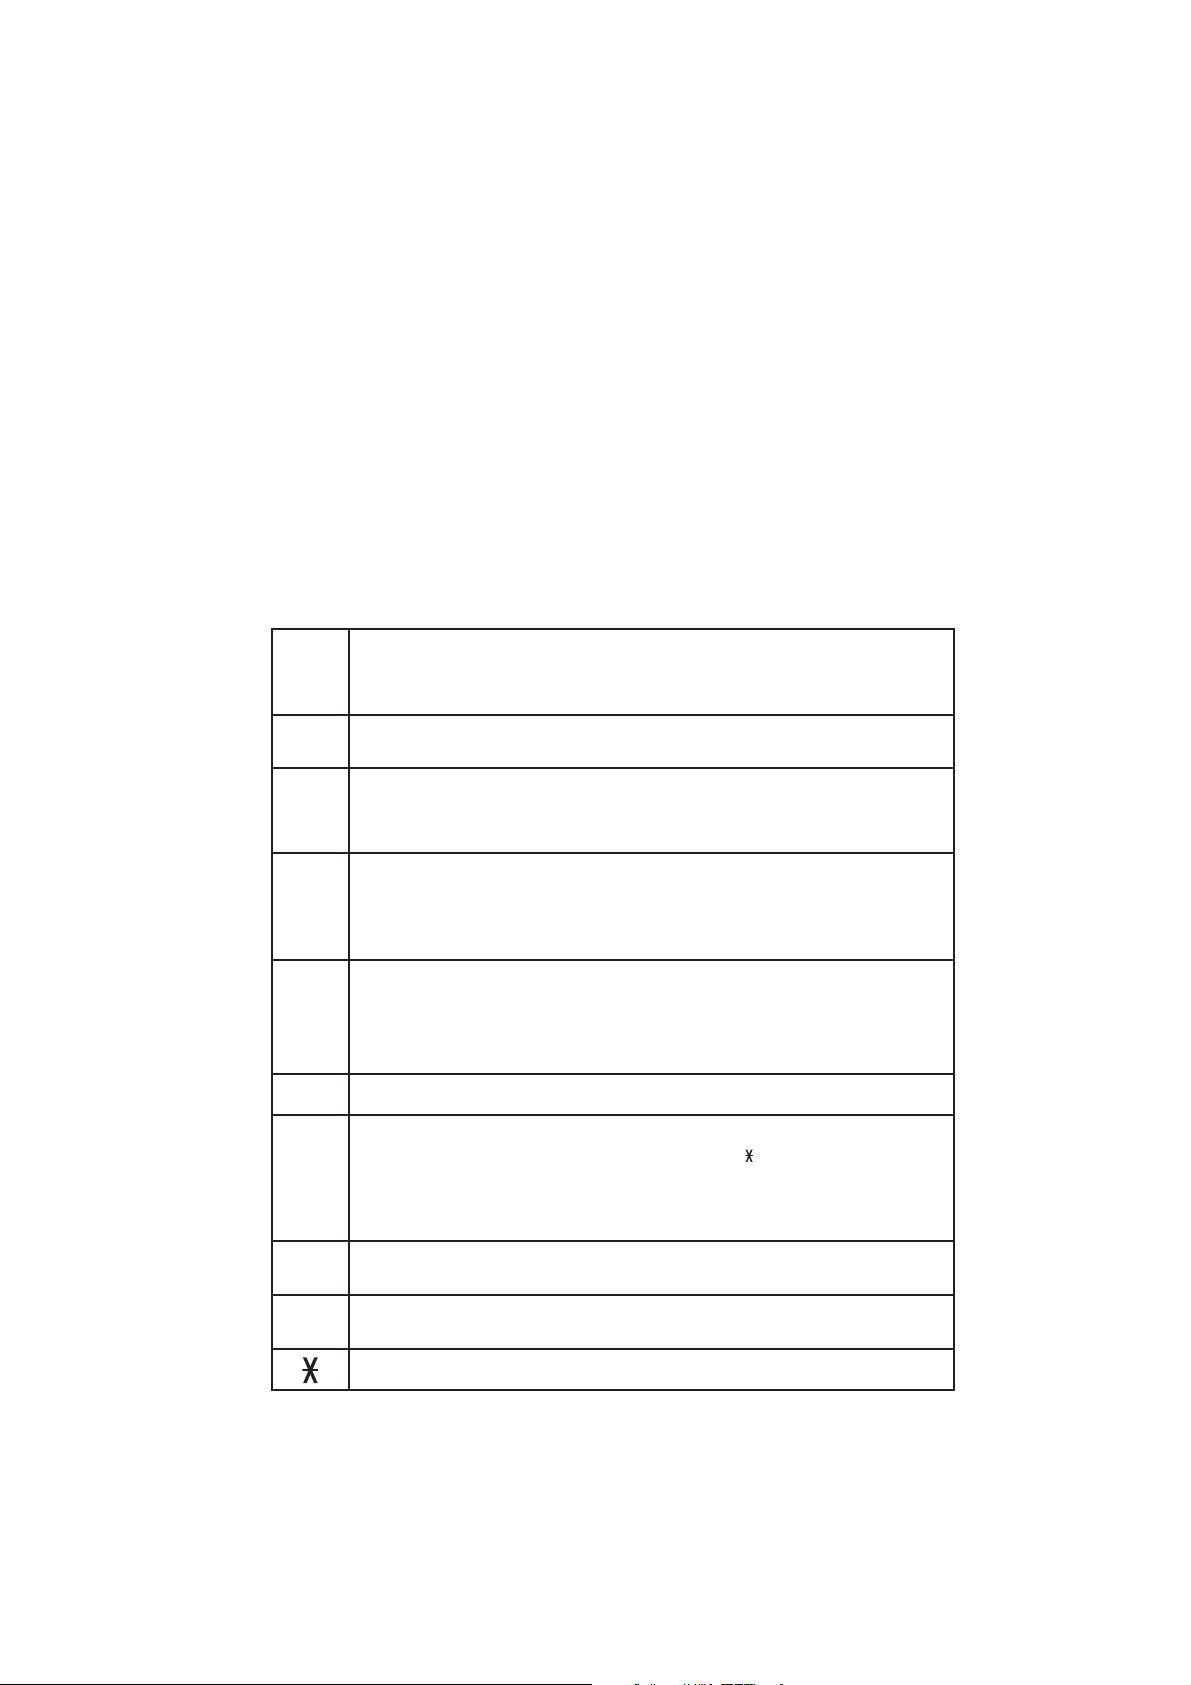
Answering system
Remote access
You can access your deskset answering system remotely by dialing your
telephone number from any touch-tone telephone.
To remotely reach the answering system:
Dial your telephone number from any touch-tone telephone.
1.
When the system answers, enter the four-digit remote access code (0000
2.
is the default code; see page 52 to change it).
The system automatically announces the number of messages (new and/or
old) if there are any, and then begins to play them.
You can also enter the following remote commands.
3.
Remote commands:
Press to play all messages.
•
Press to record a new announcement (during announcement
•
1
playback).
Press to accept the recorded announcement (during
•
2
3
4
5
announcement playback).
Press to delete the current message (during playback).
•
Press to delete the recorded announcement (during
•
announcement playback).
Press to repeat the current message (during playback).
•
After you hear "Repeat" and within five seconds, press 4 again
•
within five seconds to listen to the previous message (during
playback).
Press to repeat the list of remote commands.
•
Press to stop and return to the remote commands (during
•
playback).
Press to end the recording (during recording announcement).
•
Press to skip to the next message (during playback).
6
Press to transfer the current message (during playback):
•
Press the handset number (1-0) or star ( ) for the base, then
•
7
8
9
press # (pound key) to transfer a message to the destination
mailbox (This option is only available when transferring of
message).
Press to change the personal announcement (only available to
handset mailboxes).
Press to change to the general delivery mailbox (only available
to handset mailboxes).
Press to end the call.
61
Page 67

Answering system
Remote access
4. Hang up to end the call.
-OR-
you can also press * to end the call
Cut out the remote access wallet card at the back of this user’s manual for
quick reference.
NOTES:
•
If the auto attendant is active, enter your extension number. Wait for the outgoing
announcement to begin, then enter the remote access code.
•
If you do not enter a valid remote access code, the answering system answers the call as
usual and all the voice and digits entered will be recorded as message stored in your general
mailbox.
•
If you do not enter any remote access code, the answering system announces, "Thank you for
calling," and the call ends.
•
When there is no new message or all the new messages are played during remote access, you
hear a help menu listing all features and commands. If there is no command after the help
menu is played three times, the call ends automatically.
•
If you press 4 within five seconds after each message playback start, the previous message
plays instead of repeating the current message.
62
Page 68
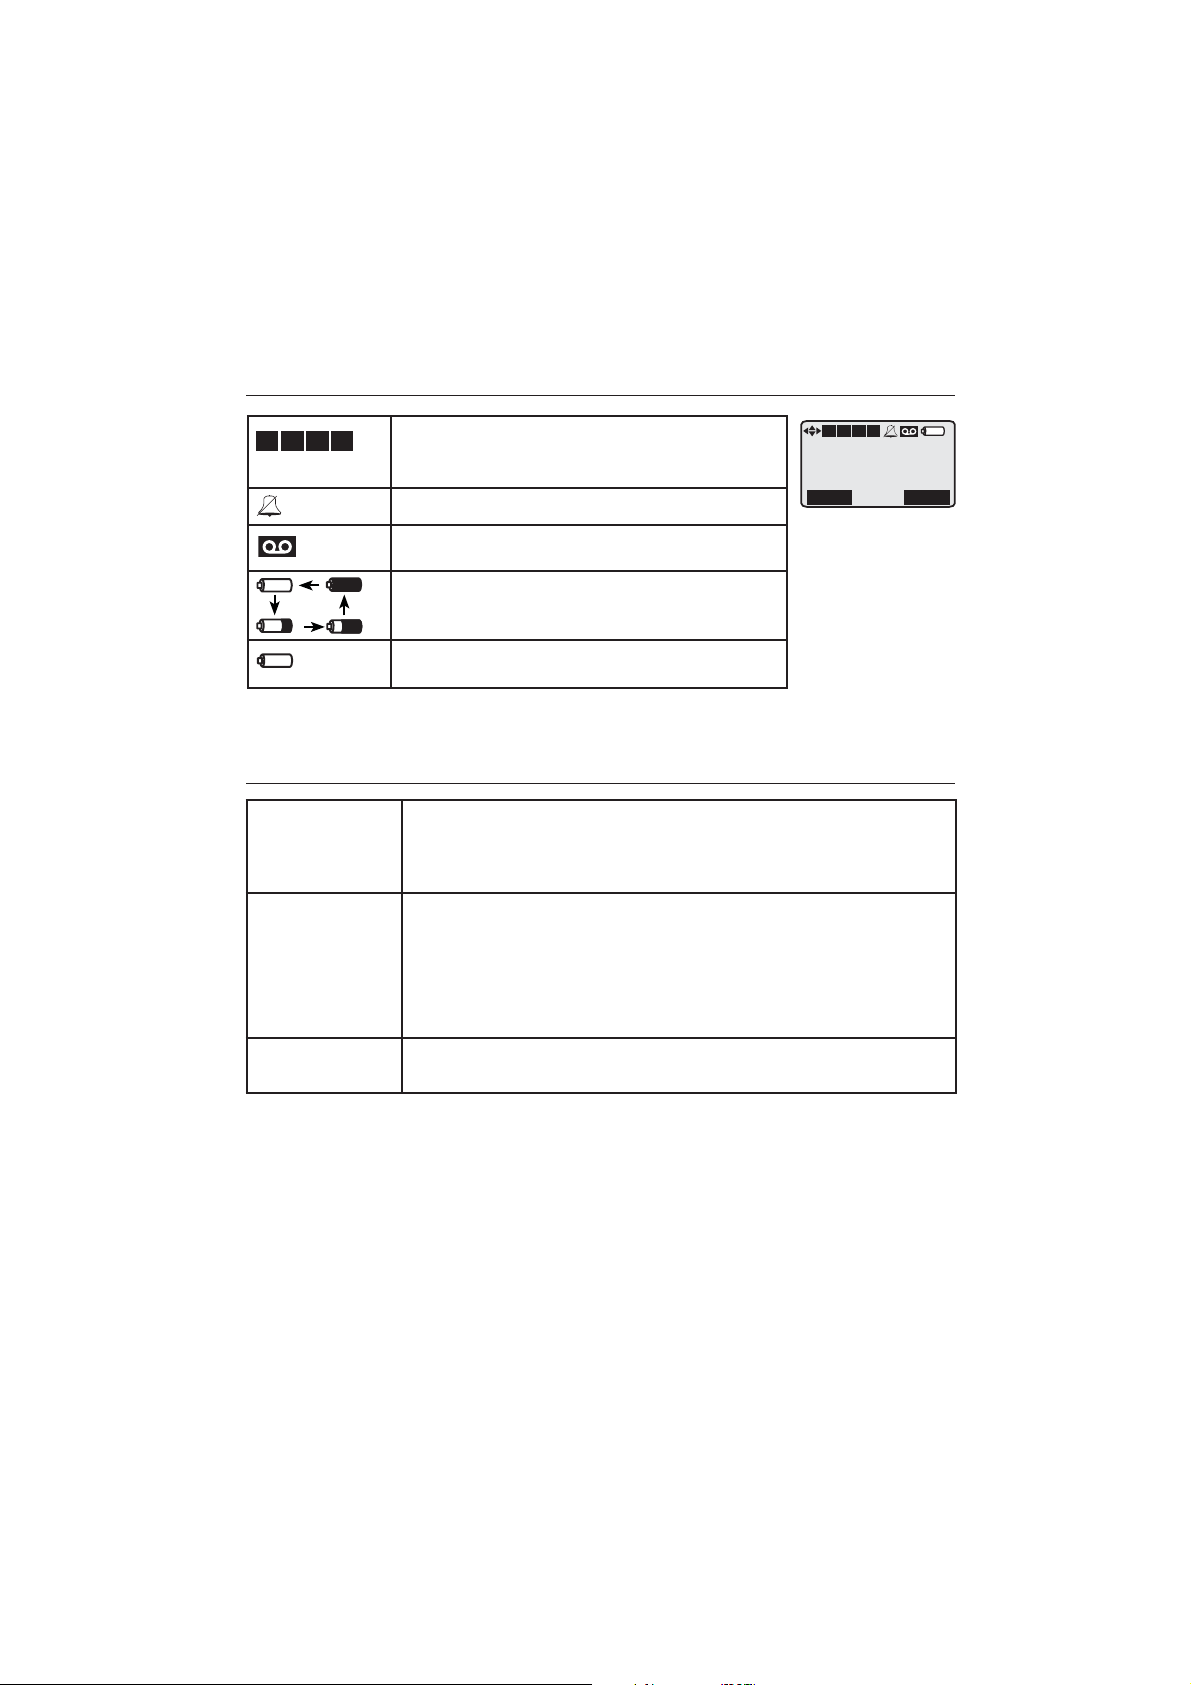
Appendix
Appendix
Screen icons, indicator tones and lights
Screen icons
L1 L2 L3 L4
Line indicator - on when the corresponding line is
in use.
Flashes when the corresponding line is on hold.
Ringer off - the deskset ringer is off.
L1 L2 L3 L4
1:Deskset
3 Missed calls
Set date & time
Redial
New answering system message - indicates you
have new answering system message(s)
Backup battery status - the backup battery is
charging (animated display).
Becomes solid when the battery is fully charged.
Backup battery status - flashes when the backup
battery is low and needs charging.
Indicator tones
One short beep The Hold reminder is active; a call has been on hold for more than
Three triple beeps You are pressing VOL+ or VOL- when the volume has reached its
Four beeps You cannot intercom with an extension when it is set to Privacy ON.
•
three minutes.
The telephone conversation recording begins. During the recording,
•
you will hear one beep per minute.
•
highest or lowest setting.
Your directory or call log is empty.
•
You enter more than 32 digits or characters while predialing or editing
•
an entry.
Deskset registration fails to register to the main base.
•
•
When you end an intercom call with other party, the deskset beeps.
•
Menu
63
Page 69
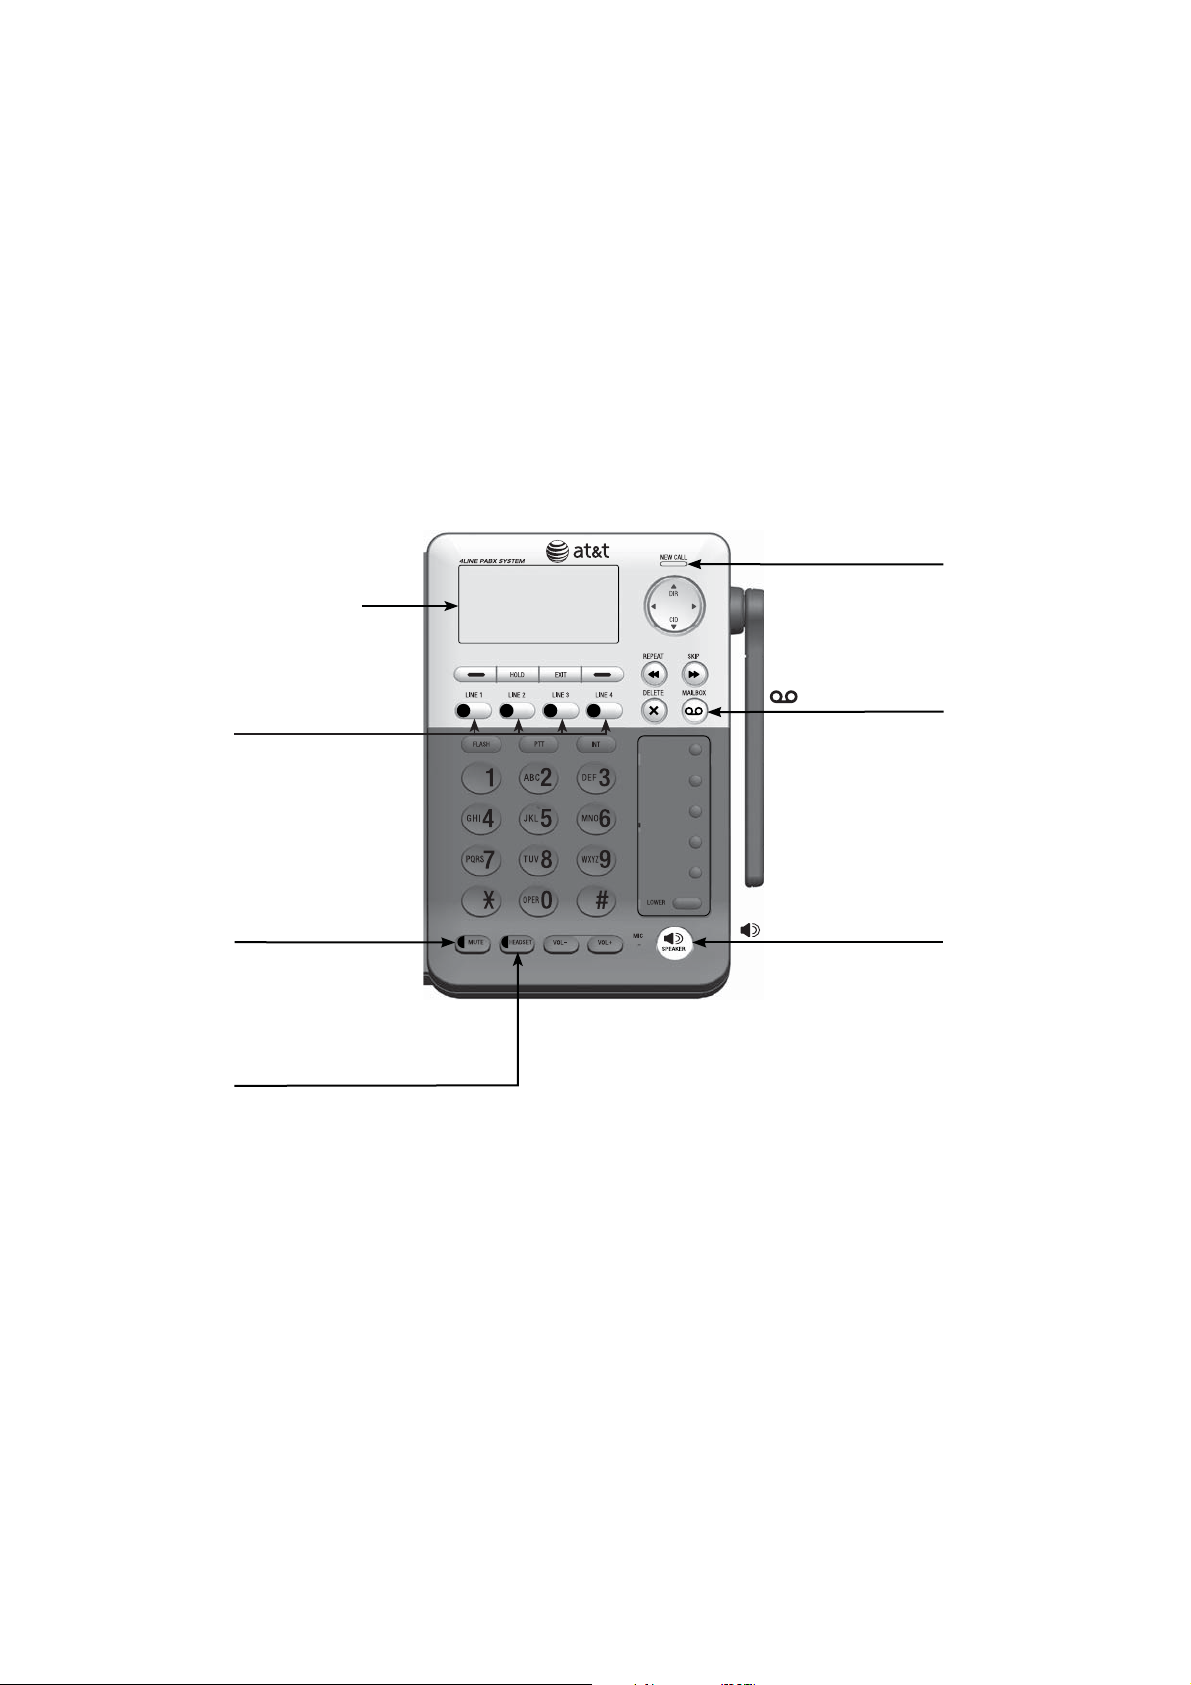
Appendix
Screen icons, indicator tones and lights
Indicator lights:
Lighted display
NEW CALL indicator
On when there are new
or missed calls in the
call log.
LINE 1-LINE 4
indicators
On when a telephone
line is in use.
Flashes slowly when a
telephone line is
on hold.
Flashes rapidly when
there is an incoming call.
MUTE indicator
Flashes slowly when
the corded handset
microphone or
speakerphone is muted.
HEADSET indicator
On when the corded
headset is in use.
/MAILBOX
Flashes when there
are new or missed
messages in the
deskset mailbox.
SPEAKER indicator
On when the speakerphone
is on.
64
Page 70

Appendix
Deskset display screen messages
All deleted
Busy
Call
All directory entries, call log entries or old messages in the
general or deskset mailbox are erased.
Failed intercom or conference call (there are already two
cordless handsets or desksets being used).
The main base is calling
*:Base
Call
Another system handset is calling.
X:Handset X
Call log empty
Calling
There are no entries in the caller ID history.
The deskset is calling all registered devices (for intercom calls).
All
Calling
The deskset is calling the main base (for intercom calls).
*:Base
Calling
The deskset is calling a cordless handset (for intercom calls).
X:Handset X
COVM L1 L2 L3 L4
Deleted
Directory empty
Ended
------Line X------
There are new voicemail messages.
A call log entry, a redial number or a directory entry was deleted.
There are no directory entries.
You have just ended a call.
There is an incoming call.
Incoming call
Line X
Low battery
Memory is full
Message is full
-MUTE
Msg. transferred
to mailbox X
No link to the
The telephone line X is in use.
The backup battery is in low power level while the deskset is in
battery mode.
The directory is full. You cannot save new entries unless you
delete some current entries.
The system memory is full. You cannot record new messages
unless you delete some old messages.
The microphone is off.
A message has been transferred from the general mailbox to a
particular private mailbox.
The deskset has lost communication with the main base.
base. Please
walk closer to
the base and try
again
65
Page 71
Appendix
Deskset display screen messages
Please enter
another
access code.
Please set
alert #
Press MENU on
MAIN base, select
Registration &
then Register HS.
Then press
Start
Press SPKR to
confirm the
alert call
-PRIV
Privacy
PTT To:
All
Release PTT
key to stop
PTT To:
*:Base
Release PTT
key to stop
PTT To:
X:Handset X
Release PTT
key to stop
-REC
Redial list empty
Registered
Registration
failed
Speed dial X
No number
The access code you are trying to save already exists in
the system.
You are trying to confirm the alert number or set the notify
alert on or off before you set the alert number.
The deskset is not registered to the telephone base. Follow the
procedure for registration.
Press the deskset speakerphone to call the alert call number.
The call is in privacy mode.
The deskset tried to join a call in which call privacy
is activated.
You are using push to talk (PTT) intercom feature to call all
registered devices. Release PTT to stop.
You are using push to talk (PTT) intercom feature to call the
telephone base. Release PTT to stop.
You are using push to talk (PTT) intercom feature to call
Handset X. Release PTT to stop.to stop.
The call is being recorded.
The redial list is empty.
The deskset registration is successful.
The deskset registration failed.
You cannot initiate a speed dial without a telephone number
stored in that speed dial location.
66
Page 72

Appendix
Deskset display screen messages
The system is busy.
The system resources are all occupied.
Please try again
later.
This mailbox is
You are trying to access a mailbox that is in use.
in use
XX Missed calls
There are new calls in the caller ID history.
67
Page 73

Appendix
Troubleshooting
If you have difficulty with your telephone, please try the suggestions below.
For customer service, visit our website at www.telephones.att.com or
call 1 (888) 915-2007. In Canada, dial 1 (866) 288-4268.
My deskset doesn’t work at all.
Make sure the power cord is securely plugged in.
•
Make sure you plug the telephone line cord securely and firmly into the
•
main base and the telephone wall jack.
Reset the deskset. Unplug the electrical power. Wait for approximately 15
•
seconds, then plug it back in. Allow up to one minute for the deskset
to reset.
Other electronic products such as HAM radios and other DECT phones can
•
cause interference with your cordless devices. Try installing your phone as
far away as possible from these types of electronic devices.
You may need to purchase a backup battery to make the deskset work in
•
the event of a power failure. Please refer to Backup battery installation
on page 6and Backup battery charging on page 7 in this user’s manual.
I cannot get a dial tone from the corded handset.
Try all the suggestions above.
•
Make sure you plug the handset cord securely and firmly into the
•
HANDSET jack on the deskset and the corded handset.
Your line cord might be malfunctioning. Try installing a new line cord.
•
I cannot dial out.
Try all the suggestions above.
•
Make sure you have a dial tone before dialing. The corded handset might
•
take a second or two to connect the deskset and produce a dial tone. This
is normal. Wait an extra second before dialing.
Eliminate any background noise. Noise from a television, radio or other
•
appliances might cause the telephone to not dial out properly. If you
cannot eliminate the background noise, first try muting the corded handset
before dialing, or dialing from another room by a cordless handset with
less background noise.
If the other telephones in your building are having the same problem,
•
contact your telephone service provider.
68
Page 74

Appendix
Troubleshooting
My deskset isn’t performing normally.
Make sure you plug the power cord securely into the deskset. Plug the
•
power adapter into a different working electrical outlet without a
wall switch.
Move the deskset closer to the main base. You might have moved out of
•
range.
Reset the deskset. Unplug the electrical power. Wait for 15 seconds then
•
plug it back in. Allow up to one minute for the deskset to reset.
Other electronic products such as HAM radios and other DECT phones can
•
cause interference with your deskset. Try installing your deskset as far
away as possible from these types of electronic devices.
The backup battery does not hold a charge.
Make sure you plug the power cord securely into the deskset. Plug the
•
power adapter into a different working electrical outlet without a
wall switch.
Unplug the electrical power. Wait for 15 seconds then plug it back in.
•
Allow up to one minute for the main base to reset.
You might need to purchase a new battery. Refer to Backup battery
•
installation on page 6and Backup battery charging on page 7 in this
user’s manual.
I experience poor sound quality when using the speakerphone.
For increased sound quality while using the telephone speakerphone, place
•
the deskset on a flat surface.
Excessive background noise will cause a speakerphone to fade in and
•
out. Try controlling the background noise by turning off any audio devices
near the speakerphone. Also, try to avoid interrupting the person at the
other end of the conversation while they are speaking. If background noise
cannot be controlled, you should stop speakerphone operation and return
to normal corded handset mode.
When using a speakerphone, controlling background noise in your
•
environment is essential. While you are listening to your party, press MUTE
to temporarily turn your microphone off. When it is your turn to speak,
remember to press MUTE again to turn the microphone on.
69
Page 75

Appendix
Troubleshooting
I get noise, static, or weak signals even when I’m near the main base.
If you subscribe to high-speed Internet service (DSL - digital subscriber line)
•
through your telephone lines, you must install a DSL filter between each
telephone line cord and the telephone wall jack. The filter prevents noise
and caller ID problems as a result of DSL interference. Please contact your
DSL service provider for more information about DSL filters.
You may be able to improve the performance of your deskset by installing
•
your new telephone base as far as possible from any other existing
cordless telephone system that may already be installed.
Other electronic products such as HAM radios and other DECT phones can
•
cause interference with your cordless devices. Try installing your deskset as
far away as possible from these types of electronic devices.
Do not install the deskset near a microwave oven or on the same electrical
•
outlet. You might experience decreased performance while the microwave
oven is operating.
If you plug your phone in with a modem or a surge protector, plug the
•
phone (or modem/surge protector) into a different location. If this does not
solve the problem, relocate your phone or modem farther apart from one
another, or use a different surge protector.
Move your main base to a higher location. The phone might have better
•
reception in a high area.
If the other phones in your building are having the same problem, contact
•
your telephone service provider (charges may apply).
I hear other calls while using my telephone.
Disconnect the main base from the telephone jack, and plug in a different
•
telephone. If you still hear other calls, call your telephone service
provider (charges may apply).
70
Page 76

Appendix
Troubleshooting
My deskset does not ring when I receive a call.
Make sure that the ringer is not off. Refer to the section on ringer selection
•
in this user’s manual.
Make sure you plug in the telephone line cord securely into the deskset.
•
Make sure you plug in the power cord securely.
The deskset may be too far from the main base.
•
You may have too many extension telephones on your telephone line to
•
allow all of them to ring simultaneously. Try unplugging some of the other
telephones.
The layout of your building might be limiting the operating range. Try
•
moving the main base to another location, preferably on a higher location.
If other telephones in your building are having the same problem, contact
•
your telephone service provider (charges may apply).
Test a working telephone at the telephone jack. If another telephone has
•
the same problem, contact your telephone service provider (charges may
apply).
Other electronic products such as HAM radios and other DECT phones can
•
cause interference with your cordless phone. Try installing your phone as
far away as possible from these types of electronic devices.
•
Your line cord might be malfunctioning. Try installing a new line cord.
71
Page 77

Appendix
Troubleshooting
My calls cut in and out while I’m using my deskset.
Other electronic products such as HAM radios and other DECT phones can
•
cause interference with your deskset. Try installing your phone as far away
as possible from these types of electronic devices.
Do not install the deskset near a microwave oven or on the same electrical
•
outlet. You might experience decreased performance while the microwave
oven is operating.
If you plug your main base in with a modem or surge protector, plug the
•
main base (or modem/surge protector) into a different location. If this does
not solve the problem, relocate your telephone base or modem farther
apart from one another, or use a different surge protector.
Relocate your main base to a higher location. The main base might have
•
better reception when installed in a high area.
If other telephones in your building are having the same problem, contact
•
your telephone service provider.
Excessive background noise will cause a speakerphone to fade in and
•
out. Try controlling the background noise by turning off any audio devices
near the speakerphone. Also, try to avoid interrupting the person at the
other end of the conversation while they are speaking. If background noise
cannot be controlled, you should stop speakerphone operation and return
to normal handset mode.
When using a deskset speakerphone, controlling background noise in your
•
environment is essential. While you are listening to your party, press MUTE
to temporarily turn your microphone off. When it is your turn to speak,
remember to press MUTE again to turn the microphone on.
My caller ID isn’t working.
Caller ID is a subscription service. You must subscribe to this service from
•
your telephone service provider for this feature to work on your phone.
The caller must be calling from an area that supports caller ID.
•
Both your and your caller’s telephone service providers must use caller ID
•
compatible equipment.
If you subscribe to high-speed Internet service (DSL - digital subscriber line)
•
through your telephone lines, you must install a DSL filter between each
telephone line cord and telephone wall jack. The filter prevents noise and
caller ID problems resulting from DSL interference. Please contact your DSL
service provider for more information about DSL filters.
72
Page 78

Appendix
Troubleshooting
The telephone system does not receive caller ID when on a call.
Make sure you subscribe to caller ID with call waiting features from your
•
telephone service provider. Caller ID feature works only if both you and the
caller are in areas offering caller ID service, and if both telephone service
providers use compatible equipment.
The answering system is recording incomplete messages.
If a caller leaves a very long message, part of it may be lost when the
•
system disconnects the call after three minutes.
If the caller pauses for longer than six seconds, the system stops recording
•
and disconnects the call.
If the system memory becomes full while recording a message, the system
•
stops recording and disconnects the call.
If the caller’s voice is very soft, the system may stop recording and
•
disconnect the call.
I have difficulty hearing messages.
Press VOL+ to increase the speaker volume on the deskset.
•
The answering system does not answer after the correct number of rings.
Make sure the auto attendant is on. Please refer to Turn the auto
•
attendant on in the SynJ SB67118/SB67138 user’s manual.
Make sure the memory of the answering system is not full. Refer to
•
Remaining space in the SynJ SB67118/SB67138 user’s manual. When the
answering system memory is full, it does not record new messages until
some old messages are deleted.
If you subscribe to voicemail service, change the number of rings so
•
that your answering system answers before your voicemail answers. To
determine how many rings activate your voicemail, contact your telephone
service provider (charges may apply).
If there is a fax machine connected to the same telephone line, try
•
disconnecting the fax machine. If that solves the problem, consult your fax
machine documentation for information on compatibility with answering
systems.
73
Page 79

Appendix
Troubleshooting
The answering system does not record messages.
Make sure the answering system is turned on.
•
Make sure the memory of the answering system is not full. Refer to the
•
Remaining space section in your SynJ SB67118/SB67138 user’s manual.SynJ SB67118/SB67138 user’s manual.
When the answering system memory is full, it does not record new
messages until some old messages are deleted.
If you subscribe to voicemail service, change the number of rings so
•
that your answering system answers before your voicemail answers. To
determine how many rings activate your voicemail, contact your telephone
service provider.
If there is a fax machine connected to the same telephone line, try
•
disconnecting the fax machine. If that solves the problem, consult
your fax machine documentation for information on compatibility with
answering systems.
System does not respond to remote commands.
Make sure to enter your remote access code correctly (page 61).
•
Make sure you are calling from a touch-tone telephone. When you dial atelephone. When you dial a. When you dial a
•
number, you should hear tones. If you hear clicks, the telephone is not atelephone is not a is not a
touch-tone telephone and cannot activate the answering system.
The answering system may not detect the remote access code while your
•
announcement is playing. Try waiting until the announcement is over
before entering the code.
There may be interference on the telephone line you are using. Press thetelephone line you are using. Press the line you are using. Press the
•
dialing keys firmly.
The outgoing announcement is not clear.
When you record your announcement, make sure you speak in a normal
•
tone of voice, about nine inches from the deskset.
Make sure there is no background noise (TV, music, etc.) while recording.
•
COVM shows on the screen display and I do not know why.
Your telephone has voicemail indication that is separate from the built-in
•
answering system. If COVM appears on the display, then your telephone
has received a signal from your telephone service provider. Contact your
telephone service provider for more information on how to access your
voicemail.
74
Page 80

Appendix
Troubleshooting
I cannot retrieve voicemail messages.
Your telephone has both a built-in answering system and voicemail
•
indication. They are independent features and each alerts you to new
messages differently (page 49). If you subscribe to voicemail service from
your telephone service provider, contact your telephone service provider for
more information on how to access your voicemail.
Common cure for electronic equipment.
If the deskset does not seem to be responding normally, do the following (in
the order listed):
Disconnect the power to the main base.
•
Disconnect the backup battery.
•
Wait a few minutes.
•
•
Connect power to the main base.
•
Install the backup battery again.
•
Wait for the deskset to reestablish its connection with the telephone base.
Allow up to one minute for this to take place.
75
Page 81

Appendix
Maintenance
Taking care of your telephone
•
Your deskset contains sophisticated electronic parts, so you must treat it with care.
•
Avoid rough treatment.
•
Place the deskset down gently.
•
Save the original packing materials to protect your deskset if you ever need to ship it.
Avoid water
•
You can damage your deskset if it gets wet. Do not use the deskset in the rain, or handle it
with wet hands. Do not install the deskset near a sink, bathtub or shower.
Electrical storms
•
Electrical storms can sometimes cause power surges harmful to electronic equipment. For
your own safety, take caution when using electric appliances during storms.
Cleaning your telephone
•
Your deskset has a durable plastic casing that should retain its luster for many years. Clean it
only with a soft cloth slightly dampened with water or mild soap.
•
Do not use excess water or cleaning solvents of any kind.
Remember that electrical appliances can cause serious injury if used when you are wet or
standing in water. If the deskset should fall into water, DO NOT RETRIEVE IT UNTIL YOU
UNPLUG THE POWER CORD AND TELEPHONE LINE CORDS FROM THE WALL. Then pull the
unit out by the unplugged cords.
76
Page 82

Appendix
Important safety information
This symbol is to alert you to important operating or servicing instructions that may
appear in this user’s manual. Always follow basic safety precautions when using this
product to reduce the risk of injury, fire, or electric shock.
Safety information
•
Read and understand all instructions in the user’s manual. Observe all markings on
the product.
•
Avoid using a telephone during a thunderstorm. There may be a slight chance of electric shock
from lightning.
•
Do not use the telephone to report a gas leak in the vicinity of the leak. Under certain
circumstances, a spark may be created when the adapter is plugged into the power outlet,
or when the handset is replaced in its cradle. This is a common event associated with
the closing of any electrical circuit. The user should not plug the phone into a power
outlet, and should not put a charged handset into the cradle, if the phone is located in an
environment containing concentrations of flammable or flame-supporting gases, unless there
is adequate ventilation. A spark in such an environment could create a fire or explosion. Such
environments might include: medical use of oxygen without adequate ventilation; industrial
gases (cleaning solvents; gasoline vapors; etc.); a leak of natural gas; etc.
•
Do not use this product near water, or when you are wet. For example, do not use it in a wet
basement or shower, or next to a swimming pool, bathtub, kitchen sink, or laundry tub. Do
not use liquids or aerosol sprays for cleaning. If the product comes in contact with any liquid,
unplug any line or power cord immediately. Do not plug the product back in until it has
dried thoroughly.
•
Install this product in a protected location where no one can trip over any line or power cords.
Protect cords from damage or abrasion.
•
If this product does not operate normally, see the Troubleshooting section on pages 68-75
of this user’s manual. If you cannot solve the problem, or if the product is damaged, refer to
the Limited warranty section on pages 81-82. Do not open this product except as directed
in your user’s manual. Opening the product or reassembling it incorrectly may expose you to
hazardous voltages or other risks.
•
Replace backup battery only as described in your user’s manual (see page 6). Do not
burn or puncture batteries — they contain caustic chemicals.
•
This power adapter is intended to be correctly oriented in a vertical or floor mount
position. The prongs are not designed to hold the plug in place if it is plugged into a
ceiling, an under-the-table or cabinet outlet.
Caution: Use only the power adapter provided with this product. To obtain a replacement, visit
our website at
www.telephones.att.com or call
1 (888) 915-2007. In Canada, dial 1 (866) 288-4268.
77
Page 83

Appendix
Important safety information
Especially about cordless telephones
•
Electrical power: The deskset must be connected to a working electrical outlet. The electrical
outlet should not be controlled by a wall switch. Calls cannot be made from the deskset if the
main base is unplugged, switched off or if the electrical power is interrupted.
•
Power adapter: The power adapter is intended to be correctly oriented in a vertical or floor
mount position. The prongs are not designed to hold the plug in place if it is plugged into a
ceiling, under-the-table or cabinet outlet.
Precautions for users of implanted cardiac pacemakers
Cardiac pacemakers (applies only to digital cordless telephones):
Wireless Technology Research, LLC (WTR), an independent research entity, led a multidisciplinary
evaluation of the interference between portable wireless telephones and implanted cardiac
pacemakers. Supported by the U.S. Food and Drug Administration, WTR recommends to
physicians that:
Pacemaker patients
•
Should keep wireless telephones at least six inches from the pacemaker.
•
Should NOT place wireless telephones directly over the pacemaker, such as in a breast pocket,
when it is turned ON.
•
Should use the wireless telephone at the ear opposite the pacemaker.
WTR’s evaluation did not identify any risk to bystanders with pacemakers from other persons
using wireless telephones.
Especially about telephone answering systems
Two-way recording: This unit does not sound warning beeps to inform the other party that the
call is being recorded. To ensure that you are in compliance with any federal or state regulations
regarding recording a telephone call, you should start the recording process and then inform the
other party that you are recording the conversation.
SAVE THESE INSTRUCTIONS
78
Page 84

Appendix
FCC part 68 and ACTA
This equipment complies with Part 68 of the FCC rules and with technical requirements adopted
by the Administrative Council for Terminal Attachments (ACTA). The label on the back or
bottom of this equipment contains, among other things, a product identifier in the format US:
AAAEQ##TXXXX. This identifier must be provided to your telephone service provider upon request.
The plug and jack used to connect this equipment to premises wiring and the telephone network
must comply with the applicable Part 68 rules and technical requirements adopted by ACTA. A
compliant telephone cord and modular plug is provided with this product. It is designed to be
connected to a compatible modular jack that is also compliant. An RJ11 jack should normally
be used for connecting to a single line and an RJ14 jack for two lines. See the installation
instructions in the user’s manual.
he Ringer Equivalence Number is an indication of the maximum number of terminals allowed
to be connected to a telephone interface. The termination on an interface may consist of any
combination of devices subject only to the requirement that the sum of the Ringer Equivalence
Numbers of all the devices does not exceed five.
This equipment may not be used with Party Lines. If you have specially wired alarm dialing
equipment connected to telephone line, ensure the connection of this equipment does not
disable your alarm equipment. If you have questions about what will disable the alarm equipment,
consult your telephone service provider or a qualified installer.
If this equipment is malfunctioning, it must be unplugged from the modular jack until the problem
has been corrected. Repairs to this telephone equipment can only be made by the manufacturer
or its authorized agents. For repair procedures, follow the instructions outlined under the Limited
Warranty.
If this equipment is causing harm to the telephone network, the telephone service provider may
temporarily discontinue your telephone service. The telephone service provider is required to
notify you before interrupting service. If advance notice is not practical, you will be notified as
soon as possible. You will be given the opportunity to correct the problem and the telephone
service provider is required to inform you of your right to file a complaint with the FCC. Your
telephone service provider may make changes in its facilities, equipment, operation, or procedures
that could affect the proper functioning of this product. The telephone service provider is required
to notify you if such changes are planned.
If this product is equipped with a corded or cordless handset, it is hearing aid compatible.
If this product has memory dialing locations, you may choose to store emergency telephone
numbers (e.g., police, fire, medical) in these locations. If you do store or test emergency numbers,
please:
Remain on the line and briefly explain the reason for the call before hanging up.
Perform such activities in off-peak hours, such as early morning or late evening.
Industry Canada
Operation is subject to the following two conditions: (1) this device may not cause harmful
interference, and (2) this device must accept any interference, including interference that may
cause undesired operation.
The term ‘’IC:‘’ before the certification/registration number only signifies that the Industry Canada
technical specifications were met.
The Ringer Equivalence Number (REN) for this terminal equipment is 0.1. The REN is an indication
of the maximum number of devices allowed to be connected to a telephone interface. The
termination on an interface may consist of any combination of devices subject only to the
requirement that the sum of the RENs of all the devices does not exceed five.
This product meets the applicable Industry Canada technical specifications.
79
Page 85

Appendix
FCC part 15
This equipment has been tested and found to comply with the requirements for a Class B digital
device under Part 15 of the Federal Communications Commission (FCC) rules. These requirements
are intended to provide reasonable protection against harmful interference in a residential
installation. This equipment generates, uses and can radiate radio frequency energy and, if not
installed and used in accordance with the instructions, may cause harmful interference to radio
communications. However, there is no guarantee that interference will not occur in a particular
installation. If this equipment does cause harmful interference to radio or television reception,
which can be determined by turning the equipment off and on, the user is encouraged to try to
correct the interference by one or more of the following measures:
•
Reorient or relocate the receiving antenna.
•
Increase the separation between the equipment and receiver.
Connect the equipment into an outlet on a circuit different from that to which the receiver is
•
connected.
•
Consult the dealer or an experienced radio/TV technician for help.
Changes or modifications to this equipment not expressly approved by the party responsible for
compliance could void the user’s authority to operate the equipment.
This device complies with Part 15 of the FCC Rules. Operation is subject to the following two
conditions: (1) this device may not cause harmful interference, and (2) this device must accept
any interference received, including interference that may cause undesired operation. Privacy of
communications may not be ensured when using this telephone.
To ensure safety of users, the FCC has established criteria for the amount of radio frequency
energy that can be safely absorbed by a user or bystander according to the intended usage of
the product. This product has been tested and found to comply with the FCC criteria. The handset
may be safely held against the ear of the user. The deskset shall be installed and used such that
parts of the user’s body other than the hands are maintained at a distance of approximately
20 cm (8 inches) or more.
This Class B digital apparatus complies with Canadian ICES-003.
This product meets the applicable Industry Canadatechnical specifications.
80
Page 86

Appendix
Limited warranty
The AT&T brand is used under license - any repair, replacement or warranty service, and all
questions about this product should be directed to: In the United States of America, visit
www.telephones.att.com or call 1 (888) 915-2007. In Canada, call
1 (866) 288-4268.
1. What does this limited warranty cover?
The manufacturer of this AT&T-branded product warrants to the holder of a valid proof of
purchase (“CONSUMER” or “you”) that the product and all accessories provided in the sales
package (“PRODUCT”) are free from defects in material and workmanship, pursuant to the
following terms and conditions, when installed and used normally and in accordance with the
PRODUCT operating instructions. This limited warranty extends only to the CONSUMER for
products purchased and used in the United States of America and Canada.
2. What will be done if the PRODUCT is not free from defects in materials and
workmanship during the limited warranty period (“materially defective PRODUCT”)?
During the limited warranty period, the manufacturer’s authorized service representative
will repair or replace at the manufacturer’s option, without charge, a materially defective
PRODUCT. If the manufacturer repairs the PRODUCT, they may use new or refurbished
replacement parts. If the manufacturer chooses to replace the PRODUCT, they may replace
it with a new or refurbished PRODUCT of the same or similar design. The manufacturer will
retain defective parts, modules, or equipment. Repair or replacement of the PRODUCT, at
the manufacturer’s option, is your exclusive remedy. The manufacturer will return repaired
or replacement products to you in working condition. You should expect the repair or
replacement to take approximately 30 days.
3. How long is the limited warranty period?
The limited warranty period for the PRODUCT extends for ONE (1) YEAR from the date of
purchase. If the manufacturer repairs or replaces a materially defective PRODUCT under the
terms of this limited warranty, this limited warranty also applies to repaired or replacement
PRODUCT for a period of either (a) 90 days from the date the repaired or replacement
PRODUCT is shipped to you or (b) the time remaining on the original one-year limited
warranty; whichever is longer.
4. What is not covered by this limited warranty?
This limited warranty does not cover:
PRODUCT that has been subjected to misuse, accident, shipping or other physical
•
damage, improper installation, abnormal operation or handling, neglect, inundation, fire, water,
or other liquid intrusion; or
PRODUCT that has been damaged due to repair, alteration, or modification by anyone
•
other than an authorized service representative of the manufacturer; or
PRODUCT to the extent that the problem experienced is caused by signal conditions,
•
network reliability or cable or antenna systems; or
PRODUCT to the extent that the problem is caused by use with non-AT&T accessories;
•
or
PRODUCT whose warranty/quality stickers, PRODUCT serial number plates or electronic
•
serial numbers have been removed, altered or rendered illegible; or
PRODUCT purchased, used, serviced, or shipped for repair from outside the United
•
States of America or Canada, or used for commercial or institutional purposes (including but
not limited to products used for rental purposes); or
81
Page 87

Appendix
Limited warranty
PRODUCT returned without a valid proof of purchase (see item 6 below); or
•
•
Charges for installation or setup, adjustment of customer controls, and installation or
repair of systems outside the unit.
5. How do you get warranty service?
To obtain warranty service in the United States of America, visit
www.telephones.att.com or call 1 (888) 915-2007. In Canada, call
1 (866) 288-4268. NOTE: Before calling for service, please review the user’s manual;
a check of the PRODUCT’s controls and features may save you a service call.
Except as provided by applicable law, you assume the risk of loss or damage during transit
and transportation and are responsible for delivery or handling charges incurred in the
transport of the PRODUCT(s) to the service location. The manufacturer will return repaired or
replaced PRODUCT under this limited warranty to you. Transportation, delivery or handling
charges are prepaid. The manufacturer assumes no risk for damage or loss of the PRODUCT
in transit. If the PRODUCT failure is not covered by this limited warranty, or proof of purchase
does not meet the terms of this limited warranty, the manufacturer will notify you and will
request that you authorize the cost of repair prior to any further repair activity. You must pay
for the cost of repair and return shipping costs for the repair of products that are not covered
by this limited warranty.
6. What must you return with the PRODUCT to get warranty service?
You must:
•
Return the entire original package and contents including the PRODUCT to the service
location along with a description of the malfunction or difficulty; and
•
Include a “valid proof of purchase” (sales receipt) identifying the PRODUCT purchased
(PRODUCT model) and the date of purchase or receipt; and
•
Provide your name, complete and correct mailing address, and telephone number.
7. Other limitations
This warranty is the complete and exclusive agreement between you and the manufacturer of
this AT&T branded PRODUCT. It supersedes all other written or oral communications related to
this PRODUCT. The manufacturer provides no other warranties for this PRODUCT. The warranty
exclusively describes all of the manufacturer’s responsibilities regarding the PRODUCT. There
are no other express warranties. No one is authorized to make modifications to this limited
warranty and you should not rely on any such modification.
State/Provincial Law rights: This warranty gives you specific legal rights, and you may also
have other rights which vary from state to state or province to province.
Limitations: Implied warranties, including those of fitness for a particular purpose and
merchantability (an unwritten warranty that the PRODUCT is fit for ordinary use) are limited to
one year from date of purchase. Some states/provinces do not allow limitations on how long
an implied warranty lasts, so the above limitation may not apply to you. In no event shall the
manufacturer be liable for any indirect, special, incidental, consequential, or similar damages
(including, but not limited to lost profits or revenue, inability to use the PRODUCT or other
associated equipment, the cost of substitute equipment, and claims by third parties) resulting
from the use of this PRODUCT. Some states/provinces do not allow the exclusion or limitation
of incidental or consequential damages, so the above limitation or exclusion may not apply to
you.
Please retain your original sales receipt as proof of purchase.
82
Page 88
Appendix
Technical specifications
RF frequency band
Channels
Operating temperature
(AC voltage, 60Hz)
Deskset voltage
(AC adapter output)
Backup battery
Operation Operating time*
Talk time (deskset) Up to five hours
Talk time (deskset speakerphone) Up to five hours
Standby Up to four days
* Operating times vary depending on your actual use and the age of the battery.
DECT 6.0 digital technology
The AT&T DECT 6.0 products offer unsurpassed range performance and sound clarity. This is
achieved through a unique antenna design and advances in noise-filtering technology. An
independent laboratory has confirmed that AT&T DECT 6.0 products perform up to 45% better
in range competitions. Now calls can be taken in the basement, backyard and garage with
exceptional sound quality.
Telephone operating range
This cordless telephone operates within the maximum power allowed by the Federal
Communications Commission (FCC). Even so, the deskset can communicate over only a certain
distance — which can vary with the locations of the deskset, the weather, and the construction of
your building.
1921.536MHz - 1928.448MHz
5
32°F - 122°F
0°C - 50°C
100 Vrms - 120VrmsDeskset voltage
6VDC @400mA
3.6V 600mAHReplacement battery
83
Page 89

Index
Index
Index
Index
A
AC adapter 5
Access code 52, 61
Add the deskset 8
Alert tones 63
Announcement 55
Answering calls 21
Answering system 49–62
B
Battery charging 7
Battery installation 6
C
Caller ID (CID) 43
add entries to phone directory 47
delete entries 46
review entries 45
Call privacy 24
Call transfer 32–33
Call waiting 23
Capacity 37
Chain dialing 27
Conference call 27
COVM 29
Customer support 17
D
Delete call log entries 46
Delete redial entries 22
Delive a memo 60
Dialing
directory dialing 42
from a record in the caller ID
history 46
Directory
capacity 37
create entries 38
dial number 42
display dial 42
edit entries 42
name search 41
E
Elapsed time 18
Ending calls 19
F
Flash (switch hook flash) 23
H
Hands-free use 20
Hold 26
Hold reminder 16
I
Incoming call, answering 21
Incoming caller ID history 45
Indicator lights 64
Indicator tones 63
Installation 4
Intercom 30
J
Join a call in progress 26
K
Key tone 14
84
Page 90

Index
Index
L
Language 15
Last number redial 22
LCD contrast 14
Limited warranty 81–82
Line selection 15
M
Maintenance 76
Making calls 18
Memory match 45
Menu settings 12
Message memo 60
Message playback 57
Missed calls indicator 45
Mute 23
N
Names
enter into directory 38
search for 41
Navigation keys 1
New message indication 51
Notify alert 53
O
On hook dialing 19
P
Pause 39
Phonebook (directory) 37
Play back a message memo 60
Power adapter 5
PPT 34
Predialing 19
Q
Quick reference guide 1–3
R
Receiving calls 21
Recharging 7
Record
a call 25
announcement 55
message memo 60
Redial 22
Registration 8
Remote access 61–62
Review directory entries 40
Review the caller ID information 45
Ringer tone options 13
Ringer volume 12
Ring silencing 21
S
Safety information 77–78
Screen display messages 65–67
Screen icons 63
Search by name 41
Speakerphone 20
Speed dial 20
T
Technical specifications 83
Telephone operating range 83
Temporary ringer silencing 21
Three-way conference calls 27
Transfer a call 32
Troubleshooting 68–75
V
Voicemail 49
Voice prompts 50
Volume control
listening volume 23
ringer volume 12
85
Page 91
Remote access wallet card
Use the wallet card below to help you remember commands to control your
answering system from any touch-tone telephone.
Cut along dotted line.
Call your telephone number, then
enter your four-digit access code
(preset to 0001 for Handset 1 and
so on).
Action Remote command
•
Fold here.
Play all messages or record announcement.......1
Accept the recorded announcement.......................2
Delete the message or
recorded announcement...........................................3
Repeat or go back............................................................4
Help menu or end the recording...............................5
Skip the message..............................................................6
Transfer the message......................................................7
Transfer message to other mailbox
Change the announcement .........................................8
Change to the general delivery mailbox...............9
End remote access call...................................................*(or hang up)
Model name: SynJ SB67148
Type: DECT 6.0 4-line corded base expansion handset for use
© 2010 Advanced American Telephones. All rights reserved. AT&T and
the AT&T logo are trademarks of AT&T Intellectual Property licensed to
Advanced American Telephones, San Antonio, TX 78219. Printed in China.
TM
SynJ
with AT&T model SynJ SB67118/SB67138
is a trademark of Advanced American Telephones.
...(Mailbox number) +
#
Page 92

www.telephones.att.com
AT&T and the AT&T logo are trademarks of AT&T Intellectual Property licensed to
© 2010 Advanced American Telephones. All Rights Reserved.
Advanced American Telephones, San Antonio, TX 78219.
TM
SynJ
is a trademark of Advanced American Telephones.
Printed in China. Issue 1 AT&T 09/10.
 Loading...