

Page 1

www.vtechphones.com
i
Congratulations
on purchasing your new VTech product.
Before using this telephone, please read the
Important safety instructions
on page 97 of this manual.
This manual has all the feature operations and troubleshooting necessary to install
and operate your new VTech telephone. Please review this manual thoroughly to
ensure proper installation and operation of this innovative and feature rich VTech
product. For support, shopping, and everything new at VTech, visit our website at
www.vtechphones.com. In Canada, please visit www.vtechcanada.com.
The BLUETOOTH® word mark and logos are owned by Bluetooth SIG, Inc. and any use of such marks by Advanced American
Telephones and its parent, VTech Holdings Limited, is under license. VTech Holdings Limited is a member of Bluetooth SIG,
Inc. Other trademarks and trade names are those of their respective owners.
The ENERGY STAR® program (www.energystar.gov) recognizes and encourages
the use of products that save energy and help protect our environment. We are
proud to mark this product with the ENERGY STAR® label indicating it meets the
latest energy efficiency guidelines.
Page 2

www.vtechphones.com
ii
Table of contents
Getting started . . . . . . . . . . . . . . . . . . . . . . 1
Parts checklist . . . . . . . . . . . . . . . . . . . . . . 1
Installation setup . . . . . . . . . . . . . . . . . . . . . 2
Battery installation and charging . . . . . . . . . . . . . 3
Spare battery . . . . . . . . . . . . . . . . . . . . . . . 4
Telephone base installation . . . . . . . . . . . . . . . 5
Expanding your telephone system . . . . . . . . . . . . 6
Adding new handsets. . . . . . . . . . . . . . . . . . . 7
Handset layout . . . . . . . . . . . . . . . . . . . . . . 8
Telephone base layout . . . . . . . . . . . . . . . . . . 9
Handset status icons . . . . . . . . . . . . . . . . . . 10
Telephone base status icons . . . . . . . . . . . . . . 11
Handset main menu . . . . . . . . . . . . . . . . . . 12
Telephone base main menu . . . . . . . . . . . . . . 14
Bluetooth . . . . . . . . . . . . . . . . . . . . . . . . 16
Introducing Bluetooth . . . . . . . . . . . . . . . . . . 16
Bluetooth setup . . . . . . . . . . . . . . . . . . . . . 19
Set up cellular . . . . . . . . . . . . . . . . . . . . . 20
Set up headset . . . . . . . . . . . . . . . . . . . . . 21
Managing your devices . . . . . . . . . . . . . . . . . 23
Change PIN (of the telephone base) . . . . . . . . . . 29
System setup . . . . . . . . . . . . . . . . . . . . . . 30
Handset settings . . . . . . . . . . . . . . . . . . . . 30
Edit handset name . . . . . . . . . . . . . . . . . . . 31
Show handset name . . . . . . . . . . . . . . . . . . 31
Keypad tone . . . . . . . . . . . . . . . . . . . . . . 32
Language . . . . . . . . . . . . . . . . . . . . . . . . 32
LCD contrast . . . . . . . . . . . . . . . . . . . . . . 33
Clear voice mail. . . . . . . . . . . . . . . . . . . . . 33
Default settings . . . . . . . . . . . . . . . . . . . . . 34
Delete registration . . . . . . . . . . . . . . . . . . . 34
Handset ringers. . . . . . . . . . . . . . . . . . . . . 35
Ringer volume . . . . . . . . . . . . . . . . . . . . . 36
Ringer melody . . . . . . . . . . . . . . . . . . . . . 37
Select a ringer melody . . . . . . . . . . . . . . . . . . 37
Delete a ringer melody . . . . . . . . . . . . . . . . . 37
Record new ringer . . . . . . . . . . . . . . . . . . . 38
Handset pictures . . . . . . . . . . . . . . . . . . . . 39
Handset animations . . . . . . . . . . . . . . . . . . 40
Telephone base settings . . . . . . . . . . . . . . . . 41
Set date . . . . . . . . . . . . . . . . . . . . . . . . . 42
Set time . . . . . . . . . . . . . . . . . . . . . . . . . 42
Keypad tone . . . . . . . . . . . . . . . . . . . . . . 43
Language . . . . . . . . . . . . . . . . . . . . . . . . 43
LCD contrast . . . . . . . . . . . . . . . . . . . . . . 44
Clear voice mail. . . . . . . . . . . . . . . . . . . . . 44
Voice mail codes . . . . . . . . . . . . . . . . . . . . 45
Default settings . . . . . . . . . . . . . . . . . . . . . 46
Page 3

www.vtechphones.com
iii
Table of contents
Delete handsets . . . . . . . . . . . . . . . . . . . . 46
Telephone base ringers . . . . . . . . . . . . . . . . 47
Ringer volume . . . . . . . . . . . . . . . . . . . . . 48
Ringer melody . . . . . . . . . . . . . . . . . . . . . 49
Answering system settings . . . . . . . . . . . . . . . 50
Answer on/off . . . . . . . . . . . . . . . . . . . . . . 51
Announcement . . . . . . . . . . . . . . . . . . . . . 52
Recording an announcement . . . . . . . . . . . . . 53
Number of rings. . . . . . . . . . . . . . . . . . . . . 54
Call screening . . . . . . . . . . . . . . . . . . . . . 55
Remote code . . . . . . . . . . . . . . . . . . . . . . 55
Message alert tone . . . . . . . . . . . . . . . . . . . 56
Telephone operation . . . . . . . . . . . . . . . . . . 57
Make a HOME call . . . . . . . . . . . . . . . . . . . . 58
Receive a HOME call . . . . . . . . . . . . . . . . . . 60
Call waiting on the HOME line . . . . . . . . . . . . . 61
Make a CELL call . . . . . . . . . . . . . . . . . . . . 62
Receive a CELL call . . . . . . . . . . . . . . . . . . 63
Call waiting on the CELL line . . . . . . . . . . . . . . 63
Adjusting the listening volume . . . . . . . . . . . . . 64
Silencing the ringers . . . . . . . . . . . . . . . . . . 64
Mute . . . . . . . . . . . . . . . . . . . . . . . . . . 65
Hold . . . . . . . . . . . . . . . . . . . . . . . . . . . 65
Receive a CELL call while on a HOME call . . . . . . 66
Receive a HOME call while on a CELL call . . . . . . 66
Conferencing HOME and CELL calls . . . . . . . . . 67
Call waiting while on a conference call. . . . . . . . . 68
Intercom . . . . . . . . . . . . . . . . . . . . . . . . 68
Phone book . . . . . . . . . . . . . . . . . . . . . . . 71
Creating a new phone book entry . . . . . . . . . . . 72
Searching for phone book entries . . . . . . . . . . . 75
Dial a phone book entry . . . . . . . . . . . . . . . . 76
Edit a phone book entry . . . . . . . . . . . . . . . . 77
Deleting phone book entries . . . . . . . . . . . . . . 78
Information about caller ID with call waiting . . . . . . 79
Call log . . . . . . . . . . . . . . . . . . . . . . . . . 80
Call log information . . . . . . . . . . . . . . . . . . . 81
Memory match . . . . . . . . . . . . . . . . . . . . . 81
Reviewing the call log . . . . . . . . . . . . . . . . . 82
Dialing a call log entry . . . . . . . . . . . . . . . . . 83
Dialing options . . . . . . . . . . . . . . . . . . . . . 83
Saving call log entries into the phone book . . . . . . 84
Deleting call log entries. . . . . . . . . . . . . . . . . 84
Play recorded messages in the call log . . . . . . . . 85
Clear missed calls . . . . . . . . . . . . . . . . . . . 86
Redial list . . . . . . . . . . . . . . . . . . . . . . . . 87
Saving redial entries into the phone book . . . . . . . 88
Dialing a redial entry . . . . . . . . . . . . . . . . . . 89
Page 4

www.vtechphones.com
iv
Editing a redial entry . . . . . . . . . . . . . . . . . . 89
Deleting redial entries . . . . . . . . . . . . . . . . . 90
Answering system . . . . . . . . . . . . . . . . . . . 91
Answering system operation . . . . . . . . . . . . . . 91
Message announcements . . . . . . . . . . . . . . . 92
Options during playback . . . . . . . . . . . . . . . . 92
To delete all messages . . . . . . . . . . . . . . . . . 93
Call screening (on the telephone base) . . . . . . . . 94
Call intercept . . . . . . . . . . . . . . . . . . . . . . 94
Record memo . . . . . . . . . . . . . . . . . . . . . 94
Remote access . . . . . . . . . . . . . . . . . . . . . 95
Appendix . . . . . . . . . . . . . . . . . . . . . . . . 96
Battery . . . . . . . . . . . . . . . . . . . . . . . . . 96
Important safety instructions . . . . . . . . . . . . . . 97
Troubleshooting . . . . . . . . . . . . . . . . . . . . 98
Operating range . . . . . . . . . . . . . . . . . . . . 111
Maintenance . . . . . . . . . . . . . . . . . . . . . . 111
About cordless telephones . . . . . . . . . . . . . . .112
Warranty . . . . . . . . . . . . . . . . . . . . . . . . 112
FCC, ACTA and IC regulations . . . . . . . . . . . . . 114
The RBRC® seal . . . . . . . . . . . . . . . . . . . .115
Technical specications . . . . . . . . . . . . . . . . 116
Index . . . . . . . . . . . . . . . . . . . . . . . . . . 117
Table of contents
Page 5

www.vtechphones.com
1
Getting started
Basic operation
Getting started
Parts checklist
Remember to save your sales receipt and original packaging in case it is necessary to ship your
telephone for warranty service. Make sure the telephone package includes the following:
To purchase a
replacement
battery or power
adapter, visit our
website at www.
vtechphones.
com or call
1 (800) 595-9511.
In Canada, go to
www.vtechcanada.
com or call
1 (800) 267-7377.
•
2. Handset
7. User’s manual
4. Battery
3. Telephone base
6. Base power adapter
5. Telephone line cord
1. Quick start guide
Page 6

www.vtechphones.com
2
Getting started
Installation setup
Install the telephone base close to a telephone jack and a power outlet not connected to a wall switch.
For optimum range and better reception, place the telephone base in a central and open location.
Depending on the environmental conditions, make sure that your Bluetooth enabled cellular phone
is within 12 feet of where you install the telephone base in order to maintain a reliable connection
between your Bluetooth cell phone, telephone base, and cell tower (see below).
Avoid placing the telephone base too close to:
Communication devices such as: personal computers, computer routers, television sets, VCRs,
wireless routers (wireless broadband, Wi-Fi, or 802.11) or other cordless telephones.
Excessive heat sources.
Noise sources such as a window with trafc outside, motors, microwave ovens, refrigerators, or
uorescent lighting.
Excessive dust sources such as a workshop or garage.
Excessive moisture.
Extremely low temperature.
Mechanical vibration or shock such as on top of the
washing machine or work bench.
•
•
•
•
•
•
•
®
Cell tower
Cell phone
Telephone base
Page 7

www.vtechphones.com
3
Getting started
Basic operation
Getting started
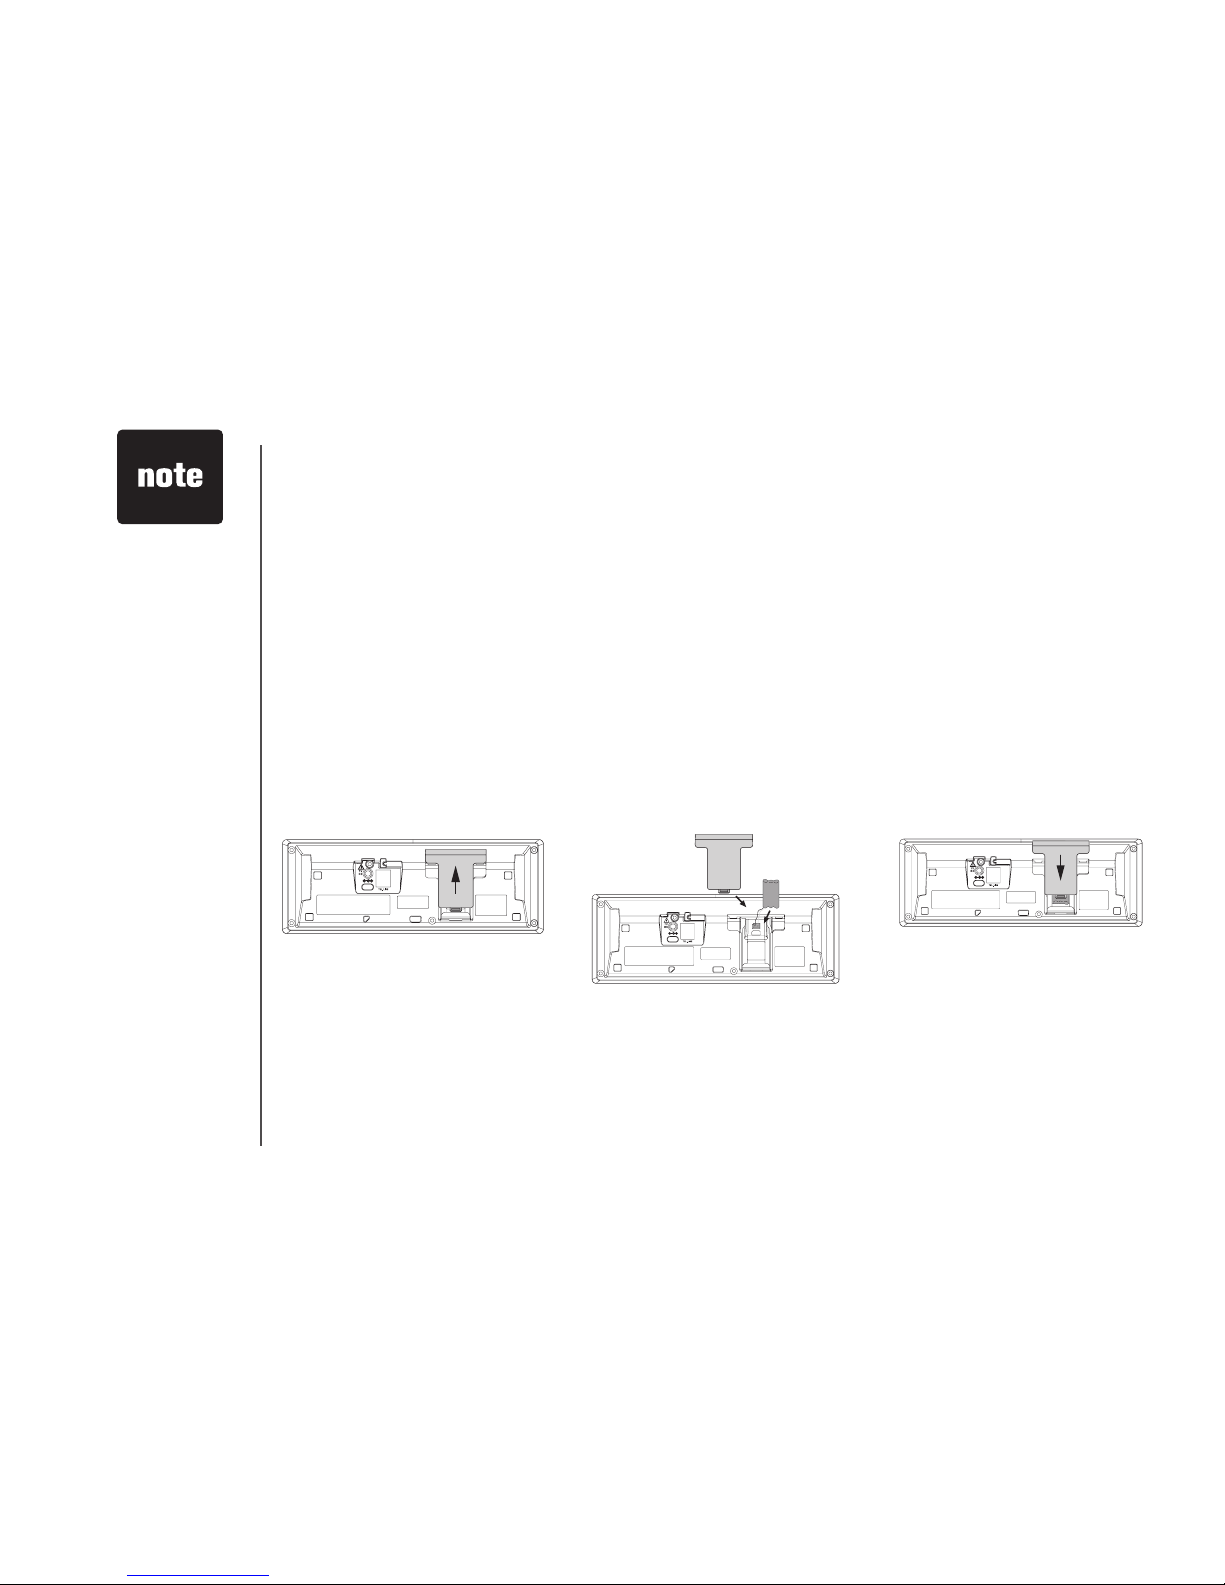
Battery installation and charging
Install the battery as shown below. After installing the battery, you can make and receive short calls,
but replace the handset in the telephone base or additional charger when not in use. For optimal
performance, charge the handset battery for at least 16 hours before use. When fully charged, the
handset battery provides approximately ve hours of talk time and three days of standby time.
1. Press the
tab and slide
the battery
compartment
cover
downwards.
2. Insert the plug
as indicated.
Make sure
it is plugged
securely and
matches the
color-coded
label inside
the battery
compartment.
4. Align the cover
at against
the battery
compartment,
then slide it
upwards until
it clicks into
place.
5. Charge the
handset, by
placing the
handset in
the telephone
base. The
charge light on
the handset
base will be on
when charging.
Use only the
battery supplied or
equivalent with this
product. To order
a replacement,
visit our website at
www.vtechphones.
com or call
1 (800) 595-9511.
In Canada, go to
www.vtechcanada.
com or call
1 (800) 267-7377.
•
3. Place the
battery
pack and
wires inside
the battery
compartment.
Charge light
Page 8
www.vtechphones.com
4
Spare battery (optional)
You can keep a charged spare battery (purchased separately) in the telephone base. The spare battery
compartment is located at the bottom of the telephone base. The spare charged battery allows you
to quickly replace a low handset battery, or in the event of a power failure, make and receive short
calls for up to three hours, depending on the amount of use.
To install and charge a spare battery:
Use only supplied
rechargeable
battery or
replacement
battery purchased
separately. To order
a replacement,
visit our website at
www.vtechphones.
com or call
1 (800) 595-9511.
In Canada, go to
www.vtechcanada.
com or call
1 (800) 267-7377.
•
3.
Position the battery
compartment cover
and slide it towards the
center of the telephone
base until it clicks into
place.
When you have nished installing the spare battery, the battery charging icon will appear in the top
right corner of the telephone base display. It takes at least 24 hours for the spare battery to reach a full
charge. Once the spare battery is fully charged, you can keep it charged until needed.
1.
Press the tab and slide
the battery compartment
cover out of the
telephone base to open.
2.
Insert the plug securely
matching the colorcoded label inside the
compartment. Place the
battery pack and wires
inside the compartment.
Getting started
Page 9

www.vtechphones.com
5
Getting started
Basic operation
Telephone base installation
Install the telephone base as shown below. Make sure that the electrical outlet is not controlled by a
wall switch. Also, if you receive high speed internet through your telephone line (commonly referred
to as DSL), install a DSL lter to the telephone line between the telephone base and the telephone
wall jack. Contact your DSL service provider for more information about DSL lters.
Telephone line cord
DSL lter (not included)
for DSL users
Power adapter
Electrical outlet
not controlled by
a wall switch
Telephone wall jack
Telephone base
Getting started
Use only the
power adapter
supplied with this
product. To order
a replacement
power adapter,
visit our website
at www.
vtechphones.
com or call 1
(800) 595-9511.
In Canada, go to
vtechcanada.com
or call 1 (800)
267-7377.
The power
adapter is
intended to be
correctly oriented
in a vertical
or oor mount
position.
•
•
Page 10
www.vtechphones.com
6
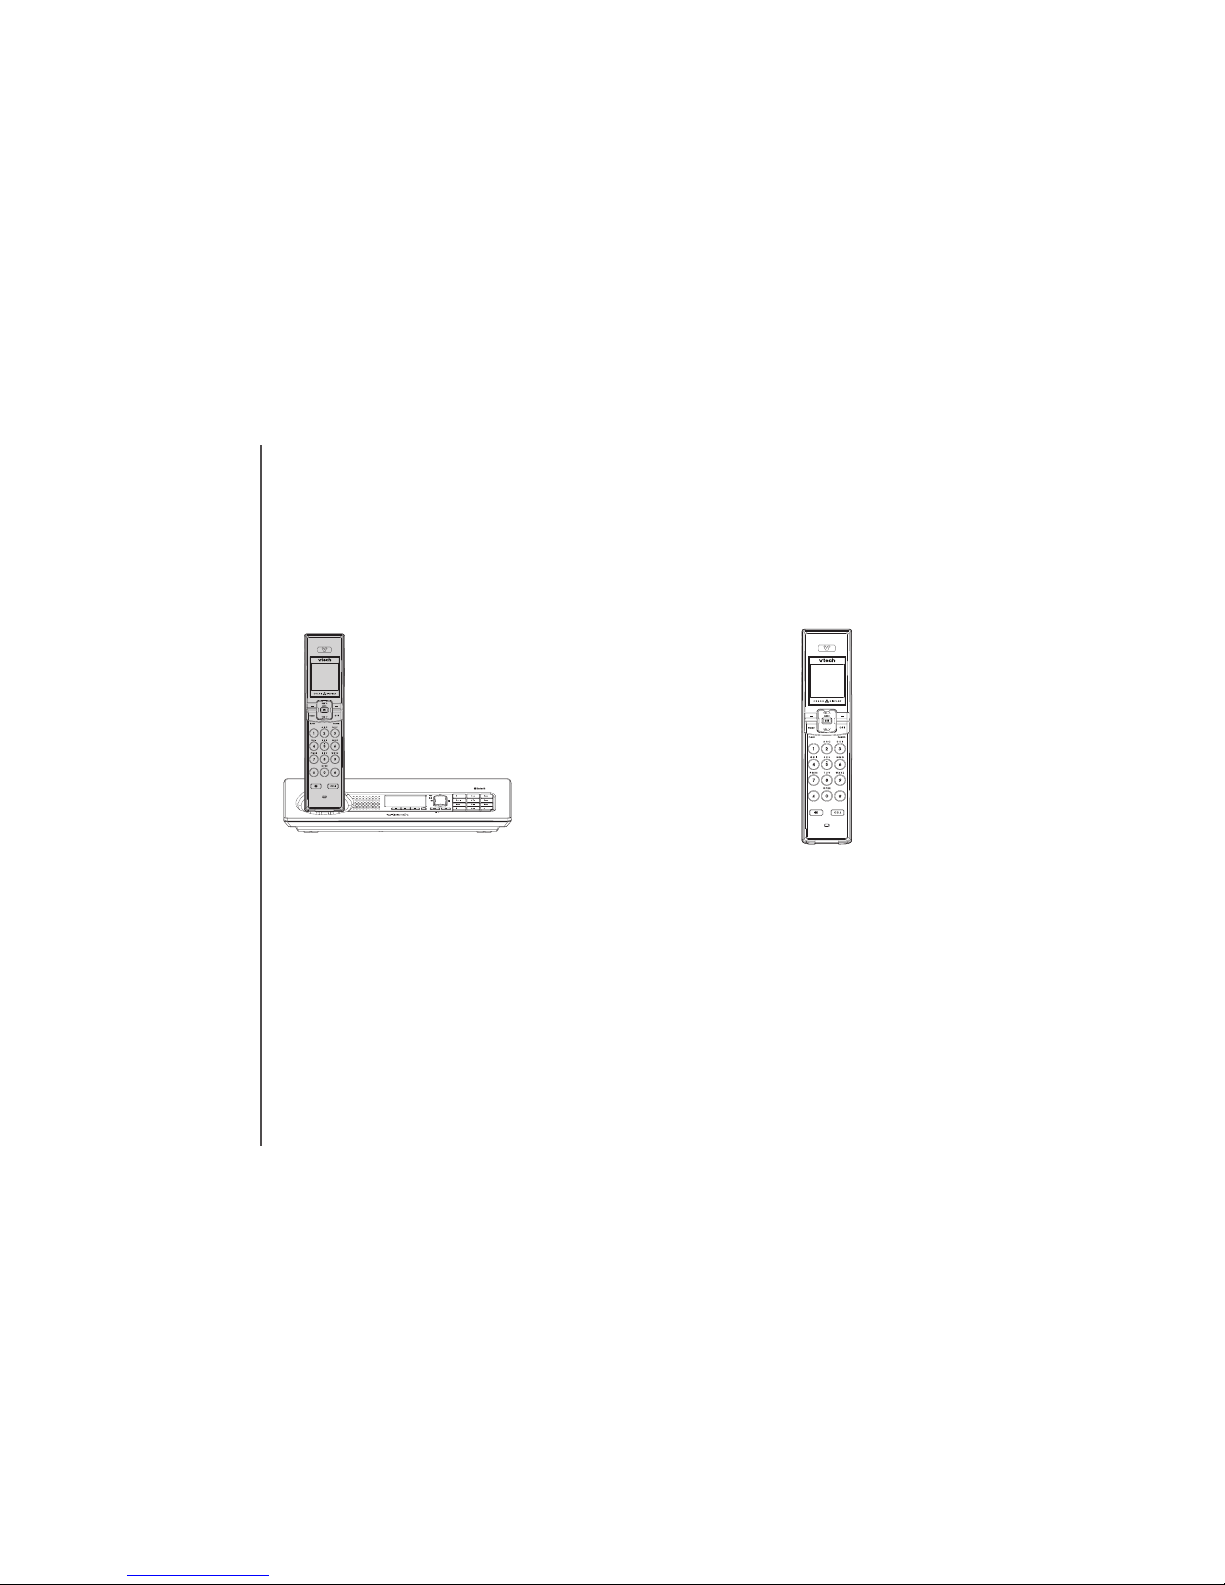
The handset provided is pre-registered as HANDSET 1. Additional handsets registered to the
telephone system will be assigned in sequential order. For instance, if the telephone system already
has HANDSET 1 and you register another handset, it will become HANDSET 2.
In normal operating conditions, up to four handsets can be used at a time. For example, two handsets
can be on a HOME call and two handsets can be on a CELL call. However, if a cordless handset
is experiencing interference or is almost out of range, the number of handsets that can be used at
a time may be reduced.
The LS5145 telephone
system comes with one
registered handset.
Up to 12 handsets (LS5105
purchased separately)
can be registered to your
telephone system.
Expanding your telephone system
Your LS5145 telephone system can accommodate up to 12 cordless handsets. You can add new
handsets to your telephone system (LS5105 purchased separately), but each handset must be
registered with the telephone base before use. To register new handsets to your telephone system,
see page 7.
Getting started
Page 11

www.vtechphones.com
7
Getting started
Basic operation
Adding new handsets (optional)
Your telephone can accommodate up to 12 handsets (LS5105 purchased separately). Before using
a newly purchased handset (LS5105), it must be registered with the telephone base.
Before registering an additional handset, make sure that the handset battery
is installed and charged.
To register a new handset:
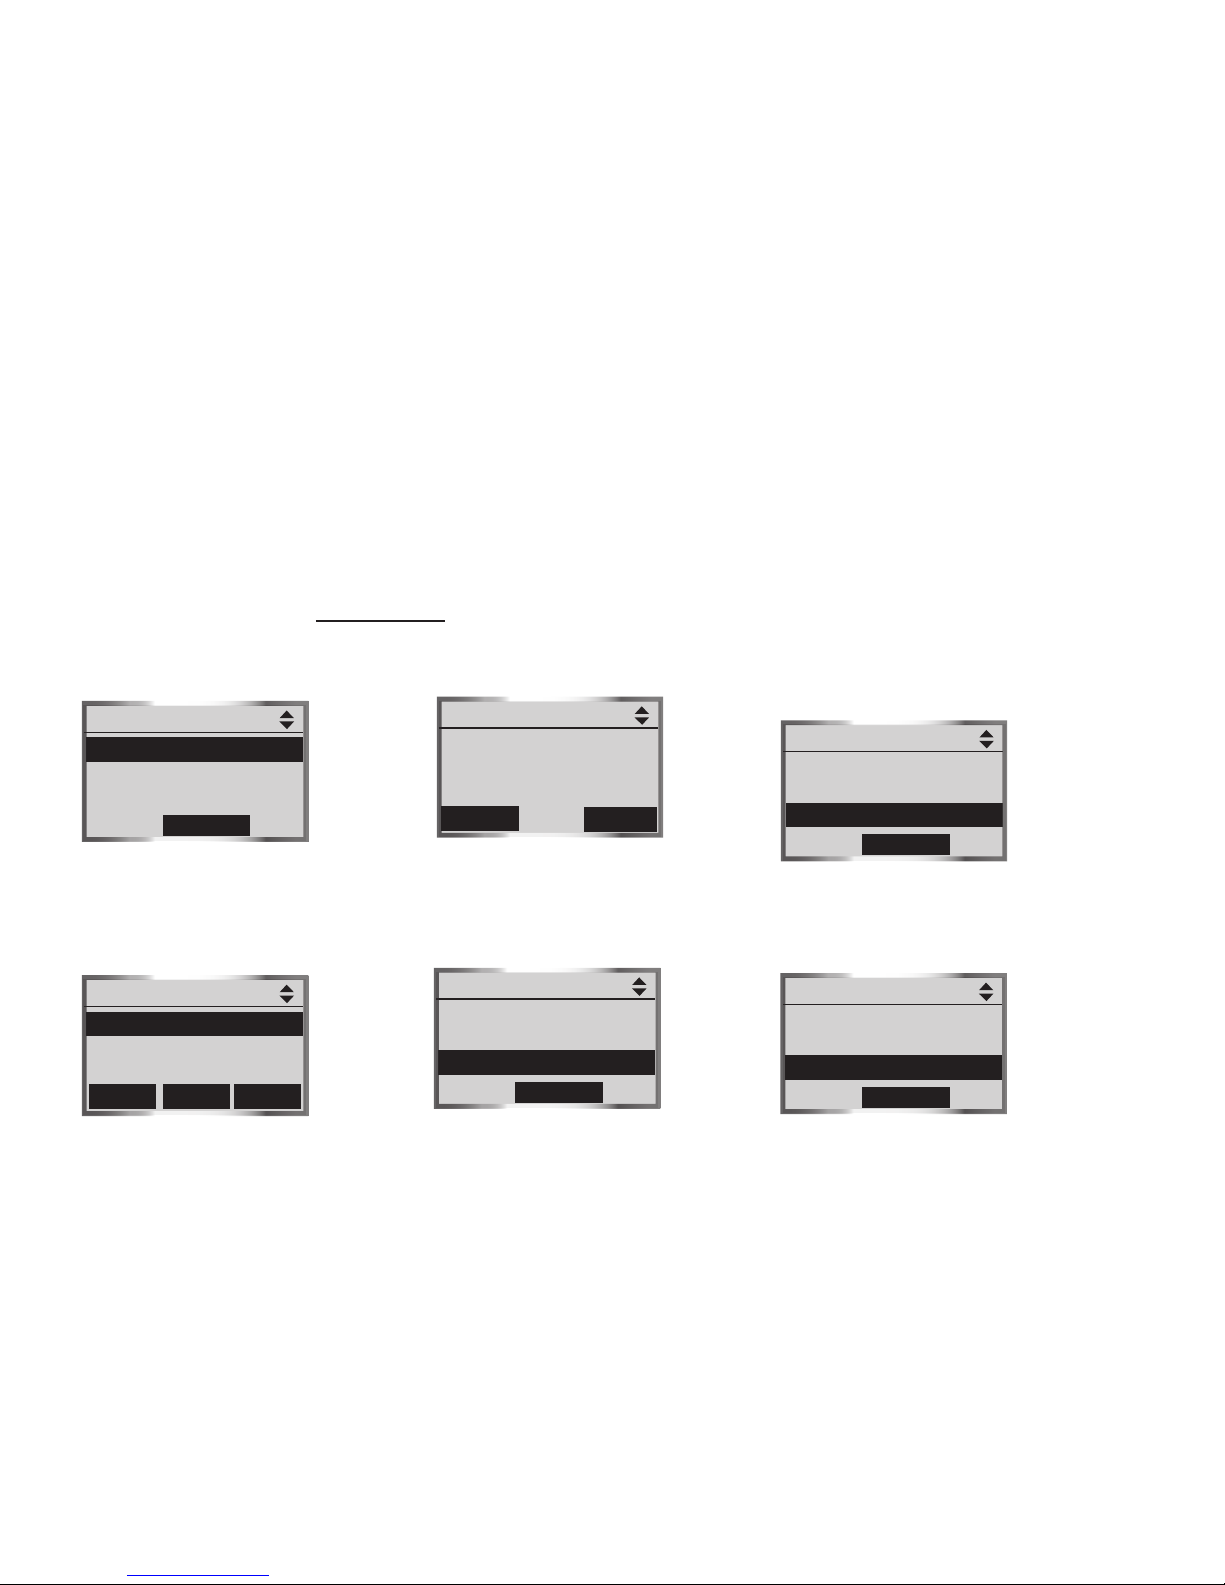
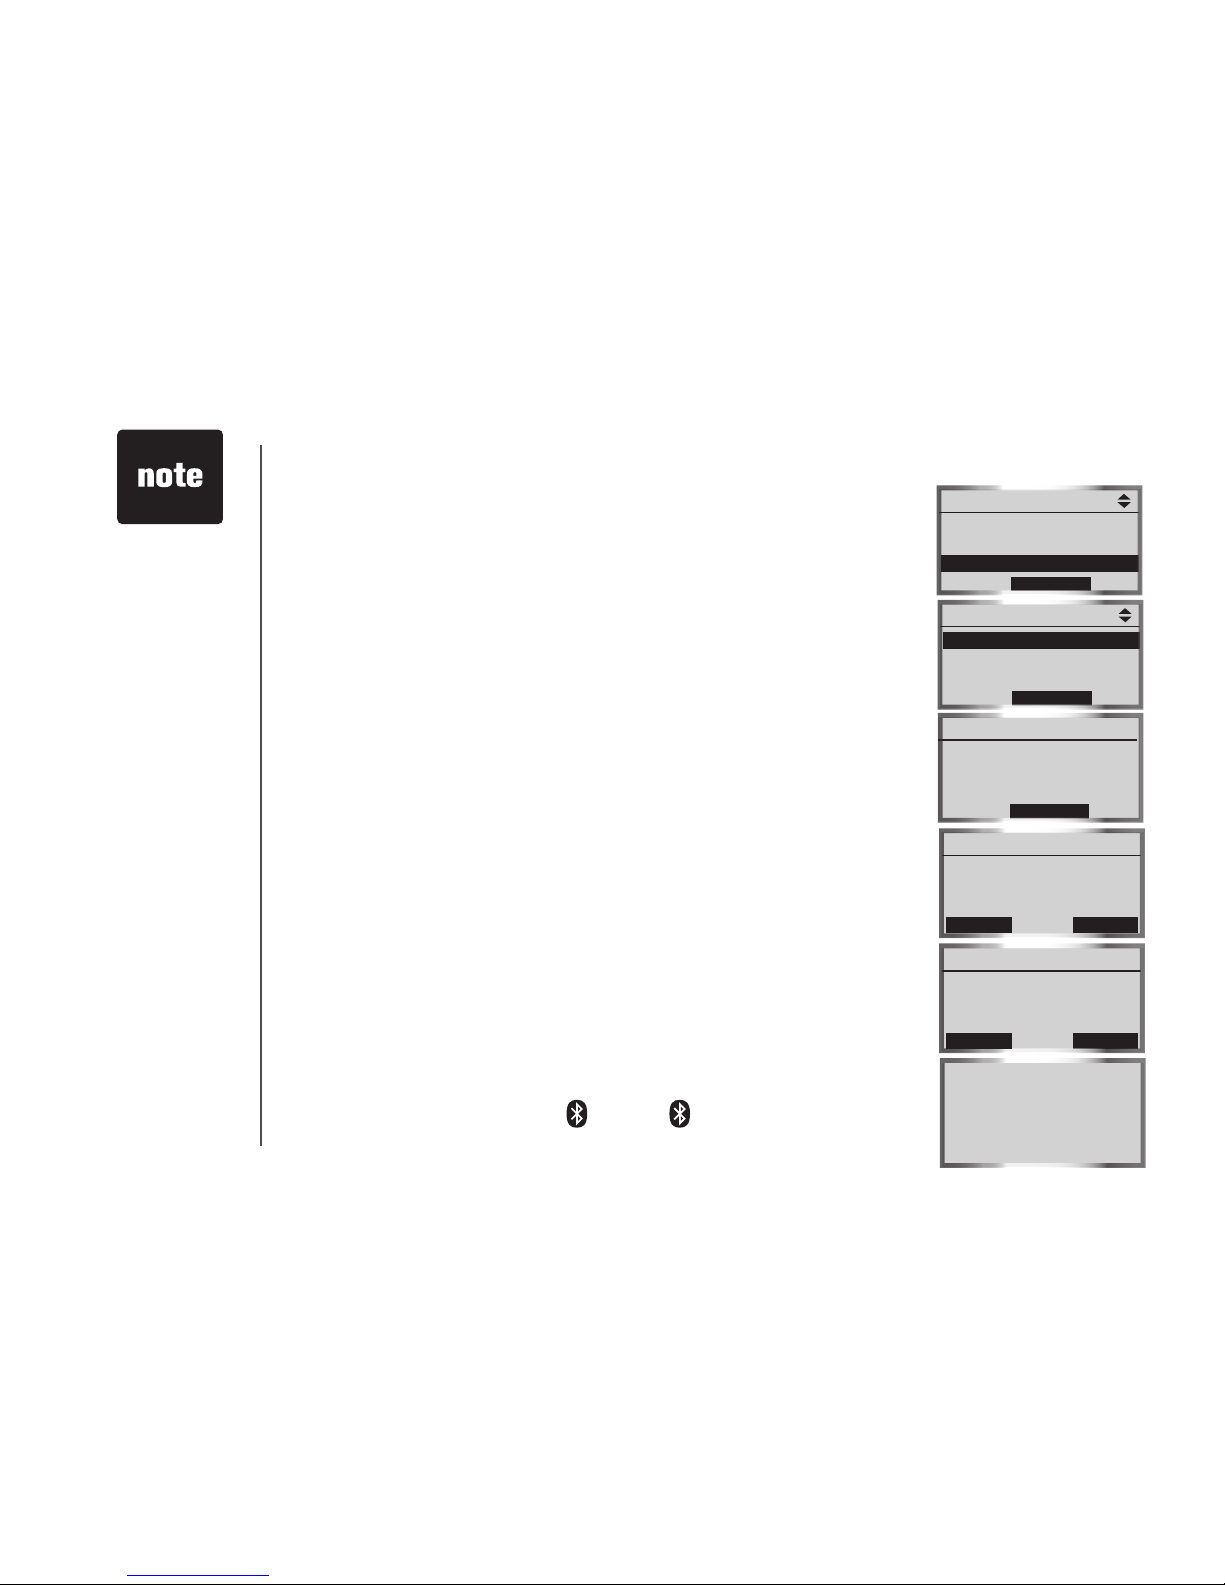
1. Place the unregistered handset in the telephone base.
2. Press the MENU softkey on the telephone base while in idle mode.
3. Press the UP and DOWN Navkeys to highlight Register Handset, then
press the SELECT softkey.
Registering Handset will appear on the telephone base display.
Registration in progress... will appear on the handset display.
The registration process may take up to 90 seconds to complete.
When the registration process is complete, the telephone base and handset
will generate a conrmation tone. The newly registered handset will be
assigned the next handset registration number. For instance, if you already
have one registered handset, HANDSET 1, the next registered handset will
be HANDSET 2.
•
•
•
12:00AM
Place in
Charger
12:00AM
Register handset:
Press MENU in the
base. Find 'Register
Handset' in the Main
Menu. Press SELECT.
12:00AM
Registration
in progress...
Getting started
Page 12
www.vtechphones.com
8
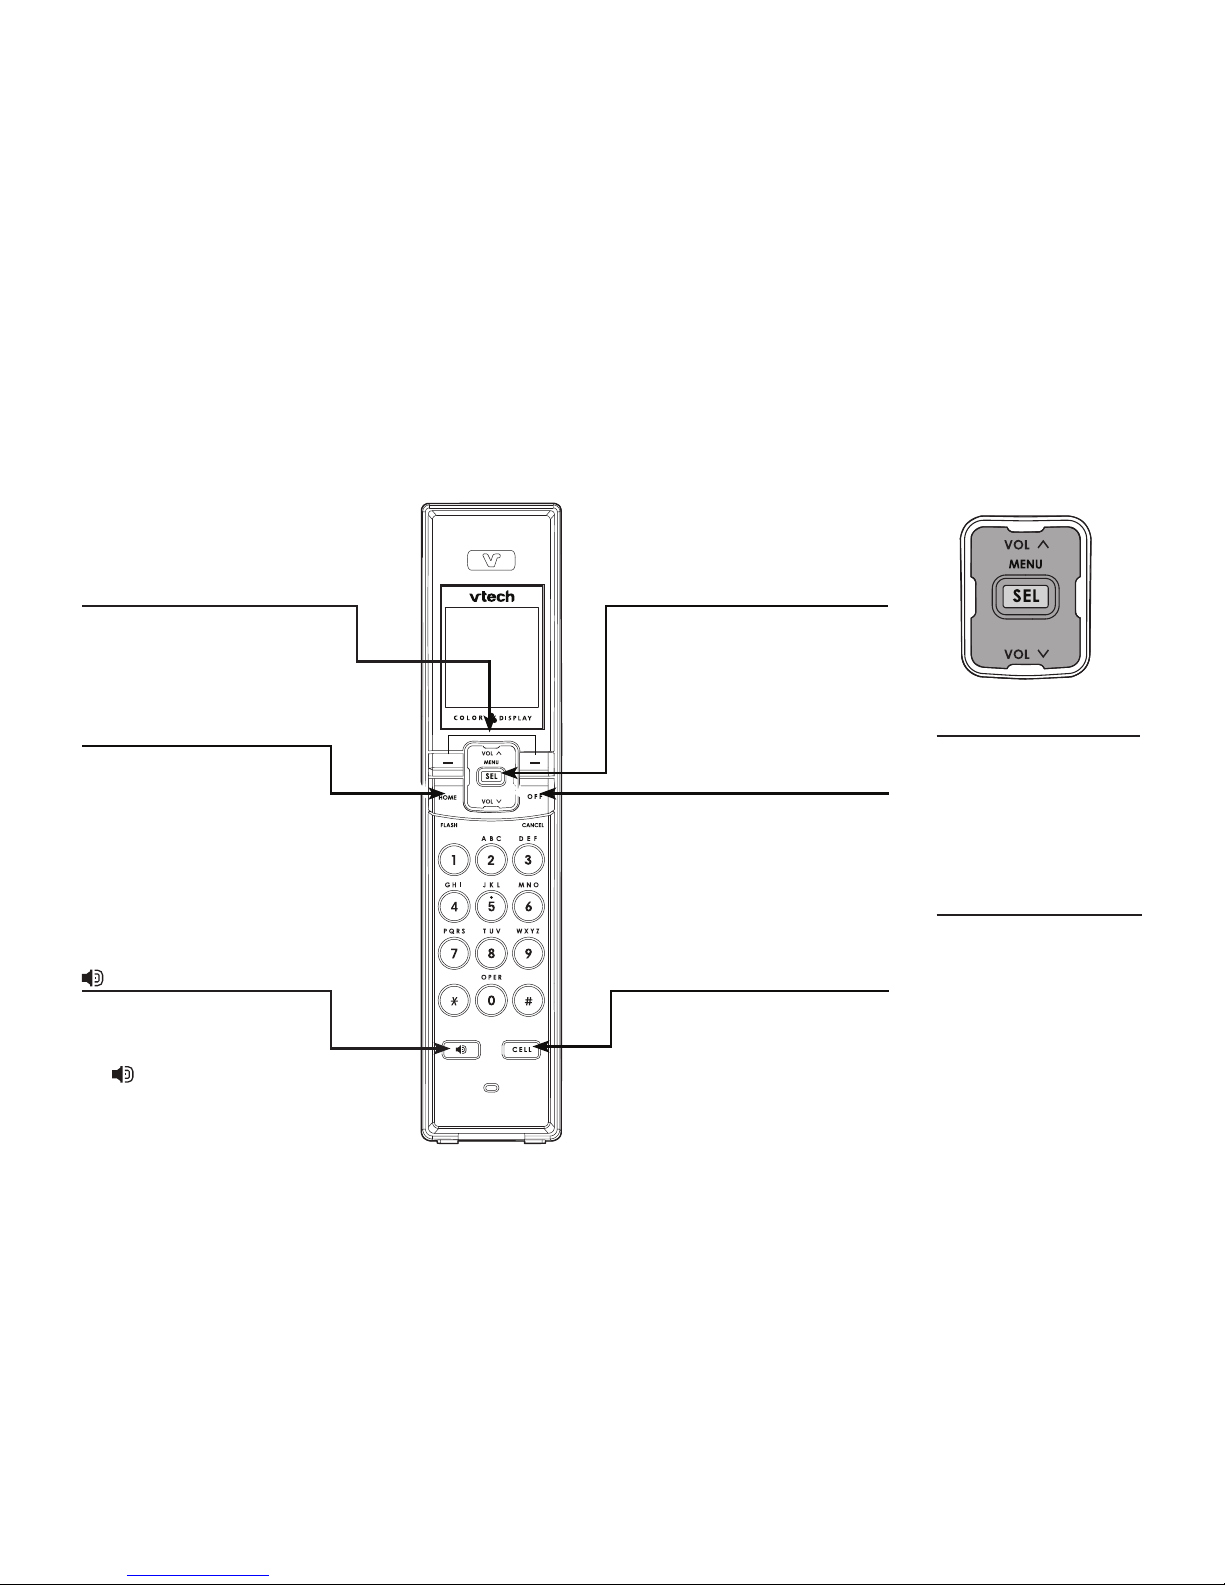
Softkeys (2)
Press to select a menu item
displayed just above the key.
HOME/FLASH
Press to make or answer a
home call. Flashes rapidlyFlashes rapidly rapidly
when there is an incoming
home call. Flashes slowly when
a home call is on hold. During a
home call, press to receive an
incoming call if call waiting is
activated (page 61).
(speakerphone)
Press to activate the
handset speakerphone. The
speakerphone is on when
the is lit. Press to resume
normal handset use.
MENU/SEL
Press to enter the main menu
(page 12). Press to select,
save, or set a desired setting.
OFF/CANCEL
During a HOME or CELLULAR
line call, press to end the call.
While in a menu, press to
cancel an operation, back up
to the previous menu, or exit
the menu display.
CELL
Press to make or answer a
cellular call.
Flashes rapidly when there is
an incoming celullar call.
Flashes slowly when a
cellular call is on hold.
Getting started
Handset layout
Navkeys
Press the UP, DOWN,
LEFT or RIGHT Navkeys
to navigate through the
menus, highlight items,
and change settings.
Quick launch keys
When in idle mode, press
one of the Navkeys to
launch a handset feature:
• Voulume up (UP)
• Volume down (DOWN)
• Intercom (LEFT)
• Messages (RIGHT)
Page 13

www.vtechphones.com
9
Getting started
Basic operation
Getting started
Telephone base layout
Answering system keys and Navkeys (in brackets)
When in idle mode, press the answering system keys to operate the answering system. When in a menu, press the UP,
DOWN, LEFT or RIGHT Navkeys to navigate through the menus, highlight items, and change settings.
VOL (UP) Press to increase speakerphone or headset volume.
PLAY/SKIP (RIGHT) Press once to play the messages and press again to skip to the next message.
REPEAT (LEFT) Press once to repeat the message currently playing. Press twice
to listen to the previous message.
VOL (DOWN) Press to decrease speakerphone or headset volume.
HOME
Press to make or answer a home call using the speakerphone.
On steady when in use.
Flashes rapidly when there is an incoming home call.
Flashes slowly when a home call is on hold.
CELL
Press to make or answer
a cellular call using the
speakerphone.
On steady when in use.
Flashes rapidly when there
is an incoming cellular call.
Flashes slowly when a cellular
call is on hold.
Softkeys (3)
Press to select a menu
item displayed just
above the key.
CANCEL
Press to cancel an operation and/or return to a
previous menu.
Press and hold to return to the idle screen.
Message light
Flashes when there are answering
systems messages.
Page 14

www.vtechphones.com
10
Handset status icons
Getting started
12:00AM
1
2
1
2
1
2
Time - indicates the handset time.
New answering system message - alternates with the time, when you have a new answering system
message.
New voice mail message - alternates with the time when you have a new voice mail message.
HOME line - on steady when the HOME line is in use. Flashes slowly when a HOME call is on hold.
Flashes rapidly when there is an incoming HOME call.
CELL (cell phones 1 or 2) - depending on which cell phone is active, on steady when the CELL line is in
use. Flashes slowly when a CELL call is on hold. Flashes rapidly when there is an incoming CELL call.
Bluetooth Active Devices - the telephone base is searching for the Bluetooth device(s) on the Active
Devices list (page 26).
Connected Active Devices - indicates that the Bluetooth device 1 and/or 2 are connected and on the
Active Devices list. On steady means that the device is connected. Flashes when it is in the process of
connecting to the device.
Disconnected Active Devices - a line through the device number (1 and/or 2) indicates the device is
disconnected from the telephone base.
Wireless Bluetooth headset -
on steady when a Bluetooth headset is in use on the HOME line.
Flashes when a connected Bluetooth headset is available to answer an incoming HOME call.
Ringer off - on steady when the HOME, CELL1, and CELL2 ringers are off. Flashes when one or two
of the HOME, CELL1, or CELL2 ringers are off.
Battery status - shows the approximate battery charge level. Flashes red when the battery is low and
animates when charging.
Page 15

www.vtechphones.com
11
Getting started
Basic operation
Telephone base status icons
Getting started
1
2
ANS. OFF
1
2
1
2
Time - indicates the telephone base time.
Answering system off - indicates that the answering system will not answer incoming calls (page 51).
HOME line - on steady when the HOME line is in use. Flashes slowly when a HOME call is on hold.
Flashes rapidly when there is an incoming HOME call.
CELL (cell phones 1 or 2) - depending on which cell phone is active, on steady when the CELL line is in
use. Flashes slowly when a CELL call is on hold. Flashes rapidly when there is an incoming CELL call.
Bluetooth Active Devices - the telephone base is searching for the Bluetooth device(s) on the Active
Devices list (page 26).
Connected Active Devices - indicates that the Bluetooth device 1 and/or 2 are connected and on the
Active Devices list. On steady means that the device is connected. Flashes when it is in the process of
connecting to the device.
Disconnected Active Devices - a line through the device number (1 and/or 2) indicates that the device
is disconnected from the telephone base.
Wireless Bluetooth headset -
on steady when a Bluetooth headset is in use on the HOME line.
Flashes when a headset is available to answer an incoming HOME call.
Ringer off - on steady when the HOME, CELL1 and CELL2 ringers are off. Flashes when one or two
of the HOME, CELL1, or CELL2 ringers are off.
Battery status (optional, see page 4) - On steady when fully charged. Animates when charging.
Flashes in the event of a power failure when the spare battery is discharging.
12:00AM
Page 16
www.vtechphones.com
12
Getting started
Handset main menu
To enter the main menu:
1. Press MENU/SEL when the handset is in the idle mode.
2. Press the UP and DOWN Navkeys to select a handset feature menu, then press MENU/SEL to enter that menu.
To return to the idle mode, press and hold OFF/CANCEL.
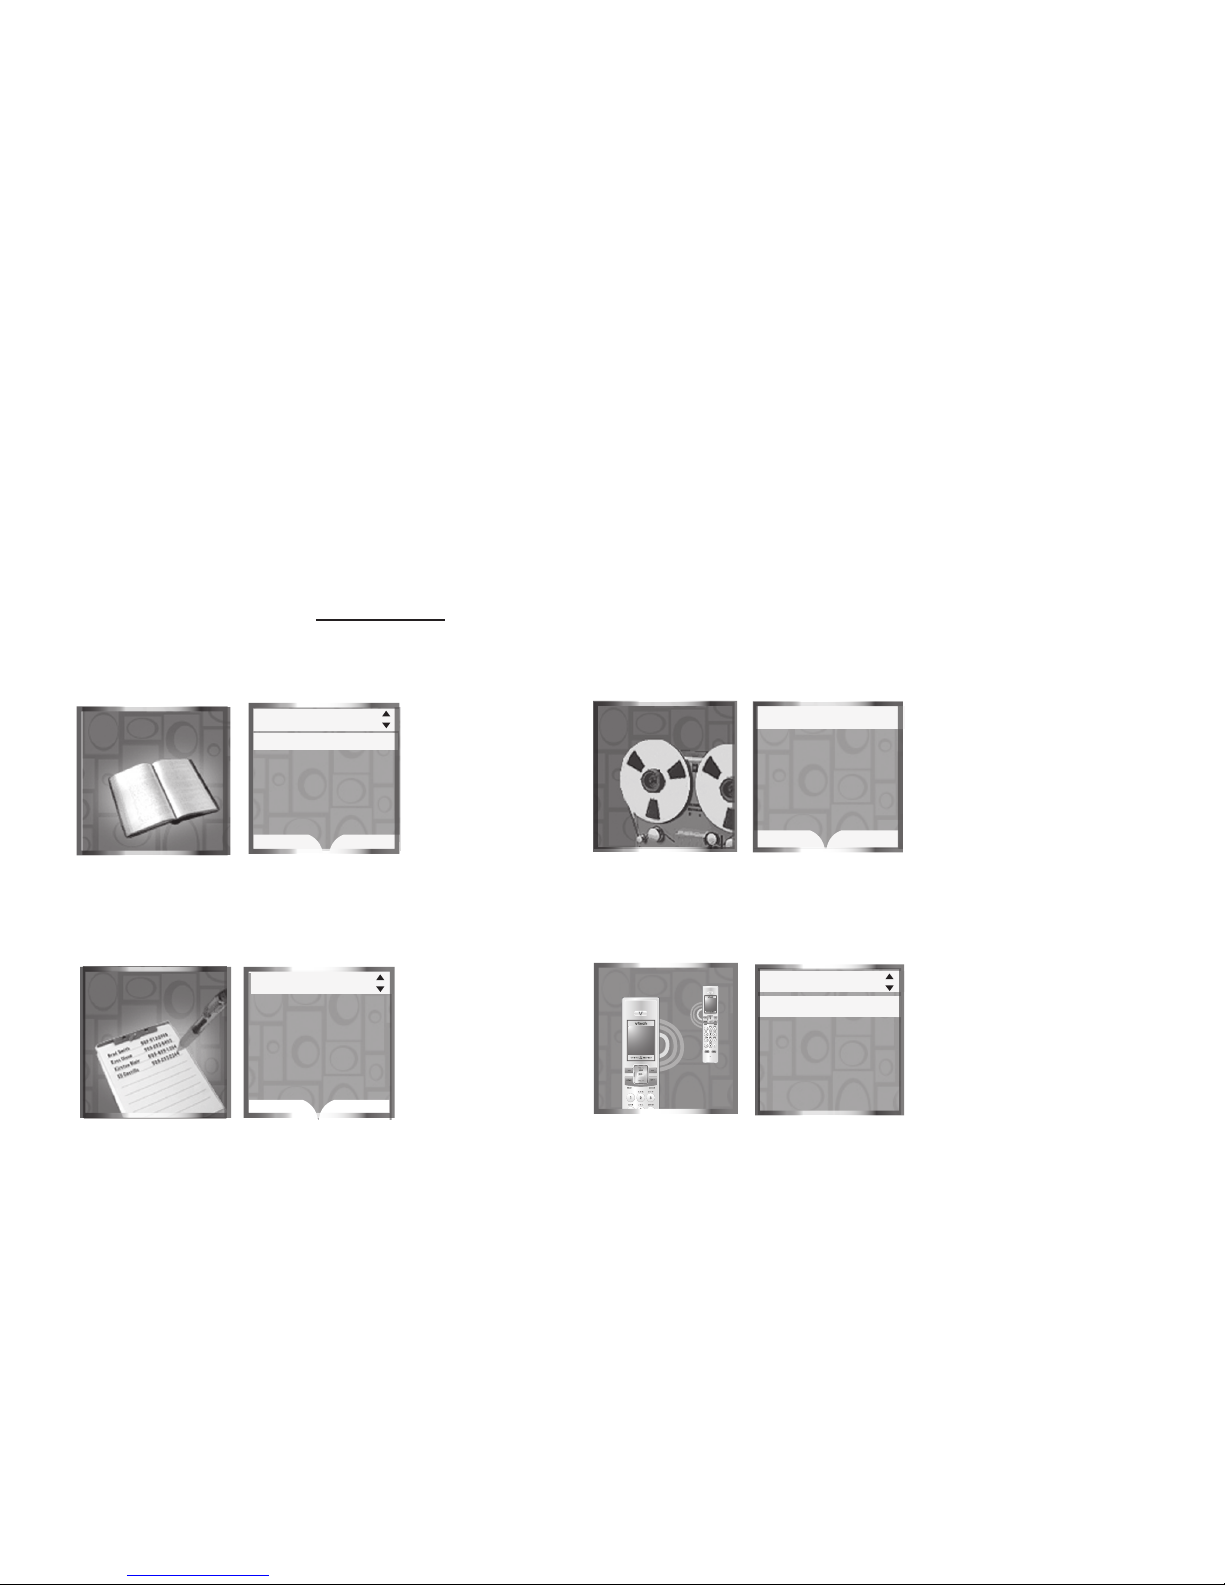
page 80
Messages allows you to review your
answering system messages.
page 91
Messages
PLAY
DEL ALL
0 New Messages
10 Old Messages
Messages
page 71
Phone Book allows you to store and
search for names and numbers.
Call Log allows you to review your most
recent incoming calls.
Call Log
Phone Book
Phone Book 1
FIND
NEW
Alice
Amy
Chris
Deborah
Jenny
Kristen
Call Log
OPTIONS
DELETE
Charlie Johns on
1-888-88 3-244 5
Jan 9 10: 39AM
HOME
Intercom allows you to page the telephone
base and other handsets.
page 68
Intercom
Intercom
Intercom
Global Page
BASE
HANDSET 1
Page 17
www.vtechphones.com
13
Getting started
Basic operation
Getting started
page 40
page 39
Pictures allows you to set the wallpaper.
Pictures
Settings allows you to change your
handset settings.
page 30
Settings
Settings
Animations allows you to choose
animated wallpapers.
page 35
Ringers
Ringers allows you to setup ringers for the
HOME and CELL lines.
Handset main menu (continued)
Settings
Set Time
Edit Handset Name
Show Handset Name
Keypad Tone
Language
Ringer for CELL 1
Ringer for CELL 2
Record New Ringer
Ringer for HOME
Ringers
SET
Pictures
Animations
Animations
Animations
SET
Page 18
www.vtechphones.com
14
Telephone base main menu
To enter the main menu:
1. Press the MENU softkey when the telephone base is in the idle mode.
2. Press the UP and DOWN Navkeys to highlight a menu item, then press the SELECT softkey to enter that menu.
To return to the idle mode, press and hold CANCEL.
Main Menu allows you to review
and setup features and settings.
Phone Book allows you to
store and search for names and
numbers.
page 71
page 71
Call Log allows you to review your
most recent incoming calls.
page 80
Getting started
Main Menu
Phone Book
Call Log
Messages
SELECT
Phone Book 1
John Smith
Mary Brown
FIND
NEW
SELECT
Call Log
VTECH
1-800-595-9511
JUL 4 11:49PM
HOME
OPTIONS
DELETE
Messages allows you to review your
answering system messages.
Intercom allows you to page the
telephone base and other handsets.
Main Menu
Phone Book
Call Log
Messages
SELECT
Main Menu
Messages
Voice Mail
Intercom
SELECT
Main Menu
CallLog
Messages
Voice Mail
SELECT
Voice Mail allows you to access
your voice mail messages sent
from your telephone company.
page 70
page 91 page 68
Page 19
www.vtechphones.com
15
Getting started
Basic operation
Bluetooth allows you to set up and
manage your Bluetooth device(s).
Settings allows you to change the
telephone base settings.
page 20
page 41
Ringers allows you to setup ringers
for the HOME and CELL lines.
Answering System allows you to
review and change the answering
system settings.
Register Handset allows you to
register a new handset LS5105
(purchased separately) with the
telephone base.
page 50
page 7
page 47
Getting started
Telephone base main menu (continued)
Bluetoohth
Set up Cellular
Set up Headset
Active Devices
SELECT
Settings
Set Date
Set Time
Keypad Tone
SELECT
Main Menu
Settings
Ringers
Register Handset
SELECT
Ringers
Ringer for HOME
Ringer for CELL 1
Ringer for CELL 2
SELECT
Answering System
Answer On/Off
Announcement
Record Memo
SELECT
Page 20

www.vtechphones.com
16
Introducing Bluetooth
Your new LS5145 telephone system with Bluetooth wireless technology has the following features:
Pair up to eight Bluetooth enabled cell phones and/or headsets with the telephone base.
Connect a maximum of two cell phones to make and receive CELL calls. Only one cell phone can
be active on a call at a time.
Connect a Bluetooth enabled headset for making and receiving HOME calls.
Conference CELL and HOME calls.
Make and receive calls using your cell phone plan while utilizing the ease and comfort of your
home telephone system.
IMPORTANT INFORMATION
Refer to your cell phone's or headset's user's manual for more information about its Bluetooth function.
Operate your Bluetooth device within 12 feet from the telephone base. Bluetooth technology
operates best within a short range. Keeping within 12 feet will maintain the connection quality of
the Bluetooth device with the telephone base.
Make sure that your cell phone has sufcient signal strength. You may need to move the cell phone
and telephone base to a location where the cell signal strength may be stronger.
Charge your Bluetooth cell phone while it is connected to the telephone base, as your cell phone's
battery will discharge faster while it is connected wirelessly to the telephone base.
Monitor your cell phone's usage, as airtime is deducted from your cellular plan for the duration
of CELL calls.
Refer to the Bluetooth setup section (page 19) to learn how to set up and manage your Bluetooth
device(s). Refer to the Telephone operation section (page 57) on how to operate your Bluetooth
devices with your new LS5145 telephone system with Bluetooth wireless technology. Refer to the
Troubleshooting section (page 98) if you experience difculty using the telephone system.
•
•
•
•
•
•
•
•
•
•
Bluetooth
Page 21

www.vtechphones.com
17
Bluetooth
Glossary of terms
Below are some terms used in this user’s manual to help you become familiar with using your Bluetooth
devices and your new LS5415 telephone system.
Active Devices list - A maximum of two paired devices (two cell phones or one cell phone and one
headset) on the Active Devices list can be connected to the telephone base, but only one cell phone
or headset can be on a call at a time.
Bluetooth cell phone - Refers to a mobile Bluetooth enabled cell telephone.
CELL line - The communications service provided through your Bluetooth enabled cell telephone.
Connected - A Bluetooth device (cell phone or headset) can only be used when it is connected to
the telephone base. When a Bluetooth device is connected to the telephone base and active on the
Active Devices list, it will be ready for use.
Disconnected - An X in front of a device in the Active Devices list will appear and a line will appear
over devices 1 and/or 2 in the icon status bar when a Bluetooth device is disconnected from the
telephone base.
Discoverable mode - Before a Bluetooth device can be paired, it must be set in this mode. When
pairing your cell phone, the telephone base will be set in this mode. When pairing a headset, the
headset must be set in this mode. Depending on the manufacturer, this mode is sometimes referred
to as Find Me or Visibility.
HOME line - Your conventional telephone land line.
Paired Devices list - Once Bluetooth devices have been paired with the telephone base, they will
appear in the Paired Devices list. A maximum of eight devices can be paired with the telephone
base, but only two can be on the Active Devices list.
Pairing - This refers to the process of Bluetooth devices registering device information with each other.
The telephone base must be paired with a Bluetooth enabled cell phone or headset before the Bluetooth
device(s) can be used. Depending on the manufacturer, this is also referred to as Bonding.
PIN - By default, the PIN is 0000 for the telephone base and for most Bluetooth devices. PIN information
must be exchanged between Bluetooth devices before they can be used. This is also known as a
Passkey or Passcode.
Bluetooth
Page 22

www.vtechphones.com
18
Before using your
Bluetooth enabled
device(s) with the
telephone base,
make sure that
your Bluetooth
device(s) are not
connected to any
other device(s).
•
Bluetooth at glance
The telephone base allows you to pair up to eight Bluetooth devices. You can have a maximum of two
paired devices connected at anytime (two cell phones, or one cell phone and one headset), but only
one cell phone or headset can be on a call at a time.
Once you have paired a device with the telephone base, the pairing information will be stored on
the Paired Devices list (page 23). To use a paired device, it must be connected and on the Active
Devices list (page 26).
When a device on the Active Devices list becomes disconnected, the Auto Connect function will
automatically search for and re-connect to that device. If the telephone base is unable to connect to
the device, the Connect to Device screen will appear on the display. Pressing the YES softkey allows
the Auto Connect function to continue searching for the device. Pressing the NO softkey ends the
search, and the device will remain disconnected.
To learn more about managing your Bluetooth device(s), see the Managing your Devices section
(page 23). To help you setup your Bluetooth device(s), please follow the instructions in each section
and refer to the Troubleshooting section for help (page 98).
IMPORTANT INFORMATION
Once you pair a device with the telephone base, you do not have to repeat the pairing procedure
again, unless you delete the device from the Paired Devices list (page 23).
Press CANCEL on the telephone base at anytime to return to a previous menu.
When adding, removing, or replacing a Bluetooth on the Active Devices list, all connected devices
will temporarily disconnect until the action is complete. It may take up to two minutes to reconnect.
•
•
•
Page 23
www.vtechphones.com
19
Bluetooth
Bluetooth Setup
To use a Bluetooth enabled cell phone or headset with your LS5145, you
must rst pair and connect your Bluetooth device(s) with the telephone base.
In the Bluetooth Setup section, you can setup a cell phone (page 20) and
headset (page 21). In Managing your Devices section, you can view and
modify the information about your Bluetooth device(s) (page 23).
To enter the Bluetooth menu:
1. Press the MENU softkey on the telephone base while in idle mode.
2. Press the UP and DOWN Navkeys to highlight Bluetooth, then press the
SELECT softkey. You can then select:
•
Set up Cellular - set up a Bluetooth enabled cell phone (page 20).
• Set up Headset - set up a Bluetooth enabled headset (page 21).
• Active Devices - replace, remove, view the current status of, and
connect to your connected Bluetooth device(s) (page 26).
• Paired Devices - rename, delete, and view information about
your paired devices (page 23).
• Change PIN - change the PIN of the telephone base (page 29).
While in the Bluetooth menu:
Press CANCEL to return to a previous menu.
Press and hold CANCEL on the telephone base to return to the idle screen.
See the Troubleshooting section on page 98 if you experience difculty
pairing or connecting your Bluetooth device(s).
•
•
To learn how
to operate your
Bluetooth devices
with the telephone
base, see the
Telephone
operation section
(page 57).
•
Bluetooth
Main Menu
Phone Book
Call Log
Messages
SELECT
Main Menu
Voice Mail
Intercom
Bluetooth
SELECT
Bluetooth
Set up Cellular
Set up Headse
Active Devices
SELECT
Page 24
www.vtechphones.com
20
Set up cellular
Before you begin, make sure that your Bluetooth enabled cell phone is not
connected to any other Bluetooth device. Refer to your cell phone user's
manual to learn how to search for or add new Bluetooth devices.
To pair and connect a cell phone:
1. Press the MENU softkey on the telephone base while in idle mode.
2. Press the UP and DOWN Navkeys to highlight Bluetooth, then press
the SELECT softkey.
3. Press the SELECT softkey to enter the Set up Cellular menu.
• If a device is already connected to the telephone base, press the
OK softkey to temporarily disconnect the device(s) and continue
the pairing process.
4. Press the NEXT softkey to set the telephone base in discoverable
mode.
5. Using your cell phone, turn on the Bluetooth feature and search for or
add new devices.
6. Once your cell phone has found the LS5145 telephone base, select it.
7. Using your cell phone, enter the PIN of the telephone base (the default
PIN is 0000) to continue the pairing process.
8. Press the YES softkey on the telephone base to connect to your cell
phone when the pairing process is complete.
• If successful, Cellular setup completed will be displayed on the
telephone base.
• If you already have two devices on the Active Devices list, press the YES
softkey to connect to your paired cell phone. You will then be prompted
to replace an existing device on the Active Devices list (page 26).
When a device is connected, the 1 and/or 2 status icons will appear
on the display.
If you have any
device(s) connected
to the telephone
base when pairing,
Connected
devices will
be temporarily
disconnected
will appear on the
display.
•
Bluetooth
Main Menu
Voice Mail
Intercom
Bluetooth
SELECT
Bluetooth
Set up Cellular
Set up Headset
Active Devices
SELECT
Set your Cellular to
search for devices,
then press NEXT
NEXT
Set up Cellular
VTech LS5145
in Discoverable Mode
PIN=0000
Set up Cellular
HELPSTOP
Pairing complete
Connect to
Cellular ?
Set up Cellular
NOYES
Cellular setup
completed
Page 25
www.vtechphones.com
21
Bluetooth
Set up headset
Before you begin, make sure that your Bluetooth enabled headset is not
connected to any other Bluetooth device. Refer to your headset's user's
manual to determine the headset's PIN and how to set your headset in
discoverable mode.
To pair and connect a headset:
1. Using the telephone base, press the MENU softkey while in idle mode.
2. Press the UP and DOWN Navkeys to highlight Bluetooth, then press
the SELECT softkey to enter the Bluetooth menu.
3. Press the SELECT softkey to enter the Set up Headset menu.
• If a device is already connected to the telephone base, press the
OK softkey to temporarily disconnect the device(s) and continue
the pairing process.
4. Using your headset, set your headset in discoverable mode.
5. Using the telephone base, press the NEXT softkey on the telephone
base to search for your headset.
6. Once the telephone base nds your headset, select it and press the
PAIR softkey. If telephone base cannot nd your headset, press the
FIND softkey to search again, and make sure that your headset is in
discoverable mode.
7. Enter the PIN of your headset, then press the DONE softkey (for most
headsets, the PIN is 0000).
If you have
any device(s)
connected to the
telephone base
when pairing,
Connected
devices will
be temporarily
disconnected
will appear on
the display.
•
Bluetooth
Main Menu
Voice Mail
Intercom
Bluetooth
SELECT
Bluetooth
Set up Cellular
Set up Headset
Active Devices
SELECT
Set your Headset in
Discoverable mode,
then press NEXT
NEXT
Set up Headset
Mary’s Headset
Headsets Found
INFOFIND
PAIR
Enter PIN:
0000
Set up Headset
ERASE
DONE
HELP
Page 26

www.vtechphones.com
22
Set up headset (continued)
8. When the pairing is complete, press the YES softkey to connect to
your headset.
• If successful, Headset setup completed will appear on the
telephone base display.
• If you have already one headset device on the Active Devices list,
press the YES softkey to connect to your paired headset. You will
then be prompted to replace the existing headset on the Active
Devices list (page 26).
When a device is connected, the 1 and/or 2 status icons will appear
on the display.
Headset setup
completed
Page 27

www.vtechphones.com
23
Bluetooth
Managing your devices
Once you have paired a Bluetooth device, you can rename, delete, and view
the device's information in the Paired Devices list.
Once a Bluetooth device is connected to the telephone base, you can replace
or remove the device from the Active Devices list (page 26), and view the
device's status information (page 26).
Paired devices
All paired devices are stored on the Paired Devices list. Up to eight devices
(any combination of cell phones and headsets) can be paired with the
telephone base.
If a device is successfully paired, the icon (for cell phone) or (for headset)
and the name of the device will be shown on the Paired Devices list.
To use a paired
device, it must be
connected, and on
the Active Devices
list (page 26).
Only the rst 16
characters of the
device name is
shown on the
Paired Devices
list.
•
•
Done
Bluetooth
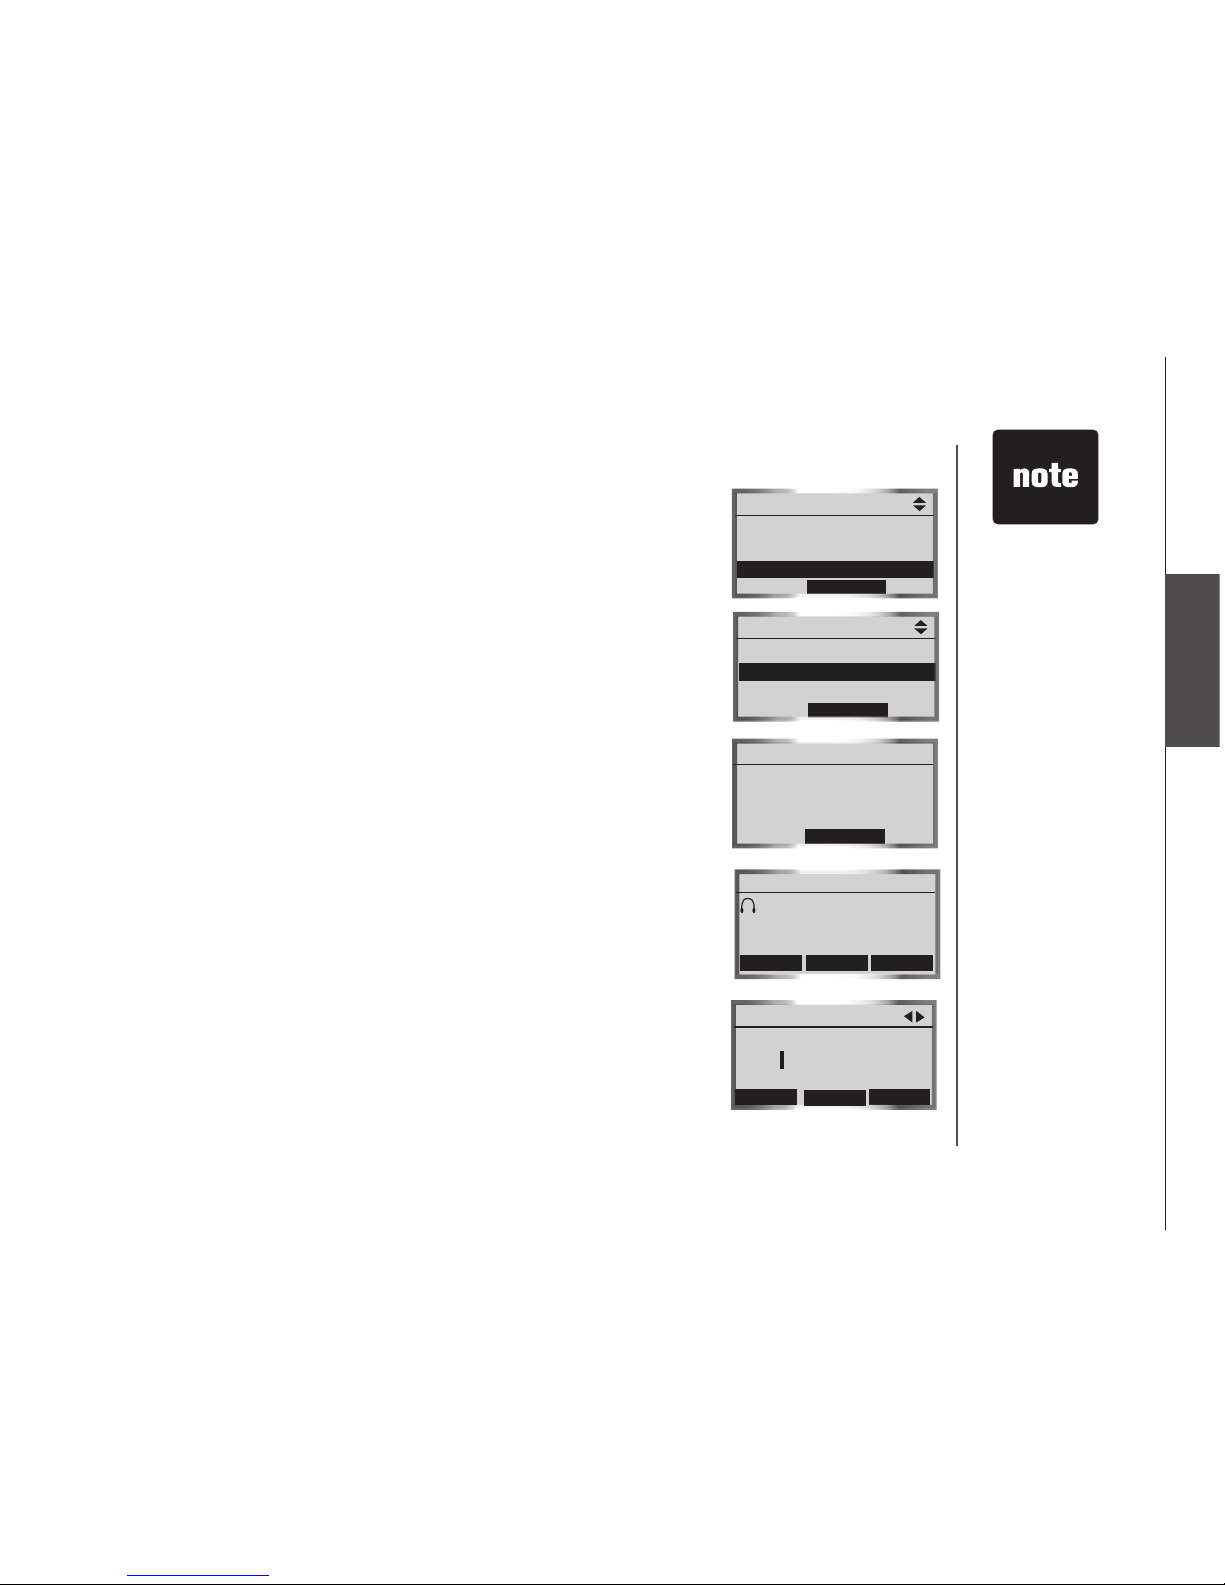
Rename a paired device
1. Press the MENU softkey on the telephone base while in idle mode.
2. Press the UP and DOWN Navkeys to highlight Bluetooth, then press the SELECT softkey to enter
the Bluetooth menu.
3. Press the UP and DOWN Navkeys to highlight Paired Devices, then press the SELECT softkey.
4. Press the UP and DOWN Navkeys to highlight the name of the device to be renamed.
5. Press the RENAME softkey to rename a device.
• Press the LEFT and RIGHT Navkeys to move the cursor left and right.
• Press the ERASE softkey to delete highlighted characters.
• Use the dial pad to enter the name (up to 16 characters). See the character chart on page 72
for more information on how to enter a name.
6. Press the DONE softkey to save the setting.
Paired Devices
DELETE
RENAME
INFO
John’s Cell
Mary’s Cell
Mary’s Headset
Rename Device
ERASE
DONE
Edit Name
John’s Cell
Page 28

www.vtechphones.com
24
Delete a paired device
If you already have the maximum of eight paired devices on the Paired
Devices list, and you want to add another device, you must delete a paired
device from the Paired Devices list.
To delete a paired device:
1. Press the MENU softkey on the telephone base while in idle mode.
2. Press the UP and DOWN Navkeys to highlight Bluetooth, then press
the SELECT softkey to enter the Bluetooth menu.
3. Press the DOWN Navkey to highlight Paired Devices, then press the
SELECT softkey.
4. Press the UP and DOWN Navkeys to highlight the name of the device
to delete.
5. Press the DELETE softkey.
6. Press the SELECT softkey to delete the selected device. Device Deleted
will appear on the display.
Bluetooth
Paired Devices
DELETE
RENAME
INFO
John’s
Mary’s Cell
Mary’s Headset
Delete Options
Delete Device
Delete All Devices
SELECT
Page 29

www.vtechphones.com
25
Bluetooth
Delete all paired devices
If you delete all paired devices, you will need to repeat the pairing process
to connect a device.
To delete all the paired devices:
1. Press the MENU softkey on the telephone base while in idle mode.
2. Press the UP and DOWN Navkeys to highlight Bluetooth, then press
the SELECT softkey to enter the Bluetooth menu.
3. Press the DOWN Navkey to highlight Paired Devices, then press the
SELECT softkey.
4. Press the DELETE softkey.
5. Press the DOWN Navkey to highlight Delete All Devices, then press
the SELECT softkey.
6. Press the YES softkey to delete all the devices in the Paired Devices list.
View device information
To view the information of a paired device:
1. Press the MENU softkey on the telephone base while in idle mode.
2. Press the UP and DOWN Navkeys to highlight Bluetooth, then press
the SELECT softkey to enter the Bluetooth menu.
3. Press the DOWN Navkey to highlight Paired Devices, then press the
SELECT softkey.
4. Press the UP and DOWN Navkeys to highlight a device, then press the
INFO softkey.
5. Press the BACK softkey to return to the Paired Devices list.
Bluetooth
Delete Options
Delete Device
Delete All Devices
SELECT
Delete Device List
NO
YES
Delete all paired
Bluetooth devices?
Paired Devices
DELETE
RENAME
INFO
John’s
Mary’s Cell
Mary’s Headset
Device Info
Cellular
John’s Cell
BLUETOOTH DEV. ADDR:
001A1A11AAAA
BACK
Page 30

www.vtechphones.com
26
Connected devices
appear on the
Active Devices
list automatically.
•
Active devices
Only devices on the Active Devices list can establish a Bluetooth connection
with the telephone base. Although two paired devices can be connected
to the telephone base, only one Bluetooth cell phone or headset can be
on a call at a time.
To enter the Active Devices list:
1. Press the MENU softkey on the telephone base while in idle mode.
2. Press the UP and DOWN Navkeys to highlight Bluetooth, then press
the SELECT softkey to enter the Bluetooth menu.
3. Press the DOWN Navkey to highlight Active Devices, then press the
SELECT softkey.
In the Active Devices list, you may see the following status symbols:
X in front of the device it indicates that it is disconnected.
in front of a device it indicates that it is connected to the telephone base.
))) in front of a device indicates that the telephone base is trying to
connect to that device.
While in the Active Devices list, you can select:
CONNECT - press the CONNECT softkey to connect to a disconnected
device.
DISCONN - press the DISCONN softkey to disconnect a device.
INFO - press the INFO softkey to view the current status and full bluetooth
device name of a device.
OPTIONS - press the OPTIONS softkey to replace or remove a device.
If you experience difculty make sure that the device is on and not connected
to any other Bluetooth device. See the Troubleshooting section for more
information (page 98).
•
•
•
•
•
•
•
Bluetooth
P
Main Menu
Voice Mail
Intercom
Bluetooth
SELECT
Bluetooth
Set up Cellular
Set up Headset
Active Devices
SELECT
Active Devices
OPTION SINFO
x 1 John’s Cell
P2
Mary’s Headset
Page 31

www.vtechphones.com
27
Bluetooth
Replace an active device
Replacing a Bluetooth device on the Active Devices list will replace an
active device with a device from the Paired Devices list.
To replace an active device:
1. Press the MENU softkey on the telephone base while in idle mode.
2. Press the UP and DOWN Navkeys to highlight Bluetooth, then press
the SELECT softkey to enter the Bluetooth menu.
3. Press the DOWN Navkey to highlight Active Devices, then press the
SELECT softkey. The screen will then display the active devices.
4. Press the UP and DOWN Navkeys to select the device to replace, then
press the OPTIONS softkey.
5. Press the SELECT softkey to replace a device. The selected device will
now be disconnected.
• If you have other paired devices, you will be prompted to select an
already paired device.
• If you do not have other paired devices, see pages 23.
6. Press the UP and DOWN Navkeys to select a device, then press the
SELECT softkey. The selected device will then replace the previous
device to the Active Devices list.
Bluetooth
Active Devices
OPTION SINFO
x 1 John’s Cell
P2
Mary’s Headset
Device Options
Replace Device
Remove Device
SELECT
Replace with:
INFOSELECT
John’s Cell
Mary’s Headset
Active Devices
OPTION SINFO
x 1 John’s Cell
P2
Mary’s Headset
Page 32

www.vtechphones.com
28
Bluetooth
Remove an active device
Removing an active device will only remove it from the Active Devices list.
To remove an active device:
1. Press the MENU softkey on the telephone base while in idle mode.
2. Press the UP and DOWN Navkeys to highlight Bluetooth, then press
the SELECT softkey to enter the Bluetooth menu.
3. Press the DOWN Navkey to highlight Active Devices, then press the
SELECT softkey. The screen will then display the active devices.
4. Press the UP and DOWN Navkeys to select the device to replace, then
press the OPTIONS softkey.
5. Press the DOWN Navkey to highlight Remove Device.
6. Press the SELECT softkey to remove the device from the
Active Devices list.
Add an active device
If you have only one active device, you can add another paired device to
the Active Devices list, however you can only have one headset on the
Active Devices list.
To add an active device:
1. Press the MENU softkey on the telephone base while in idle mode.
2. Press the UP and DOWN Navkeys to highlight Bluetooth, then press
the SELECT softkey to enter the Bluetooth menu.
3. Press the UP and DOWN Navkeys to highlight Active Devices, then
press the SELECT softkey.
4. Press the UP and DOWN Navkeys to select an empty device number,
then press the ADD softkey.
Devices on the
Active Device
list temporarily
disconnect during
this process, but
automatically
reconnect
afterwards. It
may take up to
two minutes to
reconnect.
•
Active Devices
OPTION SINFO
x 1 John’s Headset
P2
Mary’s Cell
Device Options
Replace Device
Remove Device
SELECT
Active Devices
ADD
x 1 John’s Cell
2
(empty)
Add Device:
INFOSELECT
John’s Headset
Mary’s Cell
Page 33
www.vtechphones.com
29
Bluetooth
Add an active device (continued)
5. Press the UP and DOWN Navkeys to select one of the paired devices.
6. Press the SELECT softkey. The paired device that you selected will be
added to the Active Devices list.
Change PIN (of the telephone base)
The PIN is exchanged between the telephone base (default is 0000) and
your Bluetooth device(s).
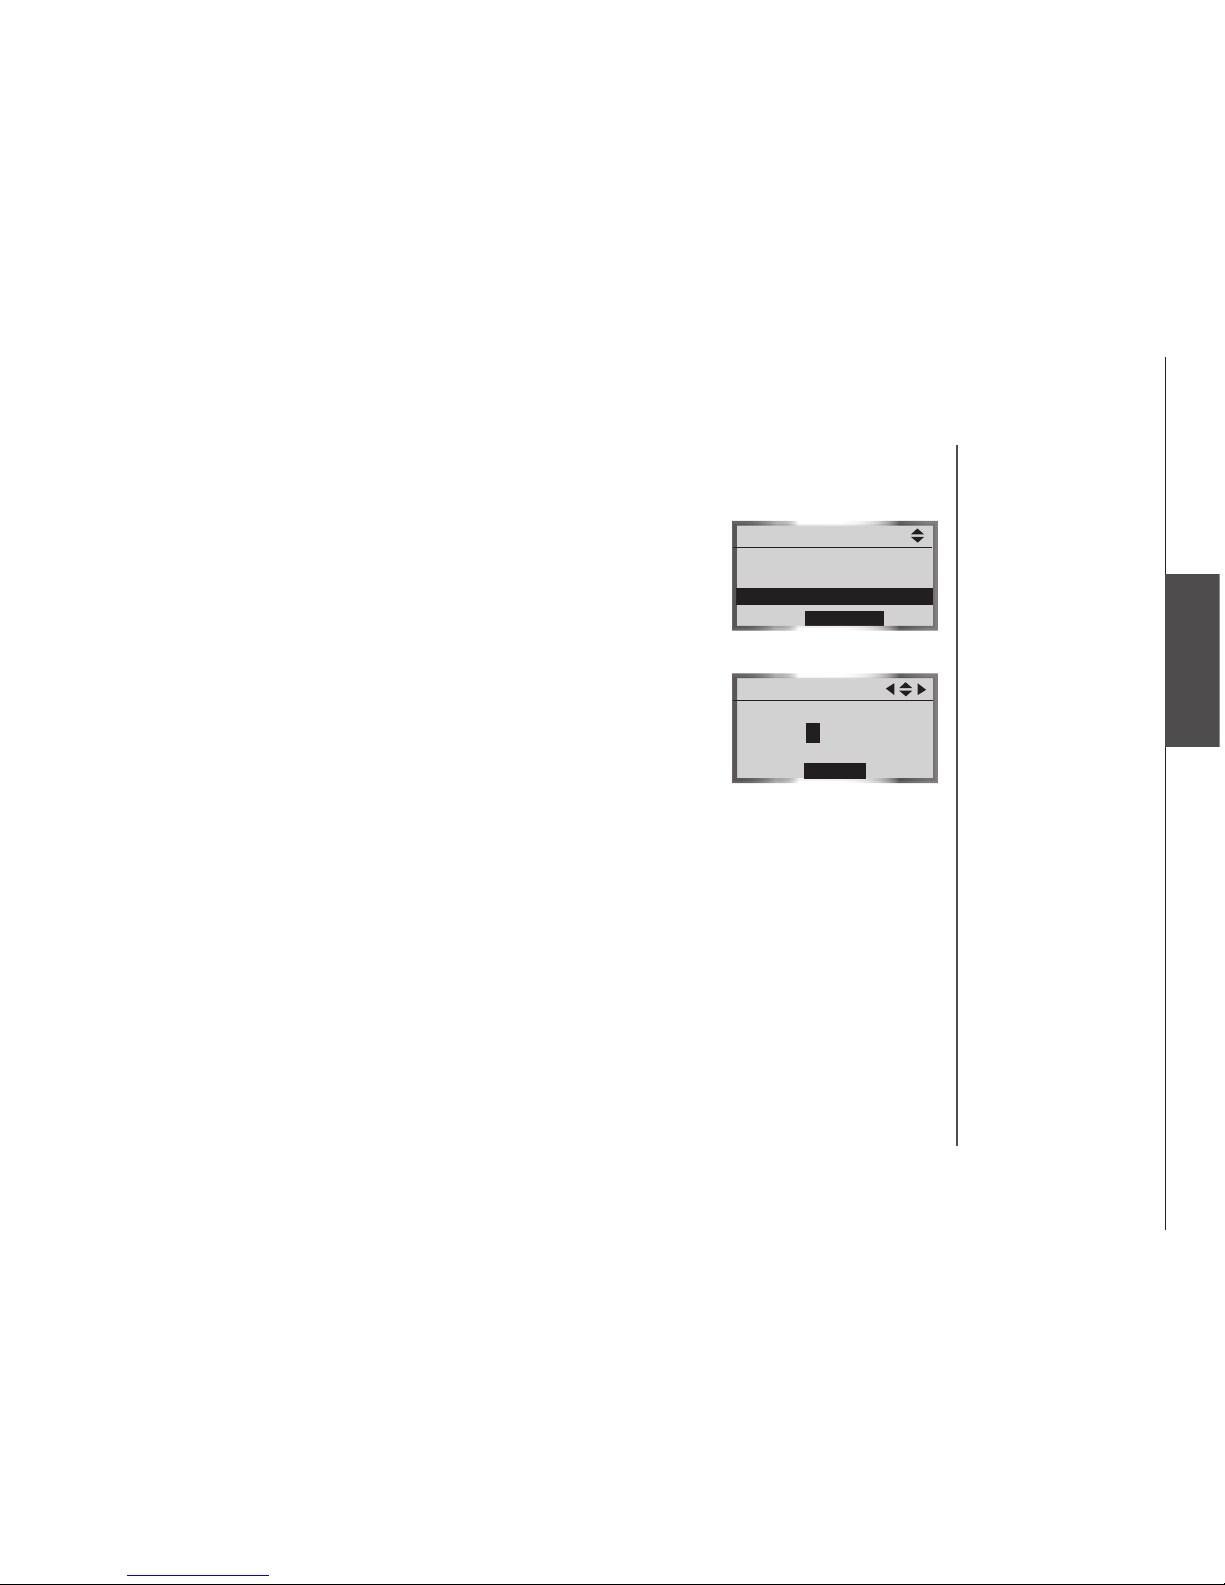
To change the PIN:
1. Press the MENU softkey on the telephone base to enter the main menu.
2. Press the UP and DOWN Navkeys to highlight Bluetooth, then press
the SELECT softkey to enter the Bluetooth menu.
3. Press the UP and DOWN Navkeys to highlight Change PIN, then press
the SELECT softkey.
4. Enter your desired four-digit code by using the:
• Dial pad keys (0-9).
• LEFT and RIGHT Navkeys to move the cursor left or right.
• UP or DOWN Navkeys to increase or decrease the number (0-9).
5. Press the SET softkey to save your setting.
Bluetooth
Bluetooth
Active Devices
Paired Devices
Change PIN
SELECT
Change PIN
SET
0000
Page 34

www.vtechphones.com
30
Handset settings
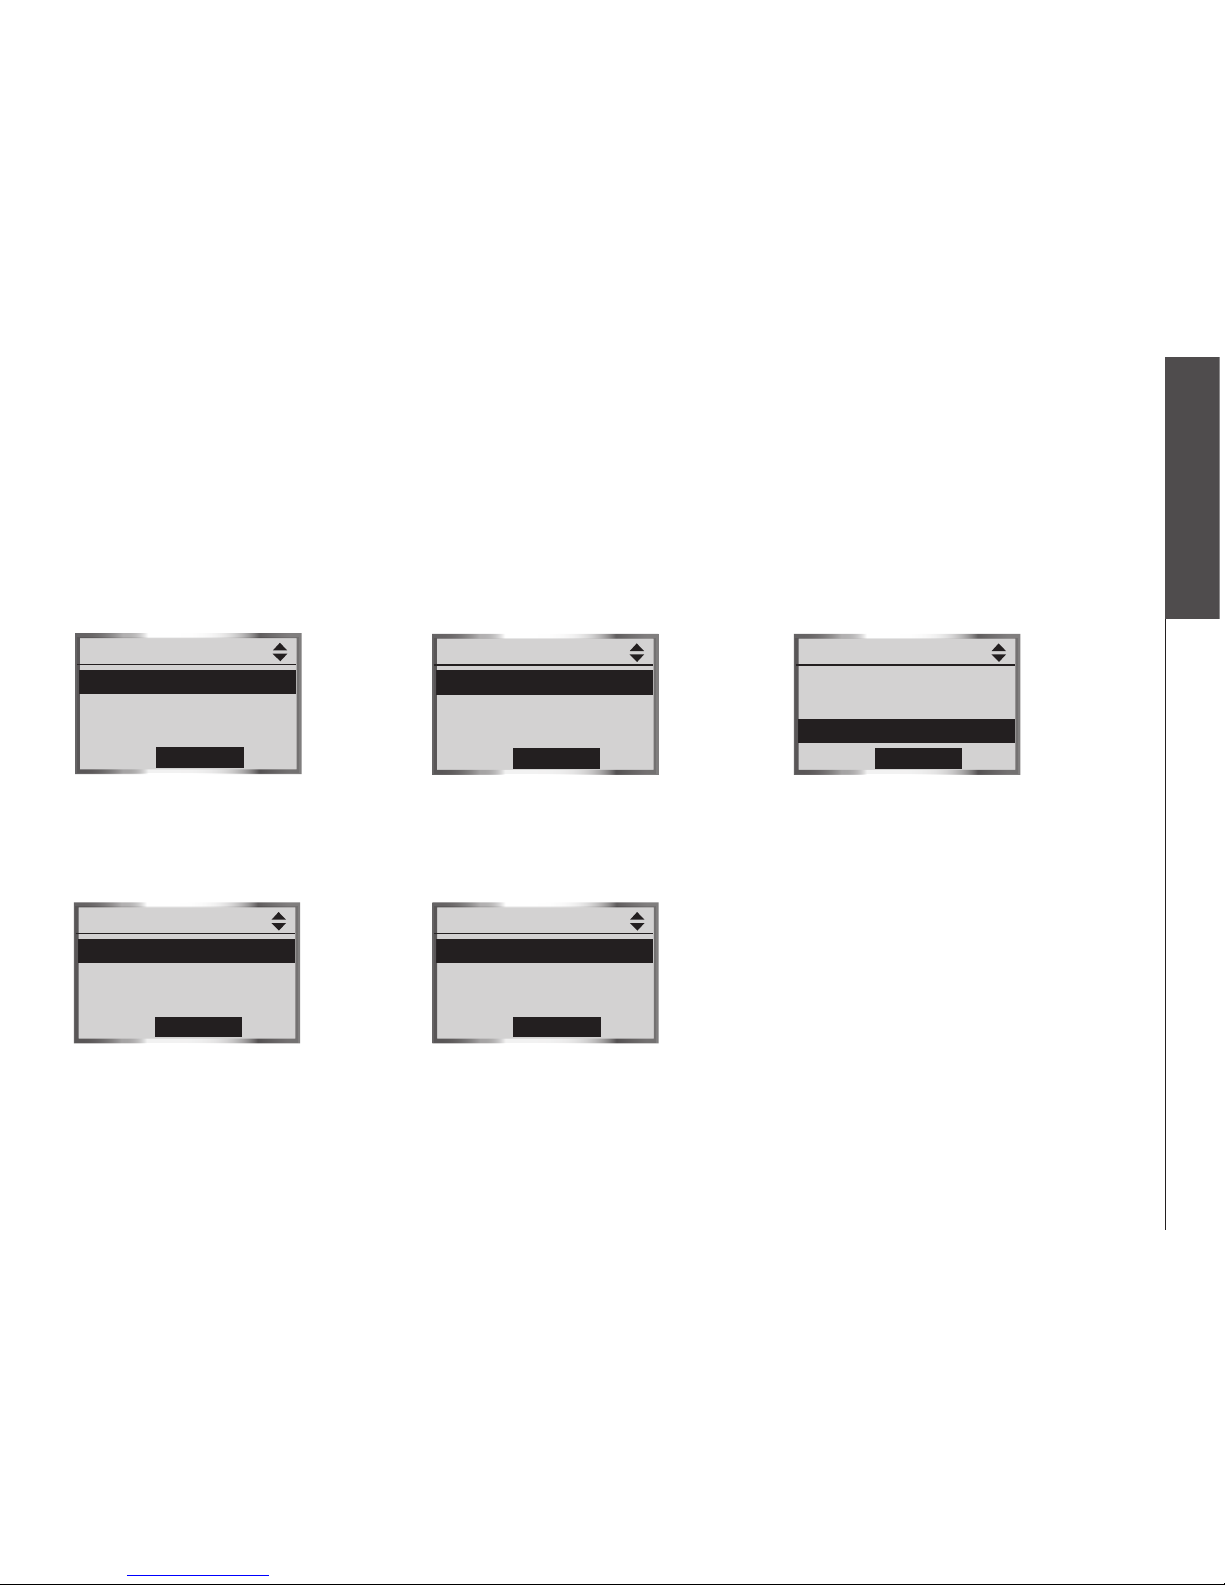
In the handset Settings menu, you can change and edit the handset settings.
You can also clear the voice mail indication, delete a handset registration
or restore the default settings.
To enter the Settings menu:
1. Press MENU/SEL in idle mode to enter the main menu.
2. Press the UP or DOWN Navkeys to select Settings, then press
MENU/SEL to enter the Settings menu. You can then select:
• Edit Handset Name - edit the handset name up to 15 characters
(page 31).
• Show Handset Name - display the handset name when in idle
mode (page 31).
• Keypad Tone - turn the keypad tone on or off (page 32).
• Language - change the handset language to English, Spanish, or
French (page 32).
• LCD Contrast - adjust the LCD screen contrast (page 33).
• Clear Voice Mail - clear the voice mail indication (page 33).
• Default Settings - restore the handset settings back to default (page 34).
• Delete Registration - delete the registration of a handset (page 34).
After a setting has been saved or set, you will hear a conrmation tone and
the display will return to the Settings menu.
While in the Settings menu:
Press OFF/CANCEL to return to a previous menu.
Press and hold OFF/CANCEL to return to idle mode.
•
•
System setup
Settings
Settings
Edit Handset Name
Show Handset Name
Keypad Tone
Language
LCD Contrast
Page 35
www.vtechphones.com
31
System setup
System setup
Edit handset name
The handset name can be up to 15 characters including spaces.
To edit the handset name:
1. Press MENU/SEL in idle mode to enter the main menu.
2. Press the UP or DOWN Navkeys to select Settings, then press
MENU/SEL to enter the Settings menu.
3. Press the DOWN Navkey to highlight Edit Handset Name, then press
MENU/SEL.
• Press the LEFT and RIGHT Navkey to move the cursor left
and right.
• Press the ERASE softkey to delete highlighted characters.
• Use the dial pad to enter up to 15 alphanumeric characters
(see page 72).
4. Press the SAVE softkey or MENU/SEL to save the setting.
Show handset name
By default, the handset name is shown on the display when in idle mode.
To change the setting:
1. Press MENU/SEL in idle mode to enter the main menu.
2. Press the UP or DOWN Navkeys to select Settings, then press
MENU/SEL to enter the Settings menu.
3. Press the UP and DOWN Navkeys to highlight Show Handset Name,
then press MENU/SEL.
4. Press the UP and DOWN Navkeys to highlight On or Off, then press the
SET softkey or MENU/SEL to save the setting.
If you change this setting to off, it will only affect that handset.
Settings
Edit Handset Name
Show Handset Name
Keypad Tone
Language
LCD Contrast
HANDSET 2
ERASE
Edit Handset Name
SAVE
Settings
Edit Handset Name
Show Handset Name
Keypad Tone
Language
LCD Contrast
If no characters
are entered for the
handset name,
Name must not
be empty will
be shown on the
display. Enter
a name for the
handset.
•
Show Handset Name
On
Off
P
SET
Page 36

www.vtechphones.com
32
Keypad tone
By default, the handset beeps when you press a key.
To change the keypad tone setting:
1. Press MENU/SEL in idle mode to enter the main menu.
2. Press the UP or DOWN Navkeys to select Settings, then press
MENU/SEL to enter the Settings menu.
3. Press the UP and DOWN Navkeys to highlight Keypad Tone, then press
MENU/SEL.
4. Press the UP and DOWN Navkeys to highlight On or Off, then press the
SET softkey or MENU/SEL to save the setting.
Language
By default, the handset language is English. You can select English, Spanish,
or French to be used in all screen displays.
To change the language setting:
1. Press MENU/SEL in idle mode to enter the main menu.
2. Press the UP or DOWN Navkeys to select Settings, then press
MENU/SEL to enter the Settings menu.
3. Press the UP and DOWN Navkeys to highlight Language, then press
MENU/SEL.
4.
Press the UP and DOWN Navkeys to highlight English, Español or
Français, then press the SET softkey or MENU/SEL to save the setting.
System setup
Keypad Tone
On
Off
P
SET
Español
Français
Language
SET
P
English
Page 37

www.vtechphones.com
33
System setup
System setup
LCD contrast
You can adjust the handset LCD screen contrast to suit different lighting
conditions.
To adjust the LCD contrast:
1. Press MENU/SEL in idle mode to enter the main menu.
2. Press the UP or DOWN Navkeys to select Settings, then press
MENU/SEL to enter the Settings menu.
3. Press the UP and DOWN Navkeys to highlight LCD Contrast, then press
MENU/SEL.
4. Press the LEFT and RIGHT or UP and DOWN Navkeys to increase and
decrease LCD contrast.
5. Press the SET softkey or MENU/SEL to save the setting.
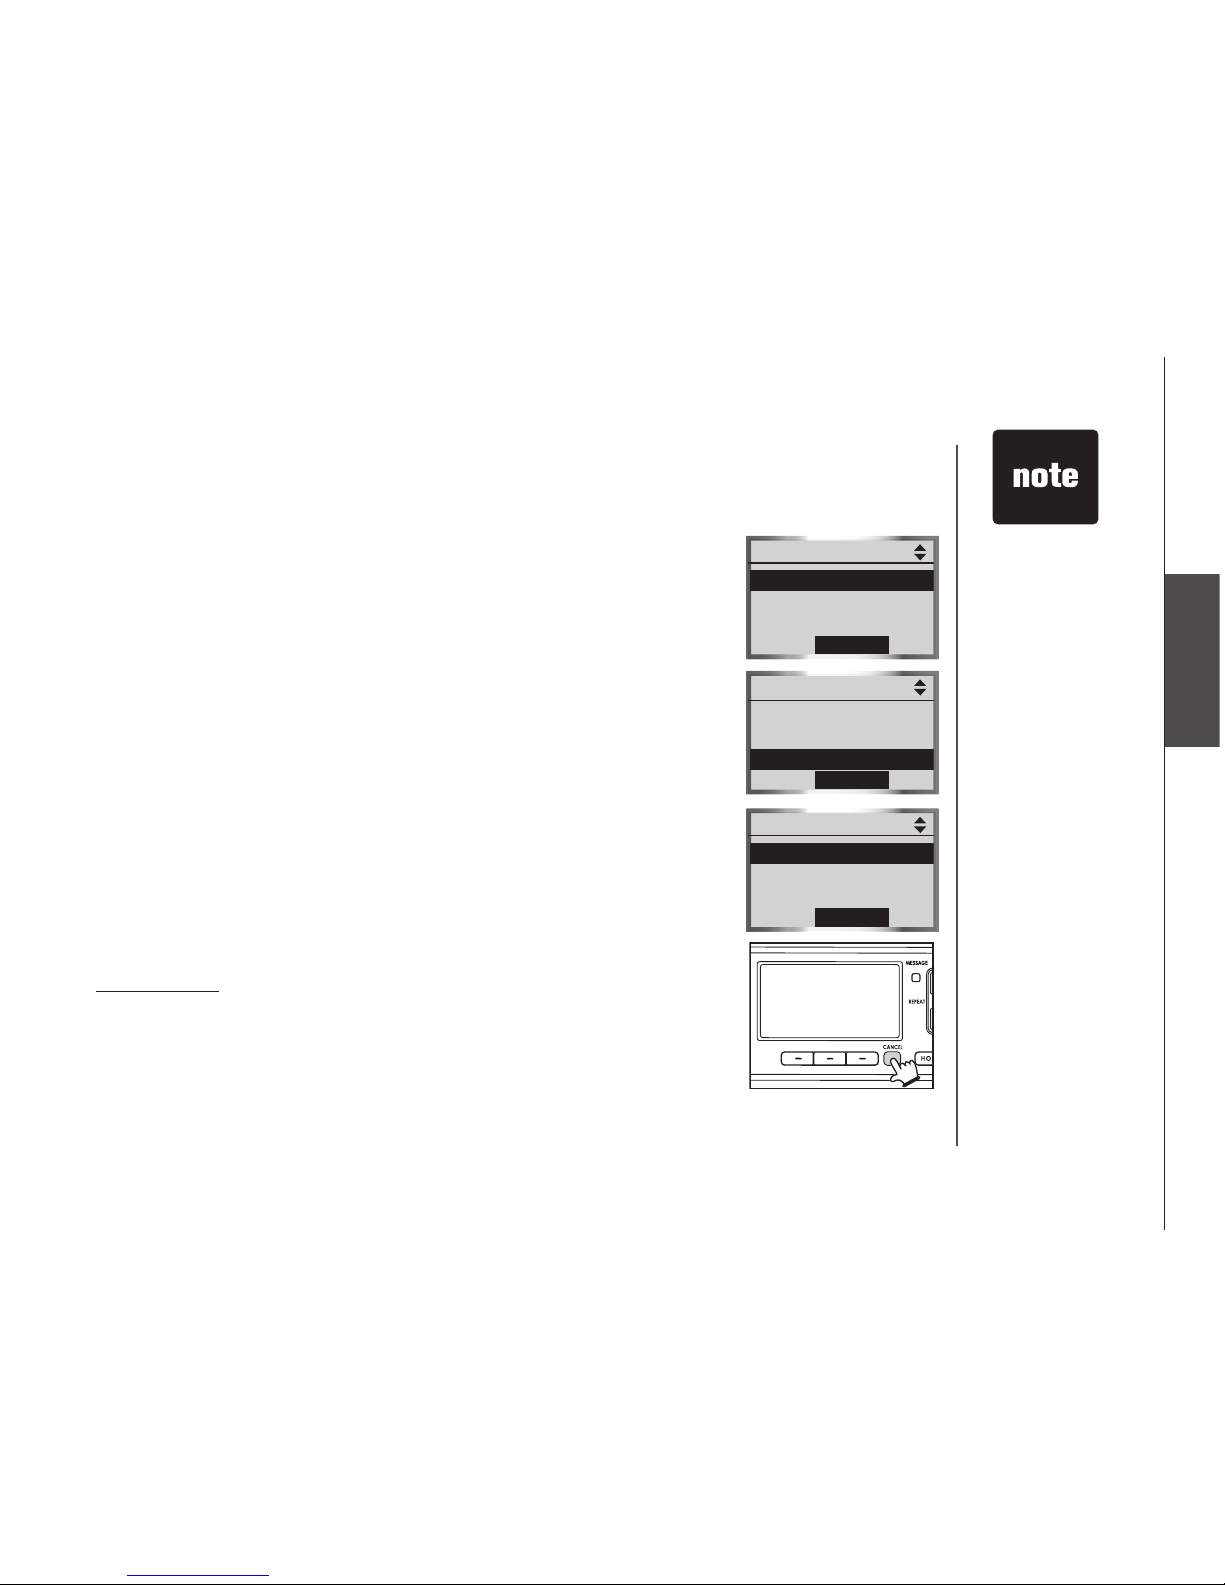
Clear voice mail
If you subscribe to voice mail service provided by the local telephone
company, and when you have new voice mail, the VOICEMAIL light on the
telephone base will ash, and New Voice Mail and the will appear on all
handset screens. If your telephone system indicates that there is new voice
mail, but you are sure that you have no new voice mail messages, you can
manually turn off the voice mail indication.
To manually turn off the voice mail indication:
1. Press MENU/SEL in idle mode to enter the main menu.
2. Press the UP or DOWN Navkeys to select Settings, then press
MENU/SEL to enter the Settings menu.
3. Press the UP and DOWN Navkeys to highlight Clear Voice Mail, then press
MENU/SEL. The screen will display Clear Voice Mail Indication?
4. Press the YES softkey.
Clear Voice Mail
Indication?
Clear Voice Mail
YES
NO
Clearing the voice
mail indication
does not delete
any voice mail
messages.
If you subscribe
to voice mail
services, your
local telephone
company may
alert you to new
voice mail with a
stutter (broken)
dial tone.
Contact your
local telephone
company for
more information
about voice mail
services.
•
•
•
Settings
Edit Handset Name
Show Handset Name
Keypad Tone
Language
LCD Contrast
LCD Contrast
SET
Settings
Show Handset Name
Keypad Tone
Language
LCD Contrast
Clear Voice Mail
Page 38
www.vtechphones.com
34
System setup
Default settings (restore settings)
You can restore the factory-set default settings for all handset settings.
Restoring the default settings for a handset only affect that handset.
To restore the default settings:
Press MENU/SEL in idle mode to enter the main menu.
Press the UP and DOWN Navkeys to select Settings, then press
MENU/SEL to enter the Settings menu.
Press the UP and DOWN Navkeys to highlight Default Settings, then
press MENU/SEL. The screen will display Restore Default Settings?
Press the YES softkey.
Delete registration
Deleting a handset registration only deletes the registration on that handset.
Deleting a handset registration is only necessary if you are replacing your
telephone base. To delete all the handset registrations on the telephone
base, see page 46.
To delete the registration on the handset:
1. Press MENU/SEL in idle mode to enter the main menu.
2.
Press the UP and DOWN Navkeys to select Settings, then press MENU/SEL
to enter the Settings menu.
3. Press the UP and DOWN Navkeys to highlight Delete Registration,
then press MENU/SEL. The screen will display Delete Handset
Registration?
4. Press the YES softkey.
1.
2.
3.
4.
Restoring the
handset default
settings does not
clear the redial list,
phone book, call
log, messages, or
reset the time or
handset name.
After deleting
the handset
registration, the
handset will reset
and display Place
in Charger. To
register a handset,
see page 7.
•
•
Settings
Keypad Tone
Language
LCD Contrast
Clear Voice Mail
Default Settings
Restore
Default Settings?
Default Settings
YES
NO
Settings
Language
LCD Contrast
Clear Voice Mail
Default Settings
Delete Registration
Delete Handset
Registration?
Delete Registraion
YES
NO
Page 39

www.vtechphones.com
35
System setup
System setup
Handset ringers
In the handset Ringers menu, you can select a ringer melody and adjust the
ringer volume for incoming calls to the HOME and CELL lines. You can also
record your own ringer through the handset microphone (page 39).
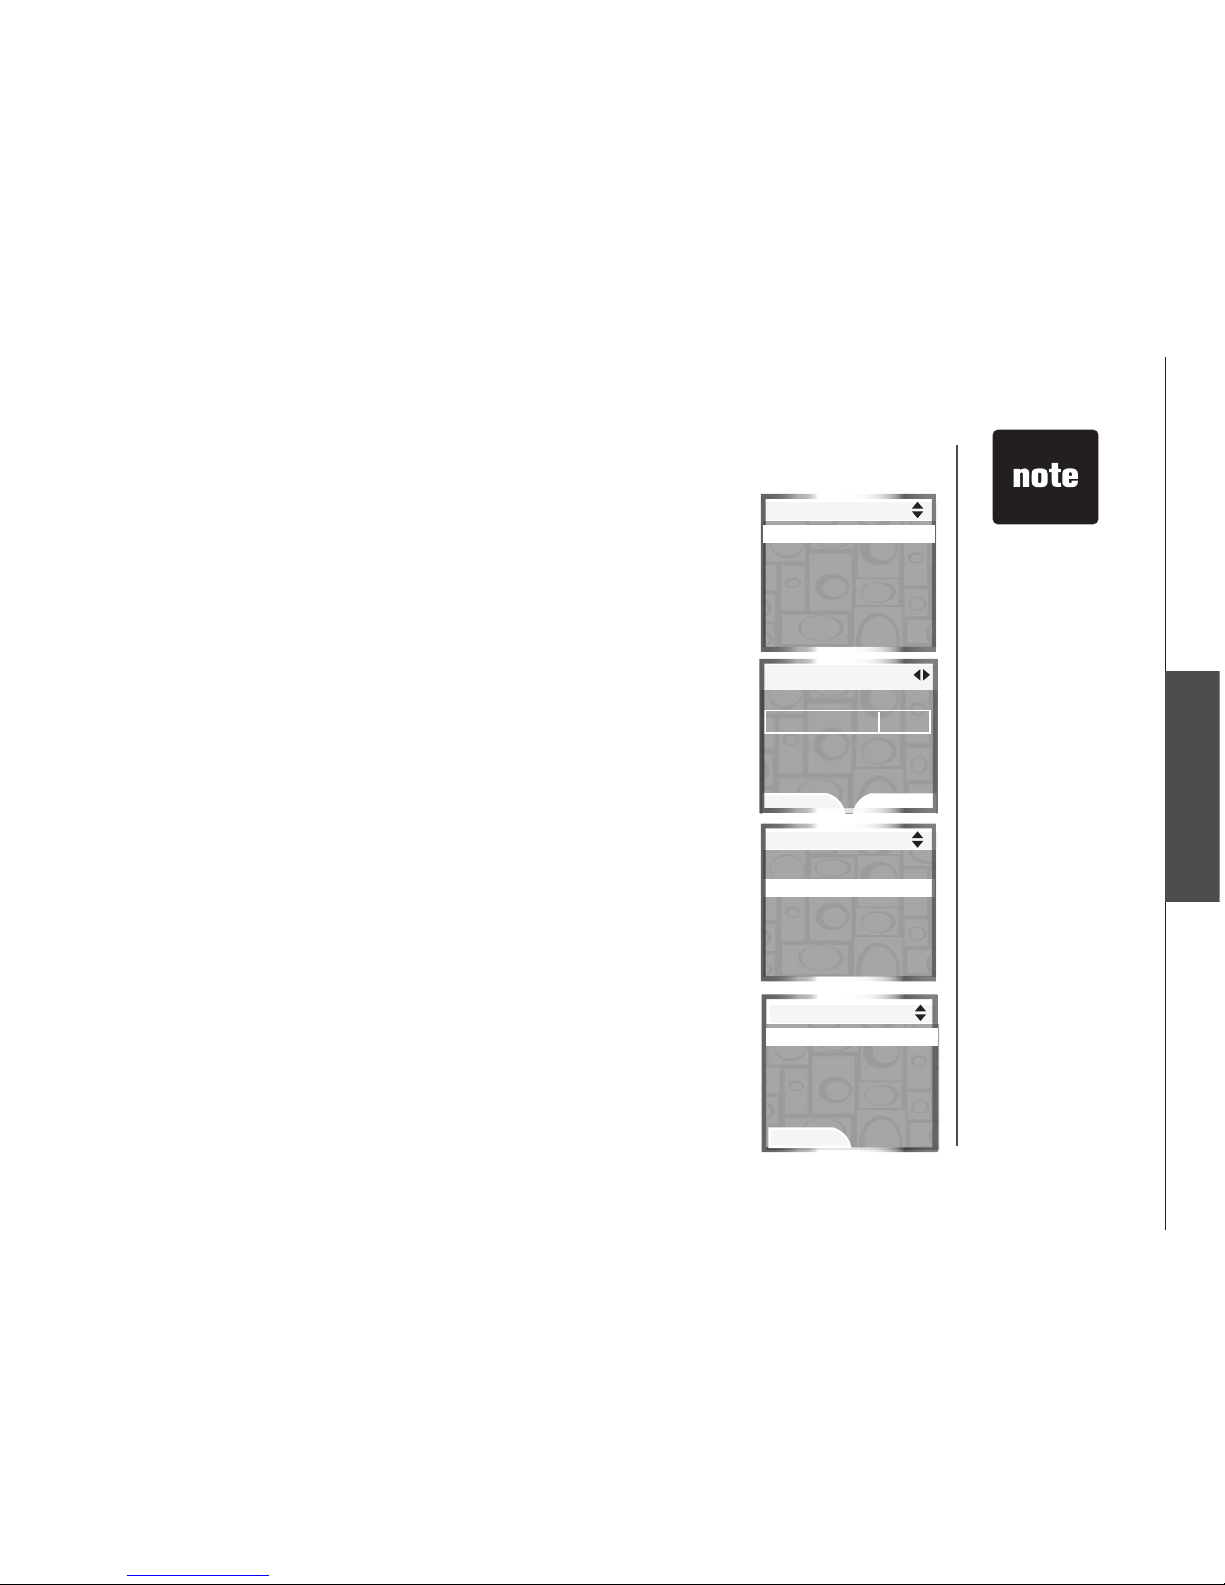
To enter the Ringers menu:
1. Press MENU/SEL in idle mode to enter the main menu.
2. Press the UP and DOWN Navkeys to select Ringers, then press
MENU/SEL to enter the Ringers menu.
In the Ringers menu, you can select:
Ringer for HOME - set the ringer volume and melody for the HOME
line.
Ringer for CELL 1 - set the ringer volume and melody for the rst
connected cell phone in the Active Devices list (page 26).
Ringer for CELL 2 - set the ringer volume and melody for the second
connected cellular phone in the Active Devices list (page 26).
Record New Ringer - record a customized ringer.
After a setting has been saved or set, you will hear a conrmation tone, and
the display will return to the Ringers menu.
While in the Ringers menu:
Press OFF/CANCEL to return to a previous menu.
Press and hold OFF/CANCEL to return to idle mode.
•
•
•
•
•
•
Ringers
Ringers
Ringe for HOME
Ringer for CELL 1
Ringer for CELL 2
Record New Ringer
Page 40

www.vtechphones.com
36
System setup
Even if the ringer
volume is off, the
telephone base or
handset will ring at
the lowest volume
setting during an
incoming intercom
call.
•
Ringer volume
You can change the handset ringer volume to a comfortable level. The ringer
can also be turned off so the phone does not ring during incoming calls.
To adjust the handset ringer volume:
1. Press MENU/SEL in idle mode to enter the main menu.
2. Press the UP and DOWN Navkeys to select Ringers, then press
MENU/SEL to enter the Ringers menu.
3. Press the UP and DOWN Navkeys to highlight:
• Ringer for HOME - set the ringer volume and melody for the
HOME line.
• Ringer for CELL 1 - set the ringer volume and melody for the
rst connected cellular phone in the Active Devices list (page 26).
• Ringer for CELL 2 - set the ringer volume and melody for the second
connected cellular phone in the Active Devices list (page 26).
4. Press MENU/SEL.
5. Press MENU/SEL again to adjust the volume setting.
6. To increase and decrease the handset ringer volume:
• Press the UP and DOWN Navkeys, or
• Press the LEFT and RIGHT Navkeys, or
• Press the UP and DOWN volume controls on the side of the handset
-OR-
To turn off the handset ringer:
• Press the OFF softkey, or
• Press the DOWN Navkey, LEFT Navkey, or DOWN volume control
on the side of handset until Ringer Off is shown on the display.
7. Press the SET softkey or MENU/SEL to save the setting.
Ringers
Ringe for HOME
Ringer for CELL 1
Ringer for CELL 2
Record New Ringer
Ringer Volume
SET
OFF
Ringer Volume
SET
OFF
Ringer Off
 Loading...