

Page 1
1
LED FLOODLIGHT INSTRUCTION
1.Do not mount a surface prone to vibrations.
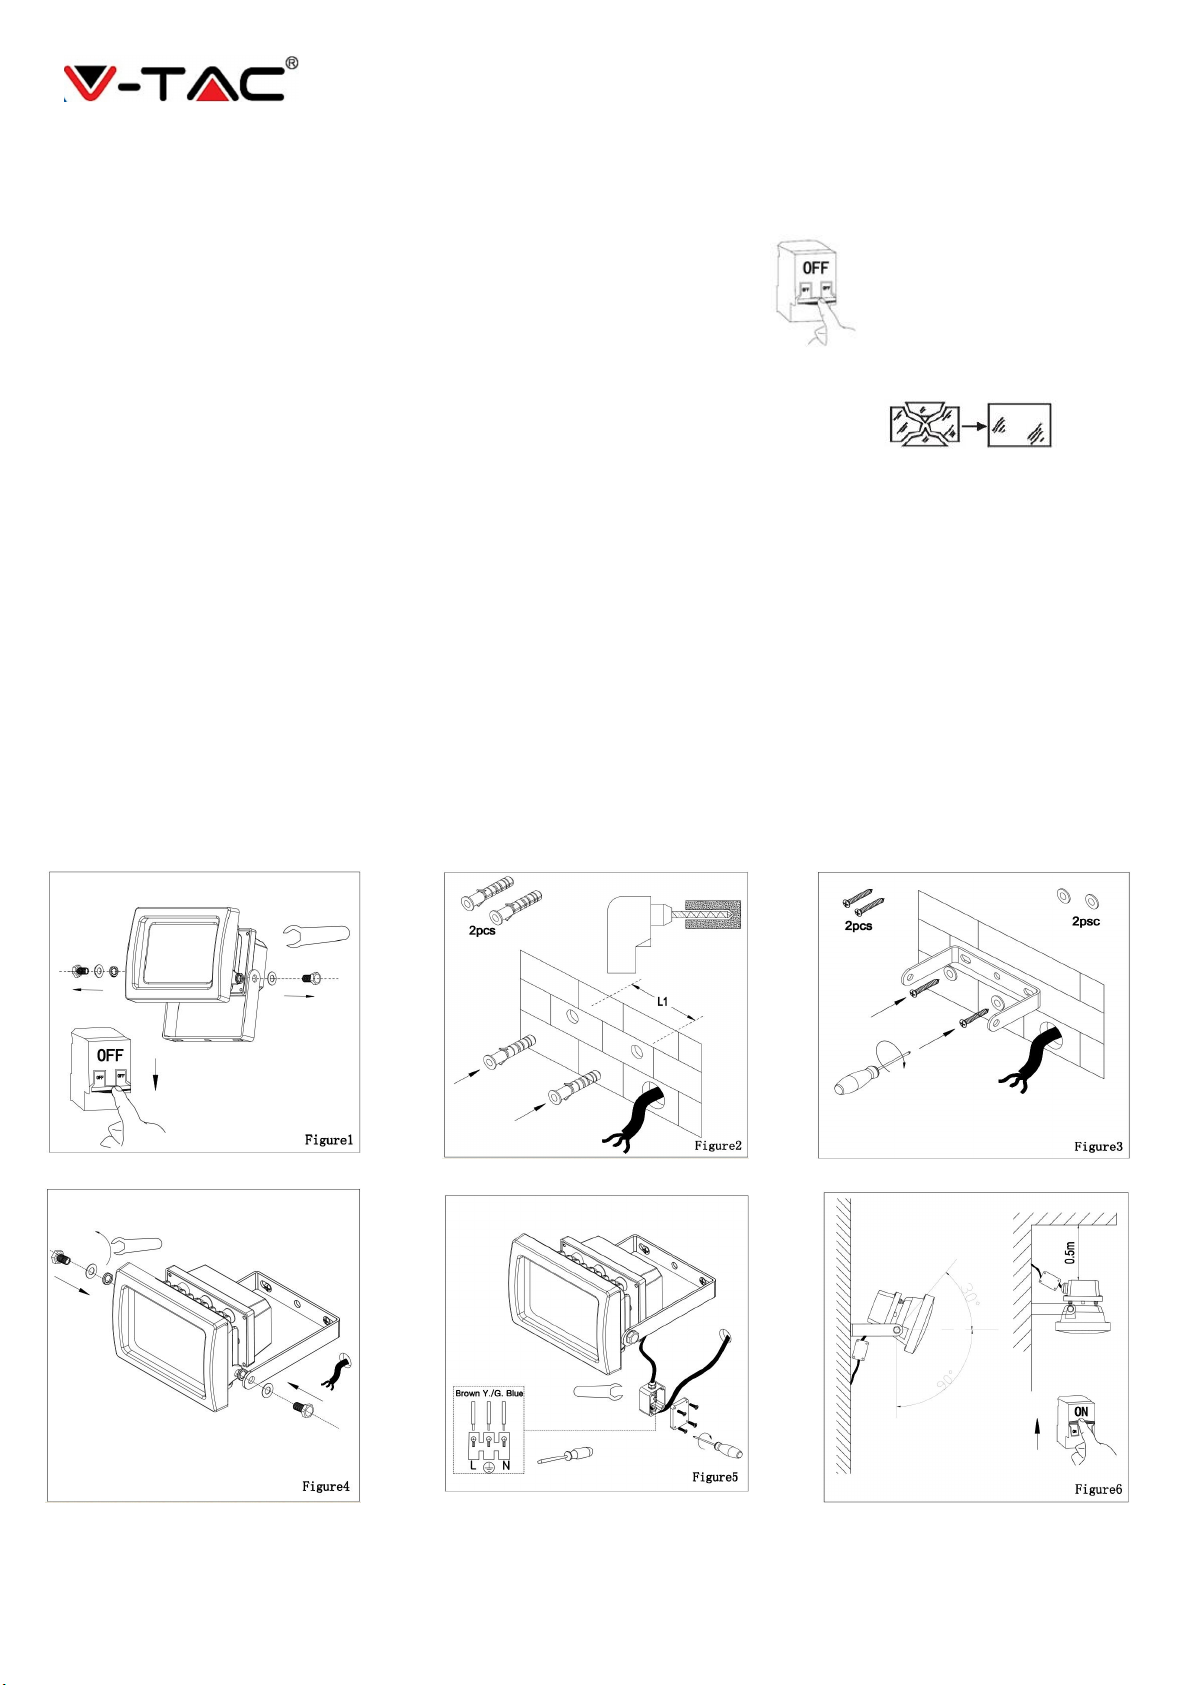
2.Remove the screw which is for mounting the bracket of the fixture. Remove the bracket.(see fig.1)
3.Mark the hole position for fixing bracket onto the wall. Drill the wall at the marked positions(screw not supplied). (see fig.2)
4.Screw the fixing bracket to the wall with suitable screw(see fig.3)
5.Mount the bracket back to the fixture. Adjust the floodlight to desired position and tighten the screw of fixing bracket(see fig.4)
6.Connect your mains cable(H05RN-F3G1.0mm2 Recommended) with the input lead of our product through the waterproof junction
7.Open the power to make sure if the product can be lighten. Adjust the irradiation angle according to the condition of
Specifications and Technical Data sheet:
Luminaire Category: LED Floodlight
Input voltage: AC100-240V 50HZ/60HZ
Ambient Temperature: -25℃<TA<50℃
WARNING:
1.ENSURE ELECTRICITY IS SWITCHED OFF BEFORE INSTALL .
2.Please read through all following instructions before installing the unit.
3.User should prepare necessary accessories and spare parts (not provided) including junction box .
4.The street light must be earthed.
5.In the case of damage the safety shield, you must replace immediately-with tempered glass.
6.Method of attachment of the cable or cord such that any replacement can only be made by the manufacturer, his service agent
or similarly qualified person.
MOUNTING
box. Note the Line(-) of the lead. (see fig.5) (Need to use the junction box of IP65 or above, ensure to tighten the waterproof screw)
usage.(see fig.6)
Please operate it strictly according to the instruction, otherwise the consequence is proud.
Please don't open our products by yourself, it may causes water leakage.The power of final interpretation belong to the manufacturer.
page
Page 2
page
2
 Loading...