

Page 1
VS NetCom Devices
Quick Installation Guide
Page 2
1. PACKING LIST
√ VS NetCom Server
√ Power supply adapter, 220V to
9V 0.5A for NetCom 111, 113 and 211
12V 1 A for NetCom 411 and 413
12V 1 A for NetCom 811 and 813
√ Serial Null Modem adapter for each port
√ CD-ROM with driver and configuration
software
√ Quick Installation Guide
Check if all parts are available. And also
carefully check, if the adapter has the correct
voltage (220V) and connector for your wall
outlets.
2. HARDWARE CONFIGURATION
2.1. POWER SUPPLY
Connect the cable from the adapter to the
power jack at the rear side of NetCom. Place the
adapter into the wall outlet.
The red Power LED on NetCom will light.
2.2. ETHERNET
Connect the RJ45 on the rear side of NetCom to
your Switch or Hub. The yellow Link LED on
NetCom will light. When data traffic occurs on
the network, this LED will blink.
If you have a 100Mbit network the green Speed
LED on NetCom will light. If you have a
network with 10Mbit, the LED remains dark.
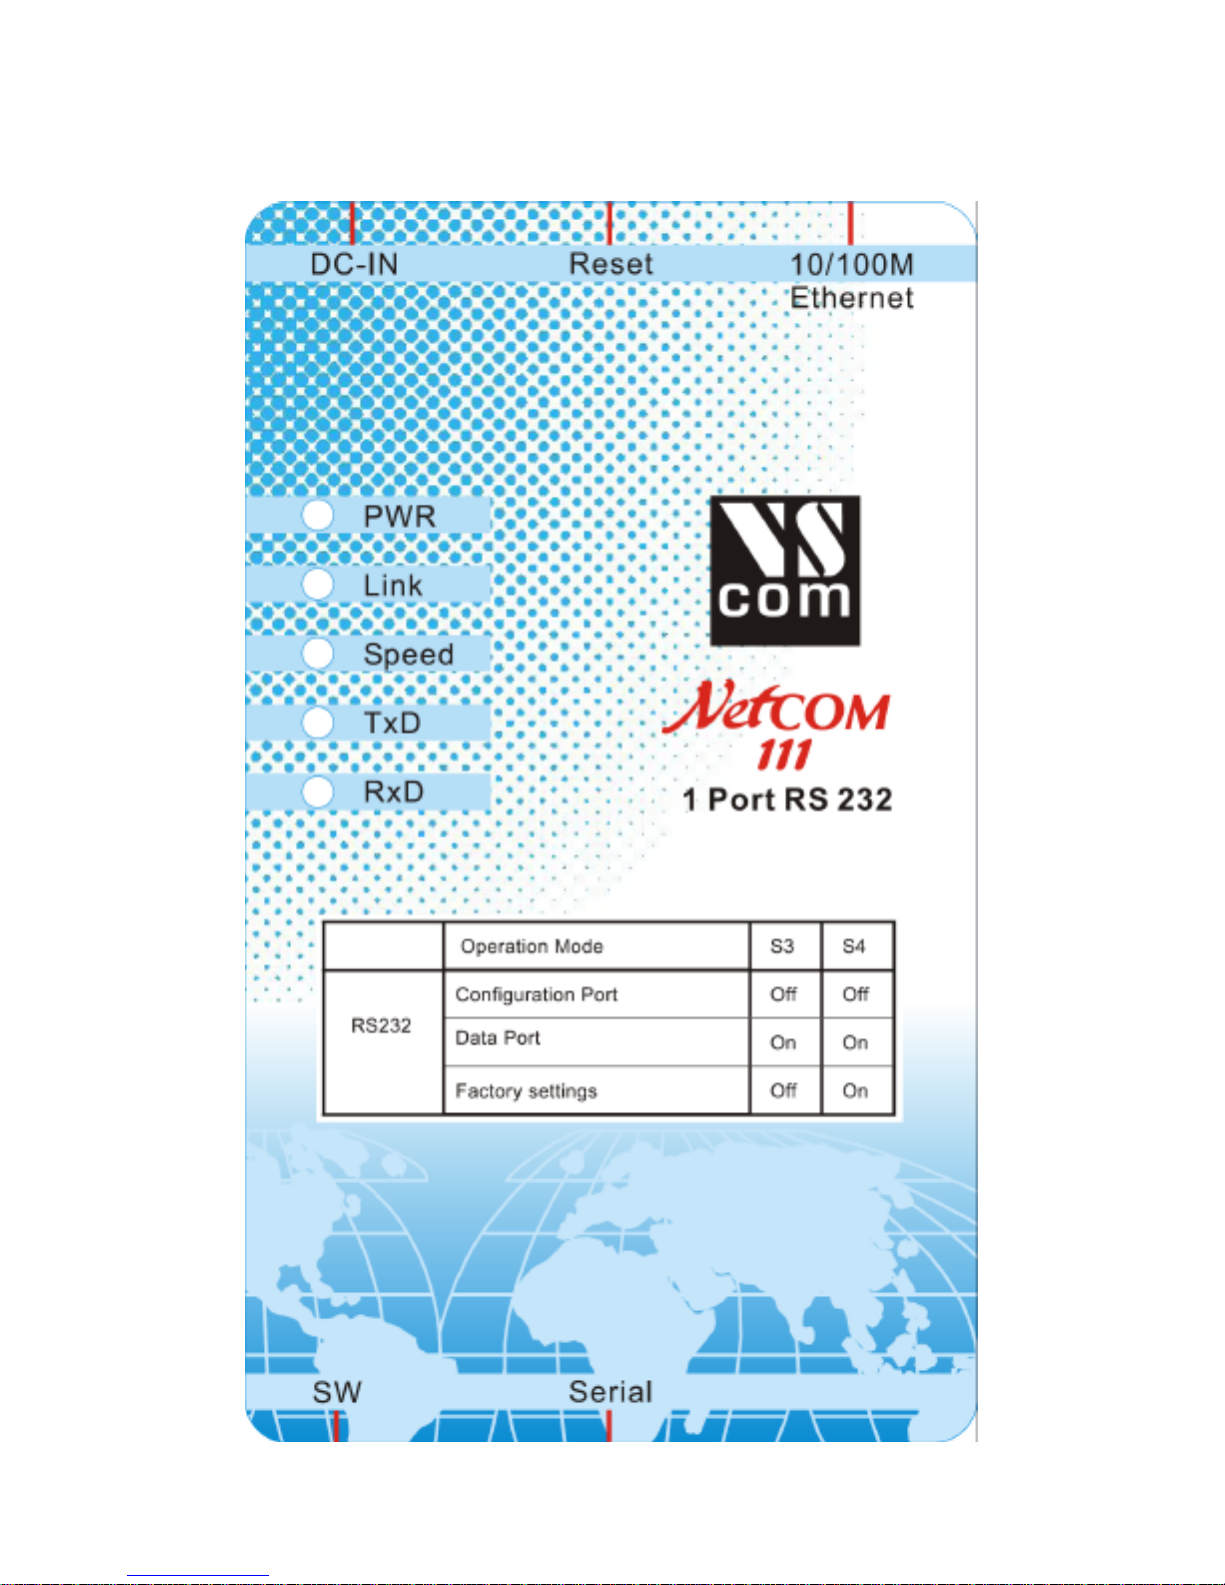
2.3. SERIAL PORT
The serial port of NetCom allows for different
operations modes. These are defined by Dip
switches. The factory setting is RS232 (like
COM1). To change this operation mode, please
consult the table printed on the NetCom (top
side), or the User Manual on the CD-ROM.
3. DRIVER INSTALLATION
The driver setup is supervised by the Installation
Wizard. Before you start, contact your Network
Administrator. He will select correct values of
IP-address and Netmask for the NetCom.
Please have him check the values mentioned
below at the “Info Panel”.
The Installation Wizard will detect the NetCom
devices in your network. Later Windows will
find the serial ports via Plug & Play.
4. THE INSTALLATION WIZARD
Insert the CD-ROM into your
drive. It will start automatic,
presenting some information.
You have the choice to start the
installation. If the CD does not
start, or you do not want it to,
double-click the Icon of the
installation program. You’ll find it in
D:\Software, where “D” is the letter of your
CD-ROM drive.
After copying some files your network is
scanned for NetCom devices. This usually takes
about 30 seconds. Ensure network settings of
the NetCom are correct, by double-clicking each
devices icon.
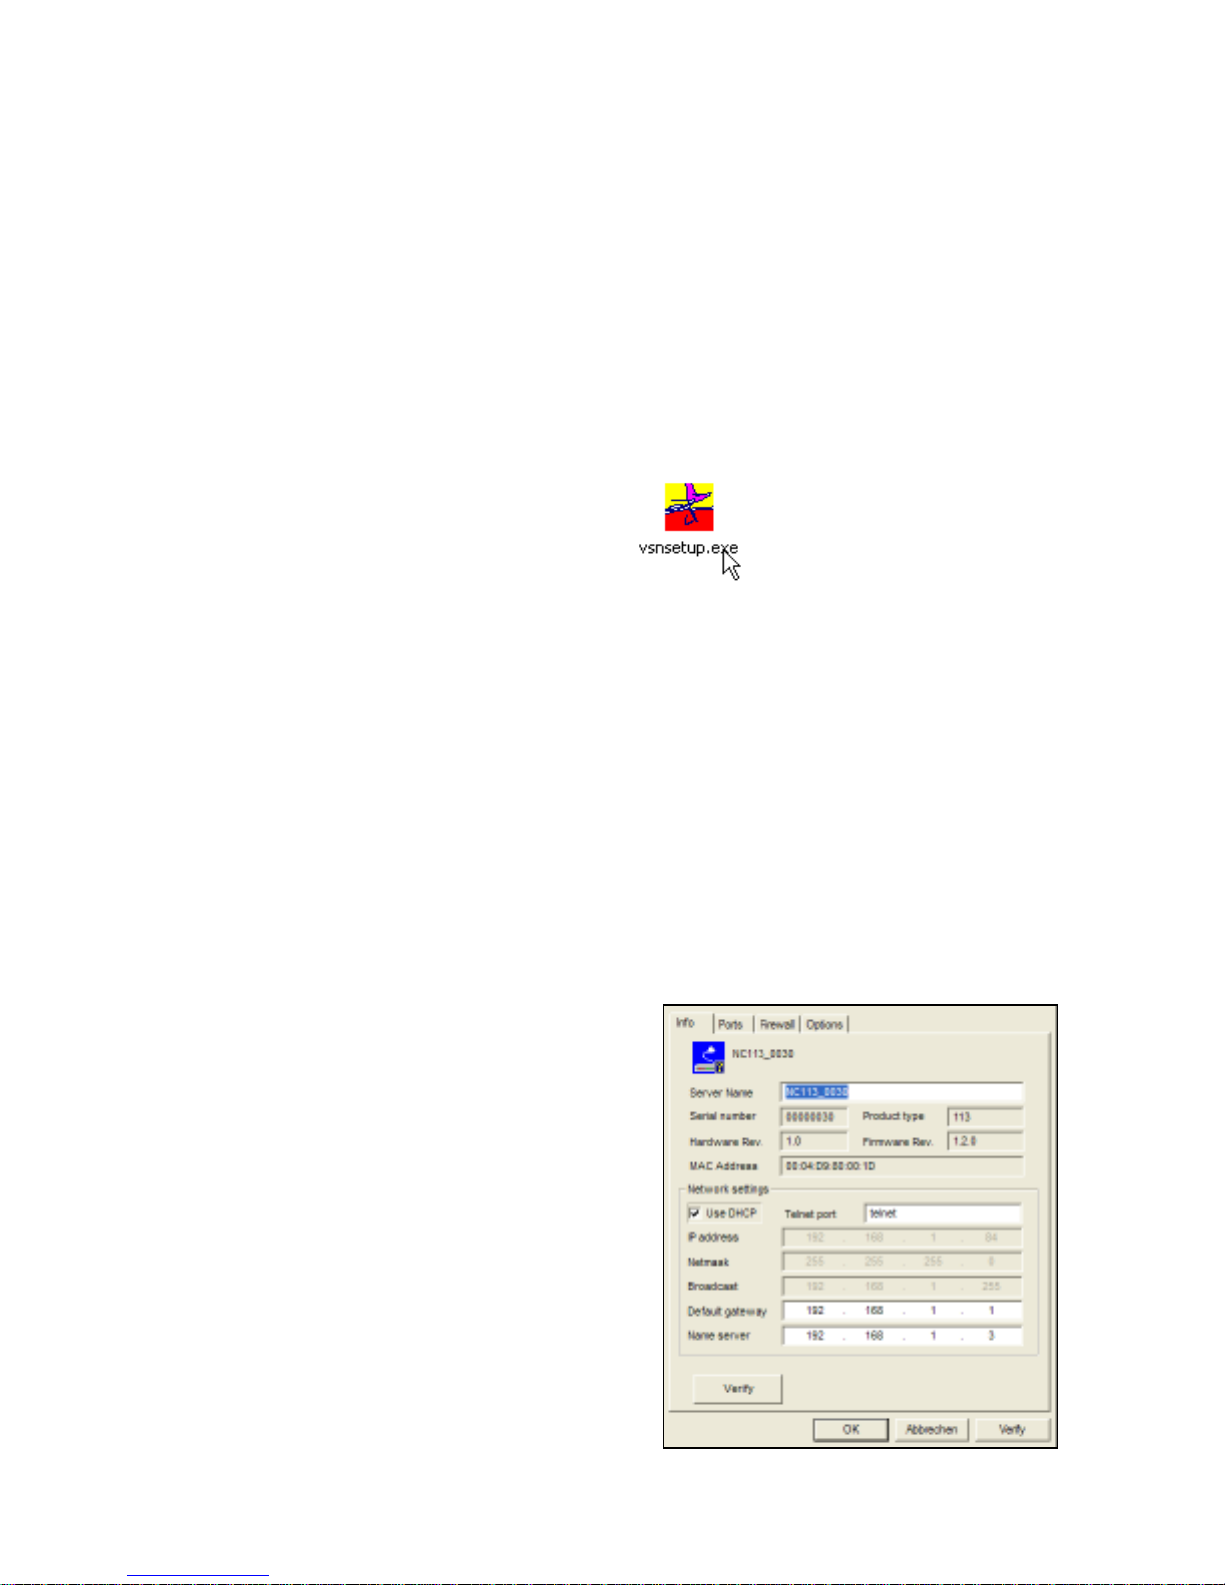
4.1. INFO-PANEL
For the Quick Installation it is most convenient
to use the DHCP option.
Installation
Wizard
Info Panel of NetCom Server
Page 3

Otherwise fill in values “IP address” through
“Name server”. IP address is required, and must
be unique for the entire network. The Netmask
is also required; consult your Network
Administrator (recommended).
Important: The default configuration of
NetCom may result in a fixed IP-Address. It will
be the same for all connected devices. Then the
Wizard can not configure to a certain device. It
is best to connect several NetCom one by one,
configure them, connect the next and search for
that device.
5. DEVICE AND PORT
INSTALLATION
In the next phase of installation the Device
Manager installs driver software for configured
NetCom devices. In some systems the
Device Manager will ask the user to confirm the
installation. This is normal, and not an error
message. Click on “Continue”. Now Windows
will detect all the serial ports on the NetCom
servers.
Windows installs drivers for virtual Com ports.
Press “Next” and let the system find the best
driver software for the device. Finish the
installation by pressing “Finish”.
6. VERIFY THE INSTALLATION
Once the drivers are installed, the devices are
listed in the Device Manager. Here is a sample
view.
The NetCom devices install components in two
classes. The serial ports are installed as usual in
Ports, while the NetCom devices have a class of
their own: “VScom Virtual Com”. Properties of
the entire class can be viewed by marking the
class name and pressing the right mouse button.
The Installation Wizard will pop up.
7. UNINSTALLING THE DRIVERS
To uninstall the drivers, open “Start” à
“Control Panel” à “Add/Remove Programs”,
and select the item “VScom drivers for virtual
serial ports”. Click “Change/Remove” to
remove the drivers.
NetCom Ports in Device Manager
Logo Test
Uninstall NetCom Drivers
Page 4

8. TECHNICAL DATA
• 1, 2, 4 or 8 serial ports RS232 and
RS232/422/485
• Fast Ethernet auto-detecting
• Serial speed up to 460 kbps
• Drivers for virtual serial ports: Win2k,
WinXP, NT4.0, Linux
• TCP RAW connection Server/Client
Mode
• UDP data transfer
• Configuration over webbrowser
• Protocols: TCP/IP, UDP, HTTP, Telnet,
SNMP, DHCP, ICMP, DNS
9. ORDERING INFORMATION
• NetCom 111 1 port RS232
• NetCom 113 1 port RS232/422/485
• NetCom 211 2 ports RS232 on RJ45
• NetCom 411 4 ports RS232
• NetCom 413 4 ports RS232/422/485
• NetCom 811 8 ports RS232
• NetCom 813 8 ports RS232/422/485
Driver Download: http://www.vscom.de/drivers.php?local=1
http://www.vscom.com.tw
Product Information: http://www.vscom.de/productshome.htm
http://www.vscom.com.tw
Purchase: http://www.vscom.de/where_to_buy.htm
 Loading...