

VRGO Chair Instruction Manual
Please read and retain these instructions for future use
Before First Use
Product Overview
1.
2.
3.
4.
5.
Read these instructions carefully before use.
Remove both parts carefully from the packaging and inspect for any
damage.
Assemble the two halves by carefully locating the rim of the upper
shell into the rubber interfacing ring in the lower shell, and pushing
rmly together.
Important: The upper shell must be fully engaged in the rubber strip
prior to use! Failure to engage correctly could result in damage to the
product and injury to the user.
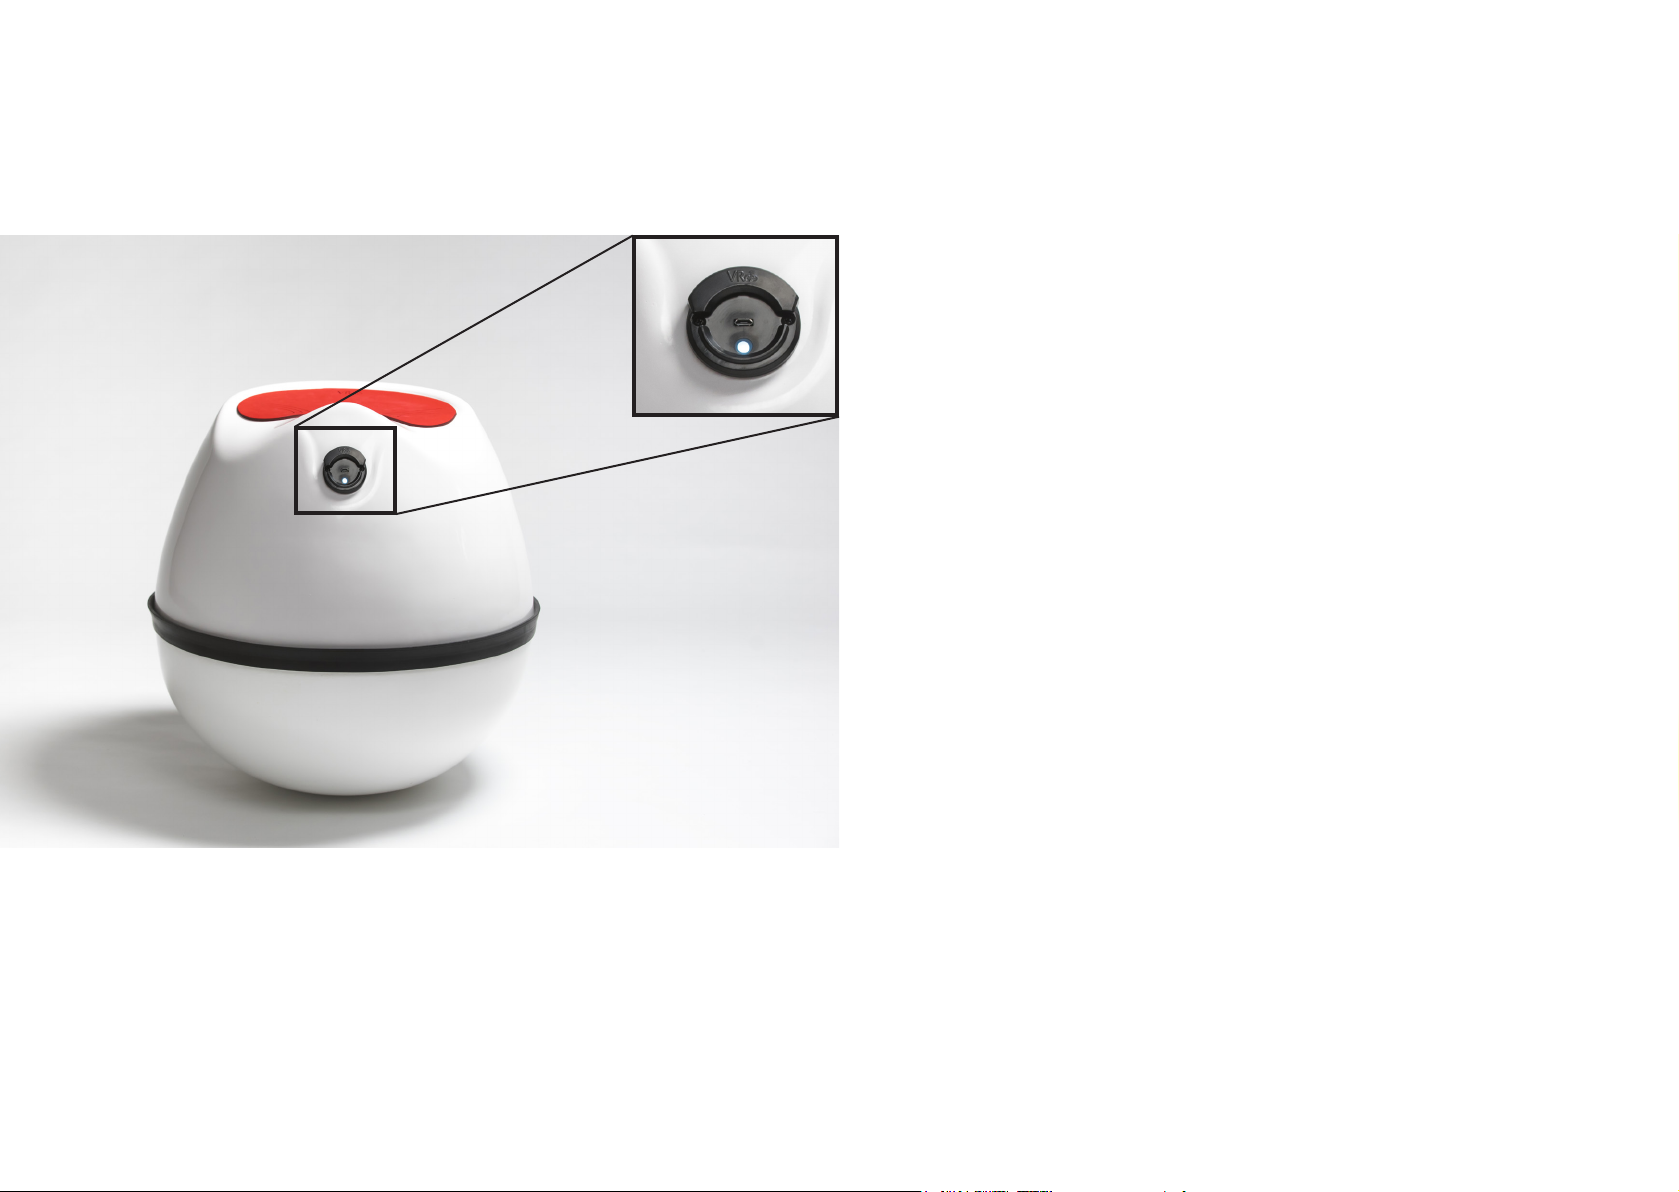
Connect the USB charger to the charging port (4), and charge for 30
minutes.
The button will ash yellow until the battery is fully charged. The button will ash green when fully charged and red when running low on
charge.
Important: The product should only be charged as required, and not
left permanently connected to the charger.
Product Features
1 – Foam Seat Pad
2 – Composite Shell Structure
3 – Rubber Interfacing Ring
4 – USB Charging Port
5 – Push Button Switch and LED Indicator
Using your VRGO
Ensure that all safety requirements have been taken into account.
Once the VRGO is fully charged, disconnect it from the USB charger,
and unplug the charger for later use.
Ensure that the VRGO is on a level surface, and is in its vertical orientation (the system will self-calibrate after switch-on against this known
vertical).
Switch on the device by briey pressing the button (5); the LED will
begin to ash.
32

The device is now ready to be paired with your Bluetooth device – if
you scan for devices it will show up as VRGO Chair.
Once paired, the LED will show a steady colour. The colour identies
one of the four possible modes of operation. The 4 modes can be
cycled through by briey pressing the button, and should be selected
for best operation depending on the application/game.
Service
The product is not user serviceable and has no user-serviceable parts
except replacement of the seat pad once worn.
If the product is not working, try switching it o, and recharging it for
30 minutes before attempting to switch it back on.
The modes are as follows:
White: Keyboard
Yellow: Keyboard and Mouse
Blue: Gamepad Controller (No Yaw)
Purple: Gamepad Controller (with Yaw)
Once the desired mode is selected, the device is ready to use. Carefully sit on the VRGO, and steer your way around your own virtual
reality by leaning and turning in the direction you want to go.
Care and Cleaning
Your VRGO has a tough composite outer shell, however some precautions should be taken to ensure it remains in best condition.
Disconnect from the charger and switch o the unit while cleaning
.
Wipe clean with a damp cloth. Do not use abrasives, or abrasive
cream cleaners. Avoid the faceplate area where the electrical connections and push button switch are located – these should not be
exposed to moisture.
If your product requires repair, you must contact us, stating the model
name and serial number (found on the label on the rear of the product).
If the product is to be returned to us for repair, carefully repack it in its
original packaging along with a letter stating your name and address,
a copy of your original receipt or purchase, and the reference number
provided to you by our service line.
We may ask you to return only part of your unit for service. This
should be robustly packaged to avoid further damage.
Contact Us
More information on this and other products can be found on our
website at:
www.vrgochair.com
You can make contact with us via:
support@vrgochair.com
VRGO Ltd, BRL, T Block, University of the West of England,Frenchay
Campus, Coldharbour Lane, Stoke Giord, Bristol BS16 1QY
The seat pad can become dirty and worn with heavy use. This can
either be replaced or covered with a new foam pad, which is available
online.
Health and Safety
TO MINIMISE THE RISK OF PERSONAL INJURY OR DAMAGE, USERS MUST READ THE FOLLOWING HEALTH AND SAFETY GUIDANCE BEFORE USE:
Read all of the manual before use. VR users can easily become disorientated. Care should be taken to avoid serious injury due to falling
54
 Loading...