

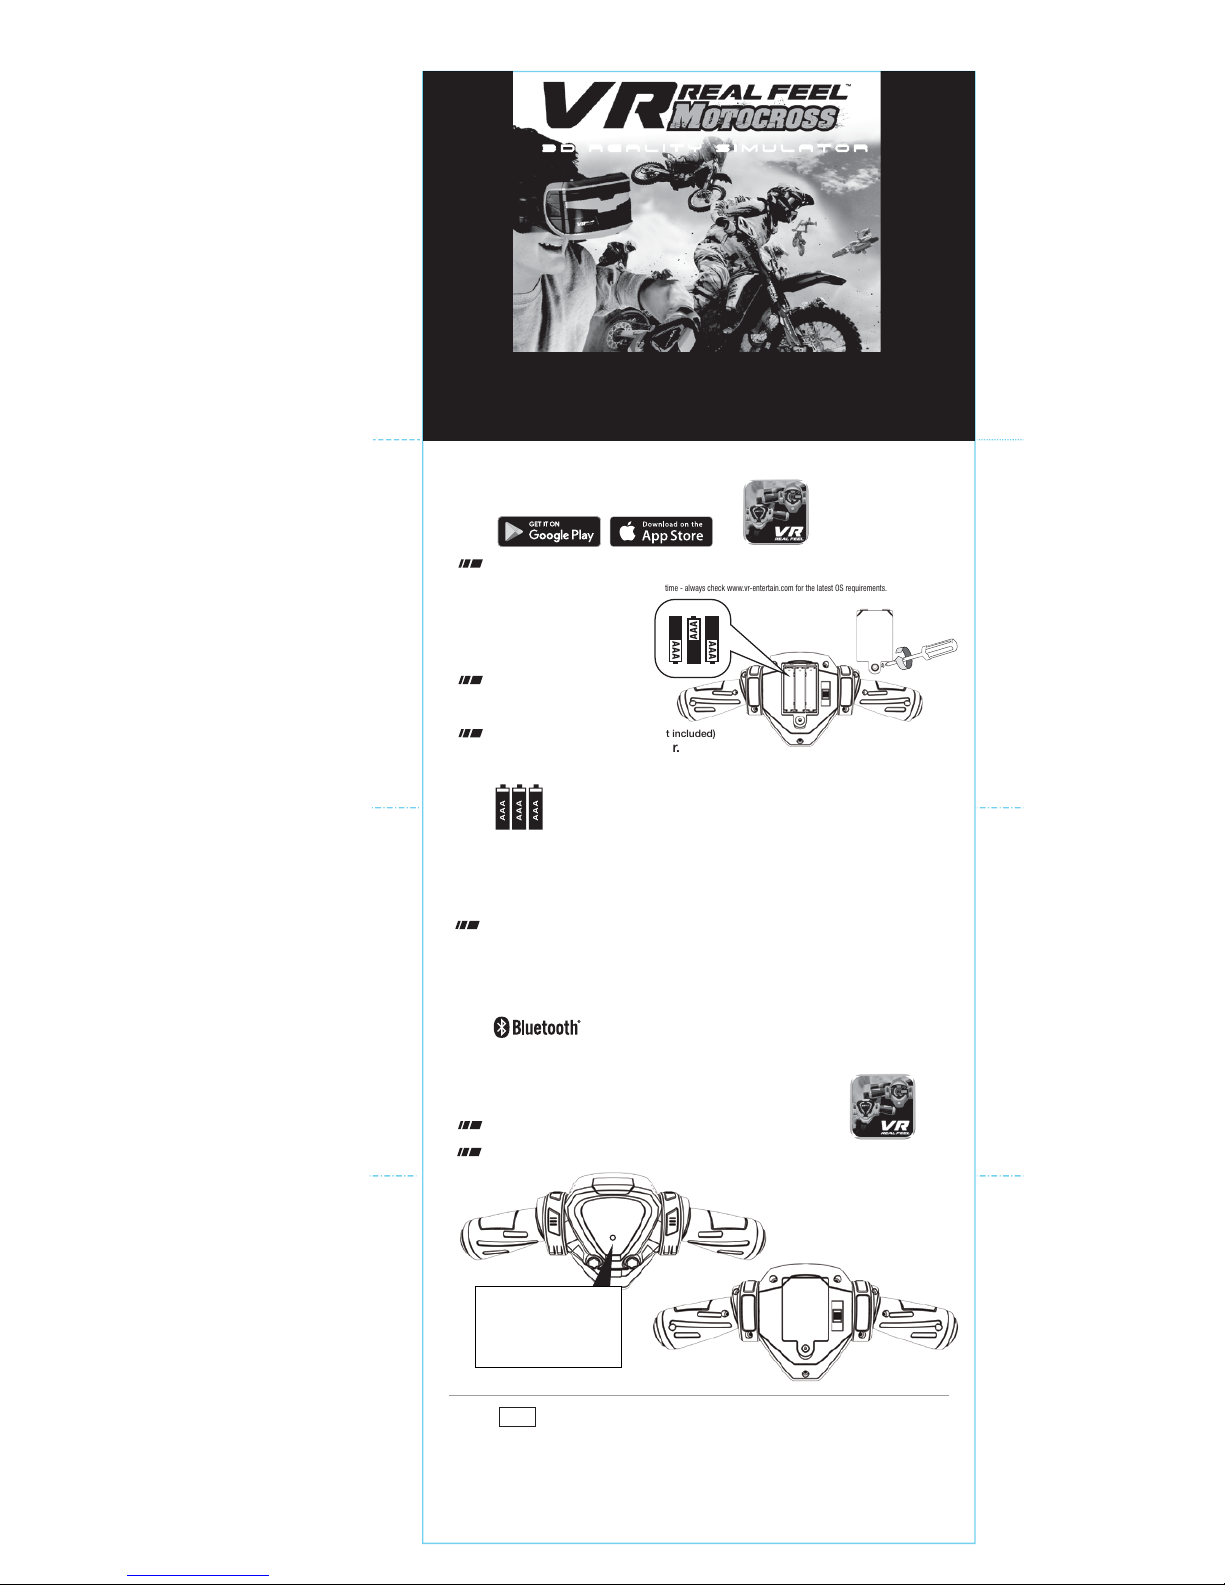
2 Install Batteries
Install 3 x AAA batteries (not included)
and replace the battery door.
Unscrew the battery
door on the handlebar.
1
Download The Free App
Search on the Apple App Store or Google Play for
VR Real Feel™ Motorcycle.
System requirement: Android 4.4 or above iOS 9.3* or above
* The minimum OS requirement may change from time to time - always check www.vr-entertain.com for the latest OS requirements.
3
Setting Up Your Smartphone
Turn OFF your WiFi and Cellular data.
This will keep you from being disturbed while playing.
You can also set your phone to “airplane mode”
but be sure your Bluetooth
®
connectivity is still enabled.
IMPORTANT:
must be working for you to play with VR Real Feel™ Motorcycle.
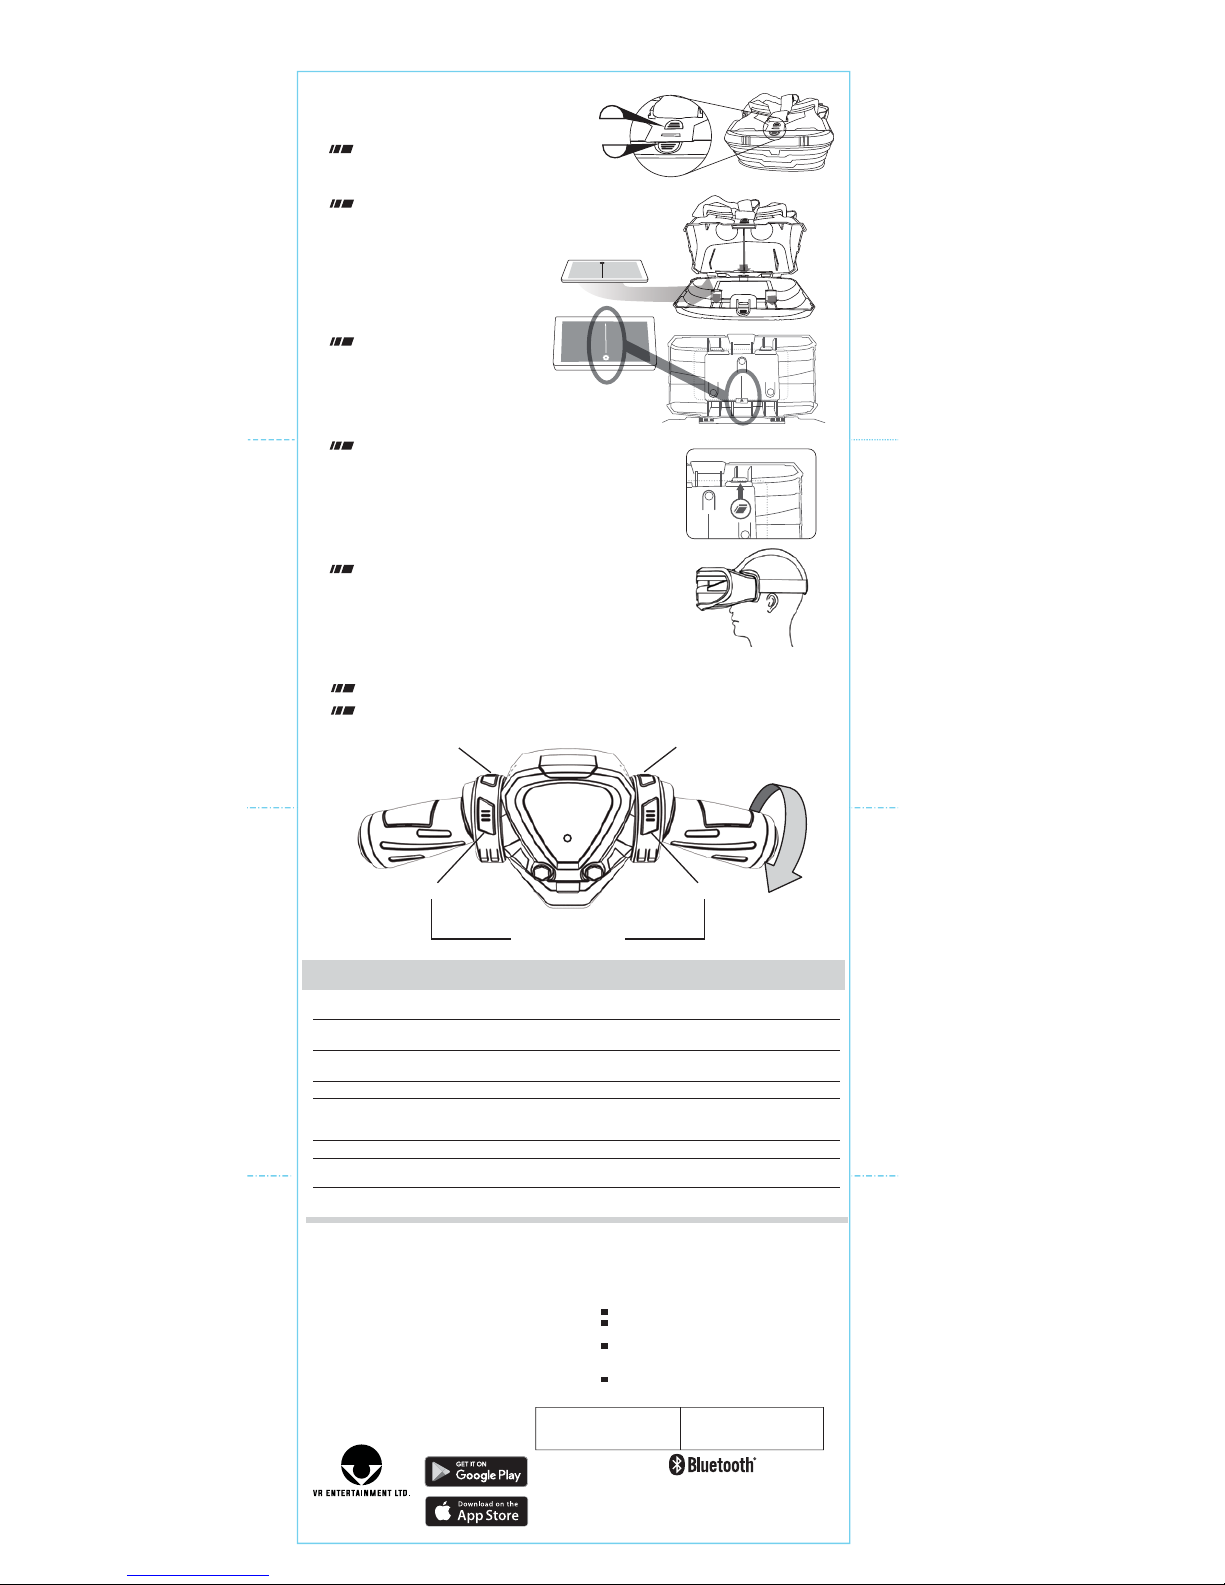
4 Launch the VR REAL FEEL
™
App
Turn the ON/OFF switch on the back of the handlebar to ON.
Click & launch the VR Real Feel™ app on your device.
LED on the handlebar should be lit.
This tells you that the Bluetooth® connection was successful.
NOTE:
•You must have the handlebar connected by Bluetooth® technology for the app to open.
Bluetooth® 4.0(BLE) connectivity
FPO
Press SCAN in the app to connect your handlebar by Bluetooth® technology.
The game will start automatically when the handlebar is successfully connected.
3D REALITY SIMULATOR
Follow these instructions and you’ll be playing in just few minutes
QUICK START GUIDE
BATTERY
DOOR
NOTE: The LED on the
front of the handlebar will
flash to tell you that the
batteries are working.
OFF
ON
USES 3 x 1.5V “AAA” BATTERIES
(NOT INCLUDED)
ALKALINE
BATTERIES
RECOMMENDED .
BATTERY WARNINGS:
RECHARGEABLE BATTERIES NOT RECOMMENDED.
DO NOT MIX OLD AND NEW BATTERIES.
DO NOT M IX ALKALINE, STANDARD (CARBON-ZINC), OR
RECHARGEABLE BATTERIES.
BATTERIES ARE TO BE INSERTED WITH T HE CORRECT POLARITY.
Android, Google Play and the Google
Play logo are trademarks of Google Inc.
Apple, Apple logo, iPod touch and iPhone
are trademarks of Apple Inc., registered
in the U.S. and other countries. App
Store is a service mark of Apple Inc.
The Bluetooth® word mark and logos are
registered trademarks owned by the Bluetooth SIG,
Inc. and any use of such marks by VR-ENTERTAINMENT
LTD. is under license. Other trademarks and trade names
are those of their respective owners.
CHANGHUANG ROAD,
CHANGPING, DONGGUAN, CHINA
MADE IN CHINA
Make sure that furniture, objects and people are out of the play area so you don’t accidentally bump into them while
playing.
Because the game is generating stereo high-definition graphics, your phone’s battery life may be shorter than with other
games. Make sure your phone is well charged before playing.
While playing VR Real Feel™ Motorcycle, you may notice that the phone is warm to the touch. This is normal. If it gets
too warm stop the app and let the device cool down.
If the LED on the handlebar does not flash when you turn the ON/OFF switch to ON, replace the batteries and try again.
If the LED does not come on after you press SCAN on the app, check to make sure your Bluetooth® connectivity setting
is in the ON position. You must be running Bluetooth® 4.0(BLE) connectivity for the app to open. Restarting the app and
the handlebar may also help.
If you want to play silently, plug in your ear buds (not included) through the slot on the side of the headset to your phone.
Bluetooth® headphones are not available for this app because mobile devices cannot connect to both your Bluetooth®
earphone and the handlebar at the same time.
If the VR image in the app is out of focus, follow steps 5 to 7 of this guide to make sure the phone is installed properly.
TIPS AND TROUBLESHOOT ING
6
Center your phone
CENTER LINE
For some phone models the frame "clips"
may align with control buttons such as power
or volume. Attach the included foam pad
to the frame clips to minimize pressure
on those buttons.
Align the white line on the
app screen with the marker
on the frame to center your
phone properly for optimum viewing.
Close the VR headset carefully;
make sure the buttons on top are locked.
5
Insert Your Phone
Spread the self-adjusting frame open
wide enough to insert your phone.
Release and make sure that it
holds your phone securely.
To open the front of the headset,
press both A and B buttons down
at the same time and flip the headset open.
VR HEADSET
However, there is no guarantee that interference will
not occur in a particular installation. If this equipment
does cause harmful interference to radio or television
reception, which can be determined by turning the
equipment off and on, the user is encouraged to try to
correct the interference by one or more of the following
measures:
Reorient or relocate the receiving antenna.
Increase the separation between the equipment
and receiver.
Connect the equipment into an outlet on a circuit
different from that to which the receiver is
connected.
Consult the dealer or an experienced radio/TV
technician for help.
This device complies with Part 15 of the FCC Rules.
Operation is subject to the following two conditions:
(1) this device may not cause harmful interference, and
(2) this device must accept any interference received,
including interference that may cause undesired operation.
Warning: Changes or modifications to this unit not expressly
approved by the party responsible for compliance could void
the user’s authority to operate the equipment.
NOTE: This equipment has been tested and found to comply
with the limits for a Class B digital device, pursuant to Part 15
of the FCC Rules. These limits are designed to provide
reasonable protection against harmful interference in a
residential installation. This equipment generates, uses and
can radiate radio frequency energy and, if not installed and
used in accordance with the instructions, may cause harmful
interference to radio communications.
CUSTOMER SUPPORT :
www.toysinquiry.com
INSTRUCTION VIDEOS :
www.vr-entertain.com
66340-US-02
B
A
7
Put On the Headset
Place the headset on your head. Make sure the
center strap is centered over the top of your head.
Adjust the straps so the headset fits snugly
and comfortably.
TIP: If the headset is putting too much weight
on your nose, make the center strap shorter.
8
Let’s Ride!
Hold the handlebar and follow the instructions in the app to start the game.
Select the race you want to play and press the Confirm button.
Stunt / Back Button
Pause Game
(Press both buttons together)
Change Camera Angle Reset On Track
Brake / Confirm Button
Twist Throttle
(Accelerate)
MOUNTAIN FOLD
VALLEY FOLD
VALLEY FOLD

Place the 3 self adhesive foam pads on the inside
area of the frame clips of the adjustable smartphone
holder. This will help prevent the frame clips from
accidentally pressing your smartphone buttons.
9x6cm 2017-07-05 update
 Loading...