

VQ ActionCare CFC-180, SmoothRider II CFC-180 Owner's Manual
Owner’s Manual
TM
SmoothRider II
Exercise Cycle
Model No.
CFC-180
TM
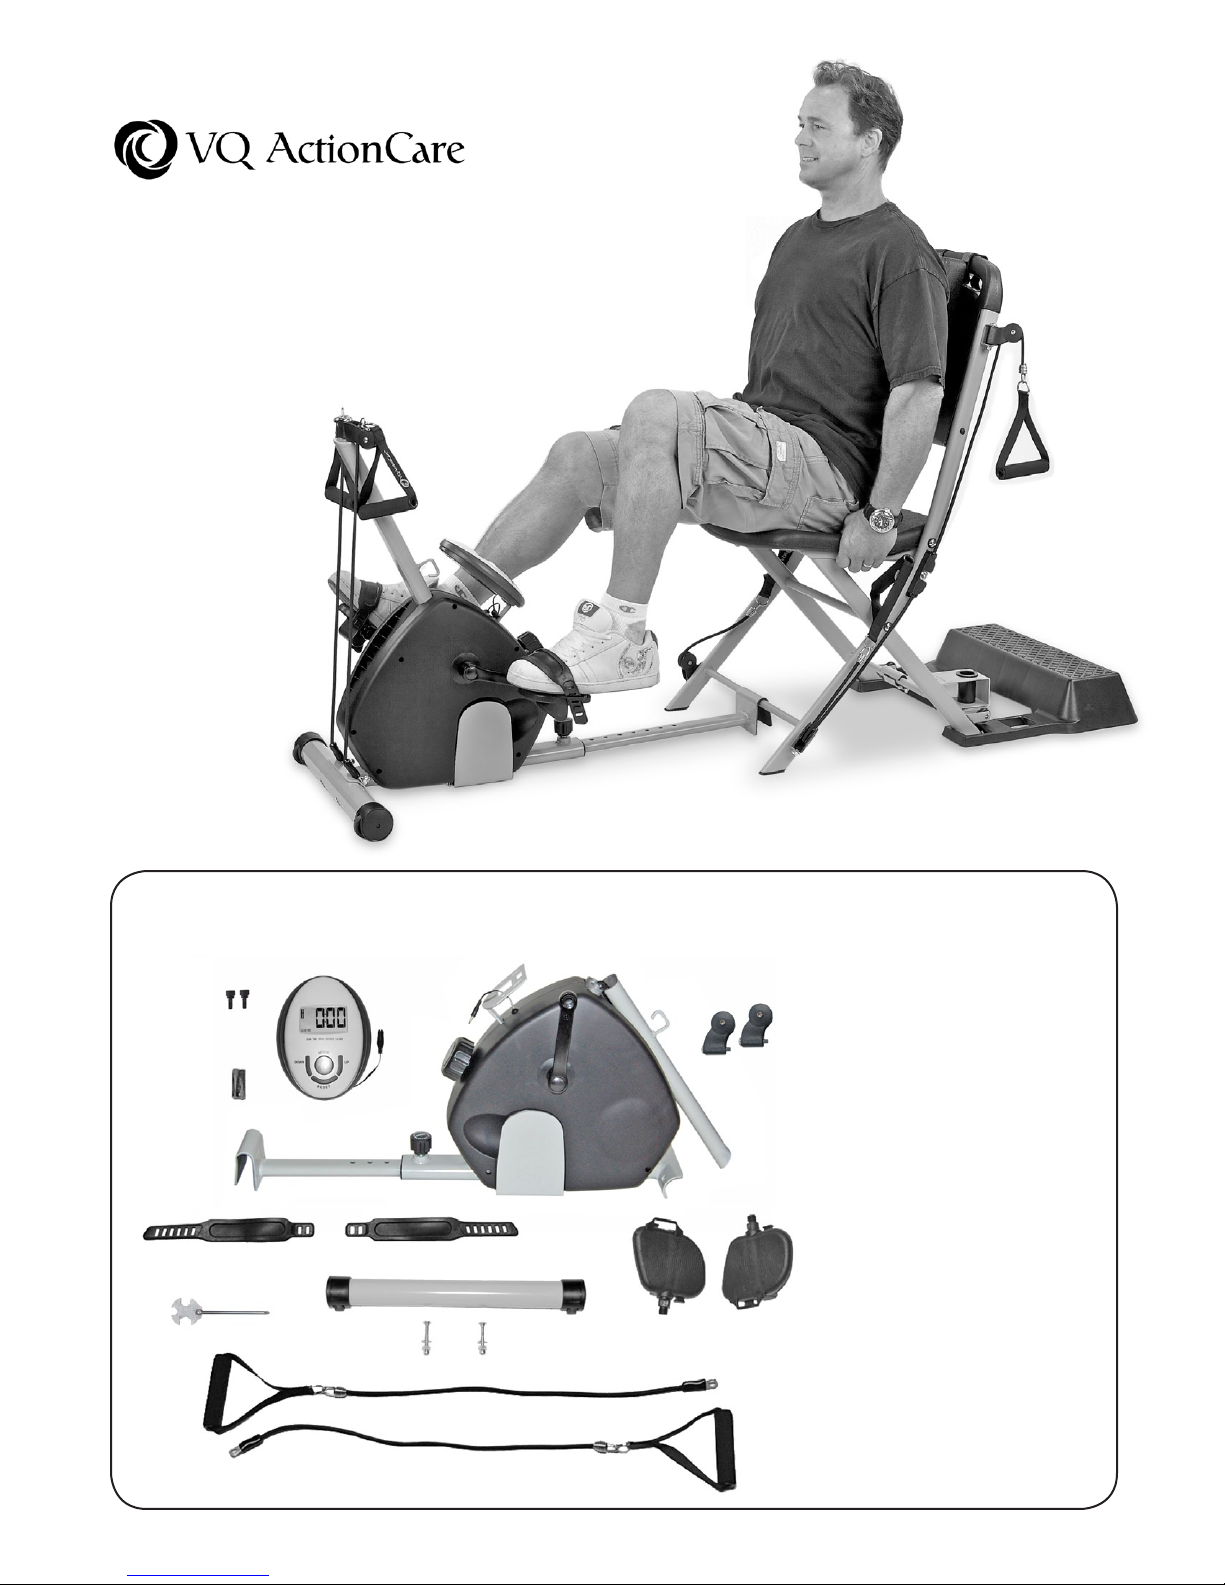
Parts included in the box with the CFC-180 SmoothRider II Exercise Cycle:
1.
Main frame
2.
2.
3.
1.
4.
7.
6.
8.
9.
10.
5.
Exercise Meter and thumb screws
3.
Batteries for computer
4.
Pedal straps (marked “L” and “R”)
5.
Pedals (marked “L” and “R”)
6.
Wrench
7.
Frame support bar
8.
Bolts for frame support bar
9.
Two resistance cables
10.
Pulleys for top of upright row bar

Assembly Instructions
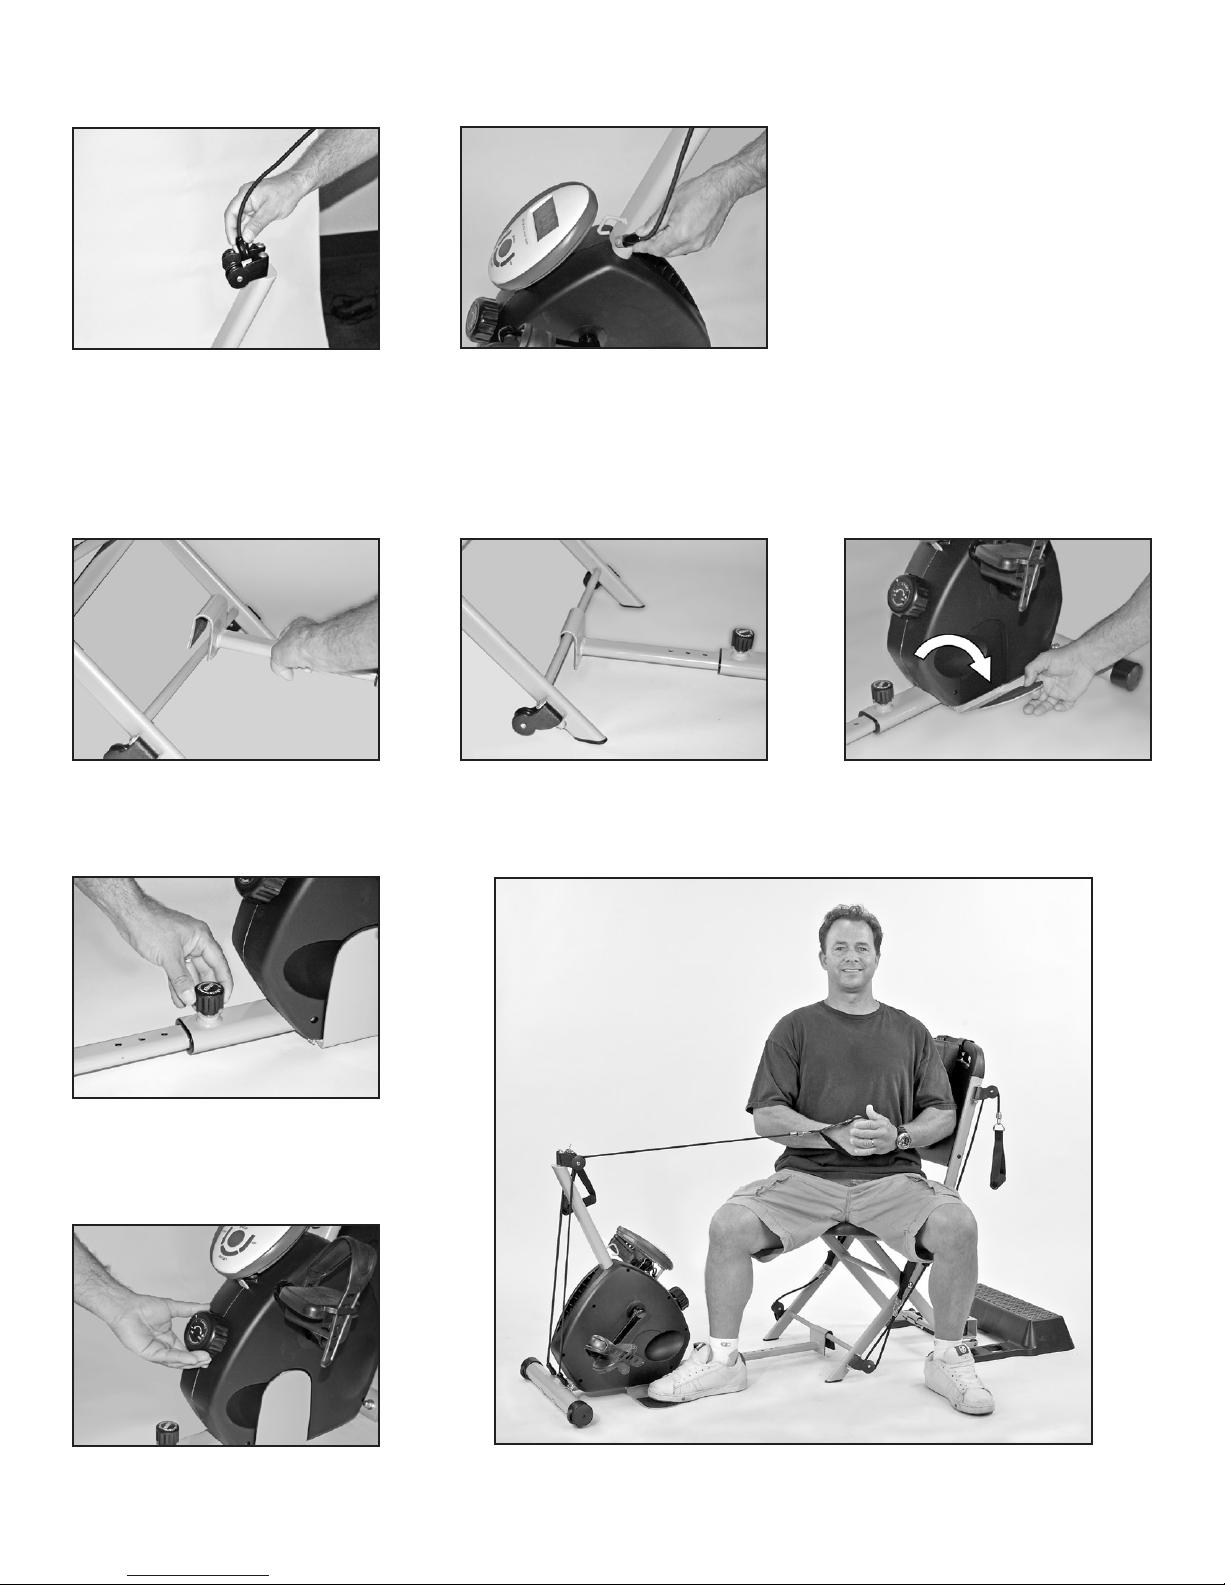
1. Swing up the upright row bar and seat it
on the mounting posts.
4. Use the wrench to tighten the bolts. Make
sure you have installed the washer between
the nut and the frame.
2. This photo shows how the upright row bar
will look when attached correctly.
5. Attach right pedal to crank. This pedal is
marked “R” for right and tightens by turning
clockwise.
3. Attach the forward cross bar to the frame.
Install the bolts from the bottom, so that the
nut and washer attach on top of the bar. The
wheels should just touch the floor. If they sit
off the floor, then turn the cross bar around.
6. After turning pedal bolts by hand, use the
wrench to tighten the pedal bolts for the final
1/4 to 1/2 turn only.
Install the left pedal, first tigtening by hand
7.
and then using the wrench for the final 1/4 to
1/2-turn. IMPORTANT: The left pedal threads
are tightened in a COUNTER-CLOCKWISE
direction, as shown in the photo.
10. The first step in setting up the exercise
meter is to connect the wire jack.
8. Attach the pedal straps to each pedal,
starting at the inside of the pedal. Each strap
is marked with either an “L” for left side or “R”
for right side.
11. Install the batteries (included in box)
in the back of the exercise meter before
mounting the meter on the bike.
9. Attach the inside of each pedal strap first,
then adjust the length of the strap on the
outside of the pedal.
12. To mount the exercise meter, slide it
down onto the mounting bracket until it’s
securely locked into place. You can install
the thumb screws (inset photo) for increased
meter stability.
Assembly Instructions
13. Use provided wrench to install both
pulleys as shown. To attach the resistance
cables, first insert the cables down through
the pulleys.
The first step to using your exercise cycle is
to attach it securely to the front crossbar of
the Resistance Chair.
14. Attach the cables to the anchor hooks
at each side of the base of the upright row
bar or to the lower hooks between the frame
support bolts.
Using Your Exercise Cycle
This photo shows the exercise cycle
correctly attached to the front crossbar of the
Resistance Chair.
Lower the fold-out floor plates and rest your
feet upon them if you would like to add more
stability to the exercise cycle while performing
lateral pull exercises with the resistance cables.
The distance from the Resistance Chair to the
pedals can be adjusted by this knob. To adjust,
loosen knob and pull up. You do not need to
remove the knob. After selecting the distance,
turn knob clockwise to lock it in position.
Use the knob located below the exercise
meter to adjust the amount of resistance.
When performing exercises that use the resistance cables on the upright row bar, you can
place your feet on either side of the floor plate to prevent the main frame of the exercise
cycle from rising during the exercise.
 Loading...