

VPR Matrix VPRN-GS200 User Manual

SeriesSeries 1800
2000
2200
vprn-gs200
rev. 01
© 2002 vpr Matrix, Inc. All rights reserved.
BBIA_5550_vprM_PalominoGetStart 8/9/02 4:43 PM Page 2
Series
1800
2000
2200
BBIA_5550_vprM_PalominoGetStart 8/9/02 4:43 PM Page 3

1
WELCOME
Congratulations on your purchase of a vpr Matrix notebook computer. We are
confident you will enjoy the leading-edge power and outstanding reliability of your
new notebook, as well as the opportunities it provides for education, work,
entertainment and more.
This guide is a short course in setting up your computer and defines some basic
concepts regarding your notebook and the Internet. It also provides some quick
solutions for common questions regarding the set-up and operation of your
notebook. Taking a few minutes to read this guide will help ensure that you
have the information necessary to operate your notebook safely and easily. At
vpr Matrix, we are committed to constantly delivering the best quality product and
experience.
Thank you again for your purchase.
vpr Matrix
Getting Started Guide
BBIA_5550_vprM_PalominoGetStart 8/9/02 4:43 PM Page 5

2
BBIA_5550_vprM_PalominoGetStart 8/9/02 4:43 PM Page 6

3
CONTENTS
1 USING YOUR NOTEBOOK COMPUTER 5
2 TROUBLESHOOTING 19
3 LIMITED WARRANTY 24
4 IMPORTANT SAFETY INSTRUCTIONS 28
BBIA_5550_vprM_PalominoGetStart 8/9/02 4:43 PM Page 7
4
BBIA_5550_vprM_PalominoGetStart 8/9/02 4:43 PM Page 8
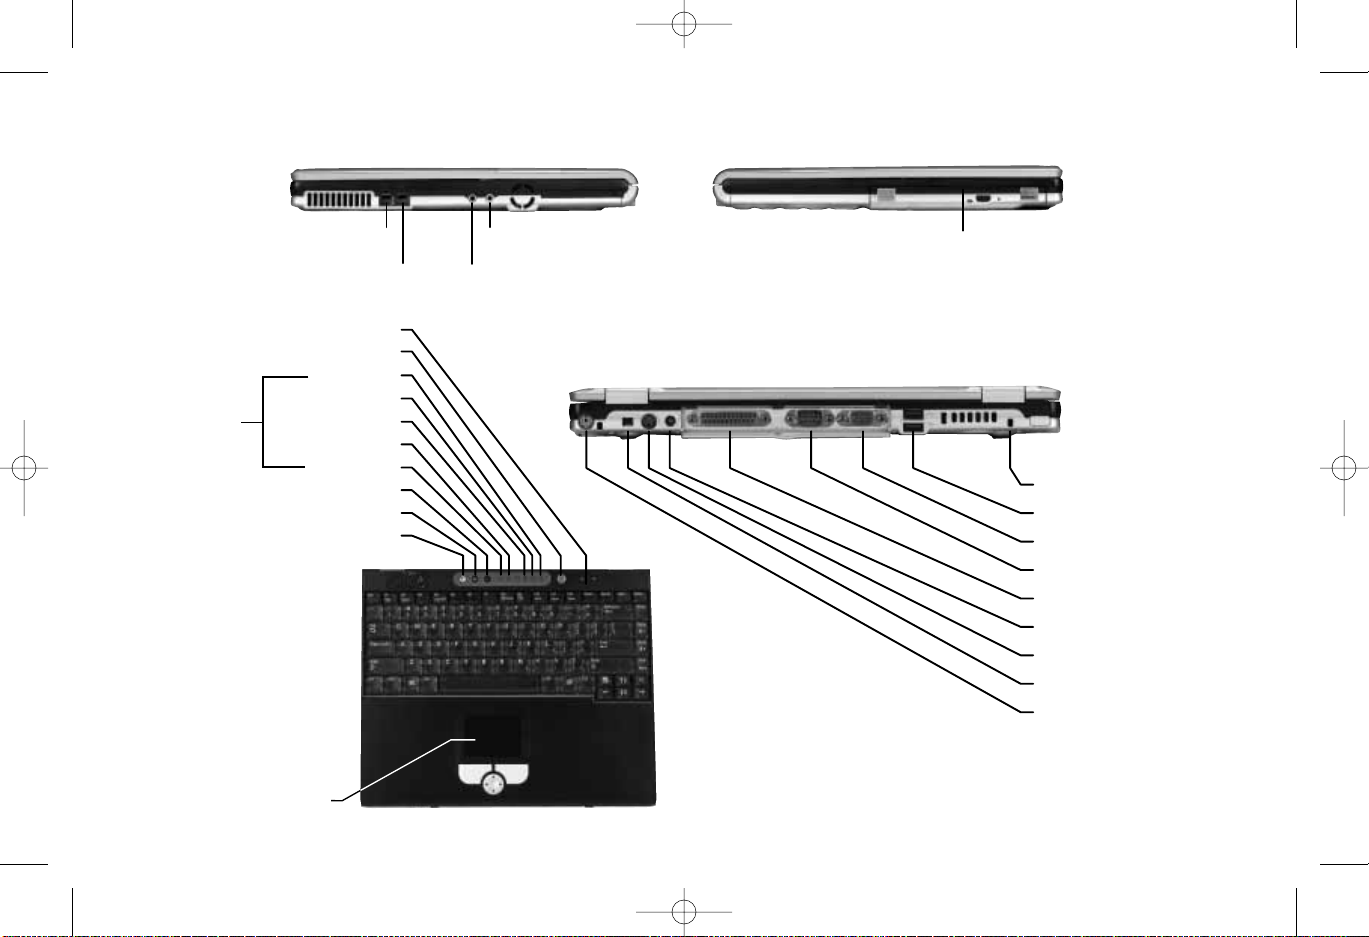
indicators
user programmable button
vpr Matrix button
modem
volume
power
scroll lock
number lock
caps lock
optical drive
hard drive
e-mail
left
microphone10/100 network
headphones
rear
right
dvd/cd-rw combo drive
Kensington lock
USB
monitor
serial
printer
AC power [A]
s-video / TV out
IEEE-1394 (FireWire
PS/2
®
)
track pad
keyboard
5
1
USING YOUR NOTEBOOK COMPUTER
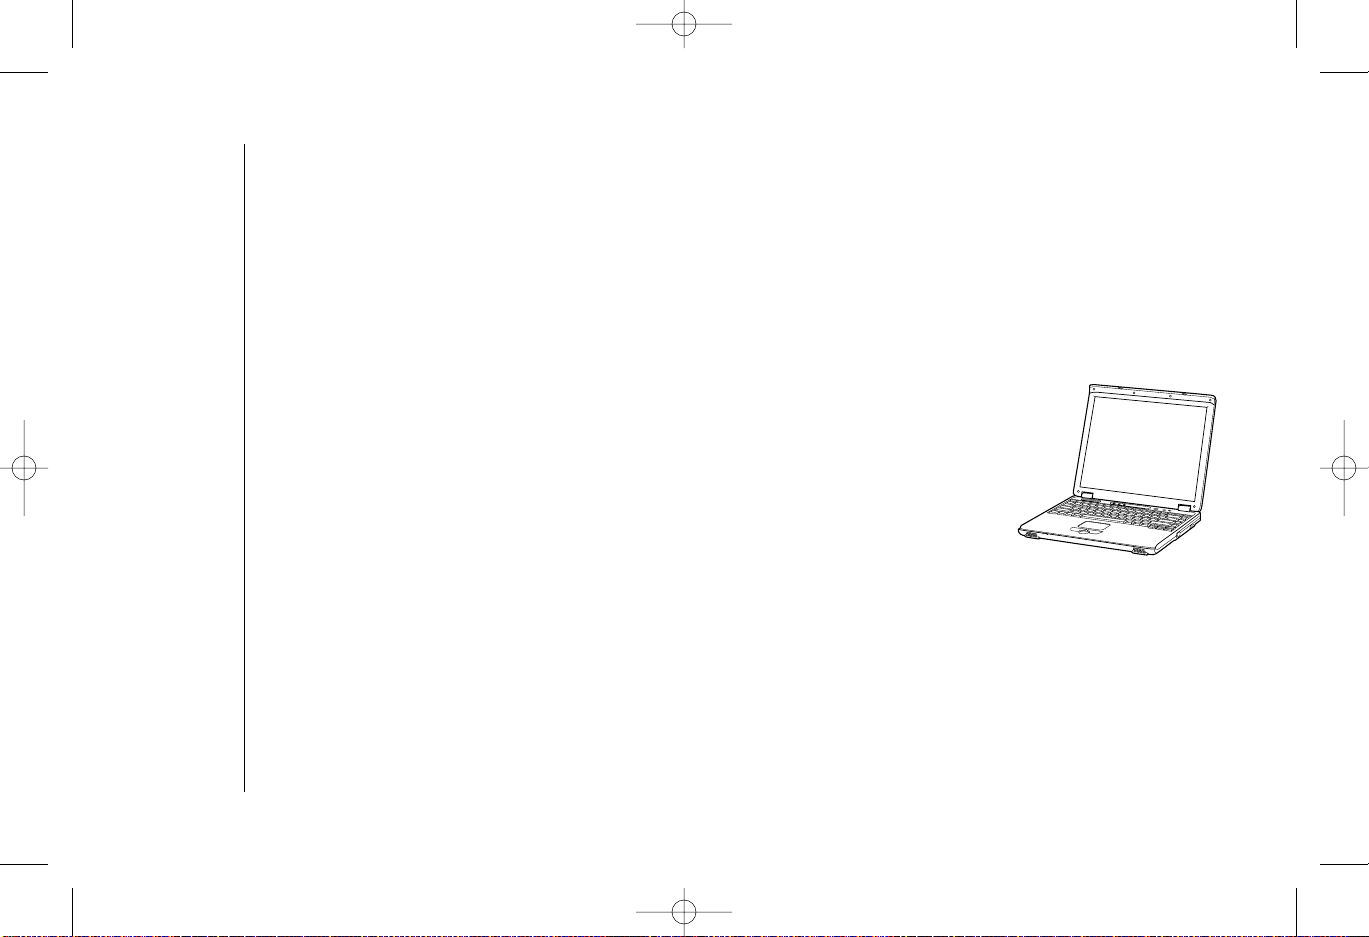
Placement of your notebook PC
It is important that you choose a good location to set up your notebook so that
both you and your new computer are safe. Make sure your working position is
comfortable and that it encourages good posture while you are at your notebook.
Proper placement of your notebook is essential to avoid repetitive stress-related
injuries. Use the computer on a flat surface so that you can comfortably view the
display and use the keyboard and trackpad without slouching. While typing try to
hold your hands slightly above the keyboard and keep your wrists parallel with the
floor. Take regular breaks from using your notebook to rest your eyes and stretch
your muscles.
There are ventilation holes on the rear and left side of your notebook that should
be kept clear at all times. Your notebook contains a fan that will operate if the
computer reaches a preset temperature, and the vents are an important part of
this cooling system. The fan may turn on under normal usage conditions and does
not indicate a problem with your notebook.
Whenever possible, use a surge protector to prevent power surges from
damaging your notebook and accessories, and a grounded 3-hole outlet to
prevent electrical shorts or fires.
BBIA_5550_vprM_PalominoGetStart 8/9/02 4:43 PM Page 9
6
Installing your battery
WARNING: Do not attempt to open your battery’s plastic casing—there are
no user-serviceable parts inside and hazardous chemicals may be released if
the case is damaged. Do not dispose of batteries in fire, they may explode or
release hazardous chemicals. Dispose of or recycle your used batteries
properly according to your local regulations.
Before using your notebook, you will first need to install the battery (packed
separately in your notebook box).
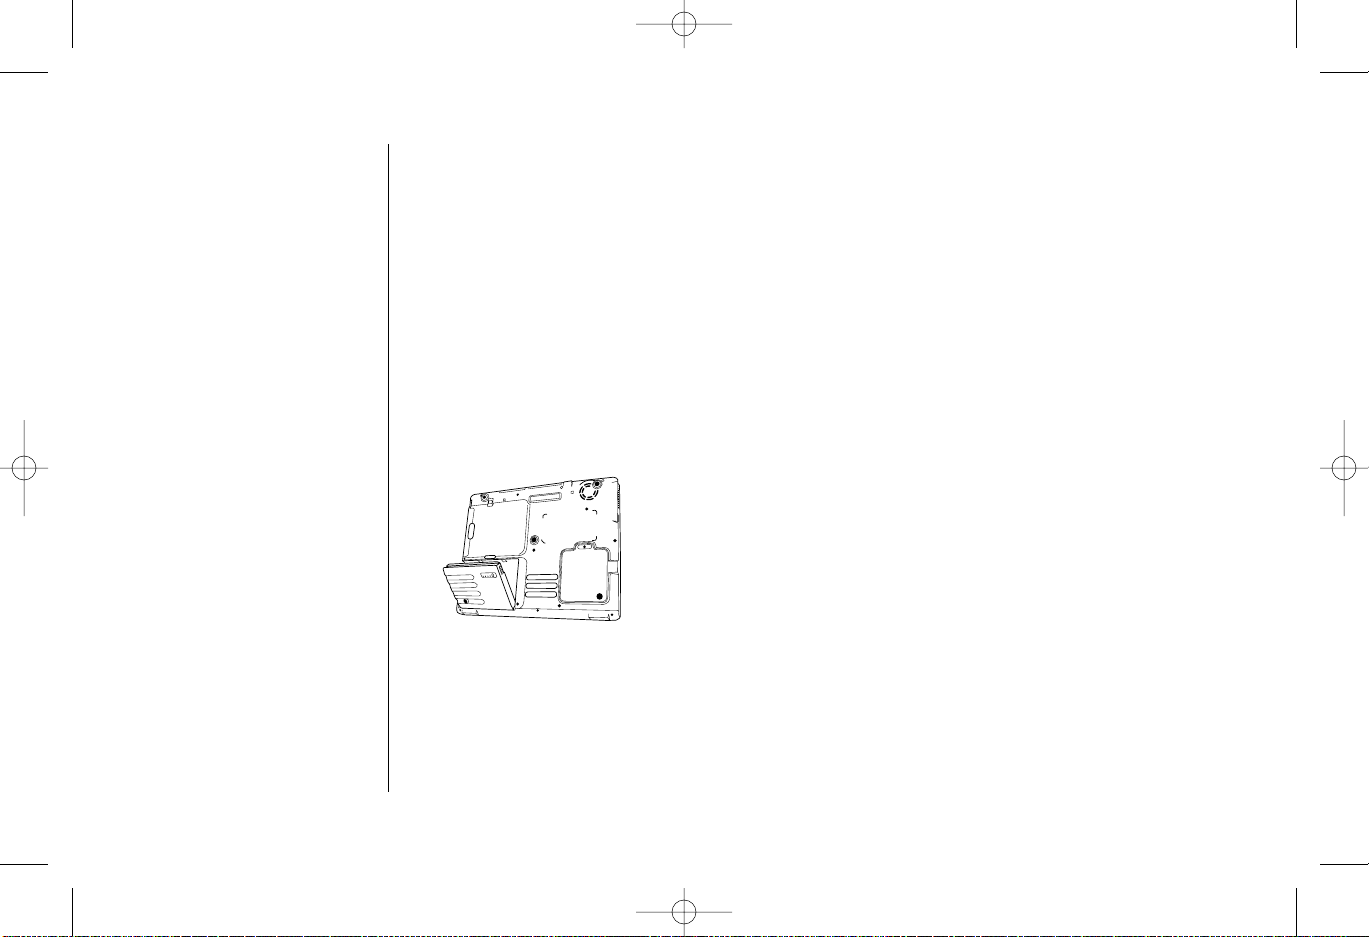
Installing battery
With the LCD display closed, turn your notebook
over to access the bottom. Holding the battery at
a 30Oangle, slide the front end of the battery into
the battery compartment, then press the back of
the battery down into the compartment until a
click signals that it has seated properly.
Removing battery
Slide the battery release latch and lift the battery from its compartment.
BBIA_5550_vprM_PalominoGetStart 8/9/02 4:43 PM Page 10
7
Using and maintaining your battery
Your notebook comes equipped with an intelligent Lithium Ion battery that can be
recharged many times. Your battery is used only when your notebook is not
connected to an AC outlet. When your computer is connected to your plugged-in
AC adapter, the notebook uses AC power directly and recharges the battery at
the same time. The battery will recharge faster if the notebook is turned off while
the AC is plugged in. A full recharge requires approximately 3 hours with the
computer turned off and 6 hours with the computer turned on.
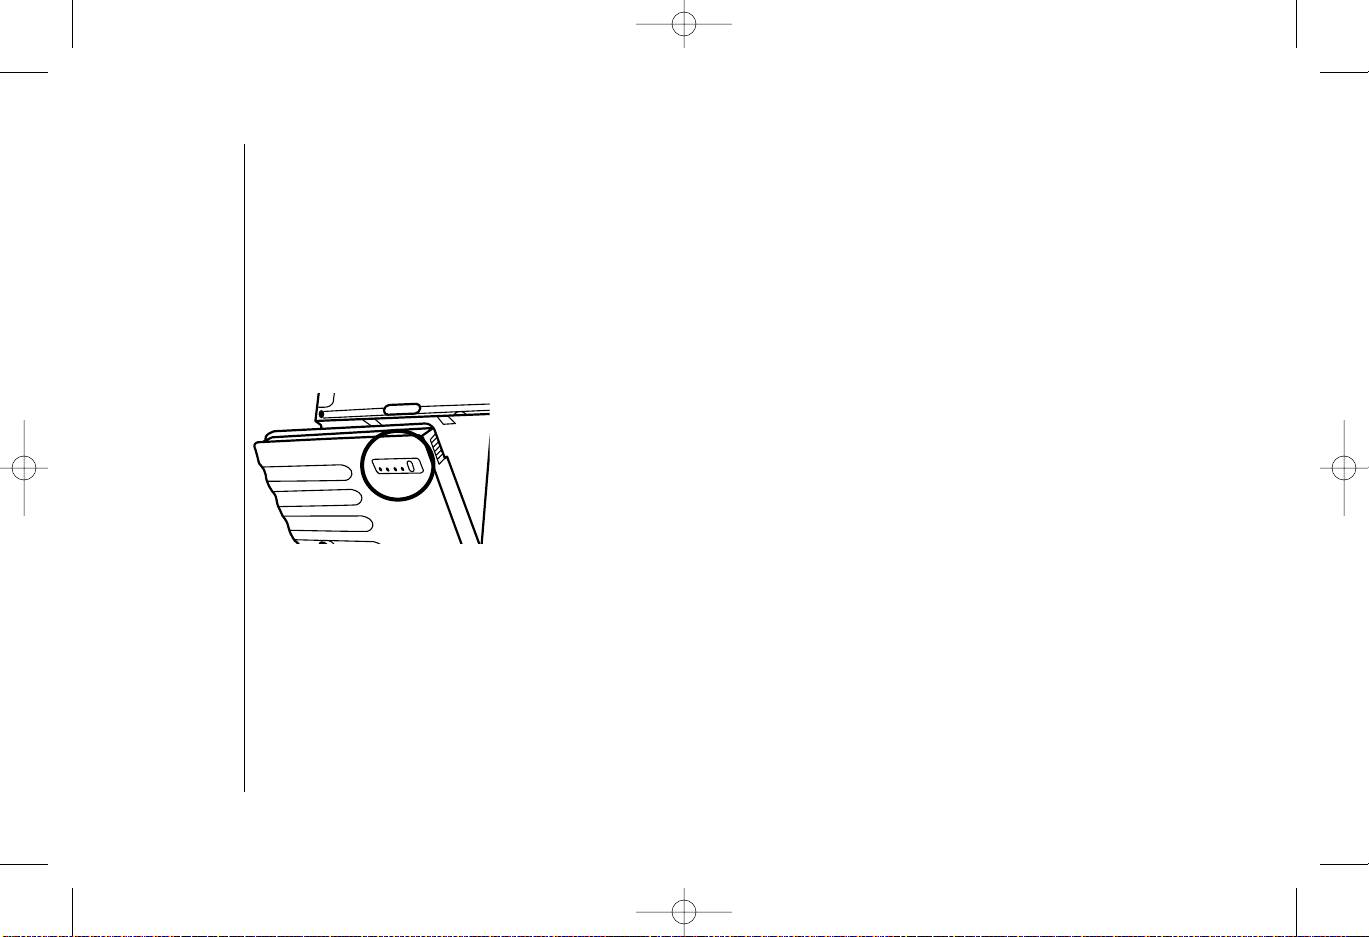
Your battery has an LED gauge that indicates how
much power remains. To determine how much of
the battery's charge remains, press the indicator
button on the battery. The LEDs will light to signify
the percentage of charge remaining.
When the battery is running low, the Windows operating system will display a
prompt screen. This power alert feature can be set or updated by clicking
Start > Control Panel > Power Options > Alarm.
Any time your battery charge falls below 25%, you should reconnect the AC
adapter to recharge the battery or shut down your notebook and insert a
fully-charged battery.
BBIA_5550_vprM_PalominoGetStart 8/9/02 4:43 PM Page 11
8
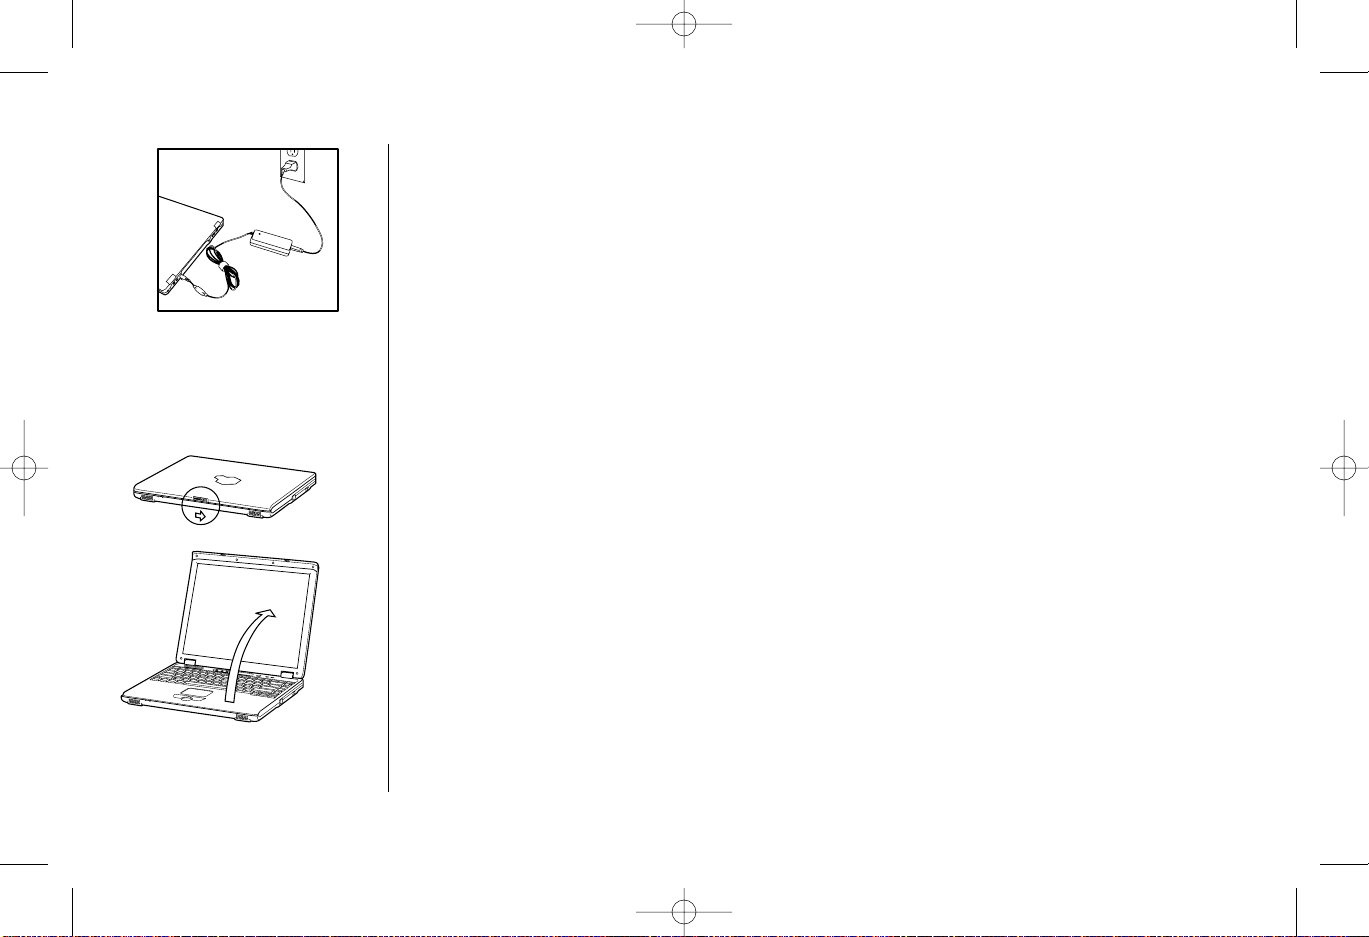
Connecting the AC adapter
Your battery will need to be charged when you first unpack your notebook.
To charge the battery, plug in the AC adapter and plug the AC adapter jack into the
power connection on the back of your notebook. Fully charge the battery before
using the notebook without the AC adapter. When charging, the charge indicator
light will glow orange; when fully charged it will glow blue.
Turning the notebook on and off
Starting your computer
REMINDER: Make certain your notebook is connected to a working phone
line or a network with Internet access before starting up for the first time. This
will allow the automatic registration process to begin. Connect one end of
the included modem cable to the modem jack on the side of your notebook
and the other end to a working phone line before you turn on the notebook.
· Open your notebook by moving the latch in the front center of the notebook to
the right and lifting the display to a comfortable viewing position
· Press the red power button near the top of the keyboard
· The display will light up and Windows®will begin to load
NOTE: If a bootable CD (such as the Restore CD) is left in the notebook when it is started, Windows
may start up from the disc rather than the hard drive. If you mistakenly boot up from a disc and wish to
BBIA_5550_vprM_PalominoGetStart 8/9/02 4:43 PM Page 12

9
restart from the hard drive, remove the CD and restart the notebook.
Your notebook has Microsoft®Windows®XP Home preinstalled on its hard disk
drive. The first time you turn on your notebook, the Windows setup program runs
automatically. You will be asked a series of questions to configure your notebook.
Follow the instructions as they appear on the display.
NOTE: If your notebook is left powered on but unused for an extended period of
time, it may go into standby mode or hibernation mode. In both modes the screen
goes dark in order to save power. You can determine if your notebook is in standby
or hibernation mode by checking the power indicator at the top of the keyboard—
the LED will flash instead of glowing constantly. To wake your system from either
mode, press the red power button at the top of the keyboard briefly and your
display will light up.
Turning off your computer
· Save all information and close all application programs
· Click Start, then click Turn Off Computer
· In the Turn Off Computer dialog box, click Turn Off and wait for your notebook to
power off automatically. The notebook is off when the power indicator light stops
glowing.
· Turn off any other devices connected to your notebook
· Alternately, you can depress Ctrl+Alt+Del to access the Windows Task Manager
window and Click Shut Down > Shut Down
BBIA_5550_vprM_PalominoGetStart 8/9/02 4:43 PM Page 13
 Loading...