

Page 1

PA IRI NG PROC ESS
1. Camera and receiver must be connected to 12 Volt DC power supply.
3. Press and hold the “pair” button on the receiver for 3 seconds
and release. (Monitor will display “Please press TX pairing bu tton”)
TR OUB LE SHOOT ING
- Check 12VDC power at camera and
receiver box.
WVRXCAM1
MA2A11100 01 -1 R
Easy installation, fits most applications
Package includes a Receiver Box, one rear color camera, stainless steel hardware,
and non-corrosive camera mounting bracket.
Notice: The changes or modifications not expressly approved by the party responsible for
compliance could void the user ’s a ut ho ri ty t o op er at e th e eq ui pm en t.
IMPORTAN T NOTE: To comply with the FCC RF exposure compliance requirements, no
change to the antenna or the device is permitted. Any change to the
antenna or the device could result in the device exceeding the RF
exposure requirements and void user’s au th or it y to o pe ra te t he d ev ic e.
VWM12 /1 2/ 11
Page 2
IN STALLIN G THE CAMERA
IN STALLIN G THE RECE IV ER
1. Choose a location so you can easily splice t he
power and ground connections.
2. Using a voltage meter, measure the power so urce
wires to determine posit ive/negaive p olarity.
.
.
Installation
Scr ew F or Us e
Hex S ocket He ad M4 x M6 L Stain less sc rew
Flat W asher s 4.5x 9.5x1 mm Stai nless
All en wren ch
Anten na Ver tical
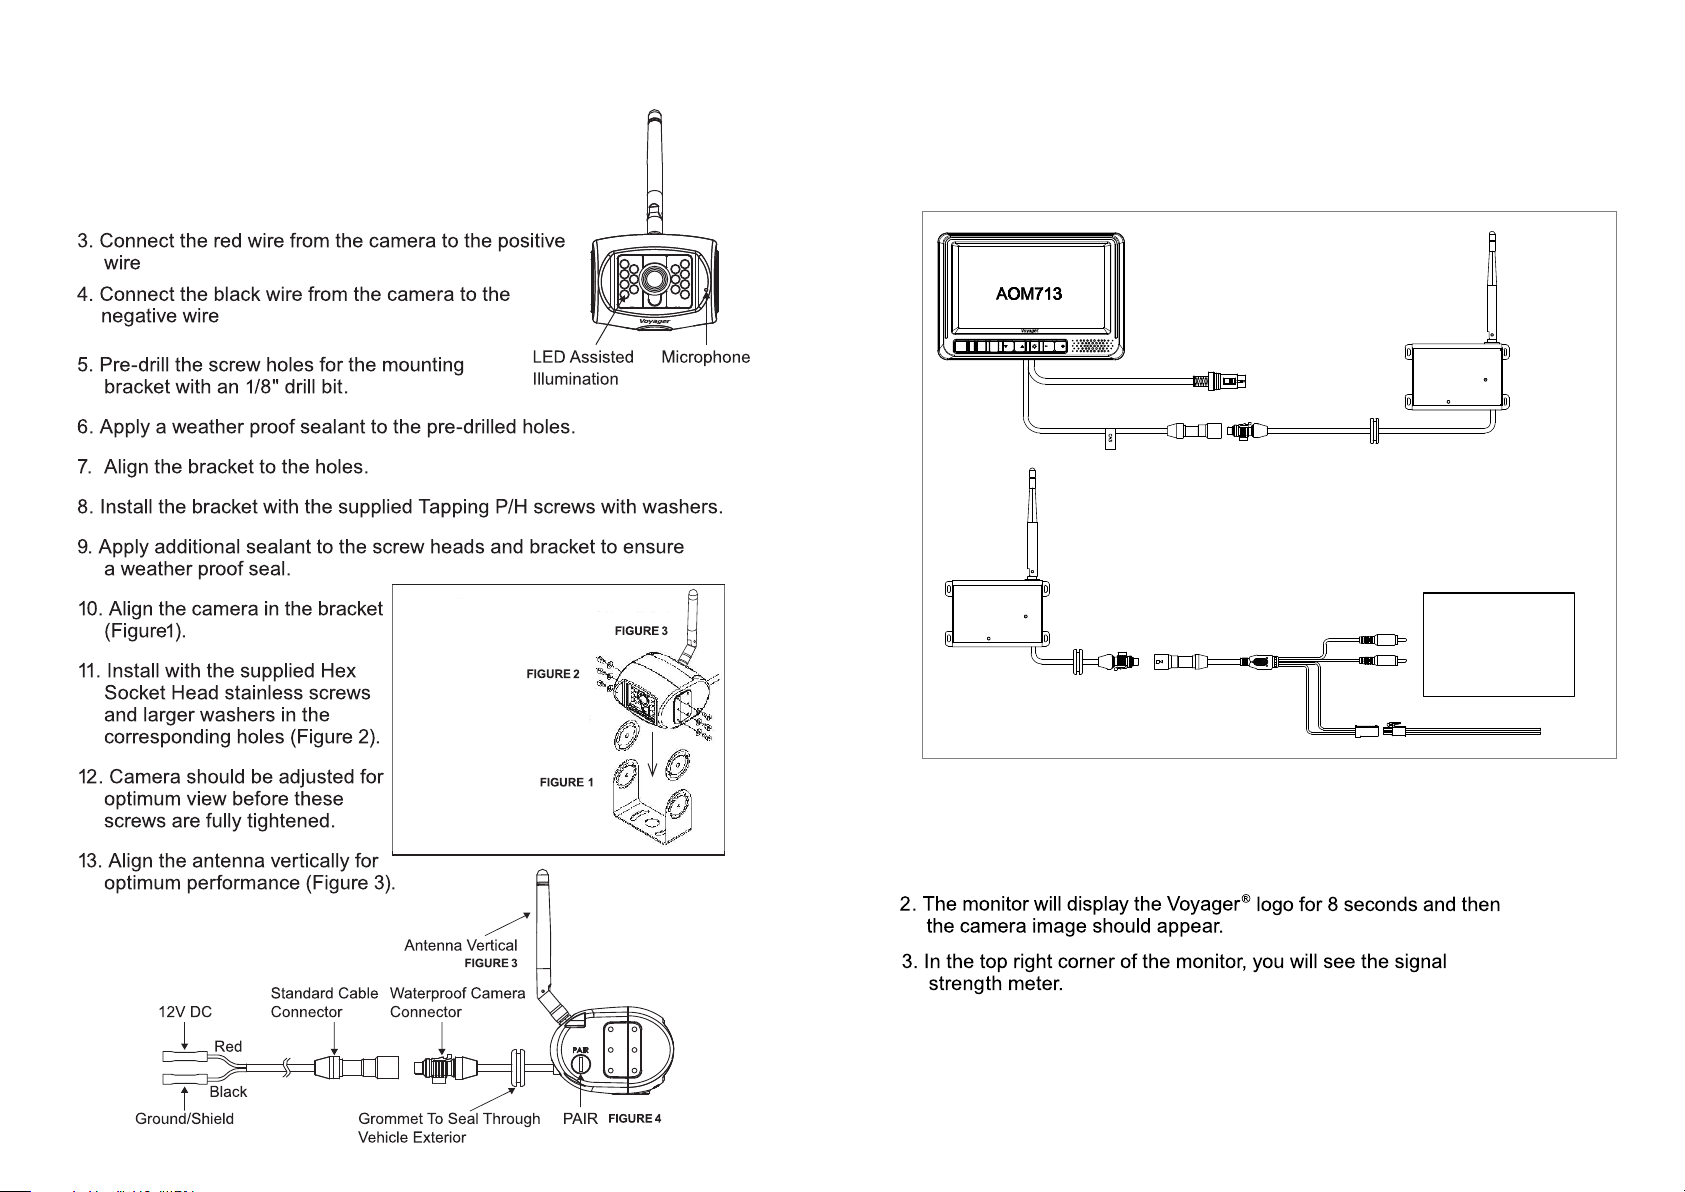
1. Conne ct W VR X1 cable to Voyager Monito r or u se a dapter cable for power,
video, a nd a ud io.
2. Align th e an te nna to its upright positi on .
MENU
VOL UME
SELECT
WVRX CAM1
LCD Mo nitor
WVRX CAM1
31300006
RED ( +12VD C)
BLA CK (GRO UND)
oP ERATIO N
1. Press the power b utton on the monito r and tur n on power to camera.
 Loading...