

Voxson Voxtrack GPS850N Quick Start Manual
Voxtrack GPS850N
Quick Start Guide

Note
All care has been taken to ensure the accuracy of this manual at time of printing however due to
upgrades and enhancements the actual product appearance, screen images, and operation is
subject to change without notice. The manufacturer and/or its affiliates bear no responsibi lity for
errors or discrepancies in information contained within this document. Actual product images
and screen shots may vary from those depicted herein.
Voxtrack GPS850N Quick Start Guide
2

Contents
1 - Introducing the Voxtrack GPS850N 4
Controls............................................................................................. ............................................................4
2 - Using the GPS850N 6
Charging the GPS850N.................................................................................................................................6
Turning the GPS850N on..............................................................................................................................6
Calibrating the touch screen..........................................................................................................................6
Installing the GPS850N in your car..............................................................................................................7
3 - Device Menus 9
The Main Menu ............................................................................................................................................9
System Menu..............................................................................................................................................1 0
4 - Navigation Software Quick Start 11
Map Description .........................................................................................................................................11
Destinator Menus........................................................................................................................................11
Navigating to an Address............................................................................................................................13
5 - Hands Free Operation 15
Setup and Pairing........................................................................................................................................15
Making a Call..............................................................................................................................................15
Receiving a Call............................................................... ......... ........ ........ ........ ......... .................................16
6 - Entertainment 17
MP3 (Music) Player....................................................................................................................................17
Photo Viewer.............................................................................................................................................. 18
7 - Troubleshooting 21
Resetting the device....................................................................................................................................21
My GPS850N wont turn on ........................................................................................................................21
My position on the map isn’t being updated...............................................................................................21
My GPS850N doesn’t seem to hold charge................................................................................................22
My GPS850N keeps saying “Signal too low”.............................................................................................22
8 - Frequently Asked Questions (FAQ) 23
How does GPS work?.................................................................................................................................23
Why are the maps not up to date?...............................................................................................................23
How do I update my maps or load overseas maps? ....................................................................................24
Can the GPS850N warn me about school zones?.......................................................................................24
Do the maps have truck routes for high or heavy vehicles?........................................................................24
Can I connect my GPS850N to my PC?.....................................................................................................24
If I’m having trouble using my fingers on the touch screen, what else can I use?......................................25
What is the difference between “Quick” and “Short” route options?.........................................................25
Where is the best place to mount my GPS850N in the car?........................................................................25
Where can I buy accessories from?.............................................................................................................25
9 - Product Disclaimer 26
Voxtrack GPS850N Quick Start Guide
3
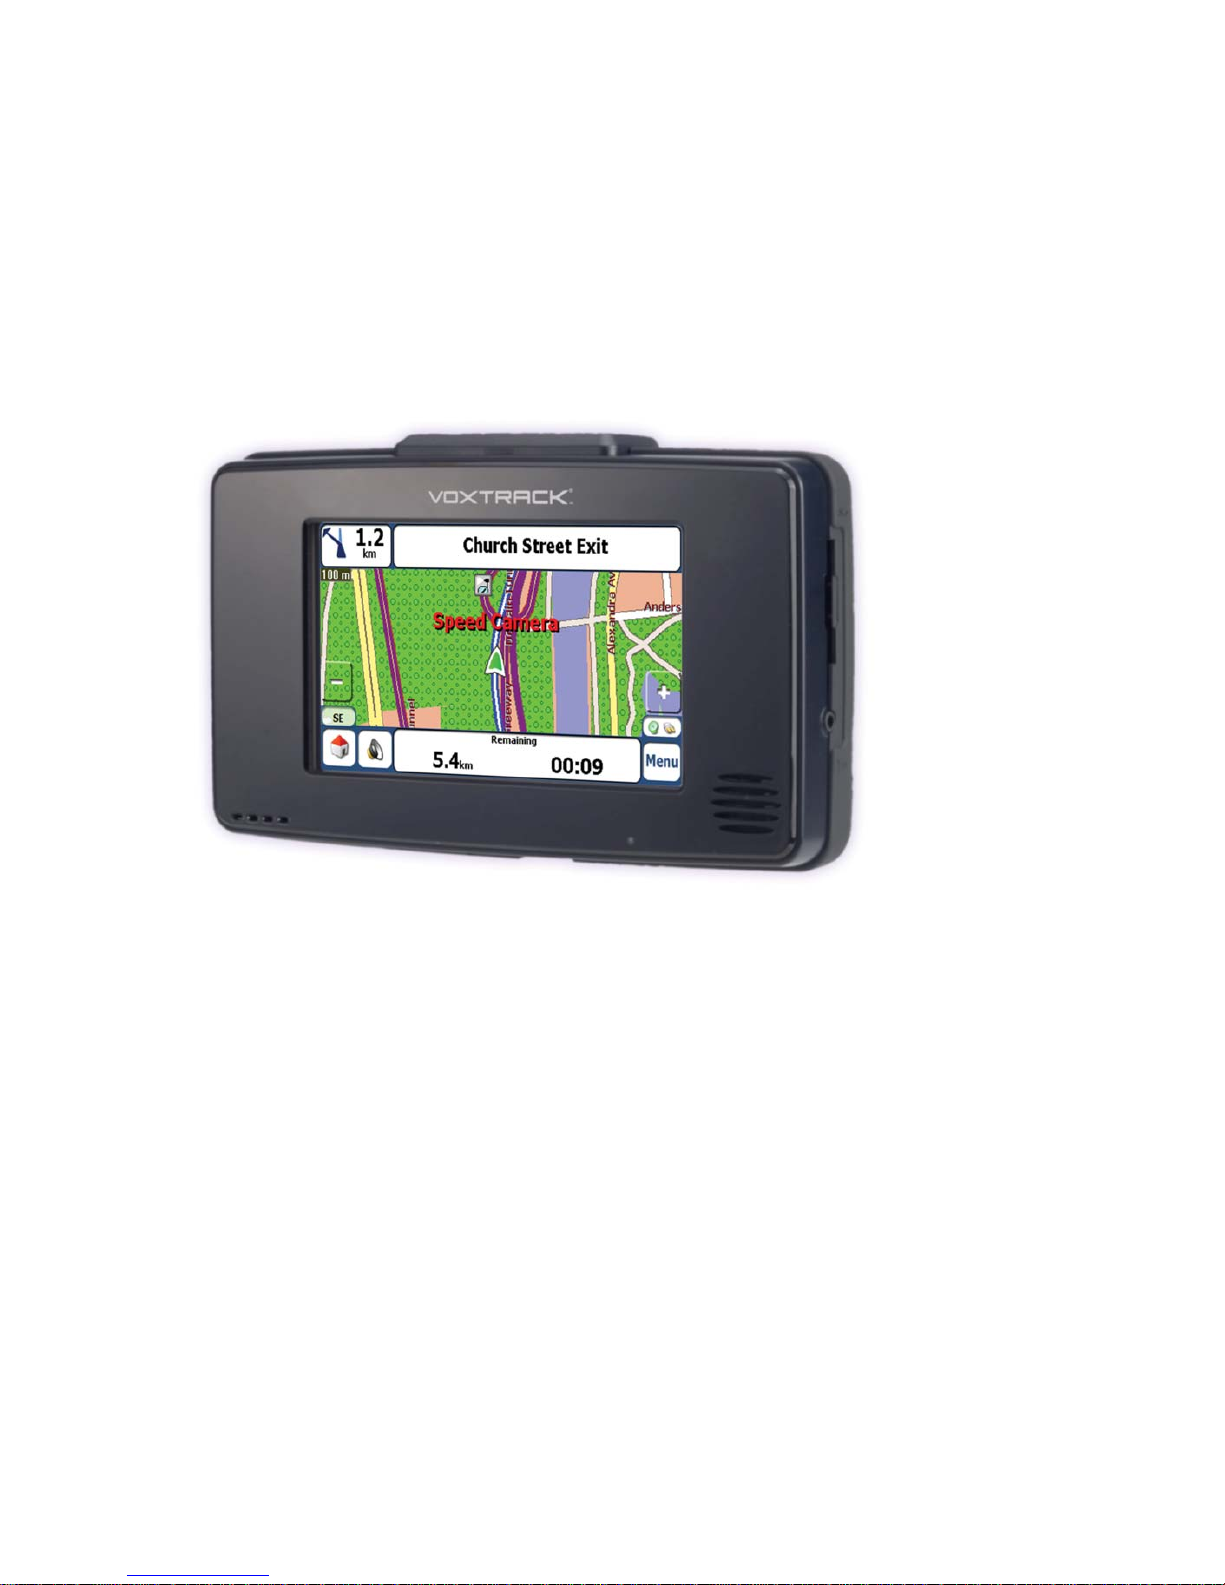
1 - Introducing the Voxtrack GPS850
Congratulations, and thank you for purchasing your new Voxtrack GPS850NGPS Navigation
System.
The following manual will briefly describe how to install and use your Voxtrack GPS850N. For
more detailed information on the operatio n of the navigation softwa re, p lease refer to the
Navigation Software User’s Manual included with your device.
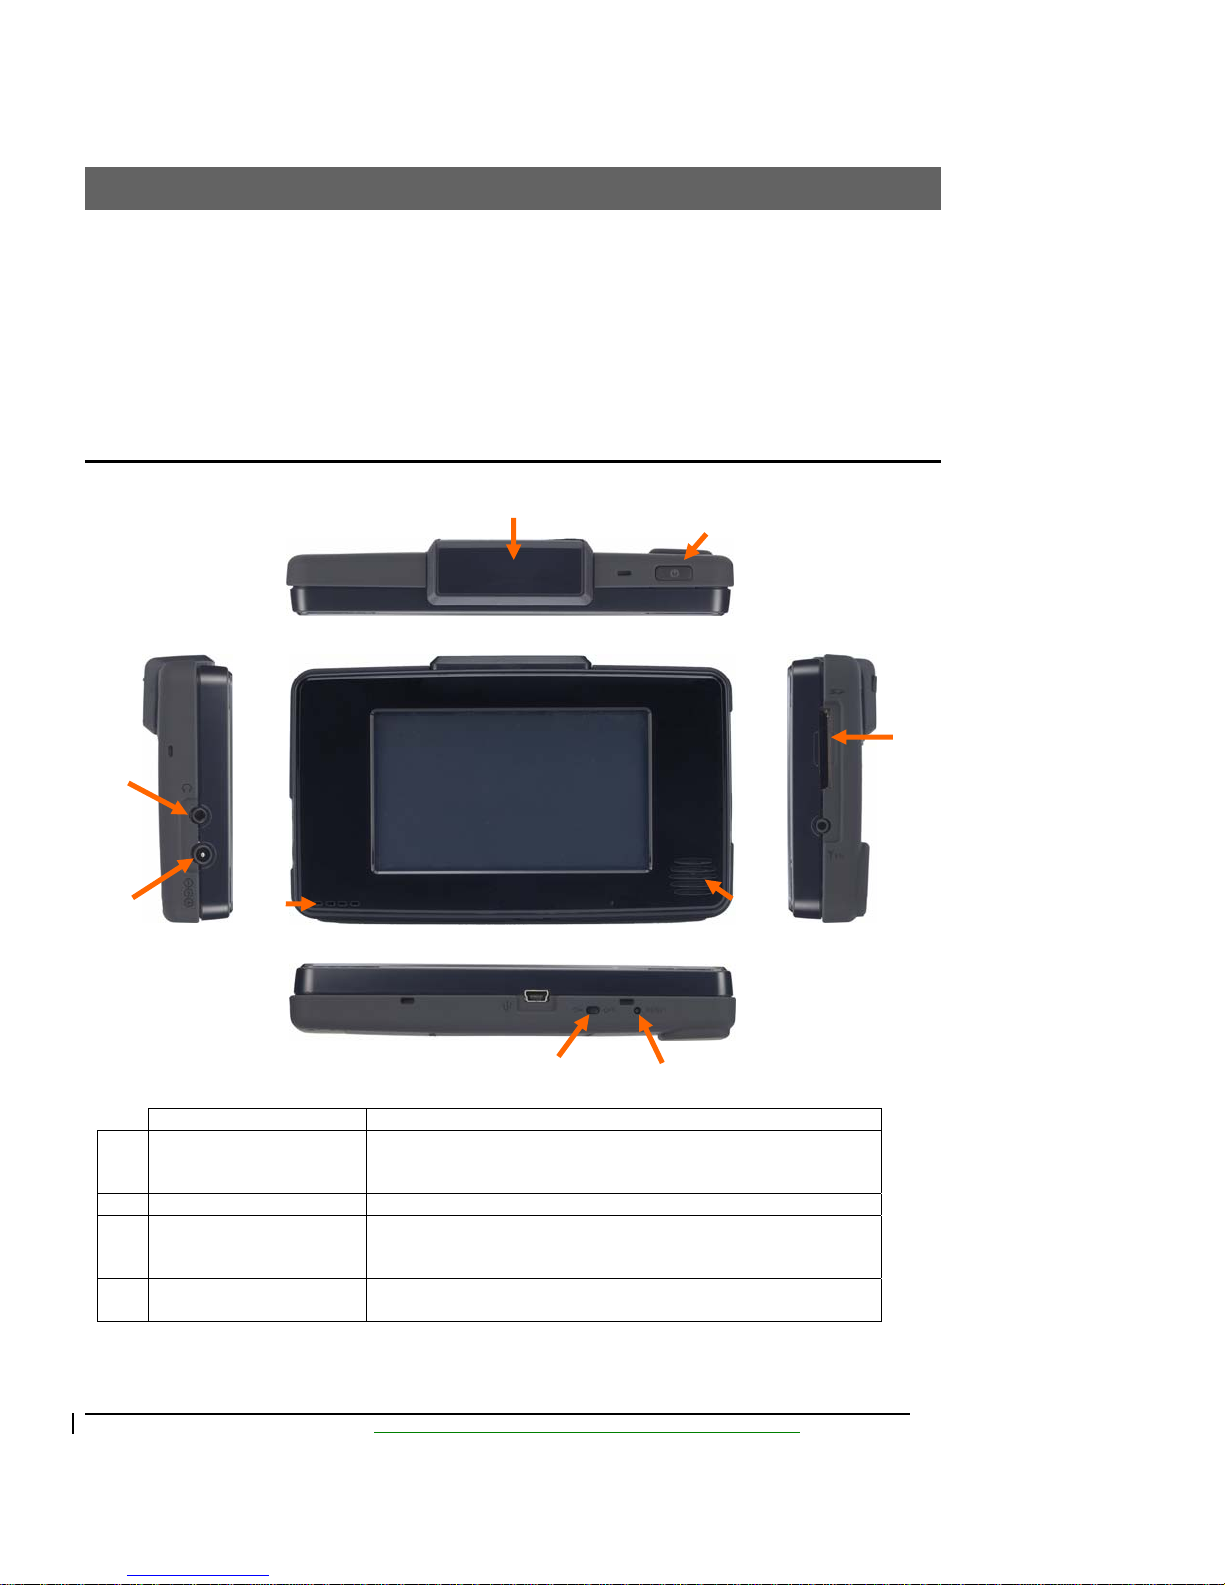
Controls
Item Description
1 Internal GPS Antenna Receives signals from GPS satellites to determine
2 Power Button Slide upward to turn unit on or off.
3 SD / MMC Card Slot SD card contains the navigation software and maps.
4 Reset Button Used to restart the device in the case that it becomes
location. Must have clear view of the sky and be
pointing upwards in order to work correctly.
The card must remain in the unit whilst using the
navigation software.
non-responsive or unstable.
Voxtrack GPS850N Quick Start Guide
4
Deleted:
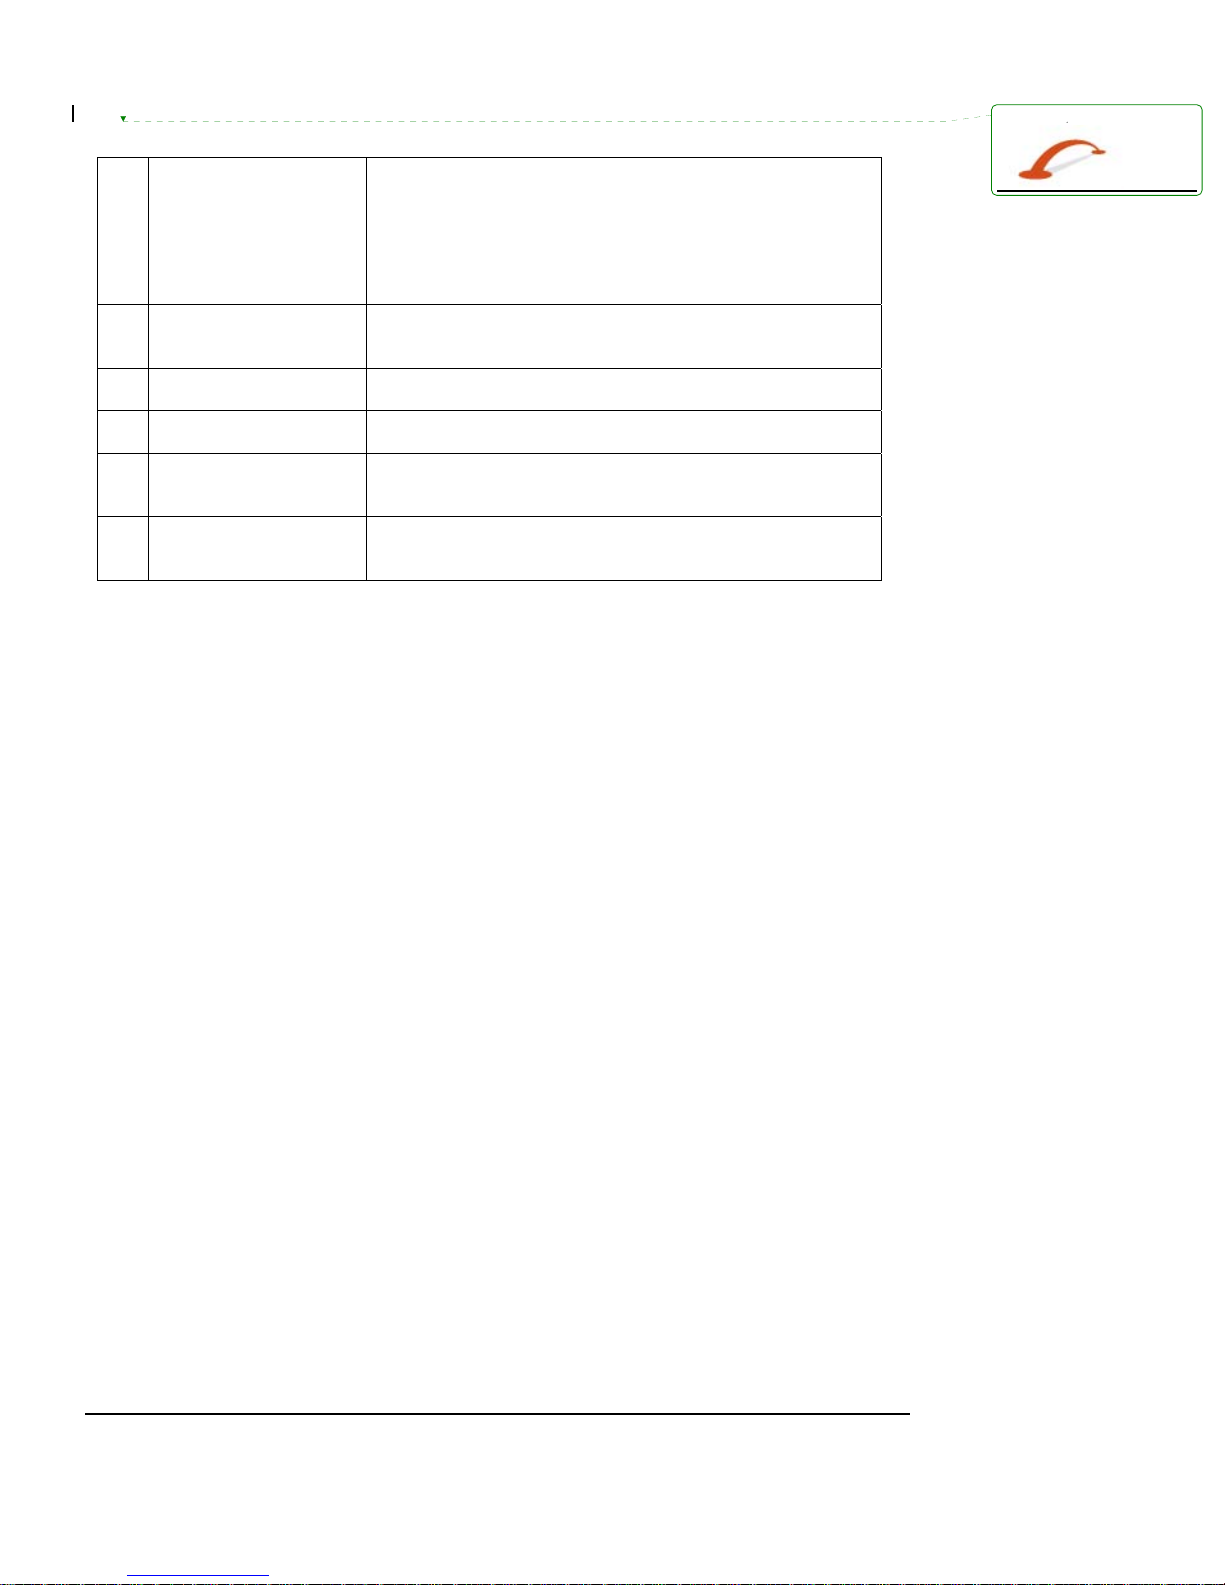
5 Battery Switch Disconnects the internal battery to completely switch
device off. This is only necessary if the device is to be
stored for an extended period of time.
NOTE: Turning the internal battery off will also perform
a hard reset which will erase all user settings and
require the first start process (screen calibration, time
setting, etc) to be completed again.
6 Charger Connector Plug in the supplied charger to charge the device.
Device should be connected to cigarette lighter charger
whenever in use in the vehicle.
7 Earphone Jack 3.5mm stereo jack used to connect headphones or FM
transmitter to use as alternative to internal speaker.
8 Microphone Internal microphone for use with h a nds-free
functionality.
9 Touch screen Used as the display as well as input device. Tap on the
screen area to activate corresponding buttons as
displayed.
10 Speaker Internal speaker to play voice guidance from navigation
software as well as phone speaker when using handsfree.
Voxtrack GPS850N Quick Start Guide
5
6
2 - Using the GPS850
Charging the GPS850
Your new GPS850N will need to be charged for at least 4 hours prior to first use. This will
condition the battery and prolong battery life.
To charge the battery:
- Switch the battery switch on the bottom of the unit to the on p o si tion.
- Connect the charger cable to the charger connector in the left side of the unit.
NOTE: To ensure a constant charge, for the first charge you should use the 240V AC home
charger.
Turning the GPS850N on
Use the power switch on the left top of the unit to turn your GPS850N on and off. If the device
does not turn on, ensure that the battery switch on the bottom is turned on and that the charger
is connected.
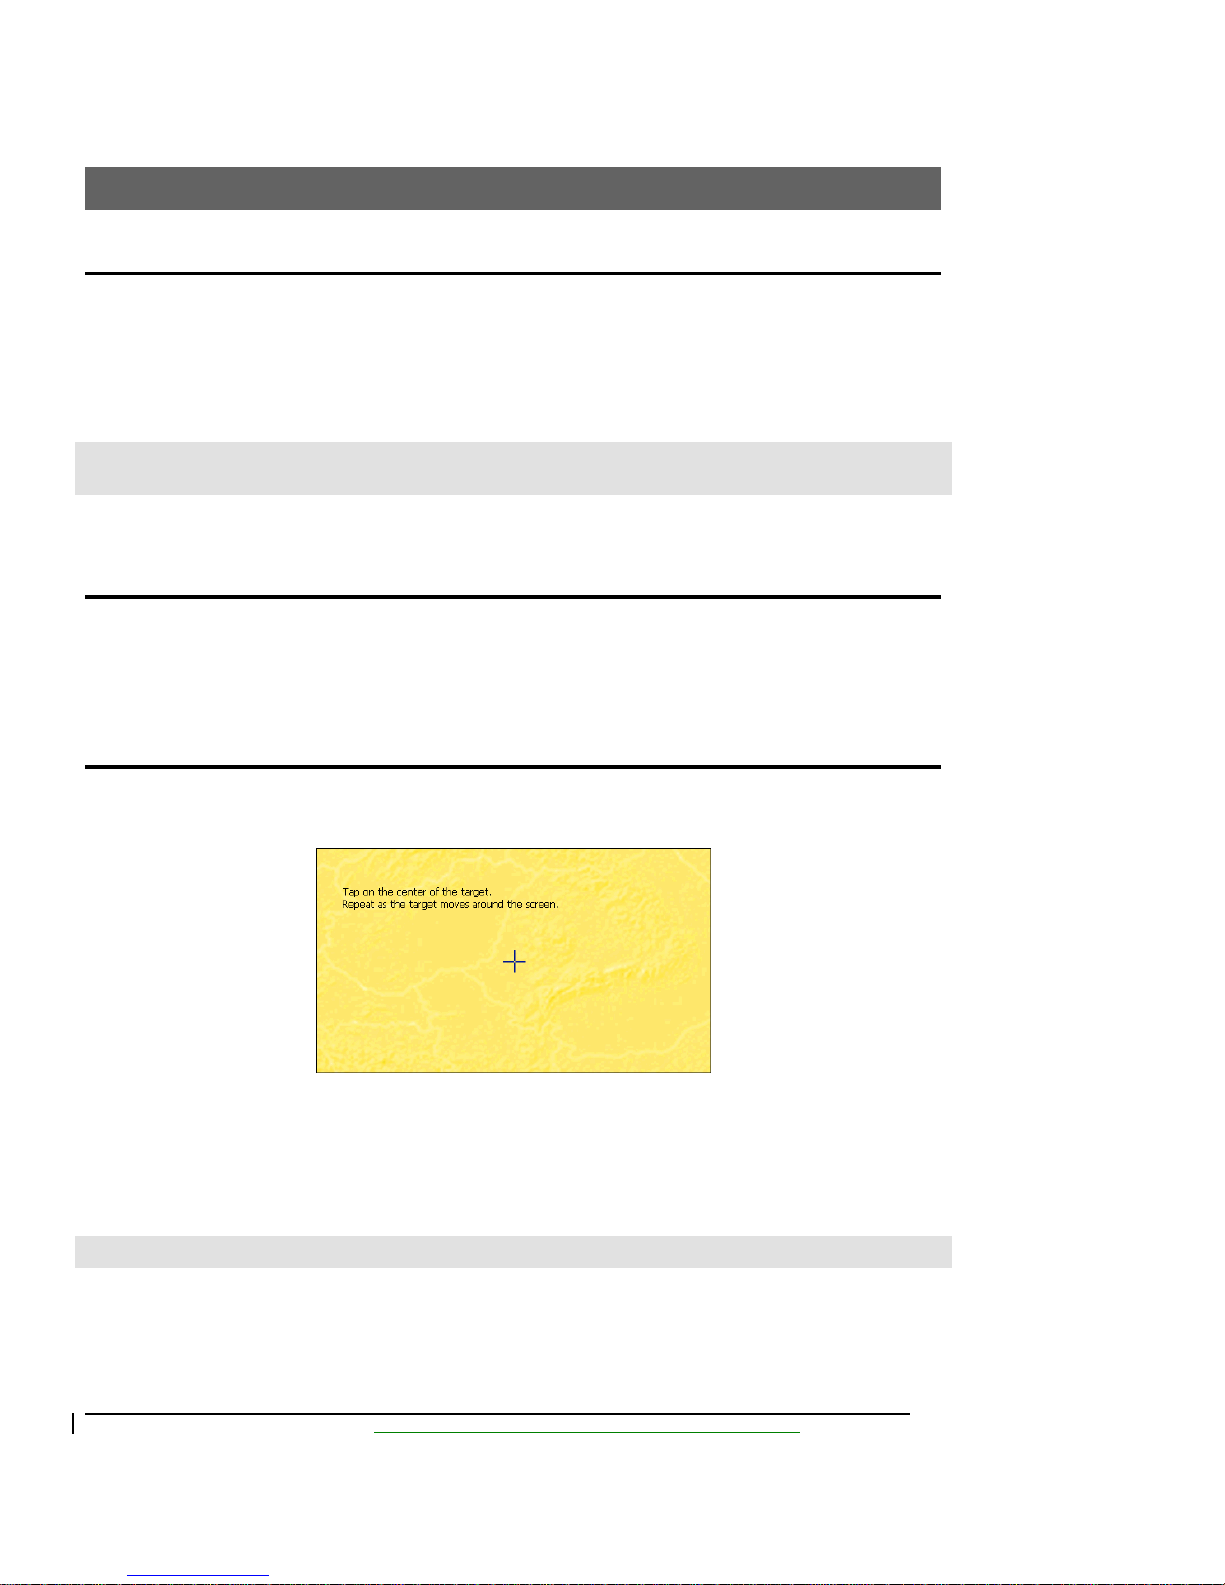
Calibrating the touch screen
When you first turn on the GPS850N, or whenever you switch off the battery switch on the
bottom of the device, you will see the following touch screen calibration display.
To calibrate the touch screen, carefu lly press on the centre of the black cross wi th your finger or
blunt pencil. The cross will move f r om the centre of the screen to the top left corner. Keep
pressing on the cross as it moves aroun d the screen until calibration screen closes. If you find
that the process is repeating over and over, try using a stylus or blunt pencil to tap the cross
rather than a finger. It is not recommended to use a pen on the touch screen as this may mark
the surface and be difficult to erase.
WARNING: Never use a sharp object on the touch scr een as you may cause irreparable damage.
Voxtrack GPS850N Quick Start Guide
7
Deleted:
Installing the GPS850N in your car
Please note that the device must be mounted in the vehicle such that is does not int er fere with
the driver’s view or operation of the veh icle’s controls. The device must also not be mounted in
the deployment area of the vehicle’s airbags (if fitted). This device must be installed in
accordance with all applicable local laws.
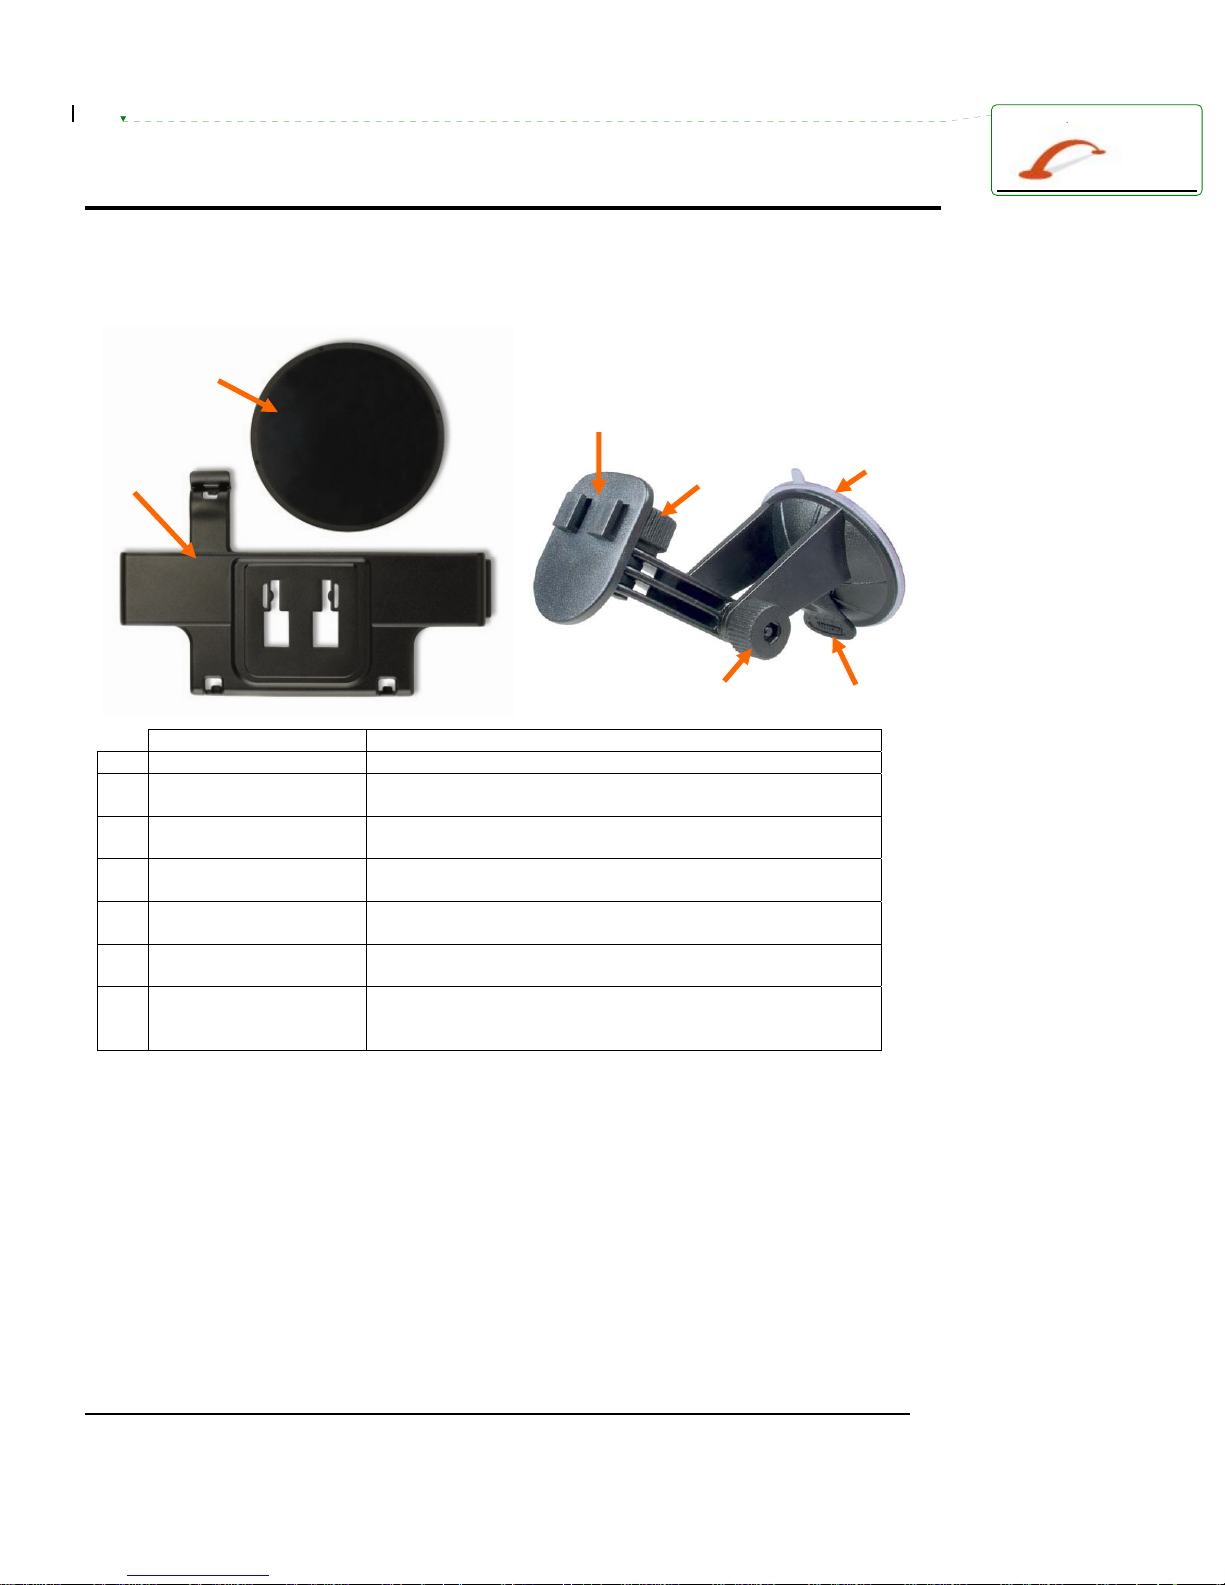
Item Description
1 Cradle Tabs Used to connect cradle to suction mount bracket.
2 Left-Right Adjustment
Screw
3 Up-Down Adjustment
Screw
4 Suction Mount Lever Use to fix / release the suction mount from the
5 Suction Cup Mounts a gainst windscreen. Ensure both suction cup
6 Cradle Holds the GPS850N device. Connects to bracket via the
7 Dash Mounting Plate For use when windscreen mounting is not an option.
1. To assemble your car holder kit first attach the cradl e to the suction-mount bracket. To
complete this start by orientating the bracket such that the lever at the base is facing
downwards. Place the cradle onto the bracket en suring that the two tabs on the bracket
align with the holes in the cradle. Slide the cradle downwards until it is securely in place.
2. Place the car holder kit in a suitable location on your windscreen ensuring that the lever
at the base of the bracket is switched such that it is away from the glass. The area of the
windscreen where the bracket is to be mou nted should be cleaned with an alcohol based
cleaner prior to attaching the bracket. The best location for the device is usually at the
bottom of the windscreen in the centr e of the vehicle.
3. Whilst firmly pressing the bracket against the glas s, push the lever back into place
against the base of the bracket. Once fitted , pull gently on the bracket to check that th e
suction mount is secure.
CAUTION: Do not place any force on the cradle itself as it can be easily broken.
Voxtrack GPS850N Quick Start Guide
Loosen to allow left and right angle adjustment of
suction mount bracket. Tighten once angle is correct.
Loosen to allow up and down angle adjustment of
suction mount bracket. Tighten once angle is correct.
windscreen.
and windscreen are clean before mounting.
tabs.
Adhesive sticks the plate to the dashboard then suction
cup can be mounted to the plate.

Deleted:
4. Before attaching the GPS850N device into the cradle, ensure that the battery swi tch is
turned on. Position the bottom of the GPS850N first by aligning the tabs on the cradle
with the holes in the device, then til t the top of the GPS850N back into position (B). Pull
gently on the top clip of the cradle until it clicks into place. With the device in pl ace,
adjust the bracket to adjust the position of the GPS850N so that you can see the screen
comfortably. Loosen the screws on the bracket to make any adjustments and tighten
them securely once finished.
5. Connect the supplied car charger cable to the Charger connector on the left side of the
GPS850N and plug the other end of the cable into the cigarette lighter socket in the car.
Use the power button on the top of the GPS850N to turn the d evi ce on.
The first time you turn on your navigation device it may take up to 10 or 15 minutes to acquire
reliable GPS signal. Obstacles such as car ports, bridges, tunnels, and buildings will affect the
navigation device’s ability to obtain an accurate signal. Do not be alarmed if the map displays
your current location in another city when you first turn the unit on, your position will be
automatically updated once reliable GPS signal is acquired. It is best to move your vehicle to a
clear and open area free from obstacles that may hinder the GPS performance, and then remain
stationary until the GPS has acquired your current position. If the vehicle is moving whilst the
GPS is trying to acquire a signal, the acquisition time may be significantly increased.
Your Voxtrack GPS850N is now ready for use! Please read the instructions regarding navigation
software to learn more about using your GPS.
CAUTION: Do not leave the device mounted i n your car when parked. Exposure to extreme heat
may cause damage. Simply disconnect the charger and remove the device from the cradle. You
may choose to leave the mounting system in pl ace on the windscreen for easy installation when
you return to your vehicle. Removing the device from view will also reduce the risk of theft.
Voxtrack GPS850N Quick Start Guide
8
 Loading...