

Page 1
GPS-500
Quick User Guide
Page 2
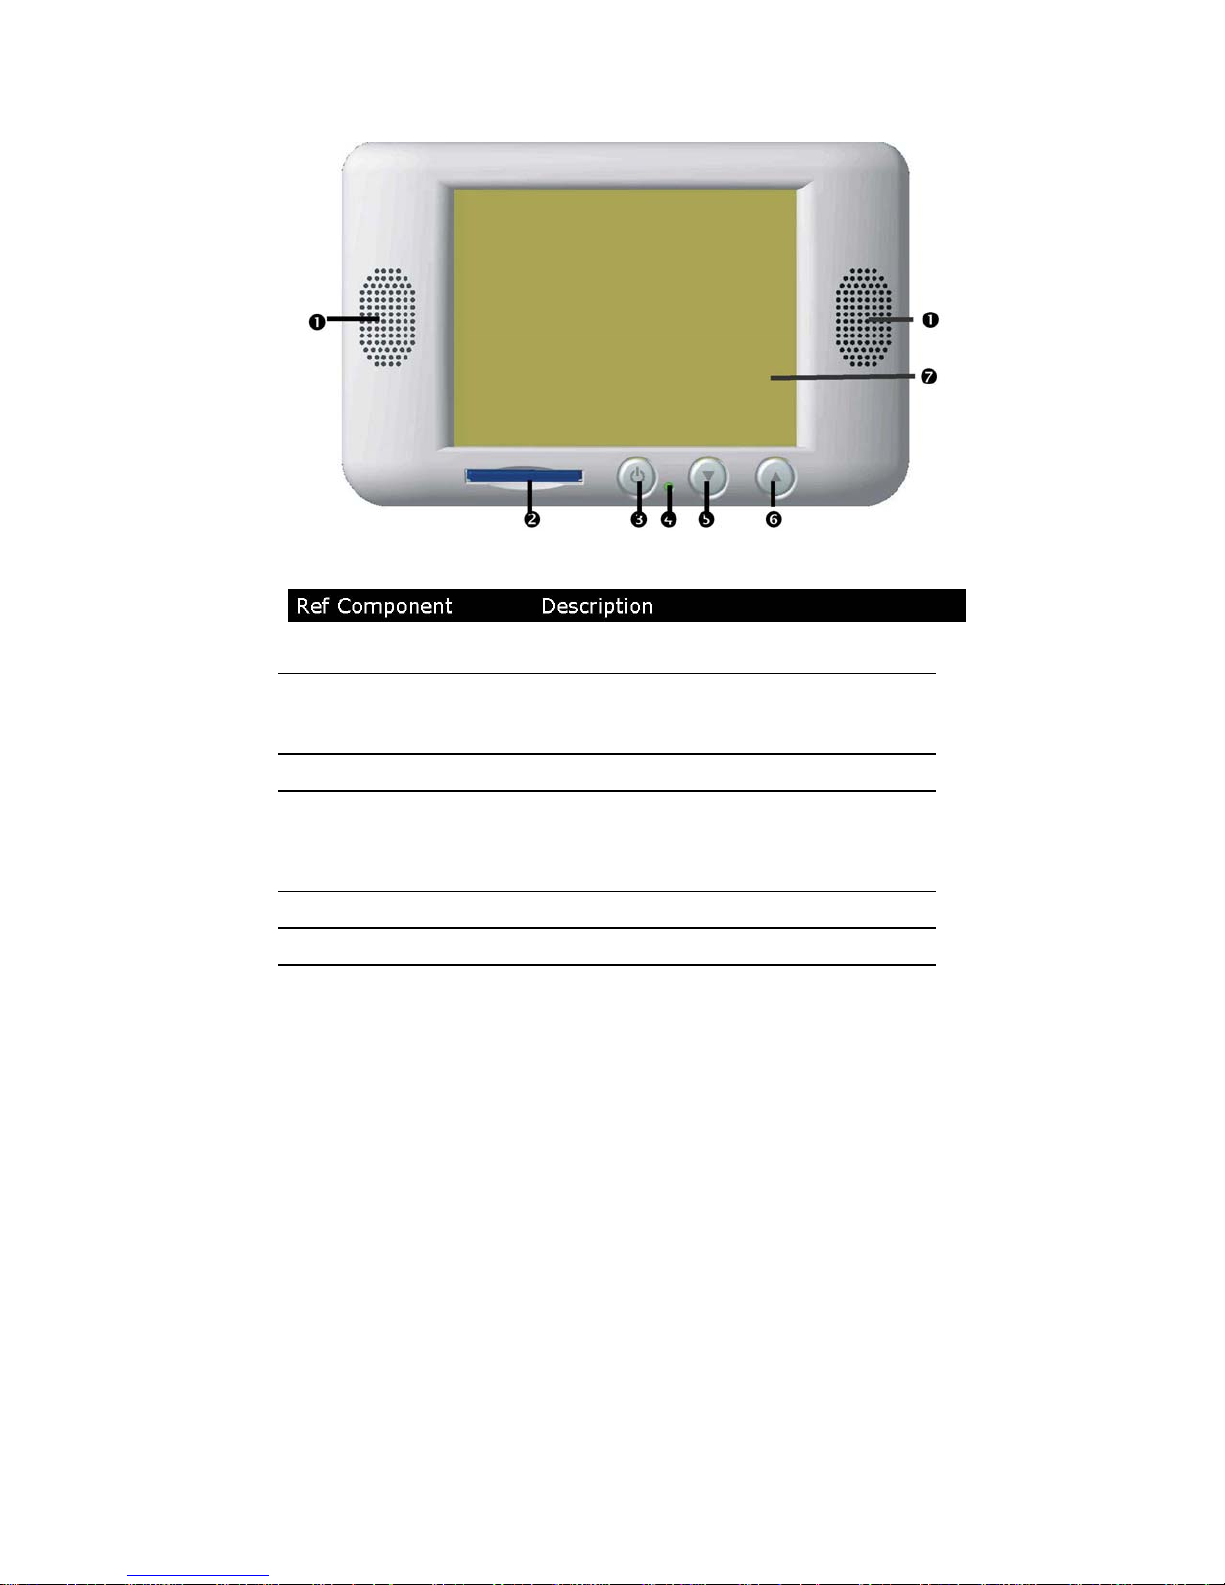
Front Components
Loudspeaker Plays back voice prompts and warnings.
1
SD/MMC Slot Accepts an optional SD (Secure Digital) or MMC
2
(MultiMedia Card) card for map data storage.
On/Off Button Turns the device on or off.
3
Battery Charge
4
Indicator
Volume key Turns the volume down.
5
Volume key Turns the volume up.
6
Touch Screen Displays the output of your device. Tap on the
7
The loading display will shine red during the
charging process. It will shine green when the
accumulator is completely charged.
screen with your finger, a stylus or a "blunt" tipped
pen to select menu commands or enter data.
Page 3
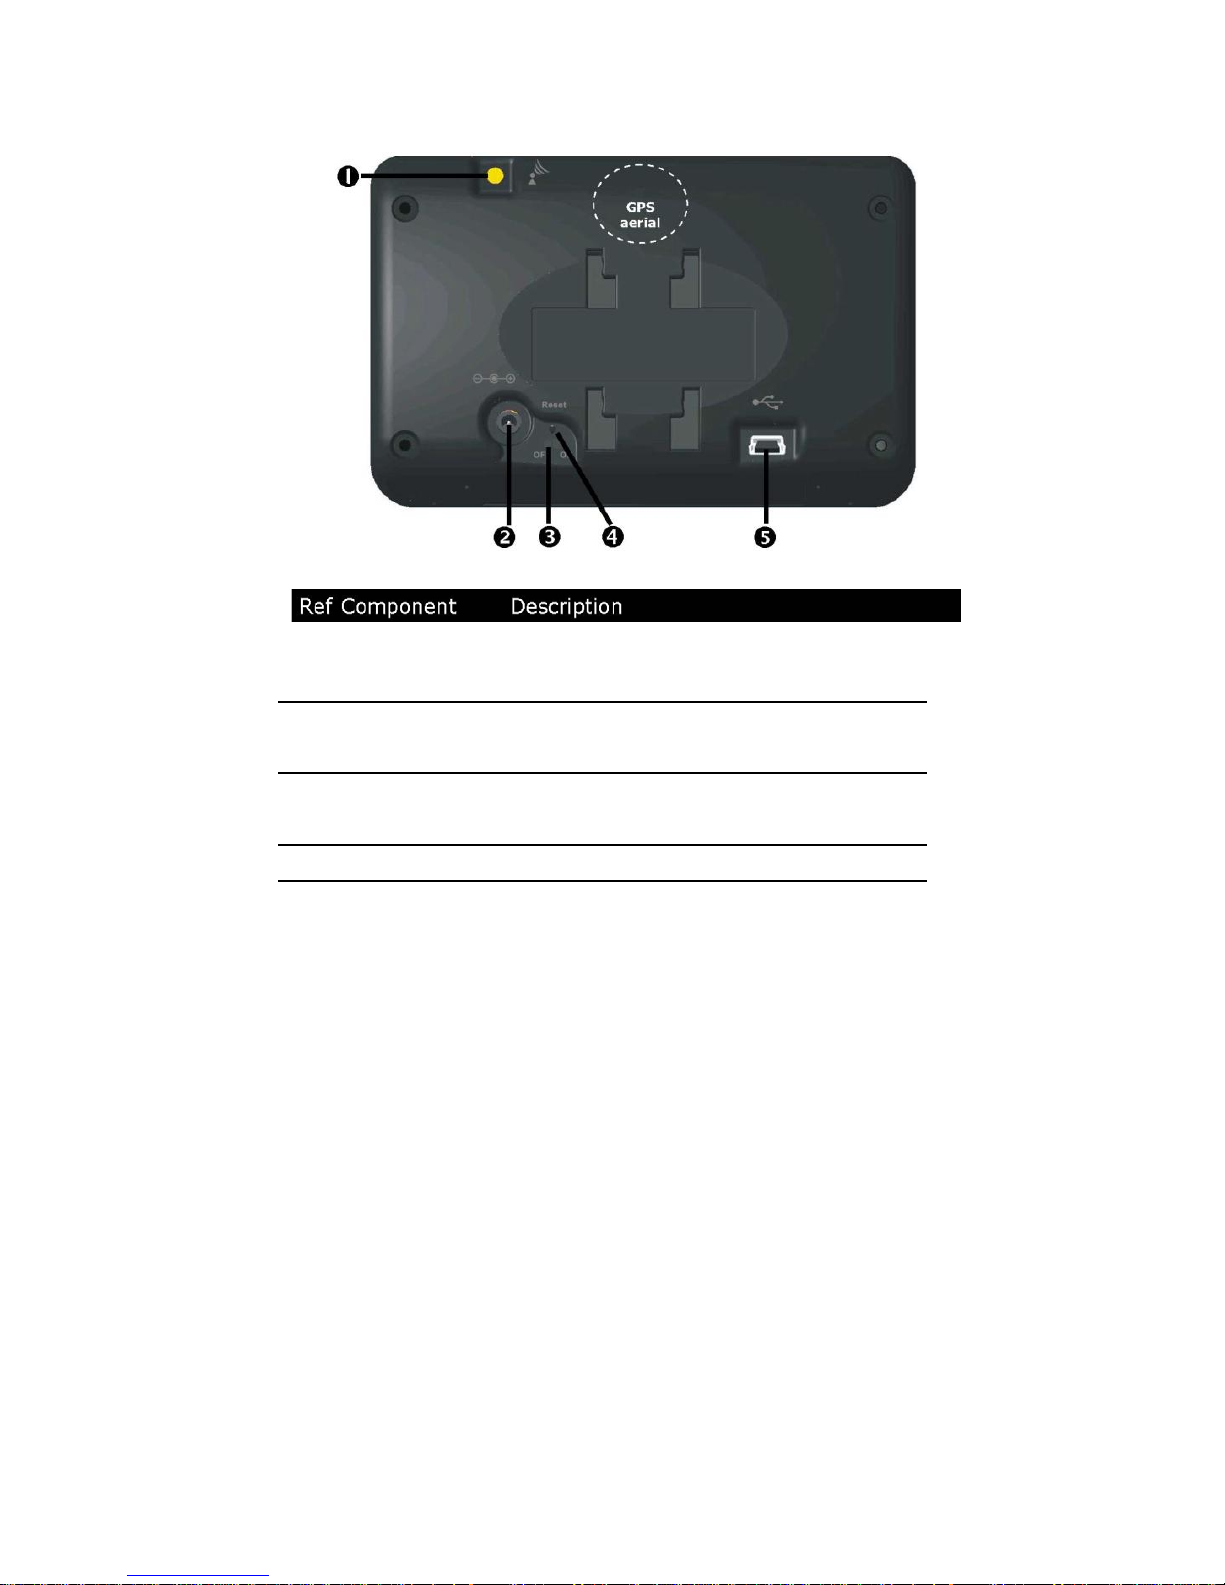
Back Components
1 External antenna
connection
2 Car adaptor port
Main switch/
3
Battery button
Reset button
4
Mini-USB-
5
Connector
The internal GPS antenna is located in the center of the upper side of the
device.
Connection for an optional external GPS
antennal.
Connection to Power cable for output 5V
cigarette lighter.
Disconnects the internal battery (also Hard
Reset).
Restarts your appliance. (Reset).
Connection for connecting to a PC by means
of the USB cable.
Page 4

Initial Set-up
The following steps will guide you through the initial basic set up of the
navigation system.
1. Charging the battery
Attention: It may be necessary to charge the battery before
initially switching on the device.
Please pay attention to the following notes when handling the battery:
The charge indicator is red until the navigation system is fully charged.
When the navigation system is fully charged the charge indicator turns
green.
Note: You can use the navigation system during the charging process.
It is advised to leave the car adapter connected when in use to ensure that
the internal battery remains charged and navigation is not interrupted.
Page 5

2. Switching on the navigation system
Remove the protective plastic from the screen and ensure the main
power switch on the back of the unit is in the ON position.
Attention: Always leave the main switch in the ON Position. The
switch should only be set in the OFF position to preserve battery
charge if the unit is to be stored for an extended period of time.
Press the power button
unit will display the main screen. Tap the “Navigation” button on the
screen to start the navigation software. To change the setup of the device,
tap the “Settings” button (see software user guide).
to switch the unit on. When switched on the
Page 6

3. Attaching the car mount
Attention: Only fix the holder for the navigation system to the
windscreen in a position that does not impede driver’s view of the
road.
Note: Clean the suction cup and the windscreen thoroughly
with a glass cleaner. Warm the suction cup slightly at temperatures
below 15° C.
1. Place the holder with the suction cup onto the windscreen in the
desired location.
2. Press the lever on the suction cup downwards as shown. The
mount will attach itself to the windscreen firmly.
3. Align the mounting holes in the device with the tabs on the mount.
Push device firmly downwards to lock into place.
Page 7

4. Connecting the car adapter
1. Plug the jack (1) of the car adapter cable into the corresponding
receptor on the back of your navigation system.
2. Insert the power adapter (2) now into the cigarette lighter socket
and ensure that it will not lose contact while driving. This could
cause a malfunction.
Note: Remove the power adapter from the cigarette lighter
socket when ending a trip or when parking the car for an extended
period of time. Otherwise the car battery could be drained. In this
case use the power switch
to switch off the navigation system.
 Loading...