

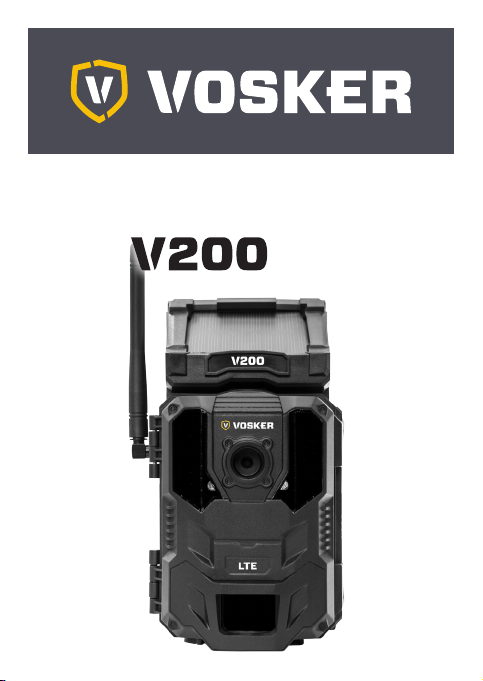
Vosker V200-V, V200 QUICK START GUIDE [ml]
QUICK START GUIDE
V200-V
V200
V 1.4

IN THE BOX
1x Camera
1X Quick start guide
1x Adjustable mounting arm
1X Micro SIM card is preactivated and inserted in the camera
1X 8 GB SD Card
1X USB charging cable
1X Installation strap
ENGLISH
Note: Batteries are sold separately.
User manual, latest firmware & FAQ available at:
www.vosker.com
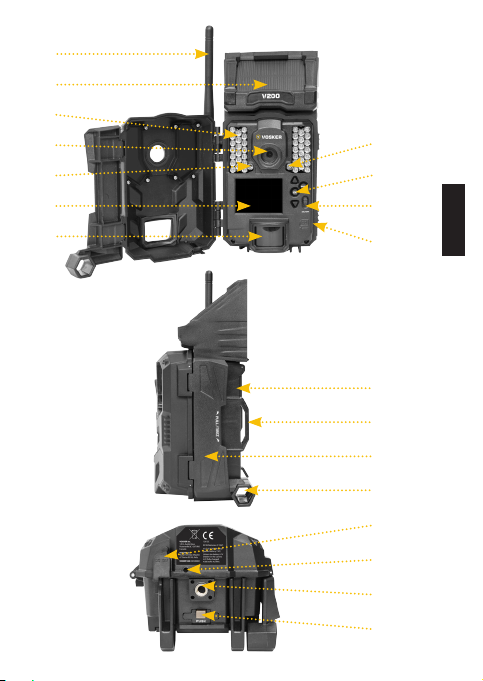
COMPONENTS
1. Antenna
2. Solar panel
3. LEDs
4. Photo lens
5. Light sensor
6. Viewing screen
7. Detection lens
8. Test light
9. Navigation buttons
10. ON / OFF Switch
Steel security boxes may reduce
the wireless functionalities of the product.
* Specs and features may differ across comparable models.
Refer to the website or packaging for full details.
2
11. SD card slot
12. Battery case &
Micro SIM card slot
13. Slot for installation strap
14. Locking latch
15. Cable lock hole
16. 12V jack
17. Microphone
18. Tripod mount
19. Battery door push button

1
2
3
4
5
6
7
8
9
10
11
12
13
14
15
16
17
18
19
ENGLISH
3
CHARGING THE INTERNAL BATTERY
Charge the camera for 24-48 hours before use. While charging, make
sure the camera is turned off and the solar panel is facing down so it
does not interfere with the USB charging process.
Plug the 12V-USB cable from the 12V port at the bottom of the camera and connect it to a USB port. Once plugged, the screen will turn on
and it will show the charging battery level for 10 seconds. Press the
OK button once more to see the battery level reappear.
ENGLISH
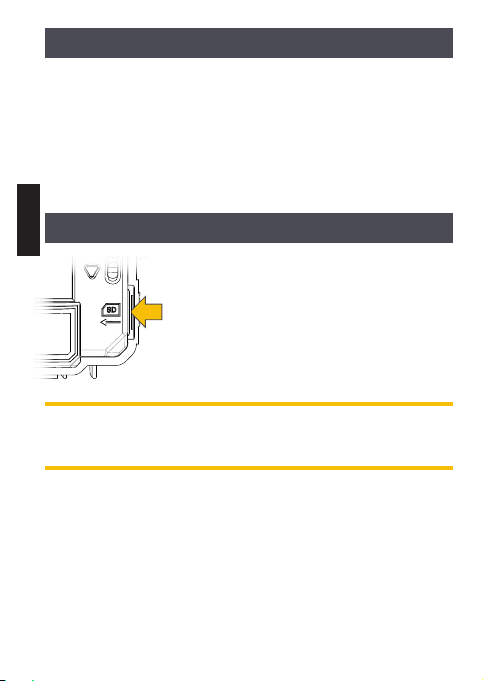
INSERT SD CARD
Open the case of your camera (right hand side)
Insert an SD/SDHC memory card (up to
32 GB capacity) in the card slot with the label
side facing upward. The card is inserted correctly when click is heard. Always ensure that the
camera is OFF before inserting an SD card.
We suggest formatting your SD card
if it’s been in another electronic device.
4
INSTALL VOSKER APP ON YOUR SMARTPHONE OR TABLET
DC 12V
1. Make sure you have a data package with either your smartphone
or tablet or a Wi-Fi connection.
2. To install the App, you can either:
• Get it on Google Play
TM
(Google Play is a trademark of Google Inc.)
• Download on the App StoreTM
(App Store is a trademark of Apple Inc.)
3. Search for the VOSKER App from VOSKER.
4. Install the App on your smartphone or tablet.
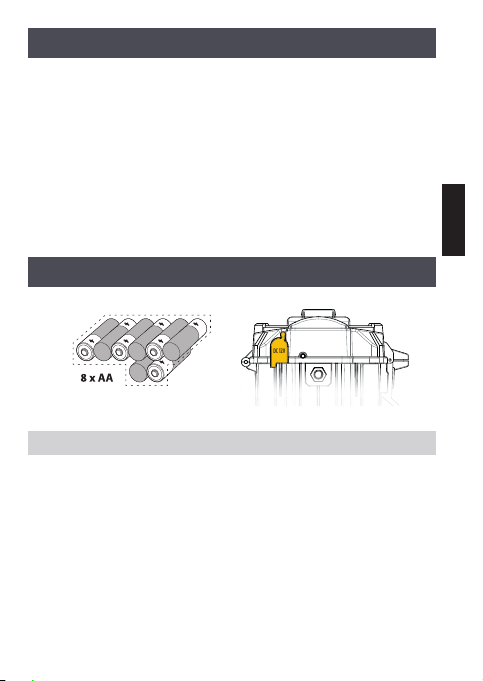
CHOOSE A POWER SOURCE
ENGLISH
Lithium or Alkaline batteries
Be sure to insert the AA batteries according to the polarity indications (+) and (-).
12V power source
To ensure maximum performance of the camera and prevent battery
leak, we recommend the use of new batteries. Use ONLY Lithium
batteries or ONLY Alkaline batteries. Rechargeable AA batteries are
not recommended as the lower voltage they produce can cause
operational issues.
In order to get best results and longer battery life, we recommend the
use of an external 12V source.
5

PRO-TIPS:
Solar panel & internal rechargeable battery
• You need at least 50% of the solar panel cleared for maximum
performance.
• If the power of the internal battery becomes insufficient, the camera will shut down. Once the battery has been charged sufficiently
by the solar panel, the camera will automatically turn on leaving the
settings untouched.
ENGLISH
• An optional power source can be added as a backup to the internal
rechargeable battery for safety.
ACTIVATE YOUR CAMERA
1. Start the VOSKER APP and select “Activate a new camera”
2. Select the model V200
3. Scan the barcode from the camera
a. Open the case of your camera and turn on the camera
b. Choose your language
c. Go to “Settings”
d. Select “General”
e. Scroll down to the second page to select
“About the device” and choose “Barcode”
f. The barcode will appear on the screen of your camera
6
4. Back to the VOSKER APP: scan the barcode
using the camera on your phone
5. Choose the type of surveillance you are going
to do with your VOSKER security camera
6. Enter your personal information
7. Your camera is now activated and you will receive
a confirmation message by email and text message.
VOSKER APP EXPLAINED
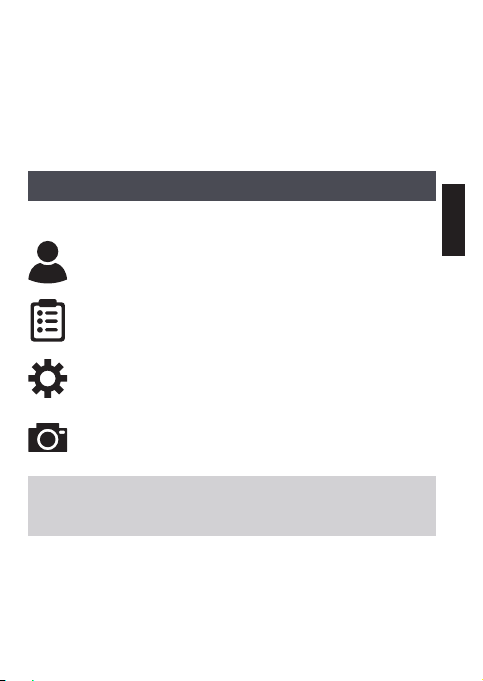
In the app, you will have the following 4 options at the bottom:
Account:
Select the data plan and modify
your profile information.
Status:
See general information like the cellular signal strength,
battery level or percentage of space used on your SD card.
Settings:
Modify the mode of the picture settings,
the synchronization frequency & all others
Photos:
Let you see your pictures by date, months and years.
Also let you share or download the photo.
Note: If you have more than one camera, it will let you select the
camera name with the white bar with a scrolling menu at the top
of the screen
SETTING THE APP
The VOSKER App let you configure all the camera’s settings. These new
settings will take effect the next time the V200 camera connects to
update its status. Here are the most important settings, there are more
available in the app.
ENGLISH
7

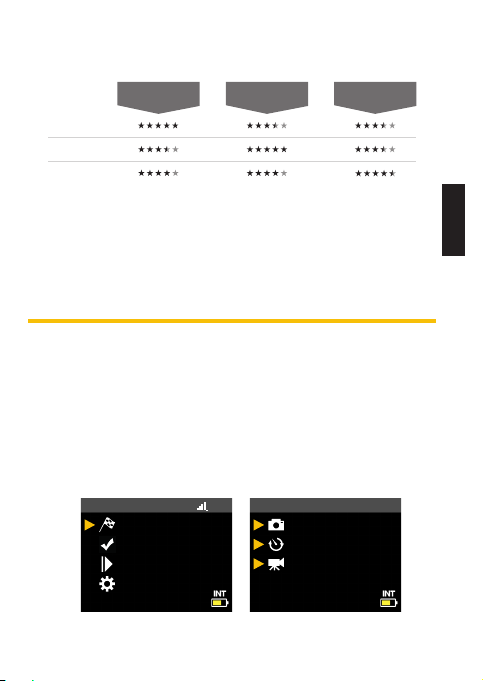
BASIC SETTINGS
Mode - PHOTO
Delay : Sets the time interval between each detection before the
camera records the next photo.
Multi-shot : Takes up to 2 consecutive shots at each detection,
with a 5 second delay between each photo.
ENGLISH
Mode - TIME LAPSE
Interval : This option allows the camera to take photos at regular
preset intervals without detection.
Mode - VIDEO
Delay : Sets the time interval between each detection before the
camera records the next video.
Photo first: When this option is enabled, a photo is taken immediately before each video.
Video length : Allows the user to select the duration of the recording.
TRANSFER SETTINGS
First transfer time: Allows the user to choose at what time of the day
the camera communicates for the first time.
Transfer frequency: Allows the user to choose the number of synchronizations that the camera performs daily.
8
ADVANCED OPTIONS
Blur reduction
Battery life
Flash range
(Conguration)
Photo
(Conguration)
Time lapse
(Conguration)
Vidéo
Night mode: Allows the user to set the best option for photos
OPTIMAL
MODE
IR-BOOST
MODE
BLUR REDUCTION
Schedule: Allows the user to set the period of operation of the
camera for each day of the week. The start and stop time are the
hours during which the camera is in action and can record pictures
or videos. For the activation of 24 hours, the same start and stop time
must enter 00h00 or 12 AM.
START THE CAMERA
Turn On the camera and let it do the network search as it can take a
few minutes. Once the network search is completed, you’ll see the
signal strength appear. If you have no signal, move outside or get near
a window and restart the camera a few times if need be to get all the
information from the cell network.
Note that the signal bars on a V200 might not be equal to your other
cellular devices as there are no industry standard and practice to label
dBm values to a specific number of bars.
LTE
MODE
Photo
Time lapse
Video
HOME
Start Camera
Detection Test
View
Settings
MODE
ENGLISH
9

Click on Start Camera and select the desired operating mode (photo,
time lapse or video) in the Mode menu by pressing OK. If you start the
camera in Video mode, make sure that you have enabled the Photo
First setting.
When the mode is selected, the test light in front of the camera will
flash for 30 seconds to allow the user to leave the area without being
photographed or recorded.
The camera has now updated its status in the VOSKER app with its
ENGLISH
latest information. The camera is now ready to take pictures and transmit them to your VOSKER app upon the next synch. Synchs are set by
default to every 4 hours from midnight.
Note: If your camera did not send the photo and/or the
status in the 15 minutes following the completion of
the last step. Please turn OFF the camera and perform
the steps 1 to 5 again. If the problem persists, please
consult the Help section of your VOSKER APP.
INSTALLATION OF THE CAMERA
Install the camera with or without the mount
Recommended installation height:
The camera should be installed at a reasonable distance from the area
you want to secure.
Ideal installation for quality pictures & videos:
For a better field of view, keep in mind that depending on the weather
and the camera you are using, the normal range of detection is 100 feet
To get brighter pictures at night, you should have elements in the
background to reflect back the IR flash to the camera.
Help
10

IMPORTANT • BEFORE THE END OF THE 30-DAY FREE TRIAL
In the VOSKER app, go activate your plan under the Account tab. For
more details about the available plans, look at the Account tab in the
App or follow the link below.
If you choose not to activate a plan, note that you’ll still be able to
transmit/receive pictures with our FREE monthly plan. It will allow you
to transmit/receive up to 100 photos per month with a photo history
of the last 7 days.
WWW.VOSKER.COM
THIS DEVICE COMPLIES WITH PART 15 OF THE FCC RULES.
Operation is subject to the following two conditions
(1) this device may not cause harmful interference,
(2) this device must accept any interferenc received,
including interference that may cause undesired
operation.
ENGLISH
11

THANK YOU FOR CHOOSING
ENGLISH
Sit back & relax as this VOSKER cameras are covered by the “Know
you’re covered” 2 year warranty. We strive on offering all customers a
positive, user-friendly experience that will have a lasting impression.
FAQ, user manual & latest firmware available at:
www.vosker.com
Live Chat support at VOSKER.COM
support@vosker.com
USA : 1-888-986-7537 | Canada : 1-866-986-7537 | UK : 44 80 00 41 87 96
Join the community
12
GUIDE DE DÉMARRAGE RAPIDE

DANS LA BOÎTE
1X Caméra
1X Guide de démarrage rapide
1X Support ajustable
1X Carte Micro SIM préactivée et insérée dans la caméra
1X Carte SD 8Go
1X Câble de recharge USB
1X Courroie d’installation
FRANÇAIS
Note: Carte mémoire et piles sont vendues séparément.
Manuels d’utilisation, mise à jour du logiciel & FAQ disponible au:
www.vosker.com
COMPOSANTES
1. Antenne
2. Panneau solaire
3. DEL
4. Lentille photo
5. Capteur de lumière
6. Écran de visionnement
7. Lentille de détection
8. Lumière de test
9. Boutons de navigation
10. Bouton ON / OFF
11. Fente de carte SD
Les boîtiers de sécurités en métal peuvent réduire
les fonctionnalités sans fil du produit.
* Les spécifications et caractéristiques peuvent varier selon les modèles comparables.
Référez-vous au site web ou à l’emballage pour tous les détails.
14
12. Compartiment à piles &
Fente de carte Micro SIM
13. Fente pour courroie
d’installation
14. Clip de verrouillage
15. Ouverture pour câble cadenas
16. Port 12V
17. Microphone
18. Support pour trépied
19. Bouton d’ouverture du
compartiment à piles
1
2
3
4
5
6
7
8
9
10
11
12
13
14
15
16
17
18
19
FRANÇAIS
15
 Loading...