

VOSKER V200 Quick Start Guide
QUICK START GUIDE
v1.5

IN THE BOX
1x Camera
1X Quick start guide
1x Adjustable mounting arm
1X Micro SIM card is preactivated and inserted in the camera
1X 8 GB SD Card
1X USB charging cable
1X Installation strap
ENGLISH
Note: Batteries are sold separately.
User manual, latest firmware & FAQ available at:
www.vosker.com
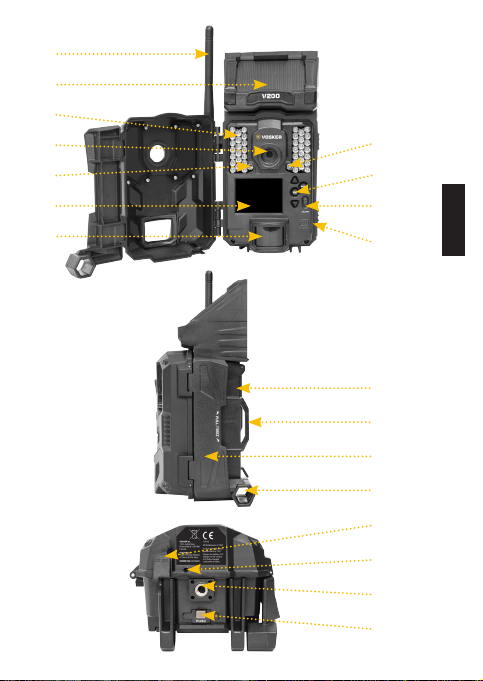
COMPONENTS
1. Antenna
2. Solar panel
3. LEDs
4. Photo lens
5. Light sensor
6. Viewing screen
7. Detection lens
8. Test light
9. Navigation buttons
10. ON / OFF Switch
Steel security boxes may reduce
the wireless functionalities of the product.
11. SD card slot
12. Battery case &
Micro SIM card slot
13. Slot for installation strap
14. Locking latch
15. Cable lock hole
16. 12V jack
17. Microphone
18. Tripod mount
19. Battery door push button
* Specs and features may differ across comparable models.
Refer to the website or packaging for full details.
2
1
2
3
4
5
6
7
8
9
10
11
12
13
14
15
16
17
18
19
ENGLISH
3
CHARGING THE INTERNAL BATTERY
Charge the camera for 24-48 hours before use. While charging, make
sure the camera is turned off and the solar panel is facing down so it
does not interfere with the USB charging process.
Plug the 12V-USB cable from the 12V port at the bottom of the camera and connect it to a USB port. Once plugged, the screen will turn on
and it will show the charging battery level for 10 seconds. Press the
OK button once more to see the battery level reappear.
ENGLISH
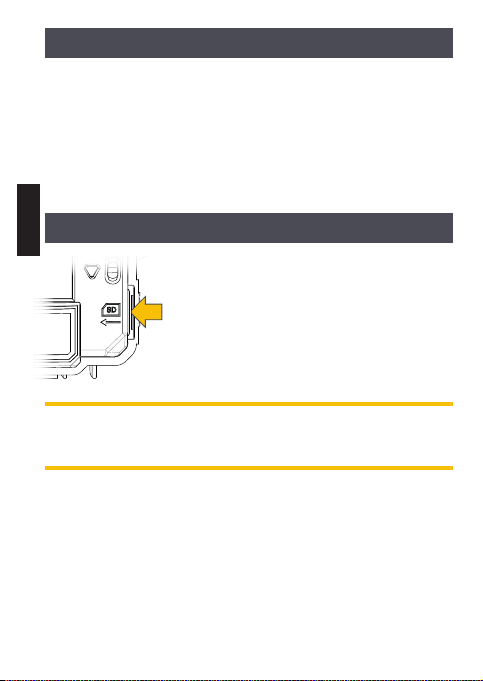
INSERT SD CARD
Open the case of your camera (right hand side)
Insert an SD/SDHC memory card (up to
32 GB capacity) in the card slot with the label
side facing upward. The card is inserted correctly when click is heard. Always ensure that the
camera is OFF before inserting an SD card.
We suggest formatting your SD card
if it’s been in another electronic device.
4
 Loading...