

Page 1
Wpsufy!Njyfst!DŽBekvtubcmf!boe!Gjyfe!Tqffe!NpefmtDž
User Manual
Adjustable speed Vortex
Fixed speed Vortex
Dbu!Op/23411123
Page 2

Page 3

1
Contents
Contents
1
Preface 2
Service 2
Warranty
2
1 Safety Instructions 3
2 Proper use 4
3 Inspection 4
3.1 Receiving Inspection 4
3.2 Listing of Items 4
4 Trial run
4
5 Operation 5
5.1 Continuous Operating 5
5.2 Touch Operating 5
6 Maintenance and Cleaning 6
7 Associated Standards and Regulations 6
8 Technical Data
7
9 Products and Accessories 7
Page 4

2
Wpsufy!Njyfst!DŽBekvtubcmf!boe!Gjyfe!Tqffe!NpefmtDž
Preface
Welcome to the ĐVortex Mixers DŽAdjustable and Fixed
Speed ModelsDž User Manualđ. Users should read this
manual carefully, follow the instructions and procedures, and
beware of all the cautions.
Service
When help needed, you can always contact the sevice department
of manufacturer or your supplier for technical support.
When calling manufacturer, please provide the following
information:
• Serial NumberDŽon the bottom panelDž
• Description of problem
• Methods and procedures adopted once to resolve the
problems
• Your contact information.
Warranty
This instrument is warranted to be free from defects in
materials and workmanship under normal use and service,
for a period of 24 months from the date of invoice. The
warranty is extended only to the original purchaser. It shall
not apply to any product or parts which have been damaged
on account of improper installation, improper connections,
misuse, accident or abnormal conditions of operation.
For claims under the warranty please contact your local
dealer. You may also send the instrument direct to our works,
enclosing the invoice copy and by giving reasons for the
claim. You would be solely liable for freight costs.
Page 5

3
Wpsufy!Njyfst!DŽBekvtubcmf!boe!Gjyfe!Tqffe!NpefmtDž
1 Safety Instructions
Warning!
• Read the operating instructions carefully
before use.
• Ensure that only trained staff use the
instrument.
Protective ground contactƽ
• Make sure the socket is earthed
(protective ground contact) before use.
- When work Ljwear the personal guard to avoid the risk
from
- Splashing of liquids.
- Mechanical vibration may leads to glass breakage.
- Being trapped of parts of the body, hair or pieces of
clothing in the moving parts.
• During manual manipulation:
- Keep medium vessels vert
ical as much as possible.
- Mix the medium in the minimum pressure required.
- Use attachment supplied when mixing a mass of different
medium.
• Set up the instrument in a spacious area on an stable,
clean, non-slip, dry and fireproof surface. Do not operate
the instrument in explosive atmospheres, with hazardous
substances or under water.
• Put th e speed contr ol knob to the lo west posit ion
.
Gradually increase the speed (adjustable model), reduce the
speed if :
- The medium splashes out of the vessel because of too
high speed.
- The instrument is not running smoothly or moves on the
stage.
• Safe operation is only guaranteed with the accessories
described in the ĐAccessoriesđ chapter.
• Accessories must be securely attached to the instrument
and can not come off by themselves.
• Check the instrument and accessories before hand for
damage each time you use them. Do not use damaged
components.
• Place a vessel at the centre of the mixing head and spread
out others uniformly.
• A sharp edged vessel can wear-out the mixing head.
• Always disconnect the plug before fitting accessories.
• The instrument may heat up when in use.
• The operating voltage required on the label and voltage
supply network must match.
• Protect the instrument and accessories from bumps and
impacts.
• The instrument may only be opened by qualified and
trained technician only.
Page 6

4
Wpsufy!Njyfst!DŽBekvtubcmf!boe!Gjyfe!Tqffe!NpefmtDž
2 Proper use
The instrument is designed for mixing liquids in schools,
laboratories or factories. This device is not suitable for use
in residential areas or other areas that may cause danger to
the user or instrument as mentioned in Chapter 1.
3 Inspection
3.1 Receiving Inspection
Unpack the equipment carefully and check for any damages
which may have arisen during transport. If it happens, please
contact manufacturer for technical support.
Note:
If there is any apparent damage to the system,
please do not plug it into the power line.
3.2 Listing of Items
The packing includes the following items:
Items Qty
Main nuit 1
User manual 1
Table 1
Please retain all packing materials. Additional shipping
charges will be assessed if packing is unavailable for the
system warranty service.
4 Trial run
Figure 1
Note:
Ensure the two-direction switch must be in
the middle (off state) before powering on.
If these operations above are normal, the instrument is ready
to operate following the Đoperationđ chapter. If these
operations are not normal, the instrument may be damaged.
please contact manufacturer for technical support.
Page 7

5
Wpsufy!Njyfst!DŽBekvtubcmf!boe!Gjyfe!Tqffe!NpefmtDž
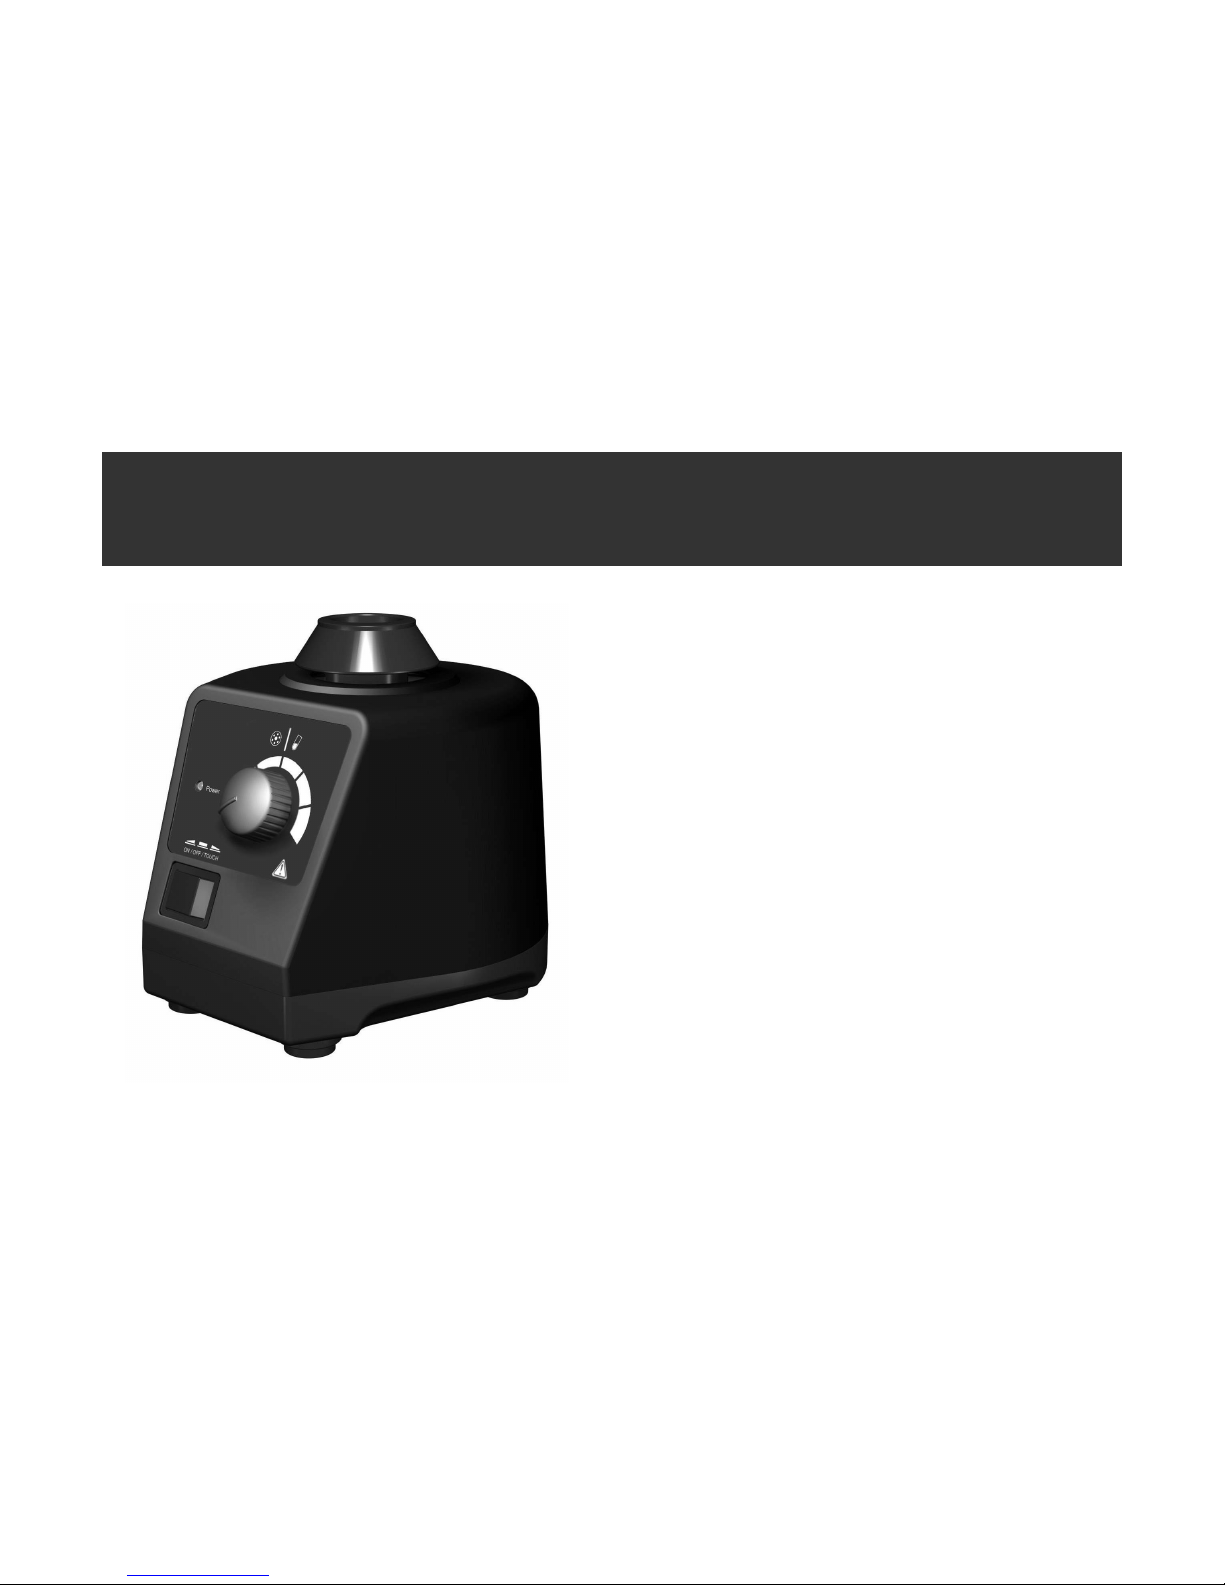
5 Operation
Speed control knob
Mixing heed
Two direction swetch
Power
LED
Figure 2
5.1 Continuous operating
ON
OFF
Figure 3
• Ensure the speed control knob to the lowest position Put
the instrument on the stable and safe place and plug in the
main power.
• Push the two-direction switch leftward to ON and power
LED is lit. Then the instrument begins to work.
• Turn the speed control kn ob to set the rated speed
(adjustable model).
• If use the Nonstandard accessoriesLjplease ensure the
speed in
indicating range (adjustable model)
• Push the two-direction switch rightward gently to OFF
and LED power is closed and the instrument is turned off.
5.2 Touch operating
OFF
Touch
Figure 4
• Ensure the speed control knob to the lowest position Put
the instrument on the stable and safe place and plug in the
main power.
• Push the two-direction switch rightward to the touch
mode.
• Turn the speed control kn ob to set the rated speed
(
adjustable model
).
• If a test tube is pressed into the mixing head vertically, the
instrument will begin to work and the power LED will be lit.
• Push the two-direction switch leftward gently to OFF and
the instrument is turned off.
Page 8

6
Wpsufy!Njyfst!DŽBekvtubcmf!boe!Gjyfe!Tqffe!NpefmtDž
Note:
• Place vessels such as a test tube as vertical as
possible into the centre of the mixing head in
order to mixing smoothly.
• Adjust the speed control knob slowly in order
to have the instrument work smoothly.
6 Maintenance and cleaning
• Proper maintenance can keep instruments working in a
good state and lengthen its life time.
• Be careful not spray the cleanser into the instrument when
cleaning.
• Unplug the power line when cleaning.
• Only use cleanser that we advised as below:
Dyes Isopropyl alcohol
Construction materials
Water containing tenside /
isopropyl alcohol
Cosmetics
Water containing tenside /
isopropyl alcohol
Foodstuffs Water containing tenside
Fuels Water containing tenside
Table 2
For materials which are not listed, please request information
from manufacturer.
• Before using other method for cleaning or decontamination,
the user must ascertain with the manufacturer t
hat this
method does not destroy the instrument.
• Wear the proper protective gloves during cleaning of the
instruments.
OPUF;
• Electrical instruments may not be placed in the cleansing
agent for the purpose of cleaning.
• The instrument is a sophisticated electronic products,
avoiding severe shake in work and transportation
• The instrument must be cleaned and put it into the initial
packaging carton before sending to service for repair,
avoiding the contamination of hazardous.
• Switch OFF the instrument and put it in the dry, clean,
stable place at room temperature in long-term disuse.
7 Associated standards and regulations
Construction in accordance with the following safety
standards:
EN 61010-1
Construction in accordance with the following EMC
standards:
EN 61326-1
Page 9

7
Wpsufy!Njyfst!DŽBekvtubcmf!boe!Gjyfe!Tqffe!NpefmtDž
Associated EU guidelines:
EMC-guidelines: 89/336/EWG
Instrument guidelines: 73/023/EWG
8 Technical data
Items Parameters
Voltage [VAC] 220-230 / 110-120
Frequency [Hz] 50 / 60
Power [W] 60
Shaking movement Orbital
Orbital diameter [mm] 4
Motor type Shaded-pole motor
Motor rating input [W] 58
Motor rating output [W] 10
Permissible ON time 100%
Speed range [rpm]
0-2500(adjustable)/
2500(
fixed
)
Speed display Scale
Run type Continuous/touch operation
Dimensions (mm) 127ġ130ġ160
Weight [kg] 3.5
Permitted ambient
temperature[ŃC]
5-40
Items Parameters
Permitted relative humidity 80%
Protection class acc. to DIN
60529
IP21
Table 3
9 Products and Accessories
Cat.No. Description
821100170000 Fixed speed VortexLjwith VT 1.1
Sta n dar d Att a chm e nt, Cn pl ug,
220v/50Hz
821100180000 Fixed speed VortexLjwith VT 1.1
Sta n dar d Att a chm e nt, Cn pl ug,
220v/60Hz
821100130000 Fixed speed VortexLjwith VT 1.1
Standard Atta ch me nt , USA plug,
110v/50Hz
821100140000 Fixed speed VortexLjwith VT 1.1
Standard Atta ch me nt , USA plug,
110v/60Hz
821100090000 Fixed speed VortexLjwith VT 1.1
St an da rd
At ta ch me nt , Euro plug,
220v/50Hz
Page 10

8
Wpsufy!Njyfst!DŽBekvtubcmf!boe!Gjyfe!Tqffe!NpefmtDž
821100100000 Fixed speed VortexLjwith VT 1.1
Stan dard A tta c hme n t, UK plu g
220v/50Hz
821100110000 Fixed speed VortexLjwith VT 1.1
St an da rd Attachment, Euro plug,
220v/60Hz
821100120000 Fixed speed VortexLjwith VT 1.1
Sta nda rd A tta chm ent , UK pl ug,
220v/60Hz
821100190000 Fixed speed VortexLjwith VT 1.1
Standard Atta ch me nt , USA plug,
220v/60Hz
821100200000 Fixed speed VortexLjwith VT 1.1
Standard Atta ch me nt , USA pl
ug,
220v/50Hz
821200170000 Adjustable speed VortexLjwith VT
1.1 Standard Attachment, Cn plug,
220v/50Hz
821200180000 Adjustable speed VortexLjwith VT
1.1 Standard Attachment, Cn plug,
220v/60Hz
821200130000 Adjustable speed VortexLjwith VT
1.1 Standard Attachment, USA plug,
110v/50Hz
821200140000 Adjustable speed VortexLjwith VT
1.1 Standard Attachment, USA plug,
110v/60Hz
821200070000 Adjustable speed VortexLjwith VT
1.1 Standard Attachment, Euro plug,
220v/50Hz
821200080000 Adjustable speed VortexLjwith VT
1.1 Standard Attachment, UK plug,
220v/50Hz
821200110000 Adjustable speed VortexLjwith VT
1.1 Standard Attachment, Euro plug,
220v/60Hz
821200120000 Adjustable speed VortexLjwith VT
1.1
Standard Attachment, UK plug,
220v/60Hz
821200190000 Adjustable speed VortexLjwith VT
1.1 Standard Attachment, USA plug,
220v/60Hz
82120200000 Adjustable speed VortexLjwith VT
1.1 Standard Attachment, USA plug,
220v/50Hz
Page 11

Wpsufy!Njyfst!DŽBekvtubcmf!boe!Gjyfe!Tqffe!NpefmtDž
Accessories
C a t . N o and
Designation
Serviceable
range
Operation
mode
18900034
VT1.1
standard top
Fortest tubes and
small vessels upto
diameter 30 mm
Continuous
/touch
operation
18900035
VT1.3
universal top
plate
1 0 0 mm - p l a t e
attachment with
rubber pad
Continuous
operation
18900020
VT1.3.1
tubeadapte
For 48Eppendorf
tubes
Con tin uou s
operation
18900021
VT1.3.2 tube
adapter
For 18 test tubes
Ø10m m f or VT
1.3
Con tin uou s
operation
18900022
VT1.3.3 tube
adapter
For 12 test tubes
Ø12mm , for VT
1.3
Con tin uou s
operation
18900023
VT1.3.4 tube
adapter
For 8 test tu bes
Ø16mm, for VT
1.3
Con tin uou s
operation
18900024
VT1.3.5 tube
adapter
For 8 test tu bes
Ø20mm, for VT
1.3
Con tin uou s
operation
18900043
VT1.3.6,
plateform pad
F o r < Ø 9 9 m m
tubes and small
vessels
Touch
operation
Table 4
NOTE: VT1.3ċVT1.3.5 adapter and pad are only suitable to
Adjustable speed Vortex
Serial Number and pattern number and accessories names
on the type plate must be supplied when ordering other
accessories.
Changing attachment
Figure 5
Page 12

 Loading...