

Page 1
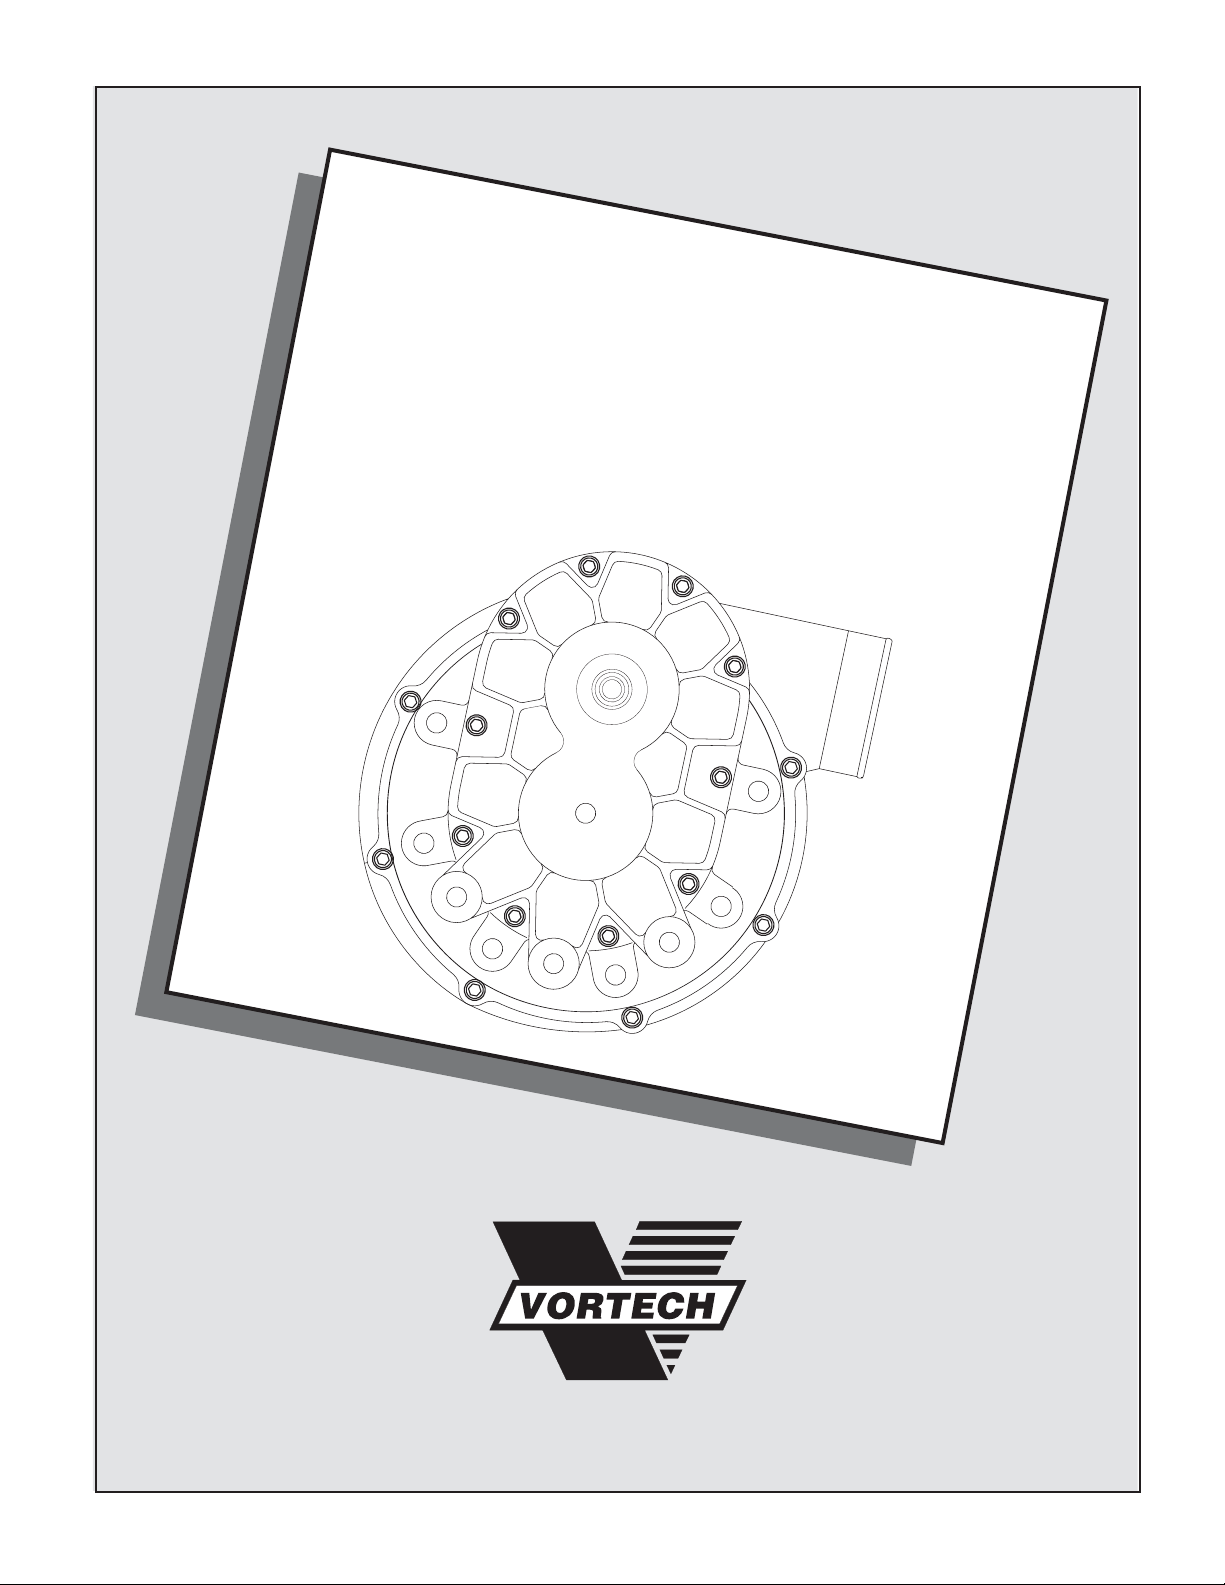
Acura 1.8L DOHC
Integra
Supercharger System
Installation Instructions
1994-2001 Model Years
50 State Smog Legal Per CARB EO #D-213-21
®
ENGINEERING, LLC
1650 PACIFIC AVENUE • CHANNEL ISLANDS, CA 93033-9901 • (805) 247-0226
FAX (805) 247-0669 • www.vortechsuperchargers.com • M-F 8:00 AM - 4:30 PM PST
P/N: 4HC020-030 (Acura Integra LS) — v2.1 01/28/04
Page 2
FOREWORD
Proper installation of this supercharger kit requires general automotive
mechanic knowledge and experience. Please browse through each step of
this instruction manual
should refer the job to a professional installer/technician. Please call Vortech
Engineering for installers in your area.
prior
to beginning the installation to determine if you
WARNING
Extreme care must be taken when driving a supercharged
vehicle with the stock clutch. If clutch slippage is detected,
discontinue hard use.Vortech recommends replacing the
stock clutch with a higher capacity unit.
NOTE
Purchase one of the following fuel pressure
optimizers. It may be necessary to compensate for
the larger fuel injectors installed in this kit. (See
“Trouble shooting” section for details.)
8F130-013 FUEL PRESSURE OPTIMIZER-BLUE
8F130-015 FUEL PRESSURE OPTIMIZER-RED
8F130-017 FUEL PRESSURE OPTIMIZER-PURPLE
8F130-018 FUEL PRESSURE OPTIMIZER-POLISH
©
2004 VORTECH ENGINEERING, LLC
All rights reserved. No parts of this publication may be reproduced, transmitted, transcribed,
or translated into another language in any form, by any means without written permission
of Vortech Engineering, LLC.
P/N: 4HC020-030
©2004 Vortech Engineering, LLC
All Rights Reserved, Intl. Copr. Secured
28JAN04v2.1(Acura Integra LS (4HC..030v2.1))
ii
Page 3

TABLE OF CONTENTS
FOREWORD.....................................................................................................................................ii
TABLE OF CONTENTS ....................................................................................................................iii
TOOL & SUPPLY REQUIREMENTS ................................................................................................iv
PARTS LIST - ACURA GSR..............................................................................................................v
PARTS LIST - ACURA INTEGRA LS ................................................................................................vi
PARTS LIST - ACURA TYPE R.........................................................................................................vii
1. PREPARATION/REMOVAL ..................................................................................................1
2. OIL FEED.............................................................................................................................1
3. OIL DRAIN ...........................................................................................................................2
4. FUEL PUMP INSTALLATION...............................................................................................3
5. FUEL INJECTOR INSTALLATION .......................................................................................4
6. FUEL MANAGEMENT (FMU) INSTALLATION ....................................................................5
7. MAP SENSOR BLEED ASSEMBLY INSTALLATION...........................................................6
8. POWER STEERING PLUMBING.........................................................................................7
9. MAIN BRACKET INSTALLATION.........................................................................................7
10. SUPERCHARGER MOUNTING PLATE INSTALLATION.....................................................8
11. SUPERCHARGER INSTALLATION.....................................................................................9
12. RADIATOR HOSE AND WATER NECK INSTALLATION .....................................................11
13. STANDARD KIT DISCHARGE DUCT INSTALLATION ........................................................12
14. AIR FILTER INSTALLATION ................................................................................................12
15. BYPASS VALVE INSTALLA TION..........................................................................................13
16. SUPERCHARGER DRIVE BELT INSTALLATION ...............................................................14
17. POWER STEERING PLUMBING/BLEEDING .....................................................................15
18. FINAL CHECK .....................................................................................................................16
19. TROUBLESHOOTING .........................................................................................................17
©2004 Vortech Engineering, LLC
iii
All Rights Reserved, Intl. Copr. Secured
28JAN04v2.1(Acura Integra LS (4HC..030v2.1))
P/N: 4HC020-030
Page 4

1994-2001 1.8L DOHC ACURA INTEGRA
Installation Instructions
Congratulations on selecting the best performing and best backed automotive
supercharger available today... the VORTECH
®
Supercharger!
Before beginning this installation, please read through this entire instruction booklet and the Street
Supercharger System Owner's Manual which includes the Automotive Limited Warranties Program
and the Warranty Registration form.
Vortech supercharger systems are performance improving devices. In most cases, increases in torque of
30-35% and horsepower of 35-45% can be expected with the boost levels specified by Vortech Engineering.
This product is intended for use on healthy, well maintained engines. Installation on a worn-out or damaged
engine is not recommended and may result in failure of the engine as well as the supercharger. Vortech
Engineering is not responsible for engine damage.
Installation on new vehicles will not harm or adversely affect the break-in period so long as factory break-in
procedures are followed.
For best performance and continued durability, please take note of the following key points:
1. Use only premium grade fuel 91 octane or higher (R+M/2).
2. The engine must have stock compression ratio.
3. If the engine has been modified in any way, check with Vortech prior to using this product.
4. Always listen for any sign of detonation (pinging) and discontinue hard use (no boost) until problem is
resolved.
5. Perform an oil and filter change upon completion of this installation and prior to test driving your vehicle.
Thereafter, always use a high grade SF rated engine oil or a high quality synthetic, and change the oil
and filter every 3,000 miles or less. Never attempt to extend the oil change interval beyond 3,000
miles, regardless of oil manufacturer's claims as potential damage to the supercharger may
result.
6. Before beginning installation, replace all spark plugs that are older than 1 year or 10,000 miles with
original heat range plugs as specified by the manufacturer and retard timing from factory specifications
(follow the procedures indicated within the factory repair manual and/or as indicated on the factory
underhood emissions tag). Do not use platinum spark plugs unless they are original equipment.
Change spark plugs every at least 15,000 miles and spark plug wires at least every 50,000 miles.
TOOL & SUPPLY REQUIREMENTS:
• Factory Repair Manual
• 3/8" Socket and Drive Set: SAE & Metric
• 3/8” Swivel Head Ratchet
• 1/2" Socket and Drive Set: SAE & Metric
• 3/8" NPT Tap and Handle
• Adjustable Wrench
• Open End Wrenches: SAE & Metric
• Center Punch and a 5/8" Tapered Punch
• Springlock 5/16" Fuel Fitting Disconnect Tool
•5 Quarts SH/CF Rated Quality Engine Oil
• Oil Filter and Wrench
• Flat #2 Screwdriver
• Phillips #2 Screwdriver
• Heavy Grease
• Silicone Sealer
• Drill Motor
• 1/8", 3/16" Drill Bits
• Hex Key Wrench Set
•Wire Strippers and Crimpers
• Utility Knife
If your vehicle has in excess of 10,000 miles since its last spark plug change, then you will also
need:
• Spark Plug Socket
• New Spark Plugs
P/N: 4HC020-030
©2004 Vortech Engineering, LLC
All Rights Reserved, Intl. Copr. Secured
28JAN04v2.1(Acura Integra LS (4HC..030v2.1))
iv
Page 5
ACURA INTEGRA GSR 1.8L
®
ENGINEERING, LLC
IMPORTANT: Before beginning installation, verify that all parts are included in the kit. Report any shortages
or damaged parts immediately.
PART # DESCRIPTION QTY PART # DESCRIPTION QTY
2E129-170 S/C,V-5 SQ G-TRIM CCW 1
4HC110-160 S/C MOUNTING PLATE ASSY 1
4HC010-160 MOUNTING PLATE, 1.8 GSR 1
7C080-056 8mm x 1.25 x 55mm HHD G5 BOLT 3
7K312-001 5/16" AN-WASHER 3
7A375-100 3/8-16 x 165 HXHD PCT. 3
7K375-040 3/8" AN960 FLAT WASHERS 3
4HC110-180 Assy, Honda Maps Bleed 1
4HC010-180 MAPS BLEED, HONDA 1
7C040-025 M4-.7 x 25mm HXHD CS PLTD 2
7U100-058 O-RING FUEL RAIL HONDA 1
7U030-046 5/32" VACUUM LINE .67'
7P062-187 1/16 NPT x 3/16 HOSE BARB 1
7U400-001 CHECK VALVE 1
7U100-055 TIE WRAP, 6" NYLON 2
4HC114-030 ASSY, S/C DRIVE, HONDA 1
8R101-000 PULLEY RETAINER ASSY, 4 RIB 1
2A034-370 S/C PULLEY 3.70" 4 GROOVE 1
2A044-520 BELT, K040520 HONDA HO S/C 1
4HC111-031 Mtng Brkt Asy, 1.8 INTEG PIN DRIVE 1
4HC011-021 MTNG BRKT, 1.8 GSR 1
4FG017-021 SPCR, LWR, ALT STY-PLT 2
7U250-022 DOWEL PIN, 1/4D x 3/4L 2
2D070-159 LARGE BEARING, EXTENDED DRIVE 2
7X100-025 WAVE WASHER-LARGE 1
7U100-084 SNAP RING, EXT DRV HOUSING 1
2D160-216 ASY, EXT DR HSNG TUBE, ACURA L 1
2D030-024 FLANGE, EXT TUBE END HONDA 1
7A312-075 5/16-18 x 3/4 HXCS GR5 ZINC 3
7K312-001 5/16 AN WASHER, PLATED 7
7A250-075 1/4-20 x 3/4 SHCS PLTD 5
4HC010-070 TENSIONER PLATE, HONDA, DOHC 1
7A250-101 1/4-20 x 1 HHCS, ZINC PLTD 4
7J006-093 6mm WASHER, PLATED 5
7A250-276 1/4-20 x 2.75" HHCS 1
7F250-020 1/4-20 HEX NUT 1
4FK116-021 IDLER PULLEY ASY. GEN II 1
7J312-000 5/16 FLAT WASHER-SAE 2
7A312-125 5/16-18 x 1-1/4 GR5 HXHD ZINC 1
4HC010-060 STUD, HONDA TENSIONER 1
7F312-018 5/16-18 NUT USS PLTD 2
7J312-875 5/16" WASHER, CUSTOM 1
4HC116-011 IDLER PULLEY ASY, HONDA 1
7C010-036 M10-1.25 x 35mm FLANGED 2
7J010-002 10mm WASHER, ZINC PLATED 2
2D170-226 ASY, DRIVE SHAFT, INTEGRA LS 1
4HC010-130 TOP PLATE, HONDA 1.6/1.8 1
7A312-525 5/16-18 x 5.25 HXCS GR8 ZINC 4
2D070-281 COUPLING, FLG, 3-PIN DRIVE 2
7U250-125 DOWEL PIN, 1/4D x 1.25L 6
2D070-260 COUPLING, DRIVE, COMPOSITE 1
7U100-070 KEY, 3/16 SQUARE x 7/8" LONG 2
7B375-075 3/8-24 x 3/4" GR8 HXHD BOLT 2
7J375-020 WASHER, 1.0 OD, .406 ID 2
2D030-051 HOUSING, COUPLING, EXT DRIVE SC 1
2D030-061 HOUSING, COUPLING, EXT DRIVE SH 1
7U312-101 DOWEL BUSHING, .312 x 1.00 2
2D030-026 SPACER, EXT DR HSNG, ACURA LS 1
4HC130-026 OIL FEED ASSY, HONDA 1
7P125-125 FTG, 1/8 NPT FEM x 1/8 BSPT MALE 1
7P125-034 1/8 NPT x 1 MALE x 2 FEM 1
7P125-027 -4 TO 1/8 NPT STRAIGHT 1
7P125-026 -4 TO 1/8 NPT 90° MALE 1
7P525-067 .500 CRIMP FERRULES 2
7P250-066 #4 SWIVEL x 1/4" HOSE BARB 2
7U030-026 1/4" OIL FEED HOSE 2.67'
7U100-055 TIE WRAP, 6” NYLON 5
4HC130-036 OIL DRAIN ASSY, HONDA 1
7U030-036 1/2" OIL DRAIN HOSE 1'
7R001-008 #8 STNLS HOSE CLAMP 2
7P375-042 MALE CONNECTOR 1
4HC100-010 TUBE NUT ASSY, HONDA 1
4HC238-048 FMU ASSY 1
6Z110-148 FUEL MGMT UNIT, 8:1 w/SPRING 1
7U030-016 1/4" FUEL LINE 1.25'
7R001-004 #4 HOSE CLAMPS 2
7U030-046 5/32" VACUUM LINE 1'
7P156-082 5/32 TEE 1
4HC110-040 POWER STEERING ASSY, 99-00 HONDA 1
7A250-104 1/4-20 x 1 BHCS SS 2
7C060-016 6mm BOLTS 2
7J006-093 6mm WASHER, PLATED 2
4HC010-040 FTG, HONDA PWR STR TOP 1
4HC010-050 FTG, HONDA PWR STR PUMP 1
4HC145-060 POWER STEERING LINE ASSY, HONDA 1
7U100-088 O-RING, -015 2
4HC110-140 SUPPLEMENT, PWR STR 1997 EAP 1
4HC010-140 FTG, GSR PWR STR TOP 1
4HC010-150 FTG, GSR PWR STR PUMP 1
7U100-013 O-RING, -013 1
4HC214-040 ASSY, GSR UPPER RADIATOR 1
4HC114-040 ASSY, GSR WATER NECK 1
7C060-020 BOLTS, M6 x 20mm 2
7U125-040 HOSE, GSR UPPER RAD. 1
7U031-016 5/16" FUEL HOSE 1.5'
4HC212-040 AIR DUCTING ASSY, GSR 1
7S275-200 2-3/4" x 2" SLEEVE 1
7S275-251 REDUCER, 2.75 TO 2.50 1
7R002-040 #40 STAINLESS HOSE CLAMP 1
7R002-044 #44 GOLDSEAL HOSE CLAMP 3
4HC112-040 DUCT, GSR DISCHARGE 1
8D001-001 BYPASS VALVE 1
8H040-075 1" AIR FILTER 1
7U034-016 1" GS HOSE 0.25'
7U030-046 5/32" VACUUM LINE 3'
7P156-082 5/32" TEE 1
7R002-016 #16 HOSE CLAMP 2
8H040-040 AIR FILTER, 3.5" FLG x 5.5L 1
7P375-008 ELBOW, 3/8" x 90° UNION 1
7U030-056 3/8" PCV HOSE 3'
4HC020-030 Instruction Manual 1
008123 Decal, Sprt Cmpct, S/C, White 2
008130 License Plate Frame, Vortech 1
008445 Ext. Drive Street Pkg Assy 1
8F001-270 Fuel Pump w/Filter, GSR IN-TANK 1
8F060-310 Fuel Injector, Honda, 310 CC/Min 4
Part No. 4HC218-030SQ
PARTS LIST
©2004 Vortech Engineering, LLC
v
All Rights Reserved, Intl. Copr. Secured
28JAN04v2.1(Acura Integra LS (4HC..030v2.1))
P/N: 4HC020-030
Page 6
ACURA INTEGRA LS 1.8L
®
ENGINEERING, LLC
IMPORTANT: Before beginning installation, verify that all parts are included in the kit. Report any shortages
or damaged parts immediately.
PART # DESCRIPTION QTY PART # DESCRIPTION QTY
4HC110-170 S/C,V-5 SQ G-TRIM CCW 1
4HC110-170 S/C MOUNTING PLATE ASSY 1
4HC010-170 MOUNTING PLATE, 1.8 LS 1
7C080-056 8mm x 1.25 x 55mm HHD G5 BOLT 3
7K312-001 5/16" AN-WASHER 3
7A375-100 3/8-16 x 165 HXHD PCT. 5
7K375-040 3/8" AN960 FLAT WASHERS 5
4HC010-200 MNTG BRKT BLOCK, INTEGRA LS 1
4HC110-180 ASSY, HONDA MAPS BLEED 1
4HC010-180 MAPS BLEED, HONDA 1
7C040-025 M4-.7 X 25mm HXHD CS PLTD 2
7U100-058 O-RING FUEL RAIL HONDA 1
7U030-046 5/32" VACUUM LINE .67'
7P062-187 1/16 NPT X 3/16 HOSE BARB 1
7U400-001 CHECK VALVE 1
7U100-055 TIE WRAP, 6" NYLON 2
4HC114-050 ASSY, S/C DRIVE, HONDA 1
8R101-000 PULLEY RETAINER ASSY, 4 RIB 1
2A034-370 S/C PULLEY 3.70" 4 GROOVE 1
2A044-525 BELT, K040525 HONDA 1
4HC111-031 MTNG BRKT ASY, 1.8 INTEG PIN DRIVE 1
4HC011-021 MTNG BRKT, 1.8 GSR 1
4FG017-021 SPCR, LWR, ALT STY-PLT 2
7U250-022 DOWEL PIN, 1/4D x 3/4L 2
2D070-159 LARGE BEARING, EXTENDED DRIVE 2
7X100-025 WAVE WASHER-LARGE 1
7U100-084 SNAP RING, EXT DRV HOUSING 1
2D160-216 ASY, EXT DR HSNG TUBE, ACURA L 1
2D030-024 FLANGE, EXT TUBE END HONDA 1
7A312-075 5/16-18 x 3/4 HXCS GR5 ZINC 3
7K312-001 5/16 AN WASHER, PLATED 7
7A250-075 1/4-20 X 3/4 SHCS PLTD 5
4HC010-070 TENSIONER PLATE, HONDA, DOHC 1
7A250-101 1/4-20 x 1 HHCS, ZINC PLTD 4
7J006-093 6mm WASHER, PLATED 5
7A250-276 1/4-20 x 2.75" SHCS 1
7F250-020 1/4-20 HEX NUT 1
4FK116-021 IDLER PULLEY ASY. GEN II 1
7J312-000 5/16 FLAT WASHER-SAE 2
7A312-125 5/16-18 X 1-1/4 GR5 HXHD ZINC 1
4HC010-060 STUD, HONDA TENSIONER 1
7F312-018 5/16-18 NUT USS PLTD 2
7J312-875 5/16" WASHER, CUSTOM 1
4HC116-011 IDLER PULLEY ASY, HONDA 1
7C010-036 M10-1.25 x 35mm FLANGED 2
7J010-002 10mm WASHER, ZINC PLATED 2
2D170-226 ASY, DRIVE SHAFT, INTEGRA LS 1
4HC010-130 TOP PLATE, HONDA 1.6/1.8 1
7A312-525 5/16-18 x 5.25 HXCS GR8 ZINC 4
2D070-281 COUPLING, FLG, 3-PIN DRIVE 2
7U250-125 DOWEL PIN, 1/4D x 1.25L 6
2D070-260 COUPLING, DRIVE, COMPOSITE 1
7U100-070 KEY, 3/16 SQUARE x 7/8 LONG 2
7B375-075 3/8-24 x 3/4" GR8 HXHD BOLT 2
7J375-020 WASHER, 1.0 OD, .406 ID 2
2D030-051 HOUSING, COUPLING, EXT DRIVE SC 1
2D030-061 HOUSING, COUPLING, EXT DRIVE SH 1
7U312-101 DOWEL BUSHING, .312 x 1.00 2
2D030-026 SPACER, EXT DR HSNG, ACURA LS 1
4HC130-026 OIL FEED ASSY, HONDA 1
7P125-125 FTG, 1/8 NPT FEM x 1/8 BSPT MALE 1
7P125-034 1/8 NPT x 1 MALE x 2 FEM 1
7P125-027 -4 TO 1/8 NPT STRAIGHT 1
7P125-026 -4 TO 1/8 NPT 90° MALE 1
7P525-067 .500 CRIMP FERRULES 2
7P250-066 #4 SWIVEL x 1/4" HOSE BARB 2
7U030-026 1/4" OIL FEED HOSE 2.67'
7U100-055 TIE WRAP, 6" NYLON 5
4HC130-036 OIL DRAIN ASSY, HONDA 1
7U030-036 1/2" OIL DRAIN HOSE 1'
7R001-008 #8 STNLS HOSE CLAMP 2
7P375-042 MALE CONNECTOR 1
4HC100-010 TUBE NUT ASSY, HONDA 1
4HC238-068 FMU ASSY 1
6Z110-141 FUEL MGMT UNIT, 6:1 W/SPRING 1
7U030-016 1/4" FUEL LINE 1.25'
7R001-004 #4 HOSE CLAMPS 2
7U030-046 5/32" VACUUM LINE 1'
7P156-082 5/32 TEE 1
4HC110-040 POWER STEERING ASSY, 99-00 HONDA 1
7A250-104 1/4-20 x 1 BHCS SS 2
7C060-016 6mm BOLTS 2
7J006-093 6mm WASHER, PLATED 2
4HC010-040 FTG, HONDA PWR STR TOP 1
4HC010-050 FTG, HONDA PWR STR PUMP 1
4HC145-060 POWER STEERING LINE ASSY, HONDA 1
7U100-088 O-RING, -015 2
4HC110-140 SUPPLEMENT, PWR STR 1997 EAP 1
4HC010-140 FTG, GSR PWR STR TOP 1
4HC010-150 FTG, GSR PWR STR PUMP 1
7U100-013 O-RING, -013 1
4HC214-060 ASSY, INTEGRA LS WATER NECK 1
4HC114-060 ASSY, INTEGRA LS WATER NECK 1
7C060-020 BOLTS, M6 x 20mm 2
7U125-040 HOSE, GSR UPPER RAD. 1
7U031-016 5/16" FUEL LINE 1.5'
4HC212-060 AIR DUCTING ASSY, INTEGRA LS 1
7S275-200 2-3/4" x 2" SLEEVE 1
7S275-251 REDUCER, 2.75 TO 2.50 1
7R002-040 #40 STAINLESS HOSE CLAMP 1
7R002-044 #44 GOLDSEAL HOSE CLAMP 3
4HC112-060 DUCT, INTEGRA LS DISCHARGE 1
8D001-001 BYPASS VALVE 1
8H040-075 1" AIR FILTER 1
7U034-016 1" GS HOSE 0.25'
7U030-046 5/32" VACUUM LINE 3'
7P156-082 5/32" TEE 1
7R002-016 #16 HOSE CLAMP 2
8H040-040 AIR FILTER, 3.5" FLG x 5.5L 1
7P375-008 ELBOW, 3/8" x 90° UNION 1
7U030-056 3/8" PCV HOSE 3'
4HC020-030 Instruction Manual 1
008123 DECAL, SPRT CMPCT, S/C, WHITE 2
008130 LICENSE PLATE FRAME, VORTECH 1
008445 EXT. DRIVE STREET PKG ASSY 1
8F001-270 FUEL PUMP W/FILTER, IN-TANK 1
8F060-310 FUEL INJECTOR, HONDA, 310 CC/MIN 4
Part No. 4HC218-060SQ
PARTS LIST
P/N: 4HC020-030
©2004 Vortech Engineering, LLC
All Rights Reserved, Intl. Copr. Secured
28JAN04v2.1(Acura Integra LS (4HC..030v2.1))
vi
Page 7
ACURA INTEGRA TYPE R 1.8L H.O.
®
ENGINEERING, LLC
IMPORTANT: Before beginning installation, verify that all parts are included in the kit. Report any shortages
or damaged parts immediately.
PART # DESCRIPTION QTY PART # DESCRIPTION QTY
2E129-170 S/C,V-5 SQ G-TRIM CCW 1
4HC110-160 S/C MOUNTING PLATE ASSY 1
(SEE PAGE “V” FOR INDIVIDUAL COMPONENTS)
4HC110-180 ASSY, HONDA MAPS BLEED 1
(SEE PAGE “V” FOR INDIVIDUAL COMPONENTS)
4HC111-031 MTNG BRKT ASY, 1.8 INTEG PIN DRIVE 1
(SEE PAGE “V” FOR INDIVIDUAL COMPONENTS)
4HC114-090 ASSY, S/C DRIVE, TYPE R 1
8R101-000 PULLEY RETAINER ASSY, 4 RIB 1
2A034-333 S/C PULLEY 3.33" 4 GROOVE 1
2A044-506 BELT, K040506 TYPE R 1
4HC130-026 OIL FEED ASSY, HONDA 1
(SEE PAGE “V” FOR INDIVIDUAL COMPONENTS)
4HC130-036 OIL DRAIN ASSY, HONDA 1
(SEE PAGE “V” FOR INDIVIDUAL COMPONENTS)
4HC238-048 FMU ASSY 1
6Z110-149 FUEL MGMT UNIT, 7:1 w/SPRING, w/SLV 1
7U030-016 1/4" FUEL LINE 1.25'
7R001-004 #4 HOSE CLAMPS 2
7U030-046 5/32" VACUUM LINE 1'
7P156-082 5/32 TEE 1
7P125-037 1/8 NPT - 90° TO 1/4 BARB 1
4HC110-040 POWER STEERING ASSY, 99-00 Honda 1
(SEE PAGE “V” FOR INDIVIDUAL COMPONENTS)
4HC110-150 SUPPLEMENT, PWR STR 1997 EARLY 1
(SEE PAGE “V” FOR INDIVIDUAL COMPONENTS)
4HC212-050 AIR DISCHARGE ASSY, INTEGRA LS H.O. 1
7S275-200 2-3/4" x 2" SLEEVE 1
7S275-251 REDUCER, 2.75 TO 2.50 1
7R002-040 #40 STAINLESS HOSE CLAMP 1
7R002-044 #44 GOLDSEAL HOSE CLAMP 3
8D001-001 BYPASS VALVE 1
8H040-075 1" AIR FILTER 1
7U034-016 1" GS HOSE 0.25'
7U030-046 5/32" VACUUM LINE 3'
7P156-082 5/32" TEE 1
7R002-016 #16 HOSE CLAMP 2
8H040-040 AIR FILTER, 3.5" FLG x 5.5L 1
7P375-008 ELBOW, 3/8" x 90° UNION 1
7U030-056 3/8" PCV HOSE 3'
4HC020-030 Instruction Manual 1
008123 Decal, Sprt Cmpct, S/C, White 2
008130 License Plate Frame, Vortech 1
008445 Ext. Drive Street Pkg Assy 1
8F001-270 Fuel Pump w/Filter, GSR IN-TANK 1
8F060-310 Fuel Injector, Honda, 310 CC/Min 4
8N105-060 WATER TANK MTG ASY 94-01 INTEG 1
4HC010-110 BRKT, H2O RESRV, HONDA 1
7A250-050 1/4-20 x .50 SHCS ZINC PLTD 3
7A250-074 1/4-20 x .75" HHCS PLTD 3
7F250-021 1/4-20 NYLOCK NUT ZINC PLTD. 3
7J006-093 6mm WASHER, PLATED 8
7J250-150 1/4" FENDER WASHER ZN PLTD 3
7P375-075 3/4" HOSE BARB UNION, BRASS 1
7P500-026 1/2NPT x Ø3/4 BARB 90° BRASS 4
7P500-078 1/2NPT x Ø3/4 HOSE FIT STRT 3
7R007-001 NYLON RATCHET CLAMP 1-1/8" 14
7U030-065 Ø3/4" x 90° RUBBER HOSE, SHORT 1
7U038-000 Ø3/4" HEATER HOSE 14
7U038-012 HOSE, Ø3/4" 90°,4x12 LEGS 2
7U038-150 HOSE, Ø3/4" x 150∞ MOLDED HOSE 2
8N055-030 TANK, WATER, TRIANGLE SHAPE 1
8N055-050 PLASTIC CAP, SURGE TANK 1
8N106-080 WATER COOLER MTG ASY 94-01 INT 1
7A250-074 1/4-20 x .75" HHCS PLTD 8
7F250-021 1/4-20 NYLOCK NUT ZINC PLTD. 8
7J250-001 1/4 WASHER, SAE, PLTD 16
7P500-026 1/2NPT x 3/4 BARB 90° BRASS 2
8N006-010 WATER COOLR, SETRAB SINGLE PAS 1
8N010-080 MTG BRKT, INTEGRA H
8N107-090 WATER PMP MNTG ASY 99-00 CIVIC 1
5W001-009 16-14GA MALE SLIDE INSULATED 3
5W001-010 16-14GA FEMALE SLIDE INSULATED 2
5W001-011 16-14 GA RING TERM .26" HOLE 2
5W001-014 FUSE HOLDER 10 GA WIRE 1
5W001-015 FUSE, BLADE TYPE 20 AMP 1
5W001-019 10-12 GA BUTT CONN INSULATED 1
5W001-022 T-TAP CONN,14-16 AWG 1
5W001-042 12-10GA x 3/16" RING TERMINAL 1
5W014-030 14GA STRD WIRE BLACK 3'
7A250-050 1/4-20 x .50 SHCS ZINC PLTD 1
7J006-093 6mm WASHER, PLATED 1
7R003-027 ADEL CLAMP, 1-11/16" 1
8F001-402 PUMP, WATER, PIERBURG 1
8F101-510 H
8N301-160 PWR COOLR CORE ASY, LS INTEGRA 1
8N101-008 INLET DUCT, LS INTEGRA COOLER 1
8N003-011 COOLER DUCT, 5.0 INLET MACH 1
8N201-001 WELDED CORE ASSY W/ENDS S2K 1
7U125-040 HOSE, 1.25" GSR UPPER RAD. 1
7R002-024 #24 SAE TYPE F SS HOSE CLAMP 2
4GK014-010 RADIATOR PIPE, LS1 FBODY 1
Part No. 4HC218-090SQ
PARTS LIST
20 COOLR 2
2O PUMP WIRING ASSY HONDA 1
vii
©2004 Vortech Engineering, LLC
All Rights Reserved, Intl. Copr. Secured
28JAN04v2.1(Acura Integra LS (4HC..030v2.1))
P/N: 4HC020-030
Page 8

This Page Left Intentionally Blank
P/N: 4HC020-030
©2004 Vortech Engineering, LLC
All Rights Reserved, Intl. Copr. Secured
28JAN04v2.1(Acura Integra LS (4HC..030v2.1))
viii
Page 9

1. PREPARATION/REMOVAL
A. Remove the plastic pan underneath the radia-
tor and set aside.
B. Remove the strut tower brace and set aside.
C. Remove the air box and all of the inlet ducting
up to, but not including, the throttle body.
D. Remove the valve cover breather hose, the
hose connecting the water neck to the throttle
body and the accompanying metal tube assembly.
E. Remove the power steering belt, pump and
mounting brackets. Remove the heat shield
from behind the power steering pump.
F. Remove the A/C drive belt and belt tensioner.
It is necessary to remove and set aside the
two bolts holding the lower driver’s side engine
mount to the frame so that the belt can be
removed between the engine mount and the
frame. The engine will be adequately supported by the remaining engine mounts during
the supercharger kit installation.
G. Drain the coolant system so that the radiator
hoses can be removed later.
H. Remove the upper radiator hose.
I. Remove the water neck from the engine block.
2. OIL FEED
A. Remove the oil filter.
B. Remove the oil pressure sender from rear of
engine block near the oil filter.
C. Install the 1/8" BSPT male to 1/8" NPT female
adapter in the engine block. Leave the TEE
pointed upward. Install the 1/8" NPT x #4
straight fitting in the top of the TEE pointed
slightly towards the passenger’s side of the
engine. Install the oil pressure sender in the
TEE and re-attach the electrical plug (see
).
2-a
D. Temporarily cover one end of the oil feed line
and protect it from debris until connecting it to
the supercharger.
E. Connect the open end of the oil feed line to the
#4 fitting. Use tie wraps to secure the line and
protect it from kinking, abrasion, and high heat
areas.
F. Install new oil filter.
G. Temporarily cover the open end of the oil feed
hose so that debris will not contaminate the
inside of the hose.
Fig.
Fig. 2-a
©2004 Vortech Engineering, LLC
1
All Rights Reserved, Intl. Copr. Secured
28JAN04v2.1(Acura Integra LS (4HC..030v2.1))
P/N: 4HC020-030
Page 10

3. OIL DRAIN
OIL PAN
OIL DRAIN
TUBE
A. To provide an oil drain for the supercharger, it
is necessary to make a hole in the front of the
oil pan. Locate and center punch the hole per
Fig. 3-a
of oil pan lip and centered between the stiffening ribs.
. This hole should be 3/4" from bottom
NOTE: Upon breaking through the oil pan, oil may
drain out of the newly formed hole. Some
oil may be drained from the pan if the oil
continues to flow.
B. Remove the paint around the hole.
C. Use a small center punch to perforate the pan
and expand the hole. Switch to a larger diameter punch and expand the hole further to
approximately Ø9/16".
D. Tap the hole with a 3/8" NPT to approximately
1/2" deep or until the supplied drain fitting can
be started. Pack the flutes of the tap with
heavy grease to hold chips.
NOTE: This method of rolling over the lip of the
hole and tapping it works very well if carefully done and should cause no problems.
E. Thoroughly clean the threaded area. Apply a
small amount of silicone sealer to the new
threads. Apply more sealer to the 3/8" NPT x
1/2" inverted flare fitting and secure in the
hole. Make sure that a seal is formed all
around the fitting.
F. Thread the tube nut and 1/2" aluminum tube
into the inverted flare fitting by hand. Do not
tighten until the supercharger drain hose has
been connected.
G. Temporarily cover the end of the oil drain tube
to keep out debris.
H. Drain the engine oil and refill with fresh oil.
3/4”
1”
Fig. 3-a
Fig. 3-b / View from passenger side.
P/N: 4HC020-030
©2004 Vortech Engineering, LLC
All Rights Reserved, Intl. Copr. Secured
28JAN04v2.1(Acura Integra LS (4HC..030v2.1))
2
Page 11

4. FUEL PUMP INSTALLATION
A. Lift up and temporarily remove the rear seat
cushion from the vehicle.
B. Remove the three screws holding the fuel
pump cover to the floor.
C. Unplug the electrical connector and both fuel
hoses from the fuel pump module.
D. Remove the six nuts.
E. Remove the fuel pump assembly from the
vehicle.
F. Remove the electrical connector from the fuel
pump by first removing the lock.
G. Disconnect the stock fuel pump from the
bracket and the hose.
H. Install the new filter on the supplied pump.
Install the small circular locking washer onto
the end of the fuel pump to retain the filter.
Fig. 4-b
(See
I. Secure the fuel pump to the bracket with a zip-
tie so that the pump will not move around.
J. Reinstall the new fuel pump in the manner
removed.
.)
Fig. 4-a / Fuel Pump Assembly
Fig. 4-b / Fuel Pump Filter Lock
©2004 Vortech Engineering, LLC
3
All Rights Reserved, Intl. Copr. Secured
28JAN04v2.1(Acura Integra LS (4HC..030v2.1))
P/N: 4HC020-030
Page 12

5. FUEL INJECTOR INSTALLATION
A. Remove the fuel rail and fuel injectors as
shown in the factory service manual.
TYPE “R” H.O. KITS - Complete the
following numbered steps.
1. Remove the factory fuel regulator from the
fuel rail.
2. Drill the regulator supply hole in the fuel
rail with an “R” (Ø.339) drill bit.
3. Tap the hole with a 1/8" tapered pipe tap
until the supplied fitting can be started.
Fig. 5-a
(See
4. Carefully clean all of the chips out of the
fuel rail.
5. Using thread sealant, install the supplied
fitting into the fuel rail as shown. (See
5-b
.)
6. Complete the rest of the steps in this
section.
B. Remove the stock lower injector rubber cush-
ions from the intake manifold.
C. Lightly coat the supplied rubber cushions with
oil and insert into the manifold.
D. Lightly coat the injector O-rings with clean
engine oil and insert the injector into the fuel
rail. Make sure that the O-ring does not pop
out of its groove and get pinched.
E. Lower the fuel rail with all injectors installed
onto the manifold. (See
F. Tighten the fuel rail nuts evenly.
G. Cut off fuel injector plugs about two inches
from the fuel injector.
H. Using the supplied butt connectors, solder the
supplied fuel injector pigtails to the factory
wiring.
I. Use shrink wrap or electrical tape to protect
the wire connections.
J. Connect each injector plug to the proper fuel
injector.
.)
Fig. 5-c
.)
Fig.
Fig. 5-a
Fig. 5-b
P/N: 4HC020-030
©2004 Vortech Engineering, LLC
All Rights Reserved, Intl. Copr. Secured
28JAN04v2.1(Acura Integra LS (4HC..030v2.1))
Fig. 5-c
4
Page 13

6. FUEL MANAGEMENT UNIT (FMU) INSTALLATION
A. Using the FMU mounting bracket as a tem-
plate, mark and drill two holes in the firewall
using
Fig. 6-a
Mount the FMU as shown in
B. Attach the supplied 1/4" hose to the 90° barb
fitting on the Vortech FMU and tighten the
suppled clamp.
C. Disconnect the factory fuel regulator return line
from the bottom of the fuel regulator and
connect to the straight fitting on the bottom of
the FMU using the original clamp.(See
b.
)
D. Attach the free end of the 1/4" hose (that was
previously installed on the FMU) to the bottom
of the fuel regulator and tighten the supplied
clamp.
E. Using the supplied 5/32" vacuum line and TEE
connect the 90° fitting on top of the FMU to the
manifold vacuum line connected to the fuel
regulator as shown in
as a reference for location.
Fig. 6-a
.
Fig. 6-
Fig. 6-a
.
Fig. 6-a
FUEL PRESSURE
REGULATOR
ATTACH TO MANIFOLD
VACUUM
IN
OUT
FMU
VEHICLE’S STOCK
RETURN LINE
(TO TANK)
Fig. 6-b
5
©2004 Vortech Engineering, LLC
All Rights Reserved, Intl. Copr. Secured
28JAN04v2.1(Acura Integra LS (4HC..030v2.1))
P/N: 4HC020-030
Page 14

7. MAP SENSOR BLEED ASSEMBLY INSTALLATION
A. Remove the two screws securing the Manifold
Air Pressure (MAP) sensor on top of the intake
manifold.
B. Insert the supplied MAP sensor bleed assem-
bly with the bleed hole positioned next to the
intake manifold. The bleed hole must be down.
Fig. 7-b.
(See
C. Use the original O-ring between the fitting and
the intake. Use the supplied O-ring between
the MAP sensor and the fitting.
D. Install the supplied 4mm bolts. (See
Do not over-tighten the fasteners.
)
Fig. 7-a
).
NOTE: The discharge side of the check valve should
be left disconnected and vented to atmosphere as shown in Fig. 7-a.
M4 x 25MM BOLT,
1/16 NPT - 3/16" BARB FITTING
5/32" HOSE
FITTING, MAP SENSOR
SUPPLIED
2 PLACES
MAP SENSOR
Fig. 7-a
SUPPLIED O-RING
BLEED HOLE
BE DOWN TOWARD
THROTTLE BODY
FACTORY O-RING
MUST
P/N: 4HC020-030
©2004 Vortech Engineering, LLC
All Rights Reserved, Intl. Copr. Secured
28JAN04v2.1(Acura Integra LS (4HC..030v2.1))
THROTTLE BODY
CHECK VALVE
CHECK VALVE
FLOW DIRECTION
Fig. 7-b
6
Page 15

8. POWER STEERING PLUMBING
A. Select the supplied pair of power steering
fittings that match the power steering pump
and the metal power steering tube. The correct
female fitting will fit snugly over the O-ring on
the power steering tube.
B. Install and lightly coat the O-ring onto the
supplied power steering pump fitting with
Honda power steering fluid and insert into the
power steering pump. Rotate fitting until the
bolt holes line up with the pump. Secure the
fitting to the power steering pump using the
supplied 6mm bolts and washers.
C. Attach the straight fitting end of the supplied
power steering hose to the just installed power
steering pump fitting and tighten. (See
a
.)
9. MAIN BRACKET INSTALLATION
Fig. 8-
Fig. 8-a
A. (For Acura Integra GSR models, skip Step A and
proceed with
Step B
.) Bolt the supplied mounting
bracket spacer block to the front of the cylinder
head using the two supplied M10 x 35 bolts. (See
Fig. 9-a
.) The spacer block is in the supercharger
mounting plate assembly.
B. Lower the supplied cast aluminum mounting
bracket assembly (w/driveshaft attached) in front
of the engine and push tightly against the exhaust manifold. Lower the power steering pump
between the mounting bracket and the vehicle
frame.
C. Each of the two lowest holes in the mounting
bracket require a supplied .304" spacer between
the mounting bracket and the block. (See
b
.)
Fig. 9-
D. Install the two shortest factory power steering
bracket bolts and the two supplied M10 x 35 (LS
models use 3/8-16 x 1.0) bolts in each of the four
MTNG BRKT SPACER BLOCK
Fig. 9-a / LS Models Only
Fig. 9-b
©2004 Vortech Engineering, LLC
7
All Rights Reserved, Intl. Copr. Secured
28JAN04v2.1(Acura Integra LS (4HC..030v2.1))
P/N: 4HC020-030
Page 16

9. MAIN BRACKET INSTALLATION. cont’d.
mounting holes in the supplied mounting bracket.
Tighten to 33 ft/lbs (44 N-m).
E. Install the supplied 2.25" idler pulley to the
mounting bracket. Make sure that the spacer
between the two idler pulley bearings slides over
the mounting bracket pilot, secure using the
supplied 5/16 x 1- 1/4" bolt and 5/16 washer.
(See
Fig. 9-c.
)
F. Loosely install the power steering pump using the
original bolts and tensioner screw.
10. SUPERCHARGER MOUNTING PLATE PREPARATION
Fig. 9-c
A. Remove the two bolts securing the bracket that
attaches the ground strap to the transmission
and set aside.
B. Remove the top three transmission to bell-
housing bolts. Leave the small steel bracket
fastened to the front of the engine by the lower
bolt.
Fig. 10-a
shows how the supercharger
mounting plate attaches to the engine in
Section 11
.
C. Remove the two bolts securing the clutch line
support to the engine mounted bracket. Remove the bracket from the clutch line.
D. The clutch tubing will need to be bent so as to
clear the supercharger when it is installed.
Bend the tubing as little as possible and avoid
kinking.
E. Loosen the bracket/clamp holding the A/C
lines. Remove the bracket connected to the
frame. (See
Fig. 10-b
.)
Fig. 10-a
P/N: 4HC020-030
©2004 Vortech Engineering, LLC
All Rights Reserved, Intl. Copr. Secured
28JAN04v2.1(Acura Integra LS (4HC..030v2.1))
Fig. 10-b
8
Page 17

11. SUPERCHARGER INSTALLATION
A. Remove the plastic drain fitting cap and install
the supplied 1/2" oil drain hose onto the barb
fitting on the bottom of the supercharger and
secure with the supplied #8 hose clamp.
B. Install the supercharger mounting plate onto
the supercharger with the three 3/8" x 1"
screws as shown in
C. Install the supplied Ø5/16" x 1.0" alignment
dowels into the countersunk holes in the
supercharger gear case.
D. Install the supplied .25" thick spacer onto the
alignment dowels placing the dowels in the
larger diameter holes of the spacer. (See
11-b, 11-c.
)
E. Align the counter bores in the black coupler
housing with the alignment dowels passing
through the previously installed spacer. Lightly
tap the housing until it is flush with the spacer.
(See
Fig. 11-c.
F. Apply a thin layer of grease on the inside
diameter of the steel supercharger drive
coupling containing three Ø1/4" dowel pins.
Install the supplied key and drive coupling onto
the supercharger input shaft. Heat may also be
necessary to intall the coupling onto the shaft.
(A propane torch will make this easier if
needed.) Verify the coupling is bottomed out
on the shaft. Secure the coupling with the
supplied Ø1.0" washer and 3/8-24 x .75" (use
a light thread-lock compound) HXHD screw.
Fig. 11-c.
(See
Fig. 11-a.
)
)
Figs.
Fig. 11-a
ALIGNMENT DOWELS
INSTALL
SPACER
HERE
Fig. 11-b
3-PIN COUPLER
COUPLING
HOUSING
.25" SPACER
Fig. 11-c
©2004 Vortech Engineering, LLC
9
All Rights Reserved, Intl. Copr. Secured
28JAN04v2.1(Acura Integra LS (4HC..030v2.1))
P/N: 4HC020-030
Page 18

11. SUPERCHARGER INSTALLATION, cont’d.
G. Lower the supercharger into the engine compart-
ment. Align the three-pin coupling on the supercharger with the three-pin coupling on the
installed drive shaft assembly and connect them
using the supplied composite drive coupling ring
(6 holes). Verify that each set of pins is inserted
into the
side of the composite ring. Align the holes so that
one side of the pins alternate with the opposite
side of pins. (See
assemblies together until a positive stop is felt
and the couplers are flush with the composite
drive coupling ring.
H. Loosely install the three supplied M8 x 55mm
screws through the mounting plate and into the
engine block.
I. Align the coupler housings and secure them to
the supercharger gear case using the supplied
5/16-18 x 5.25" HXHD screws with washers.
Snug the screws at this time
J. Tighten the supplied M8 x 55 screws securing
the mounting plate to the engine.
K. Route the free end of the oil feed hose to the
supercharger and attach.
L. Attach the free end of the oil drain hose to the
previously installed oil drain tube. Make sure that
the oil drain hose and tube are constantly slanting down towards the oil pan.
M. Tighten the oil drain tube nut in the oil pan fitting.
Tighten the oil drain hose clamp.
N. Carefully bend the clutch line until it runs next to
the oil feed fitting. Using a small section of hose
to keep the tube from touching any metal objects, secure the tube to the oil feed fittings.
O. Relocate the ground strap bracket as shown in
Fig. 11-f
P. Trim the A/C support, leaving the threaded nut
insert intact. Install the bracket in its original
location.
Q. Remove the clamp from the A/C lines and
reinstall it upside down. Re-attach to the trimmed
bracket. (See
raised bosses on their corresponding
Figs. 11-d, 11-e
.) Slide the two
using one of the original bolts.
Fig. 11-g
.)
Fig. 11-e
Fig. 11-f
P/N: 4HC020-030
©2004 Vortech Engineering, LLC
All Rights Reserved, Intl. Copr. Secured
28JAN04v2.1(Acura Integra LS (4HC..030v2.1))
Fig. 11-d
COMPOSITE DRIVE
COUPLING RING
10
Fig. 11-g
Page 19

12. RADIATOR HOSE AND WATER NECK INSTALLATION
A1. GSR and LS Models
1. Install the supplied water neck in place of
the removed factory water neck.
2. Replace the hose running from the bottom
of the throttle body to the engine block/
water neck with the supplied 5/16" hose.
Secure with the factory clamps.
3. Trim about 1" from the straight end of the
supplied radiator hose and install. (See
.)
12-a
A2. Type R
1. Disconnect the upper radiator hose from
the radiator.
2. Trim about 1/2" from the longer straight end
of the supplied radiator hose.
3. Install the cut end of the supplied radiator
hose onto the radiator. Cut the factory
radiator hose as needed to connect to the
installed hose using the supplied hose
coupler.
4. Secure the hose coupler using the supplied
#24 hose clamps. Use the factory hose
clamp to secure the supplied radiator hose
to the radiator. (See
Fig. 12-b
.)
B. If necessary for supercharger mounting plate
clearance, disconnect the lower radiator hose
from the radiator. Trim about 2" off and reinstall. Use the section of hose just removed to
protect the hose from any sharp or metal
objects.
Fig.
Fig.12-a / GSR and Ls Models
11
Fig.12-b / Type R Model
©2004 Vortech Engineering, LLC
All Rights Reserved, Intl. Copr. Secured
28JAN04v2.1(Acura Integra LS (4HC..030v2.1))
P/N: 4HC020-030
Page 20

13. STANDARD KIT DISCHARGE DUCT INSTALLATION
NOTE: If a high-output kit (with charge air cooler) is
being installed, complete the steps included
in the “Maxflow Power Cooler Installation
Instructions” (P/N: 8N020-110) and then proceed with Step 14.
A. Loosely install the supplied sleeves on both
ends of the supplied discharge duct. The
2-3/4" to 2-1/2" reducer sleeve should be
placed on the supercharger.
B. Put the discharge duct into position and slide
the sleeves onto the supercharger and the
throttle body.
C. Tighten the hose clamps on both ends of the
discharge duct.
Fig. 13-a / (GSR shown, others similar.)
14. AIR FILTER INSTALLATION
A. Drill a 5/16" hole in the end of the supplied air
filter.
B. Install the air filter on the supercharger inlet
and tighten the clamp.
C. Insert the supplied plastic elbow into the end of
the air filter and attach to the valve cover vent
with 3/8" hose.
Fig. 14-a / GSR inlet
P/N: 4HC020-030
©2004 Vortech Engineering, LLC
All Rights Reserved, Intl. Copr. Secured
28JAN04v2.1(Acura Integra LS (4HC..030v2.1))
12
Page 21

15. BYP ASS V AL VE INST ALLA TION
A. Use the supplied 1" hose to connect the
bypass valve inlet to the 1" barb on the supercharger discharge tube/duct. (See
B. Install the supplied filter onto the bypass valve
discharge.
C. Tighten hose clamps on each connection.
D. Using supplied 5/32" vacuum line and TEE,
connect barb on bypass valve to manifold
vacuum. Use the manifold vacuum line connected to the fuel regulator.
Fig. 15-a
.)
Fig. 15-a
SUPERCHARGER
DISCHARGE TUBE
BYPASS VALVE
BYPASS VALVE
AIR FILTER
5/32” HOSE
Fig. 15-b
13
©2004 Vortech Engineering, LLC
All Rights Reserved, Intl. Copr. Secured
28JAN04v2.1(Acura Integra LS (4HC..030v2.1))
P/N: 4HC020-030
Page 22

16. SUPERCHARGER DRIVE BELT INSTALLATION
A. Insert the keyway into the extended drive input
shaft and install the pulley. Using threadlocker, install the 3/8-24 bolt through the
washer and retainer and into the input shaft.
The pulley retainer bolt will be tightened after
the supercharger belt is installed.
NOTE: Do not hammer or pry on the supercharger
pulley. Heat gently with a propane torch if
required for easier installation.
B. Install the supercharger drive belt. Once the
belt is fully routed except for going around the
supercharger pulley, start the belt on the
supercharger pulley and use a ratchet on the
harmonic damper bolt to manually rotate
engine until the belt is on and centered. (See
Fig. 16-a
.)
C. Tighten the input shaft bolt as much as pos-
sible until belt slippage occurs. Grab the belt
on each side of the supercharger pulley with
one hand and squeeze together. Tighten the
input shaft bolt to 35 ft/lbs.
D. Install the original power steering pump belt.
Using the factory tensioner screw snug the
power steering belt. Tighten both power
steering pump mounting bolts.
E. Install mounting bracket top plate. Center on
dowel pins and tighten the five socket head
cap screws. Verify that the plate is fully seated
on mounting surface. (See
Fig. 16-c.
)
F. Install the grooved idler pulley onto the ma-
chined idler stud. Using thread-locker, tighten
the 5/16" nut and washer. (See
Fig. 16-b.
)
G. Insert stud through mounting bracket side plate
and start the thick washer and 5/16" nut.
H. Attach the side plate to the top plate and to the
mounting bracket using four 1" bolts and
washers. (See
Fig. 16-c
).
I. Thread a 1/4” nut onto the long 1/4" tensioner
bolt and thread the bolt into the side plate.
J. Press down firmly on the tensioner idler and
thread 1/4" bolt into the side plate until it
touches the tensioner stud. Tighten 5/16" nut on
outside of tensioner stud. Tighten the jam nut
on the 1/4" tensioner bolt.
K. Reinstall and tighten the two lower engine
mount to frame bolts.
L. Verify that the supercharger belt does not
contact the upper driver side motor mount. If
contact is detected, tighten the belt tensioner
until clearance is achieved.
Fig. 16-a
Fig. 16-b
P/N: 4HC020-030
©2004 Vortech Engineering, LLC
All Rights Reserved, Intl. Copr. Secured
28JAN04v2.1(Acura Integra LS (4HC..030v2.1))
Fig. 16-c
14
Page 23

17. POWER STEERING PLUMBING/BLEEDING
A. Loosely attach the power steering pressure
hose to the remaining power steering fitting.
With the original O-ring installed, slide the
original power steering fitting into the other end
of the fitting.
B. Install the fitting in the receiver in the mounting
bracket top plate. Use the two threaded holes
in the top plate that provide the best hose
routing. Secure using the supplied 1/4-20 cap
screws. (See
Fig. 17-a.
for the best hose routing and tighten fitting.
(See
Fig. 17-b.
)
C. Reattach the factory power steering return
hose to the power steering pump with the
original clamp.
D. Fill the power steering reservoir to the upper
level line. Bleed the system by starting the
engine and running it at a fast idle while
turning the steering wheel lock to lock several
times. Recheck the fluid level.
CAUTION: The Honda Shop Manual recom-
mends using only Honda Power
Steering Fluid -“V” or “S” as any other
fluid can cause poor performance
and increased wear.
) Rotate the 90° fitting
Fig. 17-a
E. Close the hood slowly. If interference occurs, it
is most likely the steel part of the power steering tube hitting the hood bracing. Bend the
tube down until there is clearance.
Fig. 17-b
15
©2004 Vortech Engineering, LLC
All Rights Reserved, Intl. Copr. Secured
28JAN04v2.1(Acura Integra LS (4HC..030v2.1))
P/N: 4HC020-030
Page 24

18. FINAL CHECK
A. Make sure that all oil drain and oil feed fittings
are connected and tight and that the engine is
filled with factory specified oil.
B. Make sure that the radiator and reservoir are
full.
C. Verify that the power steering reservoir is at
“full cold” level.
D. Cycle the fuel pump several times by turning
ignition on and then off. Check all fuel system
hose connections for leakage.
E. With the engine running, turn the steering
wheel in both directions. Check power steering
hose connections for leakage.
F. For racing and high RPM use, a boost retard
ignition may be installed. The engine should
never be run against the factory rev limiter. If
detonation is detected, discontinue hard use
until the problem is fixed.
G. Belt slippage is usually accompanied by a
squealing noise at high RPM and a leveling off
or fluctuating boost pressure. If belt slippage
occurs, tighten tensioner as follows:
1. Turn the engine off.
2. Loosen the 5/16 nut on the outside of the
belt tensioner plate until the tensioner stud
is just loose. Loosen the jam nut on the
tensioner bolt.
3. Thread in the tensioner bolt until the idler
moves 1/4".
4. Tighten the nut securing the idler stud.
Tighten the jam nut on the tensioner bolt.
5. Test drive the vehicle and repeat steps until
belt slippage is eliminated.
H. Periodically, verify that the supercharger pulley
bolt is tight. Also verify that the belt is not
slipping under boost.
I. Read the STREET SUPERCHARGER SYS-
TEM OWNER'S MANUAL AND RETURN
THE WARRANTY REGISTRATION FORM
within thirty (30) days of purchasing your
supercharger system.
Fig. 18-a / Integra GSR
Fig. 18-b / Integra LS
P/N: 4HC020-030
©2004 Vortech Engineering, LLC
All Rights Reserved, Intl. Copr. Secured
28JAN04v2.1(Acura Integra LS (4HC..030v2.1))
Fig. 18-c / Integra Type R w/Cooler
16
Page 25

19. TROUBLESHOOTING
A. Supercharger belt is slipping: Belt
slippage is usually accompanied by a
squealing noise at high RPM and a
leveling off or fluctuating boost pressure.
If belt slippage occurs, tighten tensioner
as follows:
1. Turn engine off.
2. Loosen the 5/16 nut on the outside of
the belt tensioner plate until the
tensioner stud is just loose. Loosen
the jam nut on the tensioner bolt.
3. Thread in the tensioner bolt until the
idler moves 1/4".
4. Tighten the nut securing the idler stud.
Tighten the jam nut on the tensioner
bolt.
5. Test drive the vehicle and repeat
steps until belt slippage is eliminated
B. Engine detonates (pre-ignition):
1. If detonation is detected, the ignition
timing should be set to the bottom of
the factory specs (located on the
under hood emissions label) by
following the procedure in the factory
shop manual.
2. For off-road and high RPM use, the
ignition timing should be set to 12°
BTDC.
3. For emissions legality or if more retard
is needed, a boost retard ignition may
be installed.
C. “Check Engine” light illuminates
(P0172) after vehicle is driven: This may
be caused by a number of things, but is
most likely due to the installation of larger
fuel injectors for which the vehicle may
not be able to trim out enough fuel. This
code does not affect the vehicle’s
driveability and may be ignored. To fix do
the following:
1. Disconnect the battery for 30 minutes
to clear the code.
2. Remove the fuel pressure regulator
and drill a .075" hole through one side
of the body as shown in Fig 19-a.
3. Purchase and install a “Maxflow Fuel
Pressure Optimizer” per the instructions supplied with it.
4. Turn the adjustment screw counterclockwise until it stops.
5. These two modifications should lower
the fuel pressure at idle to ~30psi
(from ~42).
6. Re-connect battery and test drive.
NOTE: If after completing the above steps,
the check engine light is still on,
complete the “Type R” steps outlined
in Section 5-a (steps 1 through 5).
DRILL .075" HOSE
THROUGH ONE WALL
Fig. 19-a
17
©2004 Vortech Engineering, LLC
All Rights Reserved, Intl. Copr. Secured
28JAN04v2.1(Acura Integra LS (4HC..030v2.1))
P/N: 4HC020-030
Page 26

®
ENGINEERING, LLC
1650 PACIFIC AVENUE • CHANNEL ISLANDS, CA 93033-9901 • (805) 247-0226
FAX (805) 247-0669 • www.vortechsuperchargers.com • M-F 8:00 AM - 4:30 PM PST
©2004 Vortech Engineering, LLC
All Rights Reserved, Intl. Copr. Secured
28JAN04v2.1(Acura Integra LS (4HC..030v2.1))
P/N: 4HC020-030
 Loading...