

Page 1
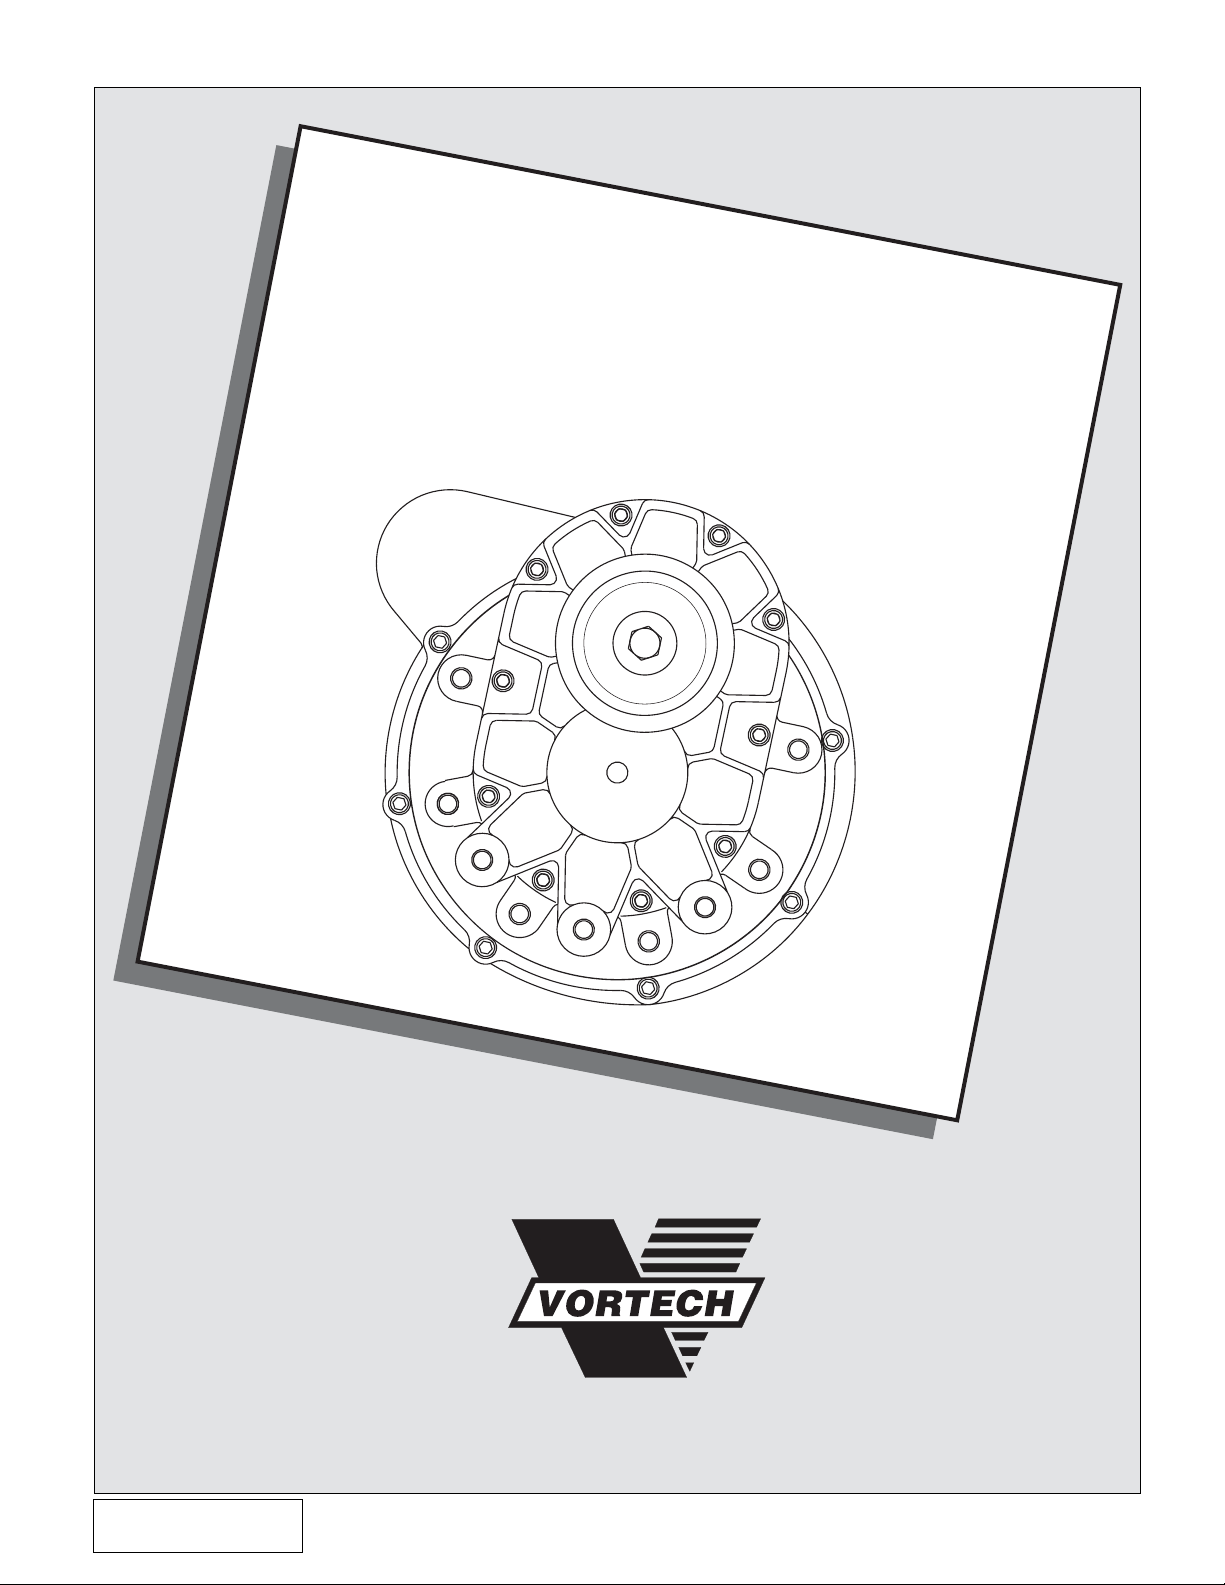
Ford 3.8L V-6 Mustang
Supercharger System
Installation Instructions
50 STATE SMOG LEGAL PER CARB EO #D-213-17
1994-2000 MODEL YEARS
1650 PACIFIC AVENUE • CHANNEL ISLANDS, CA 93033-9901 • (805) 247-0226
FAX (805) 247-0669 • www.vortechsuperchargers.com • M-F 8:00 AM - 4:30 PM PST
P/N: 4FF020-010
©2003 Vortech Engineering, LLC
All Rights Reserved, Intl. Copr. Secured
09JUN03 V2.1
(94-00 3.8L Mus.(4FF V2.1))
®
ENGINEERING, LLC
Page 2

FOREWORD
Proper installation of this supercharger kit requires general automotive
mechanic knowledge and experience. Please browse through each step of
prior
this instruction manual
you should refer the job to a professional installer/technician. Please call
Vortech Engineering for installers in your area.
to beginning the installation to determine if
© 2003 VORTECH ENGINEERING, LLC
All rights reserved. No part of this publication may be reproduced, transmitted, transcribed,
or translated into another language in any form, by any means without written permission
of Vortech Engineering, LLC.
P/N: 4FF020-010
©2003 Vortech Engineering, LLC
All Rights Reserved, Intl. Copr. Secured
09JUN03 V2.1
(94-00 3.8L Mus.(4FF V2.1))
ii
Page 3

TABLE OF CONTENTS
FOREWORD......................................................................................................................................ii
TABLE OF CONTENTS .................................................................................................................... iii
NOTICE ............................................................................................................................................ iv
TOOL & SUPPLY REQUIREMENTS ................................................................................................. v
PARTS LIST - 1994-1998 3.8L V-6 MUSTANG ................................................................................ vi
PARTS LIST - 1999-2000 3.8L V-6 MUSTANG ................................................................................vii
1. PREPARATION/REMOVAL.................................................................................................. 1
2. OIL FEED ............................................................................................................................ 2
3. OIL DRAIN .......................................................................................................................... 3
4. FUEL MANAGEMENT UNIT (94-98 ONLY)......................................................................... 4
5. FUEL PUMP INSTALLATION (94-98 ONLY) ....................................................................... 6
6. MAIN MOUNTING BRACKET/SUPERCHARGER PLATE ASSEMBLY ................................ 8
7. A/C LINE MODIFICATIONS ................................................................................................ 9
8. FUEL INJECTOR REPLACEMENT (99-00 ONLY) .............................................................. 12
9. EGR TUBE MODIFICATION (99-00 ONLY)........................................................................ 12
10. SUPERCHARGER MOUNTING/HOSE DRAIN/INLET DUCT ............................................. 15
11. AIR INLET........................................................................................................................... 17
12. AIR DISCHARGE................................................................................................................ 18
13. FINAL CHECK.................................................................................................................... 19
©2003 Vortech Engineering, LLC
iii
All Rights Reserved, Intl. Copr. Secured
09JUN03 V2.1
P/N: 4FF020-010
(94-00 3.8L Mus.(4FF V2.1))
Page 4

NOTICE
This product is protected by state common law, copyright and/or patent. All legal
rights therein are reserved. The design, layout, dimensions, geometry, and
engineering features shown in this product are the exclusive property of Vortech
Engineering, LLC. This product may not be copied or duplicated in whole or part,
abstractly or fundamentally, intentionally or fortuitously, nor shall any design,
dimension, or other information be incorporated into any product or apparatus
without prior written consent of Vortech Engineering, LLC.
1999-2000 Models
This kit requires ECM modification and the installation of a Vortech ECM Module.
The ECM must be sent directly to Vortech by the installing customer (the charge
for this service with module installation has been included in the purchase price).
• Included in this kit is a prepaid next-day air shipping box and a credit tag for one
Vortech ECM Module.
• The modules are made specifically for each individual vehicle with respect to the
factory ECM calibration.
• Simply contact the Vortech Service Department at 805 247-0226 to request a
Return Authorization Number (see ECM Module Credit Tag for more details).
—Mail to Vortech the enclosed "ECM Module Credit Tag" (send original tag
photocopies will not be accepted) and ECM in the supplied box.
—Turnaround time will be 1-2 days (each application varies). Vortech will give an
estimate at the time of your order.
Your Vortech ECM Module comes with a twelve month limited warranty from the
original date of purchase of your supercharger system (see Owner's Manual for
details).
P/N: 4FF020-010
©2003 Vortech Engineering, LLC
All Rights Reserved, Intl. Copr. Secured
09JUN03 V2.1
(94-00 3.8L Mus.(4FF V2.1))
iv
Page 5
1994-2000
FORD 3.8L MUSTANG
Installation Instructions
50 State Smog Legal per CARB EO #D-213-17
Congratulations on selecting the best performing and best backed automotive
supercharger available today... the VORTECH® V-2® Supercharger!
Before beginning this installation, please read through this entire instruction booklet and the Street
Supercharger System Owner's Manual which includes the Limited Warranty Program and the Warranty
Registration form.
Vortech supercharger systems are performance improving devices. In most cases, increases in torque of 3035% and horsepower of 35-45% can be expected with the boost levels specified by Vortech Engineering. This
product is intended for use on healthy, well maintained engines. Installation on a worn-out or damaged engine
is not recommended and may result in failure of the engine as well as the supercharger. Vortech Engineering
is not responsible for engine damage.
Installation on new vehicles will not harm or adversely affect the break-in period so long as factory break-in
procedures are followed.
For best performance and continued durability, please take note of the following key points:
1. Use only premium grade fuel 92 octane or higher (R+M/2).
2. The engine must have stock compression ratio.
3. If the engine has been modified in any way, check with Vortech prior to using this product.
4. Always listen for any sign of detonation (pinging) and discontinue hard use (no boost) until problem is
resolved.
5. Perform an oil and filter change upon completion of this installation and prior to test driving your vehicle.
Thereafter, always use a high grade SF rated engine oil or a high quality synthetic, and change the oil and
filter at least every 3,000 miles. Never attempt to extend the oil change interval beyond 3,000 miles,
regardless of oil manufacturer's claims as potential damage to the supercharger may result.
6. Before beginning installation, replace all spark plugs that are older than 3 years or 30,000 miles with
original heat range plugs as specified by the manufacturer and reset timing to factory specifications (follow
the procedures indicated within the factory repair manual and/or as indicated on the factory underhood
emissions tag). Do not use platinum spark plugs unless they are original equipment. Change spark
plugs every 30,000 miles and spark plug wires every 50,000 miles.
TOOL & SUPPLY REQUIREMENTS
*
A/C system drain and recharge required - Procedure to be performed properly by a trained technician.
• Factory Repair Manual
• 3/8" Socket and Drive Set: SAE and metric
• 1/2" Socket and Drive Set: SAE and metric
• 3/8" and 1/2" Breaker Bars, 4" Extension
• 3/8" NPT Tap, 3/8-16 Tap and Handle
• Adjustable Wrench
• Open End Wrenches: 3/8", 7/16", 1/2", 9/16"
• Flat #2 Screwdriver
• Phillips #2 Screwdriver
• Heavy Grease
• Silicone Sealer
• Drill Motor
• 3/32", 5/16", 7/16", 9/16" (96-98 models), 37/64 Drill Bits
• Ford Springlock 3/8" Fuel Fitting Disconnect Tool
or Lisle A/C and Fuel Disconnect Tool Set #37000
• 5 Quarts SF Rated Quality Engine Oil
• Oil Filter and Wrench
• 9/16" ROTA-BROACH
• T55 Torx Bit
• Power Steering Pulley Puller/Installer (94-95 models)
• Tubing Cutter (ø5/8" Tube)
• Grinder
If your vehicle has in excess of 30,000 miles since its last spark plug change, then you will also need:
• Spark plug socket • NEW spark plugs
©2003 Vortech Engineering, LLC
v
All Rights Reserved, Intl. Copr. Secured
09JUN03 V2.1
P/N: 4FF020-010
(94-00 3.8L Mus.(4FF V2.1))
Page 6
1994-1998 3.8L V-6 Mustang
Part No. 4FF218-010SQ/018SQ
®
ENGINEERING, LLC
IMPORTANT:
Before beginning installation, verify that all parts are included in the kit. Report any
shortages or damaged parts immediately.
Part Number Description Quantity
4FF111-021 MOUNTING BRACKET ASSEMBLY 1
4FF011-021 Mounting bracket 1
4FF010-034 Mounting plate 1
7C010-066 10mm x 1.5 x 65 bolt 3
7C080-065 8mm x 1.25 x 65 1
7J375-044 3/8" Washer 3
7K312-001 5/16" Washer 1
7A375-100 3/8" - 16 x 1" Screw 5
7A375-075 3/8" - 16 x 3/4" Screw 5
7K375-040 3/8" Flat washer 10
7G010-175 12mm x 1.75 nut 1
2A046-114 Belt 1
4FA016-170 Idler pulley 1
4FD017-011 Idler spacer 1
7C012-050 12mm x 1.75 x 50mm Hex 1
4FA016-171 Dust shield 1
7J012-092 12mm Flat washer 2
2E228-250
4FF101-003 A/C LINE SUPPLEMENT 1
5W018-020 18 Gauge std. black wire (1.333 ft.) 1
5W018-050 18 Gauge std. yellow wire (1.333 ft.) 1
5W018-070 18 Gauge std. green wire (1.667 ft.) 1
5W018-080 18 Gauge std. blue wire (1.667 ft.) 1
5W001-012 Solderless connector, 22 red gauge 8
5W001-007 3/16" Heat-shrunk tube (1.00 ft.) 1
7P375-039 5/8 x 90° Barb 1
7P625-016 5/8 Union 1
7U034-100 5/8 A/C hose (.312 ft.) 1
7R002-010 #10 Clamp 3
4FF112-020 DISCHARGE ASSEMBLY 1
7R002-044 #44 Hose clamps 4
7R002-016 #16 Hose clamps 4
7S275-200 2-3/4” x 2” Sleeve 2
8D001-001 Bypass valve 1
7U034-016 1" Heater hoses (.416 ft.) 1
7U034-016 1" Heater hoses (.229 ft.) 1
4FF012-020 Discharge tube 1
4FF130-026 OIL FEED ASSEMBLY 1
7U030-026 1/4” Oil feed hose (3.16 ft.) 1
7P250-066 #4 Swivel x 1/4” hose barb fitting 4
7P525-067 .525 Crimp ferrules 4
7U100-055 Tie wrap, 6" nylon 2
7P250-144 1/4" NPT x #8 fitting 1
7P250-082 1/4" NPT x #4 90° fitting 1
7P125-103 #4 x 45° Male elbow 1/8" NPT 1
7P250-034 1/4 NPT Strt., Tee 1
7U030-026 1/4" Oil feed hose (1.58 ft.) 1
V2SQ SUPERCHARGER ASSEMBLY
1
PARTS LIST
Part Number Description Quantity
4FF238-068 FMU (with lines) 1
6Z110-112 10:1 Fuel management unit 1
4FF145-010 Male fuel assy., 3.8 (from rail) 1
4FF145-012 Female line assy., 3.8 (to tank) 1
7U030-046 5/32" Vacuum line (6 ft.) 1
7P156-082 5/32" TEE 2
7U100-055 Tie wrap, 6" nylon 4
4FF130-036 OIL DRAIN ASSEMBL Y 1
7U030-036 1/2” x 19” Oil drain hose (1.667 ft.) 1
7P375-017 3/8” NPT x 1/2” Bead straight barb 1
7R001-008 #8 Stainless hose clamps 2
7P375-045 45° Street elbow, 3/8" NPT 1
4FF112-010 AIR INTAKE ASSEMBLY 1
4FG112-022 Inlet duct w/ ring 1
7U035-001 3-1/2" Flex hose (1.33 ft.) 1
7R002-056 #56 Hose clamps 2
7R002-052 #52 Hose clamps 2
8H040-030 Air filter 1
7J250-001 1/4" SAE washers 8
7F250-021 1/4"-20 Nylock nuts 4
7A250-075 1/4"-20 x 3/4" Socket head cap screw 4
7S325-100 3.25 x 1 Sleeve 1
7S350-200 3-1/2 x 2 Sleeve 1
4FA012-012 90° Intake elbow 1
7U030-056 3/8" PCV hose (1.250 ft.) 1
7P250-045 1/4 NPT x 3/8 ID fitting 1
7R005-001 208-91 T-bolt clamp 3.75" 1
4FG110-050 MAF bracket assy. 1
7P375-016 3/8 Pipe plug 1
7U100-052 7/16 Rubber grommet 1
4FF101-002 FUEL PUMP ASSEMBLY 1
8F001-002 155 Inline fuel pump 1
8F101-200 T-Rex wir ing assy. 1
5W001-010 16-14 Gauge female slide, insulated 3
7R004-003 14.5 Stepless clamps 2
7R001-004 #4 Hose clamps 2
7U030-050 12mm Fuel hose (2.41 ft.) 1
7U031-018 5/16 Fuel hose (2 ft.) 1
7R003-024 Adel clamp, 1-1/2 ID 1
7E010-075 #12 x 3/4" Sheet metal, hex only 2
7P312-003 5/16" Female fuel connector 1
7P500-004 1/2" fuel adapter fitting 1
7C008-032 #8-32 Hex lock nut 1
7J008-001 #8 Flat washer 1
5W001-001 Wire tap 1
7U100-055 Tie wrap, 6" nylon 5
5W001-002 Fuse tap 1
5W001-015 Blade type fuse, 20 amp 1
5W001-014 #10 Fuse holder 1
5W001-019 Solderless connector, 12-10 gauge 1
5W001-011 16-14 Gauge eyelet, .25" bolt 1
7U375-135 Mounting pad 5
7U100-044 Tie wrap 5
7S625-000 Fire sleeve 1 ft.
P/N: 4FF020-010
©2003 Vortech Engineering, LLC
All Rights Reserved, Intl. Copr. Secured
09JUN03 V2.1
(94-00 3.8L Mus.(4FF V2.1))
vi
Page 7

1999-2000 3.8L V-6 Mustang
Part No. 4FF218-020SQ/028SQ
®
ENGINEERING, LLC
IMPORTANT:
Before beginning installation, verify that all parts are included in the kit. Report any
shortages or damaged parts immediately.
Part Number Description Quantity
4FF218-020SQ 99-01 MUST 3.8 V6 KIT 1
4FF111-021
4FF011-021 Mounting bracket 1
4FF010-034 Mounting plate 1
7C010-066 10mm x 1.5 x 65 bolt 3
7C080-065 8mm x 1.25 x 65 1
7J375-044 3/8" Washer 3
7K312-001 5/16" Washer 1
7A375-100 3/8" - 16 x 1" Screw 5
7A375-075 3/8" - 16 x 3/4" Screw 5
7K375-040 3/8" Flat washer 10
7G010-175 12mm x 1.75 nut 1
2A046-114 Belt 1
4FA016-170 Idler pulley 1
4FD017-011 Idler spacer 1
7C012-050 12mm x 1.75 x 50mm Hex 1
4FA016-171 Dust shield 1
7J012-092 12mm Flat washer 2
2E228-350
4FF130-026 OIL FEED ASSY 1
7U030-026 1/4” Oil feed hose (3.16 ft.) 1
7P250-066 #4 swivel x 1/4” hose barb fitting 4
7P525-067 .525 Crimp ferrules 4
7U100-055 Tie wrap, 6" nylon 2
7P250-144 1/4" NPT x #8 fitting 1
7P250-082 1/4" NPT x #4 90° fitting 1
7P125-103 #4 x 45° Male elbow 1/8" NPT 1
7P250-034 1/4 NPT Strt., Tee 1
7U030-026 1/4" Oil feed hose (1.58 ft.) 1
4FF130-036 OIL DRAIN ASSY 3.8 V6 1
7U030-036 1/2” x 19” Oil drain hose (1.667 ft.) 1
7P375-017 3/8” NPT x 1/2” Bead straight barb 1
7R001-008 #8 Stainless hose clamps 2
7P375-045 45° Street elbow, 3/8" NPT 1
4FF112-010 AIR INTAKE ASSY 3.8 V6 1
4FG112-022 Inlet duct w/ ring 1
7U035-001 3-1/2" Flex hose (1.33 ft.) 1
7R002-056 #56 Hose clamps 2
7R002-052 #52 Hose clamps 2
8H040-030 Air filter 1
7J250-001 1/4" SAE washers 8
7F250-021 1/4"-20 Nylock nuts 4
7A250-075 1/4"-20 x 3/4" Socket head cap screw 4
7S325-100 3.25 x 1 Sleeve 1
7S350-200 3-1/2 x 2 Sleeve 1
4FA012-012 90° Intake elbow 1
MOUNTING BRACKET ASSY 3.8 V6
V2SQ SUPERCHARGER ASSY 3.8 V6
1
1
PARTS LIST
Part Number Description Quantity
7U030-056 3/8" PCV hose (1.250 ft.) 1
7P250-045 1/4 NPT x 3/8 ID fitting 1
7R005-001 208-91 T-bolt clamp 3.75" 1
4FG110-050 MAF bracket assy. 1
7P375-016 3/8 Pipe plug 1
7U100-052 7/16 Rubber grommet 1
4FF101-003 A/C LINE SUPPLEMENT 1
5W018-020 18 Gauge std. black wire (1.333 ft.) 1
5W018-050 18 Gauge std. yellow wire (1.333 ft.) 1
5W018-070 18 Gauge std. green wire (1.667 ft.) 1
5W018-080 18 Gauge std. blue wire (1.667 ft.) 1
5W001-012 Solderless connector, 22 red gauge 8
5W001-007 3/16" Heat-shrunk tube (1.00 ft.) 1
7P375-039 5/8 x 90° Barb 1
7P625-016 5/8 Union 1
7U034-100 5/8 A/C hose (.312 ft.) 1
7R002-010 #10 Clamp 3
4FF112-130 DISCHARGE ASSY 99-01 V6 MUSTANG 1
4FF112-030 Duct, disch 99-01 V6 mustang 1
7P156-082 5/32 TEE 1
7R002-016 #16 Goldseal hose clamp 4
7R002-044 #44 Goldseal hose clamp 4
7S275-200 2-3/4 x 2 sleeve 2
7U030-046 5/32" vacuum line 1.333'
7U034-016 1" GS hose .708'
7U100-055 Tie wrap, 6" nylon 4
7U133-090 Rubber elbow, ø1.0" x 90° 1
8D001-001 Std comp bypass valve 1
7P375-106 PCV valve 1
4FL120-025 ECM CHIP PACKAGE 99-01 V6 1
5A101-016 MAF VOLTAGE CLAMP ASSY 1
4FF101-003 A/C LINE SUPPLEMENT 1
4FF014-030 FLEXIBLE EGR TUBE 1
5W001-051 JUMPER HARNESS 6
7P500-626 1/2" F NPT-5/8" TUBE CONN S.S. 2
8F060-038 FUEL INJECTOR, 38 LBS RAIL 6
2A046-113 BELT, K061130-GATES 1
vii
©2003 Vortech Engineering, LLC
All Rights Reserved, Intl. Copr. Secured
09JUN03 V2.1
P/N: 4FF020-010
(94-00 3.8L Mus.(4FF V2.1))
Page 8

This Page Left Intentionally Blank
P/N: 4FF020-010
©2003 Vortech Engineering, LLC
All Rights Reserved, Intl. Copr. Secured
09JUN03 V2.1
(94-00 3.8L Mus.(4FF V2.1))
viii
Page 9
1. PREPARATION/REMOVAL
A. Disconnect the negative battery cable.
B. Remove all of the components that lead to the
throttle body including the mass air flow (MAF)
sensor, air filter assembly and rubber bellows.
Separate the MAF sensor from the air filter
assembly and set aside.
C. Remove the air temperature sensor from the inlet
duct.
D. Remove the factory accessory drive belt.
E. It is necessary to remove the refrigerant from
the air conditioning system. This should be
performed by a qualified technician using a
refrigerant recycling system. Releasing refrigerant
into the atmosphere is environmentally
irresponsible and should be avoided.
F. Unplug the A/C compressor and the A/C line
electrical connectors. Using a springlock
disconnect tool, disconnect both ends of the A/C
line that runs from the condensor to the firewallmounted canister. Remove the screw mounting
the A/C line junction block to the compressor and
remove the line from the vehicle.
G. Remove the A/C compressor from the factory
bracket.
H. Using a T55 Torx bit, remove the belt tensioner
from the factory bracket.
I. Remove the factory A/C bracket including
mounting hardware from the engine.
(1999-2000 Models Only)
J. Remove (if equipped) the exhaust gas recirculation
(EGR) tube (one end connects to the passenger
side exhaust manifold). Note the orientation of
the pressure differential sensor.
K. Remove the passenger side front kick panel from
the interior of the vehicle. Remove the sound
deadening material (if any) that is covering the
ECM. Remove the plastic ECM hold-bracket.
L. Using the 10mm socket or wrench, remove the
harness and plug from the ECM (as you loosen
the screw, the connector will slowly release).
Remove the ECM from the vehicle.
M. Contact the Vortech Sevice Department for a
return authorization number. Send both ECM
and supplied credit tag to Vortech using the
enclosed shipping box.
©2003 Vortech Engineering, LLC
1
All Rights Reserved, Intl. Copr. Secured
09JUN03 V2.1
P/N: 4FF020-010
(94-00 3.8L Mus.(4FF V2.1))
Page 10

2. OIL FEED
NOTE:
IMPORTANT:
A.
The supercharger uses engine oil for lubri-
cation and must have an oil feed line connected to a filtered oil access on the engine.
Use only clean engine oil on the
pipe threads. Teflon tape or pipe
sealant is not recommended as it
might loosen and cause blockage
of the small oil feed orifice resulting
in possible supercharger failure.
1994-1995 Models only
1. Remove the vehicle's power steering pump
pulley. Remove the screws that fasten the
power steering/alternator bracket to the head.
Pull the assembly away from the engine
temporarily to gain access to the oil pressure
sending unit. Remove the factory pressure
sending unit. Thread the supplied 1/4" NPT
street TEE and 1/4" NPT x 90° x #4 flare into
the previous pressure sending unit location.
Install pressure sending unit into the street
TEE. (See
Fig. 2-a
.)
2. Connect the supplied 19" (2 different hose
lengths are supplied) oil feed line to the flare
fitting and route up to supercharger location.
Secure the hose with the tie wraps provided,
routing it away from chaffing and/or sharp
objects. Temporarily cover the open end
from debris until the connection is made to
the supercharger in Step 7.
B.
1996-2001 Models only
1. Remove the factory #8 O-ring plug located
on the engine oil filter boss. Replace the plug
with the supplied #8 O-ring x 1/4" NPT adapter
fitting. Thread the supplied 1/4" NPT x 90° x
#4 flare fitting into the adapter fitting. Orient
the 90° fitting as shown in
Fig. 2-b
2. Connect the supplied 38" (2 different hose
lengths are supplied) oil feed line to the flare
fitting and make a gentle upward loop around
the power steering pump. Secure the hose
with the tie wraps provided, routing it away
from exhaust heat, chaffing and/or sharp
objects. Temporarily cover the open end
from debris until the connection is made to
the supercharger in Step 7.
1994-1995 MODELS
OIL FEED FITTING & ADAPTER
Fig. 2-a
1996-2001 MODELS
OIL FEED FITTING & ADAPTER OIL FEED HOSE
Fig. 2-b
.
P/N: 4FF020-010
©2003 Vortech Engineering, LLC
All Rights Reserved, Intl. Copr. Secured
09JUN03 V2.1
(94-00 3.8L Mus.(4FF V2.1))
2
Page 11

3. OIL DRAIN
1.2”
OIL PAN
FRONT/PASSENGER SIDE
CORNER OF OIL PAN
A. To provide an oil drain for the supercharger, it is
necessary to make a hole in the oil pan. Locate
and mark hole as per
Figs. 3-a and 3-b
B. Carefully drill a pilot hole (the same diameter as
the Rota-Broach pilot) into the marked spot on
the oil pan (this procedure may also be done by
removing the oil pan if you are unsure of your
ability to perform the following steps properly).
Drill slowly as to catch most of the aluminum
chips from the hole being drilled. Using the 9/16"
Roto-Broach, very slowly machine a hole in the
pan (use the previously drilled hole as a guide).
Stop machining just before the tool breaks through
into the oil pan. Using a scribe or a small
screwdriver, remove the remaining disc-shaped
oil pan piece (allowing you to remove the pan slug
before it falls into the oil pan and keeps most of
the aluminum chips out).
C. Tap the hole with a 3/8" NPT tap approximately
1/4" deep. Pack the flutes of the tap with heavy
grease to hold the chips. Thoroughly clean the
threads in the hole with acetone or lacquer thinner.
D. Using a small amount of silicone sealer, install the
3/8 NPT x 45° elbow into the oil pan. Thread the
supplied 3/8" NPT x 1/2" barb fitting into 45°
elbow. (Orient the fittings as shown in
Temporarily cap the fitting until the drain hose is
connected in Step 7.
E. Drain the engine oil and change the filter. Refill
engine with factory specified weight oil. Vortech
recommends the use of synthetic oil.
.
Fig. 3-b
Fig. 3-a
.)
Fig. 3-b
©2003 Vortech Engineering, LLC
3
All Rights Reserved, Intl. Copr. Secured
09JUN03 V2.1
P/N: 4FF020-010
(94-00 3.8L Mus.(4FF V2.1))
Page 12

4. FUEL MANAGEMENT UNIT (1994-1998 Models only)
A. Position the FMU onto the right side inner fender
and secure with the supplied sheet metal screws.
(See
Fig. 4-a.
B. Disconnect and discard the factory rubber fuel
return line running from the fuel rail (note that the
return line DOES NOT have pressure test fitting
on it) to the steel return line (the smaller of the
two) located behind the right side shock tower
using a springlock disconnect tool.
C. Connect the FMU inlet hose (the hose that goes
to the 90° fitting on the side of the FMU) to the
return side of the factory fuel regulator. Make
sure the hose end is securely “snapped” onto the
factory connector. (See
page.)
D. Connect the FMU outlet hose (attaches to the
center fitting on the bottom of the unit) to the steel
return line running to the tank. Make sure the
hose end is securely "snapped" onto the factory
fuel line.
E. Secure the fuel lines away from abrasion and
exhaust with the tie wraps provided.
F. Attach the supplied length of 5/32" vacuum hose
to the fitting on top of the FMU. Connect the
opposite end of the hose to the factory fuel
regulator vacuum connection using the 5/32"
TEE provided. (See graphic on the next page.)
Trim hose length as necessary.
)
Fig 4-b
on the next
Fig. 4-a
P/N: 4FF020-010
©2003 Vortech Engineering, LLC
All Rights Reserved, Intl. Copr. Secured
09JUN03 V2.1
(94-00 3.8L Mus.(4FF V2.1))
4
Page 13

4. FUEL MANAGEMENT UNIT (1994-1998 Models only), cont'd.
FACTORY VACUUM HOSE
FUEL MANAGEMENT
UNIT (FMU)
VACUUM LINE
SUPPLIED
TEE
OUTLET
INLET
FACTORY QUICKDISCONNECT
FITTING
FUEL RETURN LINE
FACTORY SPRINGLOCK
CONNECTOR
FILTER
VORTECH
FUEL PUMP
FUEL FEED LINE
ENGINE
FACTORY
REGULATOR
FUEL TANK
Fig. 4-b
5
©2003 Vortech Engineering, LLC
All Rights Reserved, Intl. Copr. Secured
09JUN03 V2.1
P/N: 4FF020-010
(94-00 3.8L Mus.(4FF V2.1))
Page 14

5. FUEL PUMP INSTALLATION (1994-1998 Models only)
A. Remove the spare tire, etc. from the trunk.
B. Jack up the rear of the car and support with jack
stands.
C. Mount the fuel pump to the underside of the spare
tire well with the adel clamp and #8 fasteners
provided. Refer to
Figs. 5-a and 5-b
.
D. Remove the factory female hose end connected
to the fuel filter inlet.
E. Insert the supplied 1/2" fuel pump inlet hose
adapter fitting into the factory female supply hose
fitting by gently pushing the fittings together and
making sure they are locked.
F. Attach the supplied 1/2" fuel hose to the pump
inlet and the inlet hose adapter fitting. Use the
supplied #4 clamps to secure both ends. Cut
hose length if necessary.
G. Fasten the extended pump inlet line clear of the
filter by looping the two 11" cable ties through the
front slot on the fuel filter mount, being careful not
to kink the line.
H. Plug the female connector located on the pump
discharge line onto the fuel filter inlet making sure
the hose assembly clears all exhaust tubing and
sharp objects.
NOTE: Use extreme caution when routing fuel
lines. Make sure fuel lines are located
away from hot exhaust pipes and sharp
edges on the vehicle underbody.
I. Mark and drill a 1/8" hole and mount the relay
inside the trunk in position as shown in the
template. Use the sheet metal screw provided.
J. From relay terminal #85, tap the yellow wire into
the stock fuel pump harness in the trunk near the
right tail light. Tap into the purple wire with the
supplied scotch lock. (On some model years,
wire may be brownish-green.)
K. Connect the short red wire on relay terminal #8 to
the (+) terminal on the fuel pump.
L. Connect the longer black wire from the (-) terminal
on the fuel pump to a clean ground.
M. Connect the short black wire to a clean ground
from relay terminal #86 (relay screw mount works
well).
N. Route the remaining long red wire from relay
terminal #30 up to the fuse panel located under
the dash. Using a solderless connector, connect
the supplied fuse holder and fuse to the end of the
wire. Crimp the fuse wire to the supplied female
slide and fuse tap. Attach fuse tap and wire to
fuse #17.
Fig. 5-a
P/N: 4FF020-010
©2003 Vortech Engineering, LLC
All Rights Reserved, Intl. Copr. Secured
09JUN03 V2.1
(94-00 3.8L Mus.(4FF V2.1))
6
Page 15

5. FUEL PUMP INSTALLATION (1994-1998 Models only), cont'd.
Mount relay in the right rear corner of the spare tire well. Make sure wires are connected
as per the relay schematic below. Provide a good ground connection free of rust and
paint, for both the pump and relay. Connect the red power lead from the relay position
#30 to fuse #17 in the under dash fuse panel. Route the wire underneath the rear seat
and carpet. Take care to avoid sharp edges and not damage the wire insulation.
MAGNIFICATION - UNDERSIDE VIEW
UNDERDASH
FUSE BOX
20 AMP
INLINE
FUSE
5/16" x 24" HOSE
FUEL PUMP
CABLE
TIE
STOCK FUEL FILTER
AND BRACKET
FLEX
LOOM
FUEL TANK
STRAP
GROUND
FRONT
OF CAR
SPARE
TIRE WELL
Pump is mounted below the tire well, under the car.
Secure wires with adhesive anchors and tie wraps.
MAGNIFICATION OF RELAY WIRING
(+) FUEL PUMP
RED/PURPLE WIRE
IN STOCK HARNESS
(Check with test light. When
key is turned to “ON” position,
test light should illuminate
for 2-3 seconds & then should
turn “OFF” automatically.)
HEATER/A/C FUSE AT
INTERIOR FUSE BOX
86
30
87
87A
85
FLOW
1/2” x 29" HOSE
FRONT OF CAR
FUEL LINE
FROM TANK
FLOW
STOCK HOSE
11" CABLE TIES
NOTE: 1998 Mustangs have 7 or 8 wires
in the harness. Use the brown wire with
pink stripe. Double check with test light.
ASSEMBLY
FROM TANK
RELAY
Fig. 5-b
7
©2003 Vortech Engineering, LLC
All Rights Reserved, Intl. Copr. Secured
09JUN03 V2.1
P/N: 4FF020-010
(94-00 3.8L Mus.(4FF V2.1))
Page 16

6. MAIN MOUNTING BRACKET/SUPERCHARGER PLATE ASSEMBLY
A. Using a grinder, remove the casting boss on the
factory water pump. (See
Figs. 6-a, 6-b.
)
B. Using the supplied 12mm nut, washer and factory
tensioner screw, secure the factory belt tensioner
to the Vortech mounting bracket.
C. Mount the factory A/C compressor to the Vortech
mounting bracket (without the A/C line) using the
factory alignment dowels and hardware.
D. Temporarily remove the two passenger side coil
screws from the coil.
E. Attach the Vortech mounting bracket assembly to
the engine using the supplied 10mm x 1.5 socket
head screws and single 8mm x 1.25 hex head
screw using a washer with each fastener. (See
Fig. 6-c.
)
F. Attach the Vortech mounting plate to the bracket
using the supplied 3/8" - 16 x 3/4" screws and AN
washers.
G. The coil capacitor must be relocated to the front
Fig. 6-a
passenger side coil bolt for supercharger
compressor clearance (see
Fig.6-c
). The two
previously removed coil screws should be
reinstalled now.
BEFORE
BOSS
REMOVAL
Fig. 6-b
AFTER
BOSS
REMOVAL
NEW CAPACITOR
LOCATION
P/N: 4FF020-010
©2003 Vortech Engineering, LLC
All Rights Reserved, Intl. Copr. Secured
09JUN03 V2.1
(94-00 3.8L Mus.(4FF V2.1))
VORTECH MOUNTING
BRACKET INSTALLED
Fig. 6-c
8
Page 17

7. A/C LINE MODIFICATIONS
NOTE:
Modified air conditioning (A/C) lines may
be purchased from Vortech or the installer
may perform the modifications by following the steps below.
Modify the A/C suction lines as shown. Note that
the 1994-95 models require slightly different
modifications than the 1996-98 models.
A. Cut off the suction line flush with the junction
block (See
Fig 7-a
). Enlarge the exposed junction
block hole by using a 37/64” drill (preferably
mounted in a milling machine or drill press to
ensure that the hole is round and properly sized).
Thread the hole with a 3/8” NPT tap. Properly
clean all chips and lube out of the hole. It is very
important that no debris be allowed to enter the
A/C compressor.
B. Following the graphic, thread the 3/8” NPT x 90°
fitting into the A/C junction block. Tighten the
fitting so that it will point in the proper direction
when finished.
C. Take the cut-off section of A/C line (separated
from the junction block in step 1) and remove the
remaining muffler and tube starting where the
ferrule meets with the rubber portion of the line
(see
Figs. 7-b, 7-c, 7-d
). Discard muffler/steel
tube portion. Clean out the remaining rubber
hose/spring lock connector line. Slightly bend the
remaining muffler tube following the full scale
template on the next page.
D. Assemble the open end of the cut-off rubber hose
assembly onto the 90° junction block fitting. 1994-
95 models require a union and an extra length of
rubber A/C hose (supplied). Connect these pieces
as shown. Temporarily install the assembled A/C
line onto the vehicle. Allow the hoses to rotate so
that proper alignment is achieved. Mark the hose
rotation and remove the line assembly from the
vehicle.
E. Secure hose junction(s) with the supplied #10
hose clamps and permanently install the complete
A/C line onto the vehicle. Make sure that both
O-rings on the A/C line junction block are properly
located and that both of the springlock connectors
snap properly into place.
F. Extend the wires for the A/C compressor and A/C
line pressure sensor switch with the supplied wire
extensions and heat shrink sleeves.
A/C LINE CUT
MODIFICATIONS
CUT
HERE
REMOVE
AND
DISCARD
CUT HERE
Fig. 7-a
©2003 Vortech Engineering, LLC
9
All Rights Reserved, Intl. Copr. Secured
09JUN03 V2.1
P/N: 4FF020-010
(94-00 3.8L Mus.(4FF V2.1))
Page 18

7. A/C LINE MODIFICATIONS, cont'd.
STOCK POSITION
SIDE VIEW (PASSENGER’S SIDE)
MODIFIED (BENT)
POSITION
P/N: 4FF020-010
©2003 Vortech Engineering, LLC
All Rights Reserved, Intl. Copr. Secured
09JUN03 V2.1
(94-00 3.8L Mus.(4FF V2.1))
FULL SCALE BEND TEMPLATE
Fig. 7-b
10
Page 19

7. A/C LINE MODIFICATIONS, cont'd.
FITTING CLOCKING
(TOP VIEW)
TO FIREWALL
MOUNTED
CANISTER
FACTOR Y 5/8" RUBBER A/C HOSE
FACTORY TUBE/
FERRULE
ORIGINAL FERRULE
1994-1995
& 1999-2000 MODELS
FACTORY HOSE
CUT AT END OF
Fig. 7-c
ATTACH #10
HOSE CLAMPS
TO HEAT EXCHANGER
(FRONT OF RADIATOR)
5/8" X 3.75
LONG A/C HOSE
(SUPPLIED)
5/8" HOSE BARB
UNION
STOCK
POSITION
3/8" NPT X 5/8"
ELBOW
CUT OFF STEEL
TUBE HERE-THEN
DRILL AND TAP
3/8” NPT
SIDE VIEW
(PASSENGER SIDE)
MODIFIED (BENT)
POSITION
TO FIREWALL
MOUNTED
CANISTER
FACTORY TUBE/
FERRULE
1996-98 MODELS
ATTACH #10 HOSE CLAMP
5/8" RUBBER A/C HOSE
FACTORY HOSE CUT AT END
OF ORIGINAL FERRULE
STOCK POSITION
TO HEAT EXCHANGER (FRONT OF RADIATOR)
Fig. 7-d
FITTING CLOCKING (TOP VIEW)
3/8" NPT X 5/8" ELBOW
CUT OFF STEEL
TUBE HERE-THEN
DRILL AND TAP
3/8” NPT
SIDE VIEW
(PASSENGER SIDE)
MODIFIED
POSITION
11
©2003 Vortech Engineering, LLC
All Rights Reserved, Intl. Copr. Secured
09JUN03 V2.1
P/N: 4FF020-010
(94-00 3.8L Mus.(4FF V2.1))
Page 20

8. FUEL INJECTOR REPLACEMENT, (1999-2000 models only)
A. Remove the plastic clips holding the ignition wires
to the upper manifold. Disconnect the throttle
cable and cruise control cable. Remove the 12
screws securing the upper manifold. Disconnect
all hose/line and electrical connections and noting
their routing. Remove the coil pack, throttle cable
bracket and EGR solenoid bracket wiring harness.
Unsnap the wiring loom from the back of the
upper manifold.
B. Lift the upper manidold carefully off of the lower
manifold. Cover the lower manifold with a clean
cloth or rag to help prevent debris from falling into
the engine.
C. Disconnect the wiring harness from each injector
and clips securing the injectors to the fuel rail.
D. Remove the four fuel rail screws (two per side).
Lift the fuel rails up and remove the injectors.
E. Lube the O-rings on the new injectors and install
into the fuel rails first, then install the fuel rail
assembly into the manifold. Reinstall the retainer
clips onto the injectors and fuel rail.
NOTE:
New injectors have two grooves. Use the
upper groove which is closest to the
O-ring.
F. Reinstall the four fuel rail retainer screws. Install
the supplied jumpers onto the new injectors and
connect the wiring harness to each one.
G. Reinstall the previously removed components in
reverse order.
9. EGR TUBE MODIFICATION (1999-2000 VEHICLES EQUIPPED WITH AN EGR TUBE)
A. The EGR tube must be modified to allow proper
clearance for the air inlet ducting. Using a tubing
cutter, cut the EGR tube just before the 90° bend
downward and just after the 90° bend that heads
to the exhaust manifold. Use the supplied flexible
tube to gauge the proper amount of tubing to be
removed, cut and discard section. (See
Fig. 9-a.
)
B. Remove any burrs remaining on the EGR tube.
Install the two 1/2" NPT x 5/8 tubing connectors
on to each end of the flexible tube and tighten.
(See
Fig. 9-b.
)
C. Slide one end of the flexible tube assembly over
each end of the EGR tube and tighten the
compression fittings. (See
Fig. 9-c.
)
P/N: 4FF020-010
©2003 Vortech Engineering, LLC
All Rights Reserved, Intl. Copr. Secured
09JUN03 V2.1
(94-00 3.8L Mus.(4FF V2.1))
12
Page 21

TO INTAKE MANIFOLD
NOTE PRESSURE DIFFERENTIAL TUBES
MAY BE LOCATED NEAR EXHAUST MANIFOLD
CUT HERE
TO EXHAUST MANIFOLD
9. EGR TUBE MODIFICATION (1999-2000 VEHICLES EQUIPPED WITH AN EGR TUBE), cont'd.
Fig. 9-a
13
©2003 Vortech Engineering, LLC
All Rights Reserved, Intl. Copr. Secured
09JUN03 V2.1
P/N: 4FF020-010
(94-00 3.8L Mus.(4FF V2.1))
Page 22

9. EGR TUBE MODIFICATION (1999-2000 VEHICLES EQUIPPED WITH AN EGR TUBE), cont'd.
EGR TUBE
FLEXIBLE EGR TUBE
1/2” NPT - 5/8 TUBE
CONNECTION
Fig. 9-b
P/N: 4FF020-010
©2003 Vortech Engineering, LLC
All Rights Reserved, Intl. Copr. Secured
09JUN03 V2.1
(94-00 3.8L Mus.(4FF V2.1))
Fig. 9-c
14
Page 23

10. SUPERCHARGER MOUNTING/HOSE DRAIN/INLET DUCT
A. Place the oil drain hose onto the supercharger
drain fitting and secure with the supplied #8
clamp. Arrange the clamp housing so that it will
not interfere with the mounting plate when
installed.
B. Lower the supercharger down onto the mounting
plate while routing the drain hose through the
mounting bracket and around the A/C compressor.
Secure the supercharger to the mounting plate
using the supplied 3/8-16 x 1" screws and AN
washers.
C. Connect the lower end of the drain hose to the
fitting in the drain pan. Hose routing must be
downhill with smooth bends and must not have
kinks, sharp bends or uphill sections. Trim hose
length if necessary. Secure drain hose to the oil
pan fitting with the supplied #8 clamp.
D. Attach the 1/8 NPT x 45° brass fitting to the
supercharger oil feed fitting. Use a 1/2” wrench to
hold the feed fitting while tightening the 45° fitting.
Attach the previously installed oil feed hose to the
supercharger.
E. Attach the supplied idler pulley to the supercharger
using the supplied spacer, dust shield and M12 x
VALVE COVER BREATHER
HOSE (SEE SECTION 8)
50mm screw (place the spacer in between the
supercharger and the idler pulley). (See
Fig. 10-c
for idler location.)
SUPERCHARGER
INLET DUCT
Fig. 10-a
NOTE:
Use only clean engine oil on the pipe
threads. Teflon tape or pipe sealant is
not recommended as it might loosen
and cause blockage of the small oil feed
orifice resulting in possible supercharger
failure.
F. Install the drive belt following
routing, on the next page.
Fig. 10-d,
belt
VORTECH IDLER PULLEY
(1994-1998 mounting location shown)
Fig. 10-b
99-01 MODELS - IDLER
MOUNTING LOCATION
Fig. 10-c
94-98 MODELS - IDLER
MOUNTING LOCATION
15
©2003 Vortech Engineering, LLC
All Rights Reserved, Intl. Copr. Secured
09JUN03 V2.1
P/N: 4FF020-010
(94-00 3.8L Mus.(4FF V2.1))
Page 24

10. SUPERCHARGER MOUNTING/HOSE DRAIN/INLET DUCT, cont'd.
FACTORY IDLER
ALTERNATOR
WATER
PUMP
POWER
STEERING
CRANK
FACTORY
TENSIONER
A/C
SUPERCHARGER PULLEY
VORTECH IDLER
94-98 MOUNTING
LOCATION
VORTECH IDLER
99-01 MOUNTING
LOCATION
BELT ROUTING
Fig. 10-d
P/N: 4FF020-010
©2003 Vortech Engineering, LLC
All Rights Reserved, Intl. Copr. Secured
09JUN03 V2.1
(94-00 3.8L Mus.(4FF V2.1))
16
Page 25

11. AIR INLET
NOTE:
1999-2000 models. Install the MAF voltage
clamp using the supplied instructions.
A. Using the supplied 1/4-20 hardware, mount the
MAF meter to the Vortech MAF bracket and
secure. (See
Fig. 11-a
for orientation.) Remove
the factory MAF screen before attaching the
meter to the new bracket.
B. Slide the supplied orange sleeve onto the MAF
outlet to function as a spacer for the 3-1/2" blue
sleeve.
C. Attach the supplied K & N air filter, 3-1/2” sleeve,
90° 3-1/2” elbow and #56 hose clamps to the
MAF and secure.
D. AIR INTAKE TEMPERATURE SENSOR:
• 1994-95 Models:
Thread the temperature
sensor into the Vortech MAF bracket.
• 1996-1998 Models:
Plug the Vortech MAF
sensor threads with the supplied 3/8 NPT plug.
Drill a 9/16" hole into the side of the plastic air
inlet elbow (see
Fig. 11-a
). Insert the factory
temperature sensor and supplied grommet into
the 9/16" hole. Lubricate for easier fit.
• 1999-2000 Models:
Plug the Vortech MAF
sensor threads with the supplied 3/8"NPT plug.
E. Working from beneath the vehicle, remove the
two factory nuts and washers from the right side
lower fender valence. Mount the MAF/bracket
assembly onto the existing studs using the same
washers and nuts originally removed. (See
11-a.
)
F. Using a #52 hose clamp, connect the piece of
3-1/2” flex hose to the elbow attached to the MAF
meter and route it through the opening in the right
side inner fender toward the supercharger. Make
sure the 3-1/2” flex hose does not contact or rub
on the edge of the inner fender opening. Eventual
hose failure will result if hose is not properly
routed. (See
Fig. 11-b
.)
G. Route the factory temperature sensor and MAF
sensor connectors out through the inner fender
opening. Reattach the connectors to the relocated
sensors.
H.
1996-1998 Models:
Attach the supplied piece
of rubber 3/8" hose to the end of the factory valve
cover breather tube (plastic). Into the end of the
rubber breather hose, insert the factory 3/8" x 90°
plastic breather fitting to allow connection of the
tube assembly to the supercharger air inlet duct.
(See
Fig. 11-c
I.
1996-1998 Models:
.)
Using a short piece of
3/8" rubber hose, join the plastic 90° elbow to the
3/8" brass barb on the supercharger air inlet duct.
J.
1999-2000 Models:
Attach the supplied piece
of 3/8" rubber hose to the factory valve cover
breather, located on the passenger side valve
cover. Connect the other end of the previously
installed hose to the 3/8" brass barb on the
supercharger air inlet duct.
Fig.
FACTORY AIR
TEMPERATURE
SENSOR
(1996-1998 Models)
3-1/2" ELBOW
SLEEVE
#56 CLAMPS
FACTORY
STUDS & NUTS
VIEW FROM
INSIDE ENGINE
COMPARTMENT
(Steel inner fender
not shown for ease
of description)
INSIDE
RIGHT FRONT
PASSENGER
FRONT
FACTORY AIR TEMPERATURE SENSOR
1994-1995 MODELS (1996-2001 USE PIPE PLUG)
FENDERWELL
Fig. 11-a
Fig. 11-b
VALVE
COVER
BREATHER
HOSE
(19941998
Models)
Fig. 11-c
17
©2003 Vortech Engineering, LLC
All Rights Reserved, Intl. Copr. Secured
09JUN03 V2.1
P/N: 4FF020-010
(94-00 3.8L Mus.(4FF V2.1))
Page 26

12. AIR DISCHARGE
A. Attach the discharge duct between the
supercharger and the throttle body using the
supplied 2.75” sleeves and #44 hose clamps.
B.
1994-1998 Models only
1. Following Fig. 12-a, connect the 1" x 5" and
1" x 2.75" hoses to the supplied supercharger
bypass valve and secure with #16 hose
clamps. Attach the bypass valve/hose
assembly to the bung located on the discharge
duct and to the 1" barb located on the plastic
molded inlet elbow (make sure the bypass
valve nipple is pointing down when installed).
Secure with #16 hose clamps.
2. Cut the 5/32” FMU vacuum hose near the
shock tower and insert one of the supplied
brass TEEs into the hose to allow a branch
for the air bypass valve connection. Run the
supplied piece of 5/32” vacuum hose from
this TEE to the nipple located on the bottom
of the supercharger bypass valve. (See
12-a
.)
C.
1999-2000 Models only
1. Following
Fig. 12-b
, connect the 1” x 8.5” and
1” x 90° hoses to the supplied supercharger
bypass valve and secure with #16 hose
Fig.
DISCHARGE DUCT
VACUUM
HOSE
1” x 2.75” HOSE
1” x 5” HOSE
1994 - 1998
INLET
DUCT
VACUUM SOURCE
clamps. Attach the bypass valve/hose
assembly to the bung located on the discharge
duct and to the 1” barb located on the plastic
molded inlet elbow (make sure that the bypass
valve nipple is pointing down when installed).
Secure with #16 hose clamps.
2. Insert the supplied brass TEE into
the vacuum hose connecting the top
of the manifold, near the throttle
body. Route the supplied piece of
5/32" vacuum hose from the
previously mentioned TEE to the
nipple located on the bottom of the
supercharger bypass valve.
3. Remove the factory PCV valve from
the driver's side valve cover and
replace with the one provided.
TEE INTO PREVIOUSLY
INSTALLED FMU VACUUM LINE
Fig. 12-a
DISCHARGE DUCT
1” x 90°ELBOW
1” x 8.5” HOSE
VACUUM HOSE
FMU
INLET DUCT
1999 - 2001
P/N: 4FF020-010
©2003 Vortech Engineering, LLC
All Rights Reserved, Intl. Copr. Secured
09JUN03 V2.1
(94-00 3.8L Mus.(4FF V2.1))
VACUUM SOURCE
Fig. 12-b
18
Page 27

WARNING:
Do not attempt to operate the vehicle
until ALL components are installed and
ALL operations are completed including the final check.
13. FINAL CHECK
A. Reconnect the battery.
B. If your vehicle has gone over 30,000 miles since
its last spark plug change, you will need to
change the spark plugs now before test driving
the vehicle.
C. Check all fittings, nuts, bolts and clamps for
tightness. Pay particular attention to oil and fuel
lines around moving parts, sharp edges and
exhaust system parts. Make sure all wires and
lines are properly secured with clamps or tie
wraps.
D. Check all fluid levels, making sure that your
tank(s) is filled with 92 octane or higher fuel
before commencing test drive.
E. Start engine and allow to idle a few minutes, then
shut off.
F. Recheck to be sure that no hoses, wires, etc. are
near exhaust headers or moving parts and for
signs of any fluid leakage.
G. PLEASE TAKE SPECIAL NOTE: Operating the
vehicle without ALL the subassemblies completely
and properly installed may cause FAILURE OF
MAJOR COMPONENTS.
H. Test drive the vehicle.
I. Read the STREET SUPERCHARGER SYSTEM
OWNER'S MANUAL AND RETURN THE
WARRANTY REGISTRATION FORM within
thirty (30) days of purchasing your supercharger
system to qualify for the 3 year limited warranty.
Fig. 12-a
NOTE:
Do not attempt to operate the air condi-
tioning until a qualified air conditioning
technician has performed the necessary steps to purge and recharge the
air conditioning system.
19
©2003 Vortech Engineering, LLC
All Rights Reserved, Intl. Copr. Secured
09JUN03 V2.1
P/N: 4FF020-010
(94-00 3.8L Mus.(4FF V2.1))
Page 28

1650 PACIFIC AVENUE • CHANNEL ISLANDS, CA 93033-9901 • (805) 247-0226
FAX (805) 247-0669 • www.vortechsuperchargers.com • M-F 8:00 AM - 4:30 PM PST
P/N: 4FF020-010
©2003 Vortech Engineering, LLC
All Rights Reserved, Intl. Copr. Secured
09JUN03 V2.1
(94-00 3.8L Mus.(4FF V2.1))
®
ENGINEERING, LLC
 Loading...