

Page 1
READ AND SAVE THESE INSTRUCTIONS
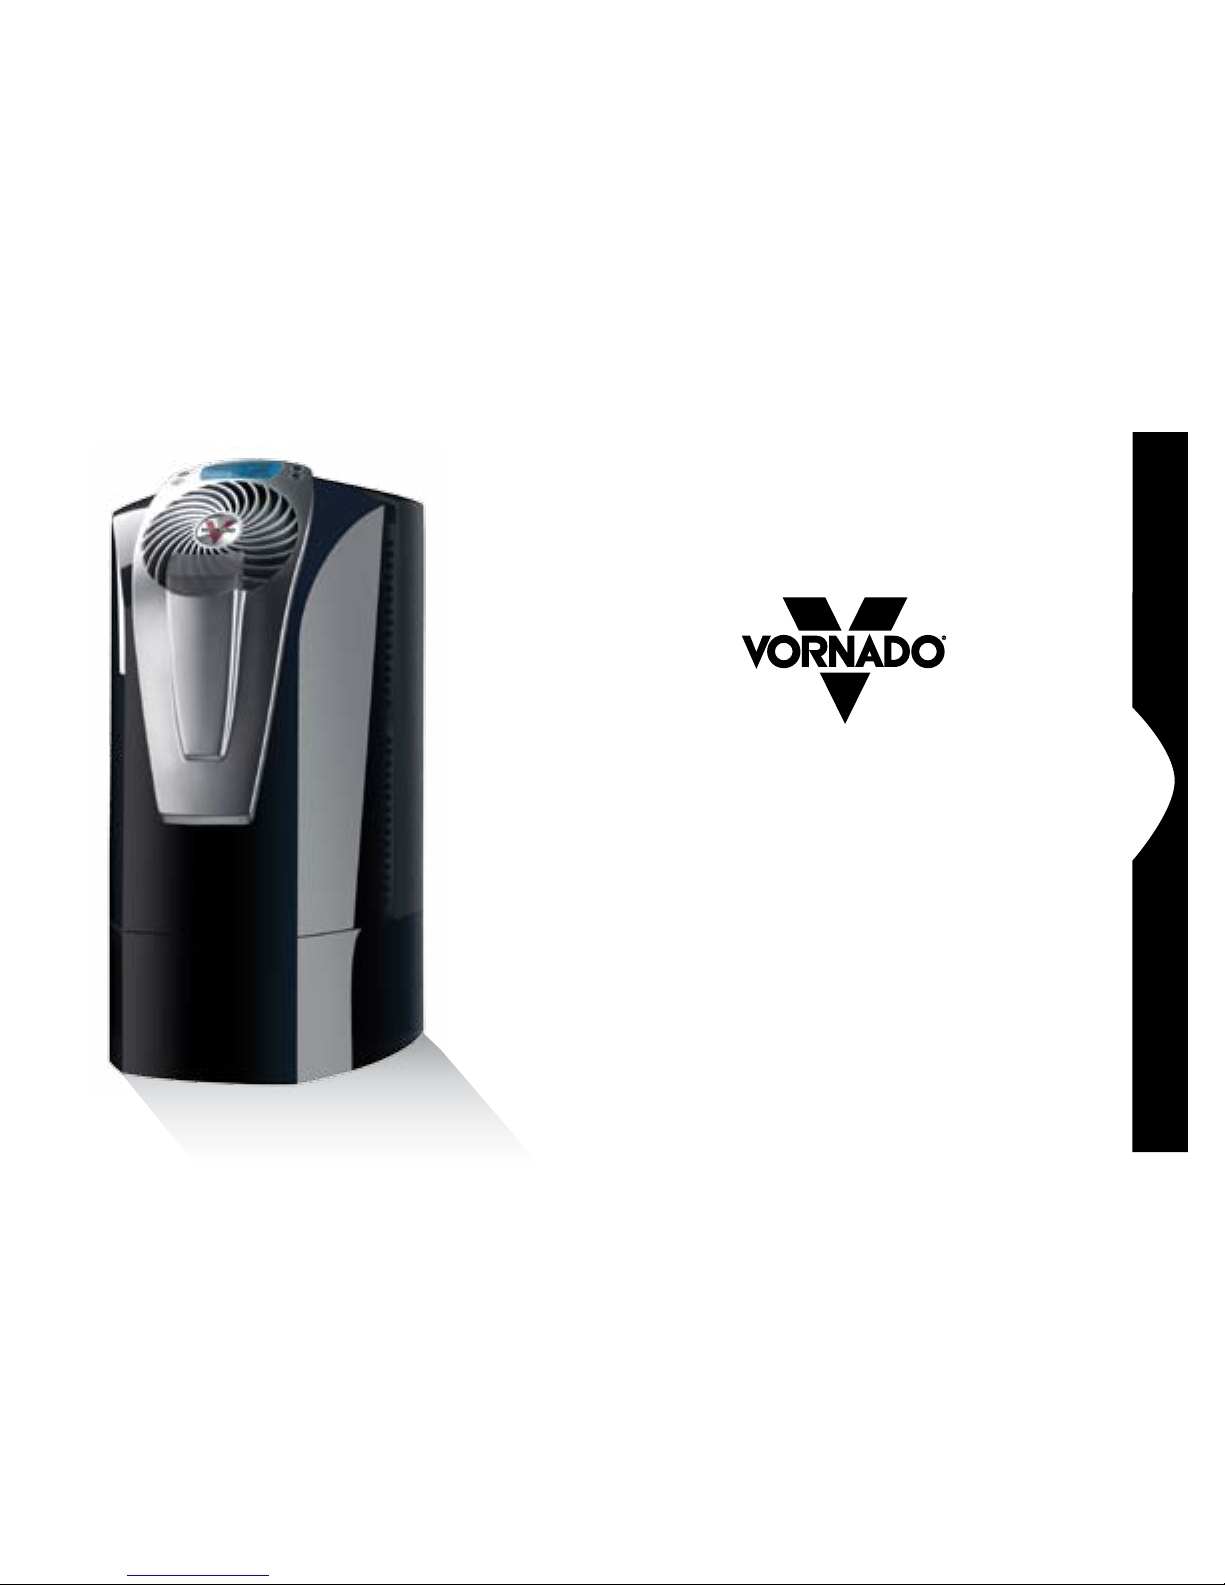
Ultrasonic Vortex Humidifier Owner’s Guide
LEER Y GUARDAR ESTAS INSTRUCCIONES
Guía del propietario del humidificador ultrasónico tipo vórtice
LISEZ ET CONSERVEZ CES INSTRUCTIONS
Mode d’emploi – Humidificateur tourbillonnaire à ultrasons
www.vornado.com
model ULTRA1
Page 2

English 3
Español p. 15
Français p. 27
Important Instructions ....................................................... 4
The Vornado Difference .....................................................5
Product Information ........................................................... 6
Getting Started
Filling Water Tank ............................................................ 8
How to Use Humidifier Controls ........................................ 9
Cleaning and Maintenance
Cleaning Instructions ...................................................... 10
Mineral Cartridge Replacement ..................................... 11
Operating Tips and Recommendations ............................. 12
Automatic Filter Refill Program ......................................... 12
Storage ............................................................................... 12
Troubleshooting .................................................................13
Warranty ............................................................................. 14
Contents
Remove your Humidifier from carton by lifting from bottom of
unit. Lifting by recessed handle on Water Tank, may cause Tank
to detach and unit to fall and cause damage.
We recommend checking the Base and Water Tank for leaks that
may have occurred due to damage caused in shipping. Please
note a visual inspection may not reveal hairline fractures.
To Check for Leaks:
Place Humidifier on a water-resistant surface.
Fill Water Tank and Base with water to inspect for leaks (For
instructions see FILLING WATER TANK.)
Not Leaking?
Empty water from Base and install full Water TANK (For
instructions see FILLING WATER TANK.)
Leaking?
In the remote chance your Humidifier has leaks, contact Vornado
Consumer Services and we will immediately replace damaged
parts.
Unpacking Your Humidifier
Designed, engineered and supported in Andover, Kansas.
Pensado, diseñado y respaldado en Andover, Kansas.
Conception, mise au point et soutien technique effectués à Andover, au Kansas.
Questions or comments?
www.vornado.com
consumerservice@vornado.com
800.234.0604
¿
Prequntas o comentarios?
Questions ou commentaires?
Page 3

4 English English 5
When using electrical appliances, basic precautions should always
be followed to reduce the risk of fire, electrical shock and injury to
persons, including the following:
Read all instructions before using this Humidifier.
This Humidifier may not work properly on an uneven surface.
Always place this Humidifier on a firm, flat surface.
This Humidifier requires periodic cleaning. Refer to the CLEANING
instructions provided. Never clean the Humidifier in any manner
other than as instructed in this manual.
Turn the Humidifier off if the relative humidity exceeds 60%.
Humidity levels above 60% may allow moisture to build up indoors
and condense on surfaces, where bacteria and fungi can settle and
grow. For accurate humidity readings, use a hygrometer which is
available at most hardware stores and home centers.
Unplug the Humidifier prior to moving, cleaning or refilling. This
Humidifier should always be unplugged and emptied when
not in operation.
This product is equipped with a polarized alternating current line
plug (a plug having one blade wider than the other). This plug will
fit into the power outlet only one way. This is a SAFETY FEATURE. If
you are unable to insert the plug fully into the outlet, try reversing
the plug. If the plug still fails to fit, contact an electrician to replace
the obsolete outlet. DO NOT defeat the safety purpose of the
polarized plug.
DO NOT operate the Humidifier with a damaged cord or plug, after
the Humidifier malfunctions, or has been dropped or damaged
in any manner. Return to Vornado for examination, electrical or
mechanical adjustment or repair.
DO NOT run power cord under carpeting. DO NOT cover cord with
throw rugs, runners or similar objects. Arrange the power cord away
from traffic areas, so it will not become a tripping hazard.
DO NOT place the Humidifier near heat sources such as stoves,
radiators or heaters.
DO NOT run unit without the Mist Outlet in place. The Mist Outlet
can be removed for cleaning.
Never pour water through the top Outlet Air Grill on the Power
Head.
If the Humidifier is to be turned off and left for more than 12 hours,
the water should be emptied from the unit, as leaving the water
will encourage the growth of algae or bacteria. If this happens,
thoroughly clean and disinfect the unit. (Refer to the CLEANING
instructions.)
If you need to move the Humidifier to another location, remove the
Water Reservoir first.
Use only water and mild detergents to perform daily maintenance
on your Humidifier. Do not use undiluted bleach or ammonia,
strong detergents, abrasive cleansers, gasoline, paint thinner or
other solvents to clean this Humidifier.
The Power Head contains no user serviceable parts. If you
experience a problem, please see the warranty for information. DO
NOT ATTEMPT TO DISASSEMBLE THE POWER HEAD. DOING
SO WILL VOID YOUR WARRANTY AND COULD CAUSE DAMAGE
AND/OR PERSONAL INJURY.
DO NOT repeatedly remove and replace the Water Reservoir. This
will only fill the Base and water will spill out.
SAVE THESE INSTRUCTIONS
Find our complete product line at www.vornado.com
Trust.
It is said that trust isn’t given, but earned. For decades Vornado has
been earning the trust of our customers by offering them only the
best. Vornado provides the highest level of performance, coupled
with the highest level of support available. Complete satisfaction
with no exceptions – this is Vornado’s promise to you. If you are not
satisfied for any reason, please contact us. Knowledgeable representatives are available at 1-800-234-0604 from 7:00 AM to 6:00 PM
CST. A wealth of additional support is also available online at
www.vornado.com. On behalf of myself and the entire staff at our
Andover, Kansas headquarters – thank you for selecting Vornado.
Sincerely,
Bill Phillips
CEO, Vornado Air
The Vornado Difference
Unlike any other ultrasonic humidifier, Vornado delivers whole room
humidification using our exclusive Vortex Action. The Vornado
Ultrasonic channels mist into a powerful beam of air and evenly distributes the humidity throughout the living area. Other systems are
only designed to push mist out of the unit, once outside, there is
no mechanism to deliver the humidity throughout the living space.
The mist simply falls, leaving the floor damp.
IMPORTANT INSTRUCTIONS
READ AND SAVE ALL INSTRUCTIONS BEFORE USING THIS HUMIDIFIER.
Without Adequate Circulation With Vornado Vortex Action
See it
in action
ULTRA1 HUMIDIFIER
ULTRA1 HUMIDIFIER
Page 4
6 English English 7
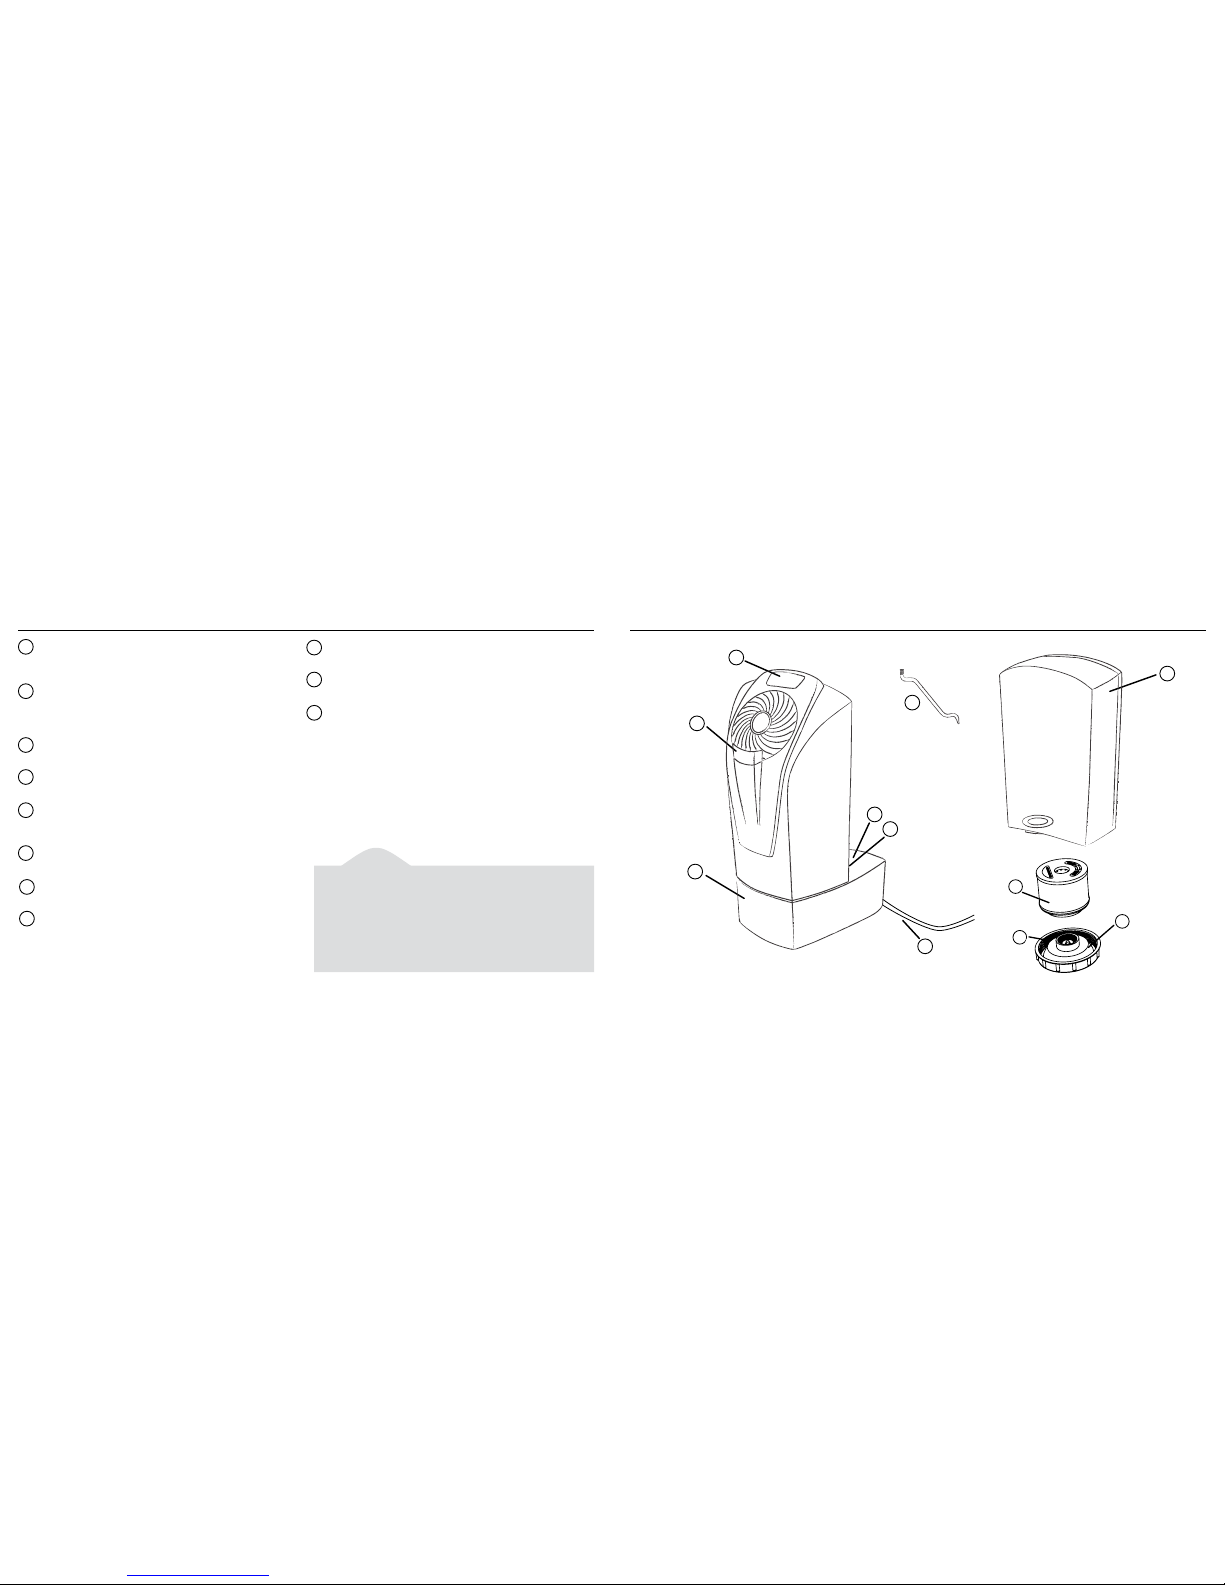
LCD Display Screen
Easily adjust fan speed, humidity level, power and
mist condition.
Mist Outlet
Moist air is dispersed through the Mist Outlet and projected into
Vornado’s signature Vortex beam of air - circulating the moist air
throughout the entire room.
Base
Durable, leak-resistant construction.
Water Tank
Large 2 gallon capacity allows for fewer refills.
Mineral Cartridge
Removes minerals from the water, thereby softening the water
and reducing harmful mineral buildup on the Transducer.
Gasket
Creates a waterproof seal between Cap and Water Tank.
Cap
Easy-to-remove Cap for convenient Water Tank refilling.
Power Cord
Convenient 6 ft. cord.
1
6
5
4
3
2
Product Information
Item ...................................................................... HU1-0022-06
Model .............................................................................. ULTRA1
Warranty ................................................................ 5 Year Limited
Mineral Cartridge ........................................................ MD1-0021
Fill Port
Releases water from Water Tank into Base.
Ultrasonic Transducer
Rapid vibrations break water into a fine mist.
Cleaning Brush
Used for cleaning the Base in hard to reach areas. Stored in Base.
7
8
9
10
1
2
3
4
8
9
10
5
6
7
Product Information
11
11
Page 5

8 English English 9
Filling Water Tank
Before initial use, you must soak the Mineral Cartridge in water for
24 hours. You may use a separate container or Water Tank to do so.
If Tank is used, empty water and refill with fresh water prior to use.
Note: the unit may take several minutes to create mist with the
initial use of a new Mineral Cartridge.
This Humidifier has a 2 gallon capacity and 3.5 gallon output in 24
hours (if set to High output, Continuous Humidity setting).
To fill Water Tank:
Unplug Humidifier. Place on firm and level surface, such as the
floor.
Note: Spills can occur during cleaning, moving, or refilling
Water Tank, so be careful to avoid spills when doing these
activities. Do not touch the water inside the Base, as the water
temperature can reach 92 degrees F.
Remove Water Tank by grasping recessed handle on back (A).
Lift and pull outward.
Turn Water Tank upside down.
Remove Cap (B). Empty any remaining water inside Water Tank.
Rinse, wipe clean and dry with clean cloth or paper towel.
Place Water Tank in sink with opening at the top.
Fill Water Tank with cool tap water (C).
Ensure Gasket is properly positioned and secure Cap.
Lower Water Tank into Base, positioning Fill Port over raised
bump in Base. Once in nested position, the water outlet valve
inside Cap will open, releasing water into Base.
Getting Started
Read and understand this owners guide before operating this
product. Position unit to not blow directly on objects or plants. Plug
unit into a 110-120 volt AC outlet.
Power Button (A) - turns the unit On or Off. LCD Screen will
illuminate when powered On. Unit will default to Continuous Misting,
Cool Mist, and High Output. Adjust settings for desired operation.
Mist Condition (B) - select Cool or Warm Mist Output. The
temperature of the mist on the Warm Mist setting is approximately 94
-98 degrees at the Outlet. However, the mist will feel much cooler to
the touch, because it is immediately entrained in the Vortex beam of
air generated by the fan.
Humidity (C) - sets desired humidity level. Press Humidity Button
until desired humidification level is illuminated. The unit will operate
until the desired humidity level is reached, at this point, the mist
output will turn Off. The humidity level indicator light will remain on. If
the mist output does not turn on, the set humidity level may be lower
than the room humidity level. Increase the humidity set point until the
mist turns on. This is an indication of the level of humidity already
in the room. If moisture forms on walls or windows, lower humidity
settings or turn Off Humidifier.
How to Use Humidifier Controls
AUTO 1 Continuous misting, cool mist, low fan speed.
AUTO 2 Continuous misting, warm mist, high fan speed
40% - 60% Humidity level. Manually set Mist Condition and Fan Speed.
Fan Speed (D) - select desired Fan Speed - High or Low .
High - operation for fast humidification for larger rooms. High speed
operation will evaporate 3.5 gallons of water (+/- 10%) in 24 hours of
continuous operation. (This assumes room conditions of 70º F and 30%
relative humidity.)
Low - operation for quiet, nighttime use or smaller rooms. On Low
operation, your Humidifier may run without refilling for extended periods.
Notifications
Refill Tank - Notifies you when the Water Tank needs to be refilled. Will
automatically turn off after it has been refilled.
Clean Unit - Displays after 400 hours of operation. It is recommended to
clean your Humidifier at this time (see CLEANING INSTRUCTIONS). To
reset notification, press and hold the Power Button for 3 seconds.
Replace the Mineral Cartridge - Displays after 800 hours of operation.
It is recommended to replace the Mineral Cartridge at this time
(see REPLACING MINERAL CARTRIDGE for instructions). To reset
notification, press and hold the Power Button for 3 seconds.
Note: The rate of water dispensing from Water Tank into Base is
controlled by the Mineral Cartridge. The unit may take several
minutes to fill the Base.
1.
2.
3.
4.
5.
6.
7.
8.
C
A
B
CA
B D
Page 6
10 English English 11
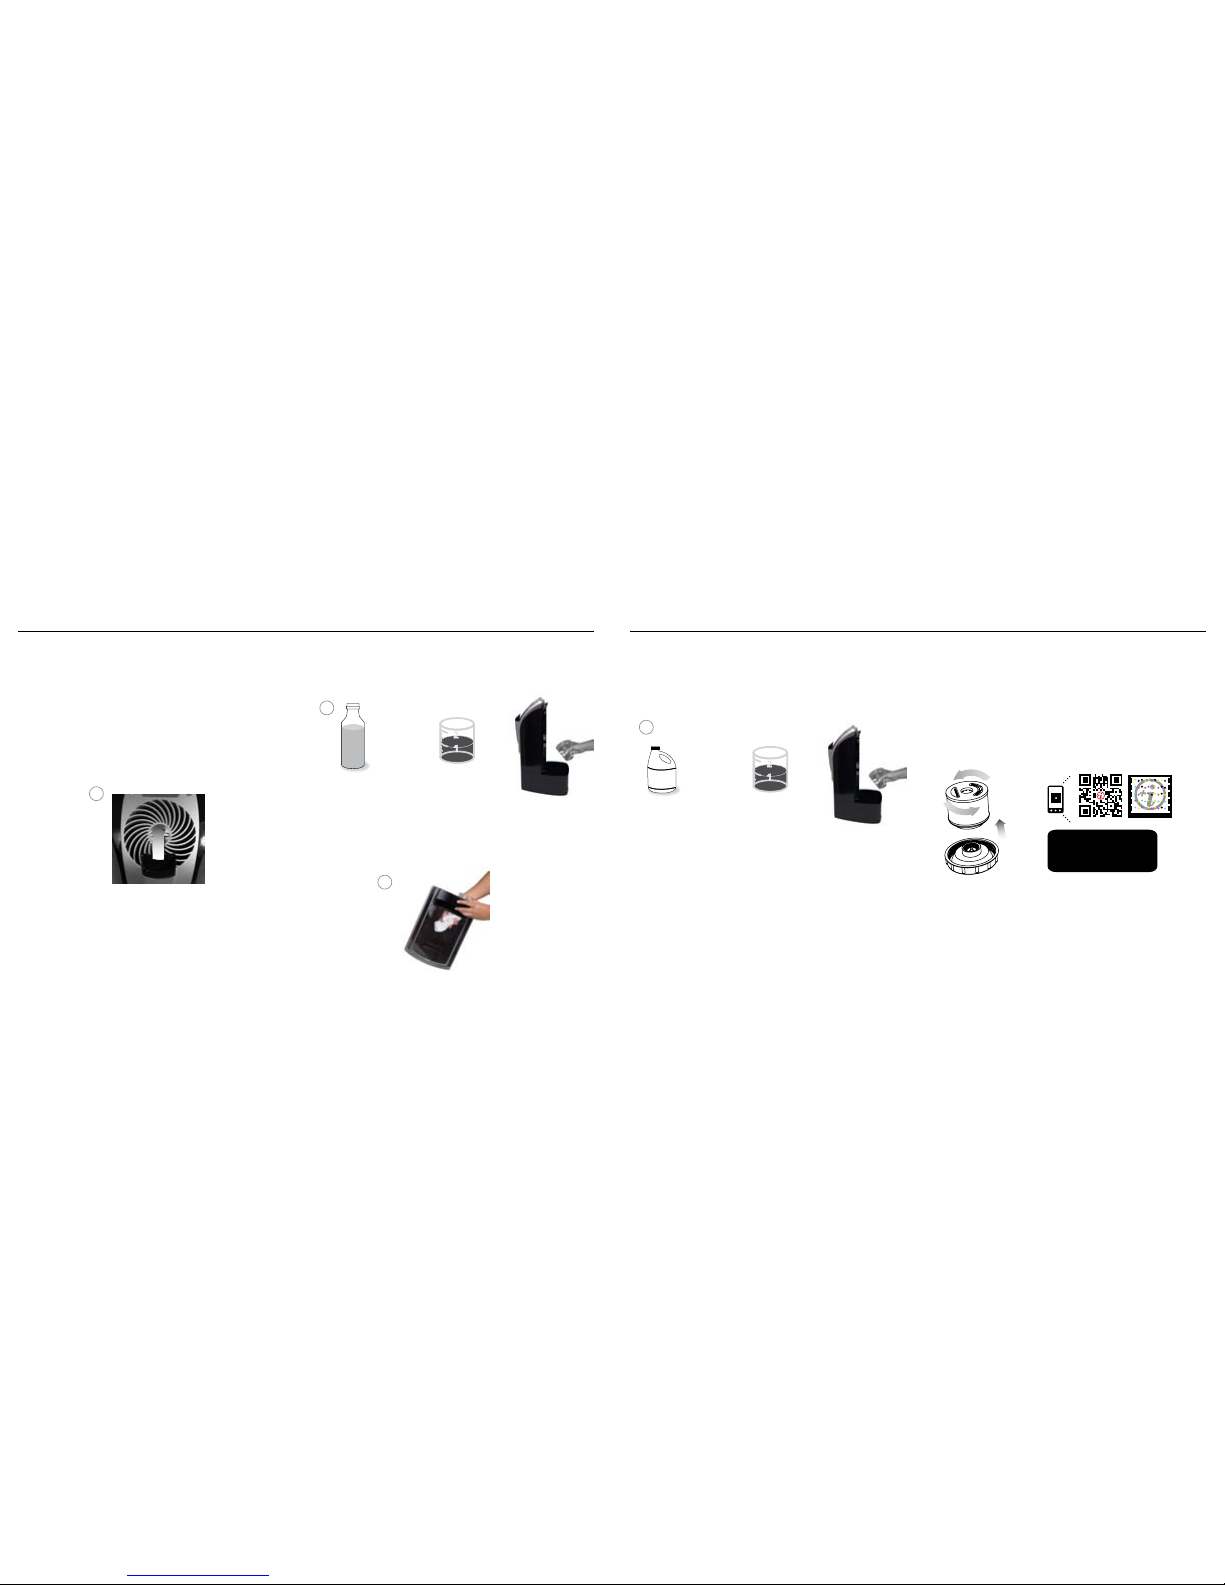
To Disinfect:
Place Mist Outlet back into Water Tank.
Fill Base and Water Tank with a mixture of water and chlorine
bleach - mixed at a ratio of one (1) teaspoon of chlorine bleach
per 1 gallon of water (D). Do not overfill, discard unused portion.
Solution should remain in Base and Water Tank for 20 minutes to
fully disinfect.
Rinse with water until bleach smell is gone. Dry with clean cloth or
paper towel.
Reinstall all components. Components must be securely in place
for unit to function properly.
Fill Base and Water Tank with a mixture of water and white vinegar mixed at a ratio of one (1) 8 oz. cup of undiluted white vinegar per 1
gallon of water (B). Do not overfill, discard unused portion. Solution
should remain in Base and Water Tank for 20 minutes to dissolve any
residue.
Empty after 20 minutes and clean Mist Outlet and all interior surfaces
of Base and Water Tank with soft brush (C). Use Cleaning Brush,
stored in Base of unit to clean hard to reach areas. Dampen soft
cloth with undiluted white vinegar and wipe down to remove scale.
Rinse thoroughly with clean warm water before disinfecting.
Cleaning Instructions
Proper cleaning of your Ultrasonic Vortex Humidifier is essential to the
air quality and performance of your unit. The frequency in which your
Humidifier will need to be cleaned will vary, depending on use, water
hardness, and outside environmental factors. It is recommended,
assuming average use, to thoroughly clean the unit several times
throughout the season, or when algae, mineral deposits or other
particles begin to form. To clean your Humidifier, follow these
instructions:
Turn the Humidifier Off and unplug. Do not submerge into water.
Remove Mist Outlet by grasping base of Outlet and pulling up (A).
Empty water from Base and Water Tank. (See FILLING WATER
TANK for instructions). Place Mist Outlet inside Water Tank to
clean both components at the same time.
Note: Do not operate the unit during cleaning.
Mineral Cartridge Replacement
The Mineral Cartridge removes minerals from the water thereby
softening the water and reducing harmful mineral buildup on the
Transducer.
When to Replace: Many factors affect the frequency in which
the Cartridge will need to be replaced - including amount of
use, water hardness, and outside environmental factors. For
Cleaning and Maintenance
1.
2.
3.
4.
heavy use, using the unit continuously, we recommend replacing the
Cartridge approximately once a month. For lighter use, using the
unit intermittently, we recommend replacing the Cartridge every two
months.
The Cartridge will need to be replaced earlier if white powder residue
accumulates around the device. If the water used in the humidifier has
been treated by a decalcification system, the salt from the treatment can
show up as white dust also.
How to Replace:
Remove Water Tank (See FILLING WATER TANK for instructions)
Unscrew Cap.
Unscrew Mineral Cartridge from Cap (A). Discard Cartridge.
Install new Cartridge onto Cap.
If continuing use of Humidifier, fill Water Tank and reinstall Cap.
Replace Tank back into unit. Your Humidifier is now ready for use.
Note: the unit may take several minutes to create mist with the initial
use of a new Mineral Cartridge.
If storing unit, empty Water Tank and reinstall Cap. Replace Tank
back into unit. See STORAGE for instructions.
Cleaning and Maintenance
A
8 oz.
White
Vinegar
+
1 gal.
Water
C
1.
2.
3.
4.
B
1.
2.
3.
4.
5.
6.
D
1 tsp.
Chlorine
Bleach
+
1 gal.
Water
View cartridge
replacement tutorial on
your mobile device.
MINERAL CARTRIDGE
MINERAL CARTRIDGE
Page 7
12 English English 13
For best results:
1. Allow for optimum airflow by keeping the mist outlet and grill unobstructed. Ensure curtains and other items are far enough away
from the unit to not be pulled into the side inlets or interfere with
airflow.
2. Operate your Humidifier continuously. This will help maintain the
desired humidity level in your home, cost only pennies a day, and
will not damage the unit.
It is normal and expected for your Humidifier to run continuously
for a few days in order to raise the moisture content of the air to
the desired level upon initial use or if the air is extremely dry. When
your home and its furnishings have absorbed sufficient moisture
and become stabilized at the desired humidity level, the amount of
water used will decrease.
If you operate your Humidifier continuously, it may need to be
refilled with water every day. Simply look through the Water Tank
to be certain that there is adequate water supply for operation.
When the water level drops below the operating level, the misting
function will stop.
Any additives such as aroma fragrances or water conditioners
must not be used. Any use of such additives will void the
manufacturer’s warranty. These additives can cause cracks in the
plastic of the Humidifier and may affect Transducer performance.
Protect the Water Tank from damage. Any cracks or damage to the
Tank may cause it to leak water onto the floor or other surfaces.
If the Humidifier is turned Off, with water in the unit, and not
turned back on for 12 hours or longer, or if the unit is not cleaned
as recommended, you may experience some growth of algae or
bacteria. These microorganisms may become airborne. Thoroughly
clean the unit to eliminate any microorganisms (See CLEANING
Operating Tips and Recommendations Troubleshooting
Unit is not plugged in. Plug power cord into electrical outlet.
Household circuit breaker / ground fault interrupter has tripped or blown a fuse. Reset circuit breaker /
ground fault interrupter, or replace fuse. For assistance, contact a licensed electrician.
The unit has blown a fuse. Cease usage and unplug. Contact Consumer Service for assistance.
Unit is damaged or in need of repair. Cease usage and unplug. Contact Consumer Service for assistance.
This is normal. Water is being dispensed into Base.
Water level in Tank is empty or too low. Refill with clean, cool tap water. (See FILLING WATER TANK for
instructions.)
Unit has reached its set point. When set humidity level is reached, the unit will not produce mist until humidity
level in the room drops below humidity set point.
Airflow is blocked. Remove obstruction.
Unit settings are too low. Set to High Output and Continuous Humidity for maximum humidity output.
Mineral Cartridge is no longer removing minerals from water. Cartridge needs to be replaced (See MINERAL
CARTRIDGE REPLACEMENT for instructions.)
Unit and Transducer is in need of cleaning. (See CLEANING AND MAINTENANCE for instructions.)
Water is too hard. Use distilled water.
Unit fails to power on.
Unit makes a bubbling or
gurgling sound.
Unit is not producing desired amount of humidity
or mist output has ceased.
White dust has accumulated on Mist Outlet or on
flooring below.
Problem Possible Cause and Solution
AND MAINTENANCE for instructions).
Your Ultrasonic Vortex Humidifier is effective at supplying necessary
moisture to dry air. It should be used with proper care to prevent
over-humidification. To know if the humidity level is too high, gauge
the condensation or frost on windows. Adjust your Humidifier to a
point where this condition is at a minimum.
Storage
1. Thoroughly clean unit (See CLEANING INSTRUCTIONS).
2. Remove and discard Mineral Cartridge (See MINERAL
CARTRIDGE REPLACEMENT). Be sure to buy a new Mineral
Cartridge now so you are ready for next season!
3. Empty Water Tank and Base. Let unit dry completely.
4. Place in original retail carton if available.
5. Your Humidifier is now ready for Storage. Store in a cool, dry
location.
Note: It is recommended to clean the unit again before use.
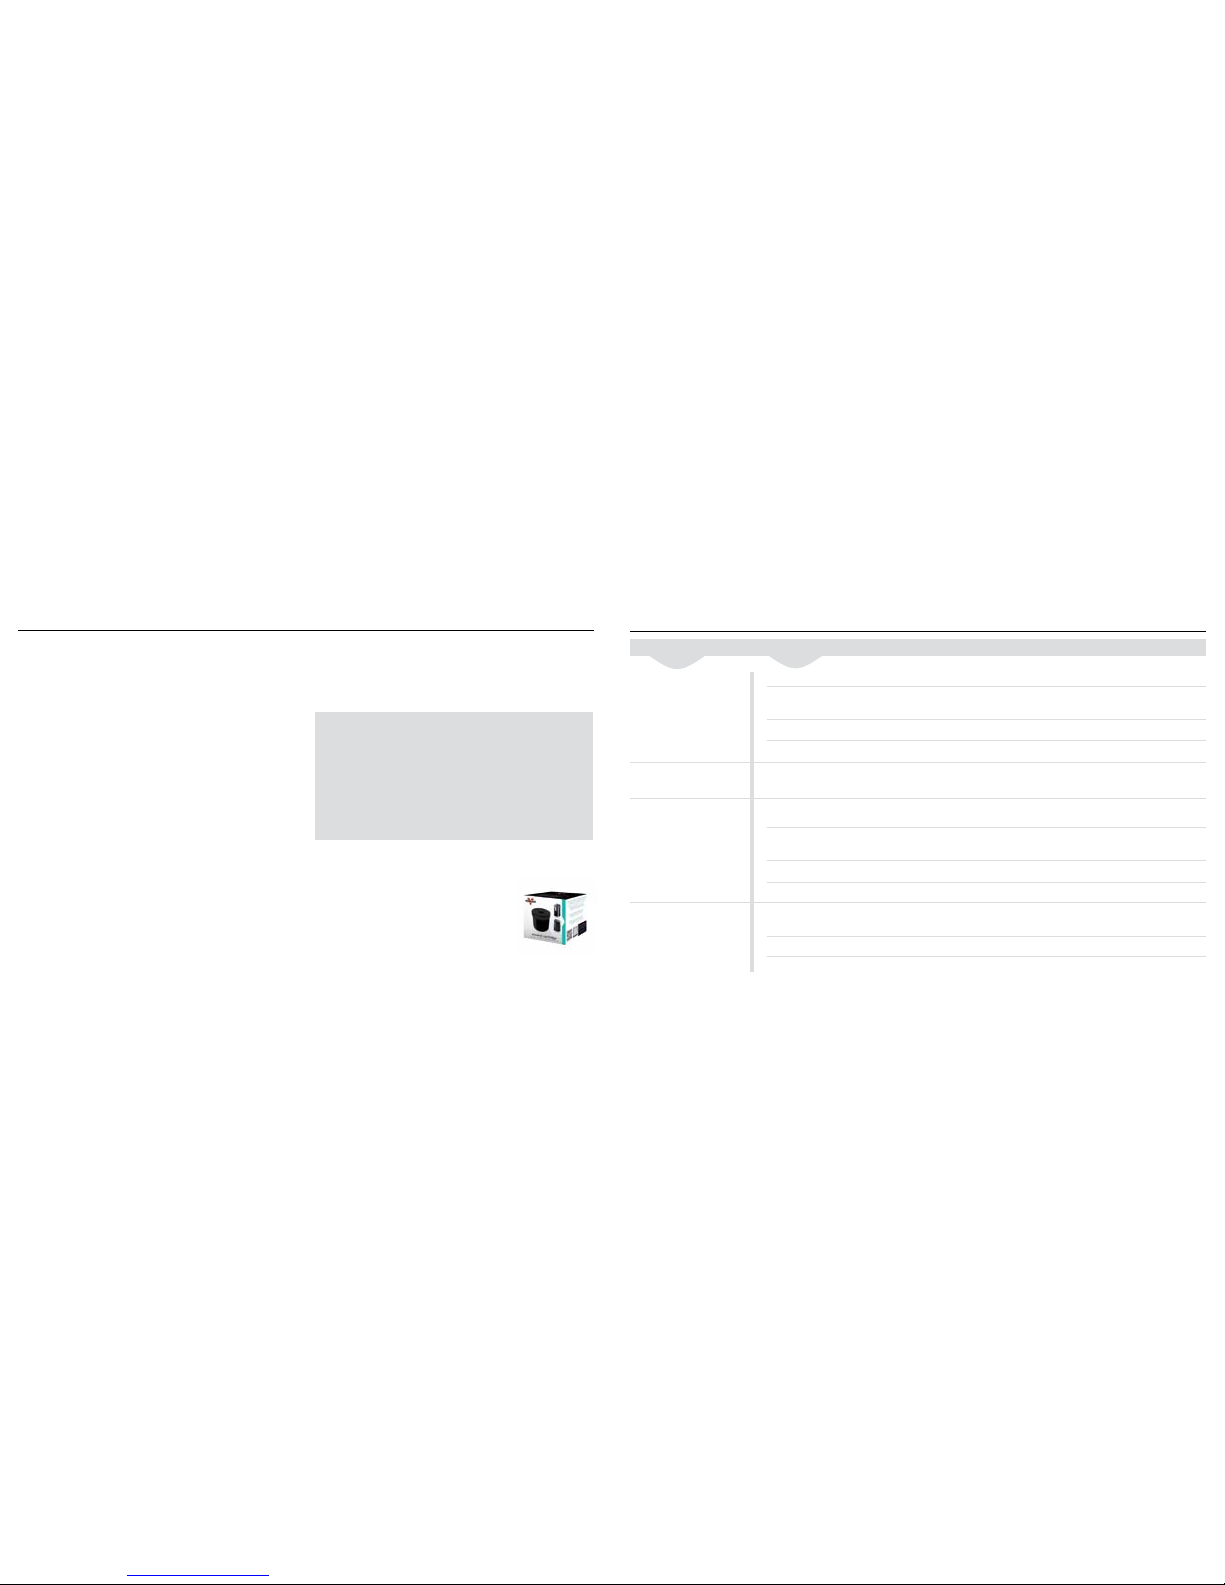
Part # MD1-0021
Automatic Refill Program
Select the shipment interval and Vornado will
send replacement Mineral Cartridges automatically. Eliminate the hassle of remembering to
reorder. Maintain the high efficiency of your
Vornado Humidifier.
To sign up, visit www.vornado.com, email consumerservice@vornado.com or call 1-800-234-
0604. Cancel at anytime.
Page 8

Español 1514 English
Vornado Air LLC (“Vornado”) warrants to the original consumer or purchaser this
Vornado® Ultrasonic Vortex Humidifier (“Product”) is free from defects in material or
workmanship for a period of five (5) years from the date of purchase, depending on
model. If any such defect is discovered within the warranty period, Vornado, at its discretion, will repair or replace the Product at no cost. Repairs not covered by the warranty or
outside the warranty period will require a fee to cover the cost of materials, labor, handling and shipping.
This warranty does not apply to defects resulting from abuse of the Product, modification,
alteration, repair or service of the Product by anyone other than Vornado, mishandling,
improper maintenance, commercial use of the Product, damages which occur in shipment
or are attributed to acts of God.
REPAIR OR REPLACEMENT AS PROVIDED UNDER THIS WARRANTY IS THE EXCLUSIVE REMEDY OF THE CONSUMER. VORNADO SHALL NOT BE LIABLE FOR ANY
INCIDENTAL OR CONSEQUENTIAL DAMAGES FOR BREACH OF ANY EXPRESS OR
IMPLIED WARRANTY ON THIS PRODUCT. EXCEPT TO THE EXTENT PROHIBITED BY
APPLICABLE LAW, ANY IMPLIED WARRANTY OF MERCHANTABILITY OR FITNESS FOR
A PARTICULAR PURPOSE ON THIS PRODUCT IS LIMITED IN DURATION TO THE DURATION OF THIS WARRANTY.
Some states do not allow the exclusion or limitation of incidental or consequential damages, or allow limitations on how long an implied warranty lasts, so the above limitations
or exclusions may not apply to you. This warranty gives you specific legal rights, and you
may have other rights that vary from state to state.
Ultrasonic Vortex Humidier • 5 Year Limited Warranty
For warranty or repair service, call 1-800-234-0604 or email consumerservice@vornado.
com to obtain a Return Authorization (“RA”) form. Please have or include your Product’s
model number and serial number, as well as your name, address, city, state, zip code and
phone number when contacting Vornado for warranty service. After receiving the RA form,
ship your Product to:
Vornado Air LLC
Attn: Warranty & Repair
415 East 13th Street
Andover, KS 67002
For your convenience, please have your model number and serial number when contacting Vornado with service inquiries. To assure proper handling, packages must be clearly
marked with the RA number. Packages not clearly marked with the RA number may be
refused at the receiving dock.
Please allow 1-2 weeks for repair and return of your Product after the Product is received.
For your records: Staple or attach your original sales receipt to this Owner’s Guide. Please
also write your products’s serial number below (located on product specs decal).
Serial No. ______________________________________
Product registration available online at www.vornado.com
© 2012 Vornado Air LLC Andover, KS 67002
Patents Pending. Specifications subject to change without notice.
Vornado® is a trademark owned by Vornado Air LLC.
Designed and Engineered in the U.S.A. Manufactured in China.
www.vornado.com consumerservice@vornado.com 800.234.0604
Instrucciones Importantes ................................................. 16
La Diferencia Vornado ........................................................ 17
Información Sobre el Producto .......................................... 18
Inicio
Llenado del tanque de agua ........................................... 20
Cómo utilizar los controles del humidificador ................... 21
Limpieza y Mantenimiento
Instrucciones para la limpieza ......................................... 22
Reemplazo del cartucho de minerales ............................ 23
Consejos y recomendaciones para el funcionamiento ...... 24
Almacenamiento Adecuado ............................................... 24
Programa De Recambio Automático De Filtros ................ 24
Resolución De Problemas .................................................. 25
Garantía .............................................................................. 26
Contenido
Extraiga el Ultra3 de la caja de cartón levantándolo desde la
parte inferior de la unidad. Si lo levanta del tirador empotrado
del depósito de agua, puede que el depósito se desprenda y
que la unidad se caiga y se dañe.
Recomendamos revisar que la base y el depósito de agua no
presenten fugas que puedan haberse producido debido a daños
durante el envío. Tenga en cuenta que una inspección visual tal
vez no revele las roturas diminutas.
Para revisar si hay fugas:
Coloque el humidificador sobre una superficie resistente al agua.
Llene de agua el depósito de agua y la base para inspeccionar
si hay fugas (Para obtener instrucciones, vea LLENADO DEL
DEPÓSITO DE AGUA).
¿No se observan fugas?
Vacíe el agua de la base e instale el depósito de agua completo
(Para obtener instrucciones, vea LLENADO DEL DEPÓSITO DE
AGUA).
¿Hay fugas?
En el remoto caso de que su humidificador tenga fugas,
comuníquese con el servicio de atención al cliente de Vornado y
reemplazaremos de inmediato las piezas dañadas.
Desembalaje del Ultra1
Page 9

16 Español Español 17
Al utilizar aparatos eléctricos, siempre deben seguirse las precauciones
básicas para reducir el riesgo de incendios, descargas eléctricas y lesiones
a personas, inclusive las siguientes:
Lea todas las instrucciones antes de utilizar este humidificador.
Es posible que este humidificador no funcione correctamente sobre
una superficie desnivelada. Siempre coloque este humidificador sobre
una superficie firme y nivelada.
Este humidificador requiere limpieza periódica. Consulte las
instrucciones para la LIMPIEZA proporcionadas. Nunca limpie el
humidificador de ninguna otra manera diferente a la que se indica en
este manual.
Apague el humidificador si la humedad relativa es superior al 60%.
Los niveles de humedad superiores al 60% pueden ocasionar la
acumulación de humedad en el interior y su condensación en las
superficies, donde pueden aparecer y desarrollarse bacterias y hongos.
Para obtener lecturas de humedad precisas, utilice un higrómetro,
que podrá encontrar en la mayoría de las ferreterías y los centros de
artículos para el hogar.
Desenchufe el humidificador antes de su traslado, limpieza o recarga.
Este humidificador siempre debe estar desenchufado y vacío si no está
en funcionamiento.
Este producto está equipado con un enchufe polarizado de corriente
alterna (un enchufe que tiene una pata más ancha que la otra). Este
enchufe podrá insertarse en un tomacorriente de una sola manera.
Esta es una CARACTERÍSTICA DE SEGURIDAD. Si no puede insertar el
enchufe por completo en el tomacorriente, pruebe invertir el enchufe.
Si aun así no puede insertar el enchufe, contacte a un electricista para
cambiar la toma de corriente obsoleta. NO evada el propósito de
seguridad del enchufe polarizado.
NO haga funcionar el humidificador con un cable o enchufe dañados,
después de comprobar que el humidificador funciona mal o si se
ha caído o dañado de alguna manera. Envíelo a Vornado para su
inspección, ajuste eléctrico o mecánico, o reparación.
NO coloque el cable de alimentación debajo de alfombras. NO cubra
el cable con alfombrillas, tapetes u objetos similares. Coloque el cable
de alimentación alejado de las áreas de circulación, para evitar riesgos
de tropiezos.
NO ubique el humidificador cerca de fuentes de calor, como estufas,
radiadores o calentadores.
No haga funcionar la unidad sin la boca de salida de vapor en su lugar.
La boca de salida de vapor puede extraerse para su limpieza.
Nunca vierta agua por la rejilla de aire de la boca de salida superior en
el cabezal motriz.
Si el humidificador permanecerá apagado durante más de 12 horas,
se debe vaciar el agua de la unidad, ya que dejar el agua fomentará el
desarrollo de algas o bacterias. Si esto sucede, limpie y desinfecte por
completo la unidad. (Consulte las instrucciones para la LIMPIEZA).
Si necesita trasladar el humidificador a otro lugar, quite el depósito de
agua primero.
Para el mantenimiento diario de su humidificador, utilice solamente
agua y detergentes suaves. No utilice blanqueadores sin diluir ni
amoníaco, detergentes fuertes, productos de limpieza abrasivos,
gasolina, diluyentes de pintura ni ningún otro disolvente para limpiar
este humidificador.
El cabezal motriz no tiene piezas que puedan ser reparadas por el
usuario. Si tiene algún problema, consulte la garantía para informarse.
NO INTENTE DESARMAR EL CABEZAL MOTRIZ. SI LO HACE, SU
GARANTÍA QUEDARÁ ANULADA Y PODRÍA OCASIONAR DAÑOS O
LESIONES PERSONALES.
No extraiga ni vuelva a colocar el depósito de agua demasiadas veces.
Esto solo llenará la base y el agua se derramará.
GUARDE ESTAS INSTRUCCIONES
Encuentre nuestra línea de productos completa en www.vornado.com
La Confianza.
Se dice que la confianza no se regala, sino que se gana. Durante
décadas Vornado se ha ganado la confianza de nuestros clientes
ofreciéndoles sólo lo mejor. Vornado brinda el mayor nivel de
rendimiento combinado con el mayor nivel de soporte disponible.
Satisfacción total sin excepciones; esta es la promesa que le realiza
Vornado. Si usted no está satisfecho por algún motivo, por favor
contáctenos. En el 1-800-234-0604 de 7:00 AM a 6:00 PM CST encontrará representantes expertos. En www.vornado.com también
encontrará abundante soporte adicional disponible. En nombre
mío y de todo el personal de nuestra sede de Andover, Kansas le
agradecemos por elegir Vornado.
Cordialmente,
Bill Phillips
CEO, Vornado Air
INSTRUCCIONES IMPORTANTES
LEA Y GUARDE TODAS LAS INSTRUCCIONES ANTES DE UTILIZAR ESTE HUMIDIFICADOR.
La Diferencia Vornado
A diferencia de cualquier otro humidificador ultrasónico, Vornado permite
la humidificación de toda la habitación gracias a nuestra exclusiva acción de
vórtice. Los canales ultrasónicos de Vornado se vaporizan en una poderosa
manga de aire y distribuyen equitativamente la humedad por toda el
área. Otros sistemas están diseñados solo para expulsar el vapor de la
unidad. Cuando el vapor ha sido expulsado, no tienen un mecanismo que
distribuya la humedad por todo el espacio. El vapor simplemente se cae,
dejando el piso húmedo.
Sin circulación adecuada Con acción de vórtice de Vornado
Véalo en
acción
ULTRA1 HUMIDIFIER
ULTRA1 HUMIDIFIER
Page 10

18 Español Español 19
Pantalla de visualización LCD
Ajuste fácilmente la velocidad del ventilador, el nivel de
humedad, la condición de vapor y alimentación.
Boca de salida de vapor
El aire húmedo se dispersa a través de la boca de salida de vapor
y se proyecta en la manga de aire tipo vórtice de la firma de
Vornado, haciendo circular el aire húmedo por toda la habitación.
Base
Construcción duradera y resistente a las fugas.
Tanque de agua
La gran capacidad para 2 galón (7,6 litros) permite una menor
cantidad de recargas.
Cartucho de minerales
Elimina los minerales del agua, de esta forma ablanda el agua y
reduce la acumulación de cal y calcio en el transductor.
Junta obturadora
Crea un sello impermeable entre la tapa y el tanque de agua.
Tapa
Tapa fácil de quitar para una recarga conveniente del tanque de
agua.
Cable de alimentación
Conveniente cable de 6 pies (1,8 metros).
1
6
5
4
3
2
Información Sobre El Producto
Artículo .................................................................... HU1-0022-06
Modelo ............................................................................ ULTRA1
Garantía ........................................................... Lmitada de 5 años
Cartucho de minerales ................................................ MD1-0021
Puerto de llenado
Distribuye el agua desde el tanque de agua hasta la base.
Transductor ultrasónico
Las rápidas vibraciones convierten el agua en un vapor fino.
Cepillo de limpieza
Se utiliza para limpiar completamente la base en las áreas difíciles
de alcanzar. Almacenado en la base.
7
8
9
10
Información Sobre El Producto
1
2
3
4
8
9
10
5
6
7
11
11
Page 11

20 Español Español 21
Llenado del tanque de agua
Antes del primer uso, debe remojar el cartucho de minerales en agua
durante 24 horas. Puede utilizar un recipiente por separado o el tanque de
agua para hacerlo. Si utiliza el tanque, vacíe el agua y vuelva a llenar con
agua dulce antes de utilizar.
Nota: Es posible que la unidad demore entre 5 y 10 minutos para crear
vapor con el primer uso de un cartucho nuevo.
Este humidificador tiene una capacidad de 2 galón (7,6 litros) y una salida
de 3.5 galones (13,2 litros) en 24 horas (si se lo establece en la configuración
de salida Alta, humedad Continua).
Para llenar el tanque de agua:
Desenchufe el humidificador. Coloque sobre una superficie firme y
nivelada, como por ejemplo el piso.
Nota: Pueden producirse derrames durante la limpieza, traslado o
recarga del tanque de agua. Trate de evitar los derrames al realizar estas
actividades. No toque el agua ubicada en el interior de la base, dado
que su temperatura puede alcanzar los 92 °F.
Extraiga el tanque de agua sujetando el tirador empotrado en la parte
posterior. Levante y jale hacia afuera (A).
Dé vuelta el tanque de agua.
Quite la tapa (B). Vacíe cualquier resto de agua dentro del tanque de
agua. Enjuague, limpie y seque con un paño limpio o una servilleta de
papel.
Coloque el tanque de agua en el fregadero con la abertura arriba.
Llene el tanque de agua con agua fría de la canilla (C).
Asegúrese de que la junta obturadora esté correctamente ubicada y
coloque la tapa.
Baje el tanque de agua a la base, ubicando el puerto de llenado sobre
la protuberancia elevada en la base. Una vez en la posición anidada, la
válvula de salida de agua dentro de la tapa se abrirá, liberando agua
hacia la base.
Inicio Cómo Utilizar Los Controles Del Humidificador
Nota: El cartucho de minerales controla la velocidad de distribución
del agua desde el tanque hacia la base. La unidad puede demorar
varios minutos en llenar la base.
1.
2.
3.
4.
5.
6.
7.
8.
C
A
B
Lea y comprenda esta guía del propietario antes de poner en
funcionamiento este producto. Ubique la unidad de manera que no
sople directamente sobre objetos o plantas. Enchufe la unidad en un
tomacorriente de CA de 110-120 voltios.
Botón de potencia (A) - enciende o apaga la unidad. La pantalla LCD
se iluminará cuando se encienda. La unidad se colocará de manera
predeterminada en modo de Vaporización continua, Vapor frío y Salida
alta. Ajuste las configuraciones según el funcionamiento que desee.
Condición de vapor (B) - seleccione Salida de vapor caliente o frío.
La temperatura del vapor en la configuración de Vapor caliente es de
aproximadamente 94 a 98 grados en la Salida. Sin embargo, el vapor se
sentirá mucho más frío al tacto, porque se toma inmediatamente en el
vórtice.
Humedad (C) - establece el nivel de humedad deseado. Presione
el botón de humedad hasta que el nivel de humidificación deseado
se ilumine. La unidad funcionará hasta que se alcance el nivel de
humedad deseado, en este punto, la salida de vapor se apagará. La
luz del indicador del nivel de humedad permanecerá encendida. Si la
salida de vapor no se enciende, es posible que el nivel de humedad
establecido sea inferior al nivel de humedad de la habitación. Aumente
el punto de ajuste de la humedad hasta que se active el vapor. Esta
es una indicación del nivel de humedad ya existente en la habitación.
Si se forma humedad en las paredes o ventanas, disminuya las
configuraciones de la humedad o apague el humidificador.
MODO AUTOMÁTICO 1 Vaporización continua, vapor frío y velocidad
baja del ventilador.
MODO AUTOMÁTICO 2 Vaporización continua, vapor caliente y
velocidad alta del ventilador
Nivel del humedad del 40 al 60 %. Ajuste manualmente la Condición de
vapor y la velocidad del ventilador.
Velocidad del ventilador (D) - seleccione la Velocidad del ventilador:
Alta: funcionamiento para la humidificación rápida de habitaciones
grandes. El funcionamiento de velocidad alta evaporará 3,5 galones (13,2
litros) de agua (+/- 10%) en 24 horas de funcionamiento continuo. (Esto
supone condiciones de ambiente de 70¼ ºF y 30% de humedad relativa).
Baja: funcionamiento para habitaciones sin movimiento, para uso durante
la noche o más pequeñas. En el funcionamiento bajo, su humidificador
puede funcionar sin ser recargado durante períodos prolongados.
Notificaciones
Recargue el tanque: le notifica cuando el tanque de agua debe recargarse.
Una vez que se recargue, se apagará automáticamente.
Limpie la unidad: aparece después de 400 horas de funcionamiento. En
este momento, se recomienda que limpie su Humidificador (consulte las
INSTRUCCIONES DE LIMPIEZA). Para restablecer la notificación, presione
y mantenga presionado el botón de potencia durante 3 segundos.
Reemplace el Cartucho de minerales: aparece después de 800 horas de
funcionamiento. En este momento, se recomienda reemplazar el Cartucho
de minerales (consulte REEMPLAZO DE CARTUCHO DE MINERALES
para obtener las instrucciones). Para restablecer la notificación, presione y
mantenga presionado el botón de potencia durante 3 segundos.
CA
B D
Page 12

22 Español Español 23
intervalos, recomendamos cambiar el cartucho cada dos meses.
Una señal de la necesidad de reemplazo temprano es la formación
de un residuo en forma de polvo blanco alrededor del dispositivo. Si
el agua utilizada en el humidificador se ha tratado con un sistema de
descalcificación, la sal del tratamiento también puede aparecer como
polvo blanco.
Cómo cambiarlo:
1. Extraiga el depósito de agua (Vea LLENADO DEL DEPÓSITO DE
AGUA para obtener instrucciones).
2. Desenrosque la tapa.
3. Desenrosque el cartucho de minerales de la tapa. Deseche el
cartucho.
4. Instale un cartucho nuevo en la tapa.
5. Si continuará usando el humidificador, llene el depósito de agua
y vuelva a colocar la tapa. Coloque el depósito nuevamente en la
unidad. Su humidificador ahora está listo para usarse.
Nota: Es posible que la unidad demore entre 5 y 10 minutos para
crear vapor con el primer uso de un cartucho nuevo.
6. Si guardará la unidad, vacíe el depósito y vuelva a colocar la tapa.
Coloque el depósito nuevamente en la unidad. Siga las instrucciones
para el almacenamiento.
Para desinfectar:
Vuelva a colocar la boca de salida de vapor en el depósito de
agua.
Llene la base y el depósito de agua con una mezcla de agua y
blanqueador con cloro, mezclados en una proporción de una
(1) cucharadita de blanqueador con cloro por 1 galón (3,8 litros)
de agua. No llene en exceso, deseche lo que no se utilice. La
solución debe dejarse en la base y el depósito de agua durante
20 minutos para desinfectar por completo.
Enjuague con agua hasta que no quede olor a blanqueador.
Seque con un paño limpio o una servilleta de papel.
Vuelva a colocar todos los componentes. Los componentes
deben estar firmes en sus lugares para que la unidad funcione
correctamente.
Llene la base y el depósito de agua con una mezcla de agua y
vinagre blanco, mezclados en una proporción de una (1) taza de 8
onzas (250 ml) de vinagre blanco sin diluir por 1 galón (3,8 litros) de
agua. No llene en exceso, deseche lo que no se utilice. La solución
debe dejarse en la base y el depósito de agua durante 20 minutos
para disolver cualquier residuo.
Instrucciones para la limpieza
La limpieza adecuada de su humidificador ultrasónico tipo vórtice
es esencial para la calidad del aire y el rendimiento de su unidad. La
frecuencia a la que será necesario limpiar su humidificador variará,
según el uso, la dureza del agua y los factores ambientales externos.
Se recomienda, suponiendo un uso promedio, limpiar la unidad
meticulosamente varias veces a lo largo de la estación, o cuando
comiencen a formarse algas, depósitos minerales u otras partículas.
Para limpiar su humidificador, siga estas instrucciones:
Apague el humidificador y desenchúfelo. No lo sumerja en agua.
Quite la boca de salida de vapor sujetando la base de la boca de
salida y tirando hacia arriba (A).
Vacíe el agua de la base y el depósito de agua. (Vea LLENADO
DEL DEPÓSITO DE AGUA para obtener instrucciones). Coloque la
boca de salida de vapor dentro del depósito de agua para limpiar
ambos componentes al mismo tiempo.
Nota: No haga funcionar la unidad mientras la esté limpiando.
Reemplazo del cartucho de minerales
El cartucho de minerales elimina los minerales del agua,
ablandando de esta manera el agua.
Cuándo cambiarlo: Muchos factores afectan la frecuencia a la que
será necesario cambiar el cartucho, como la cantidad de uso, la
dureza del agua y los factores ambientales exteriores. Si el uso
es intensivo, es decir cuando se utilice la unidad continuamente,
recomendamos cambiar el cartucho aproximadamente una vez
al mes. Si el uso es menor, es decir cuando se utilice la unidad a
Limpieza y Mantenimiento
1.
2.
3.
4.
Limpieza y Mantenimiento
A
8 onzas de
vinagre
blanco
+
1 galón
de agua
C
1.
2.
3.
4.
B
D
1 cucharadita
de
blanqueador
con cloro
+
1 galón
de agua
Consulte la demostración de cambio de
cartucho en su dispositivo móvil.
MINERAL CARTRIDGE
MINERAL CARTRIDGE
Page 13

24 Español Español 25
la unidad para eliminar cualquier microorganismo (Vea LIMPIEZA Y
MANTENIMIENTO para obtener instrucciones).
Su humidificador ultrasónico tipo vórtice es efectivo para suministrar
la humedad necesaria al aire seco. Se lo debe utilizar con el cuidado
adecuado para evitar la humidificación excesiva. Para saber si el nivel de
humedad es demasiado alto, mida la condensación o escarcha en las
ventanas. Ajuste su humidificador a un punto en el que esta condición esté
al mínimo.
Para mejores resultados:
1. Mantenga como mínimo una distancia de 6 pulgadas (15 centímetros)
desde las paredes o los muebles en cada lado (A).
2. Haga funcionar su humidificador continuamente. Esto ayudará a
mantener el nivel de humedad deseado en su hogar, tiene un costo de
apenas unos centavos por día y no dañará la unidad.
Es normal y se prevé que su humidificador funcione continuamente durante
algunos días con el fin de aumentar el contenido de humedad del aire al
nivel deseado con el primer uso o si el aire es extremadamente seco. Una
vez que su hogar y sus muebles hayan absorbido suficiente humedad y
se hayan estabilizado al nivel de humedad deseado, la cantidad de agua
utilizada disminuirá.
Si hace funcionar su humidificador continuamente, tal vez sea necesario
recargarlo con agua todos los días. Simplemente revise el tanque de agua
para asegurarse de que haya un suministro de agua adecuado para el
funcionamiento. Cuando el nivel de agua caiga por debajo del nivel de
funcionamiento, la función de humidificación se detendrá.
No deben utilizarse aditivos, como fragancias aromáticas o
acondicionadores de agua. El uso de tales aditivos anulará la garantía del
fabricante y puede afectar el rendimiento del transductor. Estos aditivos
pueden producir fisuras en el plástico del humidificador.
Proteja al tanque de agua de los daños. Cualquier fisura o daño al tanque
puede ocasionar que pierda agua sobre el piso u otras superficies.
Si el humidificador está apagado, con agua en la unidad, y no se lo volverá
a encender durante 12 o más horas, o si la unidad no se limpia de la manera
recomendada, es posible que se desarrollen algas o bacterias. Estos
microorganismos pueden transportarse por el aire. Limpie meticulosamente
Consejos y recomendaciones para el funcionamiento Resolución De Problemas
La unidad no está enchufada. Enchufe el cable de alimentación en el tomacorriente eléctrico.
El interruptor de circuito/falla a tierra del hogar se desconectó o se quemó un fusible. Vuelva a conectar el
interruptor de circuito/falla a tierra o cambie el fusible. Para obtener asistencia, comuníquese con un electricista autorizado.
La unidad ha quemado un fusible. Suspenda el uso y desenchúfela. Comuníquese con el servicio de atención
al cliente para obtener asistencia.
La unidad está dañada o necesita reparación. Suspenda el uso y desenchúfela. Comuníquese con el servicio
de atención al cliente para obtener asistencia.
Esto es normal. El agua se está distribuyendo hacia la base.
El nivel de agua en el tanque está vacío o demasiado bajo. Recargue con agua limpia y fría de la canilla. (Vea
LLENADO DEL TANQUE DE AGUA para obtener instrucciones).
La unidad ha alcanzado su punto de ajuste. Cuando se alcance el nivel de humedad establecido, la unidad no
producirá vapor hasta que el nivel de humedad en la habitación sea inferior al punto de ajuste de la humedad.
El flujo de aire está bloqueado. Quite la obstrucción.
Las configuraciones de la unidad están demasiado bajas. Establezca en salida Alta y humedad Continua para
una salida máxima de la humedad.
El cartucho de minerales ya no elimina los minerales del agua. Es necesario cambiar el cartucho (Consulte
REEMPLAZO DEL CARTUCHO DE MINERALES para obtener instrucciones).
La unidad y el transductor necesitan limpieza. (Consulte LIMPIEZA Y MANTENIMIENTO para obtener instrucciones).
El agua es demasiado dura. Use agua destilada.
La unidad no se enciende.
La unidad emite un sonido
de burbujeo o borboteo.
La unidad no produce la
cantidad deseada de humedad o la salida de vapor ha
cesado.
Se ha acumulado polvo
blanco en la Salida de
vapor o debajo del revestimiento del suelo.
Problema Posible causa y solución
Almacenamiento
1. Limpie completamente la unidad (Vea INSTRUCCIONES PARA
LA LIMPIEZA).
2. Extraiga y deseche el cartucho de minerales (Vea REEMPLAZO
DEL CARTUCHO DE MINERALES). ¡Asegúrese de comprar un
nuevo cartucho de minerales ahora para estar preparado para
la próxima estación!
3. Vacíe el depósito de agua y la base. Deje que la unidad se
seque por completo.
4. Coloque en la caja de cartón original si dispone de la misma.
5. Su humidificador ahora está listo para almacenarse. Almacene
en un lugar seco y fresco.
Nota: Se recomienda volver a limpiar la unidad antes de utilizarla.
Part # MD1-0021
Programa de recarga automática
Seleccione el intervalo de envío y Vornado le enviará los
cartuchos de minerales para el reemplazo automáticamente.
Despreocúpese por tener que recordar cuándo volver a
hacer el pedido. Mantenga la alta eficiencia de su humidificador Vornado.
Para inscribirse, visite www.vornado.com, envíe un correo
electrónico a consumerservice@vornado.com o comuníquese
al 1-800-234-0604. Puede cancelar en cualquier momento.
Page 14

Français 2726 Español
Vornado Air LLC (“Vornado”) garantiza al consumidor o comprador original que este Humidificador Ultrasónico Tipo Vórtice Vornado® (“Producto”) no tendrá defectos de materiales o fabricación durante un periodo de cinco (5) años a partir de la fecha de compra,
según el modelo. En caso de detectarse algún defecto de este tipo dentro del periodo
de garantía, Vornado, a su discreción, reparará o reemplazará el producto sin costo
alguno. Respecto de las reparaciones que no cubra la garantía o que se realicen fuera el
periodo de garantía, deberá pagarse un arancel para cubrir el costo de materiales, mano
de obra, manipulación y envío.
Esta garantía no se aplica a defectos generados por el abuso del Producto, modificación,
alteración, reparación o servicio del Producto por parte de una persona externa a Vornado, manipulación incorrecta, mantenimiento adecuado, uso comercial del Producto,
daños producidos durante el envío o atribuidos a hechos fortuitos.
LA REPARACIÓN O EL REEMPLAZO SEGÚN SE ESTABLECE EN VIRTUD DE ESTA
GARANTÍA ES UN RECURSO EXCLUSIVO DEL CONSUMIDOR. VORNADO NO SERÁ
RESPONSABLE DE LOS DAÑOS INCIDENTALES O INDIRECTOS PRODUCIDOS COMO
CONSECUENCIA DEL INCUMPLIMIENTO DE UNA GARANTÍA EXPLÍCITA O IMPLÍCITA
SOBRE ESTE PRODUCTO. SALVO QUE LA LEY APLICABLE LO PROHÍBA , LA VIGENCIA
DE LA GARANTÍA IMPLÍCITA DE APTITUD O IDONEIDAD PARA UN FIN ESPECÍFICO DE
ESTE PRODUCTO ESTARÁ LIMITADA A LA VIGENCIA DE ESTA GARANTÍA.
Algunos estados no permiten la exclusión o limitación de los daños incidentales o indirectos, o limitaciones sobre la vigencia de una garantía implícita. Por ello, las limitaciones o
exclusiones que se indican anteriormente pueden no aplicarse en su caso. Esta garantía
le otorga derechos legales específicos, y usted puede tener otros derechos que varían
entre un estado y otro.
Para consultas sobre garantía o servicio de reparación, llame al 1-800-234-0604 o envíe
Humidicador Ultrasónico Tipo Vórtice • Garantía Limitada De 5 Años
un correo electrónico a consumerservice@vornado.com para obtener un formulario de
Autorización de Devolución (“RA” por sus siglas en inglés). Cuando se comunique con
Vornado respecto del servicio de garantía, tenga o incluya el número de modelo y número de serie del Producto, como también su nombre, dirección, ciudad, estado, código
postal y número de teléfono. Luego de recibir el formulario RA, envíe su Producto a:
Vornado Air LLC
Attn: Warranty & Repair
415 East 13th Street
Andover, KS 67002
Para su comodidad, tenga a mano el número de modelo y número de serie al comunicarse con Vornado para consultas sobre servicio. Para garantizar la manipulación adecuada, los paquetes deben estar claramente marcados con el número RA. Los paquetes que
no estén claramente marcados con el número RA podrán ser rechazados en la plataforma
de recepción.
La reparación y devolución de su Producto tardará entre 1 y 2 semanas a partir de la
recepción del Producto. Para su control: Abroche o adjunte el comprobante original de
compra a esta Guía para el propietario. También anote el número de serie de su producto
a continuación (se encuentra en el autoadhesivo de especificaciones del producto).
N.º de serie ______________________________________
Registro del producto disponible en línea en www.vornado.com
© 2012 Vornado Air LLC Andover, KS 67002
Patente en trámite. Las especificaciones pueden modificarse sin previo aviso.
Fabricado en China.
Vornado® es una marca registrada propiedad de Vornado Air LLC.
www.vornado.com consumerservice@vornado.com 800.234.0604
Directives Importantes ....................................................... 28
La Différence Vornado .......................................................29
Informations Sur Le Produit ............................................... 30
Pour démarrer
Remplissage du réservoir d'eau ..................................... 32
Utilisation des commandes de l'humidificateur................. 33
Nettoyage et Entretien
Instructions de nettoyage ............................................... 34
Remplacement de la cartouche minérale ....................... 35
Conseils et recommandations quant à l’utilisation ............ 36
Rangement Adéquat .......................................................... 36
Programme de Réapprovisionnement Automatique ........ 36
Dépannage ......................................................................... 37
Garantie ............................................................................. 38
Table Des Matières
Retirez votre appareil Ultra3 de sa boîte en le soulevant par le
bas. Ne le soulevez pas au moyen de la poignée en creux du
réservoir d’eau, sinon le réservoir pourrait se séparer, et l'appareil
pourrait tomber et s'endommager.
Nous recommandons de vérifier la base et le réservoir d’eau pour
détecter toute fuite qui pourrait survenir en raison de dommages
causés pendant l'expédition. Veuillez noter qu'une inspection
visuelle ne révélera pas nécessairement les fissures fines.
Pour détecter les fuites :
Placez l’humidificateur sur une surface qui résiste à l'eau.
Versez de l'eau pour remplir la base et le réservoir d’eau,
puis vérifiez s’il y a des fuites (consultez les instructions de
REMPLISSAGE DU RÉSERVOIR D’EAU).
Aucune fuite?
Videz l'eau de la base, puis installez le réservoir d’eau et
remplissez-le au complet (consultez les instructions de
REMPLISSAGE DU RÉSERVOIR D’EAU).
Il y a des fuites?
Dans le cas peu probable où votre humidificateur fuirait,
contactez le service aux consommateurs de Vornado afin que
nous remplacions immédiatement les pièces endommagées.
Déballage de Votre Ultra3
Page 15

28 Français Français 29
Lors de l'utilisation d'appareils électriques, il faut toujours suivre des
précautions de base afin de réduire le risque d'incendie, de décharge
électrique et de blessure, y compris ce qui suit :
Lire toutes les instructions avant d'utiliser l'humidificateur.
Cet humidificateur pourrait mal fonctionner s'il est placé sur une
surface inégale. Toujours placer l’humidificateur sur une surface
ferme et plane.
Cet humidificateur doit être nettoyé régulièrement. Consulter
les instructions de NETTOYAGE fournies. Ne jamais nettoyer
l'humidificateur d’une façon différente de celle expliquée dans le
présent mode d'emploi.
Mettre l'humidificateur hors tension si l'humidité relative dépasse
60 %. Si le taux d'humidité est supérieur à 60 %, l'humidité pourrait
s'accumuler à l'intérieur et se condenser sur les surfaces, où les
bactéries et les champignons peuvent s'installer et proliférer.
Pour connaître le taux d’humidité exact, utiliser un hygromètre;
on en trouve dans la plupart des quincailleries et des centres de
rénovation.
Débrancher l'humidificateur avant de le déplacer, de le nettoyer ou
de le remplir à nouveau.
Cet humidificateur doit toujours être débranché et vidé quand il ne
fonctionne pas.
Ce produit est doté d'une fiche polarisée pour tension alternative
(une de ses broches est plus large que l'autre). Cette fiche
s’insère d’une seule façon dans une prise électrique. Il s'agit
d'une CARACTÉRISTIQUE DE SÉCURITÉ. Si la fiche ne s'insère
pas complètement dans la prise, inverser la fiche. S'il est encore
impossible d'insérer la fiche, contacter un électricien afin de
remplacer la prise désuète. NE PAS passer outre à la caractéristique
de sécurité de la fiche polarisée.
NE PAS faire fonctionner l'humidificateur si son cordon ou sa fiche
sont endommagés, après une défaillance de l'humidificateur,
ou après que l'appareil est tombé ou a été endommagé d'une
quelconque façon. Retourner l'appareil à Vornado pour qu'il soit
examiné, qu'il fasse l'objet d'un réglage électrique ou mécanique,
ou qu'il soit réparé.
NE PAS faire passer le cordon d'alimentation sous un tapis. NE
PAS recouvrir le cordon d’une carpette, d’un tapis d’escalier
ou de corridor, ou d’un objet similaire. Faire passer le cordon
d’alimentation à l'écart des zones passantes, dans un endroit où il
ne peut faire trébucher les gens.
NE PAS placer l'humidificateur près d'une source de chaleur telle
qu'une cuisinière, un radiateur ou un appareil de chauffage.
NE PAS faire fonctionner l'appareil sans le diffuseur de vapeur. Le
diffuseur de vapeur peut être enlevé pour être nettoyé.
Ne jamais verser d'eau à travers la grille de sortie d'air supérieure
sur la tête motrice.
Si l'humidificateur est hors tension et non utilisé pendant plus de
douze heures, il faut vider l'eau de l'appareil, sinon les algues ou
les bactéries risquent de se développer. Dans ce cas, nettoyer
complètement l'appareil et le désinfecter (consulter les instructions
de NETTOYAGE).
S'il est nécessaire de déplacer l'humidificateur pour l'apporter
ailleurs, retirer d'abord le réservoir d’eau.
Utiliser seulement de l'eau et un détergent doux pour effectuer
l'entretien quotidien de l'humidificateur. Ne pas utiliser de
javellisant ou d'ammoniaque non dilué, de détergent puissant,
de nettoyant abrasif, d'essence, de diluant à peinture ou d'autres
solvants pour nettoyer l'humidificateur.
La tête motrice ne contient aucune pièce réparable. En cas de
problème, consulter la garantie pour en savoir plus. NE PAS
ESSAYER DE DÉSASSEMBLER LA TÊTE MOTRICE. LE FAIT DE
NE PAS SE CONFORMER À CETTE DIRECTIVE ANNULERA LA
GARANTIE ET POURRAIT ENTRAÎNER DES DOMMAGES ET/OU
DES BLESSURES.
NE PAS retirer et remettre le réservoir d’eau à répétition, sinon
la base se remplira graduellement d'eau, ce qui causera un
déversement.
INSTRUCTIONS IMPORTANTES
Découvrez notre gamme complète de produits sur www.vornado.com
La Confiance.
On entend souvent dire que la confiance n'est pas donnée, mais
méritée. Pendant des décennies, Vornado continue de mériter
la confiance de ses clients en ne leur offrant que ce qu’elle a de
mieux. Vornado propose le plus haut niveau de performance,
couplé avec le plus haut niveau de soutien possible. Une entière
satisfaction sans aucune exception - c'est bien la promesse que
Vornado vous fait. Si vous n'êtes pas satisfait pour une quelconque
raison, veuillez nous contacter. Nos représentants hautement informés sont à votre disposition au 1-800-234-0604 de 7:00h à 18:00h
HNC. Une abondance de données de soutien supplémentaires est
également disponible en ligne sur www.vornado.com. J’aimerais
enfin, à mon propre nom et au nom de l'ensemble du personnel
de notre siège à Andover, Kansas, vous remercier d'avoir choisi
Vornado.
Cordialement,
Bill Phillips
CEO, Vornado Air
SAVE THESE INSTRUCTIONS
LIRE ATTENTIVEMENT TOUS LES RENSEIGNEMENTS AVANT D'UTILISER L'HUMIDIFICATEUR ET LES CONSERVER.
La Différence Vornado
Contrairement aux autres humidificateurs à ultrasons, l'appareil Vornado distribue l'humidité dans toute la pièce grâce à notre méthode par
tourbillon exclusive. L'appareil Vornado à ultrasons concentre la vapeur
pour créer un puissant jet d'air qui diffuse uniformément l'humidité
dans toute la pièce. Conçus pour simplement pousser la vapeur hors
de l'appareil, les autres systèmes ne sont dotés d'aucun mécanisme
qui diffuse l'humidité dans toute la pièce. Ainsi, la vapeur retombe et
mouille le sol.
Sans besoin d'une
bonne circulation
Avec la technologie
Vornado Vortex
Voyez-le
en
action
ULTRA1 HUMIDIFIER
ULTRA1 HUMIDIFIER
Page 16

30 Français Français 31
Afficheur ACL
Permet de régler facilement la vitesse du ventilateur, le taux
d’humidité, l'alimentation et la diffusion de vapeur.
Diffuseur de vapeur
L'air humide est propagé à travers le diffuseur de vapeur et projeté au moyen du jet d'air tourbillonnaire caractéristique de Vornado, faisant circuler l'air humidifié dans toute la pièce.
Base
Construction durable à l'épreuve des fuites.
Réservoir d’eau
Grâce à sa grande capacité de 7,6 l, il n'a pas besoin d'être rempli aussi souvent.
Cartouche minérale
Élimine les minéraux de l'eau, ce qui adoucit l'eau tout en
réduisant l'accumulation de calcaire et de calcium sur le transducteur.
Joint
Crée une barrière étanche entre le bouchon et le réservoir d'eau.
Bouchon
Bouchon qui s'enlève facilement pour permettre de remplir le
réservoir d'eau en toute commodité.
1
6
5
4
3
2
Informations Sur Le Produit
Article ...................................................................... HU1-0022-06
Modèle ............................................................................ ULTRA1
Garantie ............................................................. Limitée de 5 ans
Cartouche minérale ..................................................... MD1-0021
Cordon d’alimentation
Cordon pratique de 1,8 m.
Orifice de remplissage
Permet à l'eau du réservoir de s'écouler dans la base.
Transducteur à ultrasons
Ses vibrations rapides transforment l'eau en une fine vapeur.
Brosse nettoyante
Permet d'atteindre les endroits difficiles d'accès pour bien nettoyer
la base. Rangée dans la base.
7
8
9
10
Informations Sur Le Produit
1
2
3
4
8
9
10
5
6
7
11
11
Page 17

32 Français Français 33
Remplissage du réservoir d'eau
Avant la première utilisation, vous devez faire tremper la cartouche minérale
dans l'eau pendant 24 heures. Pour ce faire, vous pouvez utiliser le réservoir
d'eau ou tout autre contenant. Si vous utilisez le réservoir d'eau, videz l'eau
et versez de l'eau fraîche avant utilisation.
Remarque : Il peut s'écouler entre 5 et 10 minutes avant que l'appareil
produise de la vapeur lors de la première utilisation d'une nouvelle
cartouche.
Cet humidificateur peut contenir 7,6 litres d'eau et produire 13,2 litres de
vapeur en 24 heures (s'il est réglé au débit élevé avec humidité continuelle).
Pour remplir le réservoir d'eau :
1. Débranchez l'humidificateur. Placez-le sur une surface ferme et plane,
comme le plancher.
Remarque : L'eau peut se déverser pendant le nettoyage, le
déplacement de l'appareil ou le remplissage du réservoir d'eau. Il faut
donc faire attention d'éviter les déversements pendant ces activités.
Ne touchez pas à l'eau dans la base, car la température de l’eau peut
atteindre 92 °F (33 °C).
2. Retirez le réservoir d'eau en empoignant la poignée en creux à l'arrière.
Soulevez et tirez le réservoir hors de l'appareil (A).
3. Retournez le réservoir à l’envers.
4. Enlevez le bouchon (B). Videz toute l'eau qui reste dans le réservoir d'eau.
Rincez, essuyez pour nettoyer et asséchez à l'aide d'un chiffon propre ou
d'un essuie-tout.
5. Placez le réservoir d'eau dans un lavabo ou un évier, l'ouverture sur le dessus.
6. Remplissez le réservoir avec de l’eau fraîche du robinet (C).
7. Assurez-vous que le joint est bien placé, puis remettez le bouchon.
8. Abaissez le réservoir d'eau dans la base en plaçant l'orifice de remplis-
sage par-dessus la bosse surélevée dans la base. Une fois le réservoir
placé correctement, la valve de sortie d'eau à l'intérieur du bouchon
s'ouvrira pour que l'eau s'écoule dans la base.
Pour Démarrer Utilisation Des Commandes De L'humidificateur
Remarque : Le débit d'écoulement de l'eau du réservoir d'eau vers la
base est régulé par la cartouche minérale. Il peut s'écouler plusieurs
minutes avant que la base se remplisse.
C
A
B
Lisez ce mode d’emploi et assurez-vous de le comprendre avant
d'utiliser ce produit. Placez l'appareil de façon qu'il ne souffle pas d'air
directement sur les objets ou les plantes. Branchez l'appareil dans une
prise CA de 110-120 volts.
Touche d'alimentation (A) - permet de mettre l'appareil sous tension ou
hors tension. L'afficheur ACL s'illumine à la mise sous tension. Par défaut,
l'appareil sera réglé à diffusion de vapeur continue, vapeur fraîche et
débit élevé. Choisissez les réglages pour l’utilisation désirée.
Diffusion de vapeur (B) - choisissez la vapeur fraîche (cool) ou la vapeur
chaude (warm). Quand la vapeur sort de l'appareil, sa température
au réglage de vapeur chaude est d'environ 94 à 98 °F (34 à 37 °C).
Toutefois, la vapeur semble beaucoup plus froide au toucher, car elle est
immédiatement entraînée dans le tourbillon.
Humidité (C) - permet de régler le taux d’humidité désiré. Appuyez
sur la touche d'humidité jusqu'à ce que le taux d'humidité désiré soit
illuminé. L'appareil fonctionnera jusqu'à ce que le taux d’humidité
désiré soit atteint, puis la diffusion de vapeur s'arrêtera. Le voyant de
taux d’humidité restera allumé. Si aucune vapeur n'est diffusée, le taux
d’humidité choisi est peut-être inférieur au taux d’humidité de la pièce.
Augmentez le taux d’humidité de l’appareil jusqu’à ce que la vapeur soit
diffusée. Vous obtenez ainsi une indication quant au taux d’humidité
actuel de la pièce. Si de l'humidité se forme sur les murs ou les fenêtres,
abaissez les réglages d'humidité ou mettez l'humidificateur hors tension.
AUTO 1 Diffusion de vapeur continue, vapeur fraîche, vitesse de
ventilateur basse.
AUTO 2 Diffusion de vapeur continue, vapeur chaude, vitesse de
ventilateur élevée.
Taux d'humidité de 40 % à 60 %. Réglez manuellement la diffusion de
vapeur et la vitesse du ventilateur.
Vitesse du ventilateur (D) - Vitesse du ventilateur (D) – choisissez la vitesse
de ventilateur désirée : high (élevée) ou low (faible).
High (élevée) – permet d’humidifier rapidement les grandes pièces. À ce
réglage, 13,2 litres d’eau (+/- 10 %) s’évaporeront en 24 heures d’utilisation
continuelle (si la pièce est chauffée à 70 °F [21 °C] avec 30 % d’humidité
relative).
Low (faible) – fonctionnement silencieux pendant la nuit ou utilisation dans
les petites pièces. À ce réglage, votre humidificateur peut fonctionner
longtemps sans avoir à être rempli.
Avis
remplir le réservoir - cet avis indique que le réservoir d'eau doit être
rempli. L'avis s'éteindra automatiquement après le remplissage.
nettoyer l'appareil - cet avis apparaît après 400 heures de
fonctionnement. Il est alors recommandé de nettoyer l'humidificateur
(consultez les INSTRUCTIONS DE NETTOYAGE). Pour effacer cet
avis, gardez la touche d'alimentation enfoncée pendant 3 secondes.
Replace remplacer la cartouche minérale - cet avis apparaît après 800
heures de fonctionnement. Il est alors recommandé de remplacer la
cartouche minérale (consultez les instructions de REMPLACEMENT DE
LA CARTOUCHE MINÉRALE). Pour effacer cet avis, gardez la touche
d'alimentation enfoncée pendant 3 secondes.
CA
B D
Page 18

34 Français Français 35
Remplissez la base et le réservoir d’eau d’une solution composée de
225 ml de vinaigre blanc non dilué pour 3,8 l d’eau. Ne versez pas
trop de solution; jetez toute portion non utilisée. Laissez la solution
agir pendant 20 minutes dans la base et le réservoir d’eau afin de
dissoudre tout résidu.
Videz après 20 minutes, puis nettoyez le diffuseur de vapeur et
toutes les surfaces internes de la base et du réservoir d’eau à l'aide
d'une brosse douce. Mouillez légèrement un chiffon doux avec du
vinaigre blanc non dilué, puis essuyez les surfaces pour éliminer
les dépôts. Rincez abondamment à l’eau chaude propre avant de
désinfecter.
Pour désinfecter :
Placez le diffuseur de vapeur dans le réservoir d’eau.
Remplissez la base et le réservoir d’eau d’une solution composée
d'une (1) cuiller à thé de javellisant chloré pour 3,8 l d’eau. Ne
versez pas trop de solution; jetez toute portion non utilisée.
Laissez la solution agir pendant 20 minutes dans la base et le
réservoir d’eau afin de désinfecter complètement.
Rincez à l'eau jusqu'à ce que l'odeur de javellisant disparaisse.
Asséchez à l'aide d'un chiffon propre ou d'un essuie-tout.
Réinstallez tous les composants. Les composants doivent être fixés
fermement en place pour que l'appareil fonctionne correctement.
Instructions de nettoyage
Il est essentiel de nettoyer adéquatement votre humidificateur
tourbillonnaire à ultrasons pour maintenir la qualité de l’air et la
performance de l'appareil. La fréquence de nettoyage de votre
humidificateur variera selon son utilisation, la dureté de l'eau et
certains facteurs environnementaux externes. Pour une utilisation
moyenne, il est recommandé de bien nettoyer l'appareil plusieurs
fois pendant la saison, ou dès que des algues, des dépôts minéraux
ou d'autres particules apparaissent. Pour nettoyer l'humidificateur,
procédez comme suit :
Mettez l'humidificateur hors tension, puis débranchez-le.
N'immergez pas l'appareil dans l’eau.
Retirez le diffuseur de vapeur en agrippant la base du diffuseur,
puis en tirant vers le haut (A).
Videz l'eau qui reste dans la base et le réservoir d’eau (consultez
REMPLISSAGE DU RÉSERVOIR D'EAU pour de plus amples
instructions). Placez le diffuseur de vapeur à l'intérieur du réservoir
d’eau pour nettoyer ces deux composants en même temps.
Remarque : Ne faites pas fonctionner l’appareil pendant le
nettoyage.
Remplacement de la cartouche minérale
La cartouche minérale élimine les minéraux de l'eau afin d'adoucir
l'eau.
Fréquence de remplacement : la fréquence de remplacement
de la cartouche variera, entre autres, selon l'utilisation de
l'appareil, la dureté de l'eau et certains facteurs environnementaux
externes. Lors d'une utilisation intensive, par exemple, si l'appareil
fonctionne continuellement, nous recommandons de remplacer
la cartouche chaque mois environ. Lors d'une utilisation moins
intensive, par exemple, si l'appareil fonctionne par intermittence,
nous recommandons de remplacer la cartouche tous les deux mois.
Nettoyage et Entretien
1.
2.
3.
4.
Si vous trouvez un résidu de poudre blanche autour de l'appareil, il est
temps de remplacer la cartouche. Si l'eau utilisée dans l'humidificateur
a été traitée par un système de décalcification, une poudre blanche
pourrait aussi apparaître; il s'agit du sel issu du traitement.
Pour remplacer :
1. Retirez le réservoir d’eau (consultez REMPLISSAGE DU RÉSERVOIR
D'EAU pour de plus amples instructions).
2. Dévissez le bouchon.
3. Dévissez la cartouche minérale du bouchon. Jetez la cartouche.
4. Installez la nouvelle cartouche sur le bouchon.
5. Si vous désirez poursuivre l'utilisation de l'humidificateur, remplissez
le réservoir d’eau et remettez le bouchon. Remettez le réservoir dans
l'appareil. L'humidificateur peut maintenant être utilisé.
Remarque : Il peut s'écouler entre 5 et 10 minutes avant que l'appareil
produise de la vapeur lors de la première utilisation d'une nouvelle
cartouche.
6. Si vous rangez l'appareil, videz le réservoir et remettez le bouchon.
Remettez le réservoir dans l'appareil. Suivez les instructions de
rangement.
Nettoyage et Entretien
A
235 ml de
vinaigre blanc
+
3,8 l
d'eau
C
1.
2.
3.
4.
B
D
1 tsp. à thé
de javellisant
chloré
+
3,8 l d'eau
Consultez le tutoriel
de remplacement des
cartouche sur votre appareil mobile.
MINERAL CARTRIDGE
MINERAL CARTRIDGE
Page 19

36 Français Français 37
Nettoyez minutieusement l'appareil pour éliminer tout micro-organisme
(consultez les instructions de NETTOYAGE ET ENTRETIEN).
Votre humidificateur tourbillonnaire à ultrasons humidifie efficacement
l'air sec. Il doit être utilisé adéquatement afin de ne pas trop humidifier
l'air. Pour savoir si le taux d’humidité est trop élevé, vérifiez s'il y a de la
condensation ou du givre sur les fenêtres. Réglez votre humidificateur afin
qu'il y ait le moins de condensation ou de givre possible.
Pour obtenir les meilleurs résultats :
1. Pour optimiser la circulation d’air, assurez-vous que rien n'obstrue le
diffuseur de vapeur ni la grille. Assurez-vous que les rideaux et les
autres éléments sont suffisamment éloignés de l'appareil afin qu'ils ne
soient pas aspirés par les prises d'air latérales et qu'ils n'entravent pas la
circulation d’air.
2. Laissez l'appareil fonctionner continuellement. Ainsi, vous maintiendrez le
degré d’humidité désiré dans votre maison, pour quelques sous par jour
seulement, ce qui n'endommagera pas l’appareil.
Il est normal que votre humidificateur fonctionne continuellement pendant
quelques jours afin d'augmenter le taux d'humidité de l'air jusqu'au taux
désiré lors de la première utilisation ou si l'air est extrêmement sec. Quand
votre maison et vos meubles auront absorbé suffisamment d'humidité et
que le taux d'humidité se sera stabilisé, l'appareil utilisera moins d'eau.
Si vous laissez l'humidificateur fonctionner continuellement, vous devrez
peut-être le remplir d'eau chaque jour. Vérifiez simplement le réservoir
d'eau pour vous assurer qu'il contient assez d'eau pour que l'appareil
fonctionne. Si le niveau d'eau est inférieur au niveau de fonctionnement, la
fonction de diffusion de vapeur arrêtera.
Il ne faut pas ajouter de produit à l'eau, comme des parfums ou des agents
pour adoucir l'eau. L'utilisation de ces additifs annulera la garantie du
fabricant et peut avoir une incidence sur la performance du transducteur.
Ces additifs peuvent faire craquer le plastique de l'humidificateur.
Protégez le réservoir d'eau des dommages. Si le réservoir comporte des
fissures ou des dommages, l'eau peut s'écouler sur le sol ou d'autres
surfaces.
Si l'humidificateur contient de l'eau et qu'il demeure hors tension
pendant douze heures ou plus, ou si l'appareil n'est pas nettoyé selon les
recommandations, des algues ou des bactéries pourraient se développer.
Ces micro-organismes pourraient se retrouver en suspension dans l'air.
Conseils et Recommandations Quant À L’utilisation Dépannage
Rangement
1. Nettoyez minutieusement l'appareil (consultez les INSTRUCTIONS DE
NETTOYAGE).
2. Enlevez et jetez la cartouche minérale (consultez REMPLACEMENT DE
LA CARTOUCHE MINÉRALE). Assurez-vous d'acheter une nouvelle
cartouche minérale maintenant afin d'en avoir une sous la main pour la
prochaine saison!
3. Videz le réservoir d’eau et la base. Laissez l'appareil sécher
complètement.
4. Remettez l'appareil dans son carton d'emballage si possible.
5. L'humidificateur peut maintenant être rangé. Rangez-le dans un endroit
frais et sec.
Remarque : Il est recommandé de nettoyer l'appareil à nouveau avant de
l'utiliser.
Part # MD1-0021
Programme de réapprovisionnement automatique
Vous choisissez la fréquence d'expédition, et Vornado vous
enverra automatiquement des cartouches minérales de
remplacement. Ne craignez plus d'oublier de passer une
nouvelle commande. Maintenez le degré d'efficacité élevé
de votre humidificateur Vornado. Pour vous inscrire, visitez
www.vornado.com, envoyez un courriel à consumerservice@vornado.com ou composez le 1-800-234-0604. Vous
pouvez annuler votre inscription en tout temps.
L'appareil n'est pas branché. Brancher le cordon d'alimentation dans une prise électrique.
Le disjoncteur de circuit/de fuite à la terre de la résidence a été déclenché ou a fait sauter un fusible. Réenclencher le disjoncteur de circuit/de fuite à la terre, ou remplacer le fusible. Pour obtenir de l’aide, contacter
un électricien compétent.
Un fusible de l'appareil a sauté. Cesser immédiatement d’utiliser l’appareil et le débrancher. Contacter le
service aux consommateurs pour obtenir de l’aide.
L’appareil est endommagé ou il doit être réparé. Cesser immédiatement d’utiliser l’appareil et le débrancher.
Contacter le service aux consommateurs pour obtenir de l’aide.
Cela est normal. L'eau s'écoule dans la base.
Le réservoir est vide ou ne contient pas assez d’eau. Remplir avec de l'eau propre et fraîche du robinet (consulter REMPLISSAGE DU RÉSERVOIR D'EAU pour de plus amples instructions).
Le réglage choisi pour l'appareil est atteint. Quand le degré d’humidité choisi est atteint, l'appareil ne produit
plus de vapeur jusqu'à ce que le taux d’humidité de la pièce descende sous le taux d'humidité choisi.
La circulation d'air est entravée. Enlever ce qui entrave la circulation d'air.
Les réglages de l'appareil sont trop faibles. Choisir le débit élevé et l'humidité continuelle pour une production d'humidité maximale.
La cartouche minérale n'élimine plus les minéraux de l’eau. La cartouche doit être remplacée (consulter REMPLACEMENT DE LA CARTOUCHE MINÉRALE pour de plus amples instructions).
L’appareil et le transducteur doivent être nettoyés (consulter la section NETTOYAGE ET ENTRETIEN pour
connaître les instructions).
L'eau est trop dure. Utiliser de l'eau distillée.
L’appareil ne se met pas
sous tension.
L'appareil fait un bruit de
bulles ou des gargouillis.
L'appareil ne génère pas
l'humidité désirée
ou la production de vapeur
s'est arrêtée.
Une poussière blanche s'est
accumulée sur le diffuseur
de vapeur ou au sol sous
l'appareil.
Problème Cause Possible et Solution
Page 20

38 Français Français 39
Vornado Air LLC (ci-après « Vornado ») garantit au consommateur initial ou à l’acheteur
initial que ce Humidificateur Tourbillonnaire À Ultrasons Vornado® (ci-après le « Produit »)
ne comporte aucun vice de matériau ou de fabrication pour une période de cinq (5) ans à
compter de la date d’achat, selon le modèle. Si un tel vice était décelé durant la période
de garantie, Vornado, à sa discrétion, réparera ou remplacera le Produit sans frais. Pour les
réparations non couvertes par la garantie ou demandées après la période de garantie, des
frais s’appliqueront pour couvrir le coût des matériaux, de la main-d'œuvre, de la manutention et de l’expédition.
Cette garantie ne s’applique pas aux vices qui résultent d’une utilisation abusive du Produit,
de sa modification, de la réparation du Produit ou de son entretien s’ils n’ont pas été effectués par Vornado, d’une manutention inadéquate, d’un entretien inadéquat, d’un usage commercial du Produit, des dommages survenus lors de la livraison ou causés par des
catastrophes naturelles.
LES RÉPARATIONS ET LES REMPLACEMENTS PRÉVUS EN VERTU DE LA GARANTIE
CONSTITUENT LE SEUL RECOURS DU CONSOMMATEUR. VORNADO NE PEUT ÊTRE
TENUE RESPONSABLE DES DOMMAGES ACCESSOIRES OU INDIRECTS DÉCOULANT DE
LA VIOLATION DE TOUTE GARANTIE EXPRESSE OU IMPLICITE DE CE PRODUIT. SAUF
DANS LA MESURE INTERDITE PAR LES LOIS APPLICABLES, TOUTE GARANTIE IMPLICITE
DE QUALITÉ MARCHANDE OU D’APTITUDE À UN USAGE PARTICULIER RELATIVE À CE
PRODUIT EST LIMITÉE À LA DURÉE DE CETTE GARANTIE.
Certains États et certaines provinces ne permettent pas l'exclusion ou la limitation des
dommages accessoires ou indirects, ou permettent la limitation de la durée d’une garantie
implicite : dans ce cas, les clauses de limitation ou d’exclusion décrites ci-dessus peuvent ne
pas s’appliquer à votre situation. Cette garantie vous octroie des droits légaux spécifiques.
Vous pouvez également bénéficier de droits additionnels, selon l’État ou la province où vous
vous trouvez.
Humidicateur Tourbillonnaire À Ultrasons • Garantie Limitée De 5 Ans
Pour bénéficier du service de garantie ou de réparation, composez le 1-800-234-0604
ou envoyez un courriel à consumerservice@vornado.com afin d’obtenir un formulaire
d'autorisation de retour (« AR »). Veuillez avoir sous la main ou inclure le numéro de
modèle de votre Produit et son numéro de série, ainsi que vos nom, adresse, ville, État ou
province, code postal et numéro de téléphone quand vous contactez Vornado au sujet du
service de garantie. Après avoir reçu le formulaire d’autorisation de retour, expédiez votre
Produit à :
Vornado Air LLC
Attn: Warranty & Repair
415 East 13th Street
Andover, KS 67002
Pour plus de commodité, veuillez avoir le numéro de modèle et le numéro de série sous
la main quand vous contactez Vornado au sujet des réparations. Pour garantir une manutention adéquate, le numéro d’AR doit être clairement indiqué sur le colis. Les colis où
ne figure pas clairement le numéro d'AR peuvent être refusés au quai de déchargement.
Veuillez prévoir 1 à 2 semaines pour la réparation et le retour de votre Produit après
réception du Produit. Pour vos dossiers : agrafez ou joignez votre reçu d’achat original au
présent mode d’emploi. Veuillez aussi inscrire le numéro de série de votre produit cidessous (vous le trouverez sur la décalcomanie où figurent les caractéristiques techniques
du produit).
No de série ______________________________________
Vous pouvez enregistrer le produit en ligne sur www.vornado.com
© 2012 Vornado Air LLC Andover, KS 67002, É.-U.
Brevets en instance. Les caractéristiques techniques peuvent être modifiées sans préavis.
Fabriqué en Chine.
Vornado® est une marque de commerce qui appartient à Vornado Air LLC.
www.vornado.com consumerservice@vornado.com 800.234.0604
Page 21

CL3-0158 RA
CL7-0158 RA, V00
Vornado Air, LLC
415 East 13th Street, Andover, Kansas 67002
800.234.0604 | www.vornado.com
Speak your mind www.vornado.com/reviews
 Loading...