

Page 1
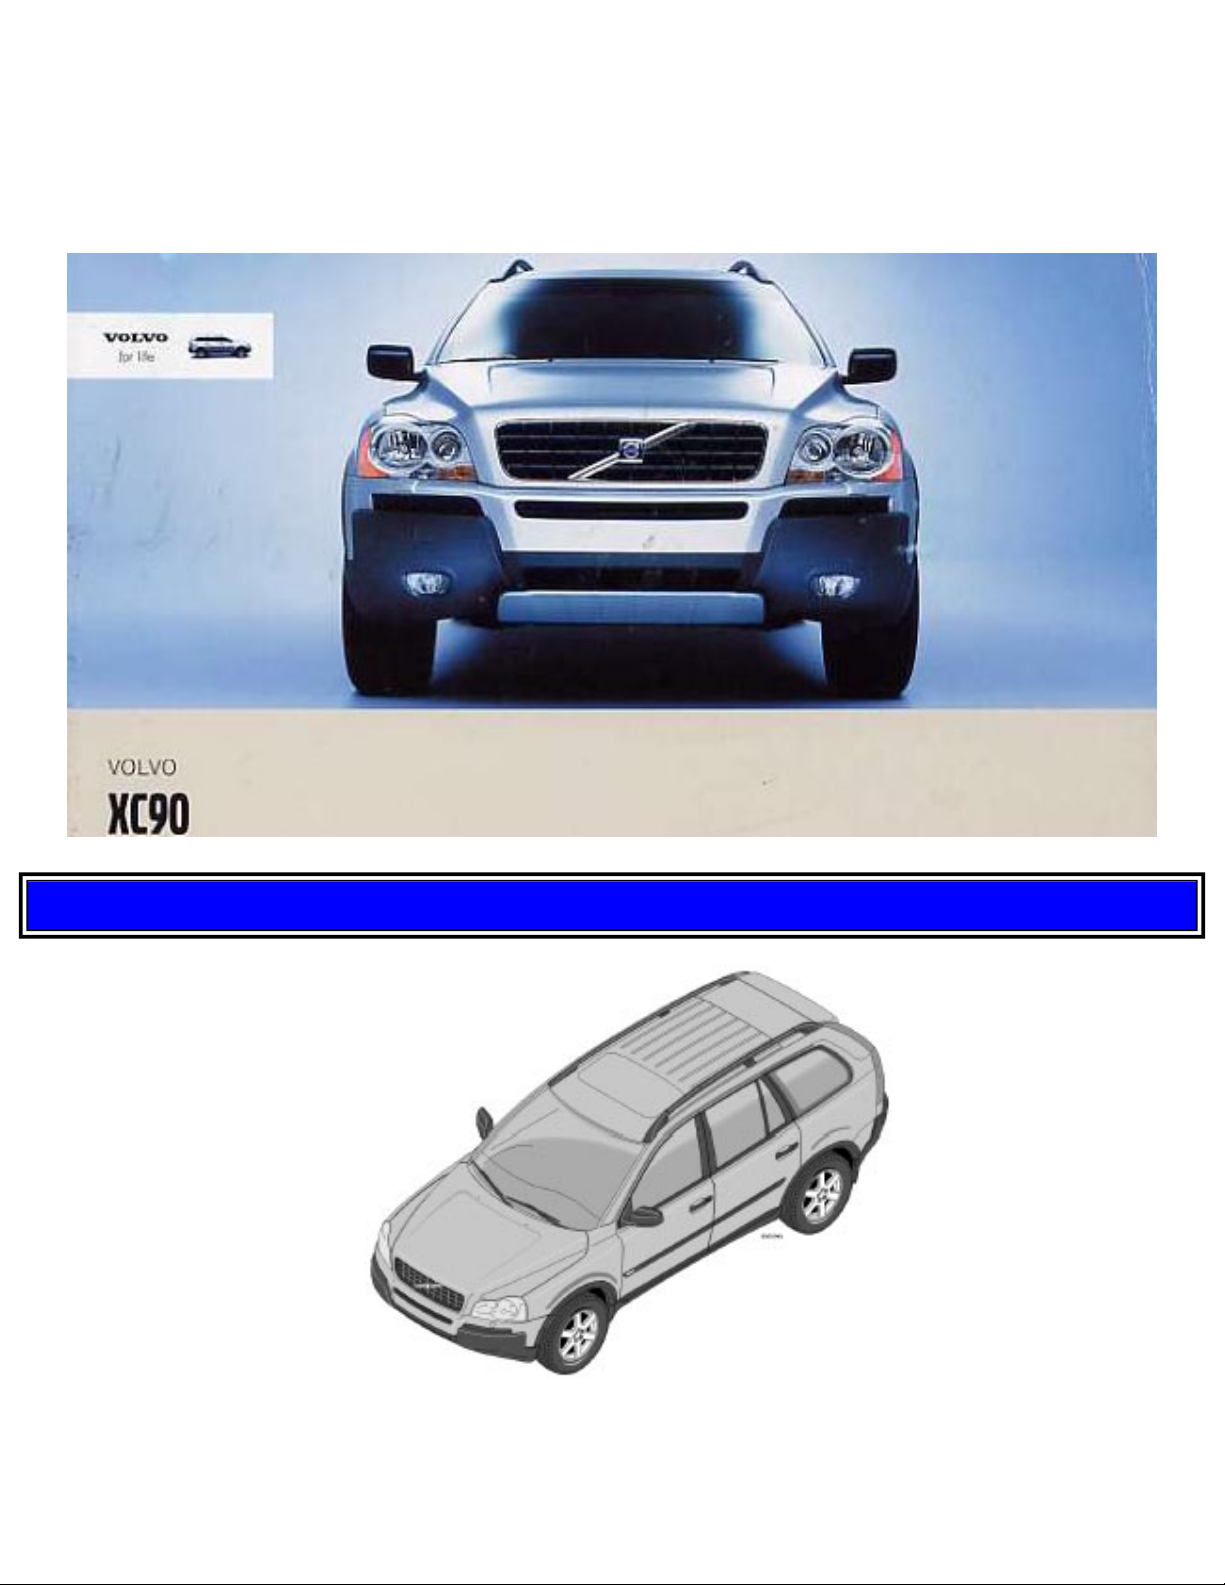
2003 VOLVO XC90
2 0 0 3
VOLVO
XC90
Introduction
Welcome to the world-wide family of Volvo owners. We trust that you will enjoy many years of safe driving in
your Volvo, an automobile designed with your safety and comfort in mind. To help ensure your satisfaction
with this vehicle, we encourage you to familiarize yourself with the equipment descriptions, operating
file:///K|/ownersdocs/2003/2003_XC90/03xc90_00.htm (1 of 7)12/30/2006 4:18:48 PM
Page 2

2003 VOLVO XC90
instructions and maintenance requirements/recommendations in this manual. We also urge you and your
passengers to wear seat belts at all times in this (or any other) automobile. And, of course, please do not operate
a vehicle if you may be affected by alcohol, medication or any impairment that could hinder your ability to
drive.
Your Volvo is designed to meet all applicable safety and emission standards, as evidenced by the certification
labels attached to the driver's door opening and on the left wheel housing in the engine compartment.
For further information please contact your retailer, or:
In the USA:
Volvo Cars of North America
Customer Relations
P.O. Box 914
Rockleigh, New Jersey 07647-0914
800-458-1552
In Canada:
Volvo Cars of Canada Ltd.
175 Gordon Baker Road
North York, Ontario M2H 2N7
800-663-8255
General information
Shiftlock
When your car is parked, the gear selector is locked in the (P)ark position. To release the selector from this
position, turn the ignition key to position II (or start the engine), depress the brake pedal, press the button on the
front side of the gear selector knob and move the selector from (P)ark.
Keylock (automatic transmission)
When you switch off the ignition, the gear selector must be in the (P)ark position before the key can be
removed from the ignition switch.
Anti-lock Brake System (ABS)
The ABS system in your car performs a self-diagnostic test when the vehicle first reaches the speed of
approximately 12 mph (20 km/h). The brake pedal will pulsate several times and a sound may be audible from
the ABS control module. This is normal.
Fuel filler door
The fuel filler door, located on the right rear fender, is connected to your vehicle's central locking system.
file:///K|/ownersdocs/2003/2003_XC90/03xc90_00.htm (2 of 7)12/30/2006 4:18:48 PM
Page 3

2003 VOLVO XC90
Press the button on the light switch panel (see page 31) when the car is at a standstill to unlock the fuel filler
door. Please note that the fuel filler door will remain unlocked until the car begins to move forward. An audible
click will be heard when the fuel filler door relocks.
Fuel filler cap
After refueling, close the fuel filler cap by turning it clockwise until it clicks into place. If this cap is not closed
tightly or if the engine is running when the car is refueled, the Malfunction Indicator Lamp ("Check Engine"
light) may indicate a fault.
Important information
Before you operate your vehicle for the first time, please familiarize yourself with the new engine oil
consumption information on
page 84. You should also be familiar with the information in chapters one, two
and eight of this manual.
Information contained in the balance of the manual is extremely useful and should be read after operating the
vehicle for the first time. The manual is structured so that it can be used for reference. For this reason, it should
be kept in the vehicle for ready access.
Do not export your Volvo to another country before investigating that country's applicable safety and exhaust
emission requirements. In some cases it may be difficult or impossible to comply with these requirements.
Modifications to the emission control system(s) may render your Volvo not certifiable for legal operation in the
U.S., Canada and other countries.
All information, illustrations and specifications contained in this manual are based on the latest product
information available at the time of publication. Please note that some vehicles may be equipped differently,
depending on special legal requirements. Optional equipment described in this manual may not be available in
all markets.
Volvo reserves the right to make model changes at any time, or to change specifications or design, without
notice and without incurring obligation.
CALIFORNIA Proposition 65 Warning
Engine exhaust, some of its constituents, and certain vehicle components contain or emit chemicals known
to the state of California to cause cancer, and birth defects or other reproductive harm. In addition, certain
fluids contained in vehicles and certain products of component wear contain or emit chemicals known to the
State of California to cause cancer, and birth defects or other reproductive harm.
Volvo and the environment
Volvo is committed to the well being of our customers. As a natural part of this commitment, we care about the
environment in which we all live. Caring for the environment means an everyday involvement in reducing our
file:///K|/ownersdocs/2003/2003_XC90/03xc90_00.htm (3 of 7)12/30/2006 4:18:48 PM
Page 4

2003 VOLVO XC90
environmental impact.
Volvo's environmental activities are based on a holistic view, which means we consider the overall
environmental impact of a product throughout its complete life cycle. In this context, design, production,
product use, and recycling are all important considerations.
In production, Volvo has partly or completely phased out several chemicals including chlorofluorocarbons
(CFCs), lead chromates, naphtanates, asbestos, mercury and cadmium; and reduced the amount of chemicals
used in our plants 50% since 1991.
Volvo was the first in the world to introduce into production a three-way catalytic converter with Lambda
Sond, now called oxygen sensor, in 1976. The current version of this highly efficient system reduces emissions
of harmful substances (CO, HC, NOx) from the exhaust pipe by approximately 95% and the search to eliminate
the remaining emissions continues. Volvo is the only automobile manufacturer to offer CFC-free retrofit kits
for the air conditioning system of all models as far back as the 1975 Volvo 240. Advanced electronic engine
controls, refined purification systems and cleaner fuels are bringing us closer to our goal.
After Volvo vehicles and parts have fulfilled their use, recycling is the next critical step in completing the life
cycle. The metal content is about 75% of the total weight of a vehicle, which makes the vehicle among the most
recycled industrial products. In order to have efficient and well controlled recycling, many Volvo variants have
printed dismantling manuals, indicating the weight and material of individual components. For Volvo, all
homogeneous plastic parts weighing more than 1.7 oz. (50 grams) are marked with international symbols that
indicate how the component is to be sorted for recycling.
In addition to continuous environmental refinement of conventional gasoline-powered internal combustion
engines, Volvo is actively looking at advanced technology alternative-fuel vehicles.
When you drive a Volvo, you become our partner in the work to lessen the car's impact on the environment.
To reduce your vehicle's environmental impact, you can:
● Maintain proper air pressure in your tires. Tests have shown decreased fuel economy with improperly
inflated tires.
● Follow the recommended maintenance schedule in your Warranty and Service Records Information booklet.
● Drive at a constant speed.
● See an authorized Volvo retailer as soon as possible for inspection if the check engine (malfunction
indicator) lamp illuminates, or stays on after the vehicle has started.
● Properly dispose of any vehicle-related waste such as used motor oil, used batteries, brake pads, etc.
● When cleaning your car, use Volvo's own car care products, all of which have systematically been adapted to
the environment.
For additional information regarding the environmental activities in which Volvo Cars of North America, LLC.
and Volvo Car Corporation are involved, visit our Internet Home Page at:
http://www.volvocars.com
file:///K|/ownersdocs/2003/2003_XC90/03xc90_00.htm (4 of 7)12/30/2006 4:18:48 PM
Page 5
2003 VOLVO XC90
PremAir®
On the surface of the radiator in the engine compartment, there is a special coating called PremAir®. PremAir®
works as a catalytic converter, converting most of the ground-level ozone passing through the radiator into
oxygen, thereby reducing harmful ground-level ozone.
Instruments, switches and controls
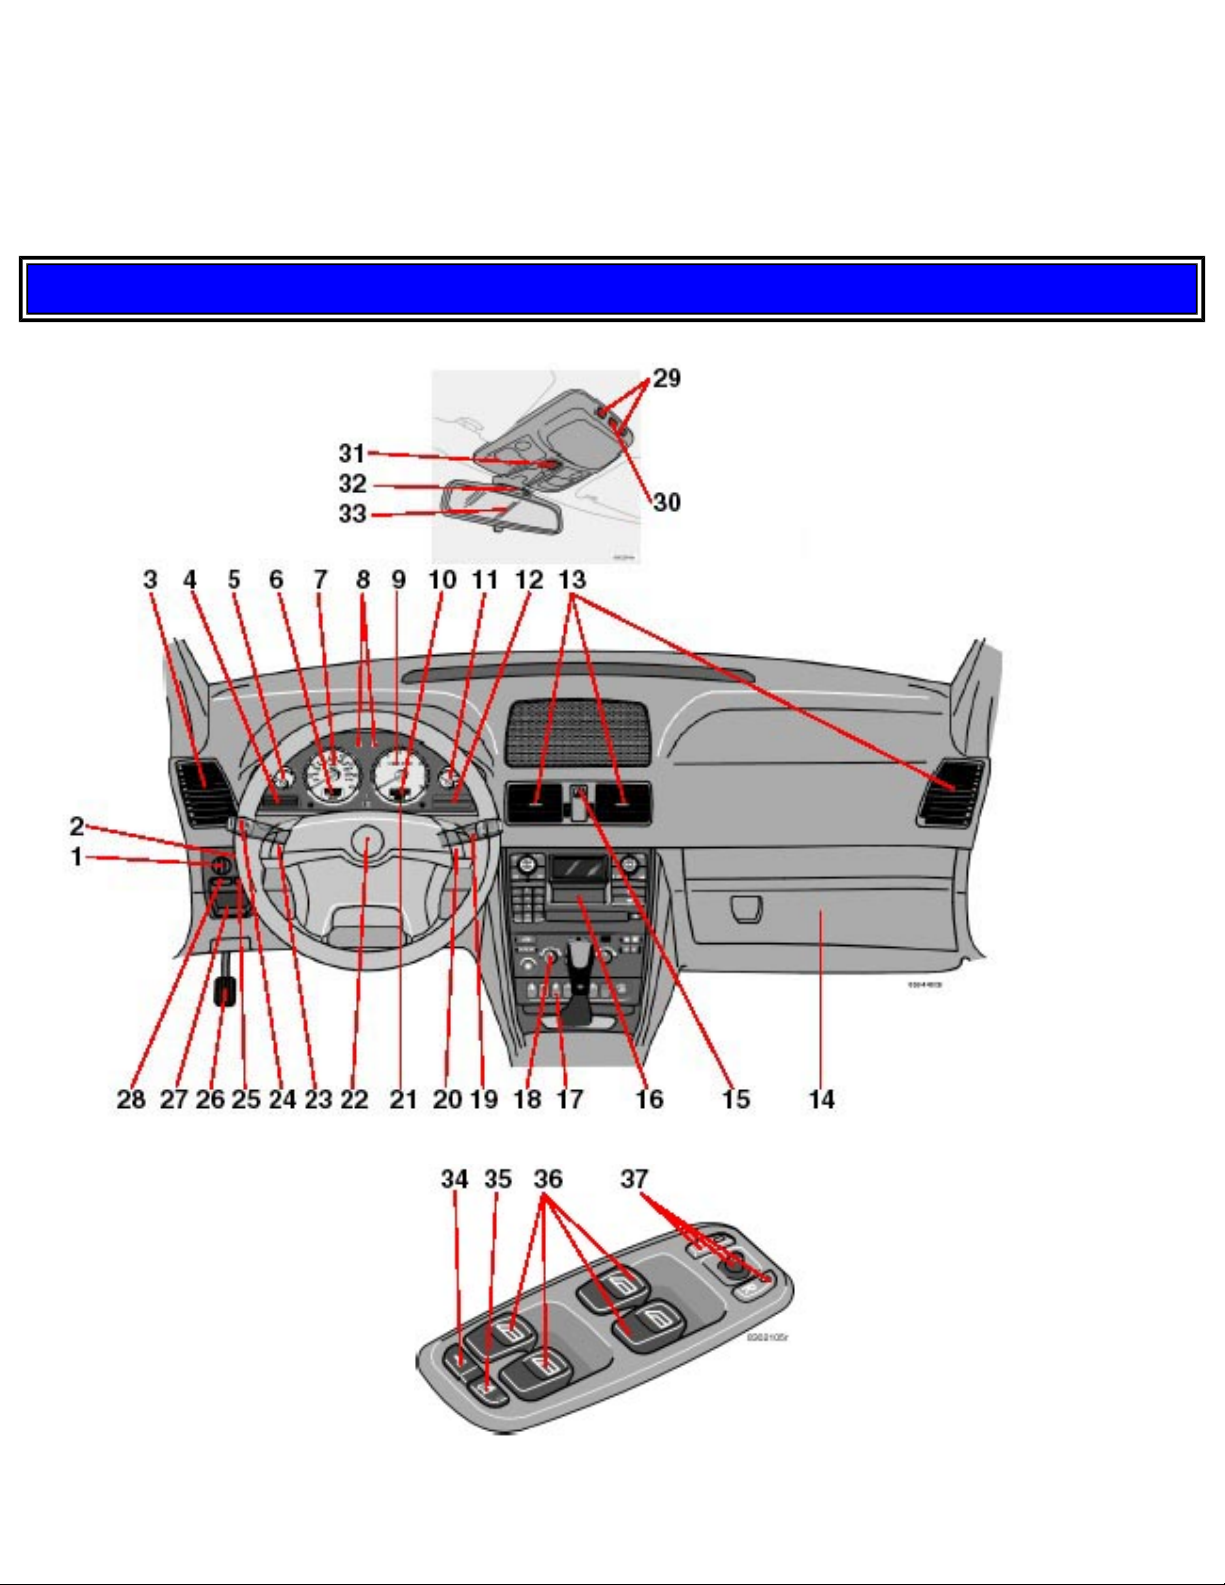
Control panel in driver's door (controls 34-37)
file:///K|/ownersdocs/2003/2003_XC90/03xc90_00.htm (5 of 7)12/30/2006 4:18:48 PM
Page 6

2003 VOLVO XC90
1. Headlights/Parking lights 31
2. Instrument lighting 31
3. Panel vents 47
4. Text window 28
5. Temperature gauge 24
6. Odometer/Trip odometer/Cruise control indicator 24, 37
7. Speedometer iv
8. Turn signal indicator lights 24
9. Tachometer 24
10. Ambient temperature gauge, clock, gear indicator 24
11. Fuel gauge 24
12. Indicator and warning symbols 25
13. Panel vents 47
14. Glove compartment 65
15. Hazard warning flashers 35
16. Audio system 159
17. Switches in the center console 29
18. Climate system controls 48
19. Windshield wiper/washer lever 34
20. Audio control buttons in steering wheel 161
21. Instrument panel 24
22. Horn iv
23. Cruise control buttons in steering wheel 37
24. Turn signals, High/low beams 33
25. Front fog lights, Rear fog light 31
26. Parking brake pedal 38
27. Parking brake release handle 38
28. Button for unlocking fuel filler door 31
29. Reading lights 61
30. Courtesy light 61
31. Moonroof control (option) 43
32. Seat belt reminder 27
33. Rearview mirror 42
34. Central locking button 77
35. Lockout switch for rear seat power windows 41
36. Power window controls 40
37. Sideview mirror controls 42
Contents
file:///K|/ownersdocs/2003/2003_XC90/03xc90_00.htm (6 of 7)12/30/2006 4:18:48 PM
Page 7

2003 VOLVO XC90
Contents
Safety
Instruments and controls
Climate control
Interior
Locks and Alarm
Starting and driving
Vehicle care
Wheels and tires
Maintenance
Specifications
Audio
Index
Back Cover
Top of Page
file:///K|/ownersdocs/2003/2003_XC90/03xc90_00.htm (7 of 7)12/30/2006 4:18:48 PM
Page 8

2003 VOLVO XC90
2 0 0 3
VOLVO
XC90
Safety
pg. 1 Safety
Seat belts 2
Airbags (Supplemental Restraint System) 4
Side airbags (SIPS airbags) 10
Inflatable Curtain (IC) 12
Roll-over Protection System 13
Inspection of airbags, Inflatable Curtains and seat belt pretensioners 14
Whiplash Protection System (WHIPS) 15
Child safety 17
Occupant safety, Reporting safety defects 21
pg. 2 Safety
Seat belts
Not wearing a seat belt is like believing "It'll never happen to me!" Volvo, the inventor of the three-point
seat belt, urges you and all occupants of your vehicle to wear seat belts and ensure that children are
properly restrained, using an infant, car or booster seat determined by age, weight and height. Volvo also
believes no child should sit in the front seat of a vehicle.
NOTE: Most states and provinces make it mandatory for occupants of a vehicle to use seat belts. So,
urging you to buckle up is not just our recommendation. The few moments it takes to buckle your seat
belt may one day allow you to say "It's a good thing I was wearing my seat belt."
file:///K|/ownersdocs/2003/2003_XC90/03xc90_01a.htm (1 of 12)12/30/2006 4:18:49 PM
Page 9
2003 VOLVO XC90
NOTE: A chime will sound several times if the driver has not fastened his/her seat belt.
Extending the lap belt
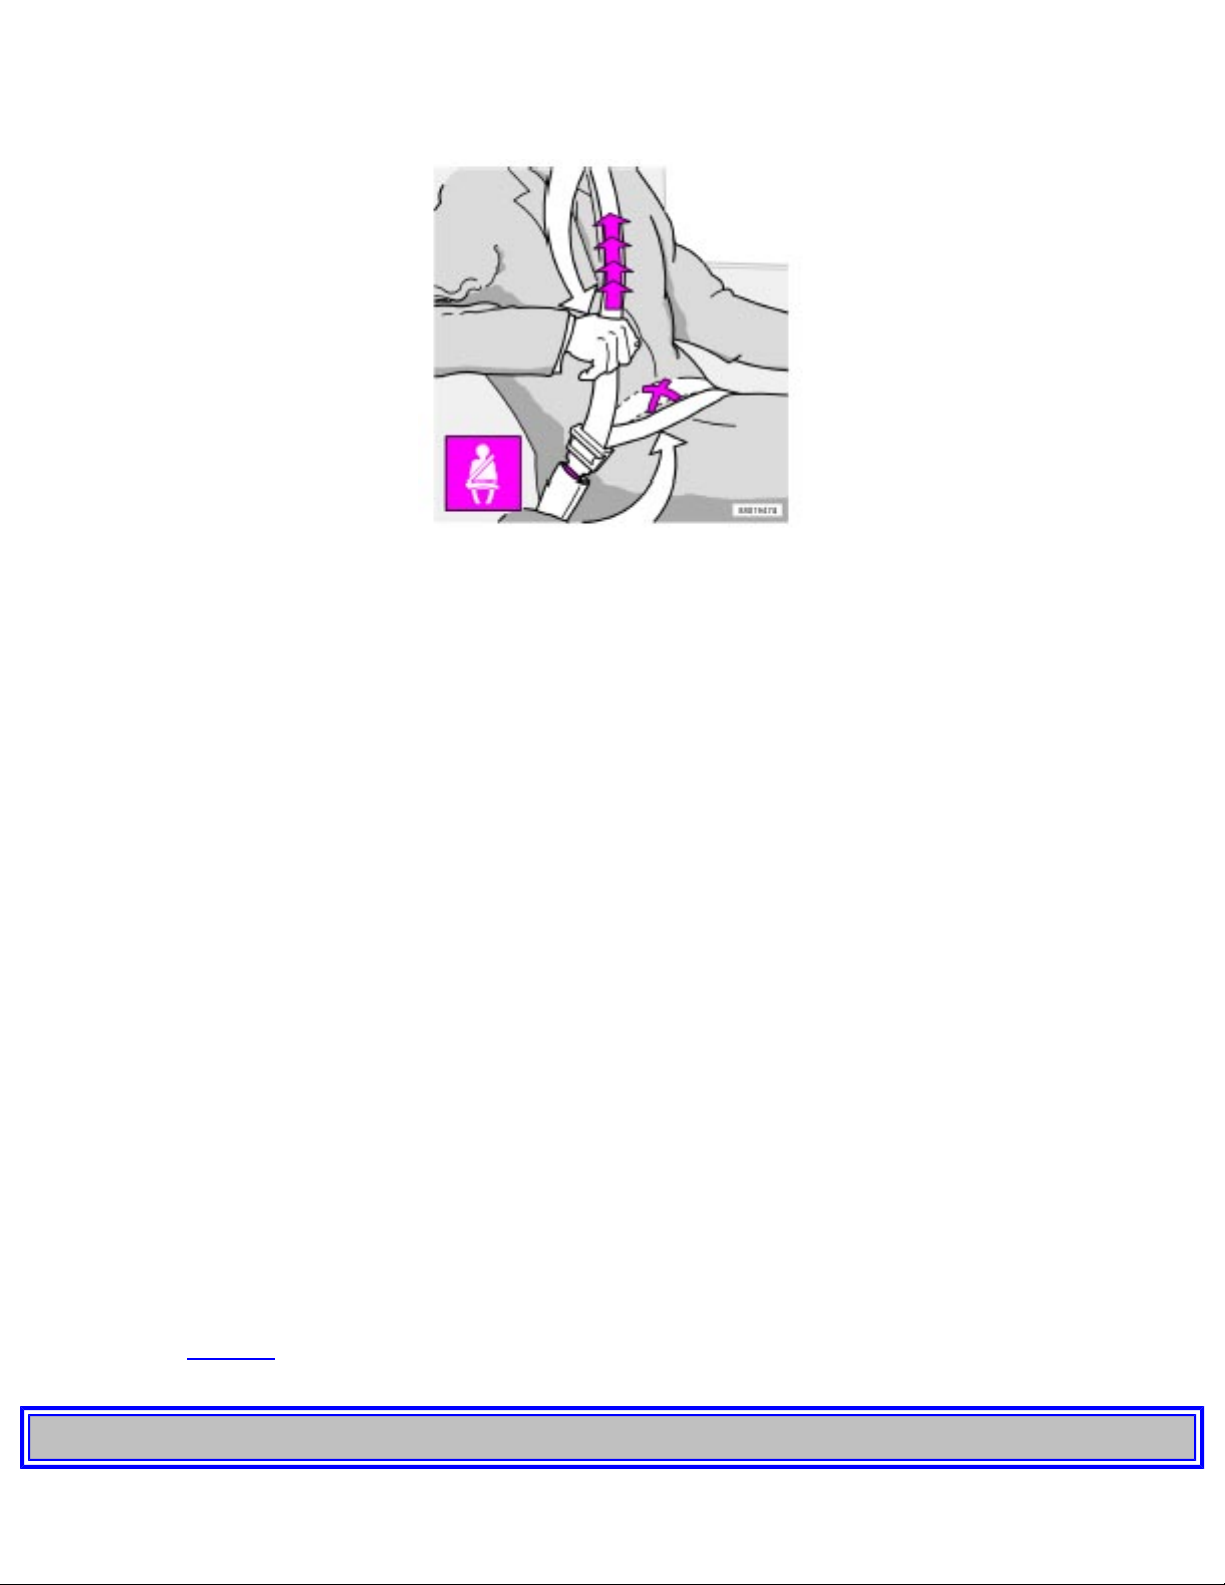
To buckle a seat belt:
Pull the belt out far enough to insert the latch plate into the receptacle until a distinct click is heard. The
seat belt retractor is normally "unlocked" and you can move freely, provided that the shoulder belt is not
pulled out too far. The retractor will lock up as follows:
● if the belt is pulled out rapidly
● during braking and acceleration
● if the vehicle is leaning excessively
● when driving in turns
For the seat belt to provide maximum protection in the event of an accident, it must be worn correctly.
When wearing the seat belt remember:
● The belt should not be twisted or turned.
● The lap belt must be positioned low on the hips (not pressing against the abdomen).
Make sure that the shoulder belt is rolled up into its retractor and that the shoulder and lap belts are taut.
Before exiting the vehicle, check that the seat belt retracts fully after being unbuckled. If necessary,
guide the belt back into the retractor slot.
Child seats:
Please refer to
page 20 for information on securing child seats with the seat belts.
pg. 3 Safety
file:///K|/ownersdocs/2003/2003_XC90/03xc90_01a.htm (2 of 12)12/30/2006 4:18:49 PM
Page 10
2003 VOLVO XC90
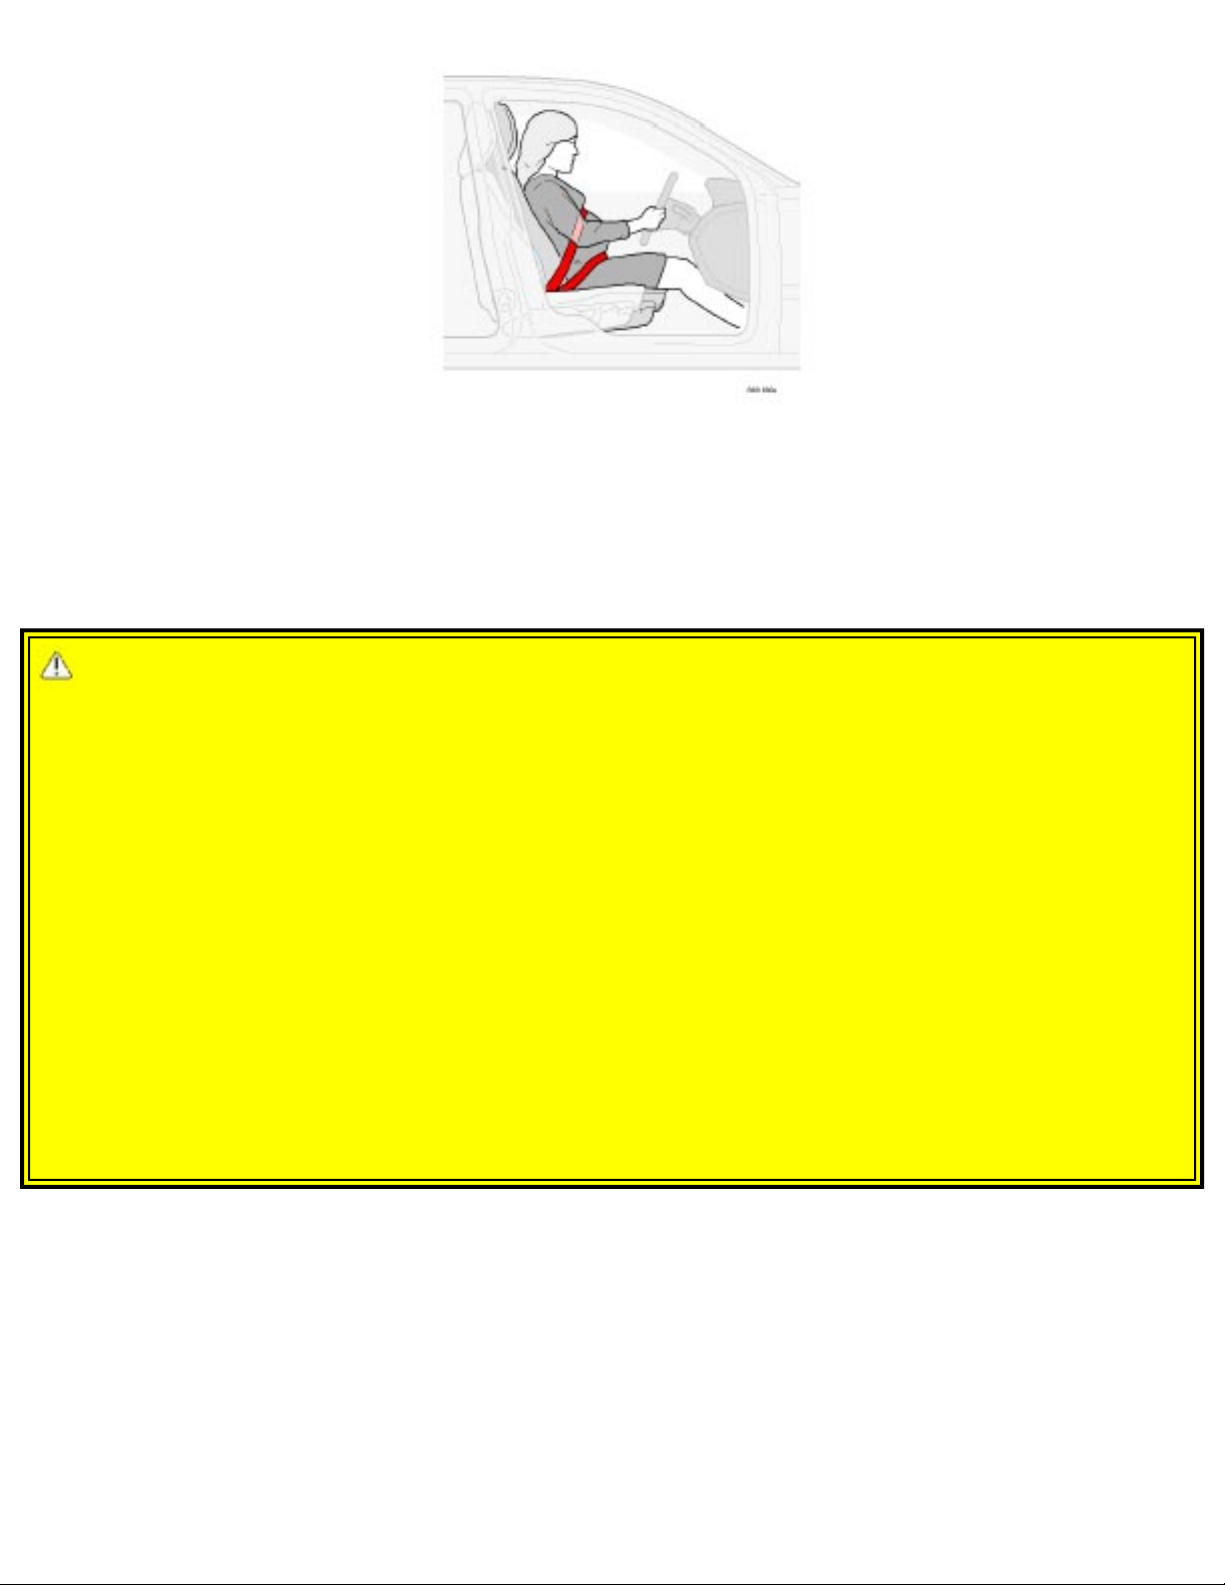
During pregnancy
Pregnant women should always wear seat belts. Remember that the belt should always be positioned in
such a way as to avoid any possible pressure on the abdomen. The lap portion of the belt should be
located low, as shown in the above illustration.
WARNING!
Seat belts:
● Never use a seat belt for more than one occupant. Never wear the shoulder portion of the belt under
the arm, behind the back or otherwise out of position. Such use could cause injury in the event of an
accident. As seat belts lose much of their strength when exposed to violent stretching, they should be
replaced after any collision, even if they appear to be undamaged.
● Never repair the belt on your own; have this work done by an authorized Volvo retailer only.
● Any device used to induce slack into the shoulder belt portion of the three-point belt system will
have a detrimental effect on the amount of protection available to you in the event of a collision.
● The seat back should not be tilted too far back. The shoulder belt must be taut in order to function
properly.
● Do not use child safety seats or child booster cushions/backrests in the front passenger's seat. We
also recommend that children who have outgrown these devices sit in the rear seat with the seat belt
properly fastened.
file:///K|/ownersdocs/2003/2003_XC90/03xc90_01a.htm (3 of 12)12/30/2006 4:18:49 PM
Page 11
2003 VOLVO XC90
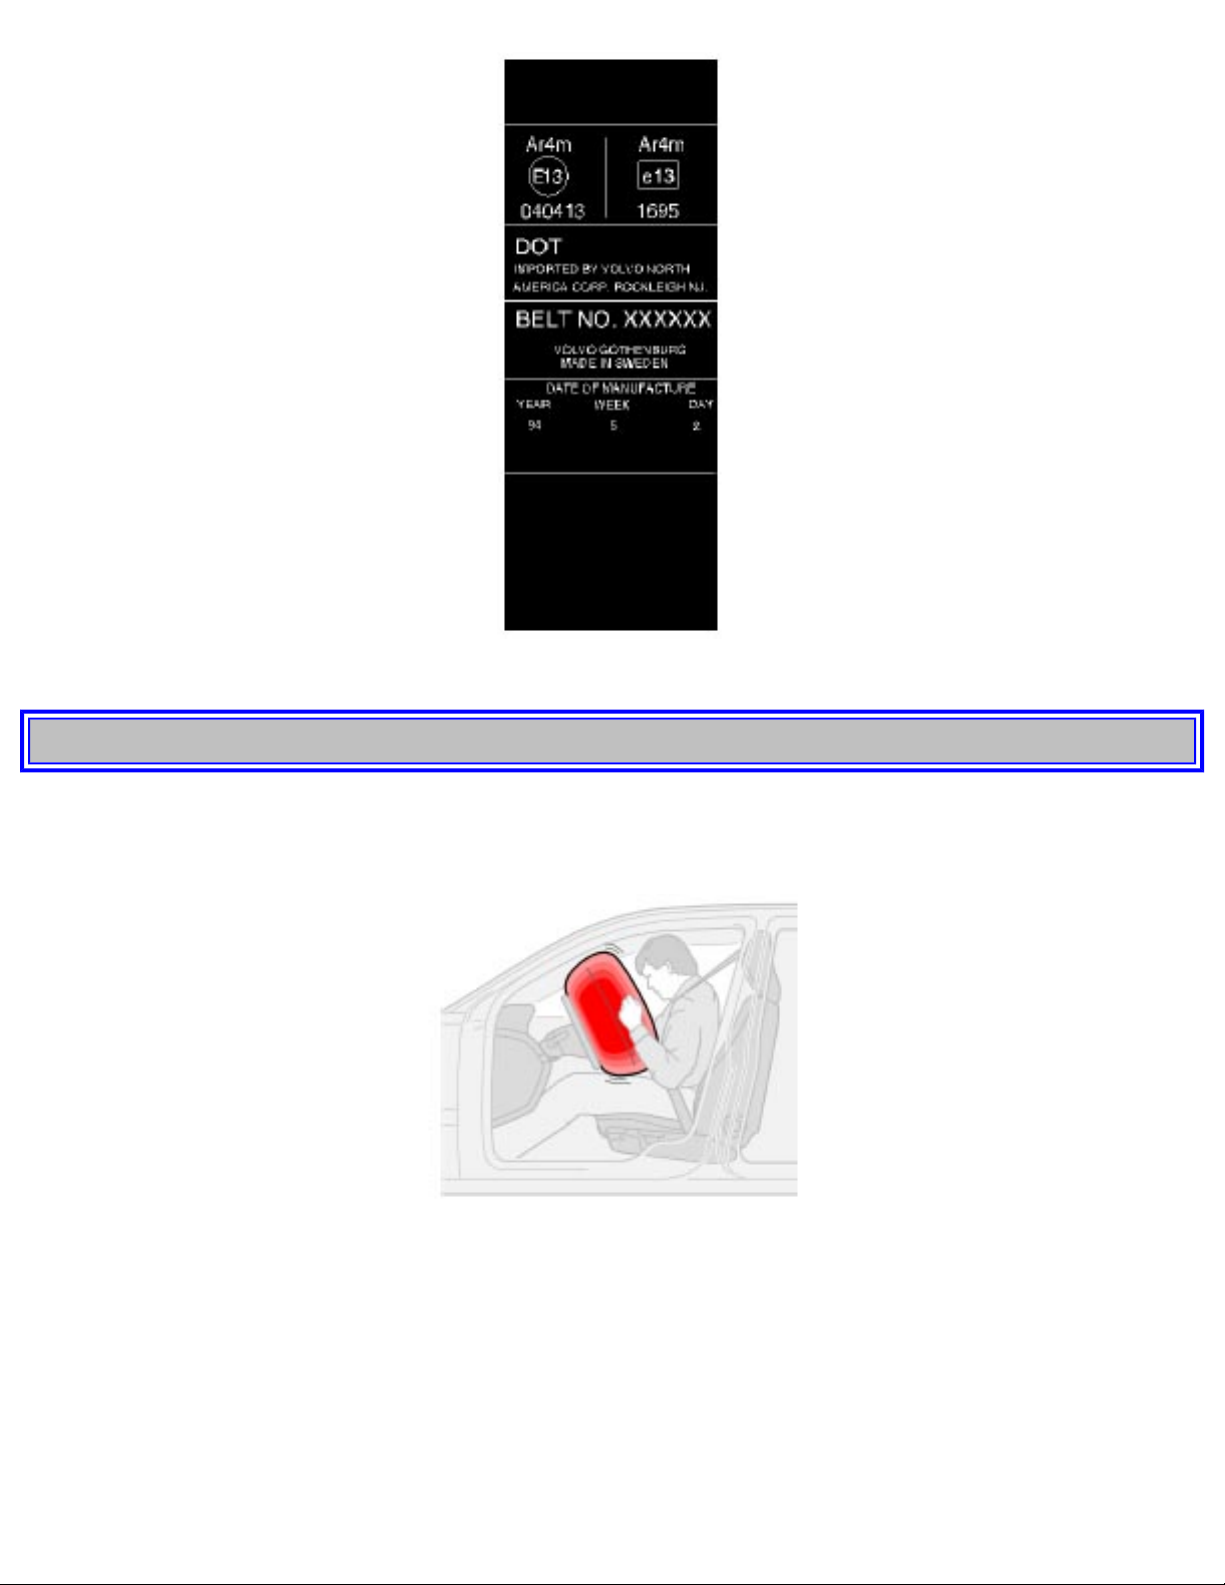
Sample label found on all seat belts with pretensioners
pg. 4 Safety
Airbags (Supplemental Restraint System)
Driver's side airbag
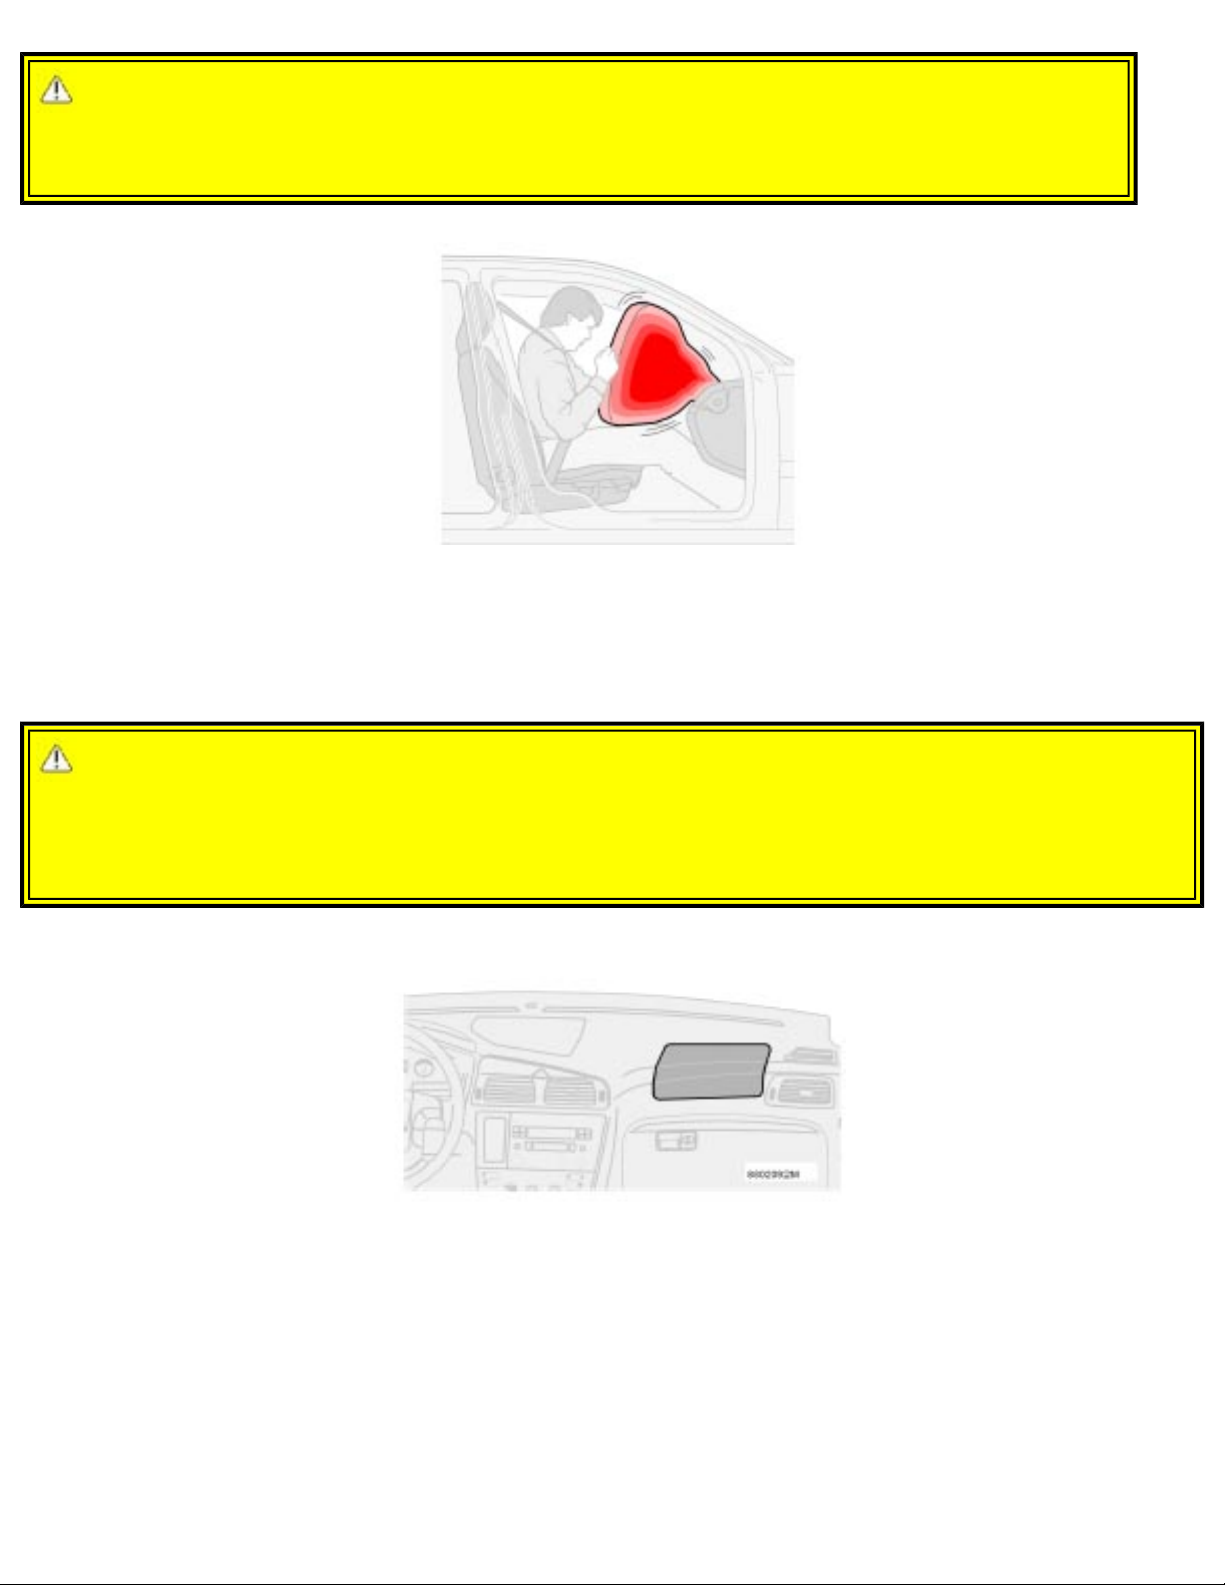
As an enhancement to the three-point seat belt system, your Volvo is equipped with a Supplemental
Restraint System (SRS) to complement the three-point seat belt system. The inflatable airbag is installed
folded up in the center of the steering wheel. The wheel is embossed with SRS.
file:///K|/ownersdocs/2003/2003_XC90/03xc90_01a.htm (4 of 12)12/30/2006 4:18:49 PM
Page 12
2003 VOLVO XC90
WARNING!
Never drive an SRS equipped vehicle with your hands on the steering wheel pad/airbag
housing.
Passenger side airbag
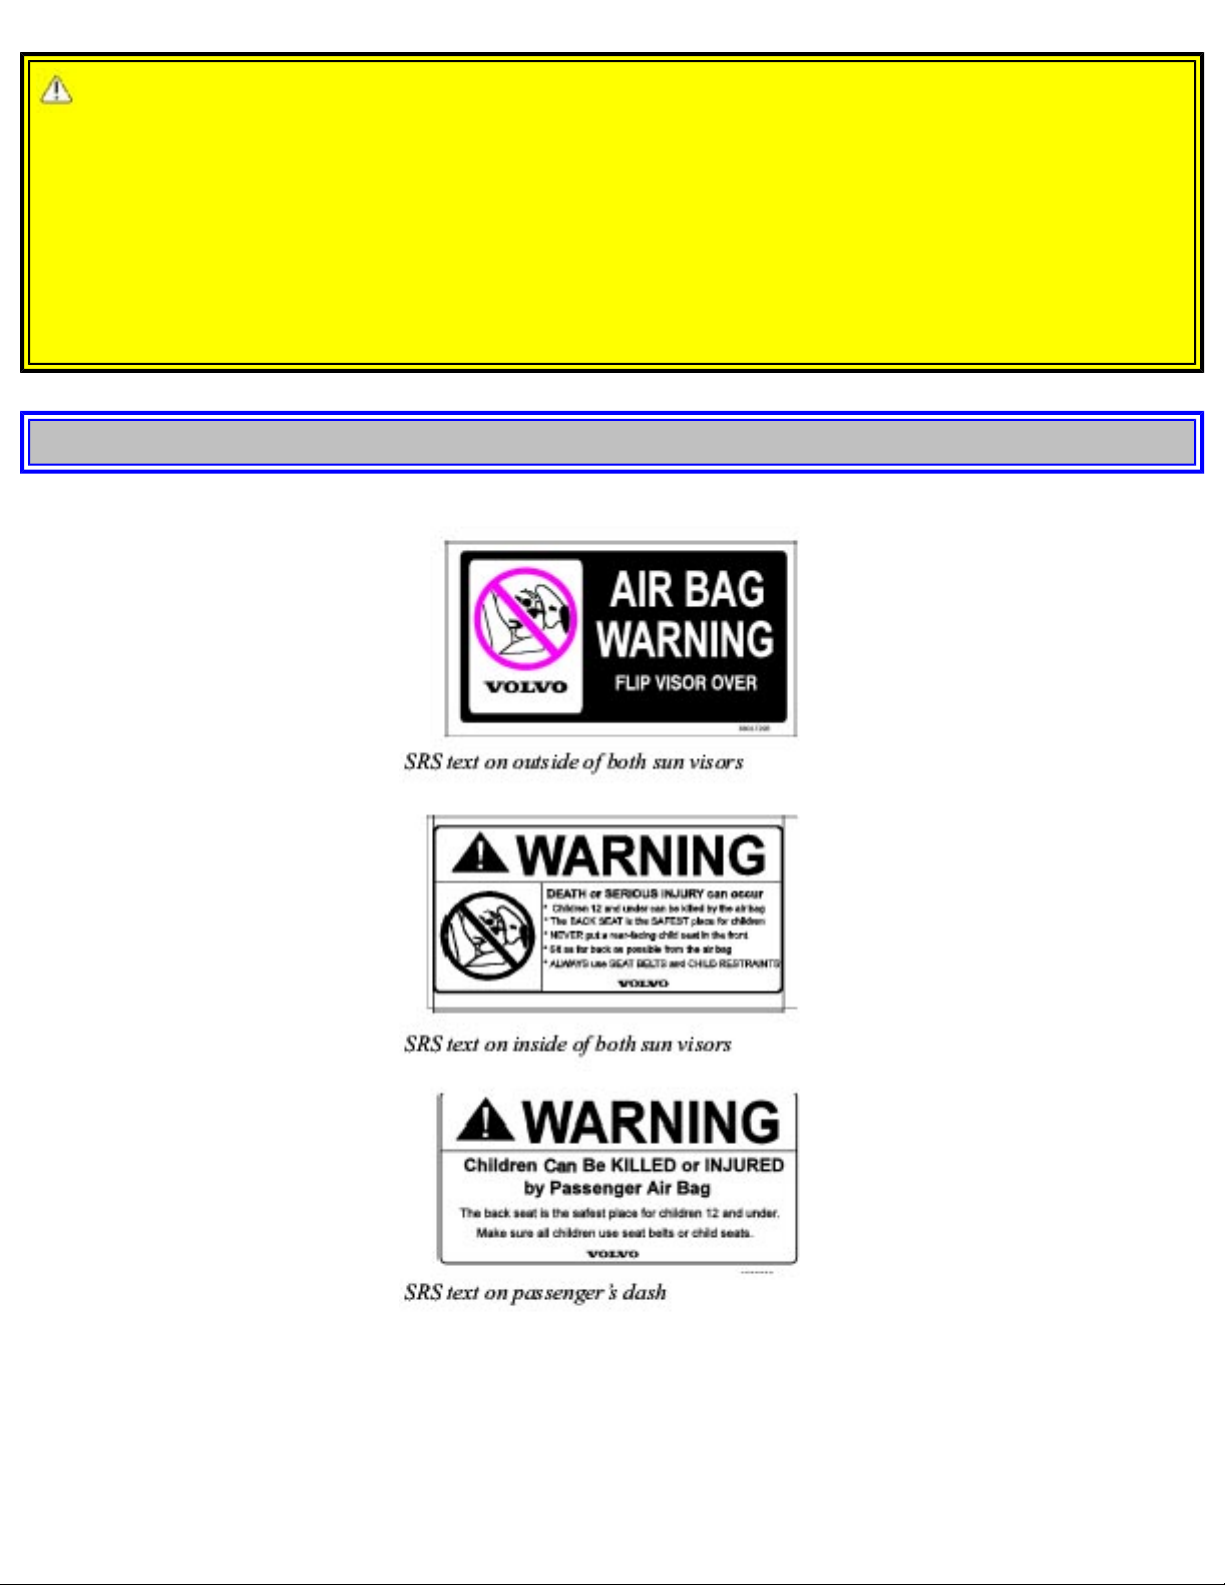
The airbag on the front passenger side is folded up in a compartment above the glove compartment. The
panel is embossed SRS.
WARNING!
No objects, accessory equipment or stickers may be placed on, attached to, or installed near the SRS
cover in the center of the steering wheel, the SRS cover above the glove compartment or the area
affected by airbag deployment.
Passenger side airbag - location
file:///K|/ownersdocs/2003/2003_XC90/03xc90_01a.htm (5 of 12)12/30/2006 4:18:49 PM
Page 13
2003 VOLVO XC90
WARNING!
As its name implies, SRS is designed to be a SUPPLEMENT to - not a replacement for - the threepoint belt system. For maximum protection, wear seat belts at all times. Be aware that no system can
prevent all possible injuries that may occur in an accident.
When installing any accessory equipment, make sure that the SRS system is not damaged. Do not
attempt to service any component of the SRS yourself. Attempting to do so may result in serious
personal injury. If a problem arises, take your vehicle to the nearest authorized Volvo retailer for
inspection as soon as possible.
pg. 5 Safety
file:///K|/ownersdocs/2003/2003_XC90/03xc90_01a.htm (6 of 12)12/30/2006 4:18:49 PM
Page 14
2003 VOLVO XC90
NOTE:
Deployment of SRS components occurs only one time during an accident. In a collision where
deployment occurs, the airbags and seat belt pretensioners activate. Some noise occurs and a small
amount of powder is released. The release of the powder may appear as smoke-like matter. This is a
normal characteristic and does not indicate fire.
NOTE:
Volvo's dual-threshold, dual-stage airbags use special sensors that are integrated with the front seat
buckles. The point at which the airbag deploys is determined by whether or not the seat belt is being
used, as well as the severity of the collision. Collisions can occur where only one of the airbags deploys.
If the impact is less severe, but severe enough to present a clear injury risk, the dual-stage airbags are
triggered at 70% of their total capacity. If the impact is more severe, the dual-stage airbags are triggered
at full capacity.
WARNING!
Do not use child safety seats or child booster cushions/backrests in the front passenger's seat. We also
recommend that occupants under 4 feet 7 inches (140 cm) in height who have outgrown these devices
sit in the rear seat with the seat belt fastened. Never drive with the airbags deployed. The fact that
they hang out can impair the steering of your vehicle. Other safety systems can also be damaged. The
smoke and dust formed when the airbags are deployed can cause skin and eye irritation in the event of
prolonged exposure.
pg. 6 Safety
Airbags (Supplemental Restraint System) (contd)
file:///K|/ownersdocs/2003/2003_XC90/03xc90_01a.htm (7 of 12)12/30/2006 4:18:49 PM
Page 15
2003 VOLVO XC90
WARNING!
Children must never be allowed in the front passenger's seat. Volvo recommends that ALL occupants
(adults and children) shorter than 4 feet 7 inches (140 cm) be seated in the back seat of any vehicle
with a front passenger-side airbag. See page 20 for guidelines.
Occupants in the front passenger's seat must never sit on the edge of the seat, sit leaning toward the
instrument panel or otherwise sit out of position. The occupant's back must be as upright as comfort
allows and be against the seat back with the seat belt properly fastened.
Feet must be on the floor, e.g. not on the dash, seat or out of the window. No objects or accessory
equipment, e.g. dashboard covers, may be placed on, attached to, or installed near the SRS hatch (the
area above the glove compartment) or the area affected by airbag deployment (see illustration on
page
4).
There should be no loose articles, e.g. coffee cups, on the floor, seat or dashboard area. Never try to
open the SRS cover on the steering wheel or the passenger side dash. This should only be done by an
authorized Volvo service technician.
Failure to follow these instructions can result in injury to the vehicle occupants.
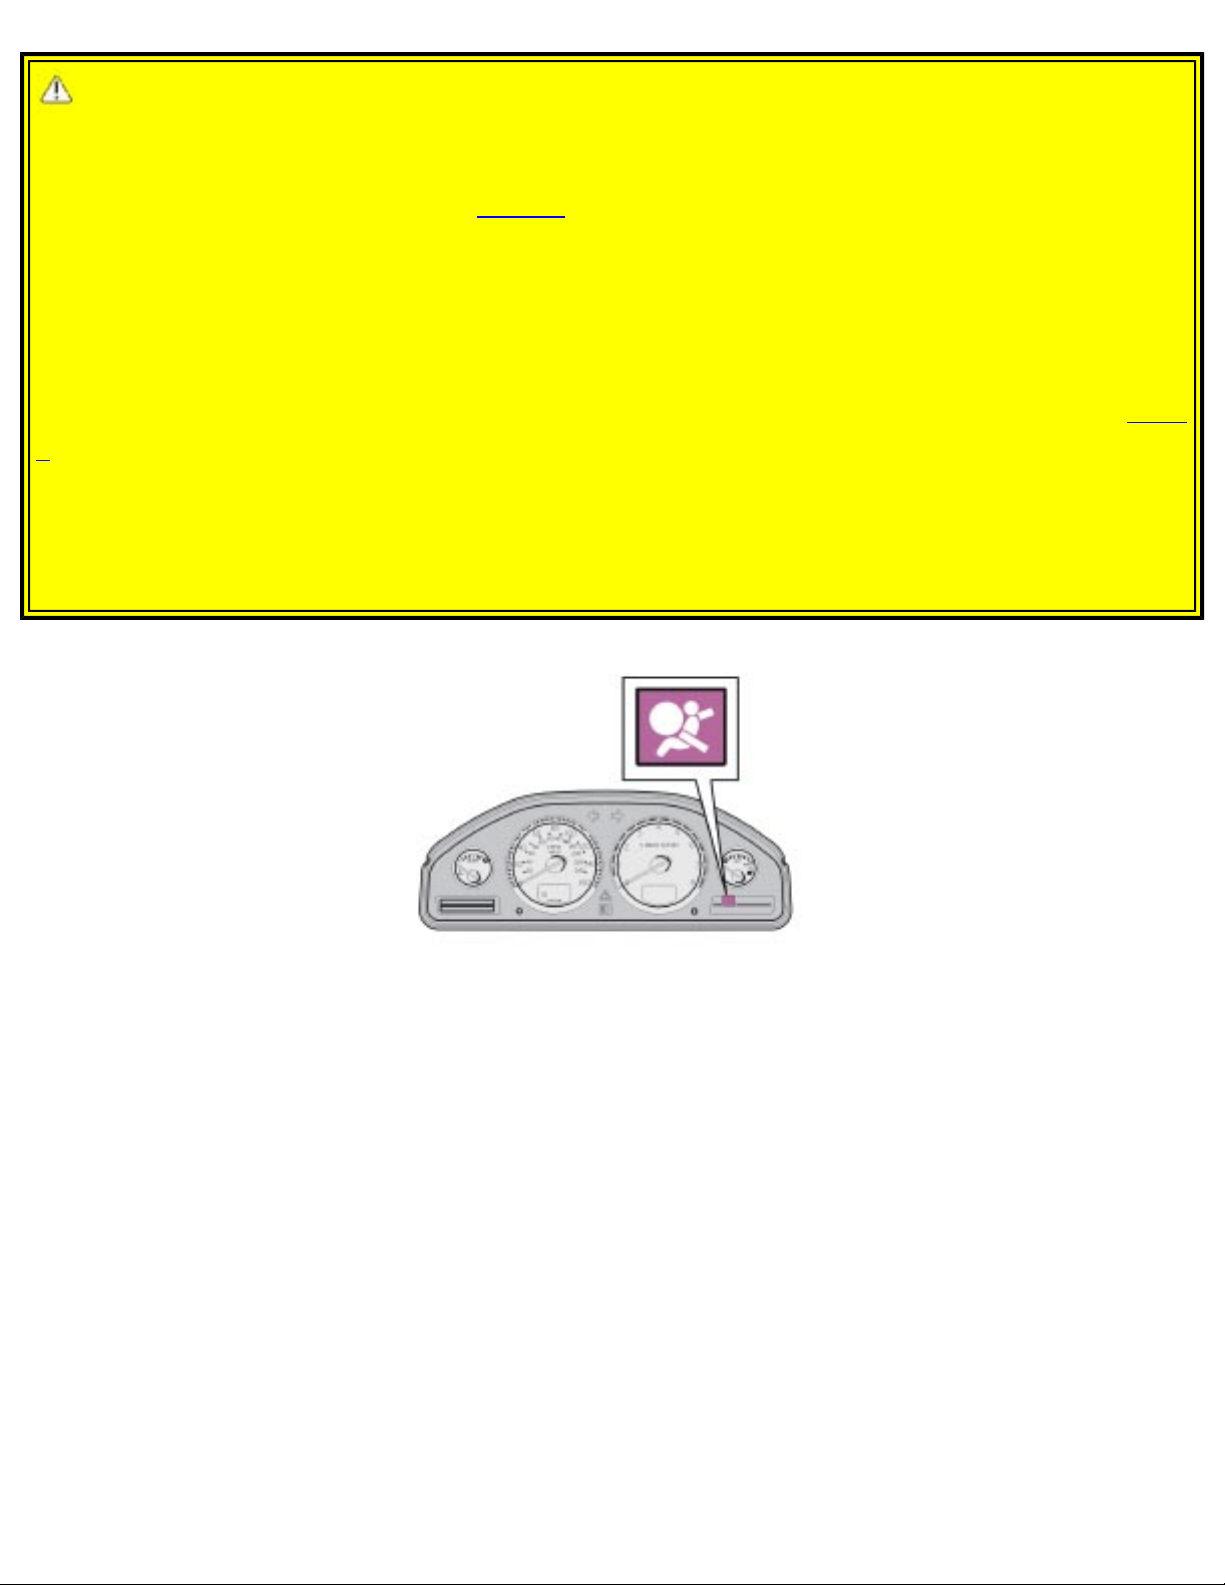
Warning light in the instrument panel
A self-diagnostic system incorporated in the sensor monitors the SRS. This system does not, however,
monitor the Side Impact Protection System (SIPS) airbags. If a fault is detected, the warning light will
illuminate. The light is included in the warning/indicator light cluster in the instrument panel. Normally,
the SRS warning lamp should light up when the ignition key is turned to positions I, II or III and should
go out after 7 seconds or when the engine is started. Check that this light is functioning properly every
time the vehicle is started.
The following items are monitored by the self-diagnostic system:
● Sensor unit
● Cable harness
● Gas generator
file:///K|/ownersdocs/2003/2003_XC90/03xc90_01a.htm (8 of 12)12/30/2006 4:18:49 PM
Page 16

2003 VOLVO XC90
WARNING!
If the SRS warning light stays on after the engine has started or if it comes on while you are driving,
drive the vehicle to the nearest authorized Volvo retailer for inspection as soon as possible.
pg. 7 Safety
When are the airbags deployed?
The information on this page pertains to SRS (front) airbags only. For information about Side Impact
Protection System (SIPS) airbags, please see
page 10. For Inflatable Curtain (IC) airbags, please see
page 12.
The SRS system is designed to deploy during certain frontal or front-angular collisions, impacts, or
decelerations, depending on the crash severity, angle, speed and object impacted. The SRS sensor is
designed to react to both the impact of the collision and the inertial forces generated by it and to
determine if the intensity of the collision is sufficient for the seat belt pretensioners or airbags to be
deployed.
If the airbags have been deployed, we recommend the following:
● Have the vehicle towed to an authorized Volvo retailer. Never drive with the airbags deployed.
● Have an authorized Volvo retailer replace the SRS system components.
● Use only new, Genuine Volvo Parts when replacing SRS components (airbags, seat belts,
pretensioners, etc.).
When are the airbags NOT deployed?
Not all frontal collisions activate the SRS system. If the collision involves a nonrigid object (e.g., a snow
drift or bush), or a rigid, fixed object at a low speed, the SRS system will not necessarily deploy. Front
airbags do not normally deploy in a side impact collision, in a collision from the rear or in a rollover
situation. The amount of damage to the bodywork does not reliably indicate if the airbags should have
deployed or not.
Seat belts - the heart of the Volvo safety system
The heart of the Volvo safety system is the three-point seat belt (a Volvo invention)! In order for the
SRS system to provide the protection intended, seat belts must be worn at all times by everyone in the
vehicle. The SRS system is a supplement to the seat belts.
WARNING!
Never drive with the airbags deployed. The fact that they hang out can impair the steering of your
vehicle. Other safety systems can also be damaged. The smoke and dust formed when the airbags are
deployed can cause skin and eye irritation in the event of prolonged exposure.
file:///K|/ownersdocs/2003/2003_XC90/03xc90_01a.htm (9 of 12)12/30/2006 4:18:49 PM
Page 17

2003 VOLVO XC90
pg. 8 Safety
Airbags (Supplemental Restraint System) (contd)
WARNING!
If your vehicle has been subjected to flood conditions (e.g. soaked carpeting/standing water on the
floor of the vehicle) or if your vehicle has become flood-damaged in any way, do not attempt to start
the vehicle or put the key in the ignition before disconnecting the battery (see below). This may cause
airbag deployment which could result in personal injury. Have the vehicle towed to an authorized
Volvo retailer for repairs.
Automatic transmission:
Before attempting to tow the vehicle, use the following procedure to override the shiftlock system to
move the gear selector to the neutral position.
● Switch off the ignition for at least 10 minutes and disconnect the battery
● Wait at least one minute
● Insert the key in the ignition and turn it to position II
● Press firmly on the brake pedal.
● Move the gear selector from (P)ark to the (N)eutral position.
There is no maintenance to perform on the SRS yourself. The month and year shown on the decal on the
door pillar indicate when you should contact your Volvo retailer for specific servicing or replacement of
airbags and seat belt pretensioners. This maintenance must be performed by an authorized Volvo
retailer. Should you have any questions about the SRS system, please contact your authorized Volvo
retailer or Volvo Customer Support:
In the U.S.A In Canada:
Volvo Cars of North America Volvo Cars of Canada Ltd.
Customer Relations 175 Gordon Baker Road
P.O. Box 914 North York, Ontario M2H 2N7
Rockleigh, New Jersey 07647-0914 800-663-8255
800-458-1552
pg. 9 Safety
file:///K|/ownersdocs/2003/2003_XC90/03xc90_01a.htm (10 of 12)12/30/2006 4:18:49 PM
Page 18
2003 VOLVO XC90
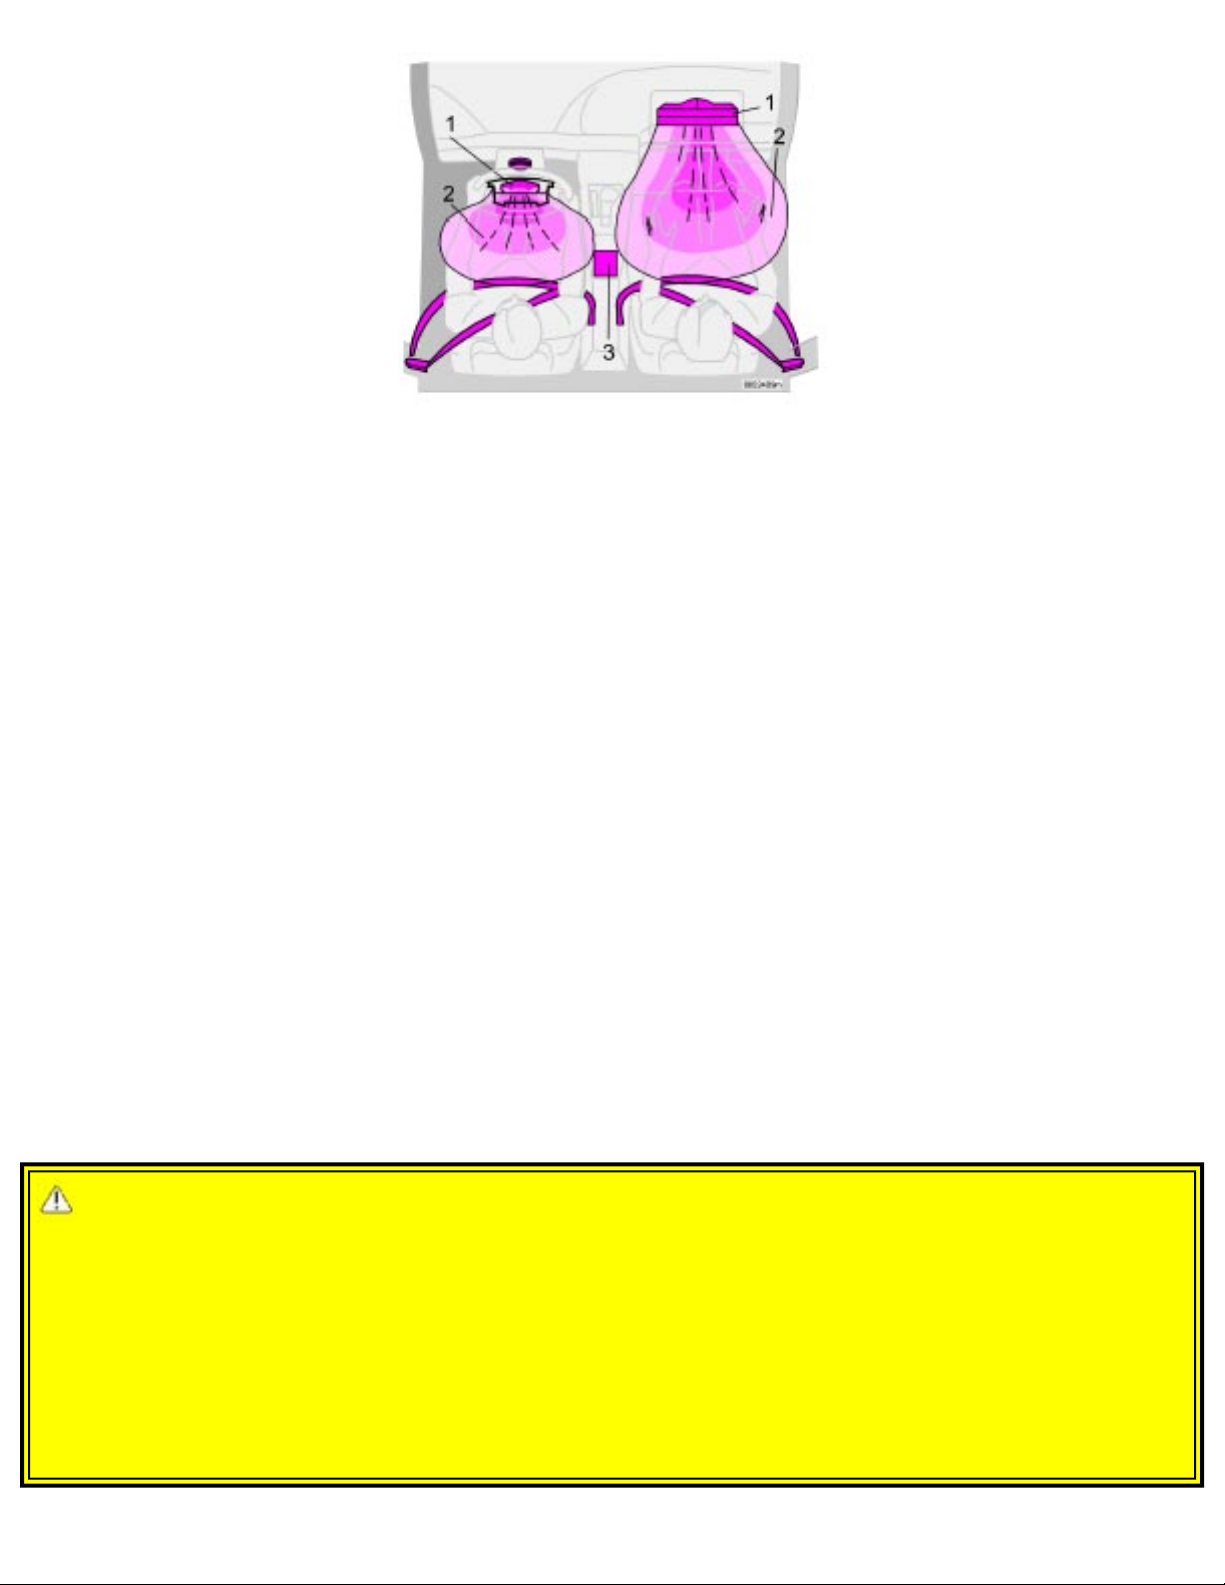
Front airbag (SRS) system
As an enhancement to the three-point seat belt system, your Volvo is equipped with a Supplemental
Restraint System (SRS). The Volvo SRS consists of an airbag (2) on both the driver's and passenger's
sides and seat belt pretensioners in both front door pillars. The system is designed to supplement the
protection provided by the three-point seat belt system. All rear seat belts are also equipped with
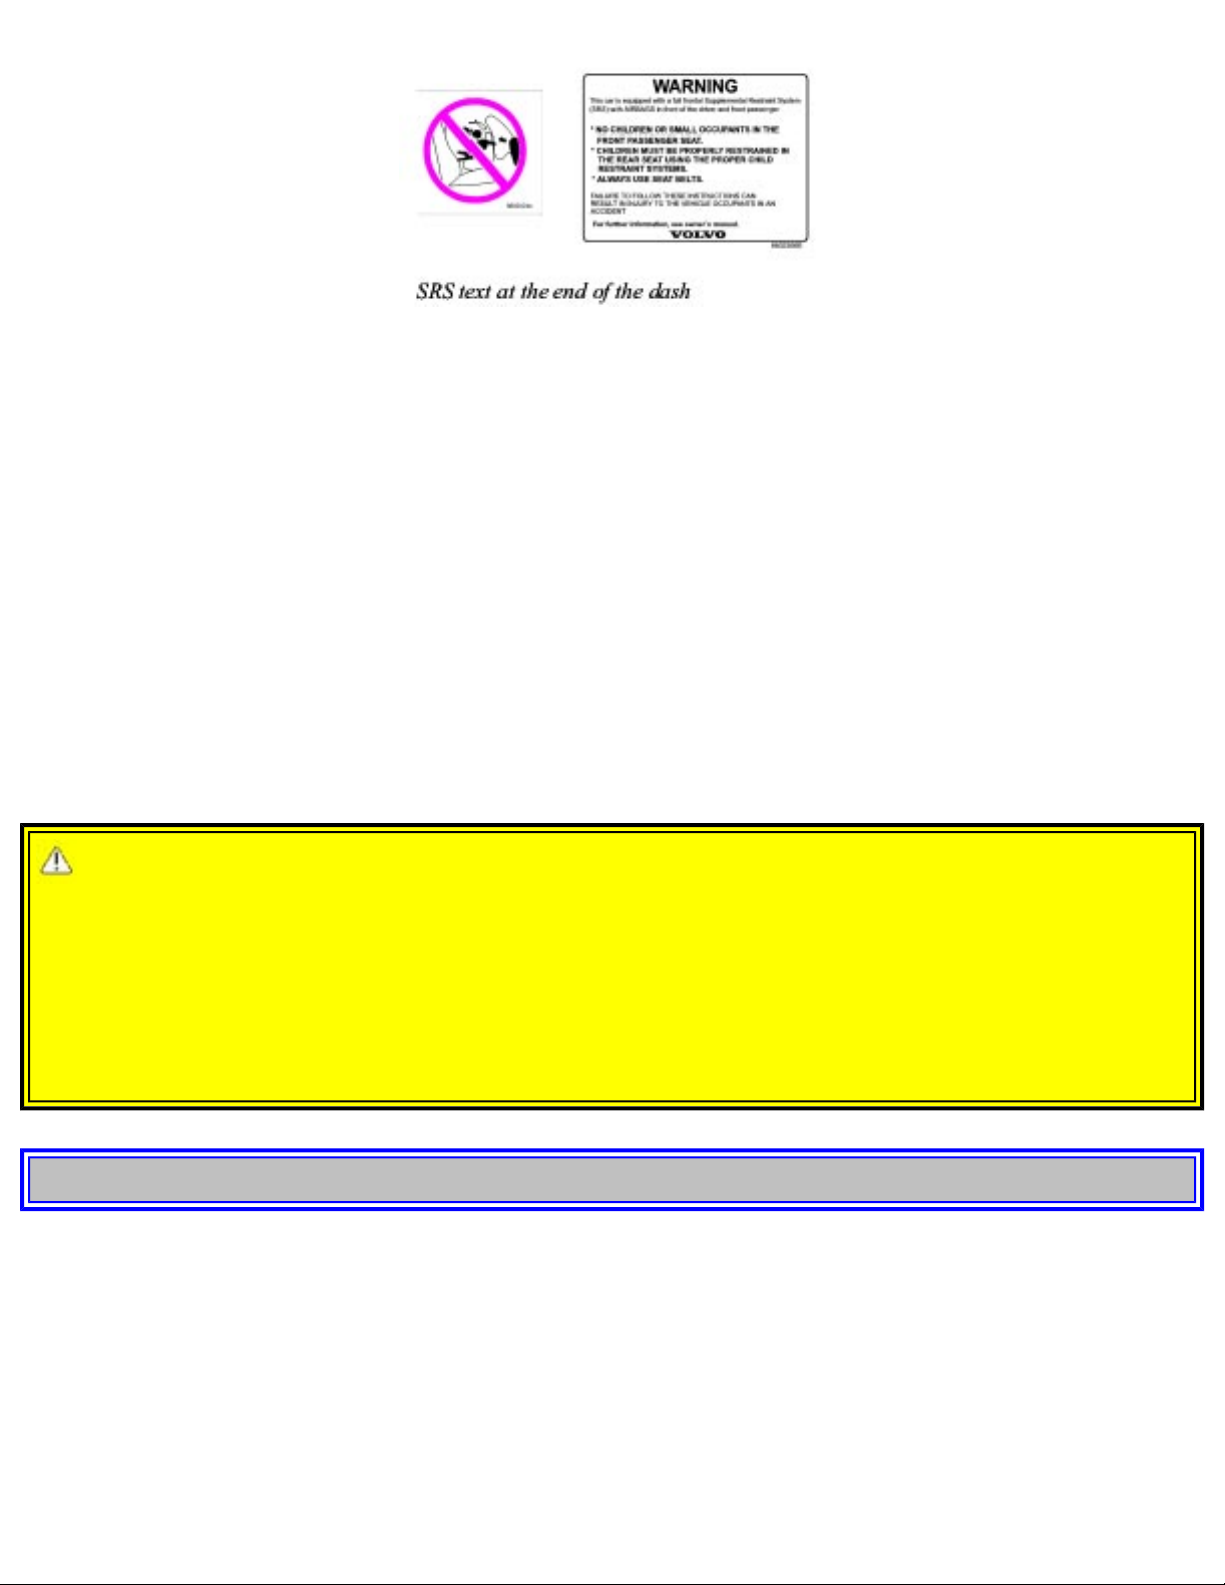
pretensioners. The SRS system is indicated by the "SRS" embossed on the steering wheel pad and above
the glove compartment, and by decals on both sun visors and on the front and far right side of the dash.
The airbags are folded and located in the steering wheel hub and above the glove compartment.
Deployment:
The SRS airbags are designed to deploy during certain frontal or front-angular collisions, impacts, or
decelerations, depending on the crash severity, angle, speed and object impacted. The airbags may also
deploy in certain non-frontal collisions where rapid deceleration occurs.
The airbag system includes gas generators (1) surrounded by the airbags (2) and front seat belt
pretensioners for both of the front seats. To deploy the system, the sensor (3) activates the gas generators
causing the airbags to be inflated with nitrogen gas.
As the movement of the seats' occupants compresses the airbags, some of the gas is expelled at a
controlled rate to provide better cushioning. Both seat belt pretensioners also deploy, minimizing any
seat belt slack.The entire process, including inflation and deflation of the airbags, takes approximately
two-tenths of a second.
WARNING!
The SRS is designed to help prevent serious injury. Deployment occurs very quickly and with
considerable force. During normal deployment and depending on variables such as seating position,
one may experience abrasions, bruises, swellings, or other injuries as a result of airbag(s) deployment.
Never try to repair any part of the SRS or SIPS bag systems yourself. Any interference in the system
could cause malfunction and serious injury. All work on these systems should be performed by an
authorized Volvo retailer.
file:///K|/ownersdocs/2003/2003_XC90/03xc90_01a.htm (11 of 12)12/30/2006 4:18:49 PM
Page 19

2003 VOLVO XC90
Contents | Top of Page
file:///K|/ownersdocs/2003/2003_XC90/03xc90_01a.htm (12 of 12)12/30/2006 4:18:49 PM
Page 20
2003 VOLVO XC90
pg. 10 Safety
Side airbags (SIPS airbags)
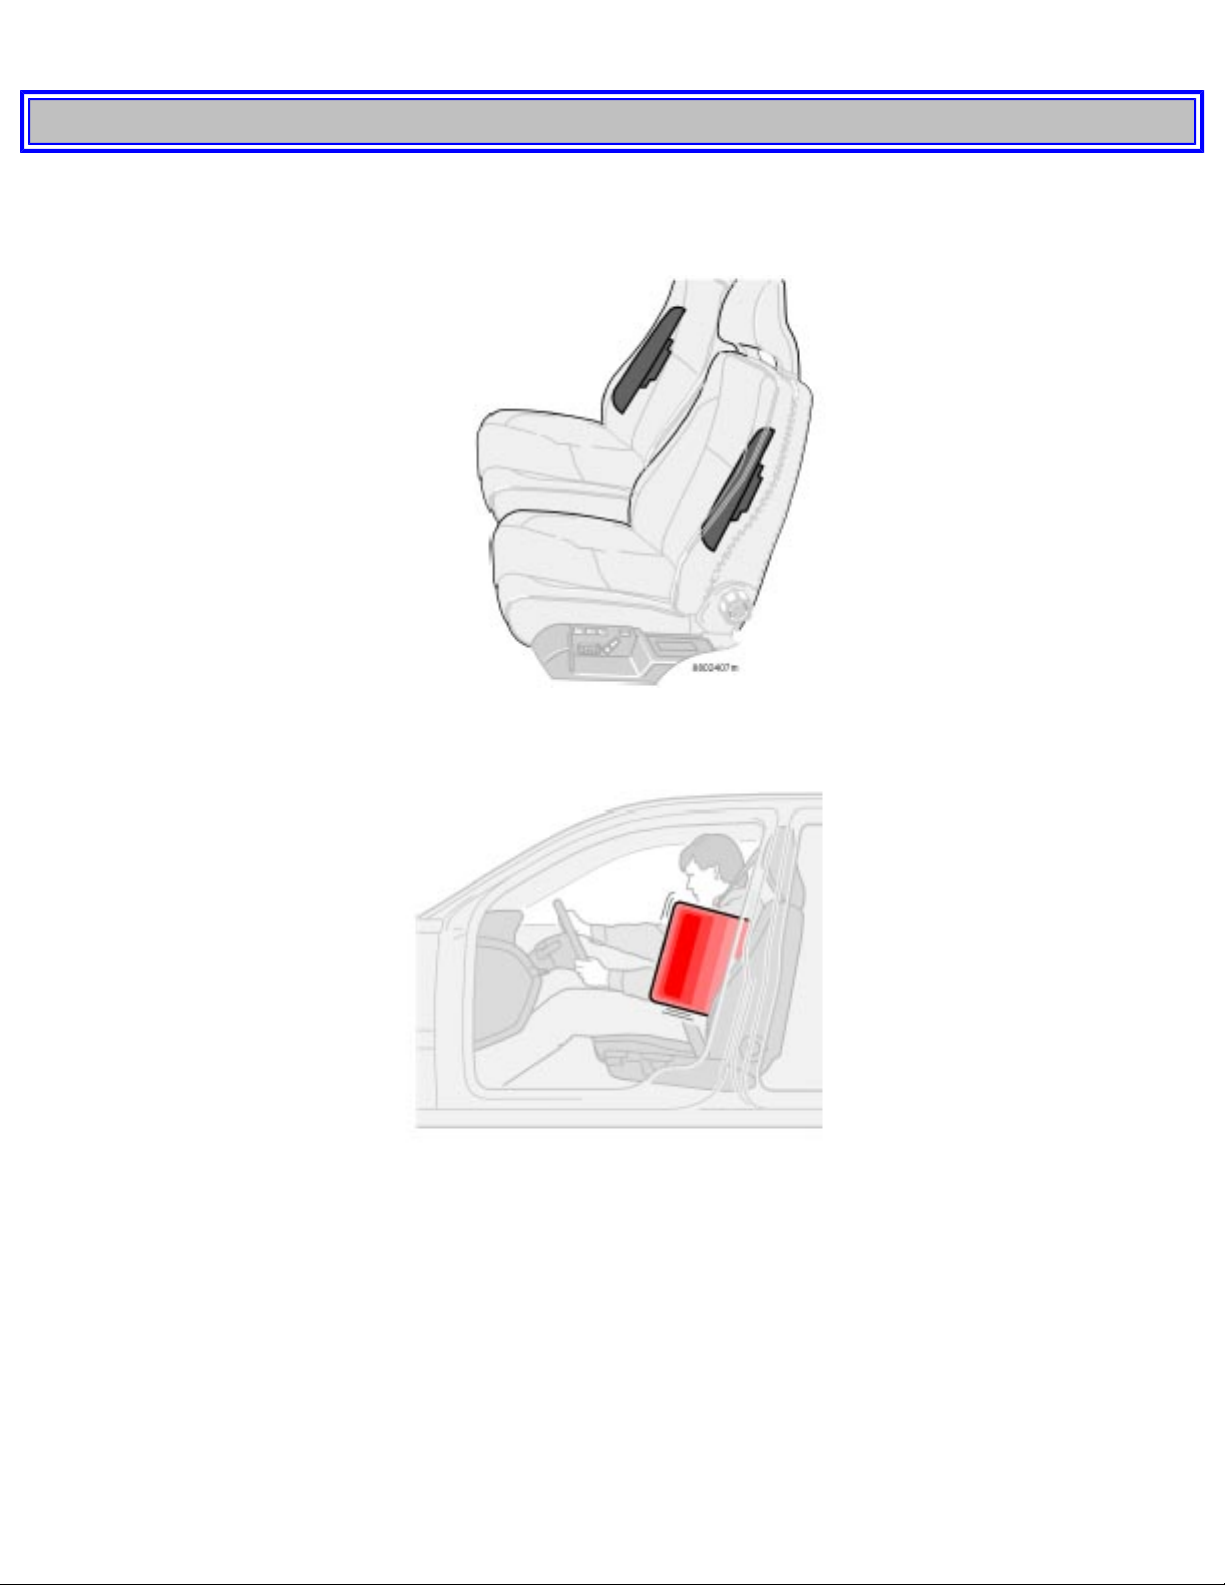
SIPS airbag*
SIPS airbag (front seats only)
As an enhancement to the structural Side Impact Protection System built into your vehicle, the vehicle is
also equipped with Side Impact Protection System (SIPS) airbags. The SIPS airbag system consists of
airbag modules built into the sides of both front seat backrests, wires and gas generators/sensor units
(see illustration on next page).
The SIPS airbag system is designed to help increase occupant protection in the event of certain side
impact collisions. The SIPS airbags are designed to deploy only during certain side-impact collisions,
depending on the crash severity, angle, speed and point of impact. The airbags are not designed to
deploy in all side impact situations.
file:///K|/ownersdocs/2003/2003_XC90/03xc90_01b.htm (1 of 15)12/30/2006 4:18:50 PM
Page 21
2003 VOLVO XC90
NOTE: SIPS airbag deployment (one airbag) occurs only on the side of the vehicle affected by the
impact.The airbags are not designed to deploy in all side impact situations.
*A SIPS airbag ' decal is also located at the end of the instrument panel on the driver's side of the
vehicle.
WARNING!
● The SIPS airbag system is a supplement to the Side Impact Protection System and the three-point
seat belt system. It is not designed to deploy during collisions from the front or rear of the vehicle,
and will only deploy in certain rollover situations.
● The use of seat covers on the front seats may impede SIPS airbag deployment.
● No objects, accessory equipment or stickers may be placed on, attached to or installed near, the
SIPS airbag system or in the area affected by SIPS airbag deployment (see illustration in the center
column above).
● Never try to open or repair any components of the SIPS airbag system. This should be done only
by an authorized Volvo service technician.
● In order for the SIPS airbag to provide its best protection, both front seat occupants should sit in an
upright position with the seat belt properly fastened.
● Failure to follow these instructions can result in injury to the occupants of the vehicle in the event
of an accident.
pg. 11 Safety
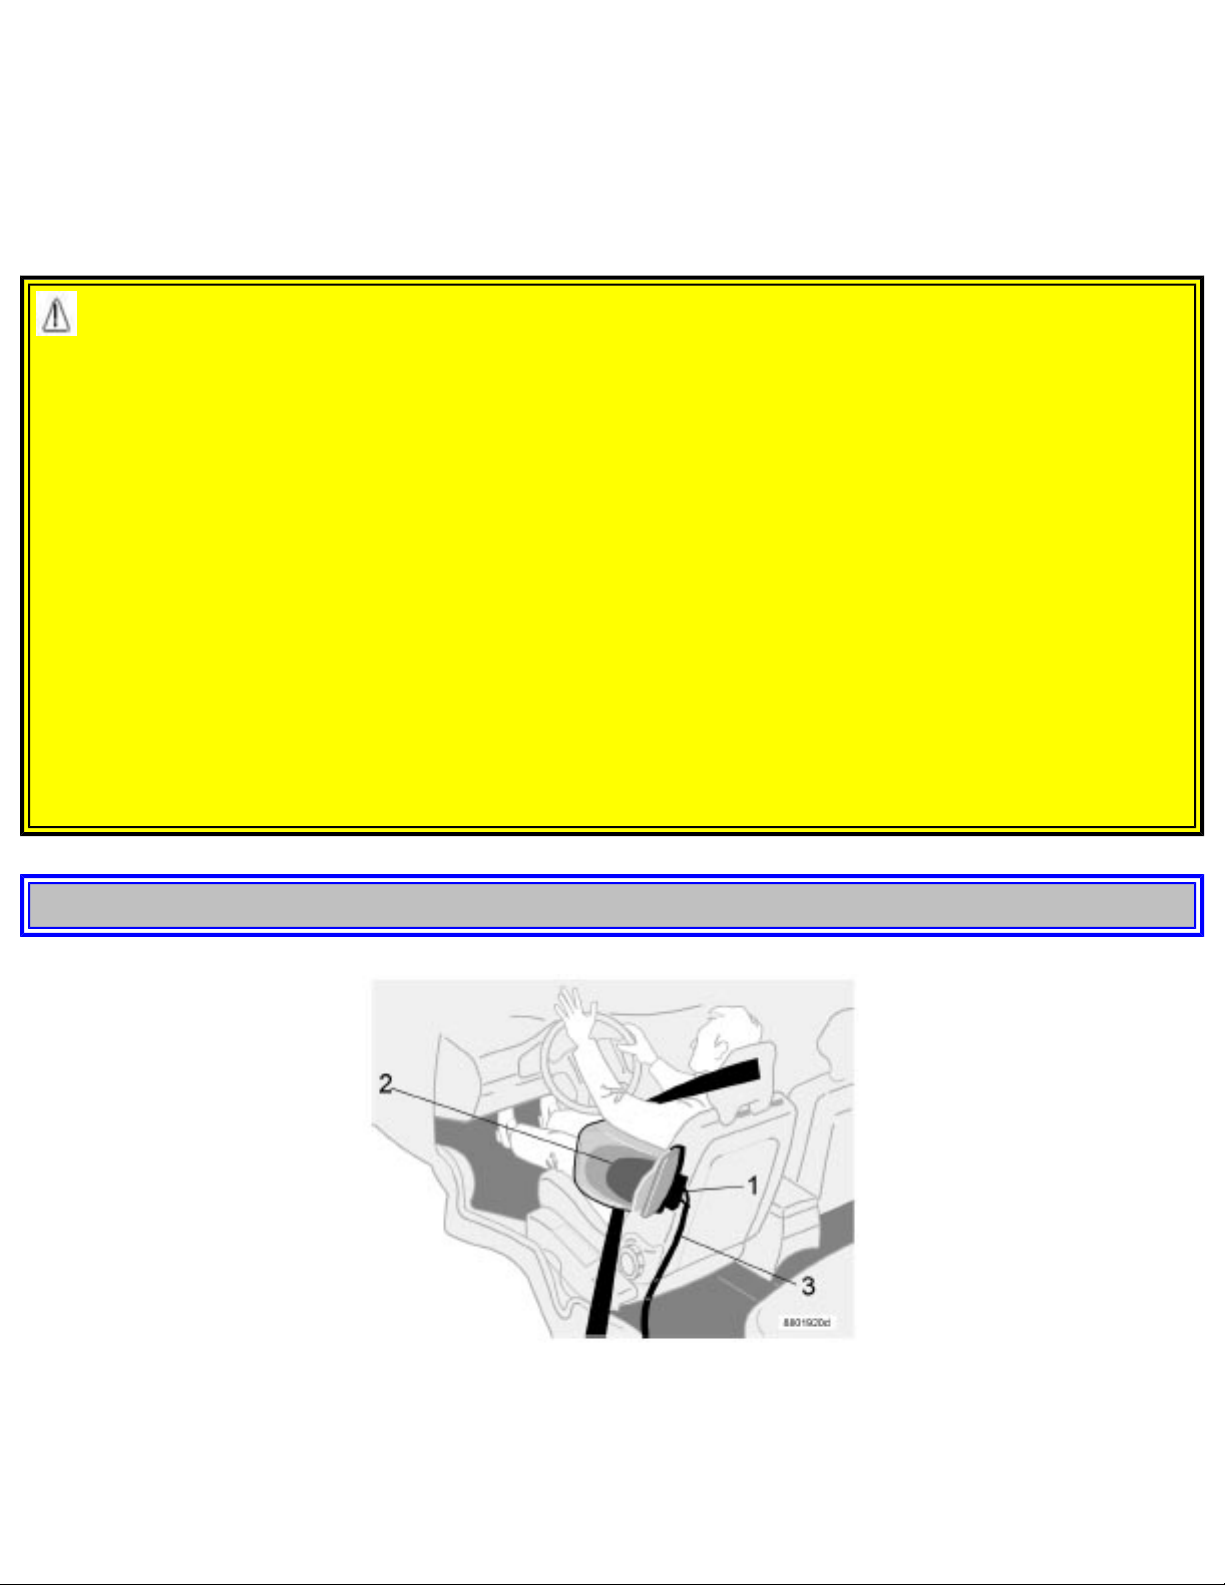
The SIPS airbag system
This system consists of a gas generator (1), the side airbags (2), and electronic sensors/cables (3).
file:///K|/ownersdocs/2003/2003_XC90/03xc90_01b.htm (2 of 15)12/30/2006 4:18:50 PM
Page 22
2003 VOLVO XC90
pg. 12 Safety
Inflatable Curtain (IC)
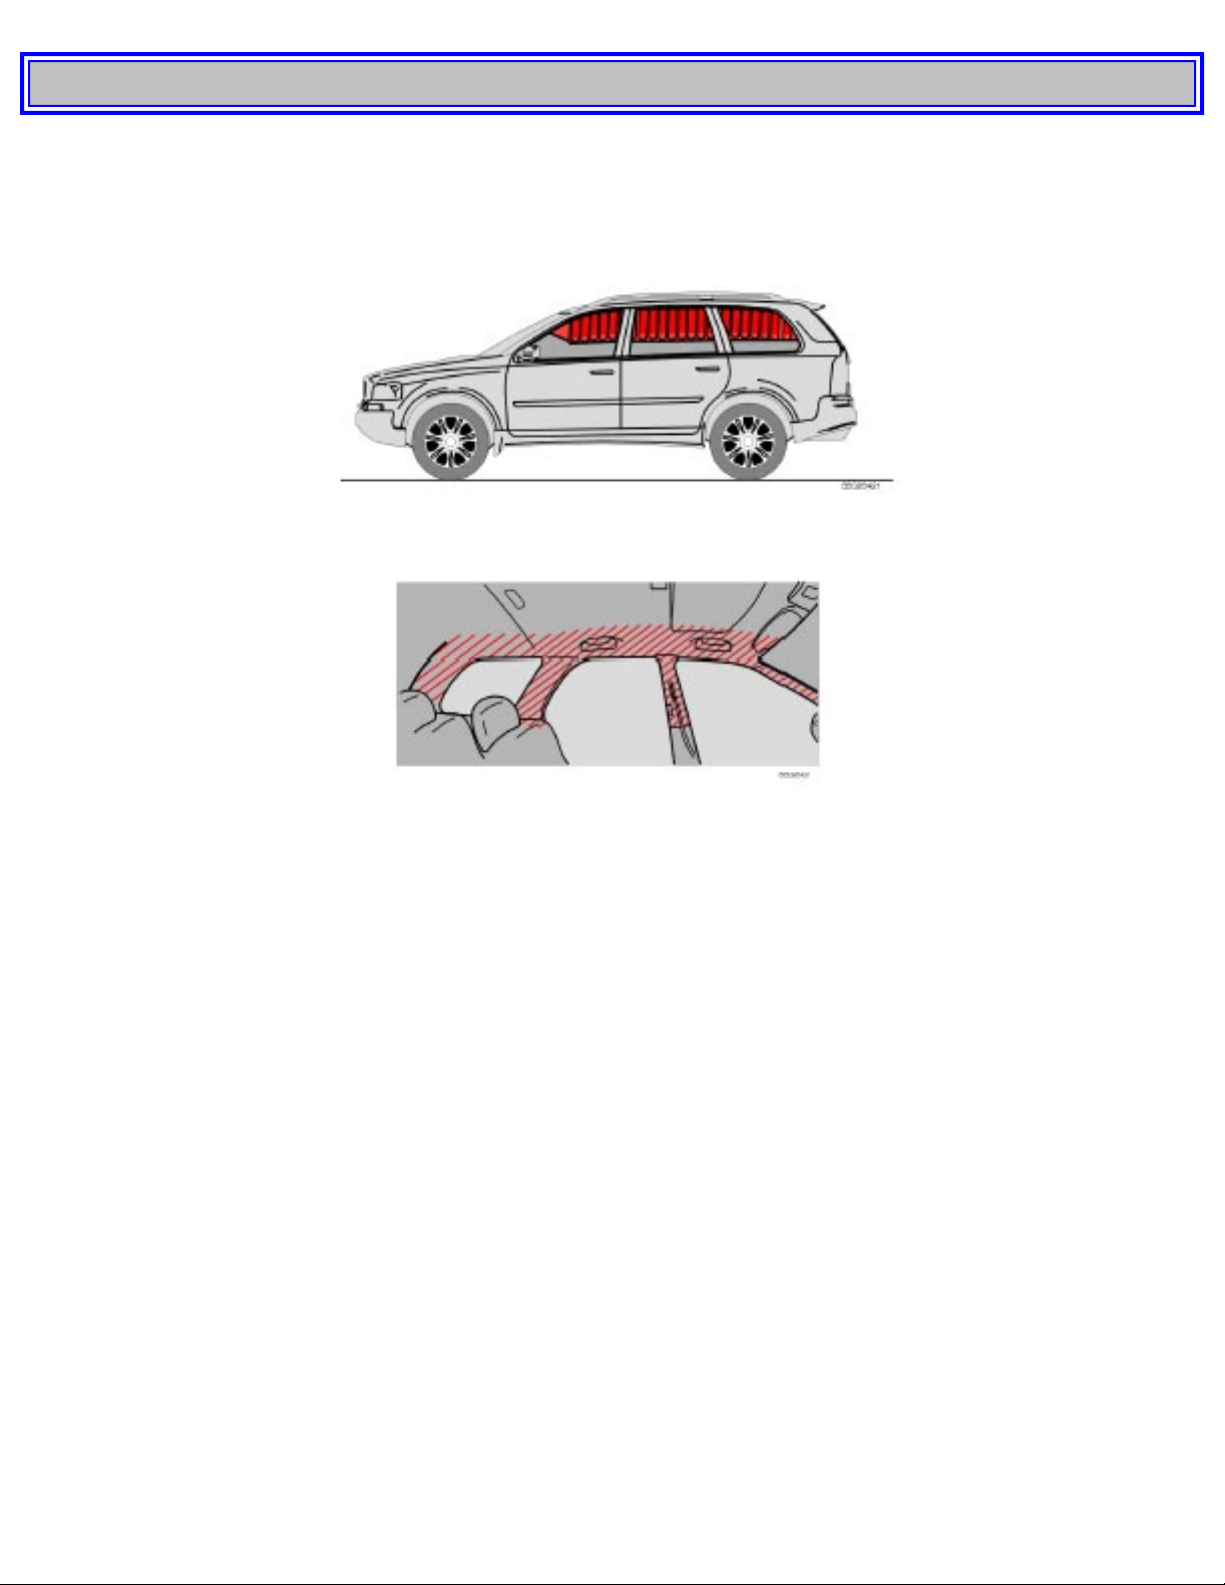
7-seat model shown
Volvo Inflatable Curtain (IC)
This system consists of Inflatable Curtains located along the sides of the roof liners, stretching from the
front side windows to the rear edge of the rear side windows. It is designed to help protect the heads of
the occupants of the front seats and the occupant of the outboard rear seating positions, including the
outboard passenger in the optional third row of seats in certain side impact collisions. The Inflatable
Curtains in the Volvo XC90 are also designed to help protect the occupants of the vehicle in a roll-over
situation, and to help prevent them from being thrown from the vehicle if a roll-over occurs.
NOTE:
In 5-seat models, the Inflatable Curtains extend to protect both rows of seats. 7-seat models, they extend
to protect all three rows.
By design, the IC system deploys only on the side of the vehicle affected by the impact. However, in
certain side impacts, or in a rollover situation, BOTH the Inflatable Curtains (IC) and the Side Impact
Airbag System (SIPS-bag) will deploy, whereas, in some cases, ONLY the Inflatable Curtain (IC) will
deploy. In cases where BOTH the IC and the SIPS-bag deploy, deployment will occur simultaneously.
If the Inflatable Curtain deploys, it remains inflated for approximately 5 seconds.
file:///K|/ownersdocs/2003/2003_XC90/03xc90_01b.htm (3 of 15)12/30/2006 4:18:50 PM
Page 23

2003 VOLVO XC90
WARNING!
The IC system is a supplement to the Side Impact Protection System. It is not designed to deploy
during collisions from the front or rear of the vehicle. The Inflatable Curtains are designed to deploy
only during certain side-impact collisions, depending on the crash severity, angle, speed and impact.
The Inflatable Curtains are not designed to deploy in all side impact situations. Never try to open or
repair any components of the IC system. This should be done only by an authorized Volvo service
technician. In order for the IC to provide its best protection, both front seat occupants and all
outboard rear seat occupants should sit in an upright position with the seat belt properly fastened;
adults using the seat belt and children using the proper child restraint system. Only adults should sit in
the front seats. Children must never be allowed in the front passenger seat. See page 20 for
guidelines. Failure to follow these instructions can result in injury to the vehicle occupants in an
accident.
When the backrest(s) in the rear seat(s) are folded down, the vehicle should not be loaded to a level
higher than 2 inches (5 cm) below the upper edge of the side windows. Objects placed higher than
this level could impede the function of the Inflatable Curtain.
pg. 13 Safety
Roll-over Protection System
Volvo's Roll-over Protection System has been developed to help prevent the vehicle from rolling over in
the event of sudden evasive maneuvers, skids, etc and to offer enhanced protection if a roll-over occurs.
The system works in two ways:
● The stabilizing system Roll Stability Control (RSC) acts to minimize body roll.
● The system provides additional protection with a reinforced body, Inflatable Curtains for all outboard
seating positions, and seat belt pretensioners for all seating positions.
RSC uses a gyro-sensor that registers the vehicle's angle of inclination and the speed at which this angle
changes. Using this information, the control module calculates the risk of a roll-over. If there is an
imminent roll-over risk, the Dynamic Stability and Traction Control (DSTC) system is activated, engine
speed is reduced, and the brakes are applied to one or more of the wheels until the vehicle has regained
stability.
If a roll-over occurs, RSC triggers the seat belt pretensioners and then deploys the Inflatable Curtains
(which remain inflated for approximately 5 seconds). These curtains are designed to follow the contours
of the side windows so that they position themselves between the occupants' heads and the sides of the
vehicle.
pg. 14 Safety
file:///K|/ownersdocs/2003/2003_XC90/03xc90_01b.htm (4 of 15)12/30/2006 4:18:50 PM
Page 24
2003 VOLVO XC90
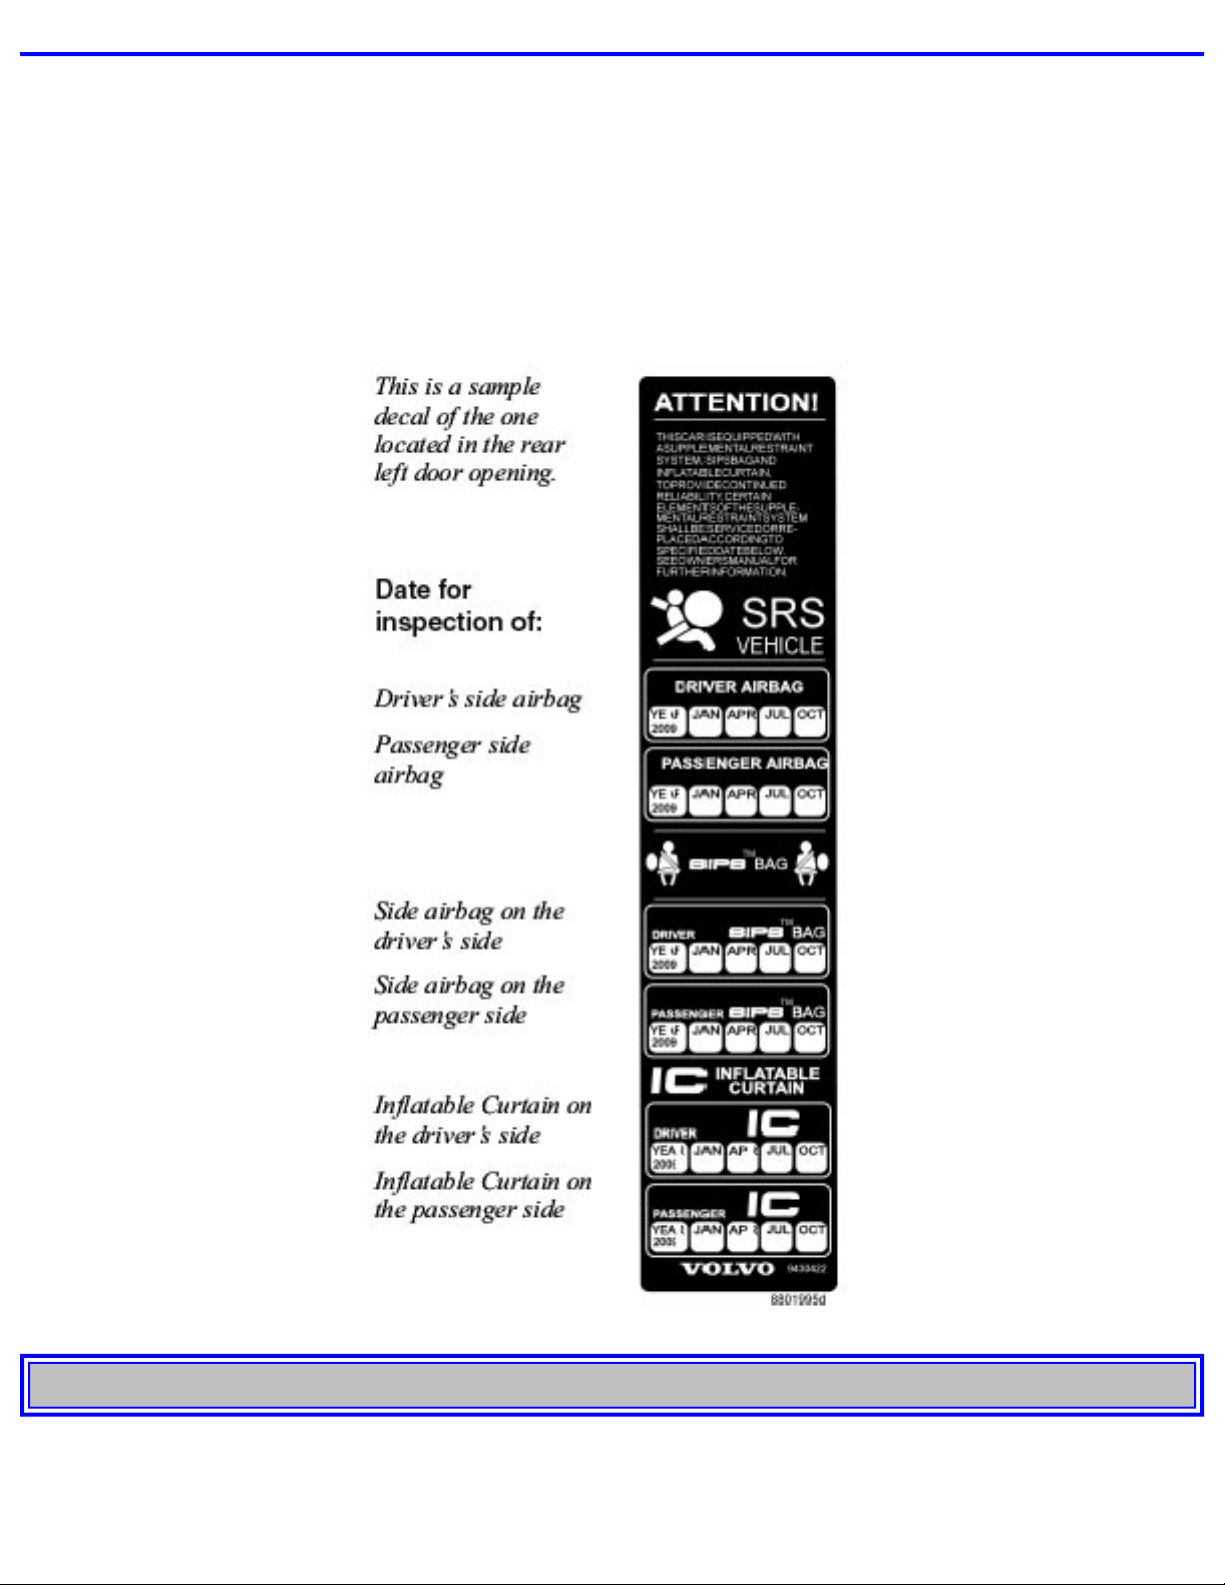
Inspection of airbags, Inflatable Curtains and seat belt
pretensioners
The year and month specified on the decal in the door pillar(s) is the date when you should contact your
Volvo retailer to inspect and, if necessary, replace the airbags and seat belt pretensioners. If you have
any questions concerning either system, contact an authorized Volvo retailer.
pg. 15 Safety
Whiplash Protection System (WHIPS)
file:///K|/ownersdocs/2003/2003_XC90/03xc90_01b.htm (5 of 15)12/30/2006 4:18:50 PM
Page 25
2003 VOLVO XC90
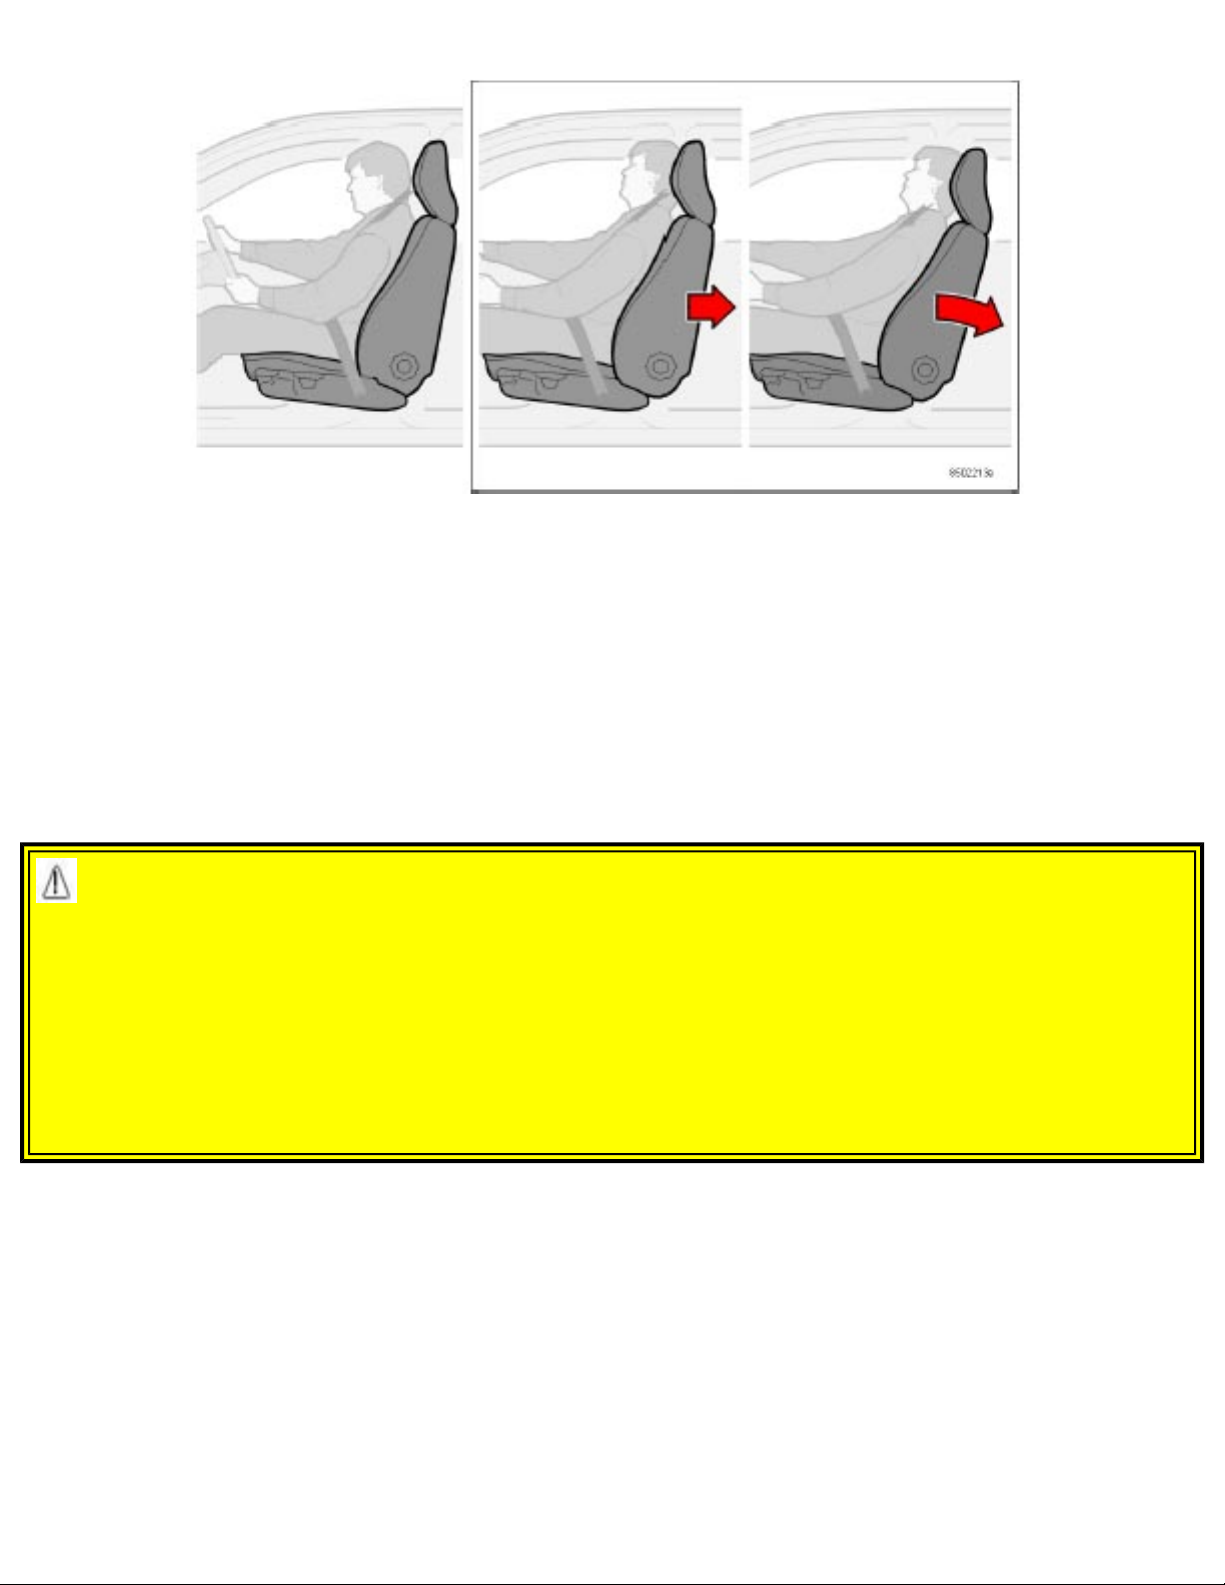
Whiplash Protection System (WHIPS) - front seats only
WHIPS consists of specially designed hinges and brackets on the front seat backrests and head restraints
designed to help absorb some of the energy generated in a rear-end collision.
In the event of a collision of this type, the hinges and brackets of the front seat backrests are designed to
change position slightly to allow the backrest/head restraint to help support the occupant's head before
moving slightly rearward. This movement helps absorb some of the forces that could result in the
whiplash effect.
WARNING!
WHIPS is designed to supplement the other safety systems in your vehicle. For this system to
function properly, the three-point seat belt must be worn. Please be aware that no system can prevent
all possible injuries that may occur in an accident.
If your vehicle has been involved in a collision, the front seat backrests must be inspected by an
authorized Volvo retailer even, if the seats appear to be undamaged. Certain components in the
WHIPS system may need to be replaced. Do not attempt to service any component in the WHIPS
system yourself.
file:///K|/ownersdocs/2003/2003_XC90/03xc90_01b.htm (6 of 15)12/30/2006 4:18:50 PM
Page 26
2003 VOLVO XC90
WARNING!
If the rear seat backrests are folded down, cargo must be secured to prevent it from sliding forward
against the front seat backrests in the event of a collision from the rear. This could interfere with the
action of the WHIPS system.
The WHIPS system is designed to function in certain collisions from the rear, depending on the crash
severity, angle and speed.
Occupants in the front seats must never sit out of position. The occupant's back must be as upright as
comfort allows and be against the seat back with the seat belt properly fastened.
pg. 16 Safety
WARNING!
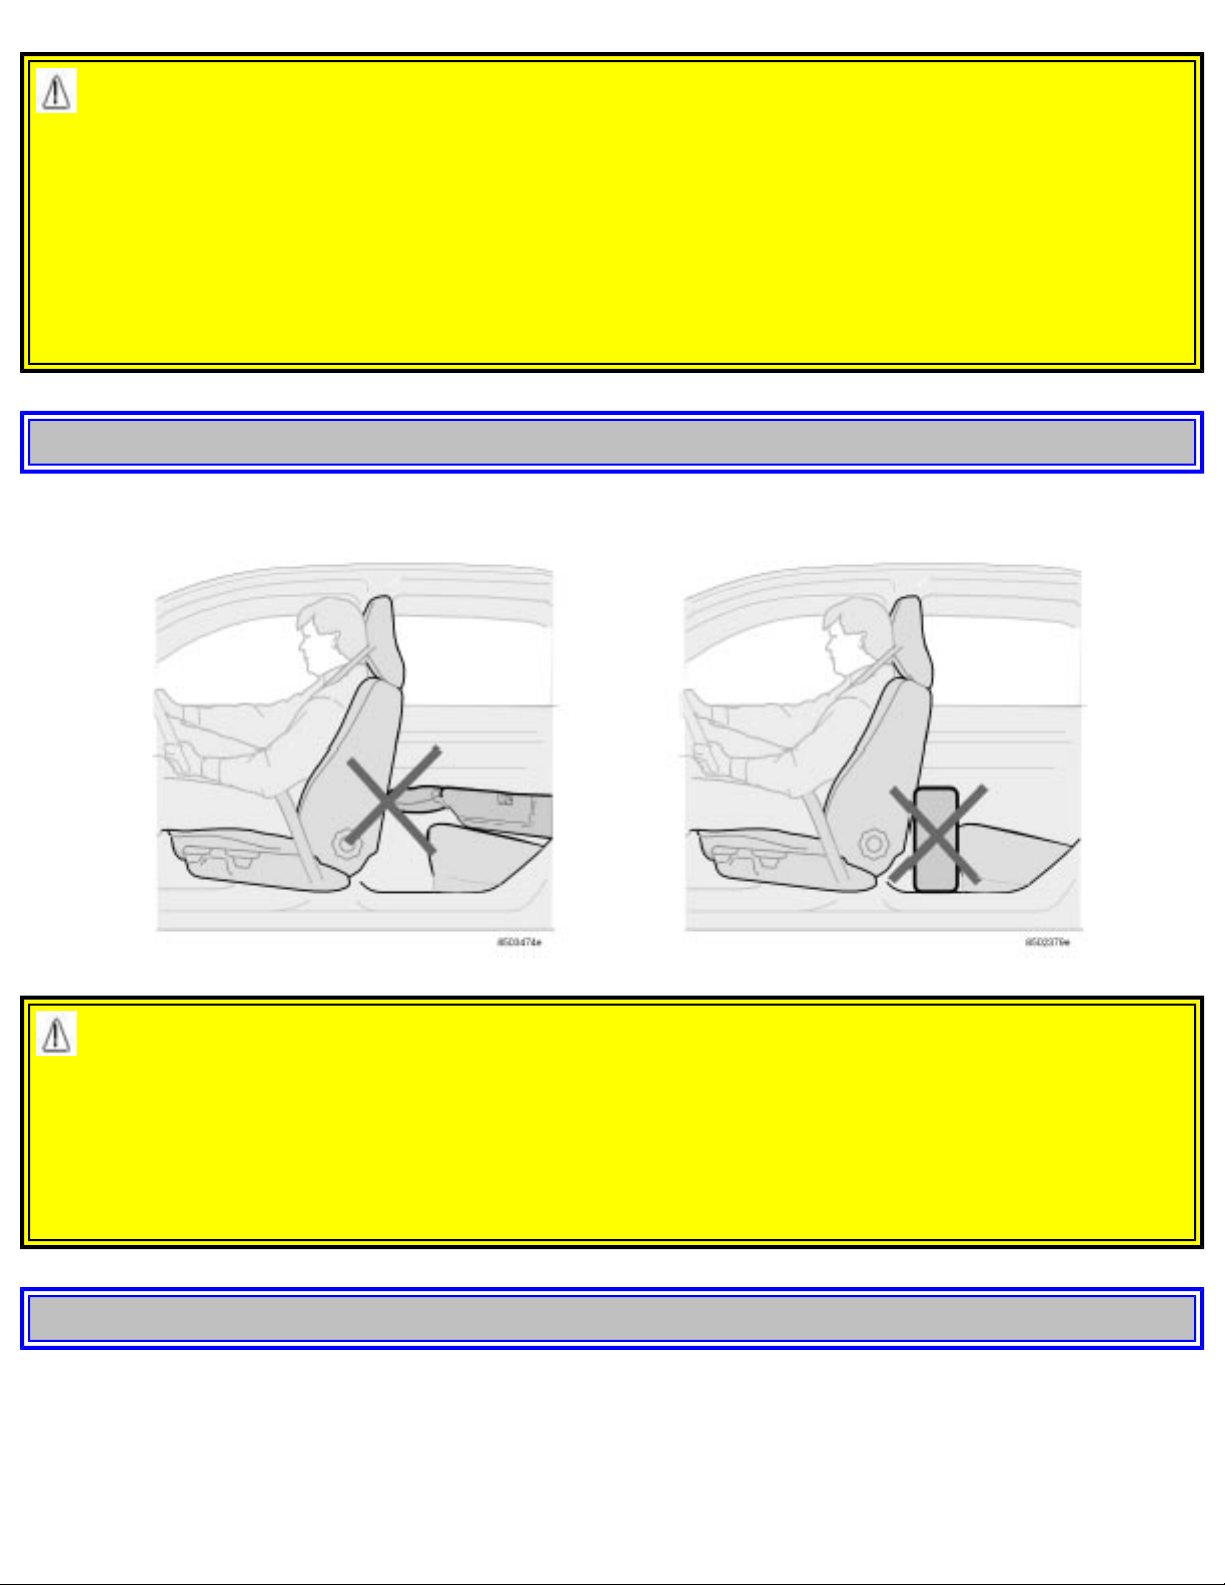
Any contact between the front seat backrests and the folded rear seat could impede the function of the
WHIPS system. If the rear seat is folded down, the occupied front seats must be adjusted forward so
that they do not touch the folded rear seat.
Boxes, suitcases, etc. wedged behind the front seats (see illustration above) could impede the function
of the WHIPS system.
pg. 17 Safety
Child safety
Volvo recommends the proper use of restraint systems for all occupants including children. Remember
file:///K|/ownersdocs/2003/2003_XC90/03xc90_01b.htm (7 of 15)12/30/2006 4:18:50 PM
Page 27

2003 VOLVO XC90
that, regardless of age and size, a child should always be properly restrained in a vehicle.
Your vehicle is also equipped with ISOFIX attachments, which make it more convenient to install child
seats (see
page 18).
Restraint systems for children are designed to be secured in the vehicle by lap belts or the lap portion of
a lap-shoulder belt. Such child restraint systems can help protect children in vehicles in the event of an
accident only if they are used properly. However, children could be endangered in a crash if the child
restraints are not properly secured in the vehicle. Failure to follow the installation instructions for your
child restraint can result in your child striking the vehicle's interior in a sudden stop.
Holding a child in your arms is NOT a suitable substitute for a child restraint system. In an accident, a
child held in a person's arms can be crushed between the vehicle's interior and an unrestrained person.
The child could also be injured by striking the interior, or by being ejected from the vehicle during a
sudden maneuver or impact. The same can also happen if the infant or child rides unrestrained on the
seat. Other occupants should also be properly restrained to help reduce the chance of injuring or
increasing the injury of a child. All states and provinces have legislation governing how and where
children should be carried in a vehicle. Find out the regulations existing in your state or province. Recent
accident statistics have shown that children are safer in rear seating positions than front seating positions
when properly restrained. A child restraint system can help protect a child in a vehicle. Here's what to
look for when selecting a child restraint system:
● It should have a label certifying that it meets applicable Federal Motor Vehicle Safety Standards
(FMVSS 213) - or in Canada, CMVSS 213.
● Make sure the child restraint system is approved for the child's height, weight and development - the
label required by the standard or regulation, or instructions for infant restraints, typically provide this
information.
● In using any child restraint system, we urge you to carefully look over the instructions that are
provided with the restraint. Be sure you understand them and can use the device properly and safely in
this vehicle. A misused child restraint system can result in increased injuries for both the infant or child
and other occupants in the vehicle.
When a child has outgrown the child safety seat, you should use the rear seat with the standard seat belt
fastened. The best way to help protect the child here is to place the child on a cushion so that the seat
belt is properly located on the hips (see
page 2). Legislation in your state or province may mandate the
use of a child seat or cushion in combination with the seat belt, depending on the child's age and/or size.
Please check local regulations.
A specially designed and tested booster cushion (not available in Canada) for children between the age
of 3 and approximately 10 years, weighing 33-80 lb (15-36 kg) and 38-54 inches (97-137 cm) in height,
can be obtained from your Volvo retailer.
file:///K|/ownersdocs/2003/2003_XC90/03xc90_01b.htm (8 of 15)12/30/2006 4:18:50 PM
Page 28

2003 VOLVO XC90
WARNING!
● Do not use child safety seats or child booster cushions/backrests in the front passenger's seat. We
also recommend that children under 4 feet 7 inches (140 cm) in height who have outgrown these
devices sit in the rear seat with the seat belt fastened.
● Keep vehicle doors and the tailgate locked and keep keys out of a child's reach. Unsupervised
children could lock themselves in an open tailgate and risk injury. Children should be taught not to
play in vehicles.
● On hot days, the temperature in the vehicle interior can rise very quickly. Exposure to these high
temperatures for even a short period of time can cause heat-related injury or death. Small children are
particularly at risk.
pg. 18 Safety
Child safety (contd)
Isofix attachments
ISOFIX fasteners and seat guides
ISOFIX fasteners are installed in the second row of seats in the outboard positions. One set of ISOFIX
guides is also provided. Consult your Volvo retailer for more information on child safety accessories.
When installing child seats in the second row of seats (in seven-seat models), we recommend that the
seats in this row be moved to their rearmost position.
file:///K|/ownersdocs/2003/2003_XC90/03xc90_01b.htm (9 of 15)12/30/2006 4:18:50 PM
Page 29
2003 VOLVO XC90
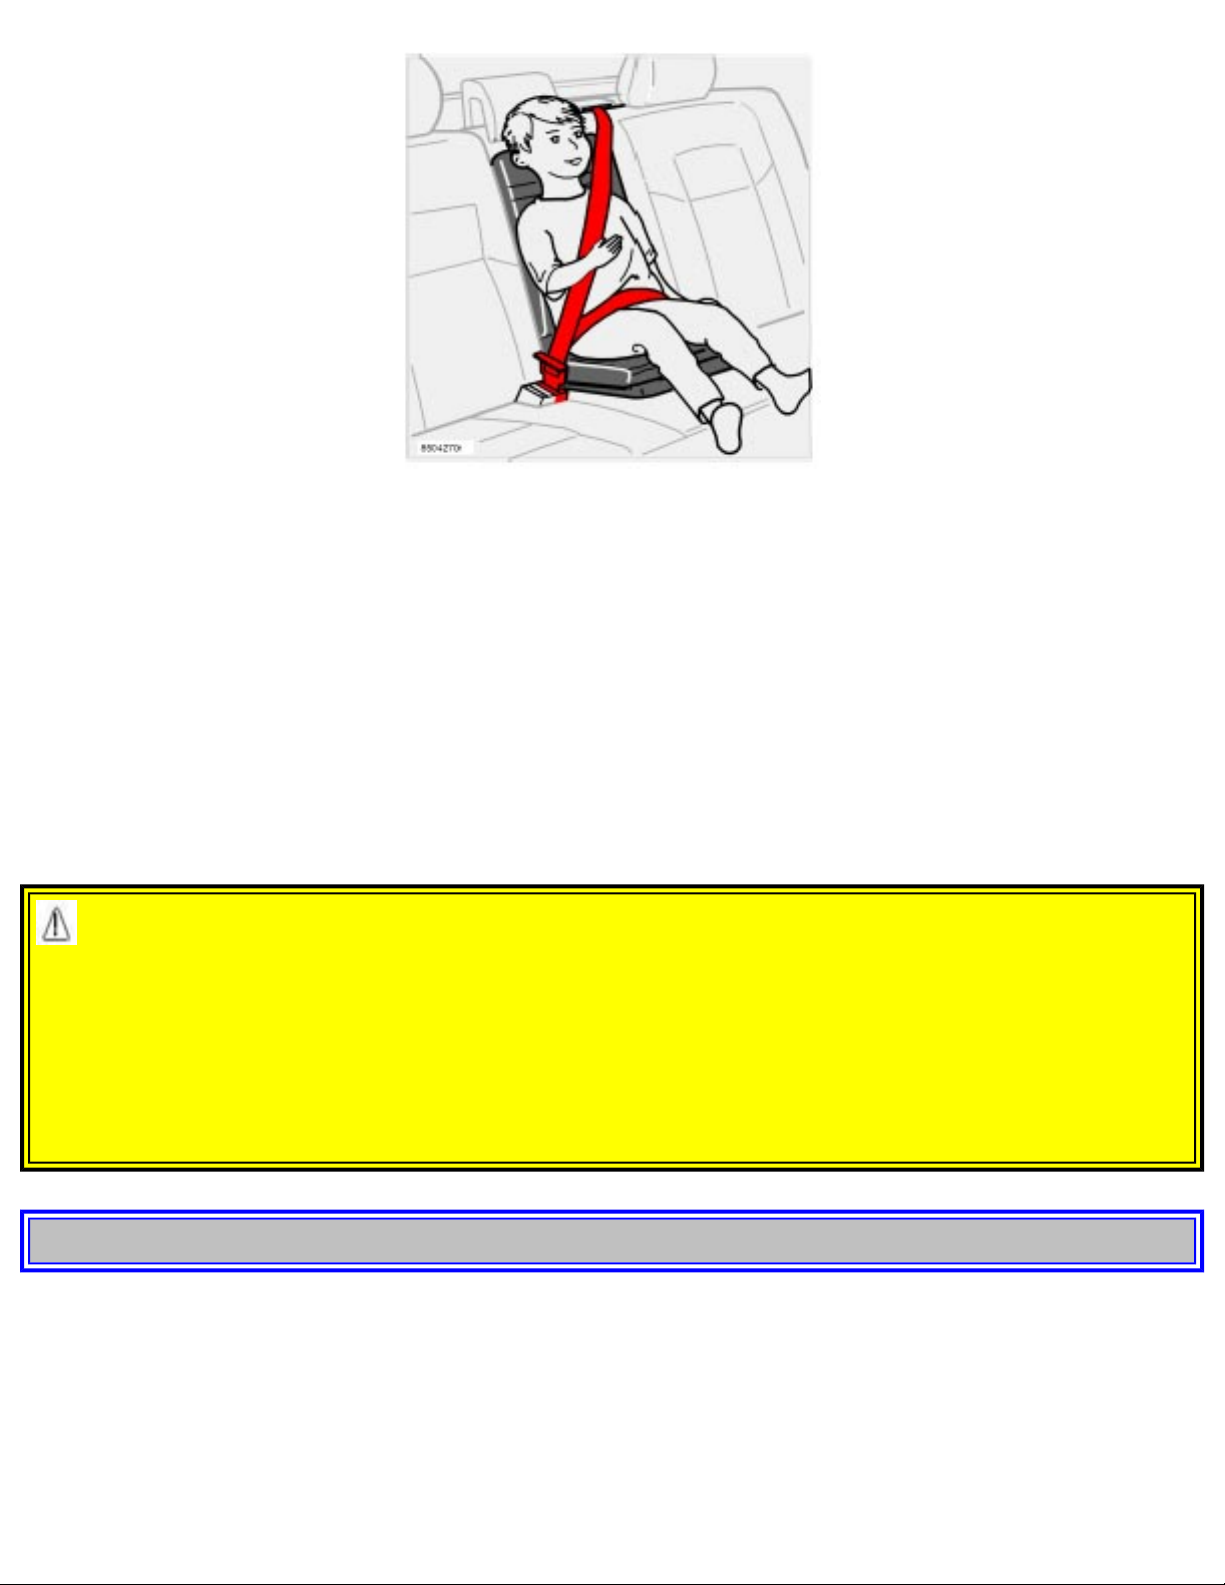
Integrated child booster cushion (option)
Volvo's own integrated booster cushion has been specially designed to help safeguard a child seated in
the rear seat. When using an integrated booster cushion, the child must be secured with the vehicle's
three-point seat belt. This child seat is designed for use only by children who weigh between 33 and 80
lb (15 and 36 kg) and whose height is between 38 and 54 in (97 and 137 cm).
The child should be properly seated on the booster cushion. The hip section of the three-point seat belt
must fit snugly across the child's hips, not across the stomach. The shoulder section of the three-point
seat belt should be positioned across the chest and shoulder (see illustration). The shoulder belt must
never be placed behind the child's back or under the arm.
WARNING!
Failure to follow the manufacturer's instructions on the use of this child restraint system can result in
your child striking the vehicle's interior during a sudden stop or crash. In the event of a collision
while the integrated booster cushion was occupied, the entire booster cushion and seat belt must be
replaced. The booster cushion should also be replaced if it is badly worn or damaged in any way. This
work should be performed by an authorized Volvo retailer only. The booster cushion should be
cleaned while in place in the vehicle if possible. If not, please consult your Volvo retailer.
pg. 19 Safety
file:///K|/ownersdocs/2003/2003_XC90/03xc90_01b.htm (10 of 15)12/30/2006 4:18:50 PM
Page 30
2003 VOLVO XC90
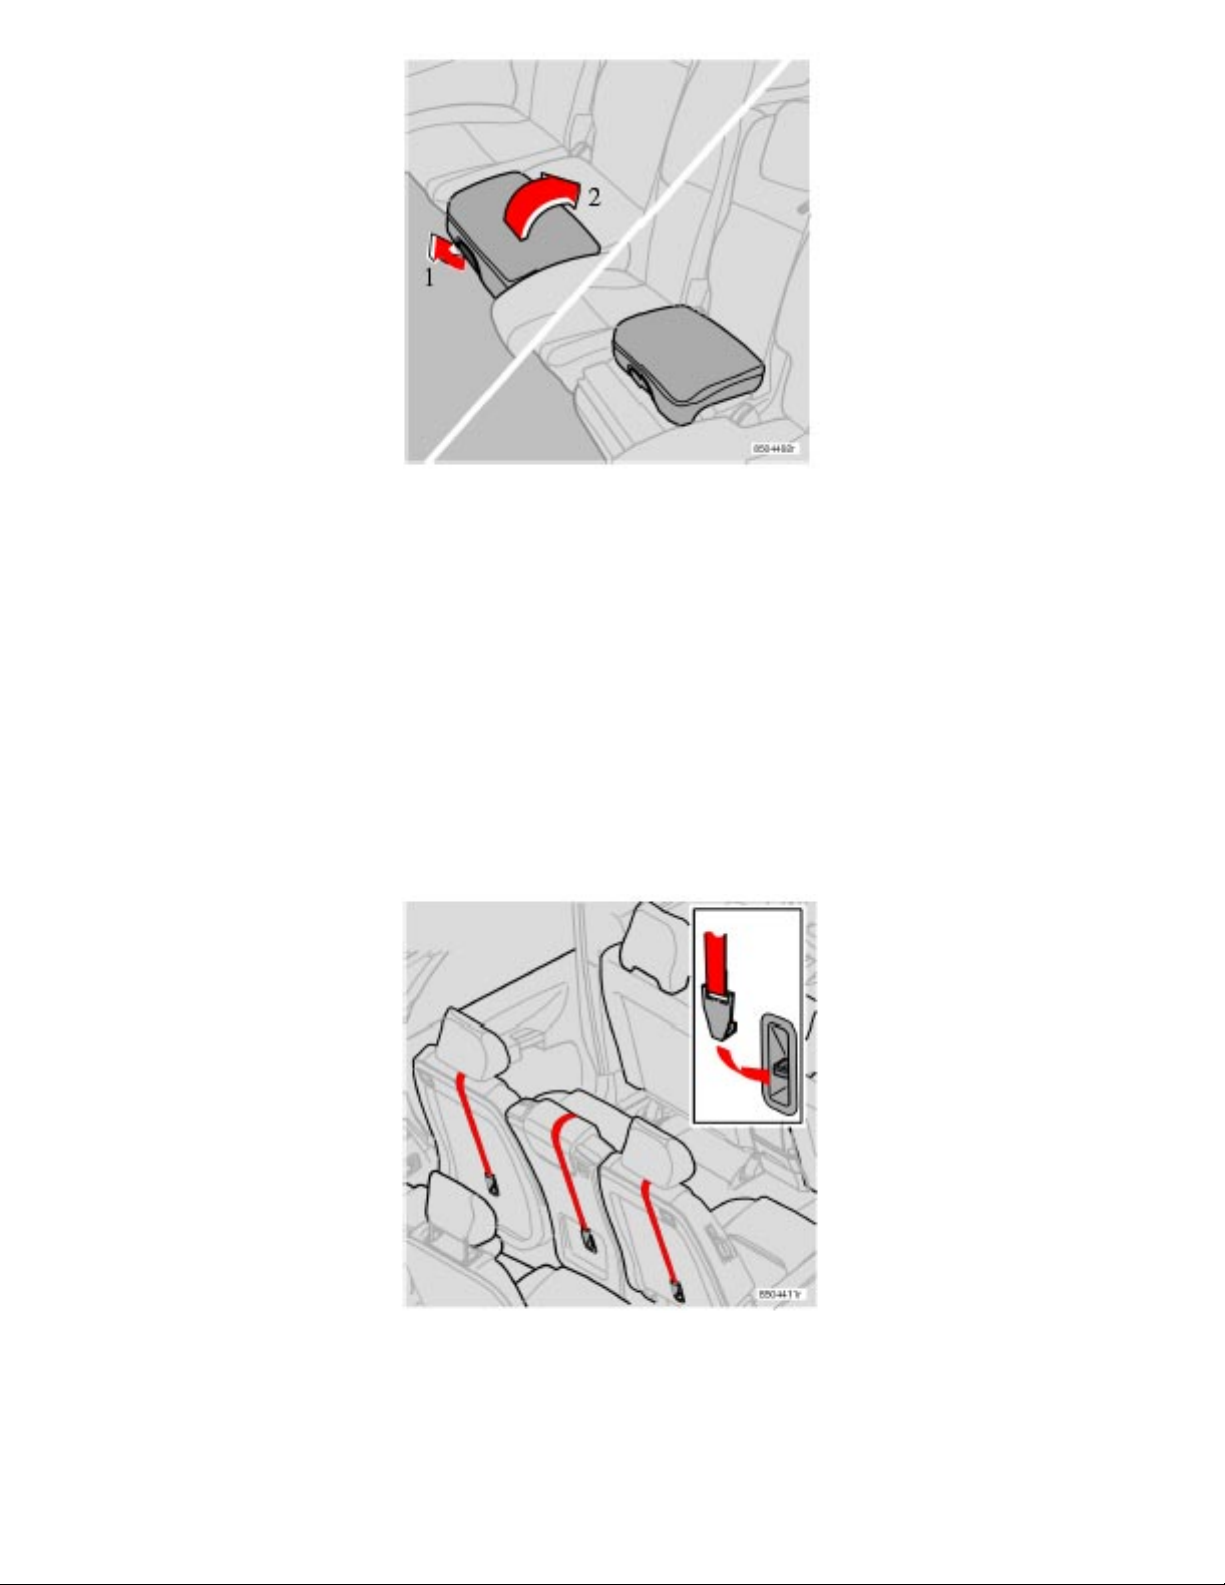
Integrated booster cushion Raising
● Pull the handle at the front of the cushion (1) forward.
● With both hands push the cushion rearward (2).
● Push the cushion until it locks in place.
Lowering
● Pull the handle at the front of the cushion (1) forward.
● Pull the seat forward and press it down until it locks in place.
The booster cushion must be pressed down before the backrest can be folded down.
Child restraint anchorages
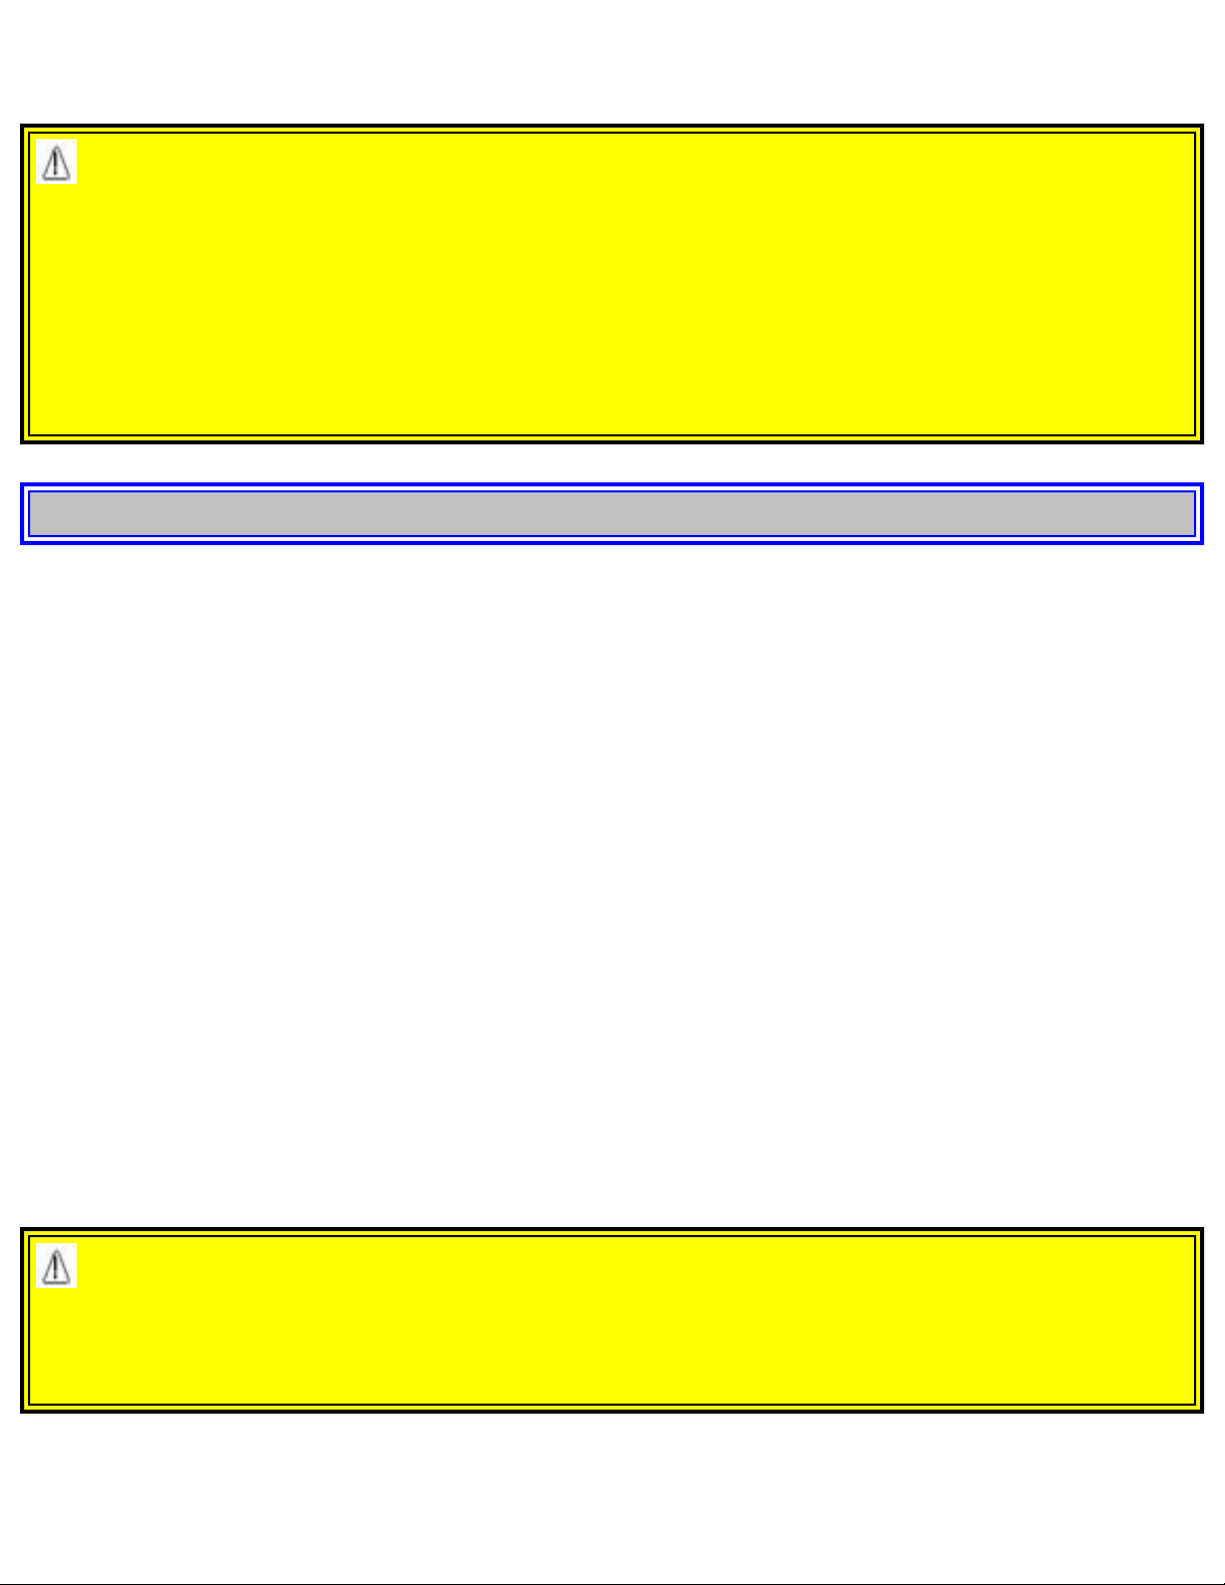
Child restraint anchorages
Volvo vehicles are equipped with child restraint top tether anchorages in the rear seats (second row of
seats in seven-seat models). Refer to the child seat manufacturer's instructions for information on
file:///K|/ownersdocs/2003/2003_XC90/03xc90_01b.htm (11 of 15)12/30/2006 4:18:50 PM
Page 31
2003 VOLVO XC90
securing the child seat.
WARNING!
Child Restraint Anchorages are designed to withstand only those loads imposed by correctly fitted
Child Restraints. Under no circumstances are they to be used for adult seat belts or harnesses. The
anchorages are not able to withstand excessive forces on them in the event of collision if full harness
seat belts or adult seat belts are installed to them. An adult who uses a belt anchored in a Child
Restraint Anchorage runs a great risk of suffering severe injuries should a collision occur. Do not
install rear speakers which would require the removal of the top tether anchors or interfere with the
proper use of the top tether strap.
pg. 20 Safety
Child safety (contd)
Keeping child seats in place (ALR/ ELR*)
To make child seat installation easier, each seat belt (except for the driver's belt) is equipped with a
locking mechanism to help keep the seat belt taut.
When attaching the seat belt to a child seat:
● Attach the seat belt to the child seat according to the child seat manufacturer's instructions.
● Pull the seat belt out as far as possible.
● Insert the seat belt latch plate into the buckle (lock) in the usual way.
● Release the seat belt and pull it taut around the child seat.
A sound from the seat belt retractor will be audible at this time and is normal.
The belt will now be locked in place.
This function is automatically disabled when the seat belt is unlocked and the belt is fully retracted.
WARNING!
Do not use child safety seats or child booster cushions/backrests in the front passenger's seat. We also
recommend that children who have outgrown these devices sit in the rear seat with the seat belt
properly fastened.
Important!
file:///K|/ownersdocs/2003/2003_XC90/03xc90_01b.htm (12 of 15)12/30/2006 4:18:50 PM
Page 32

2003 VOLVO XC90
Why Volvo believes no child should sit in the front seat of a vehicle
It's quite simple really. A front airbag is a very powerful device designed, by law, to help protect an
adult. Because of the size of the airbag and its speed of inflation, a child should never be placed in the
front seat, even if he or she is properly belted or strapped into a child safety seat. Volvo has been an
innovator in safety for over fifty years, and we'll continue to do our part. But we need your help. Please
remember to put your children in the back seat, and buckle them up.
Volvo has some very specific recommendations:
● Always wear your seat belt.
● Airbags are a SUPPLEMENTAL safety device which, when used with a three-point seat belt can help
reduce serious injuries during certain types of accidents. Volvo recommends that you do not disconnect
the airbag system in your vehicle.
● Volvo strongly recommends that ALL children sit in the rear seat of any vehicle and that they be
properly restrained.
● A child should NEVER sit in the front passenger seat of any vehicle equipped with a passenger-side
front airbag.
● Volvo recommends that ALL occupants (adults and children) shorter than four feet seven inches (140
cm) be seated in the back seat of any vehicle with a front passenger side airbag.
Drive safely!
* Automatic Locking Retractor/Emergency Locking Retractor
pg. 21 Safety
Occupant safety, Reporting safety defects
Seat belt maintenance
Check periodically that the seat belts are in good condition. Use water and a mild detergent for cleaning.
Check seat belt mechanism function as follows: attach the seat belt and pull rapidly on the strap.
Volvo concern for safety
Safety is Volvo's cornerstone. Our concern dates back to 1927 when the first Volvo rolled off the
production line. Three-point seat belts (a Volvo invention), safety cages, and energy-absorbing impact
zones were designed into Volvo vehicles long before it was fashionable or required by government
regulation. We will not compromise our commitment to safety. We continue to seek out new safety
features and to refine those already in our vehicles. You can help. We would appreciate hearing your
suggestions about improving automobile safety. We also want to know if you ever have a safety concern
with your vehicle. Call us in the U.S. at: 800-458-1552 or in Canada at: 800-663-8255.
Occupant safety
file:///K|/ownersdocs/2003/2003_XC90/03xc90_01b.htm (13 of 15)12/30/2006 4:18:50 PM
Page 33

2003 VOLVO XC90
How safely you drive doesn't depend on how old you are, but rather on:
● How well you see.
● Your ability to concentrate.
● How quickly you make decisions under stress to avoid an accident.
The tips listed below are suggestions to help you cope with the ever changing traffic environment.
● Never drink and drive.
● If you are taking any medication, consult your physician about its potential effects on your driving
abilities.
● Take a driver-retraining course.
● Have your eyes checked regularly.
● Keep your windshield and headlights clean.
● Replace wiper blades when they start to leave streaks.
● Take into account the traffic, road, and weather conditions, particularly with regard to stopping
distance.
Reporting Safety Defects in the U.S.
If you believe that your vehicle has a defect which could cause a crash or could cause injury or death,
you should immediately inform the National Highway Traffic Safety Administration (NHTSA) in
addition to notifying Volvo Cars of North America. If NHTSA receives similar complaints, it may open
an investigation, and if it finds that a safety defect exists in a group of vehicles, it may order a recall and
remedy campaign. However, NHTSA cannot become involved in individual problems between you,
your retailer, or Volvo Cars of North America. To contact NHTSA, you may either call the Auto Safety
Hotline toll-free at 1- 800-424-9393 (or 202-366-0123 in Washington, D.C. area) or write to: NHTSA, U.
S. Department of Transportation, Washington D.C. 20590. You can also obtain other information about
motor vehicle safety from the Hotline.
Volvo strongly recommends that if your vehicle is covered under a service campaign, safety or emission
recall or similar action, it should be completed as soon as possible. Please check with your local retailer
or Volvo Cars of North America, LLC if your vehicle is covered under these conditions.
NHTSA can be reached at:
Internet:
http://www.nhtsa.dot.gov
Telephone:
1-888-DASH-2-DOT (1-888-327-4236) (toll free)
1-800-424-9393 (toll free)
1-202-366-0123 (in Washington DC area)
pg. 22 This page intentionally left blank.
file:///K|/ownersdocs/2003/2003_XC90/03xc90_01b.htm (14 of 15)12/30/2006 4:18:50 PM
Page 34

2003 VOLVO XC90
Contents | Top of Page
file:///K|/ownersdocs/2003/2003_XC90/03xc90_01b.htm (15 of 15)12/30/2006 4:18:50 PM
Page 35

2003 VOLVO XC90
2 0 0 3
VOLVO
XC90
Safety
pg. 23 Instruments and controls
Instrument panel 24
Indicator and warning symbols 25
Switches in center console 29
Steering wheel adjustment 30
Lighting panel 31
Manually unlocking the fuel filler door 32
Turn signals 33
Hazard warning flashers, rear window/sideview mirror defroster, heated front seats 35
Trip computer (option) 36
Cruise control 37
Parking brake, Opening/closing the hood 38
Opening the tailgate, Auxiliary 12-volt sockets 39
Electrically operated windows 40
Rearview mirror/power folding sideview mirrors 42
Electrically operated moonroof (option) 43
pg. 24 Instruments and controls
file:///K|/ownersdocs/2003/2003_XC90/03xc90_02a.htm (1 of 16)12/30/2006 4:18:52 PM
Page 36
2003 VOLVO XC90
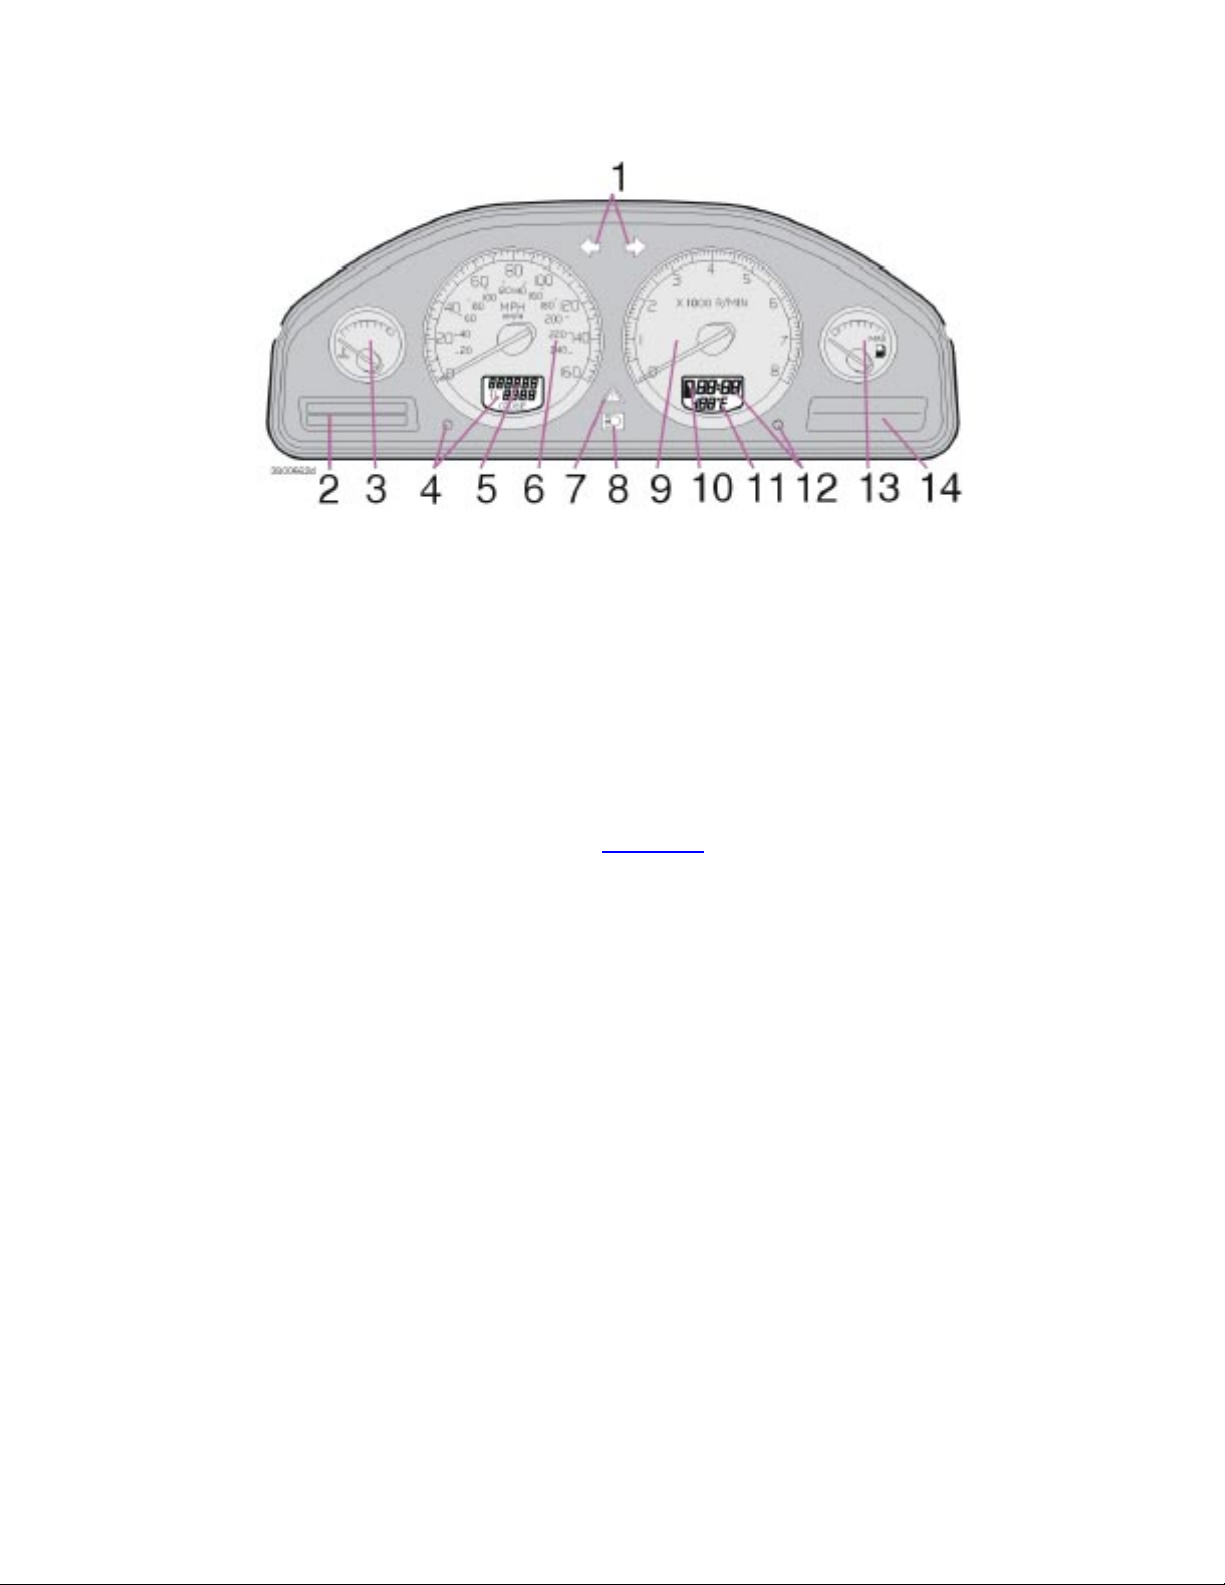
Instrument panel
1. Turn signal indicators - right - left
2. Text window
The text window displays information and warning messages.
3. Temperature gauge
The pointer should be approximately midway on the gauge when driving. Do not drive the vehicle if
the warning light is on. The text window will provide you with additional information. If the engine
temperature remains high, check coolant level - see
page 127.
4. Trip odometer
The trip odometers are used for measuring shorter distances. The right-hand digit gives tenth of a mile/
kilometer. Press the button for more than 2 seconds to reset. Change between trip odometers 1 and 2
using one short press on the button.
5. Odometer
6. Speedometer
7. Warning symbol
8. High beam indicator
9. Tachometer
The tachometer shows engine speed in thousands of revolutions per minute (rpm). Do not drive
continuously with the needle in the red area of the dial, which indicates maximum allowable engine rpm
range. Instead, shift to a higher gear or slow the vehicle down. The engine management system will
file:///K|/ownersdocs/2003/2003_XC90/03xc90_02a.htm (2 of 16)12/30/2006 4:18:52 PM
Page 37

2003 VOLVO XC90
automatically prevent excessively high engines speeds. This will be noticeable as a pronounced
unevenness in engine speed.
10. Gear and driving mode indicator
The currently selected driving mode is displayed here. If you use the optional Geartronic function on the
automatic transmission, the currently selected gear will be displayed.
11. Ambient temperature gauge
This display indicates the air temperature outside your vehicle. A "snowflake" symbol in the text
window is displayed when the temperature is in the range of 23 -36° F (-5 -+2° C). Please note that this
symbol does not indicate a fault with your vehicle. At low speeds or when the vehicle is not moving, the
temperature readings may be slightly higher than the actual ambient temperature.
12. Clock/set button
Turn the button to set the clock.
13. Fuel gauge
The fuel tank holds approximately 19 US gals (72 liters). When a warning light in the gauge comes on,
there are approximately 1.8 US gal. (8 liters) of fuel remaining in the tank.
14. Indicator and warning symbols
pg. 25 Instruments and controls
Indicator and warning symbols
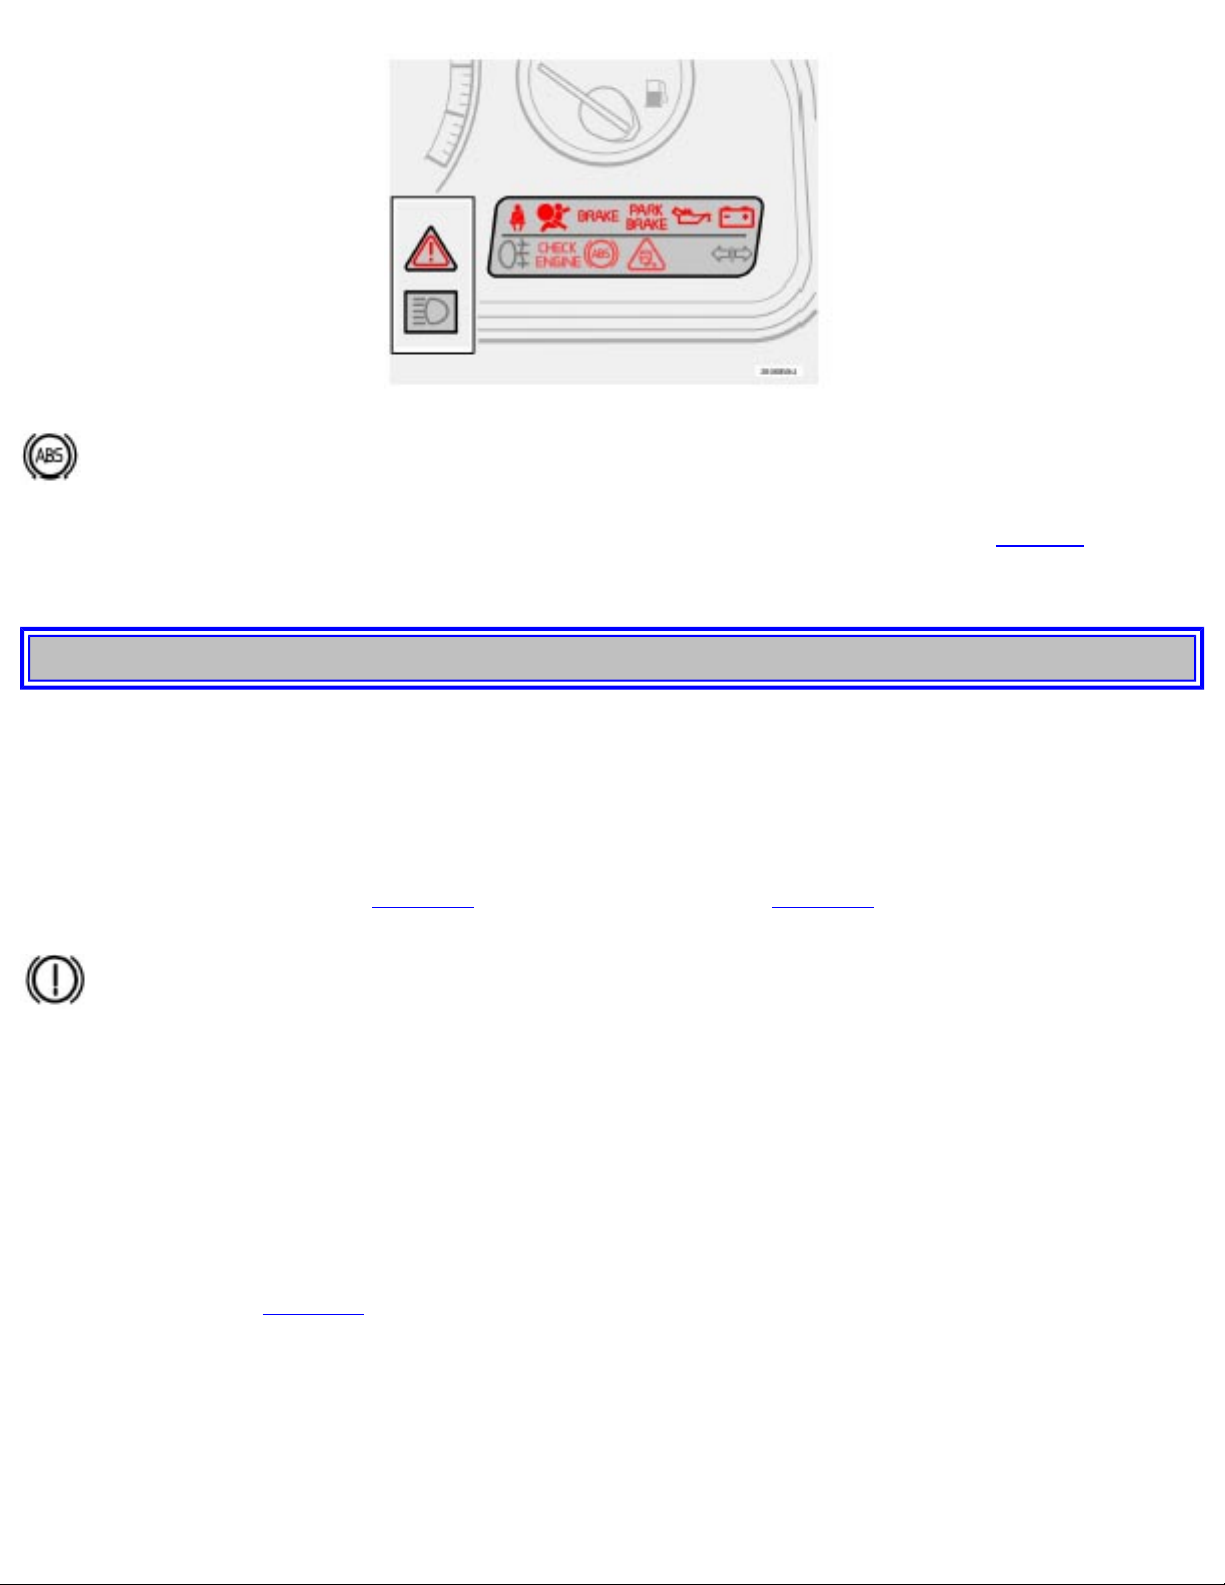
The indicator and warning symbols light up when you turn the ignition key to the driving position
(position II) before starting. This shows that the symbols are functioning. When the engine starts, all
symbols go out. If the engine is not started within 5 seconds, all symbols except CHECK ENGINE and
go out. The symbol for the parking brake goes out when the parking brake is released.
Warning symbol in center of instrument panel
This symbol shines as a red or yellow light depending on the severity of the fault that has been detected.
Red symbol -Stop the vehicle as soon as possible in a suitable location and read the message shown in
the text window.
Yellow symbol -Follow the instructions shown in the text window.
file:///K|/ownersdocs/2003/2003_XC90/03xc90_02a.htm (3 of 16)12/30/2006 4:18:52 PM
Page 38
2003 VOLVO XC90
Anti-lock brake system ABS
If the warning light comes on, there is a malfunction of the ABS system (the standard braking system
will still function). The vehicle should be driven to a Volvo retailer for inspection. See
page 96 for
additional information.
pg. 26 Instruments and controls
Indicator and warning symbols (contd)
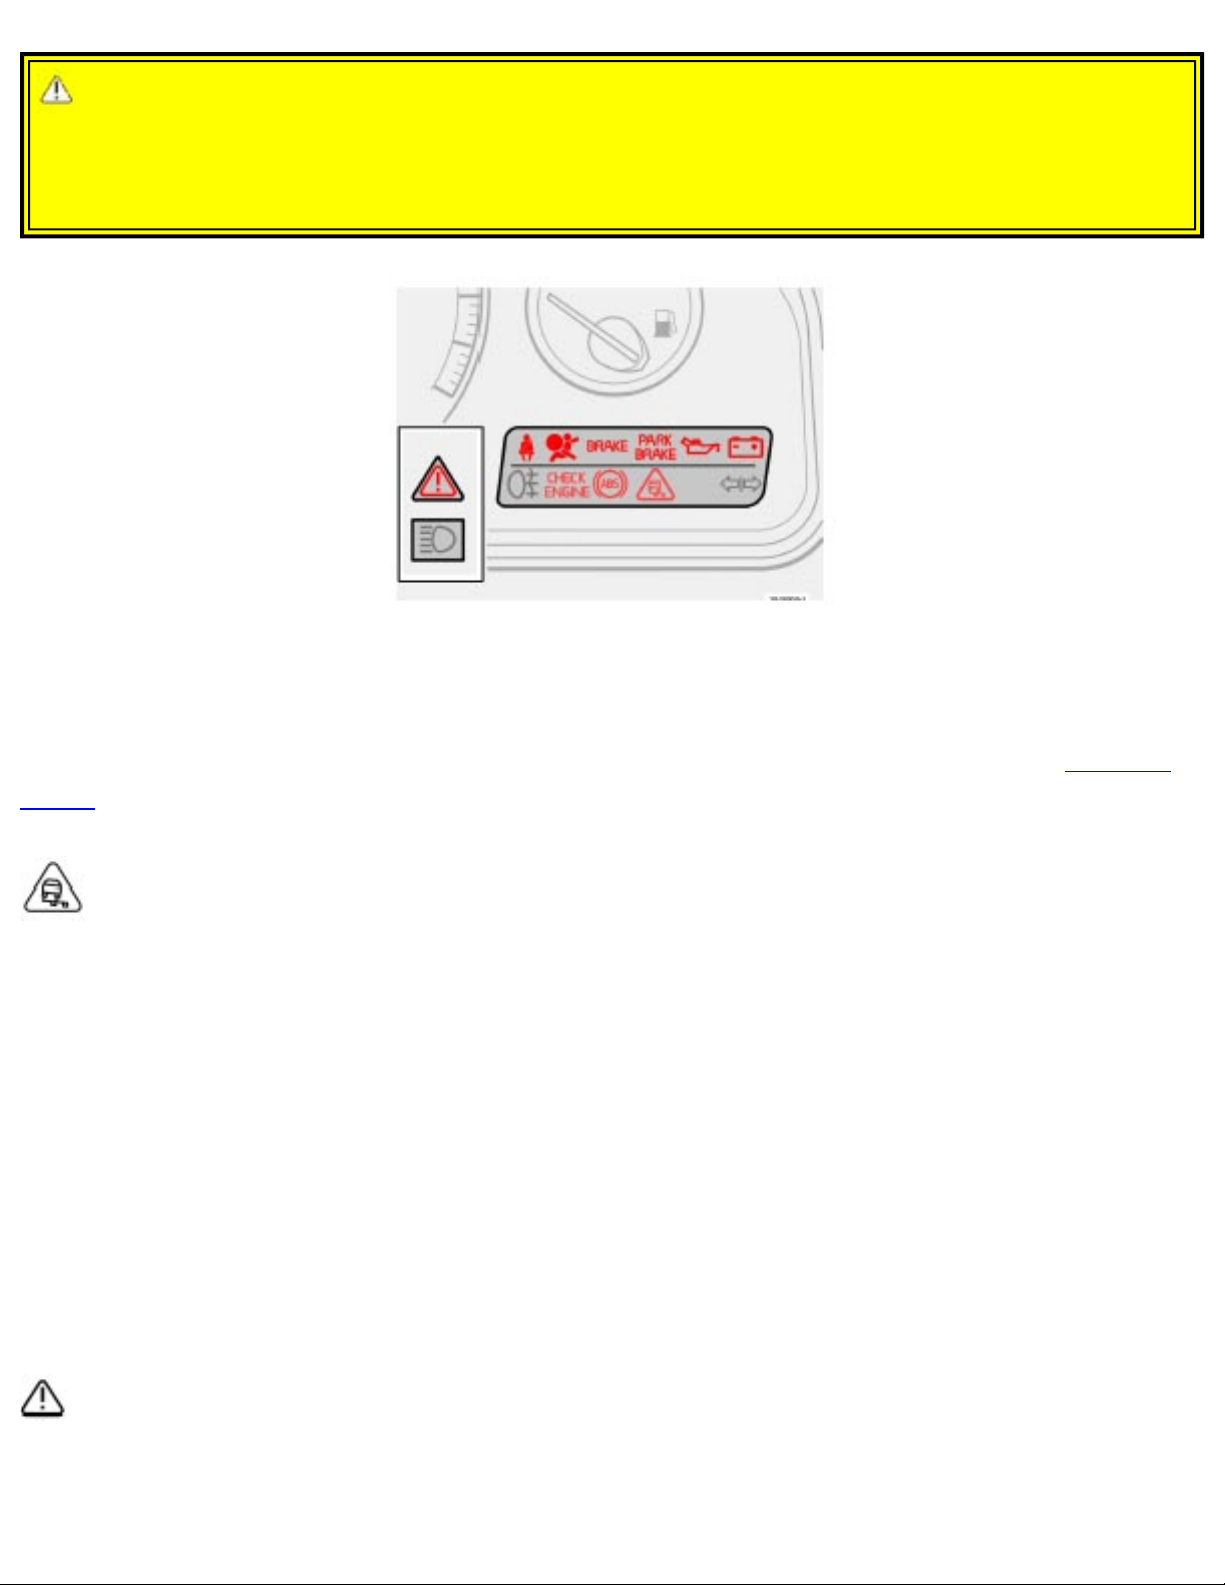
BRAKE Brake failure warning light
If the light comes on while driving or braking, stop immediately, open the hood and check the brake
fluid level in the reservoir. See page 128 for reservoir position and page 132 for instructions.
Canadian models are equipped with this warning light.
If the BRAKE and ABS warning lights come on at the same time, this could indicate a fault in the
brake system.
● Stop the vehicle in a suitable place and switch off the engine.
● Restart the engine.
● If both warning lights go off, no further action is required.
● If both lights are still on after the engine has been restarted, switch off the engine again and check the
brake fluid level (see page 128 for the location of the brake fluid reservoir).
file:///K|/ownersdocs/2003/2003_XC90/03xc90_02a.htm (4 of 16)12/30/2006 4:18:52 PM
Page 39
2003 VOLVO XC90
WARNING!
The If the fluid level is below the MIN mark in the reservoir or if a "Brake failure - Service urgent"
message is displayed in the text window: DO NOT DRIVE. Have the vehicle towed to an authorized
Volvo retailer and have the brake system inspected.
● If the brake fluid level is above the MIN mark, drive carefully to an authorized Volvo retailer and
have the brake system inspected Volvo retailer and have the brake system inspected.
DSTC
The Dynamic Stability and Traction Control system (DSTC) is explained in greater detail on
pages 97
and 98. This system consists of several functions:
Risk for slippery conditions
If the warning light comes on and stays on, this indicates that traction with the road surface is reduced.
Drive with caution.
If this light flashes, it indicates that the DSTC system is working to restore traction to one or more of the
wheels.
Reduced Stability Control
If the green indicator light in the DSTC button goes out, DSTC has reduced effect because the system
had been switched off with the button in the center console. The text DSTC SPIN CONTROL OFF will
be displayed in the text window.
Reduced anti-spin function
If the yellow indicator light comes on and remains on, DSTC's Stability Control function has been
switched off due to excessively high brake temperature. The text TRACTION CONTROL
TEMPORARILY OFF will be displayed in the text window.
file:///K|/ownersdocs/2003/2003_XC90/03xc90_02a.htm (5 of 16)12/30/2006 4:18:52 PM
Page 40
2003 VOLVO XC90
Fault in the DSTC system
If the yellow indicator light remains on, there is a fault in the system. The text ANTI-SKID SERVICE
REQUIRED will be displayed.
● Stop the vehicle in a safe place and switch off the engine. Restart the engine.
● If the indicator light goes off, no further action is necessary.
If the indicator light remains on, drive to an authorized Volvo retailer to have the system inspected.
pg. 27 Instruments and controls
Indicator and warning symbols (contd)
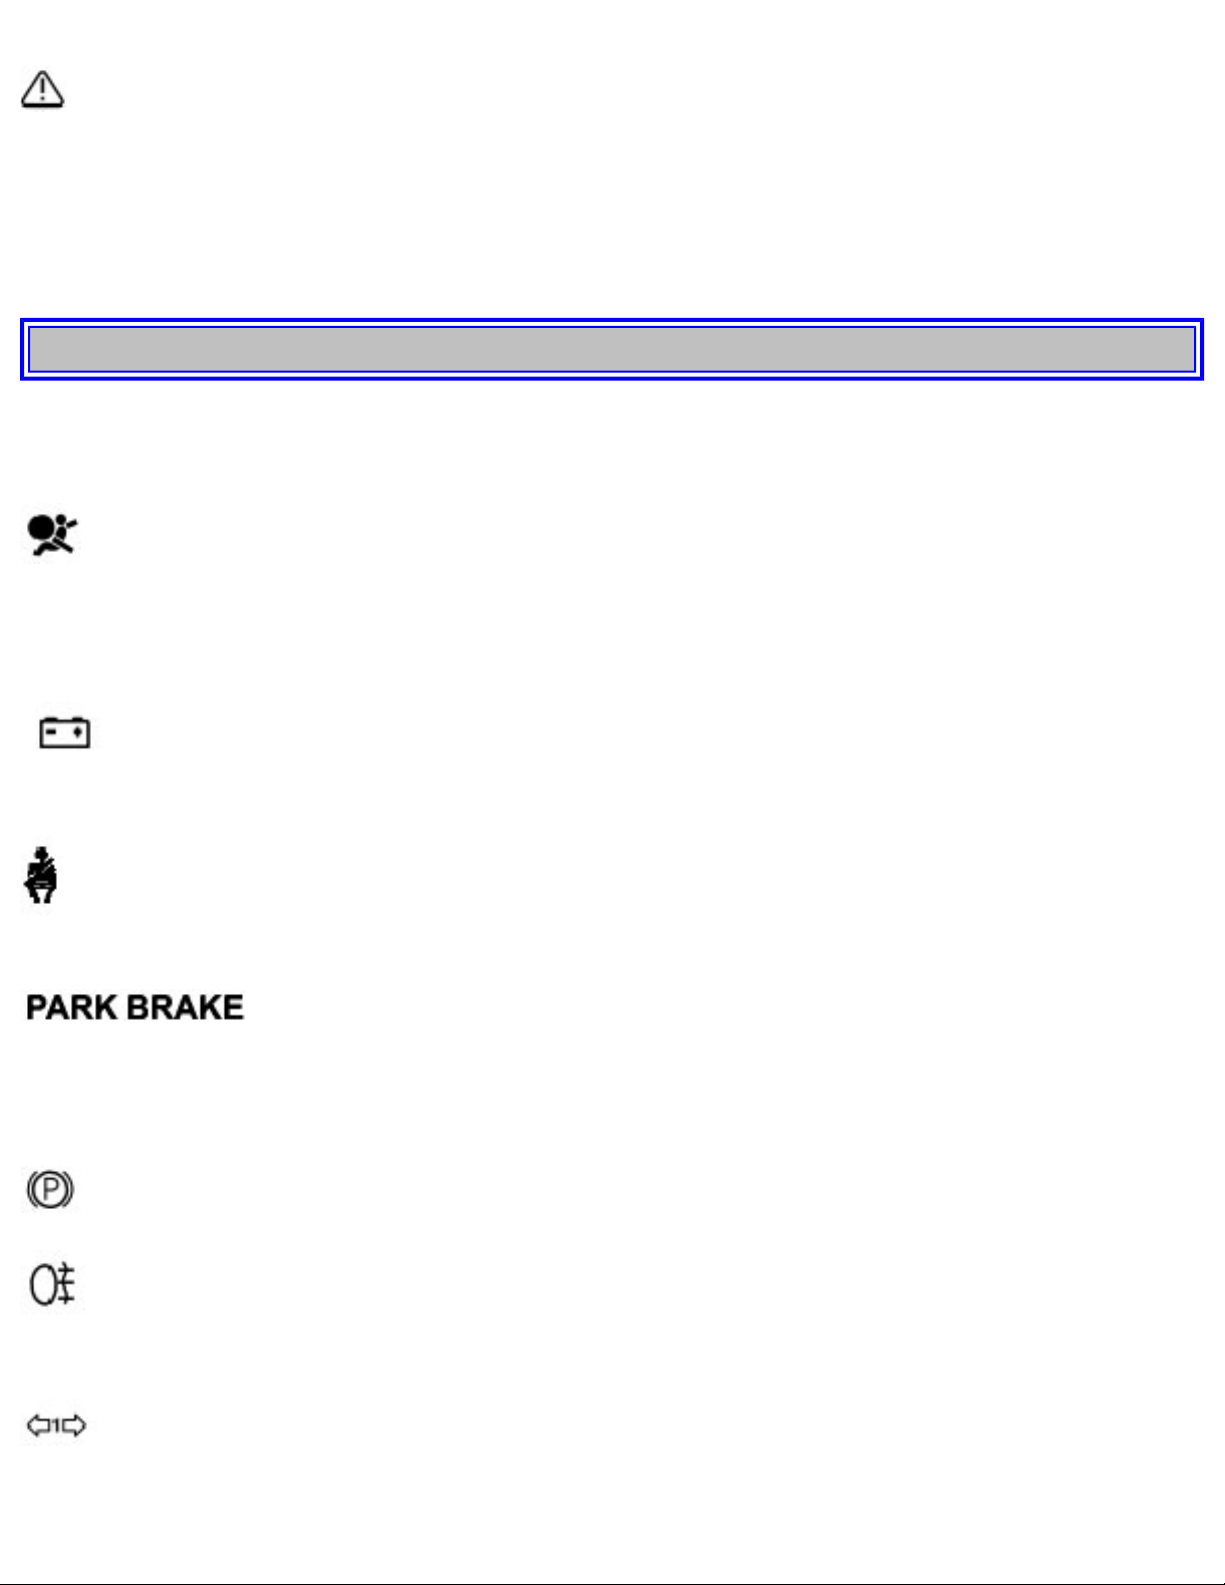
Supplemental Restraint system (SRS)
If the light comes on (or stays on after the vehicle has started), the SRS diagnostic system has detected a
fault. Drive to an authorized Volvo retailer for an inspection of the system. See the SRS section for more
information.
Generator warning light
If the light comes on while the engine is running, have the charging system checked.
Seat belt reminder This symbol lights up to indicate that the driver has not fastened his/her seat
belt.
PARKING BRAKE
This light will be on when the parking brake is applied. The parking brake lever is situated between the
front seats.
Canadian models are equipped with this symbol.
Rear fog light
This light indicates that the fog light is on.
Turn signal indicator - trailer (certain models)
If you are towing a trailer, this light will flash simultaneously with the turn signals on the trailer. If the
light does not flash when signaling, neither the trailer's turn signals nor the vehicle's turn signals are
file:///K|/ownersdocs/2003/2003_XC90/03xc90_02a.htm (6 of 16)12/30/2006 4:18:52 PM
Page 41
2003 VOLVO XC90
functioning.
Oil pressure warning light
If the light comes on while driving, stop the vehicle and then stop the engine immediately and
check the engine oil level See
page 130. If the light stays on after restart, have the vehicle towed to the
nearest authorized Volvo retailer. After hard driving, the light may come on occasionally when the
engine is idling. This is normal, provided it goes off when the engine speed is increased.
CHECK ENGINE Malfunction indicator light
On-Board Diagnostics II (OBDII): As you drive, a computer called "OBDII" monitors your vehicle's
engine, transmission, electrical and emission systems. The CHECK ENGINE light will light up if the
computer senses a condition that potentially may need correcting. When this happens, please have your
vehicle checked by a Volvo retailer as soon as possible.
A CHECK ENGINE light may have many causes. Sometimes, you may not notice a change in your
vehicle's behavior. Even so, an uncorrected condition could hurt fuel economy, emission cleanliness, and
driveability. Extended driving without correcting the cause could even damage other components in
your vehicle.
Canadian models are equipped with this warning light.
pg. 28 Instruments and controls
Indicator and warning symbols (contd)
Messages in the text window
file:///K|/ownersdocs/2003/2003_XC90/03xc90_02a.htm (7 of 16)12/30/2006 4:18:52 PM
Page 42

2003 VOLVO XC90
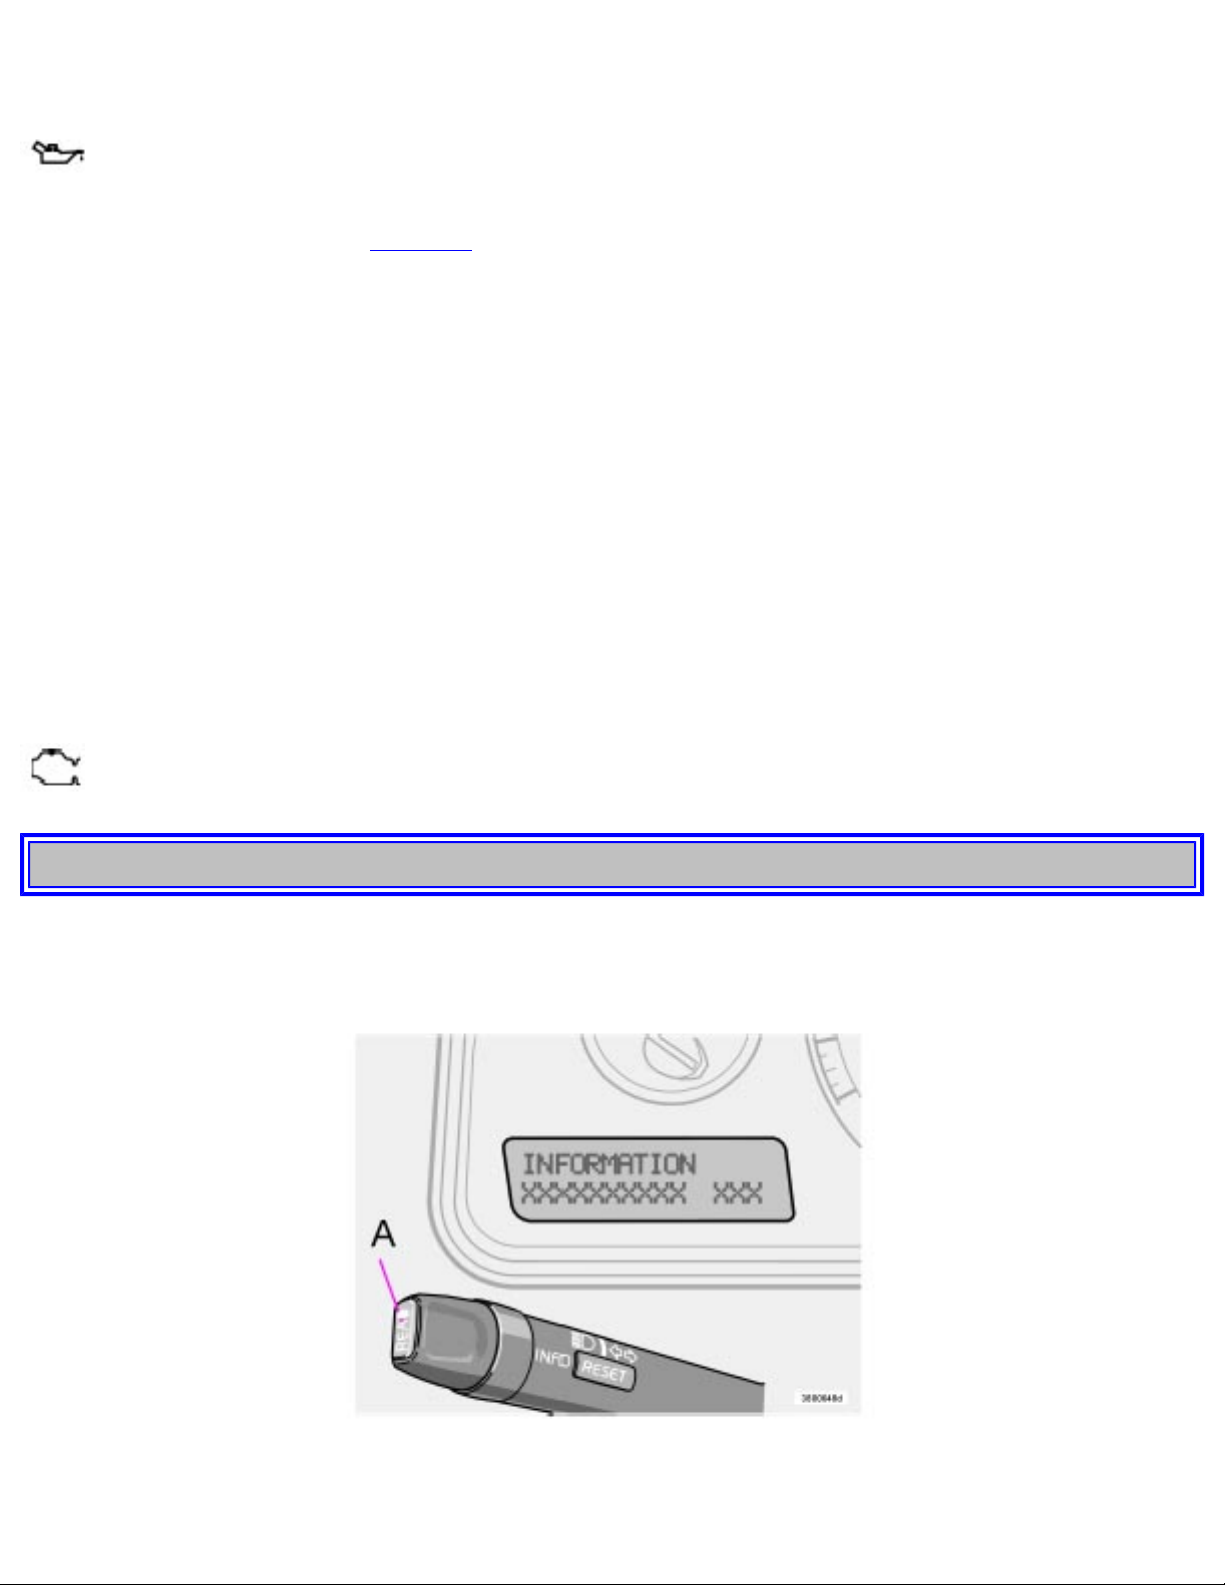
When a warning light in the instrument panel comes on, a message is also displayed in the text window.
After you have read the message, you can erase it by pressing button A (see illustration).
NOTE: Certain messages cannot be erased until the condition has been corrected.
If a warning message is displayed when e.g. you are using the trip computer, this message must be
erased before you can access the function of your choice. Press button A to erase the warning message.
You can scroll through the stored messages by pressing button A (see illustration). The text window can
be cleared (the message will be returned to memory) by pressing button A again.
Message Meaning:
STOP SAFELY:
Stop and switch off the engine - to help prevent serious risk of
damage.
STOP ENGINE:
Stop and switch off the engine - to help prevent serious risk of
damage.
SERVICE URGENT:
Take your vehicle to an authorized Volvo retailer for inspection as
soon as possible.
SEE MANUAL:
Refer to your owner's manual. For additional information, please
contact your Volvo retailer.
SERVICE REQUIRED:
Take your vehicle to an authorized Volvo retailer for inspection at
your convenience (but preferably before the next scheduled
maintenance).
FIX NEXT SERVICE:
Have the system affected inspected at the next scheduled
maintenance.
TIME FOR REGULAR
SERVICE
This light will come on at 7,500 mile (12,000 km) intervals, after
750 hours of driving or after 12 months, whichever occurs first, to
remind the driver that the maintenance interval has been exceeded.
The light will stay on for 2 minutes after start until reset by the
servicing retailer.
pg. 29 Instruments and controls
Switches in center console
file:///K|/ownersdocs/2003/2003_XC90/03xc90_02a.htm (8 of 16)12/30/2006 4:18:52 PM
Page 43
2003 VOLVO XC90
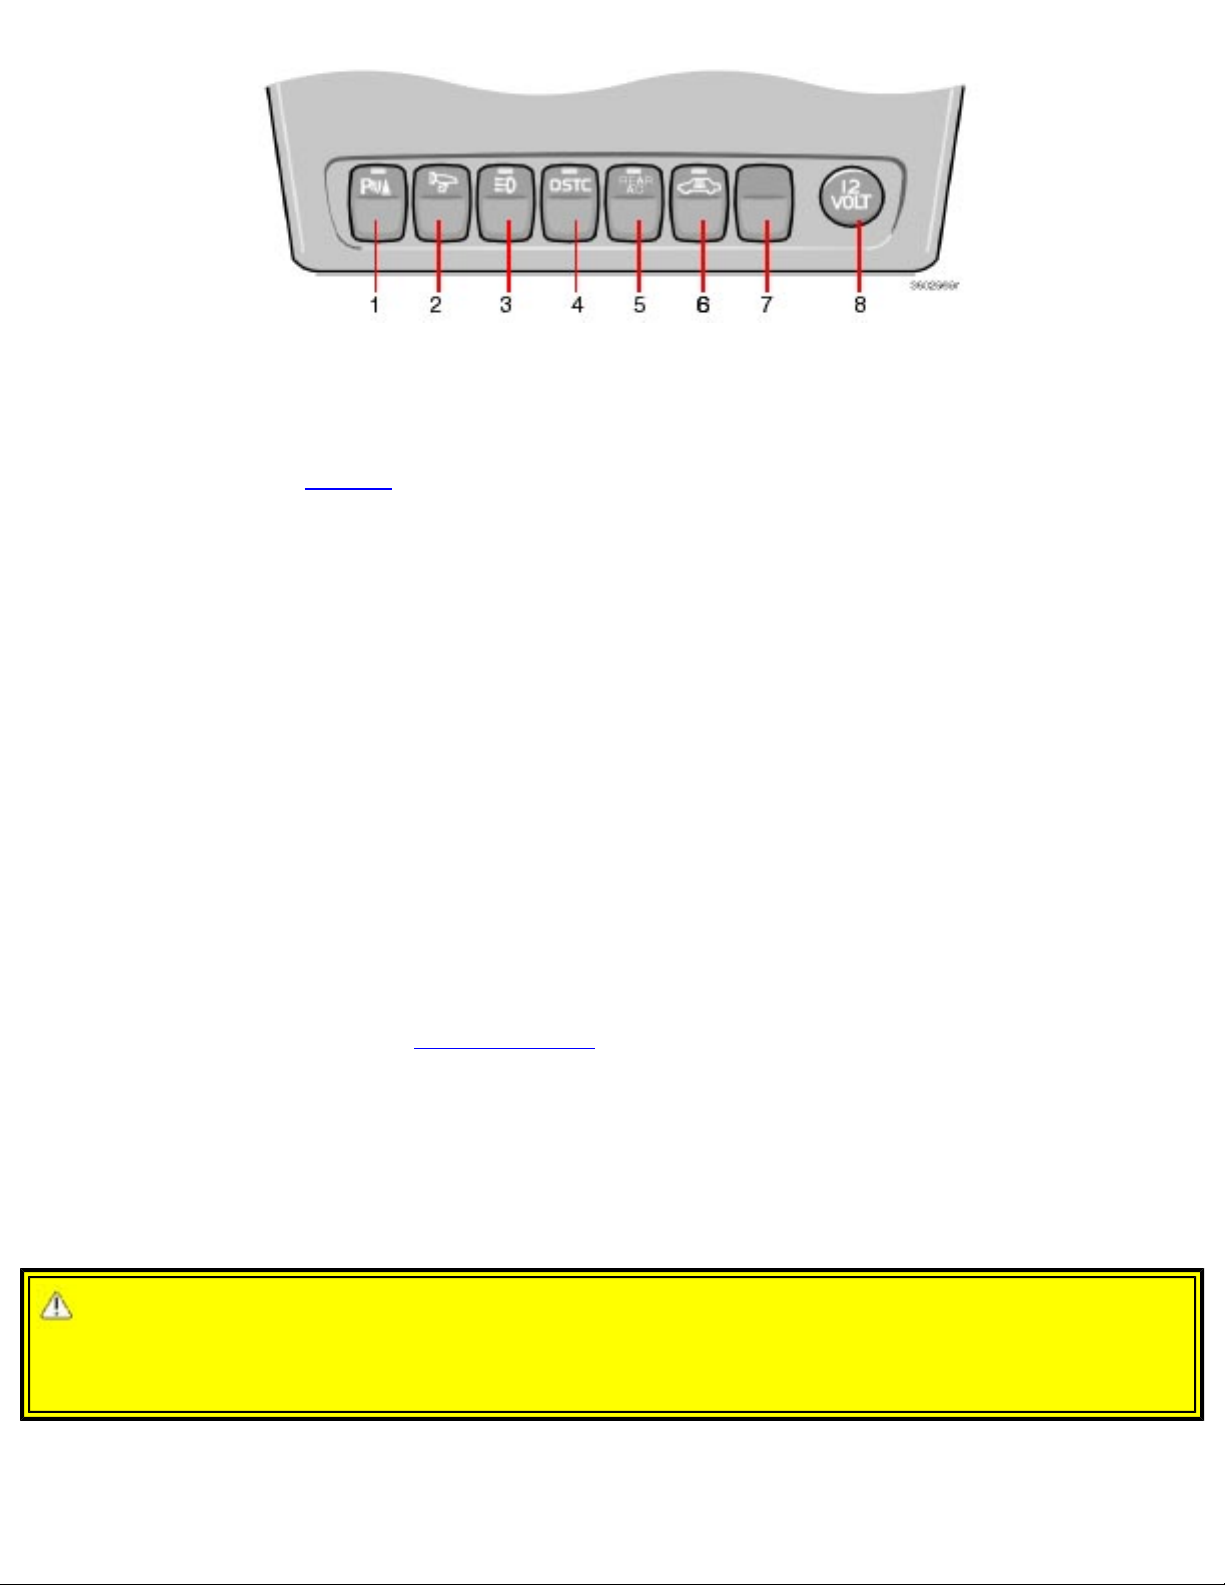
The positions of these buttons may vary, depending on the specifications of your vehicle
1. Reverse warning system (option)
This system provides an audible warning if you back the vehicle to within approximately 5 feet (1.5
meters) of an object. See
page 99 for more information.
NOTE: The system activates automatically when the engine is started, and can be deactivated by
pressing this button (e.g. when towing a trailer) or reactivated if necessary.
2. Folding sideview mirrors (option)
Press the button and release it to fold the sideview mirrors in or out. When the button is pressed while
the mirrors are folded in, there will be a delay of several seconds before the mirrors begin to move
outward.
3. Auxiliary lights
This button is used to switch on auxiliary lights (if installed). An LED in the switch will light up to
indicate that the auxiliary lights are illuminated.
4. Dynamic Stability Traction Control system (DSTC)
This button is used to switch off DSTC's stability Control function. When the LED in the button is ON,
all DSTC functions are active. See
pages 97 and 98 for additional information.
NOTE: To avoid inadvertently switching off the Stability Control function, the button must be pressed
for at least half a second. The text "SPIN CONTROL OFF" will be displayed in the text window and the
green indicator light in the button will go out. All DSTC functions will be automatically be on when the
engine is started.
WARNING!
The Please be aware that the vehicle's handling characteristics may be affected if the Stability Control
function is switched off.
5. Rear seat air conditioing (option)
file:///K|/ownersdocs/2003/2003_XC90/03xc90_02a.htm (9 of 16)12/30/2006 4:18:52 PM
Page 44
2003 VOLVO XC90
This button controls the optional rear seat air conditioning system on seven-seat models. See page 48 for
more information.
6. Temporarily disconnecting the alarm sensors (option)
See page 81 for more details.
7. Not in use
8. 12 volt socket
This 12 volt socket can be used to plug in certain accessories such as cellular telephones, etc. The
ignition key must be in position 1 (or higher) for the auxiliary socket to function.
NOTE: The auxiliary sockets can also be used for cigarette lighters, which are available as accessories
at your Volvo retailer.
pg. 30 Instruments and controls
Steering wheel adjustment
Steering wheel adjustment
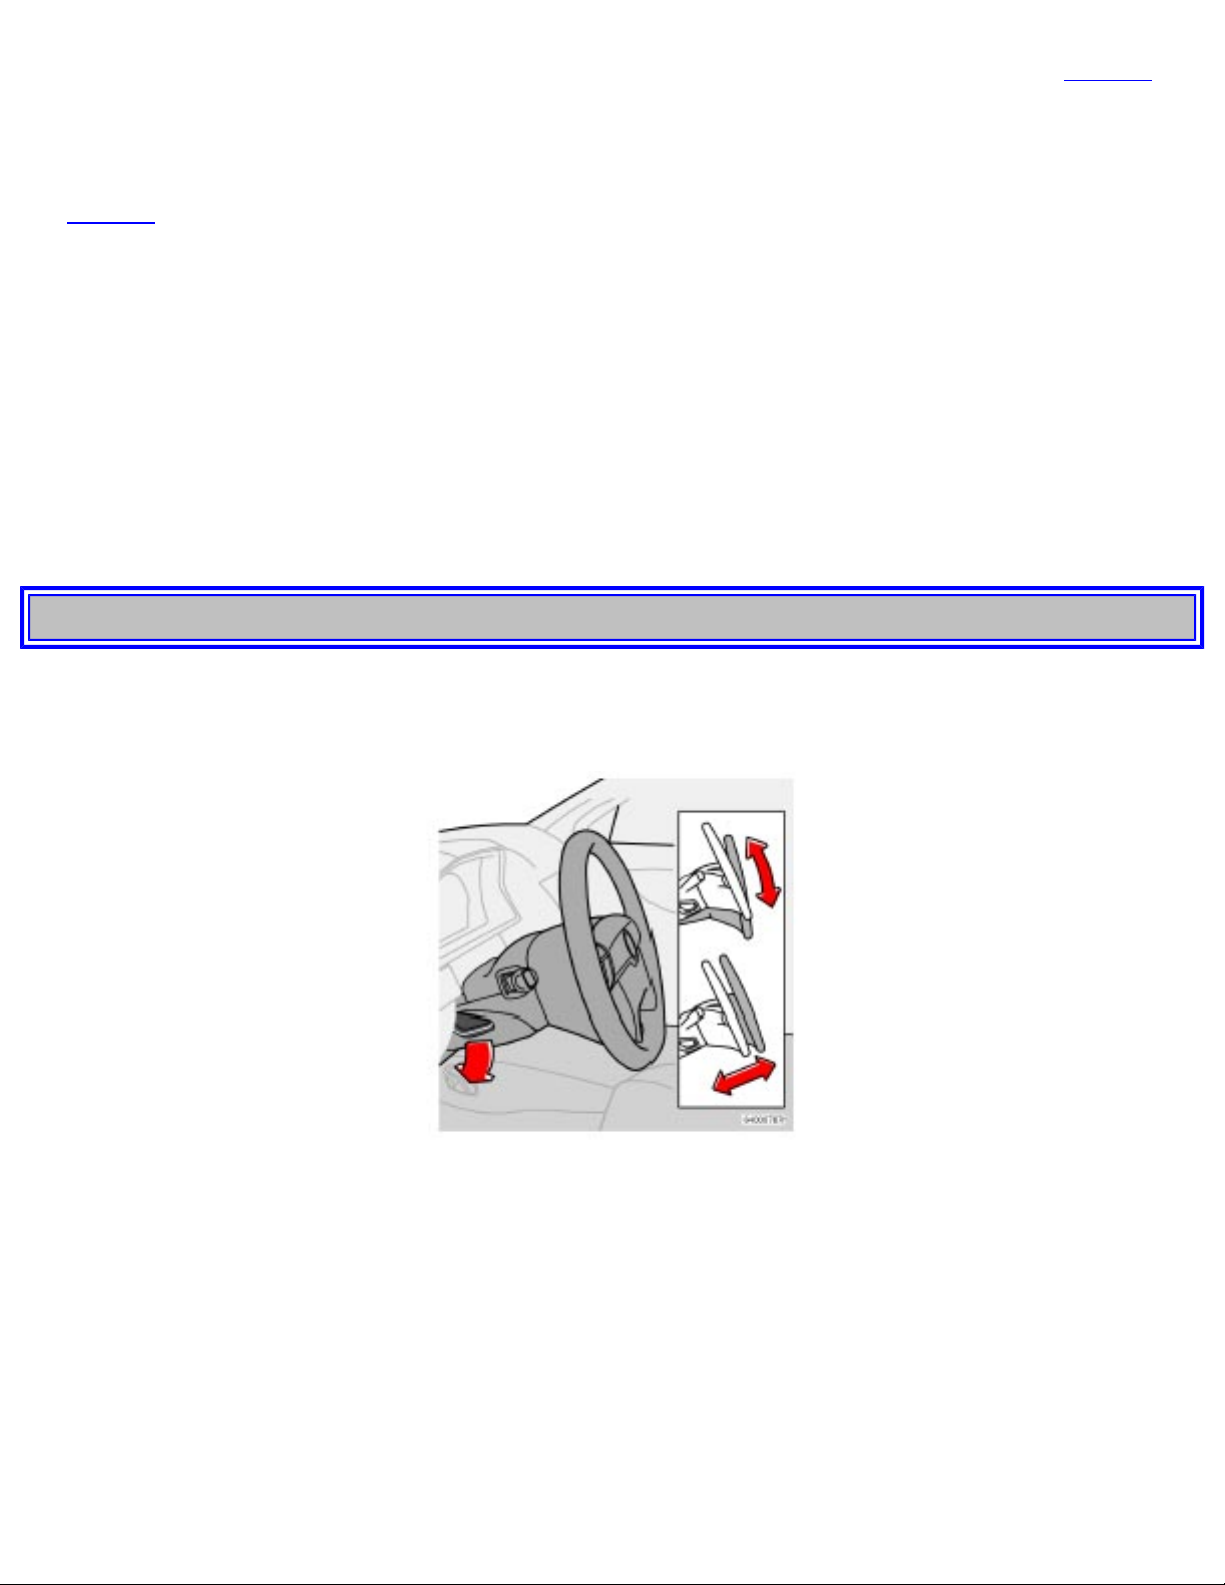
Both the height and the reach of the steering wheel can be adjusted to a comfortable position for the
driver. Pull down the lever on the left of the steering column. Adjust the steering wheel to a suitable
position and press the lever back into place to lock the steering wheel in the new position. Check that the
steering wheel is locked in the new position.
file:///K|/ownersdocs/2003/2003_XC90/03xc90_02a.htm (10 of 16)12/30/2006 4:18:52 PM
Page 45
2003 VOLVO XC90
WARNING!
The Never adjust the steering wheel while
driving.
pg. 31 Instruments and controls
Lighting panel
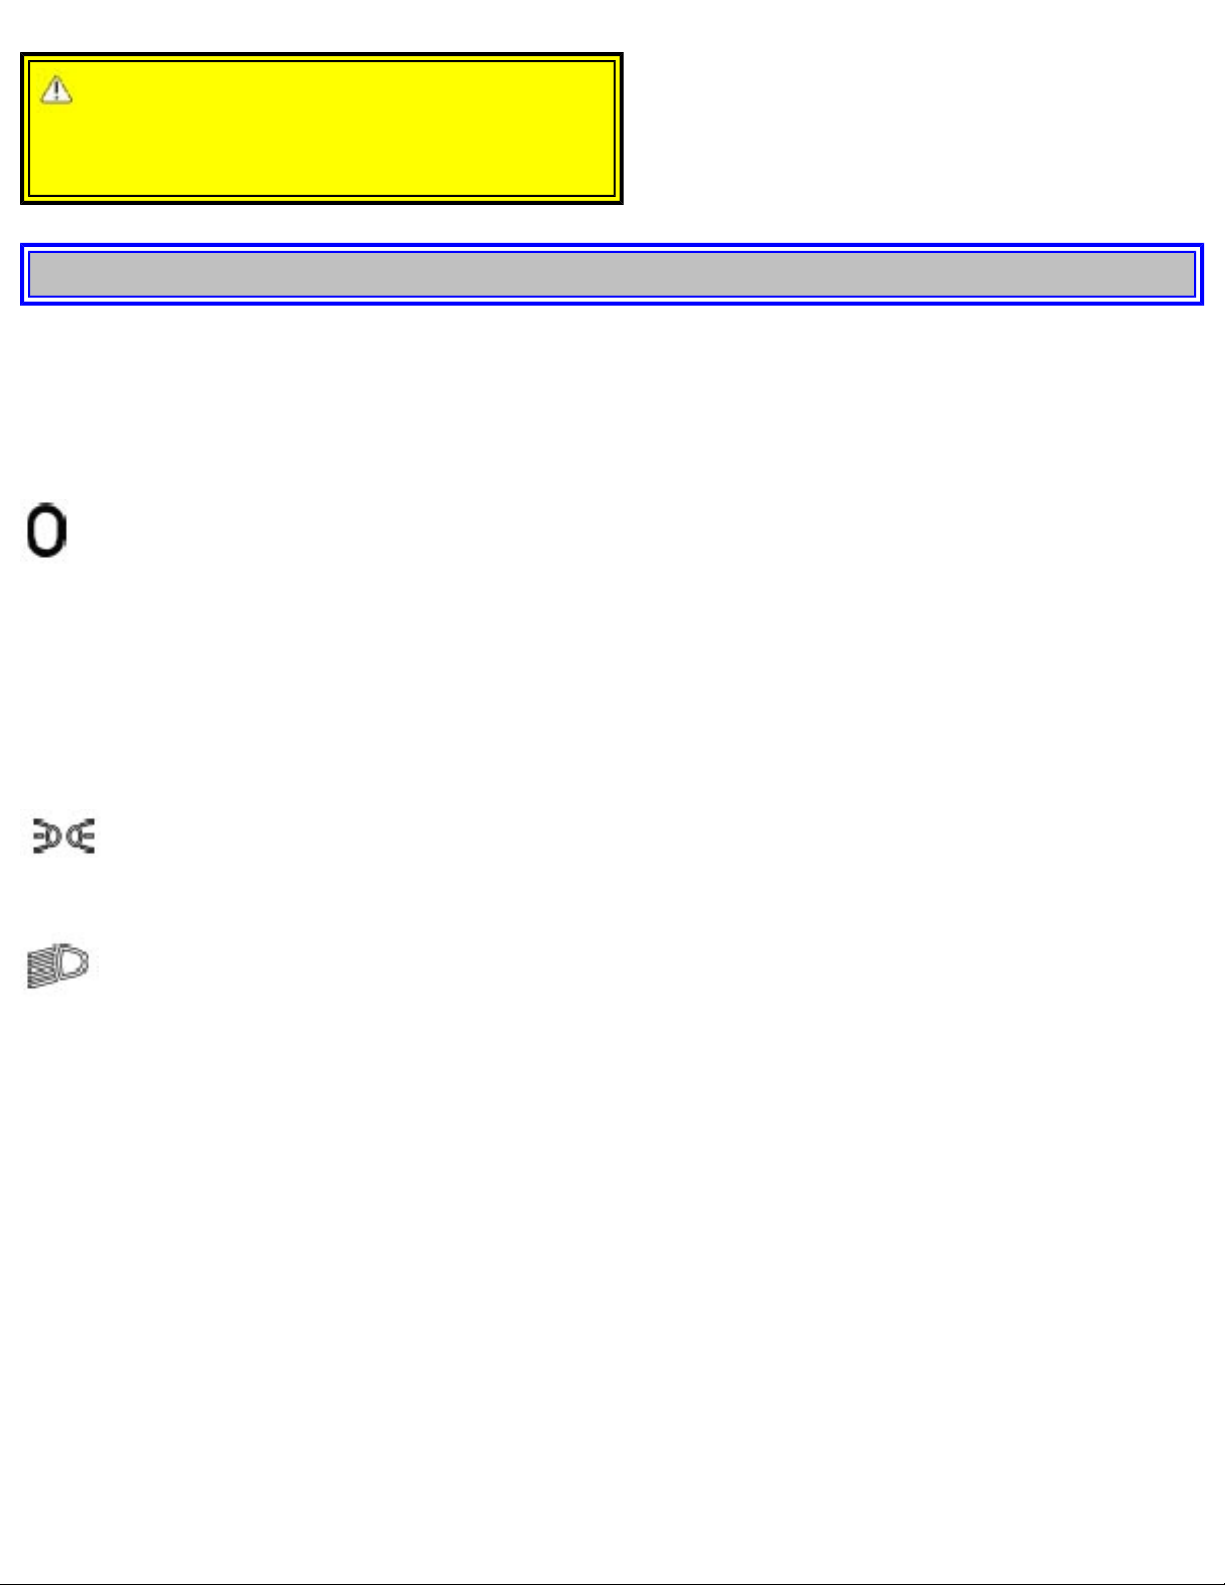
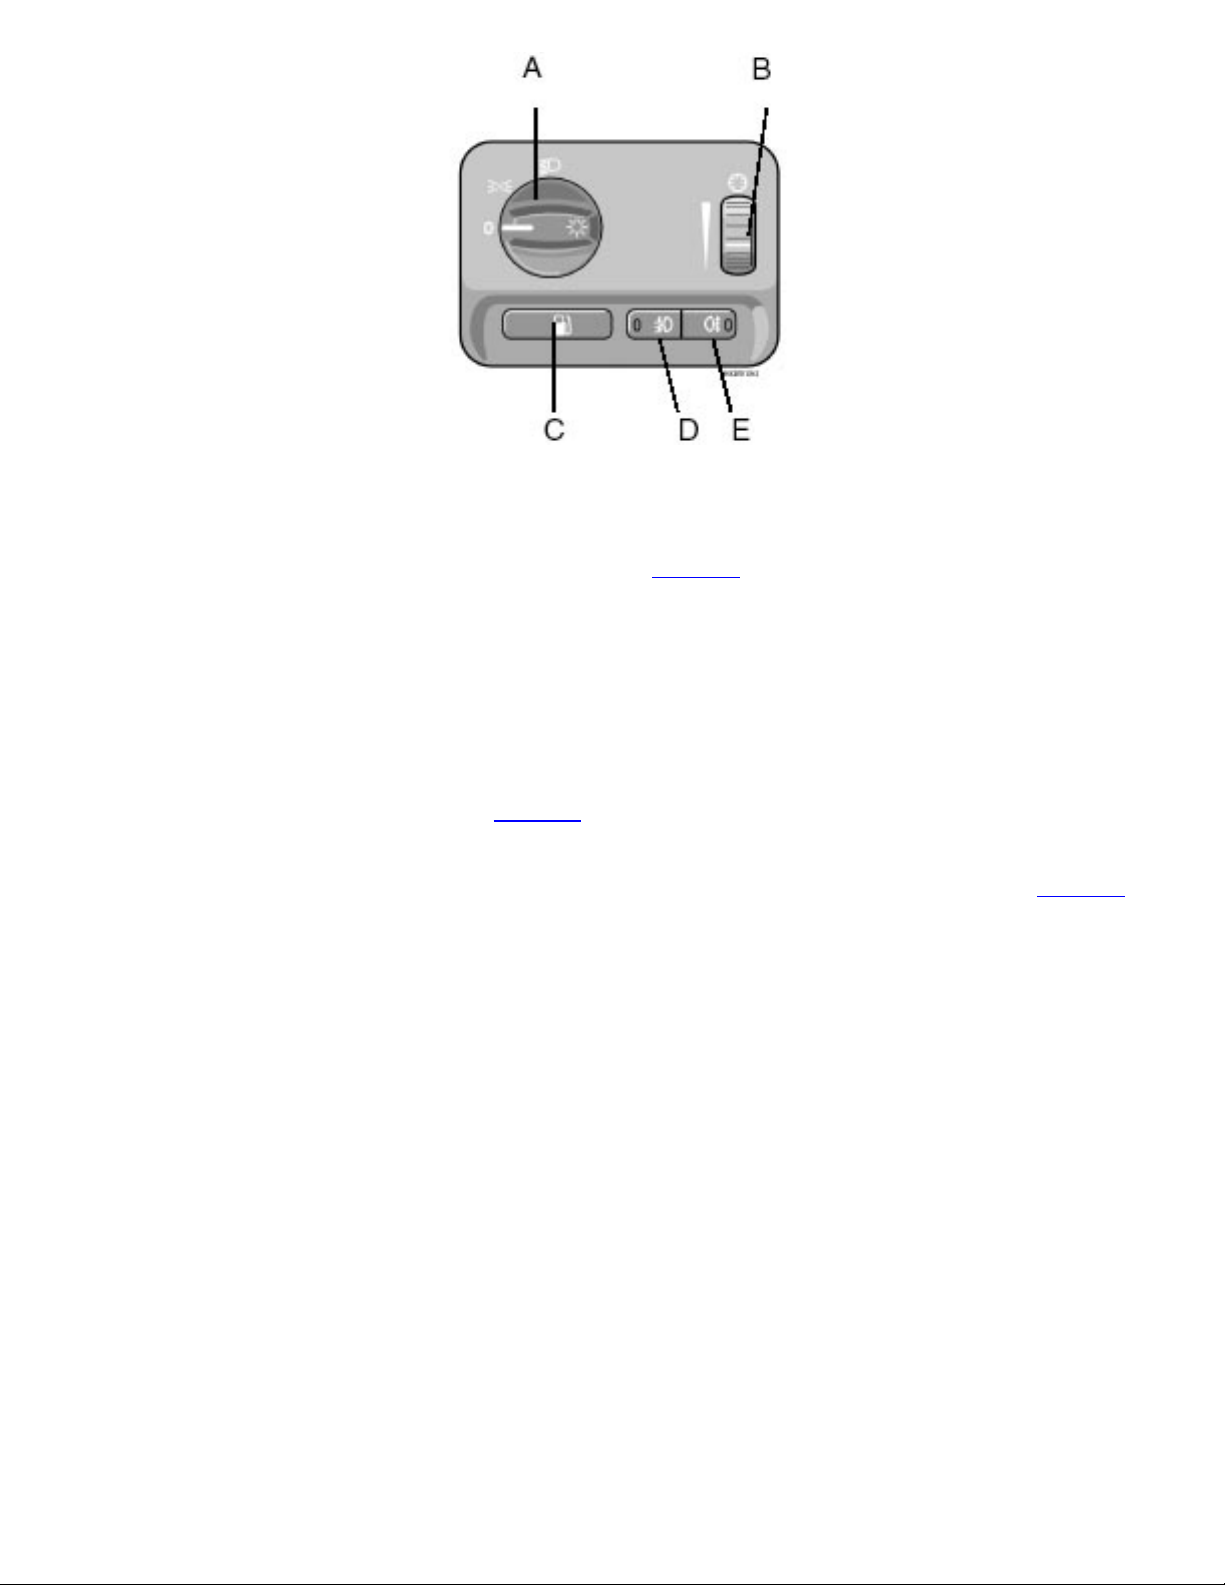
A - Headlights and parking lights
All lighting off.
Models with daytime running lights:
Low beam headlights will automatically come on if the ignition key is in position II. Front and rear
parking lights, tail lights, side marker lights, and license plate lights will also be on. Volvo recommends
the use of daytime running lights. If, however, you would prefer to have these lights turned off (USA
only), please consult your Volvo retailer. Please note that the use of daytime running lights is mandatory
in Canada.
Parking lights on. The parking lights should be switched off when you leave the vehicle to
help avoid battery drain.
Headlights, parking lights, license plate lights and instrument panel illumination are on if the
ignition key is in position II.
If the headlight switch is in this position, all lights will go out when the ignition is switched off.
The headlight switch must be in this position before the high beams will function.
Switch from high to low beams and vice versa by pulling the turn signal switch lever on the left side of
steering column toward you.
file:///K|/ownersdocs/2003/2003_XC90/03xc90_02a.htm (11 of 16)12/30/2006 4:18:52 PM
Page 46
2003 VOLVO XC90
B - Instrument lighting
Move the thumb wheel up to increase brightness or down to decrease brightness. There is also an
instrument panel illumination sensor (see illustration on
page 48) which automatically adjusts the level
of illumination. The symbols have maximum illumination in daylight (only the background lighting can
be adjusted). At night, both the symbol light and background lighting can be adjusted.
C - Unlocking the fuel filler door
Press this button when the vehicle is at a standstill to unlock the fuel filler door. Please note that the fuel
filler door will remain unlocked until the vehicle begins to move forward. An audible click will be heard
when the fuel filler door relocks. See also
page 86.
NOTE: If the fuel filler door does not unlock after the button has been pressed, please see page 32 for
information on manually unlocking this door.
D - Front fog lights
The front fog lights will function only in combination with the low beam headlights. The fog lights turn
off when the ignition is switched off. A light in the switch indicates when the front fog lights are on.
E - Rear fog light
The rear fog light is considerably brighter than the normal tail lights and should be used only when
conditions such as fog, rain, snow, smoke or dust reduce visibility for other vehicles to less than 500 ft
(150 meters).
A light in the switch indicates when the rear fog light is on.
The rear fog light will only function in combination with the high/low beam headlights.
By design, there is one rear fog light only, located in the driver's side tail light cluster.
file:///K|/ownersdocs/2003/2003_XC90/03xc90_02a.htm (12 of 16)12/30/2006 4:18:52 PM
Page 47
2003 VOLVO XC90
pg. 32 Instruments and controls
Manually unlocking the fuel filler door
Panel on passenger's side of cargo area
Manually unlocking the fuel filler door
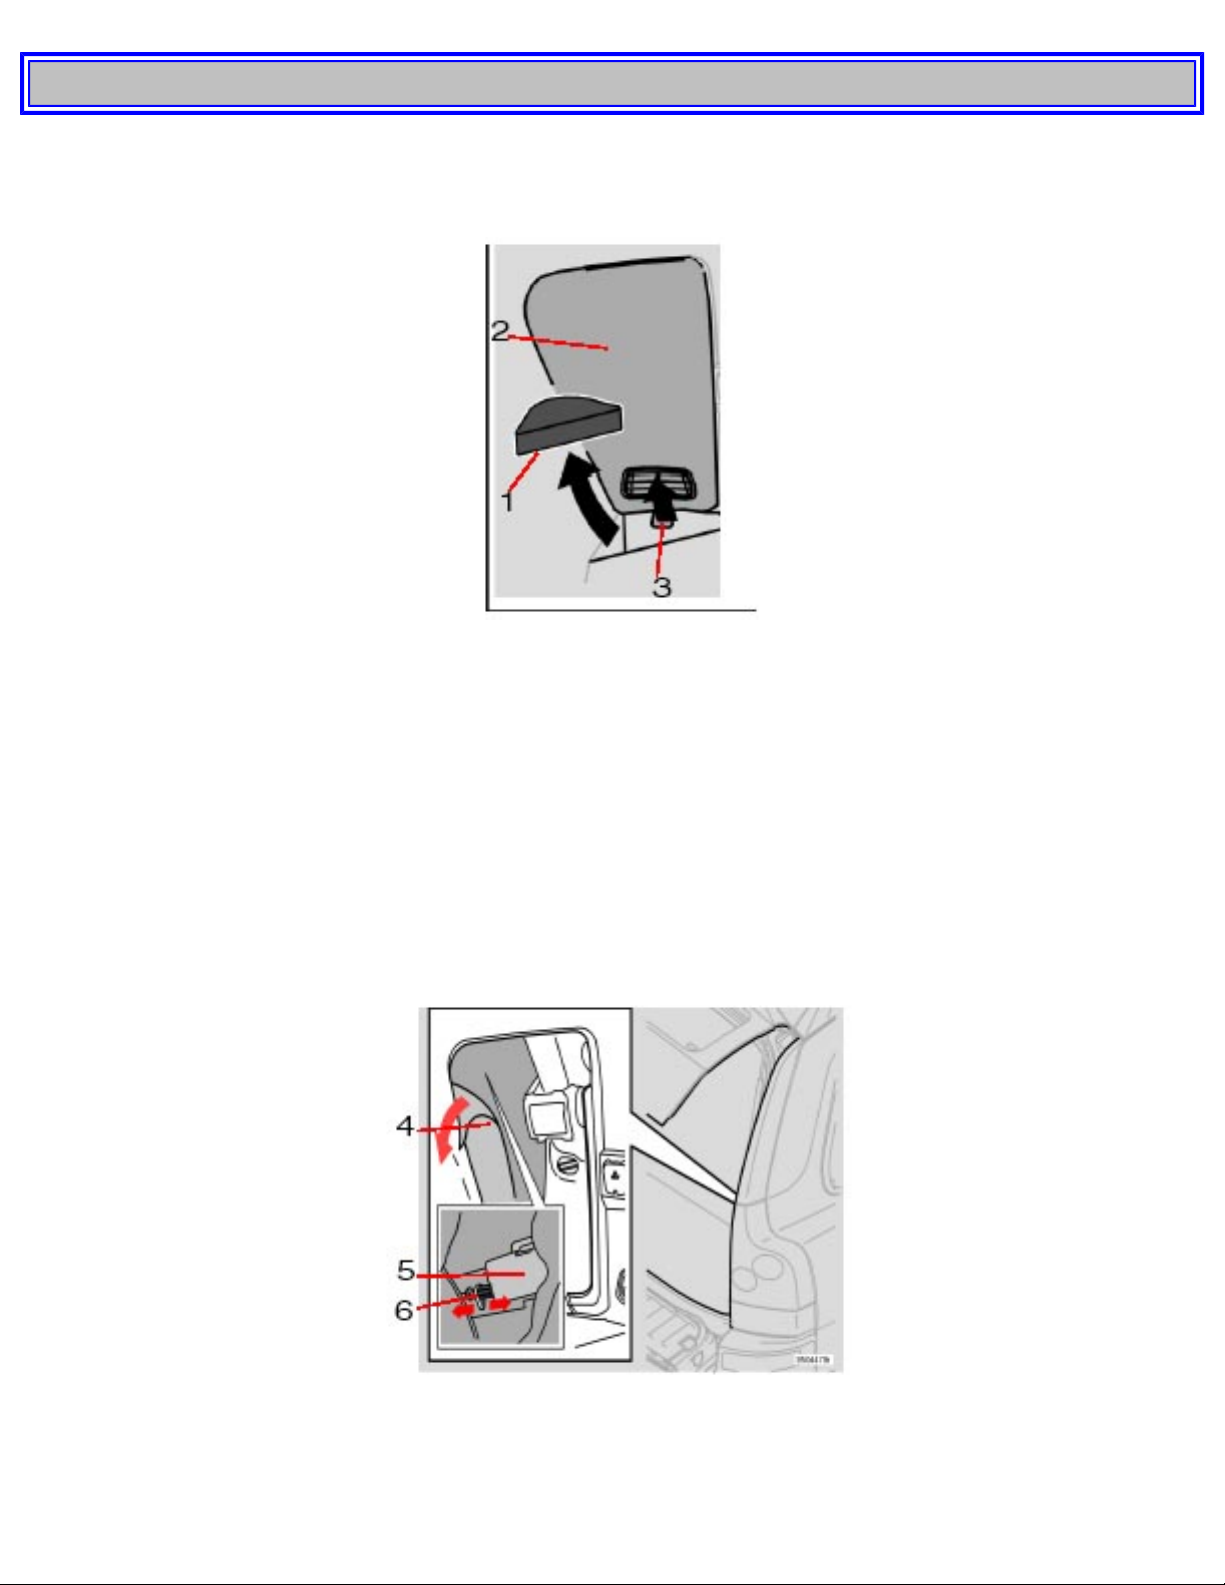
NOTE: Cotton gloves are available in the tool kit located in the spare wheel well.
1. Open the upper and lower sections of the tailgate, and fold up the rear section of the cargo area floor.
2. If the vehicle is equipped with the optional grocery bag holder, detach the holder's bands.
3. Remove the corner panel (1) from the floor of the cargo area.
4. Open the cover (2) in the side panel by pulling the tab (3) upward/outward.
file:///K|/ownersdocs/2003/2003_XC90/03xc90_02a.htm (13 of 16)12/30/2006 4:18:52 PM
Page 48
2003 VOLVO XC90
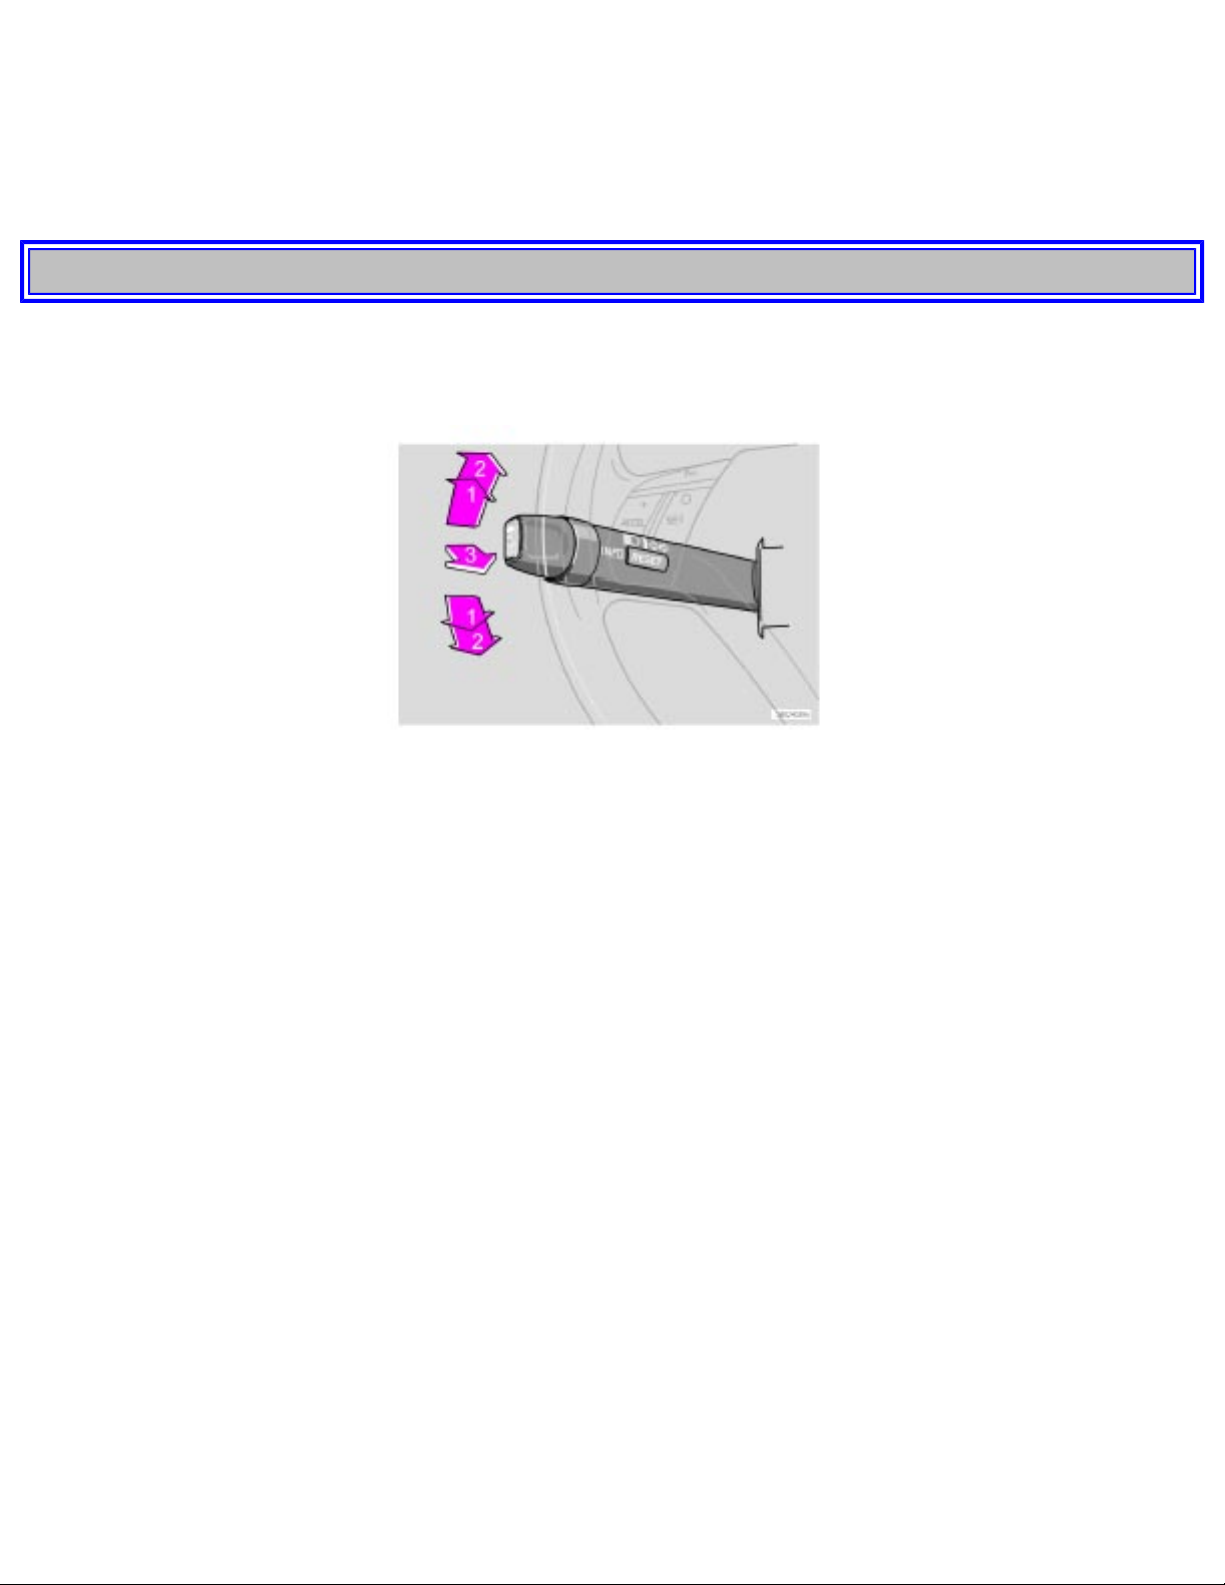
5. Pull down the insulating material (4) to access the fuel filler door motor (5).
6. Move the catch (6) rearward to unlock the fuel filler door lock, or move it forward to lock the filler
door.
pg. 33 Instruments and controls
Turn signals
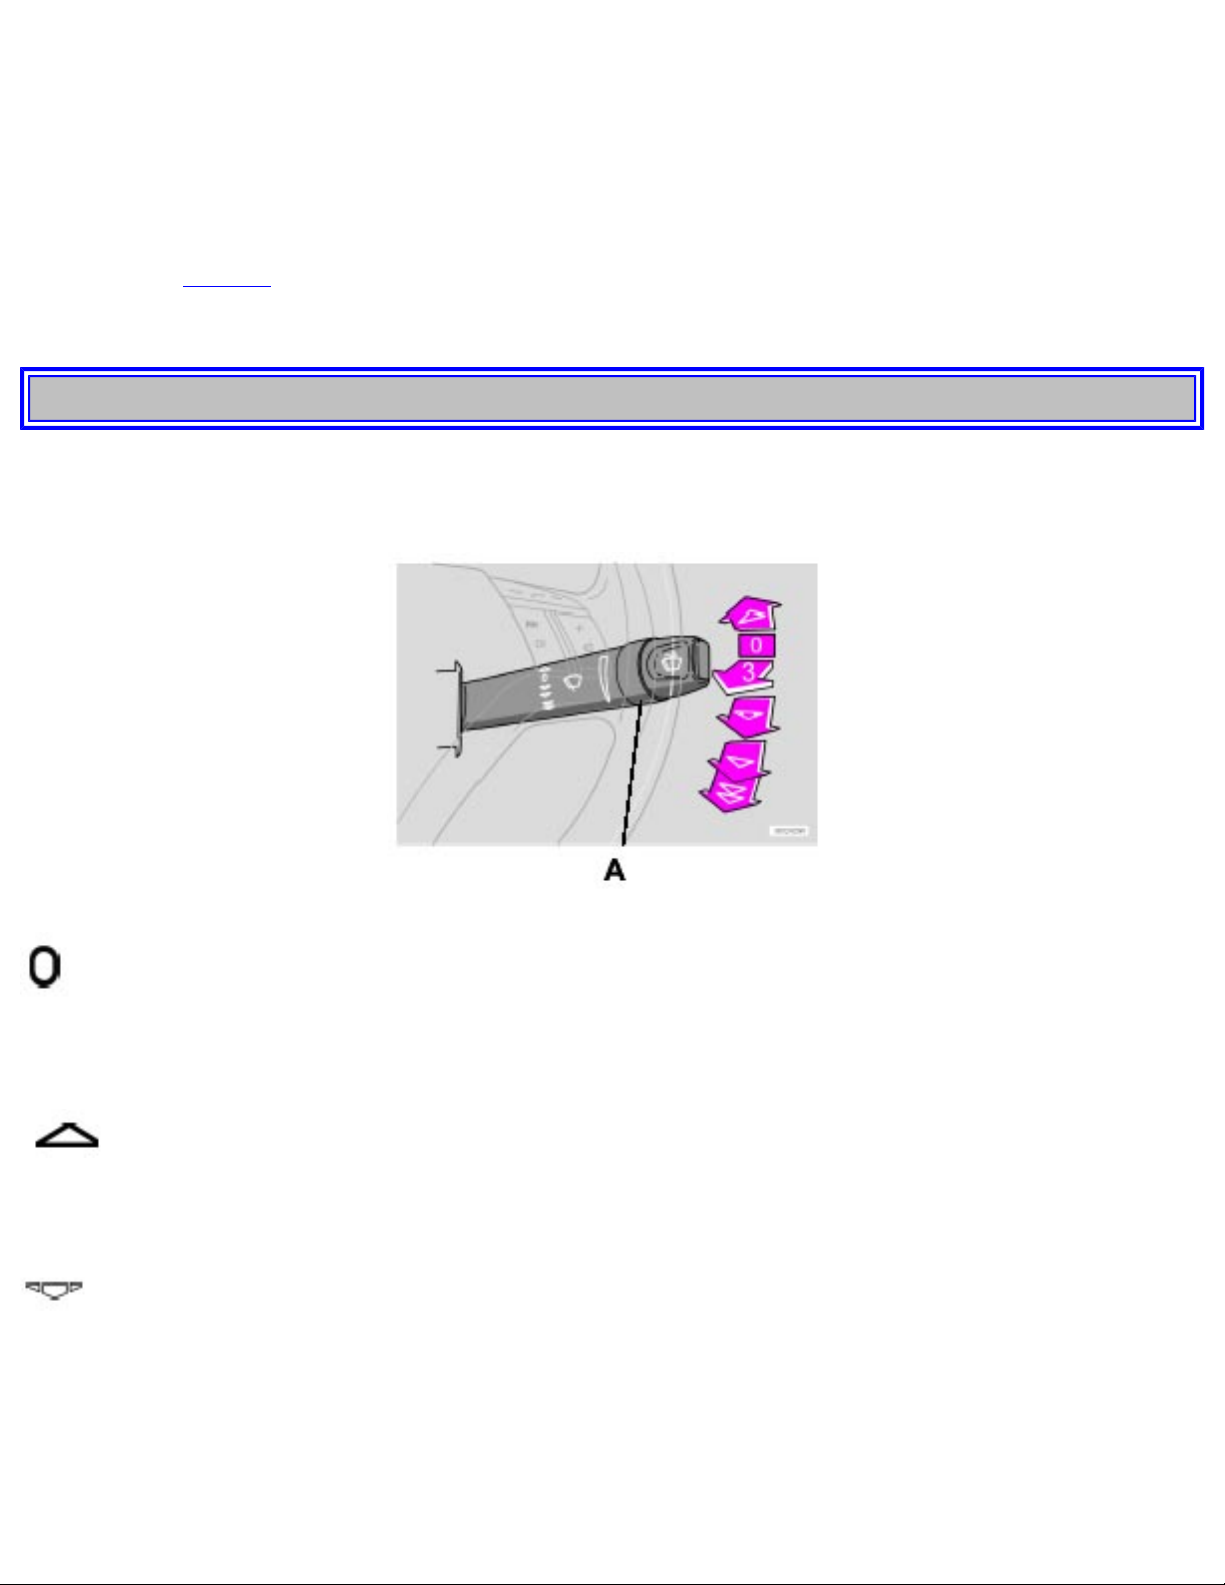
1. Lane change
In maneuvers such as lane changing, the driver can flash the turn signals by moving the turn signal lever
to the first stop and holding it there. The lever will return to the neutral position when released.
2. Signal lever engaged for normal turns
3. High/low beam switch (headlights on).
Move the lever towards the steering wheel and release it.
Headlight flasher (headligts off).
Move the lever towards the steering wheel. The headlight high beam will be on until the lever is
released.
NOTE: If the turn signal indicator flashes faster than normal, check for a burned-out turn signal bulb.
Exterior courtesy lights
Home safe lighting
When you leave your vehicle at night, you can make use of the courtesy lighting function:
● Remove the key from the ignition switch.
● Pull the turn signal lever towards the steering wheel (as when using the headlight flasher function).
● Exit the vehicle and lock the doors.
file:///K|/ownersdocs/2003/2003_XC90/03xc90_02a.htm (14 of 16)12/30/2006 4:18:52 PM
Page 49
2003 VOLVO XC90
The headlights, parking lights, license plate lights and the lights in the sideview mirrors will now come
on and remain on for 30, 60 or 90 seconds (the time interval is at your discretion and can be changed by
an authorized Volvo retailer).
Approach lighting
When approaching the vehicle at night, press the yellow button in the central locking remote control (see
illustration on
page 75). This lights up the interior courtesy lights, parking lights, license plate lights and
the lights in the sideview mirrors.
pg. 34 Instruments and controls
Windshield wipers
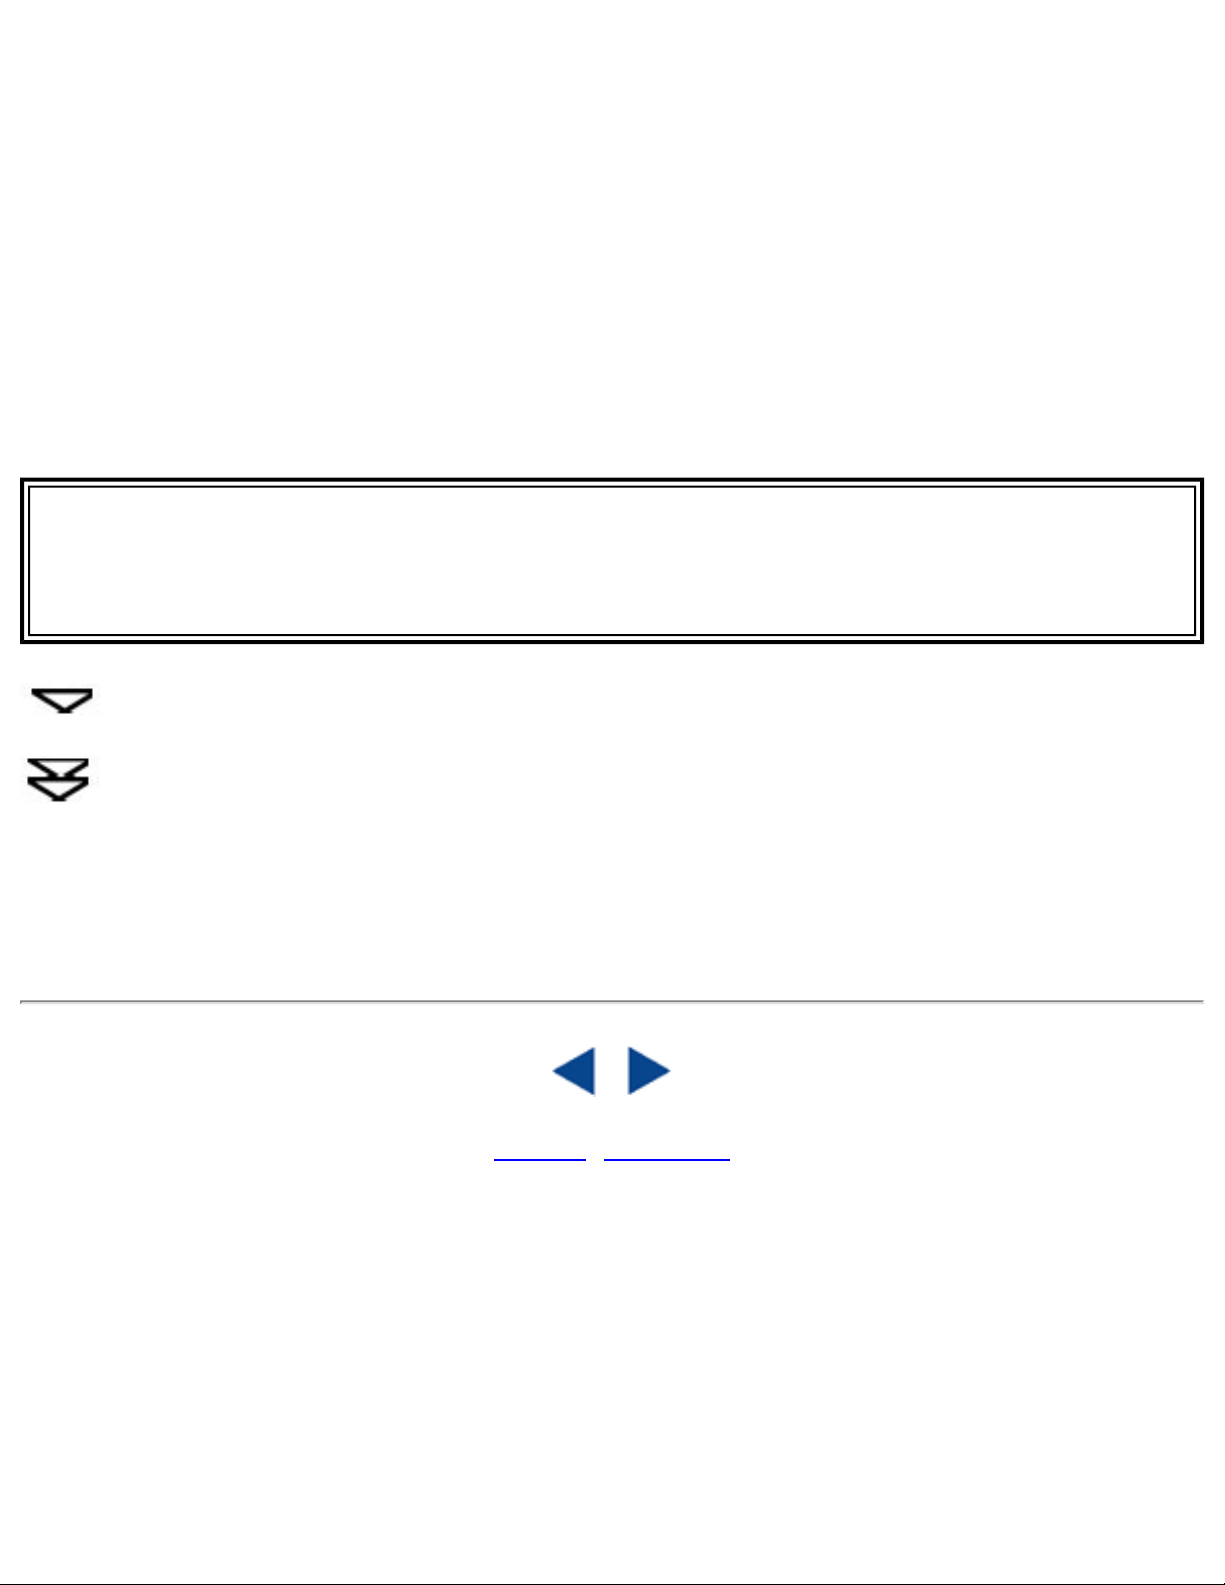
Windshield wipers off
If the lever is in the 0 position and you move it upwards, the wipers will sweep one stroke at a time for
as long as you hold the lever up.
"Single sweep" position
Move the lever slightly upwared from the 0 position for one sweep of the wipers. The lever return
automatically to 0 when released.
Intermittent wiper function
With the lever in this position, you can set the wiper interval by twisting the control ring (A) upward to
increase wiper speed or downward to decrease the speed.
Rain sensor (option)
The rain sensor replaces the intermittent wiper function and automatically regulates wiper speed
according to the amount of water on the windshield. The sensitivity of the sensor can be adjusted by
file:///K|/ownersdocs/2003/2003_XC90/03xc90_02a.htm (15 of 16)12/30/2006 4:18:52 PM
Page 50
2003 VOLVO XC90
twisting collar A upward or downward.
Activating the rain sensor function:
1. Switch on the ignition.
2. Move the windshield wiper lever to the intermittent position.
The rain sensor is deactivated when the ignition is switched completely off.
To reactivate the rain sensor function:
1. Switch on the ignition.
2. Move the windshield wiper lever to position 0 and then back to the intermittent position.
CAUTION
When washing the vehicle in an automatic car wash, move the windshield wiper lever to
position 0 to deactivate the rain sensor. If the rain sensor is left on, the wipers will activate in the
car wash and could be damaged.
Wipers operate at "normal" speed
Wipers operate at "high" speed
3 - Windshield washer/headlight washer (certain models)
Pull the lever toward you and release it. High pressure jets mounted in the bumper will spray the
headlights.
Contents | Top of Page
file:///K|/ownersdocs/2003/2003_XC90/03xc90_02a.htm (16 of 16)12/30/2006 4:18:52 PM
Page 51
2003 VOLVO XC90
pg. 35 Instruments and controls
Hazard warning flashers, rear window/sideview mirror
defroster, heated front seats
Hazard warning flashers
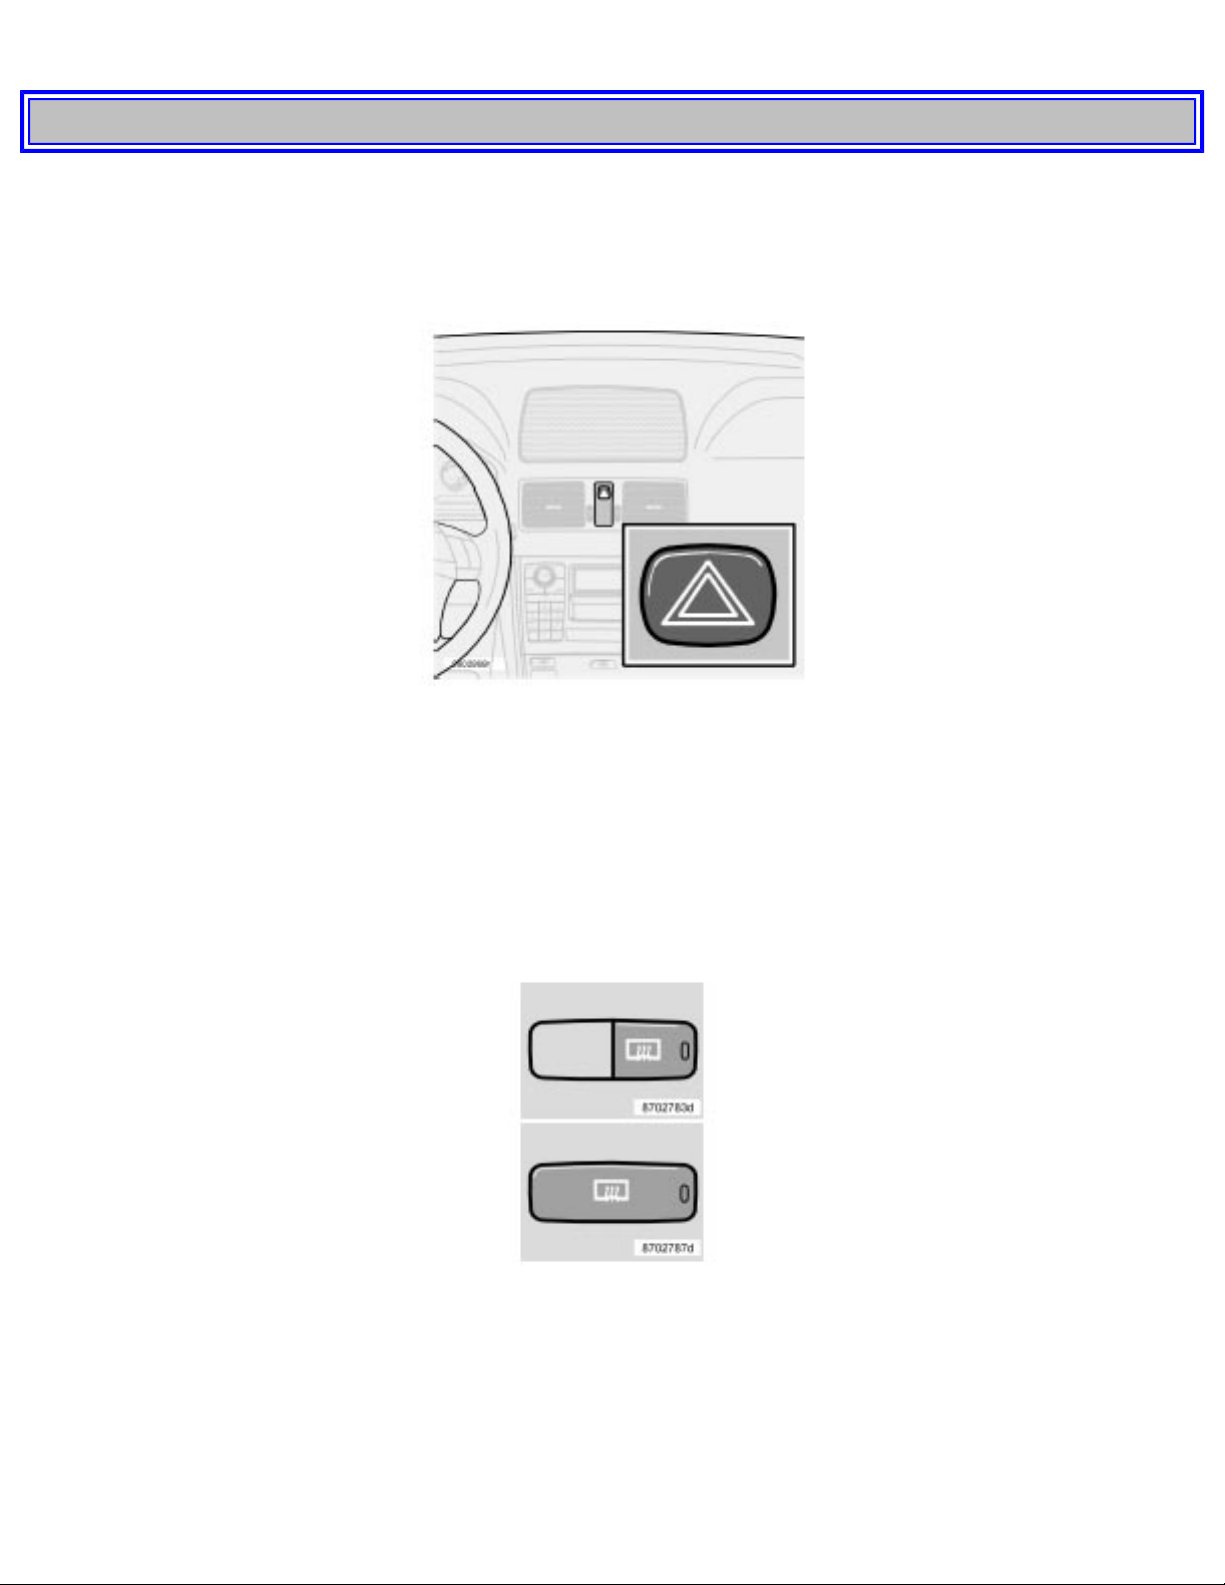
The four-way flasher should be used to indicate that the vehicle has become a traffic hazard. To activate
the flashers, press the triangular button in the center dash. Press the button again to turn off the flashers.
NOTE: Regulations regarding the use of the hazard warning flasher may vary, depending on where you
live.
Sideview mirror and rear window defroster
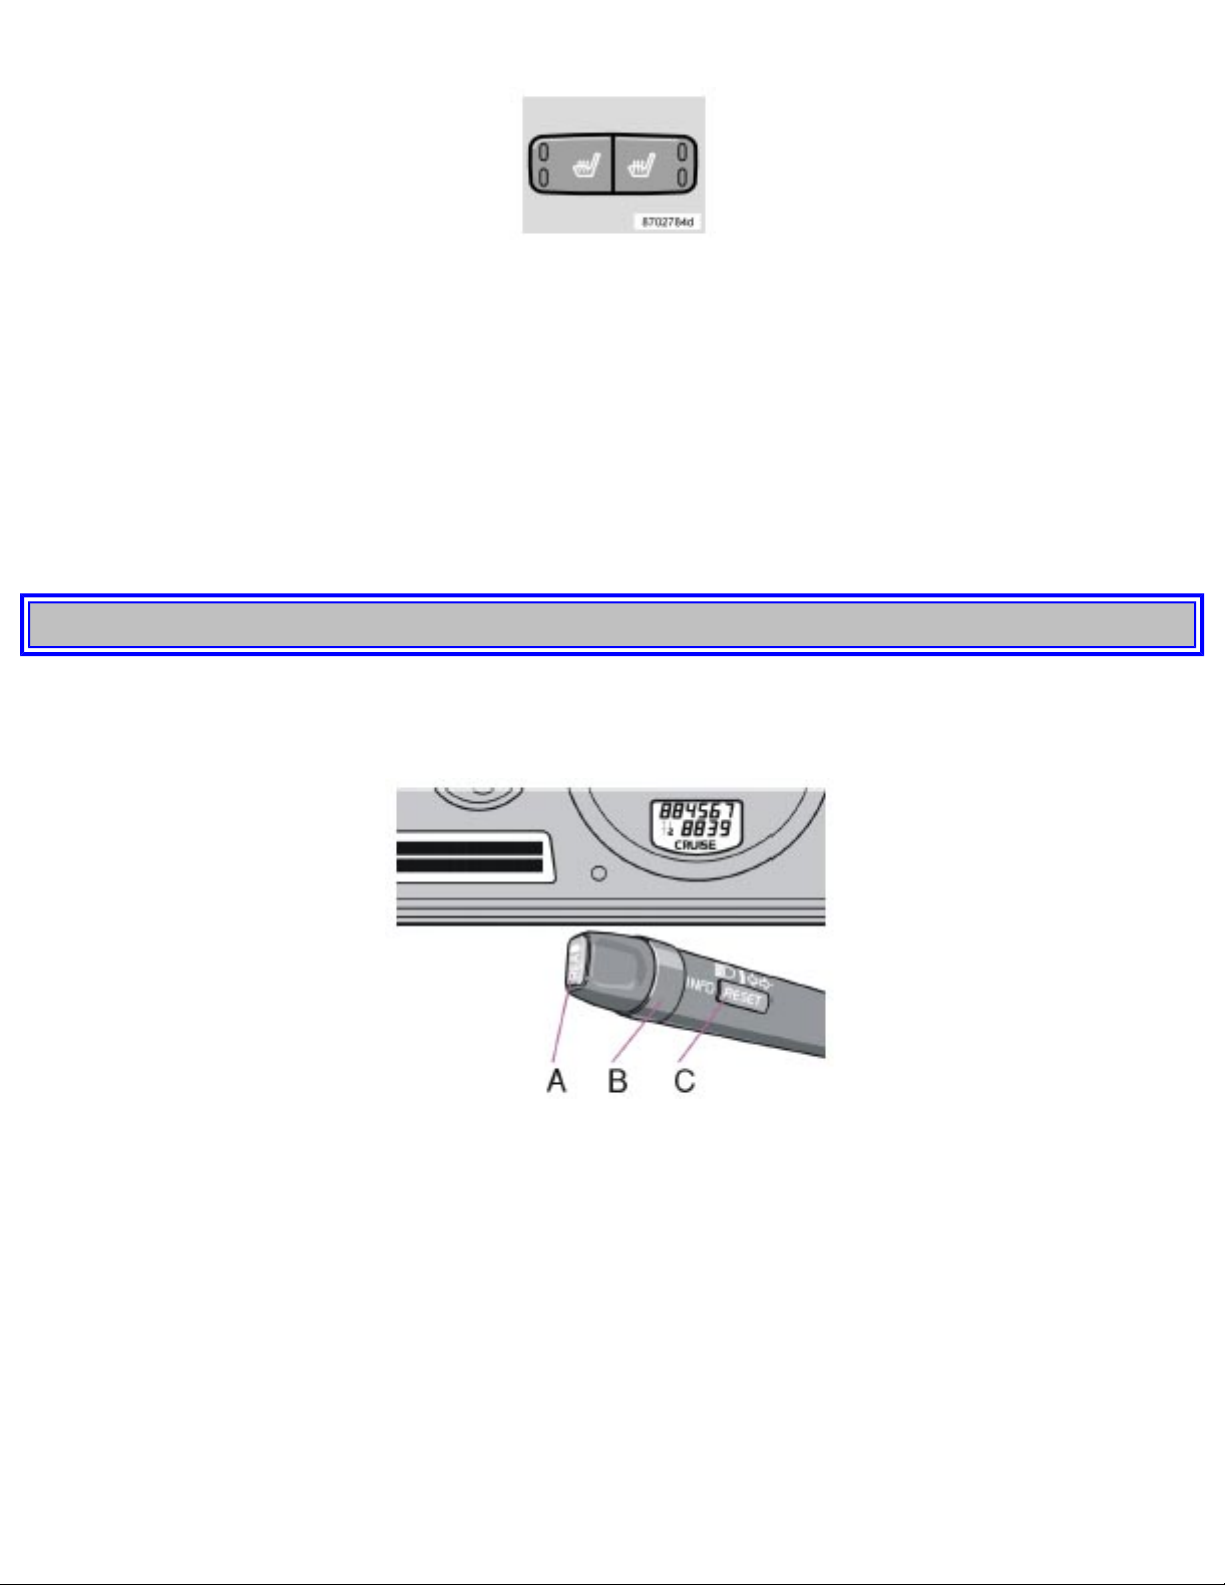
Press the switch to start heating the rear window and sideview mirrors to remove ice or condensation.
An LED in the switch will light up.
A timer automatically switches off the heating to the sideview mirrors after approximately 4 minutes and
to the rear window after approximately 12 minutes. The LED will go out correspondingly.
file:///K|/ownersdocs/2003/2003_XC90/03xc90_02b.htm (1 of 14)12/30/2006 4:18:53 PM
Page 52
2003 VOLVO XC90
Heated front seats (option)
● The front seat heating can be switched on and off as required.
● Press the switch once for maximum seat heating. Both LED's in the switch will be lit.
● Press the switch a second time for comfort heating. One LED in the switch will be lit.
● Press the switch a third time to turn the heating off completely.
The seat heating for the passenger seat should be switched off when the seat is not occupied.
pg. 36 Instruments and controls
Trip computer (option)
The trip computer stores information gathered from several systems in your vehicle and has four menus
that can be displayed in the text window.
● Driving distance on current fuel reserve
● Average fuel consumption
● Current fuel consumption
● Average speed
● Current speed in mph (Canadian models only)
NOTE: Warning messages from the vehicle's monitoring systems will override the trip computer
function. If a warning message is displayed in the text window while you are using the trip computer,
you must acknowledge the message by pressing button A. Press button A again to return to the trip
computer function.
file:///K|/ownersdocs/2003/2003_XC90/03xc90_02b.htm (2 of 14)12/30/2006 4:18:53 PM
Page 53

2003 VOLVO XC90
Trip computer controls and functions.
The four* trip computer functions can be accessed by twisting control B one step at a time in either
direction. Twisting a fifth** time returns you to the original function.
The trip computer can be reset (current data will be erased from system memory) by pressing RESET
(button C).
1. Driving distance on current fuel reserve
This function shows the approximate distance that can be driven on the fuel remaining in the tank. This
calculation is based on average fuel consumption during the last 12 miles (20 km) of driving and the
amount of fuel remaining in the tank when the reading was taken.
When the driving distance on current fuel reserve is less than 12 miles (20 km), "----" will be displayed
in the text window.
2. Average fuel consumption
This value indicates fuel consumption since the last time the trip computer was reset (by pressing
RESET, button C). When the engine is switched off, information on fuel consumption is stored and
remains in system memory until the RESET (button C) is pressed again.
3. Current fuel consumption
This value indicates the current fuel consumption, based on readings taken once per second. When the
vehicle is not moving, "----" will be displayed.
4. Average speed
This value indicates average speed since the last time the trip computer was reset (by pressing RESET,
button C). When the engine is switched off, information on average speed is stored and remains in
system memory until the RESET (button C) is pressed again.
5. Current speed in miles per hour (Canadian models only)
This function provides the driver with an instantaneous conversion of the vehicle's current speed from
km/h to mph.
* Five functions on Canadian models
** A sixth time on Canadian models
pg. 37 Instruments and controls
Cruise control
file:///K|/ownersdocs/2003/2003_XC90/03xc90_02b.htm (3 of 14)12/30/2006 4:18:53 PM
Page 54
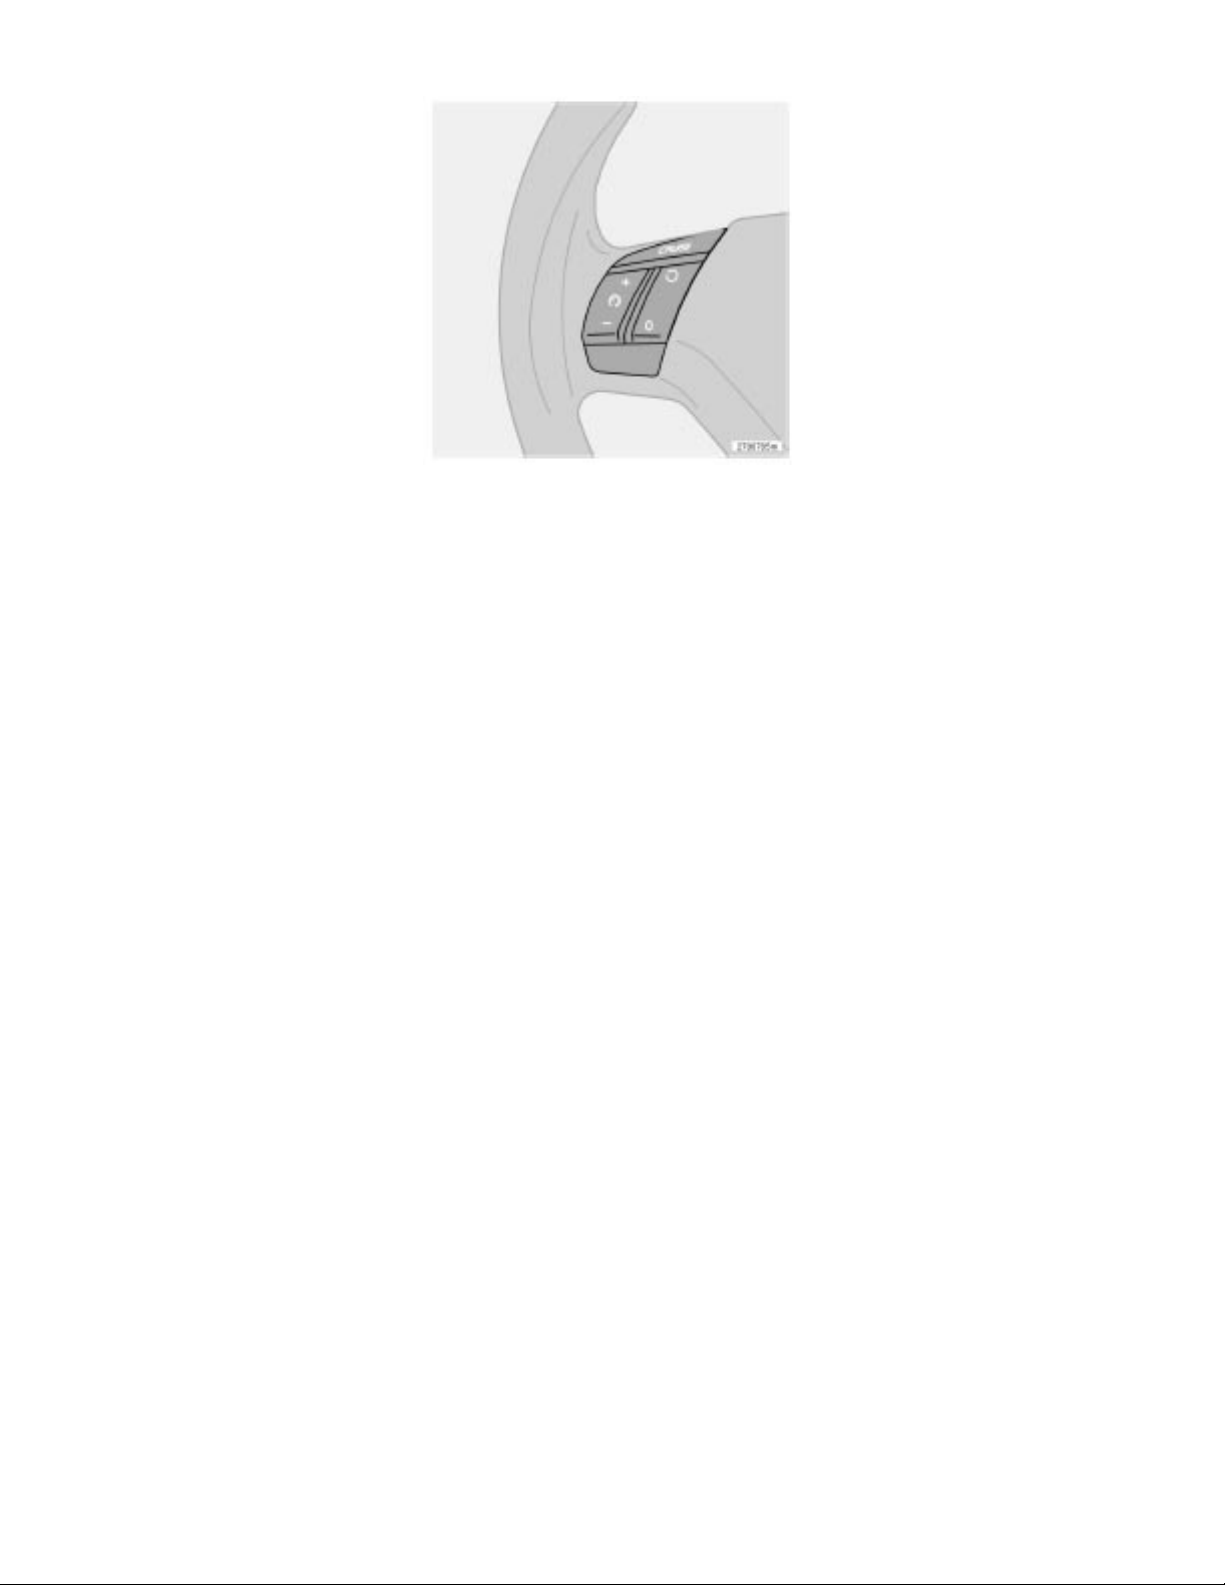
2003 VOLVO XC90
Cruise control
The cruise control panel is located on the left side of the steering wheel hub.
Engaging cruise control/setting speed
● Press the CRUISE button. The word CRUISE will be displayed in the window in the lower section of
the speedometer.
● Press + or - to set the current speed
● Increase or decrease speed as desired
NOTE: Cruise control will not function at speeds below 22 mph (35 km/h).
Braking
Cruise control is automatically disengaged when the brake pedal is depressed. The currently set speed is
stored in memory. Quickly pressing resume will return the vehicle to the previously set speed.
Acceleration
● Momentary acceleration, such as when passing another vehicle, does not affect cruise control
operation. The vehicle will automatically return to the previously set speed when you release the
accelerator pedal.
● When the cruise control is already engaged, the vehicle's speed can be increased or decreased by
holding down + or - until the vehicle reaches the desired speed. One short press on either symbol
corresponds to a speed change of approximately 1 mph (1.6 km/h).
Disengaging cruise control
Cruise control can also be disengaged by:
● Pressing the CRUISE button.
● Putting the gear selector in (N)eutral.
NOTE: Cruise control is automatically disengaged if the engine is switched off, if the gear selector is
file:///K|/ownersdocs/2003/2003_XC90/03xc90_02b.htm (4 of 14)12/30/2006 4:18:53 PM
Page 55
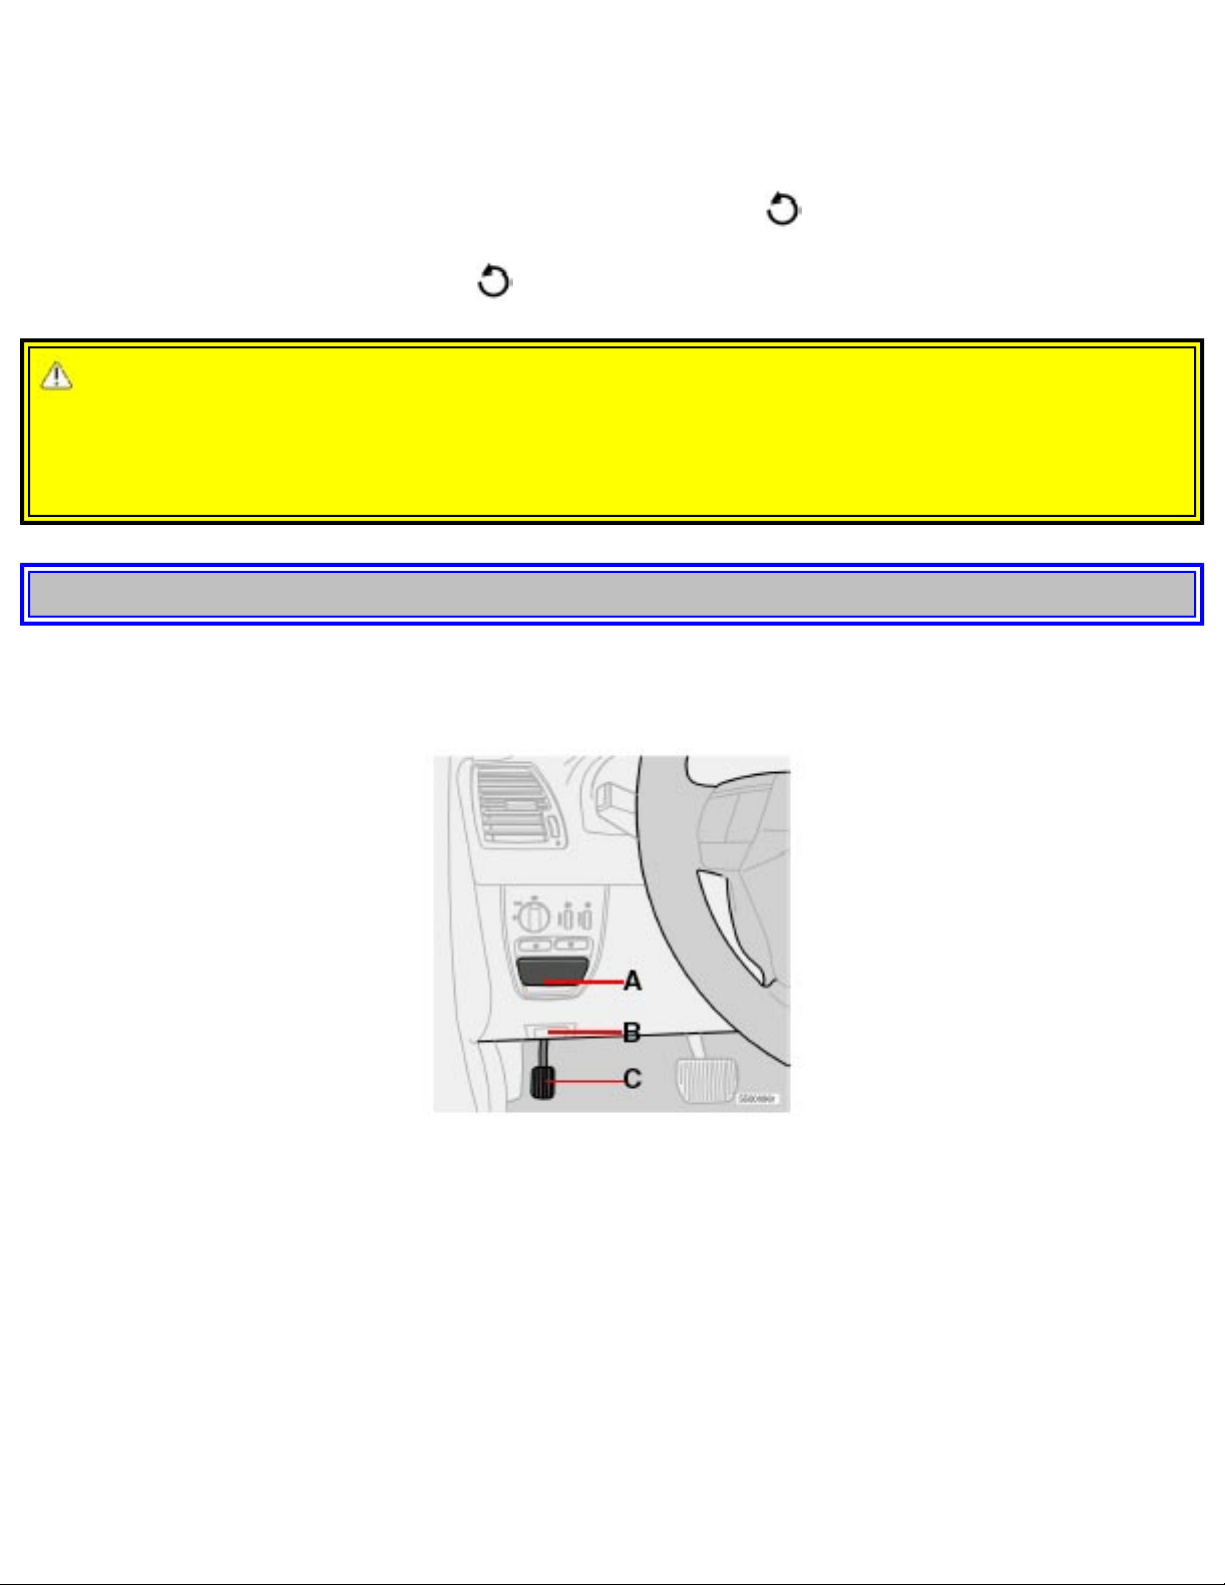
2003 VOLVO XC90
placed in (N)eutral, if the vehicle's speed drops to under 70% of the currently set speed or if the wheels
start to spin.
Temporarily disengaging cruise control
● Press 0 to temporarily disengage cruise control. Press "resume" to return to the previously set
speed.
● Press the brake pedal. Press "resume" to return to the previously set speed.
WARNING!
The Cruise control should not be used in heavy traffic or when driving on wet or slippery roads, or
when driving on unpaved or uneven road surfaces. Cruise control may not maintain set speed on steep
downgrades.
pg. 38 Instruments and controls
Parking brake, Opening/closing the hood
Parking brake
● To apply the parking brake, press the pedal (C). The brake is applied to the rear wheels. The indicator
light in the instrument panel will light up to indicate that the parking brake is applied.
● Release the parking brake pulling out the lower edge of the release handle (A).
● If you inadvertently pull the plastic cover (B), it can be pressed back into place.
file:///K|/ownersdocs/2003/2003_XC90/03xc90_02b.htm (5 of 14)12/30/2006 4:18:53 PM
Page 56
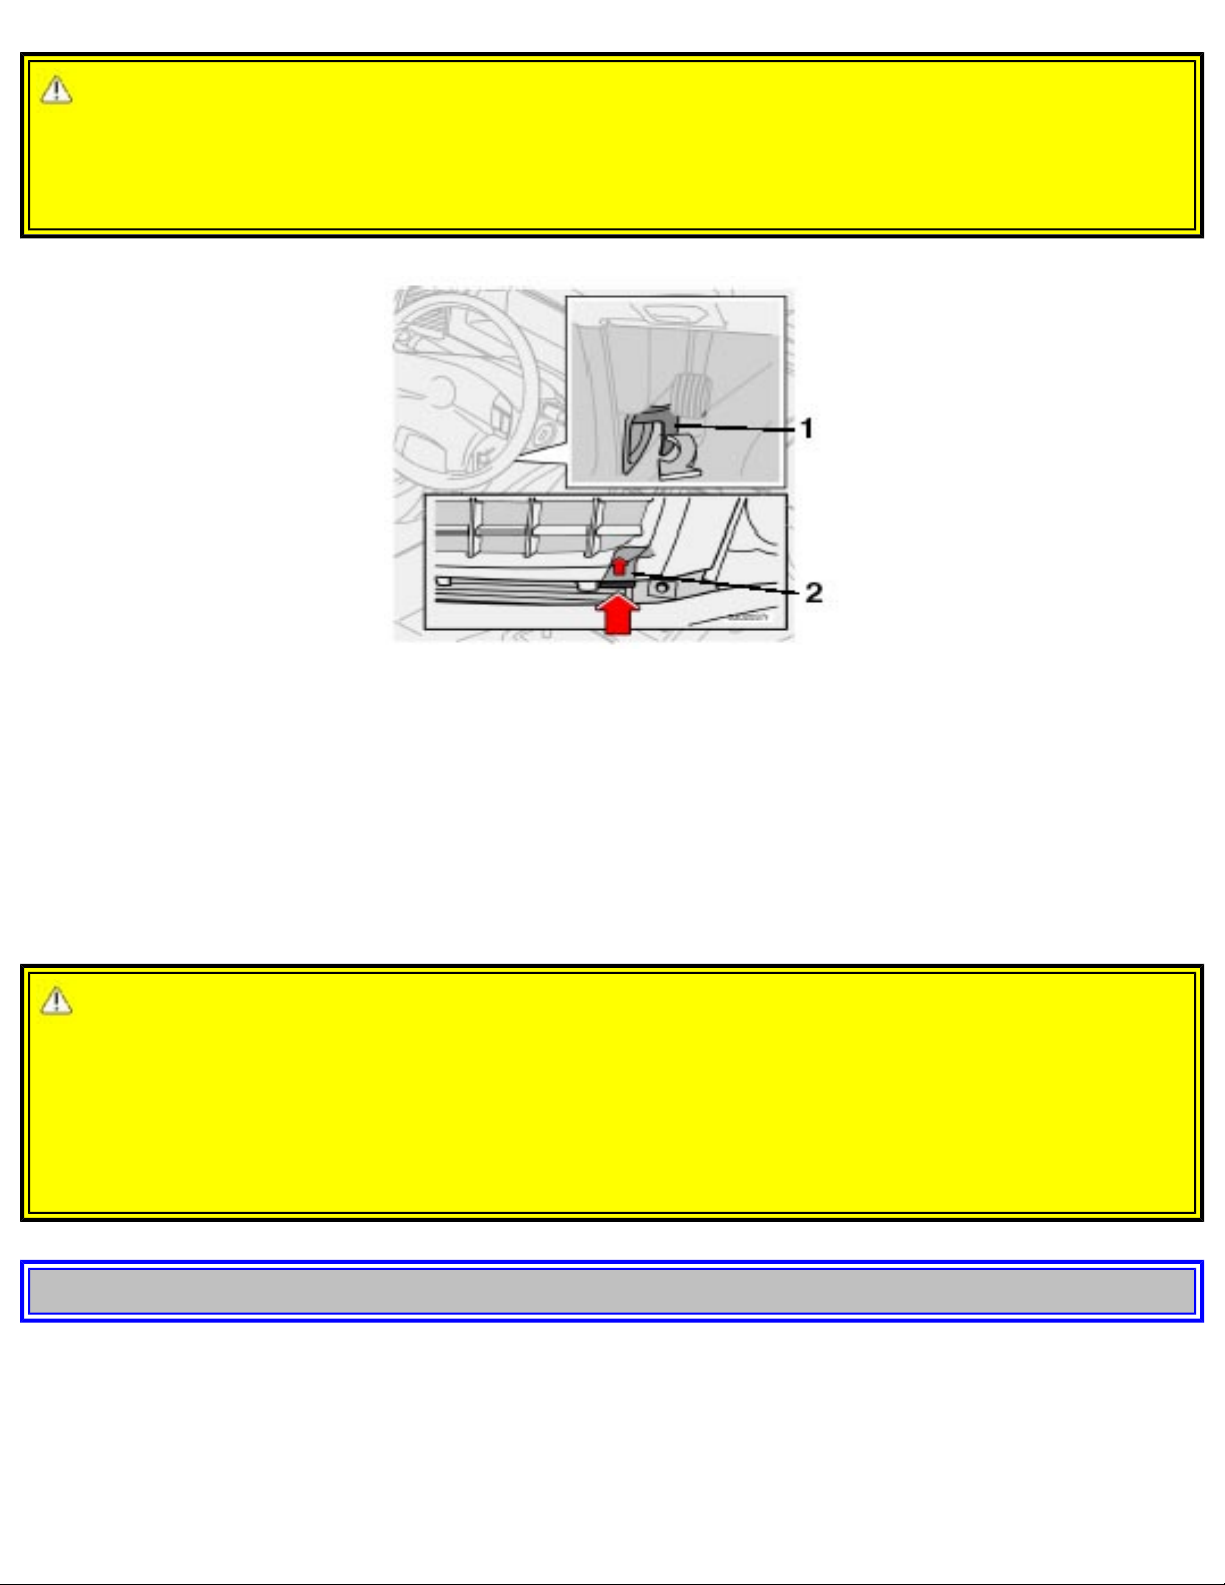
2003 VOLVO XC90
WARNING!
Always use the parking brake when parking. On hills, also turn the front wheels toward the curb.The
indicator light in the instrument panel will light up even if the parking brake is applied only slightly.
Be sure to press down on the pedal sufficiently.
Opening the hood
Opening/closing the hood
1. Pull the lever (1) located under the left side of the dashboard to release the hood lock.
2. Lift the hood slightly.
3. Press up the release control (2) located under the front edge of the hood and lift.
To close the hood, place your hand on it and press down until the hood locks in the closed position.
WARNING!
● Do not grasp the ribs in the grille when closing the hood. If your fingers protrude through the
grille, they could be injured on components in the engine compartment as the grille closes. We
recommend pressing down on the hood to close it.
● Check that the hood locks properly when closed!
pg. 39 Instruments and controls
Opening the tailgate, Auxiliary 12-volt sockets
file:///K|/ownersdocs/2003/2003_XC90/03xc90_02b.htm (6 of 14)12/30/2006 4:18:53 PM
Page 57
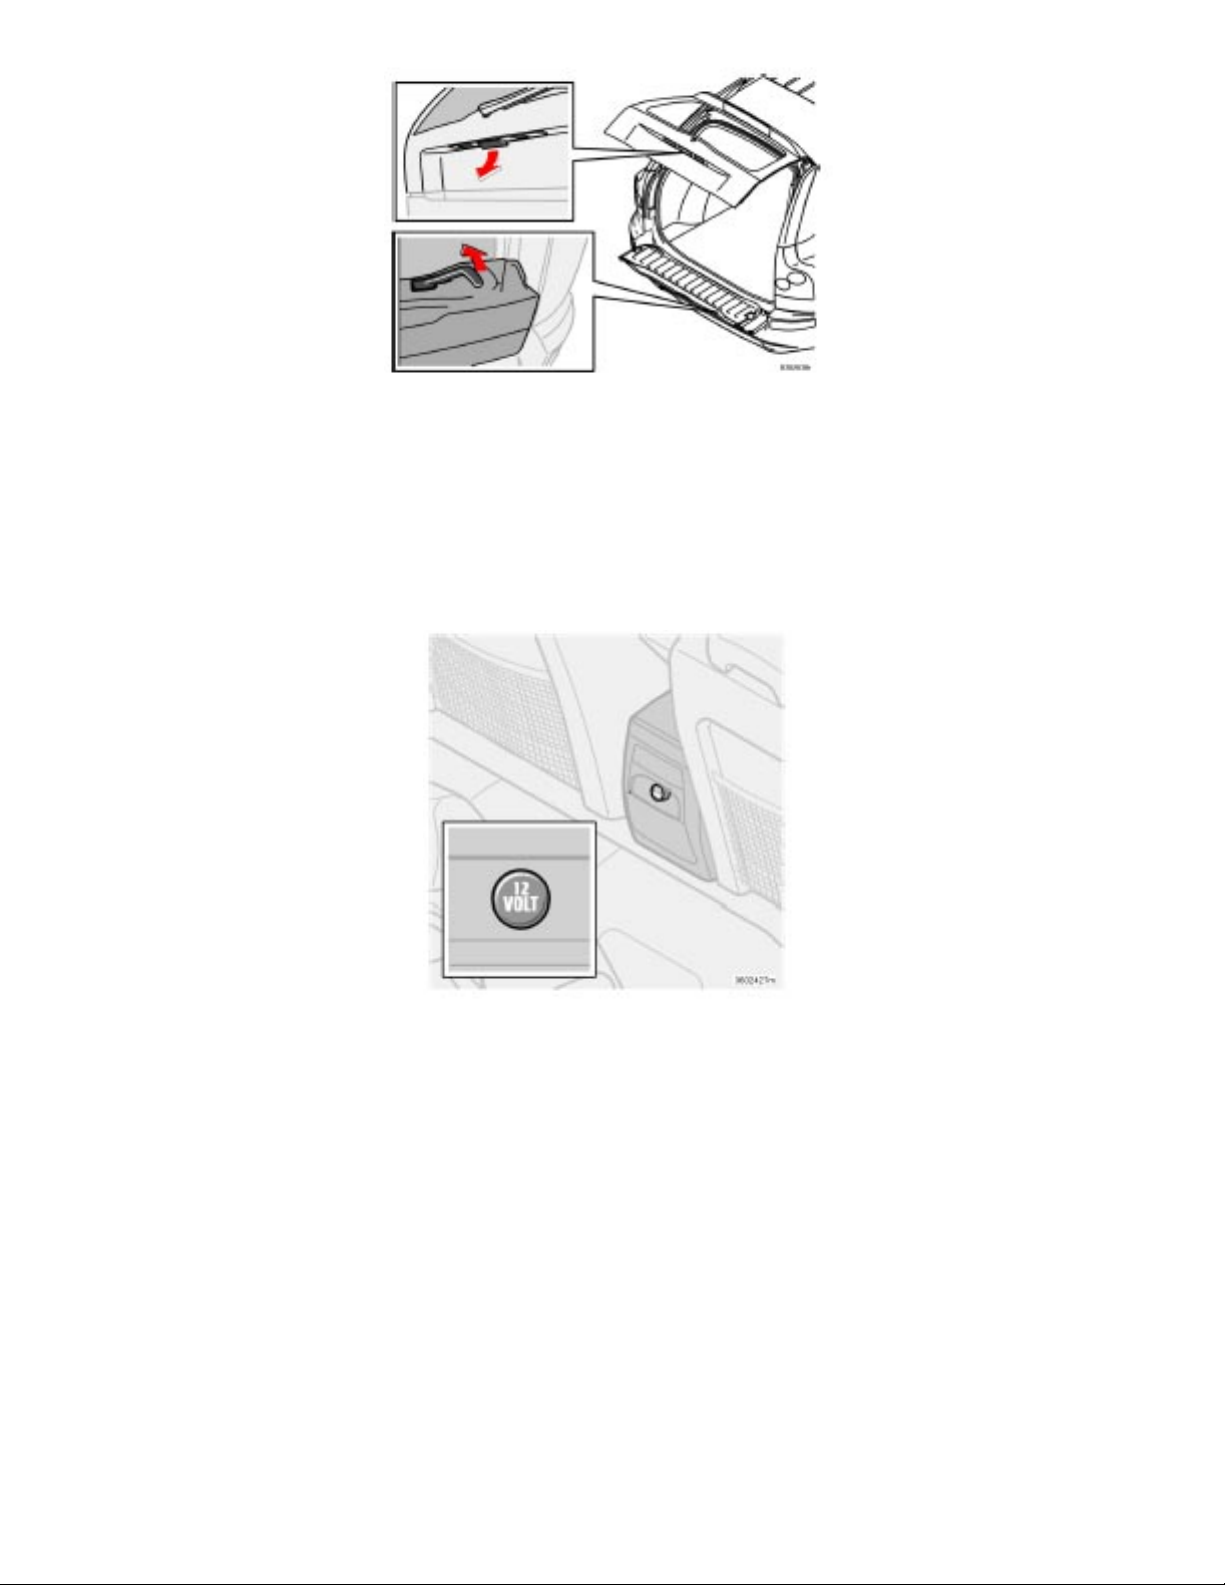
2003 VOLVO XC90
Opening the tailgate
To open the upper section of the tailgate, pull the handle (A) downward.
To fold down the lower section of the tailgate, pull handle (B) upward.
12-volt socket at the rear of the center console
Auxiliary 12-volt sockets
These 12 volt sockets can be used to plug in certain accessories such as cellular telephones, etc.
12-volt socket in the cargo compartment
Fold down the lid to use the socket.
NOTE!
● If the 12-volt sockets are used while the engine is not running, there is a risk that the vehicle's battery
will be discharged.
file:///K|/ownersdocs/2003/2003_XC90/03xc90_02b.htm (7 of 14)12/30/2006 4:18:53 PM
Page 58
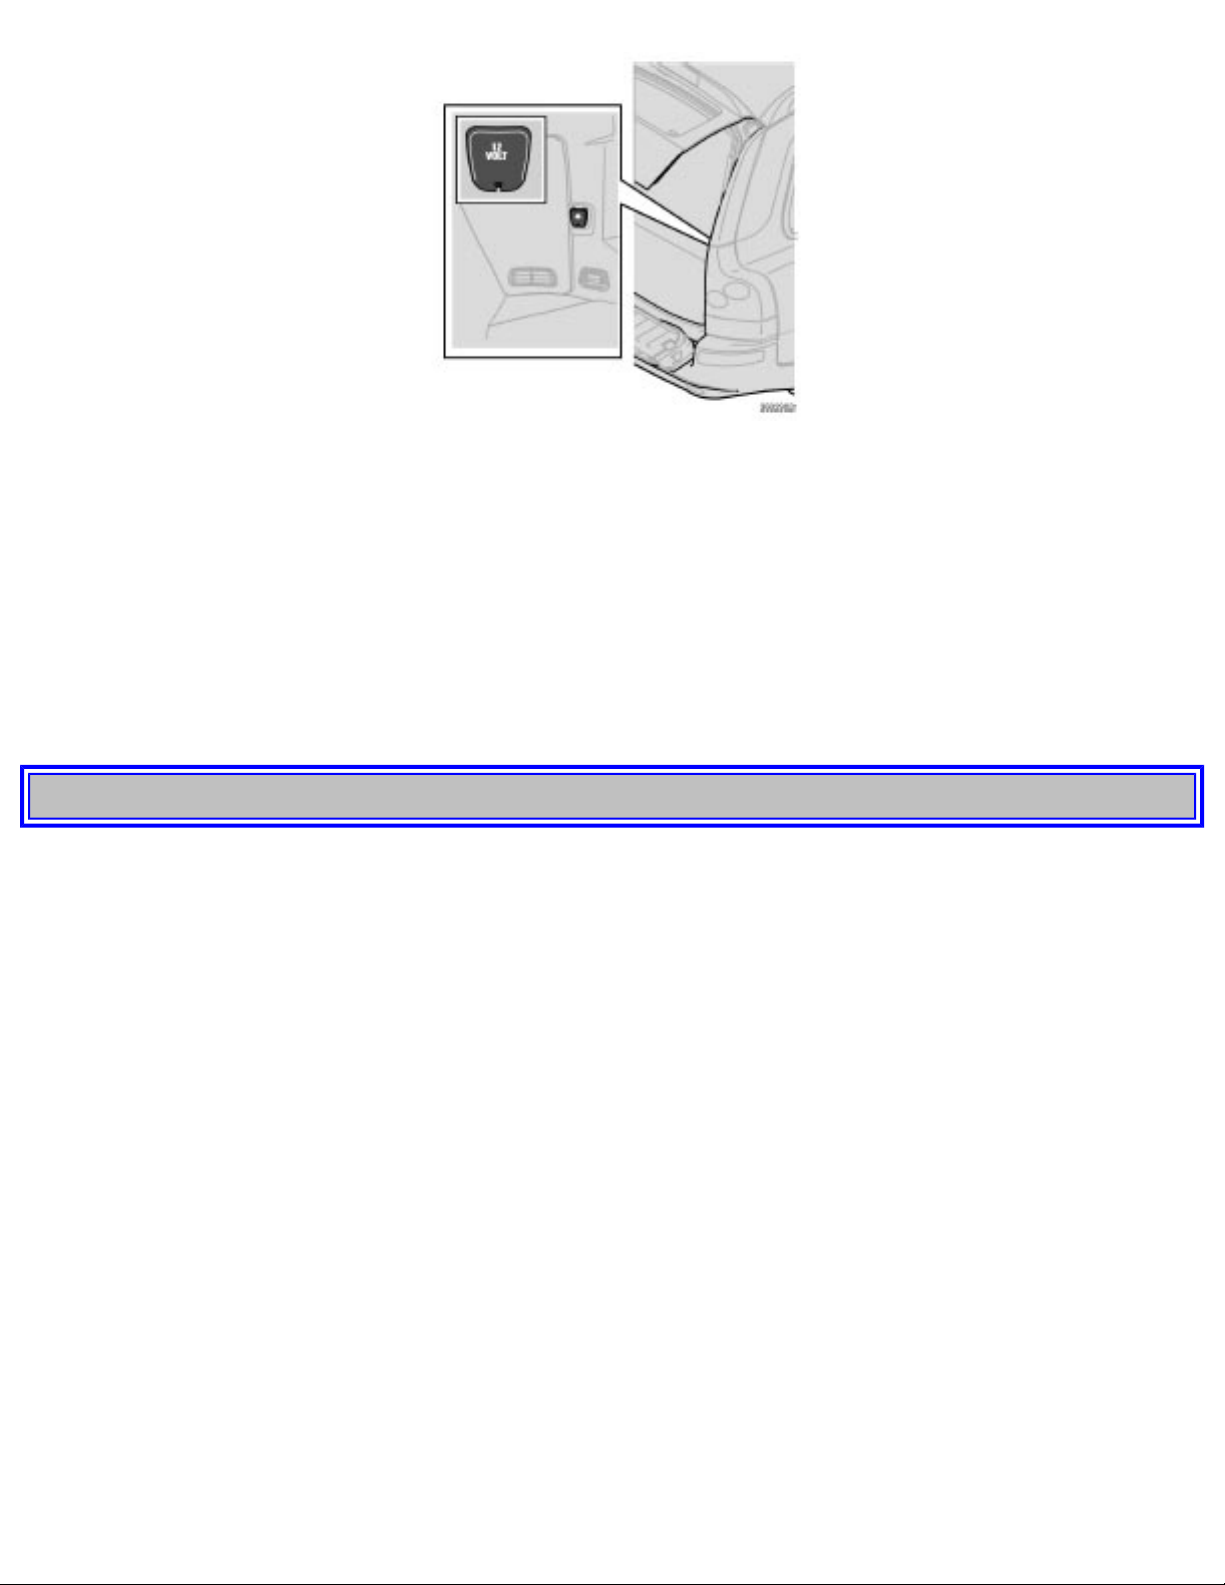
2003 VOLVO XC90
12-volt socket in the cargo compartment
● If the ignition is switched off and a device drawing more than 0.1A is connected to a socket, a battery
warning will be displayed in the text window.
● The covers should be kept on when the auxiliary sockets are not in use.
● Maximum current from the sockets is 15A.
Ashtrays/cigarette lighter
The auxiliary sockets can also be used for cigarette lighters.
Ashtrays and lighters are available as accessories. Please contact your Volvo retailer.
pg. 40 Instruments and controls
Electrically operated windows
The electrically operated windows are controlled by buttons in the arm rests.
● The ignition switch must be ON* (ignition key in position I, II or the engine running) for the
electrically operated windows to function.
● To lower: Press down the front edge of the button to the first detent ("stop").
● To raise: Lightly pull up the front edge of the button to the first detent ("stop").
* The electrically operated windows will also function after the ignition has been switched off as long as
neither of the front doors has been opened.
Auto up/down function (front doors only):
Either front door window can be opened or closed automatically.
Auto down: Press the front part of the button as far down as possible and release it immediately. To
stop the window at any time, pull the button up.
Auto up: Pull the front part of the button up as far as possible and release it immediately. To stop the
file:///K|/ownersdocs/2003/2003_XC90/03xc90_02b.htm (8 of 14)12/30/2006 4:18:53 PM
Page 59
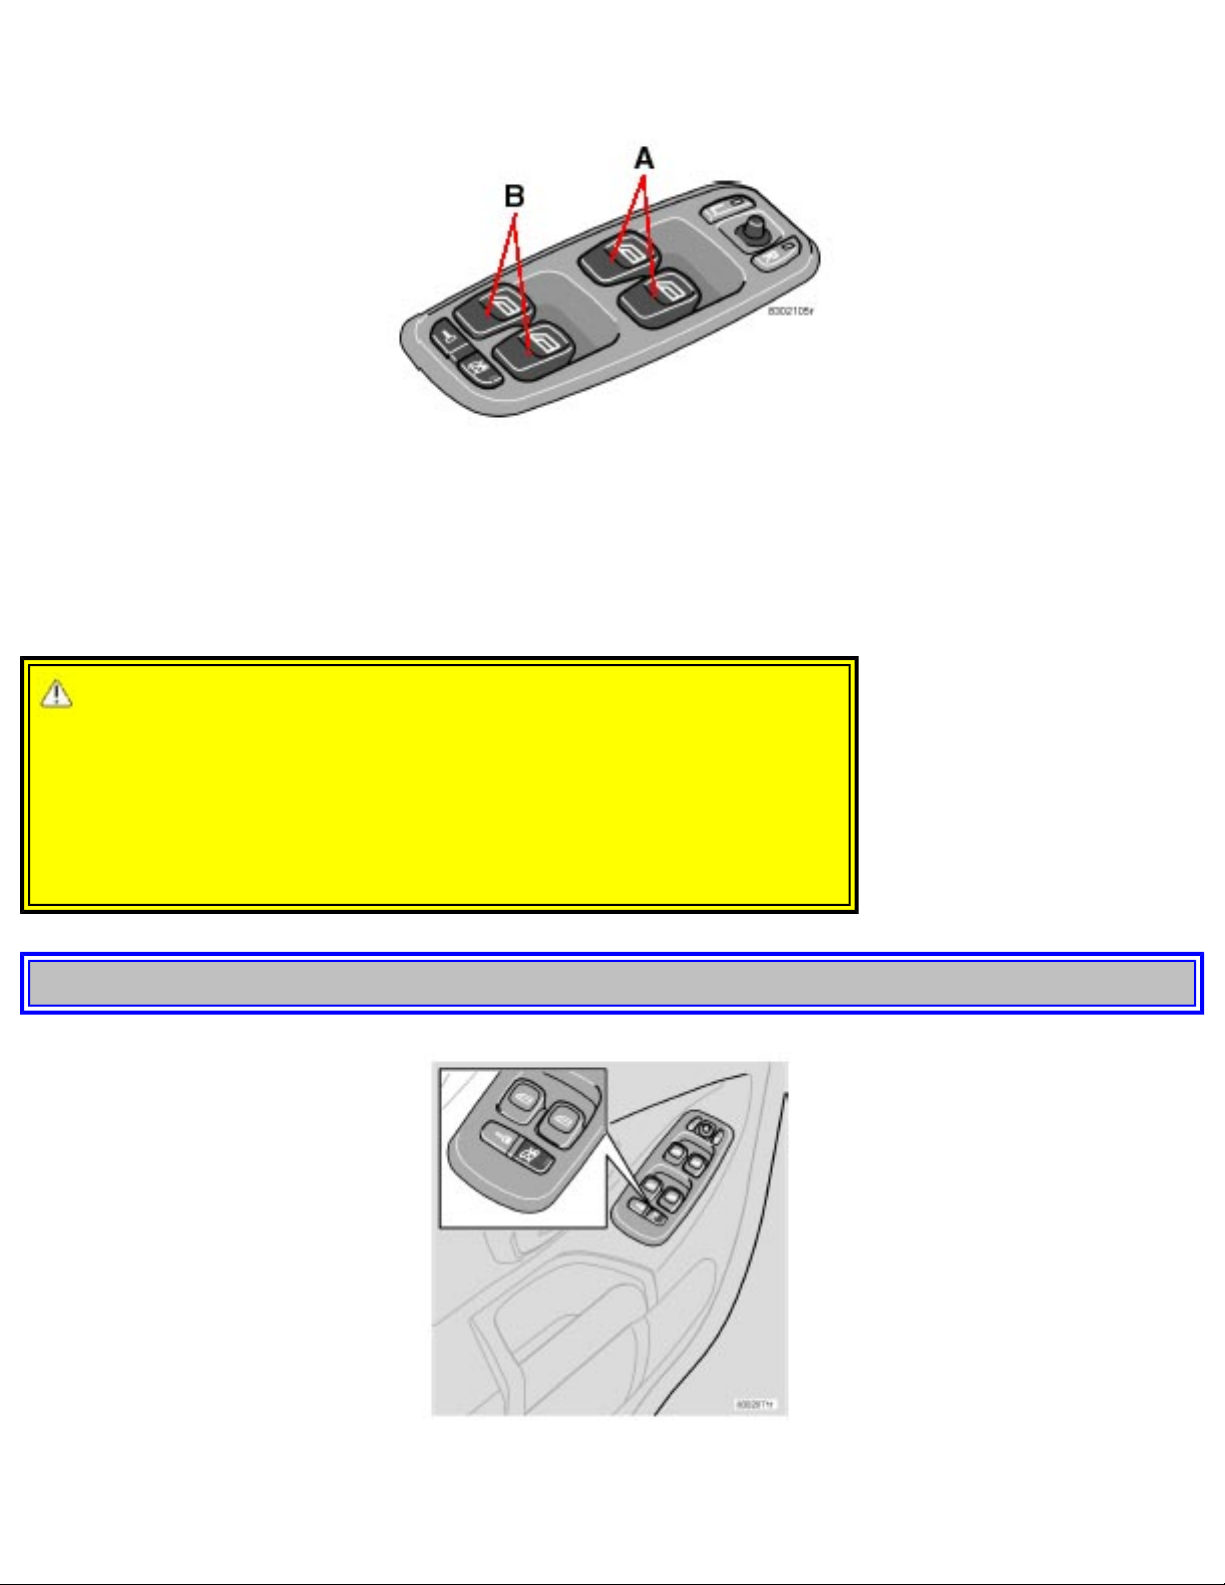
2003 VOLVO XC90
window at any time, press the button down.
NOTE: If a window is obstructed during auto-up, it will automatically reverse direction and return to its
starting position. If a window is repeatedly obstructed during auto-up operation, an overload protection
circuit breaker will temporarily halt window function. The window will return to normal function after a
brief cool-down period.
WARNING!
● Always remove the ignition key when the vehicle is unattended.
● Make sure that childrens' hands are clear before raising the
windows.
● Never leave children unattended in the vehicle.
pg. 41 Instruments and controls
Lockout switch for rear windows
file:///K|/ownersdocs/2003/2003_XC90/03xc90_02b.htm (9 of 14)12/30/2006 4:18:53 PM
Page 60
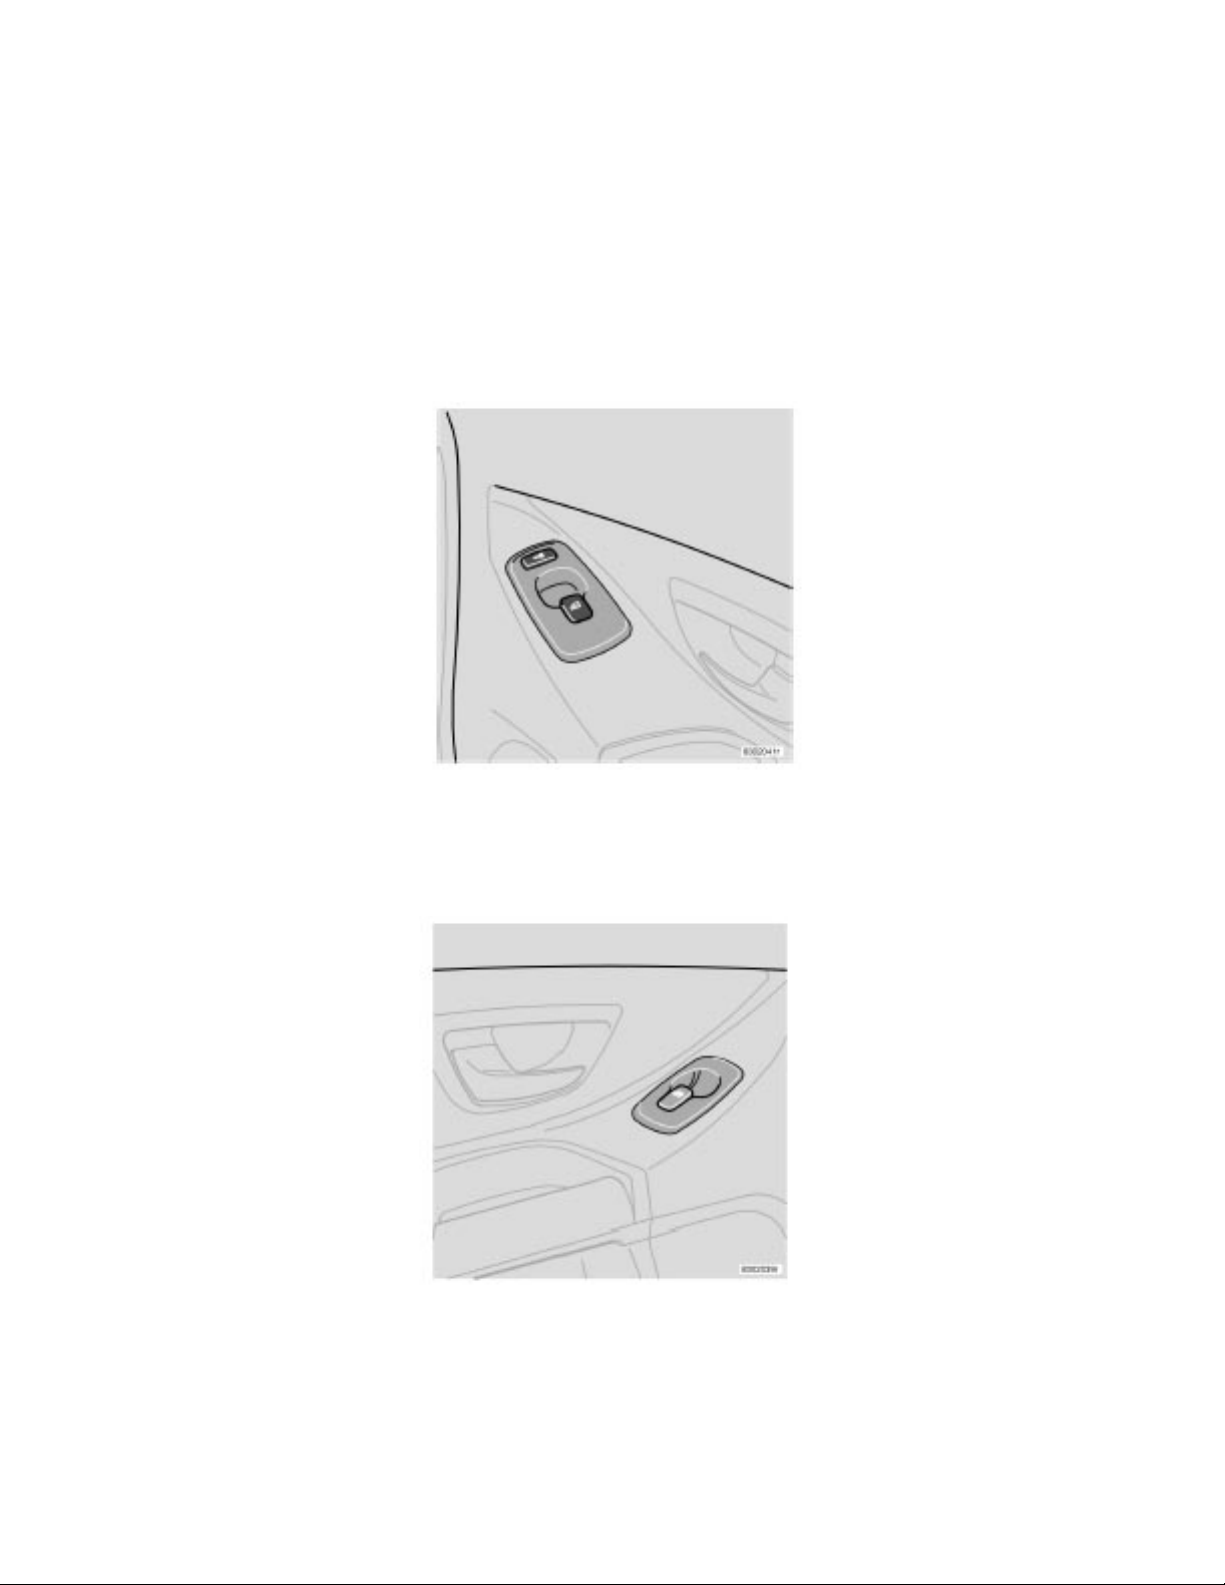
2003 VOLVO XC90
Lockout switch for rear windows
The electrically operated rear door windows can be disabled by a switch located on the driver's door (see
illustration).
If the light in the switch is OFF: The rear door windows can be raised or lowered with the buttons on
the rear door armrests or with the buttons on the driver's door armrest.
If the light in the switch is ON: The rear door windows can only be raised or lowered with the buttons
on the driver's door armrest.
Electrically operated window in the front passenger's seat
The control for the electrically operated window in the front passenger's seat operates that window only.
Electrically operated windows in the rear doors.
The rear door windows can be operated with the control on each door and the switch on the driver's
door. If the light in the switch for blocking electrically operated windows in the rear doors (located in
the driver's door control panel) is on, the rear door windows can only be operated from the driver's door.
file:///K|/ownersdocs/2003/2003_XC90/03xc90_02b.htm (10 of 14)12/30/2006 4:18:53 PM
Page 61
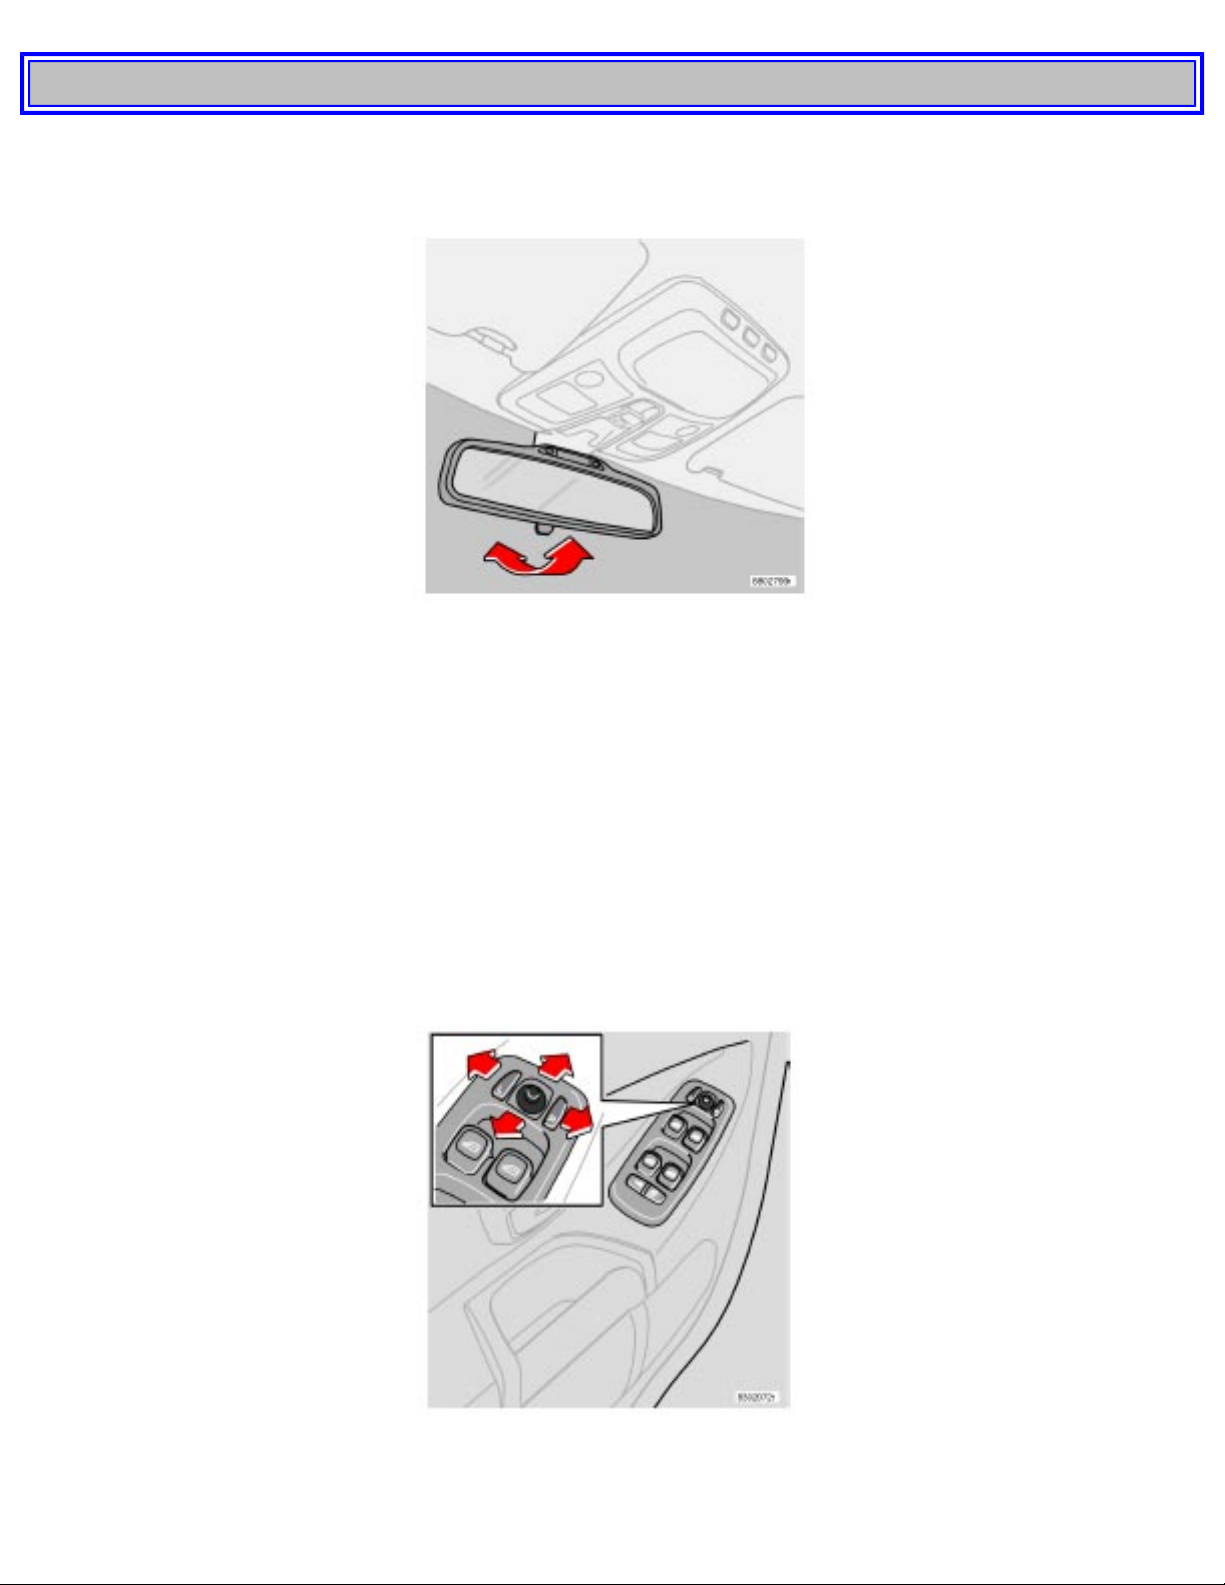
2003 VOLVO XC90
pg. 42 Instruments and controls
Rearview mirror/power folding sideview mirrors
Rearview mirror
A Normal position
B Night position, reduces glare from following headlights
Autodim function (option)
The autodim function reacts to headlights from following traffic and automatically reduces glare.
NOTE: The autodim function is automatically switched off when the gear selector is placed in the
Reverse position.
Electrically operated sideview mirrors
file:///K|/ownersdocs/2003/2003_XC90/03xc90_02b.htm (11 of 14)12/30/2006 4:18:53 PM
Page 62
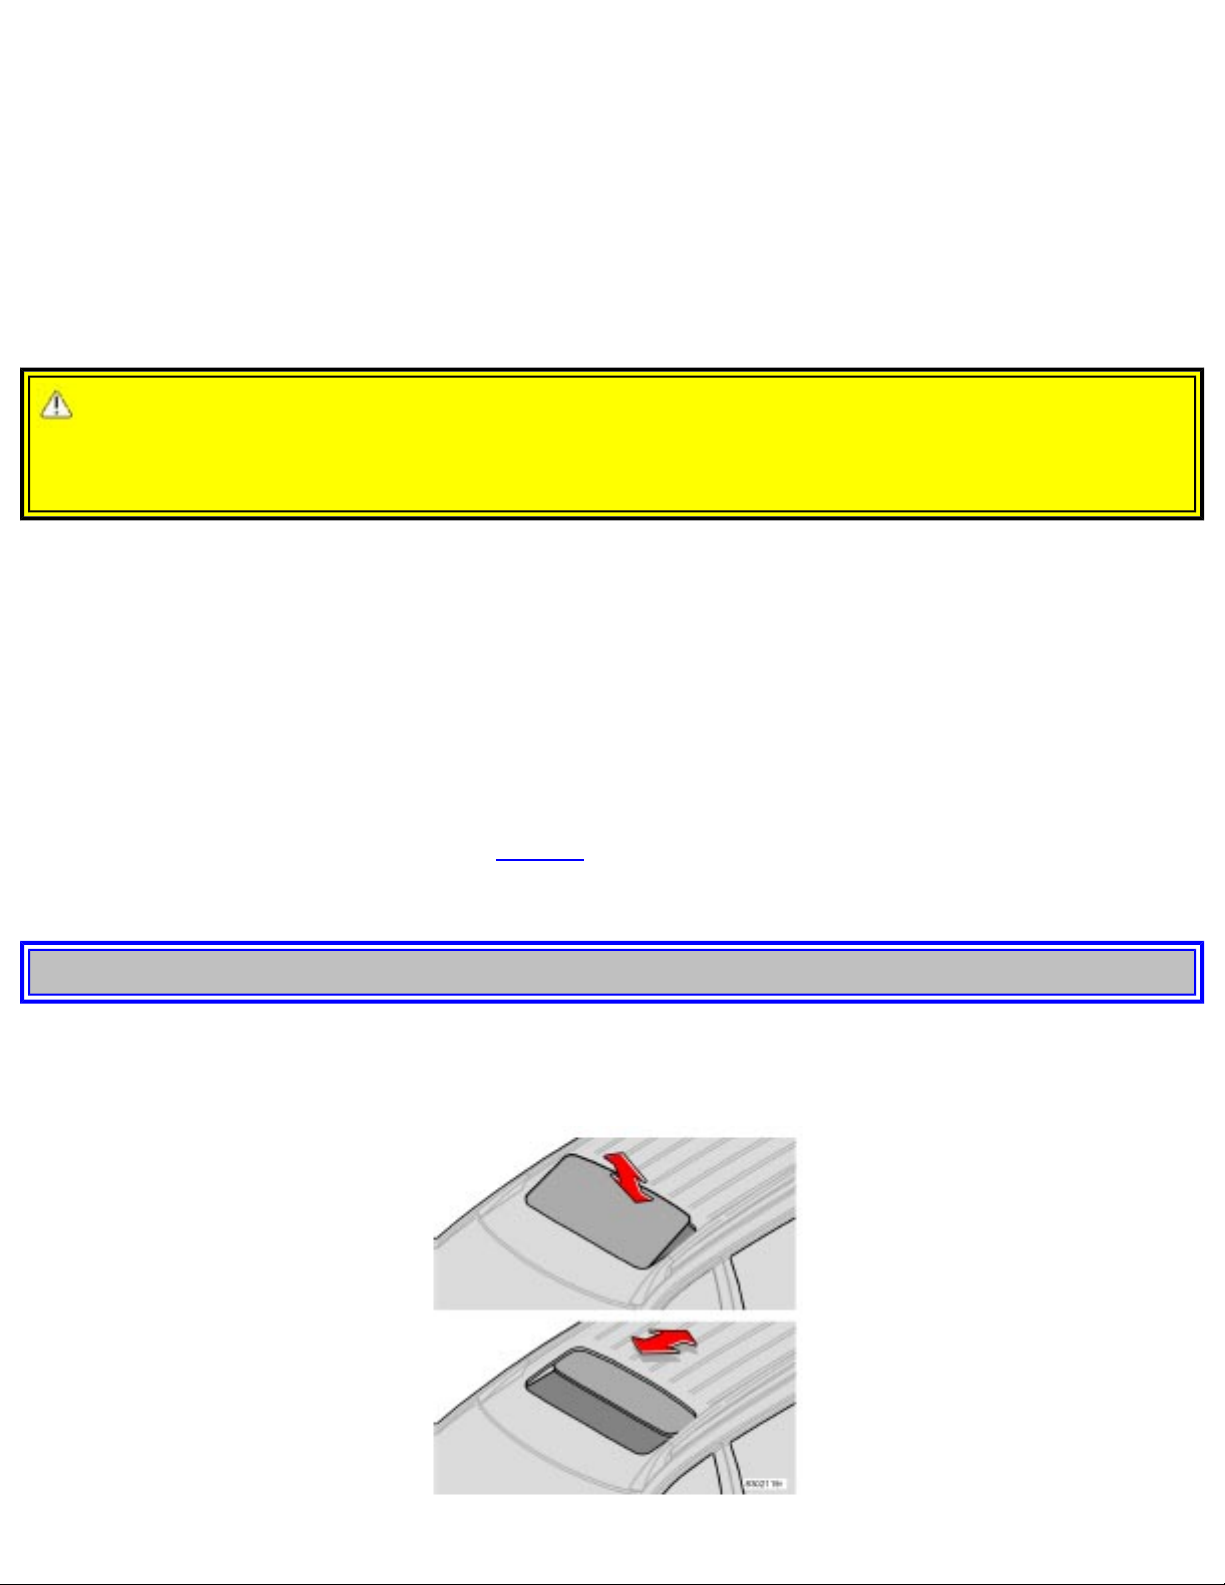
2003 VOLVO XC90
The mirror control switches are located on the driver's door armrest.
Driver's side: Press the L button (a light in the switch will go on) to activate the adjustment control. Use
this control to adjust the driver's door mirror.
Passenger's side: Press the R switch (a light in the switch will go on) to activate the adjustment control.
Use this control to adjust the passenger's door mirror. After you have adjusted the mirror(s), press the L
or R switch again (the LED will go out) to deactivate the adjustment control.
WARNING!
The mirrors should always be adjusted prior to driving. Objects seen in the passenger's side wideangle sideview mirror are closer than they appear to be.
Mirror memory function (with the central locking system) - option
If you lock the vehicle and later unlock it with the same remote control and open the driver's door, the
sideview mirrors (and the driver's seat) will automatically move to the position they were in when you
left the vehicle. This feature will work in the same way with all of the remote control transmitters (up to
3) that you use with your vehicle. This feature will not function if you lock your vehicle with the key.
Folding in the sideview mirrors
The sideview mirrors can be folded in toward the side of the car when parking in narrow spaces, etc.
Press the button in the center console (see
page 29 for the position of the button) to fold in the mirrors.
The mirrors must be returned to their normal position manually.
pg. 43 Instruments and controls
Electrically operated moonroof (option)
file:///K|/ownersdocs/2003/2003_XC90/03xc90_02b.htm (12 of 14)12/30/2006 4:18:53 PM
Page 63
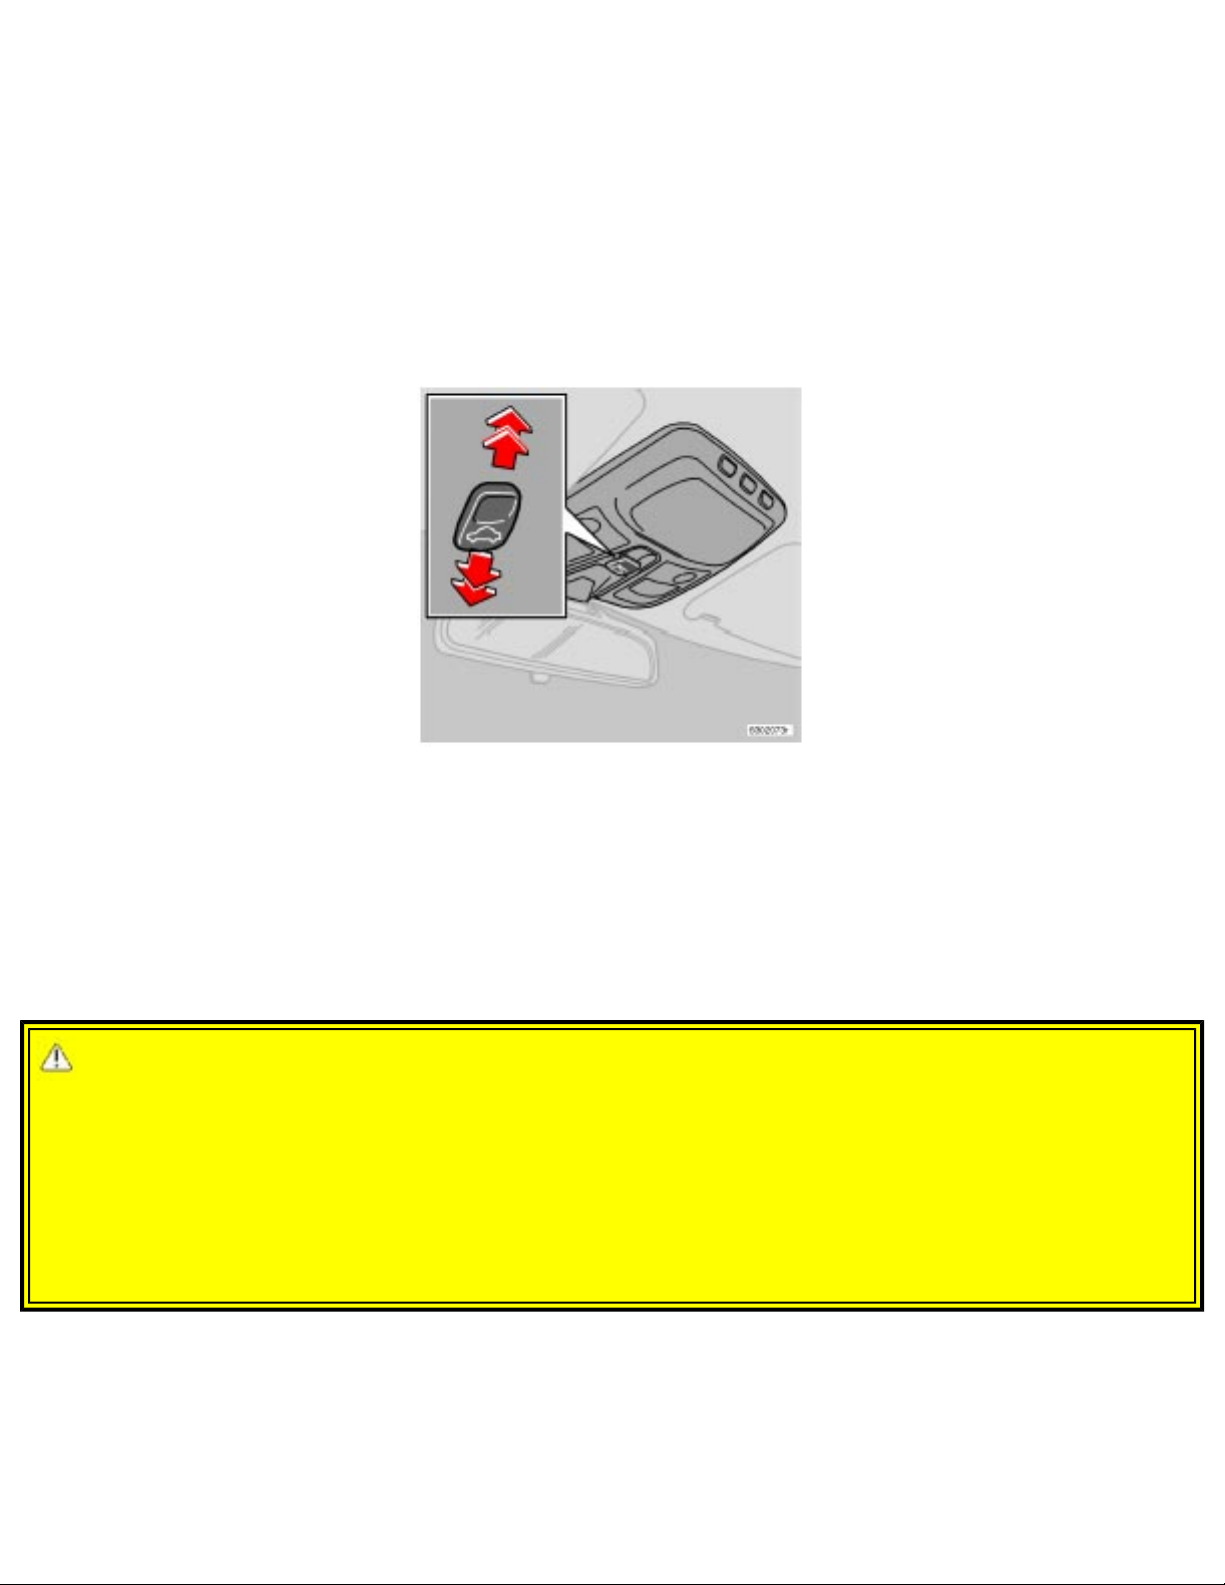
2003 VOLVO XC90
Electrically operated moonroof
To operate the moonroof, the ignition key must first be turned to the intermediate or drive position
(position I, II or the engine running).
● To slide open the moonroof: Pull the switch back to the first detent ("stop") and hold it until the
moonroof has opened to the position you prefer.
● Pull and hold the switch again to open the moonroof completely.
● AUTO open: Pull the switch as far back as possible and release it to automatically slide open the
moonroof to the "comfort"* position. Pull the switch again to open the moonroof completely.
● To close the moonroof: Push the switch forward to the first detent ("stop") and hold it until the
moonroof has closed completely.
● AUTO close: Push the switch forward as far as possible and release it to automatically close the
moonroof.
● Ventilation position (opening the rear edge of the moonroof): With the moonroof closed, push up the
rear section of the switch.
To close, pull the front section of the switch straight down until the moonroof has closed completely.
WARNING!
● Never open/close the moonroof if it is obstructed in any way when in operation.
● Never allow a child to operate the moonroof.
● Never extend any object or body part though the open moonroof, even if the vehicle's ignition is
completely switched off.
● Never leave a child alone in a vehicle.
file:///K|/ownersdocs/2003/2003_XC90/03xc90_02b.htm (13 of 14)12/30/2006 4:18:53 PM
Page 64
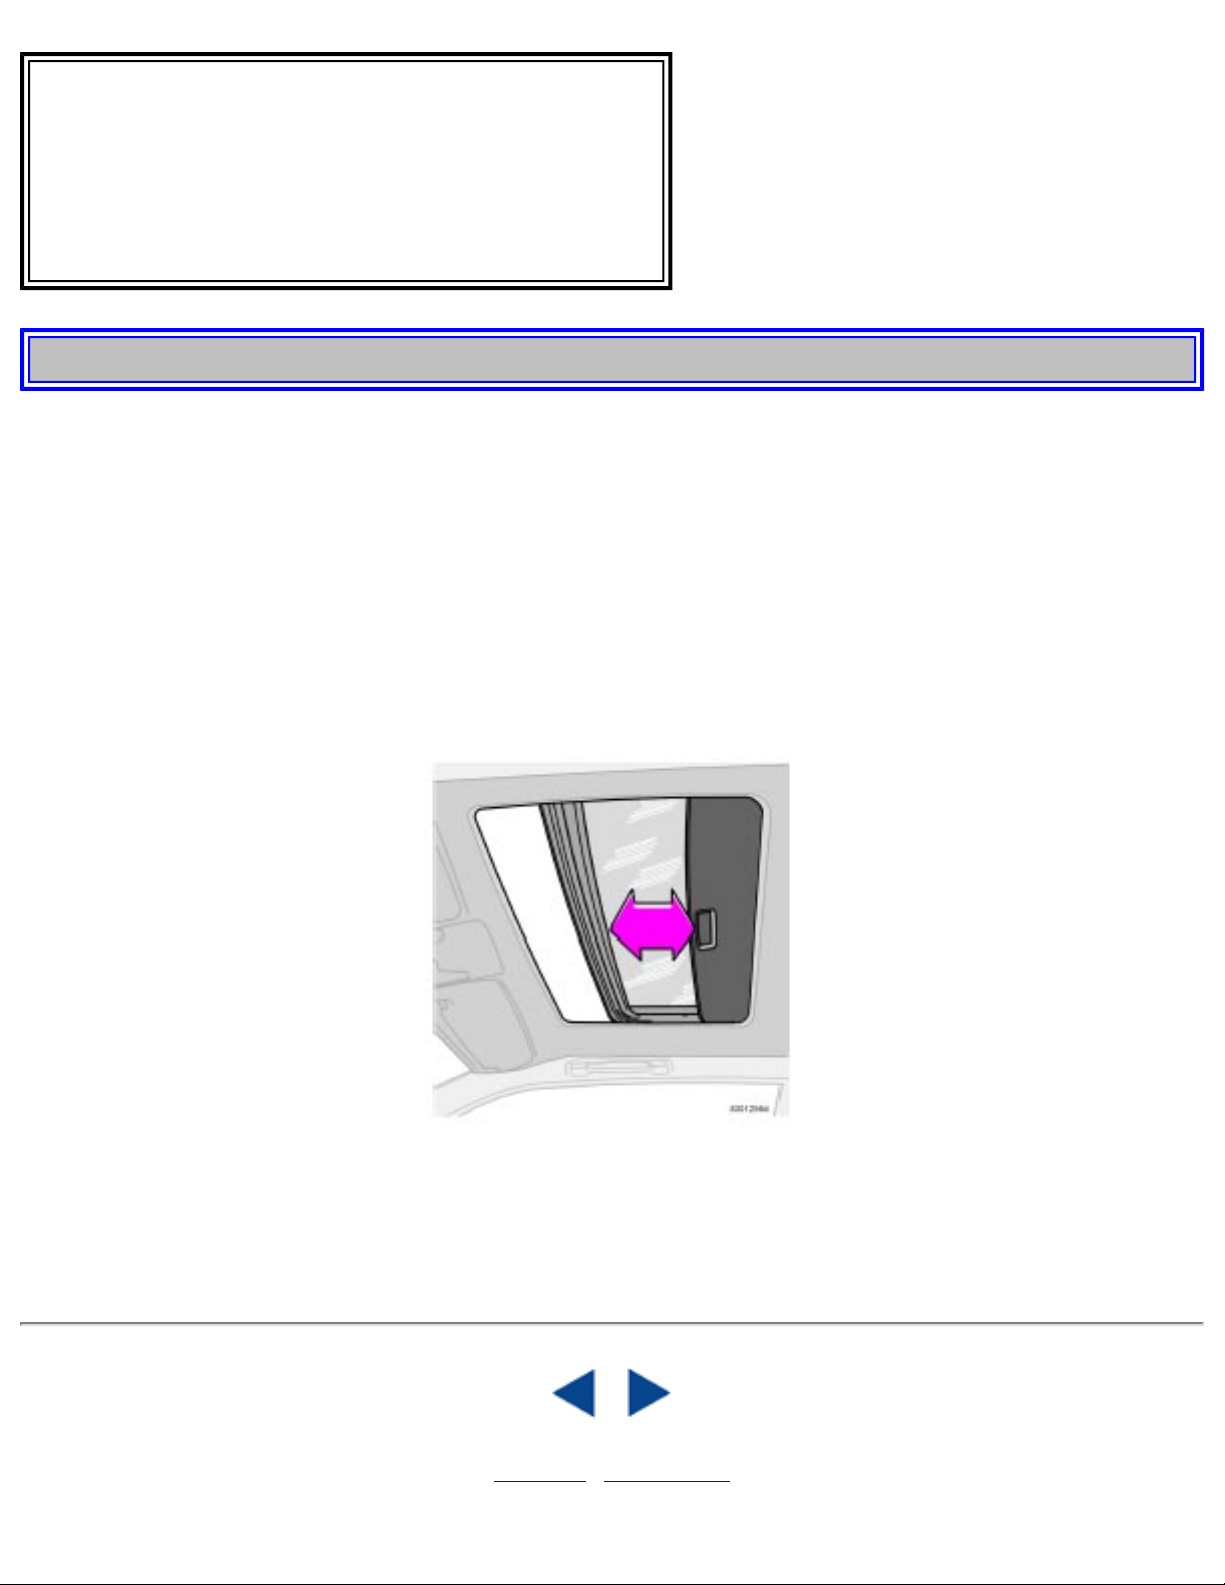
2003 VOLVO XC90
CAUTION
● Remove ice and snow before opening the
moonroof.
● Do not operate the moonroof if it is frozen closed.
● Never place heavy objects on the moonroof.
pg. 44 Instruments and controls
Electrically operated moonroof (option) (contd)
NOTE: If the moonroof is obstructed during auto-close operation, it will automatically reverse direction
and return to its starting position. If the moonroof is repeatedly obstructed during auto-close operation,
an overload circuit breaker will temporarily halt moonroof function. The moonroof will return to normal
function after a brief cool-down period.
* A position where the moonroof is not quite fully open which helps alleviate "rumbling" wind noise.
Visor
The optional moonroof also features a sliding visor. The visor slides open automatically when the
moonroof is opened, and must be closed manually
Contents | Top of Page
file:///K|/ownersdocs/2003/2003_XC90/03xc90_02b.htm (14 of 14)12/30/2006 4:18:53 PM
Page 65

2003 VOLVO XC90
2 0 0 3
VOLVO
XC90
Climate control
pg. 45 Climate control
Climate control system-general information 46
Air distribution 47
Electronic Climate Control (ECC) 48
pg. 46 Climate control
Climate control system-general information
Condensation on the inside of the windows
Keeping the insides of the windows clean will help reduce the amount of condensation that forms on the windows. Use a
commercial window cleaning agent to clean the windows.
Ice and snow
Always keep the air intake grille at the base of the windshield free of snow.
Cabin air filter
Replace the cabin air filter with a new one at intervals shown in your Warranty and Service Records Information booklet.
The filter should be replaced more often when driving under dirty and dusty conditions. The filter cannot be cleaned and
therefore should always be replaced with a new one.
Sensors
The sunlight sensor on the dashboard and passenger compartment temperature sensor in the ECC control panel should not
be covered in any way as this could cause incorrect information to be sent to the ECC system.
Parking the vehicle in warm weather
If your vehicle has been parked in the sun in warm weather, opening the windows and moonroof (option) for several
minutes before driving will help release the warm air from the passenger compartment. When the engine is running, close
the windows and moonroof and use the recirculation function for several minutes to enable the air conditioning to cool the
compartment as quickly as possible.
Windows and optional moonroof
The ECC system will function best if the windows and optional moonroof are closed. If you drive with the moonroof open,
we recommend that you manually adjust the temperature and blower control (the LED in the AUTO switch should be off).
file:///K|/ownersdocs/2003/2003_XC90/03xc90_03.htm (1 of 7)12/30/2006 4:18:54 PM
Page 66
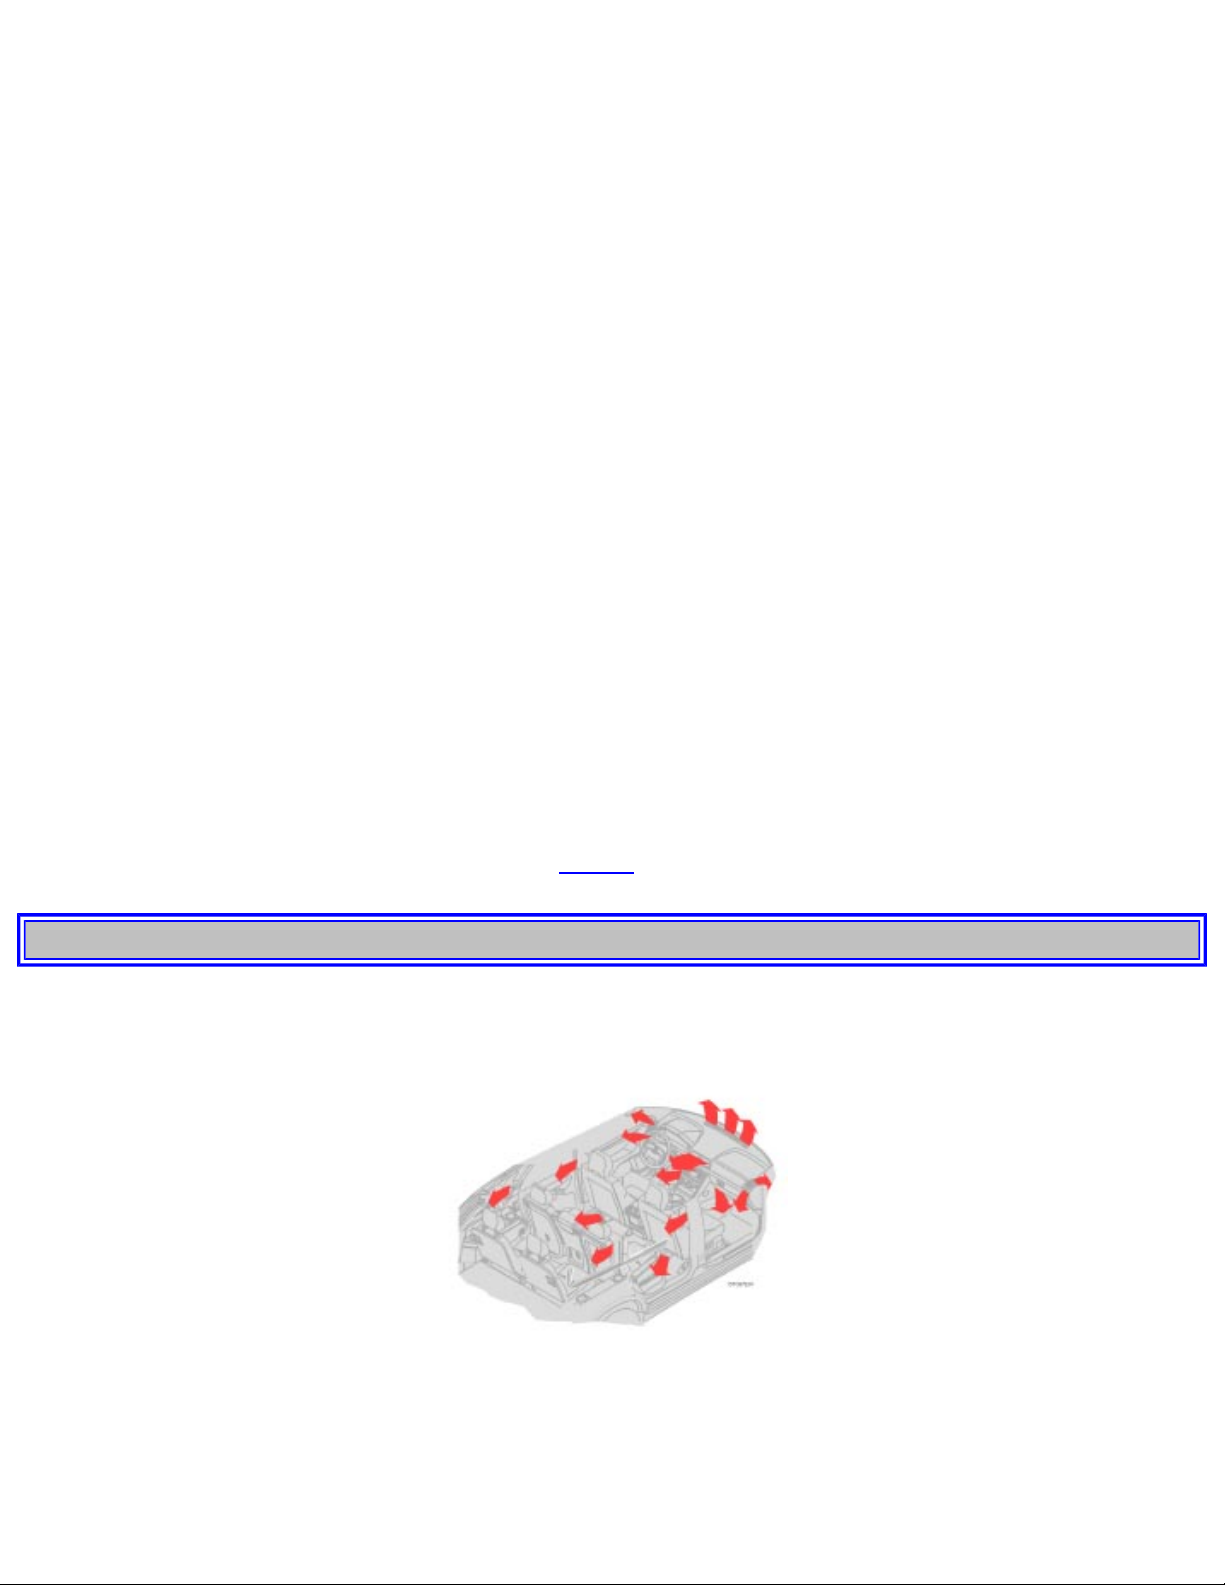
2003 VOLVO XC90
Acceleration
The air conditioning is momentarily disengaged during full-throttle acceleration.
Climate control maintenance
All maintenance on the climate control systems should be carried out by an authorized Volvo service technician only.
Refrigerant
Volvo cares about the environment. The air conditioning system in your vehicle contains a CFC-free refrigerant - R134a.
This substance will not deplete the ozone layer. The system contains 2.2 lbs (1000 g) R134a and uses PAG oil.
Passenger compartment blower
Approximately 50 minutes after the ignition is turned off, the blower may come on automatically, and run for seven
minutes, to remove condensation in the A/C evaporator.
Blower function to reduce battery drain
The climate system's blower functions normally while the engine is running.
However, when the engine is switched off (even if the ignition is switched to positions I or II), the blower control will be
automatically switched off to avoid unnecessary battery drain. The following points pertain if the ignition key is on but the
engine is not running:
● To restart the blower, turn the control knob to the setting of your choice.
● After approximately 2 minutes, the blower speed will be reduced to avoid battery drain.
You can reset the blower speed at any time. Please be aware that the system has been designed to reduce the blower's speed
again after 2 minutes, until the engine is started. If the battery becomes drained:
● LOW BATTERY, FAN IS REDUCED will be displayed in the text window in the instrument panel.
● The yellow warning light in the instrument panel (see page 25) will also light up.
pg. 47 Climate control
Air distribution
Air distribution
The incoming air is distributed through the ventilation points in the passenger compartment shown above.
file:///K|/ownersdocs/2003/2003_XC90/03xc90_03.htm (2 of 7)12/30/2006 4:18:54 PM
Page 67
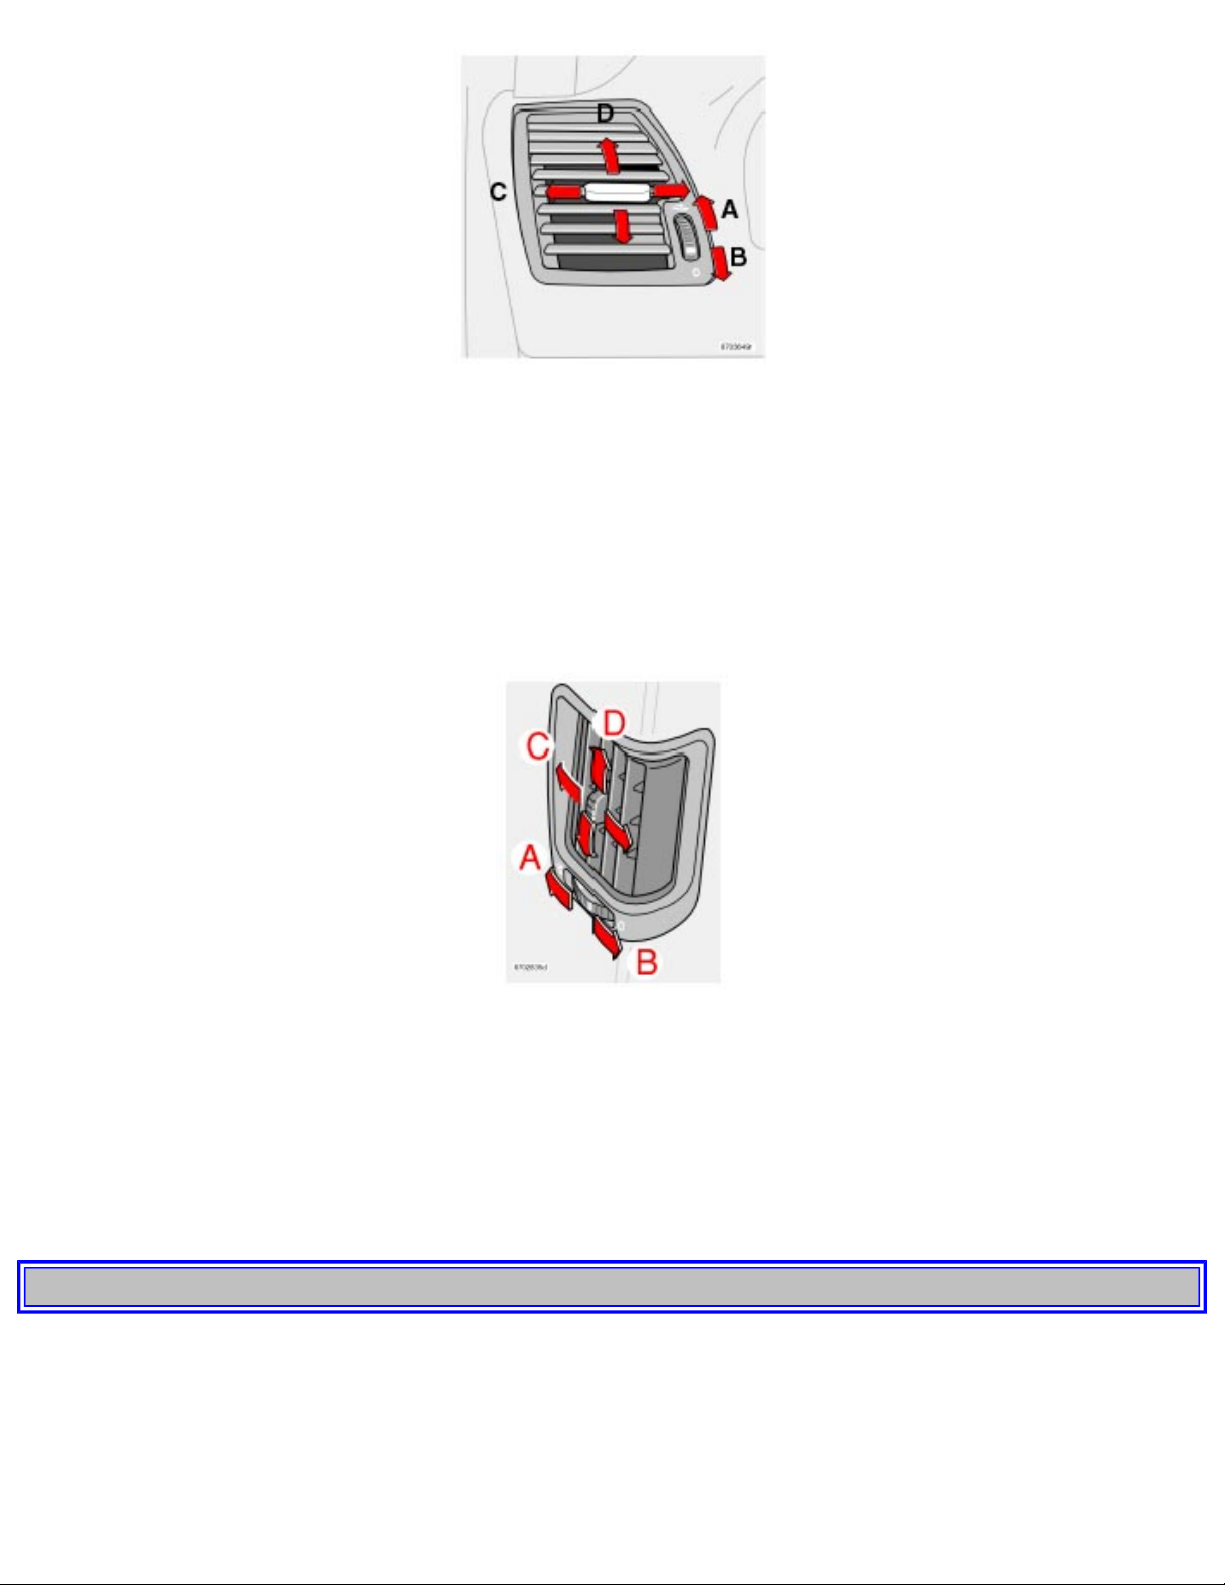
2003 VOLVO XC90
Air vents in the dash
A Open
B Closed
C Horizontal air flow
D Vertical air flow
● Direct the outer air vents toward the side windows to defrost.
● In cold weather, close the air vents in the center of the dashboard to direct as much air as possible toward the windows.
Air vents in the door pillars
A Open
B Closed
C Horizontal air flow
D Vertical air flow
● Direct the outer air vents toward the side windows to defrost.
pg. 48 Climate control
Electronic Climate Control (ECC)
file:///K|/ownersdocs/2003/2003_XC90/03xc90_03.htm (3 of 7)12/30/2006 4:18:54 PM
Page 68
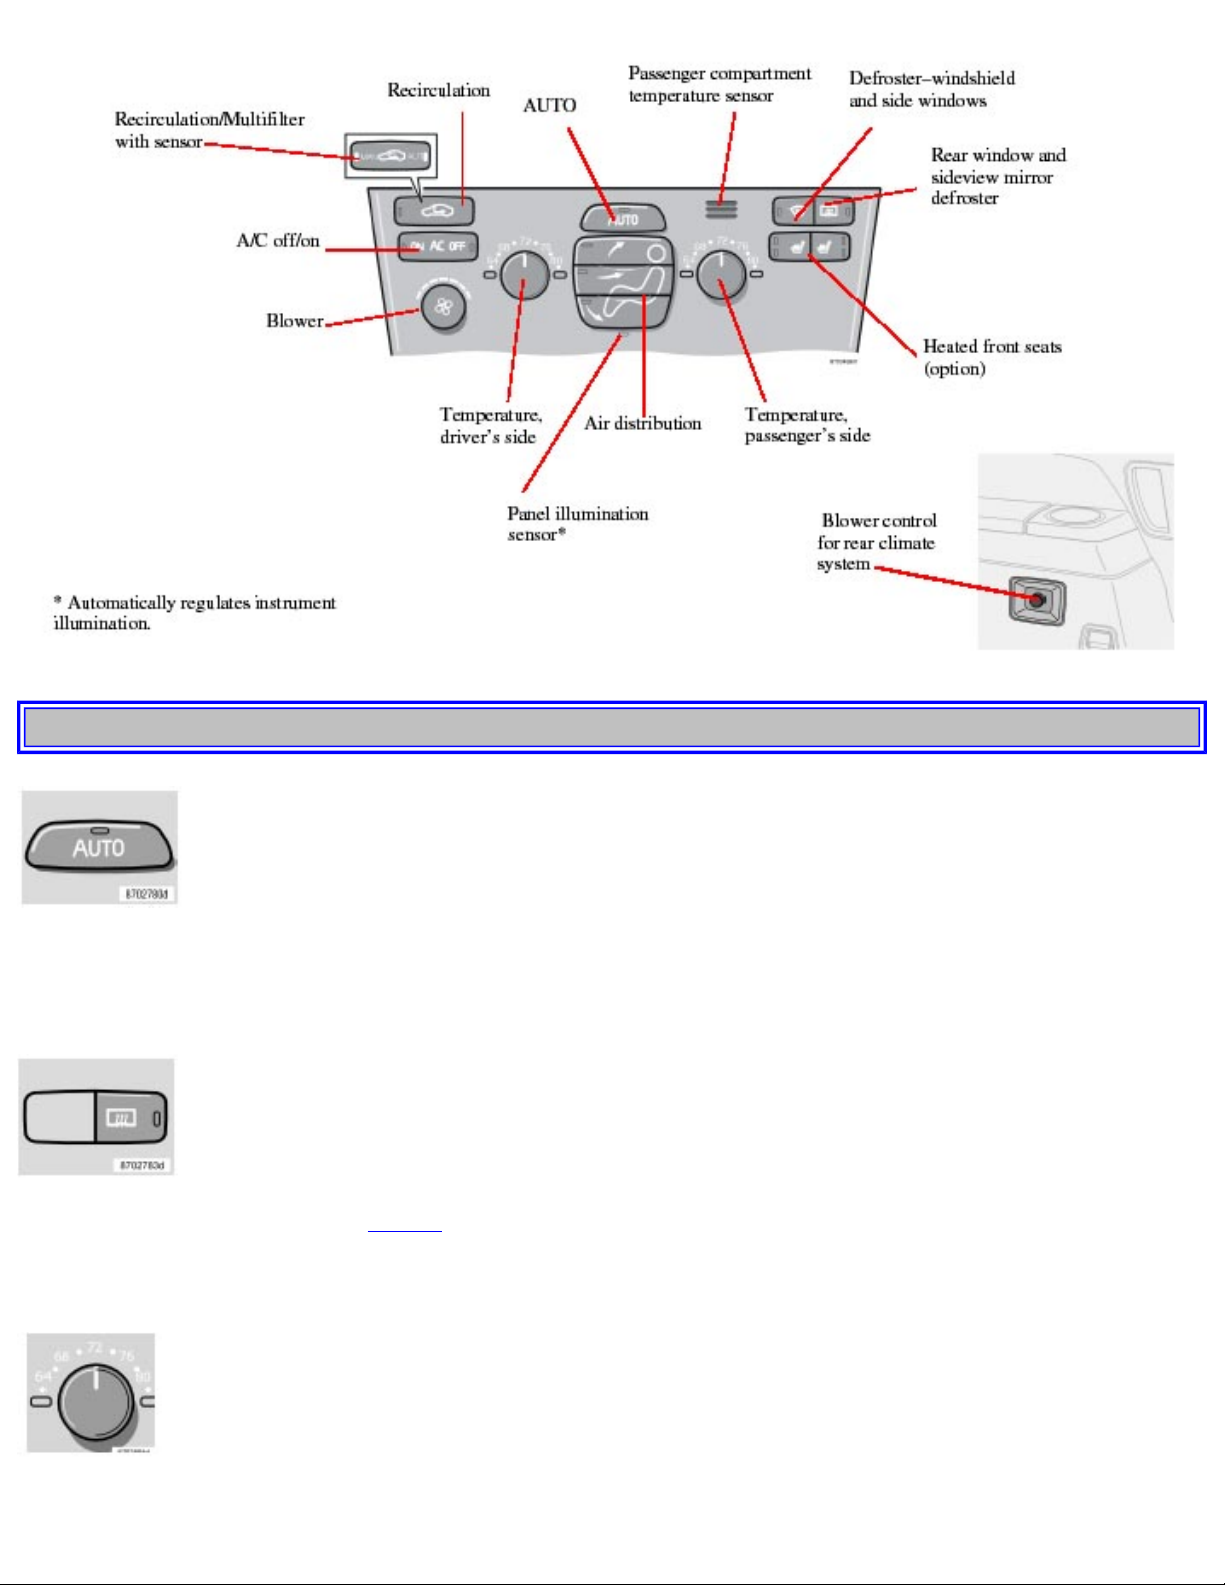
2003 VOLVO XC90
pg. 49 Climate control
AUTO
This function automatically regulates the Electronic Climate Control system so that the selected temperatures are
maintained. The blower, heating, air distribution (air flow) and air conditioning are controlled.
If you prefer to manually set any of these functions, the remaining functions will still be controlled automatically. Pressing
the AUTO button overrides any settings that were previously made manually.
Rear window and sideview mirror defrosters
This function defrosts/de-ices the rear window and sideview mirrors. The LED in the switch will light up to indicate that
the heating function is engaged. See
page 35 for additional information on this function.
Never use ice scrapers made of metal as the can easily scratch the mirror surface.
Temperature
These controls are used to individually set the temperature for both sides of the passenger compartment. Please note that the
compartment will not be heated or cooled faster by setting the temperature higher or lower than necessary.
file:///K|/ownersdocs/2003/2003_XC90/03xc90_03.htm (4 of 7)12/30/2006 4:18:54 PM
Page 69
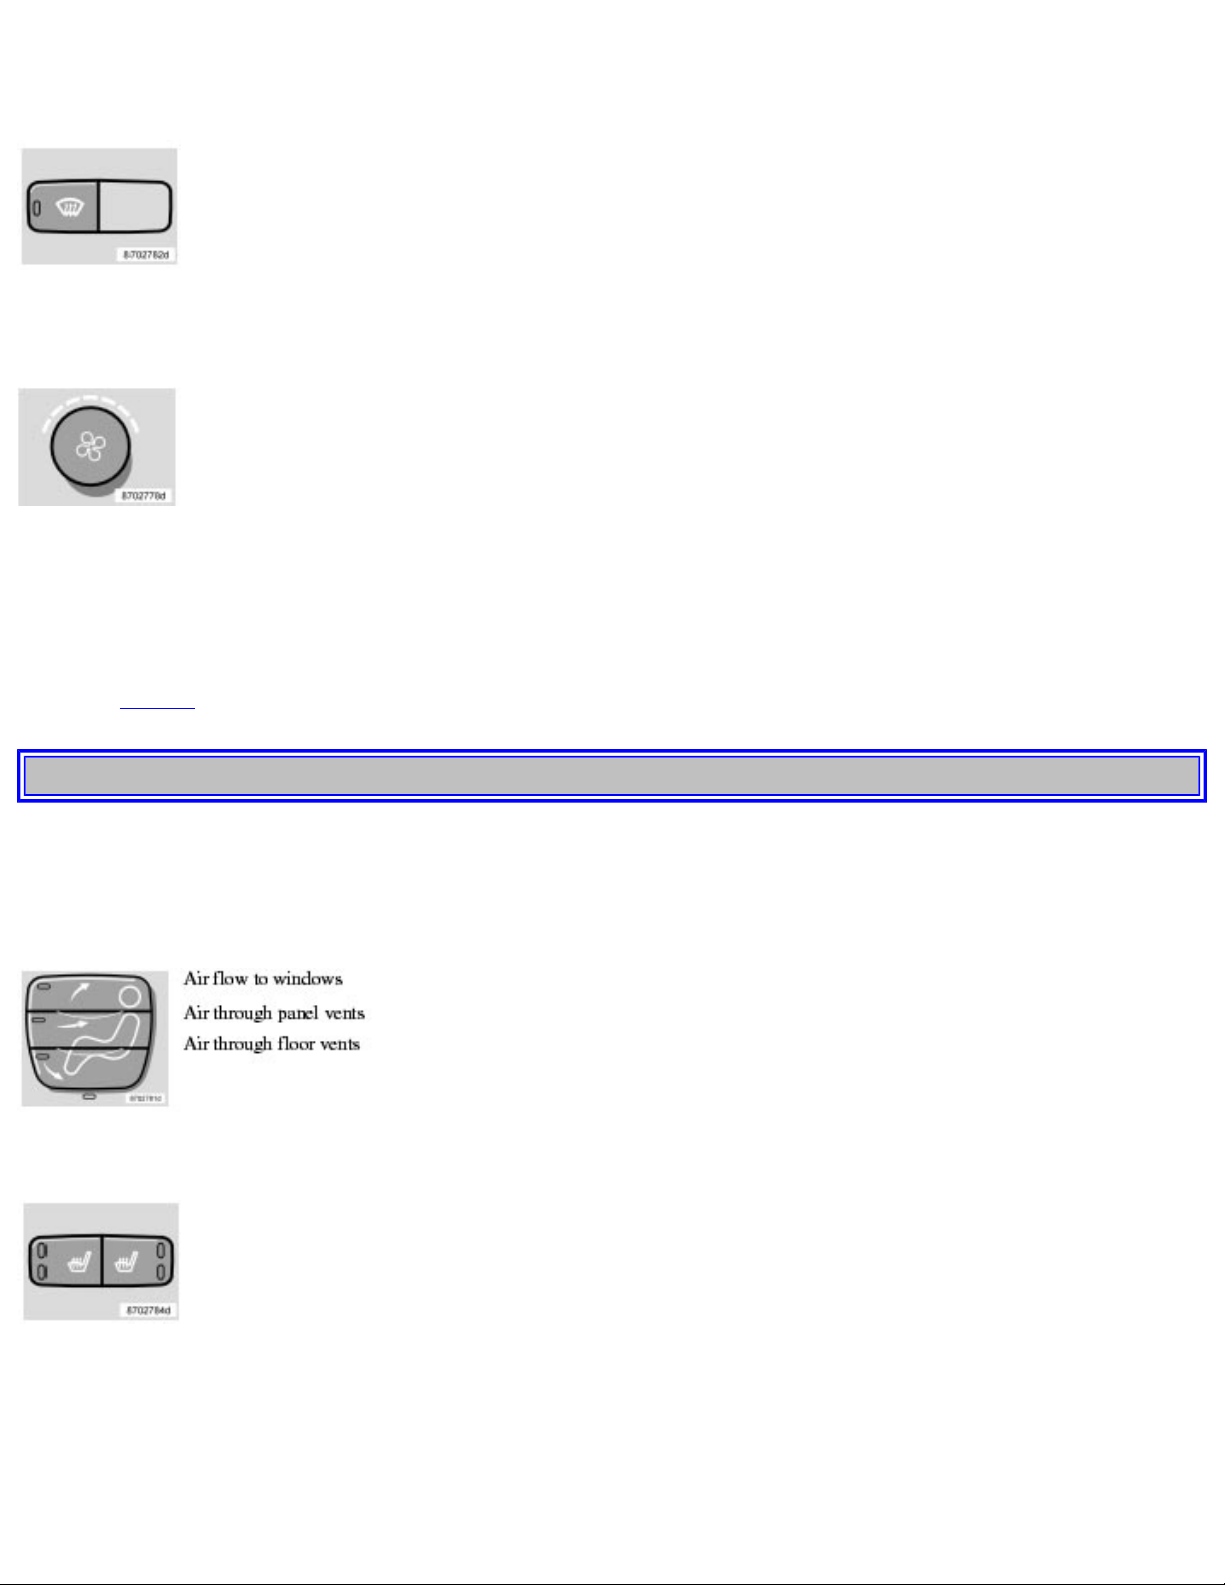
2003 VOLVO XC90
Set the control to the temperature you prefer.
Defroster
This function defrosts/de-ices the windshield and front side windows. The LED in the switch will light up to indicate that
the defrost function is engaged. Blower speed increases automatically and the air in the passenger compartment is
dehumidified. Recirculation will not function while defrost is engaged.
Blower control*
Turn the control clockwise to increase or counterclockwise to decrease the blower speed. Pressing the AUTO switch will
automatically regulate blower speed and override manual adjustment.
NOTE: Turning the blower control counterclockwise until an orange LED comes on will turn both the blower and the air
conditioning off.
* See also
page 46.
pg. 50 Climate control
Electronic Climate Control (ECC) (contd)
Air distribution
Press AUTO to automatically regulate air flow or press any combination of the controls shown in the illustration to
manually adjust air flow. An LED in the switch will light up if an air flow control has been pressed.
Heated front seats (option)
● Press the switch once for maximum seat heating. Both LEDs in the switch will be lit.
● Press the switch a second time for comfort heating. One LED in the switch will be lit.
● Press the switch a third time to turn the heating off completely. The LED will go off.
The seat heating for the passenger seat should be switched off when the seat is not occupied.
file:///K|/ownersdocs/2003/2003_XC90/03xc90_03.htm (5 of 7)12/30/2006 4:18:54 PM
Page 70
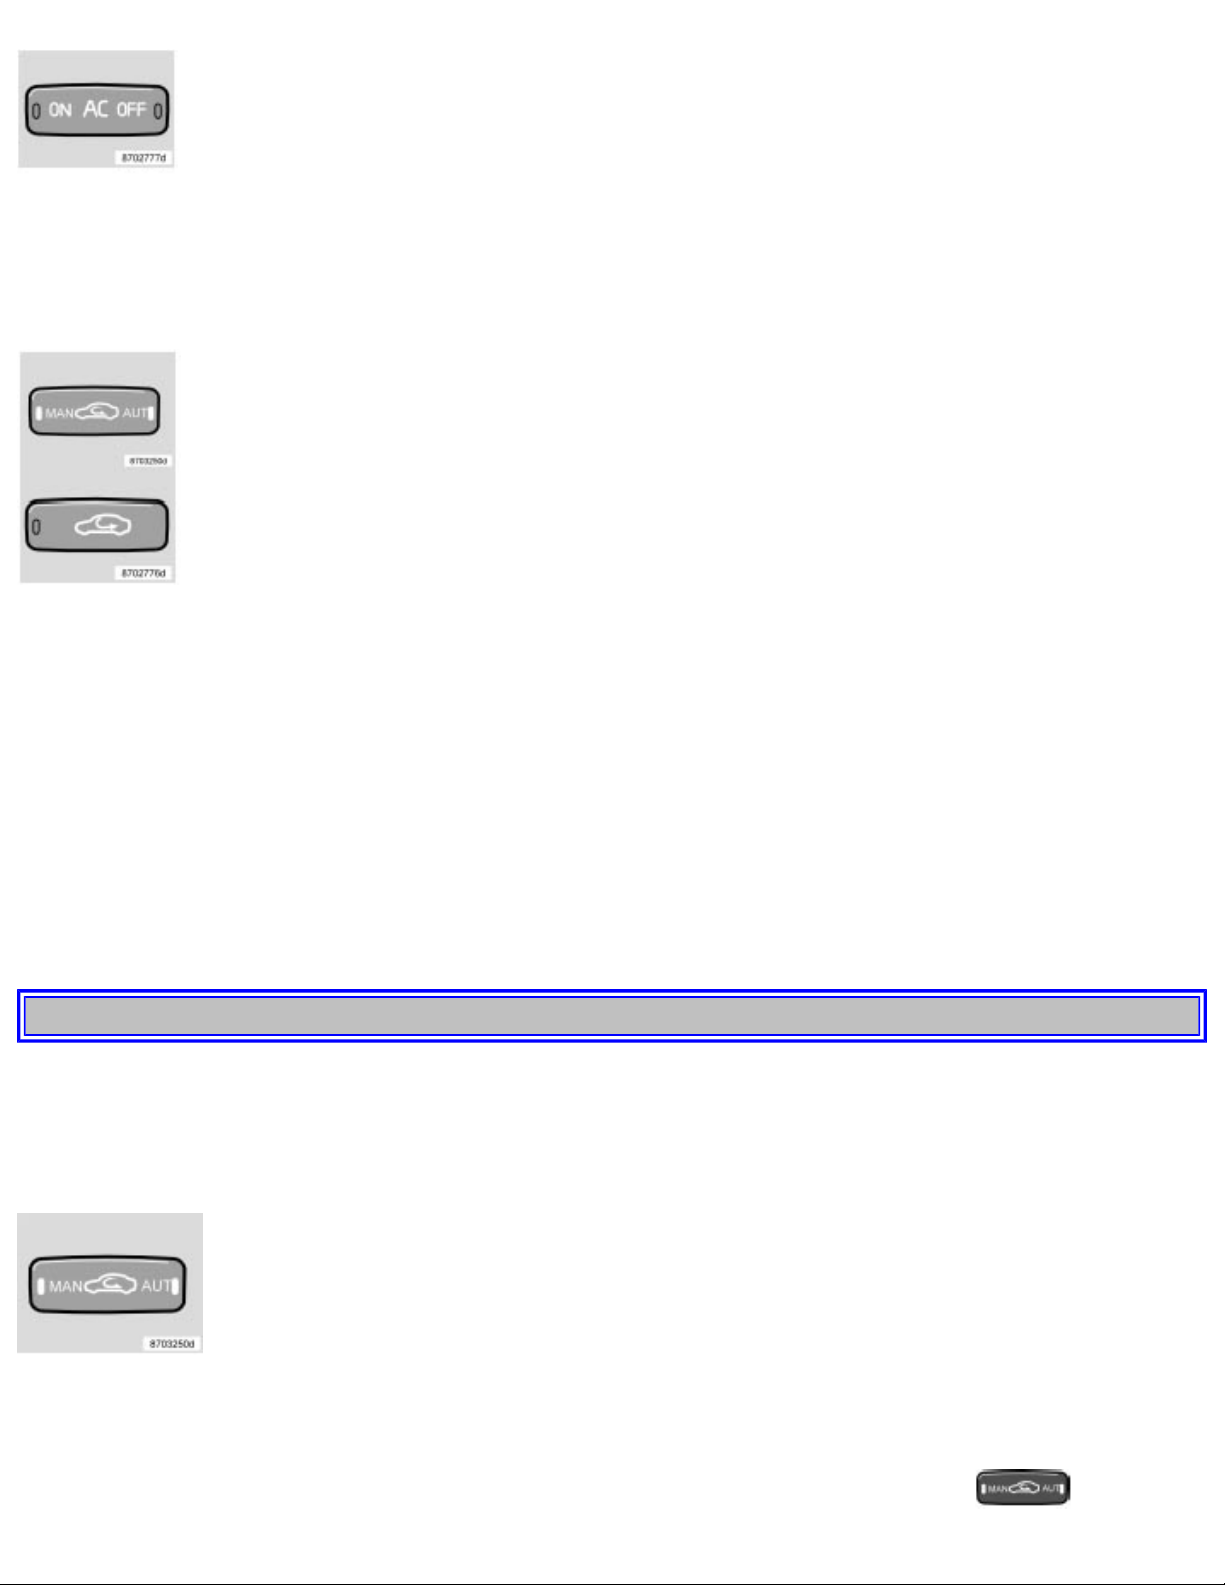
2003 VOLVO XC90
A/C - ON/OFF
Press the switch to turn the air conditioning on or off. The "ON" or "OFF" LED will light up to indicate if the system is
switched on or off. Other functions will still be regulated automatically (if the AUTO switch is on).
● The air conditioning functions only at temperatures above 32° F (0° C).
● While the Defroster function is selected, the air conditioning is temporarily activated to dehumidify the air, even if you
have manually switched the air conditioning off. This will only function if the blower is not switched off.
Recirculation
Press this switch to engage the recirculation function (air in the passenger compartment recirculates - no fresh air enters the
compartment). The LED in the switch will light up to indicate that the function is engaged.
● Use this function if the outside air is contaminated with exhaust gases, smoke, etc or to heat/cool the vehicle quickly.
● Recirculation should not be used for more than 15 minutes. If your windows begin to fog or mist, make sure that the
recirculation function is switched off.
● Selecting Defroster automatically switches recirculation off.
● Timer mode activation: (Vehicles equipped with the Interior Air Quality System have no timer mode) Press and hold
the recirculation button for at least 3 seconds to activate a recirculation timer mode. The amber LED in the recirculation
button will flash 5 times to show that the timer mode is being activated. In timer mode, each time the recirculation button is
pressed, the climate control system will recirculate the air in the passenger compartment for 5-12 minutes, depending on the
outside air temperature, and then revert back to fresh air.
● Timer mode deactivation: Press and hold the recirculation button for 3 seconds. The amber LED in the recirculation
button will illuminate steadily for 5 seconds to show a return to "normal" mode.
pg. 51 Climate control
● In normal mode, when the recirculation button is pressed, the climate control system will recirculate the air in the
passenger compartment until the recirculation button is pressed again.
● Timer mode memory: If the vehicle is turned off while timer mode is active, timer mode will still be active when the
vehicle is restarted.
Interior Air Quality sensor (option)
Some vehicles are equipped with a multifilter and Air Quality sensor. The filter separates gases and particles, thereby
reducing the amounts of odors and contaminants entering the vehicle. The Air Quality sensor detects increased levels of
contaminants in the outside air. When the Air Quality sensor detects contaminated outside air, the air intake closes and the
air inside the passenger compartment is recirculated, i.e. no outside air enters the vehicle. The filter also cleans recirculated
passenger compartment air. When the ECC system is in the AUTO mode, the green LED will be on
.
file:///K|/ownersdocs/2003/2003_XC90/03xc90_03.htm (6 of 7)12/30/2006 4:18:54 PM
Page 71
2003 VOLVO XC90
Operation
Press
to operate the Air Quality sensor (normal setting).
Or:
Select one of the following three functions by pressing
1, 2 or 3 times.
1. The AUT LED lights. The Air Quality sensor is now activated.
2. No LED lights. Recirculation is not activated unless needed to cool the passenger compartment in a warm climate.
3. The MAN LED lights. Recirculation is now activated.
Keep in mind the following:
● Make it a rule to have the Air Quality sensor activated at all times.
● Recirculation is limited in cold climates to avoid fogging.
● If window fogging occurs, you should deactivate the Air Quality sensor.
● If fogging occurs, use the defroster functions for the windshield, side windows and rear window. See page 49.
● The filter should be changed at the intervals recommended in the maintenance schedule. However, if the vehicle is used
in a severely contaminated environment, it may be necessary to change the filter more frequently.
pg. 52 Climate control
This page intentionally left blank
Contents | Top of Page
file:///K|/ownersdocs/2003/2003_XC90/03xc90_03.htm (7 of 7)12/30/2006 4:18:54 PM
Page 72

2003 VOLVO XC90
2 0 0 3
VOLVO
XC90
Interior
pg. 53 Interior
Front seats 54
Rear seats 58
Interior lighting 61
Floor mats 62
Storage compartments 63
Securing cargo 67
pg. 54 Interior
Front seats
file:///K|/ownersdocs/2003/2003_XC90/03xc90_04a.htm (1 of 11)12/30/2006 4:18:54 PM
Page 73
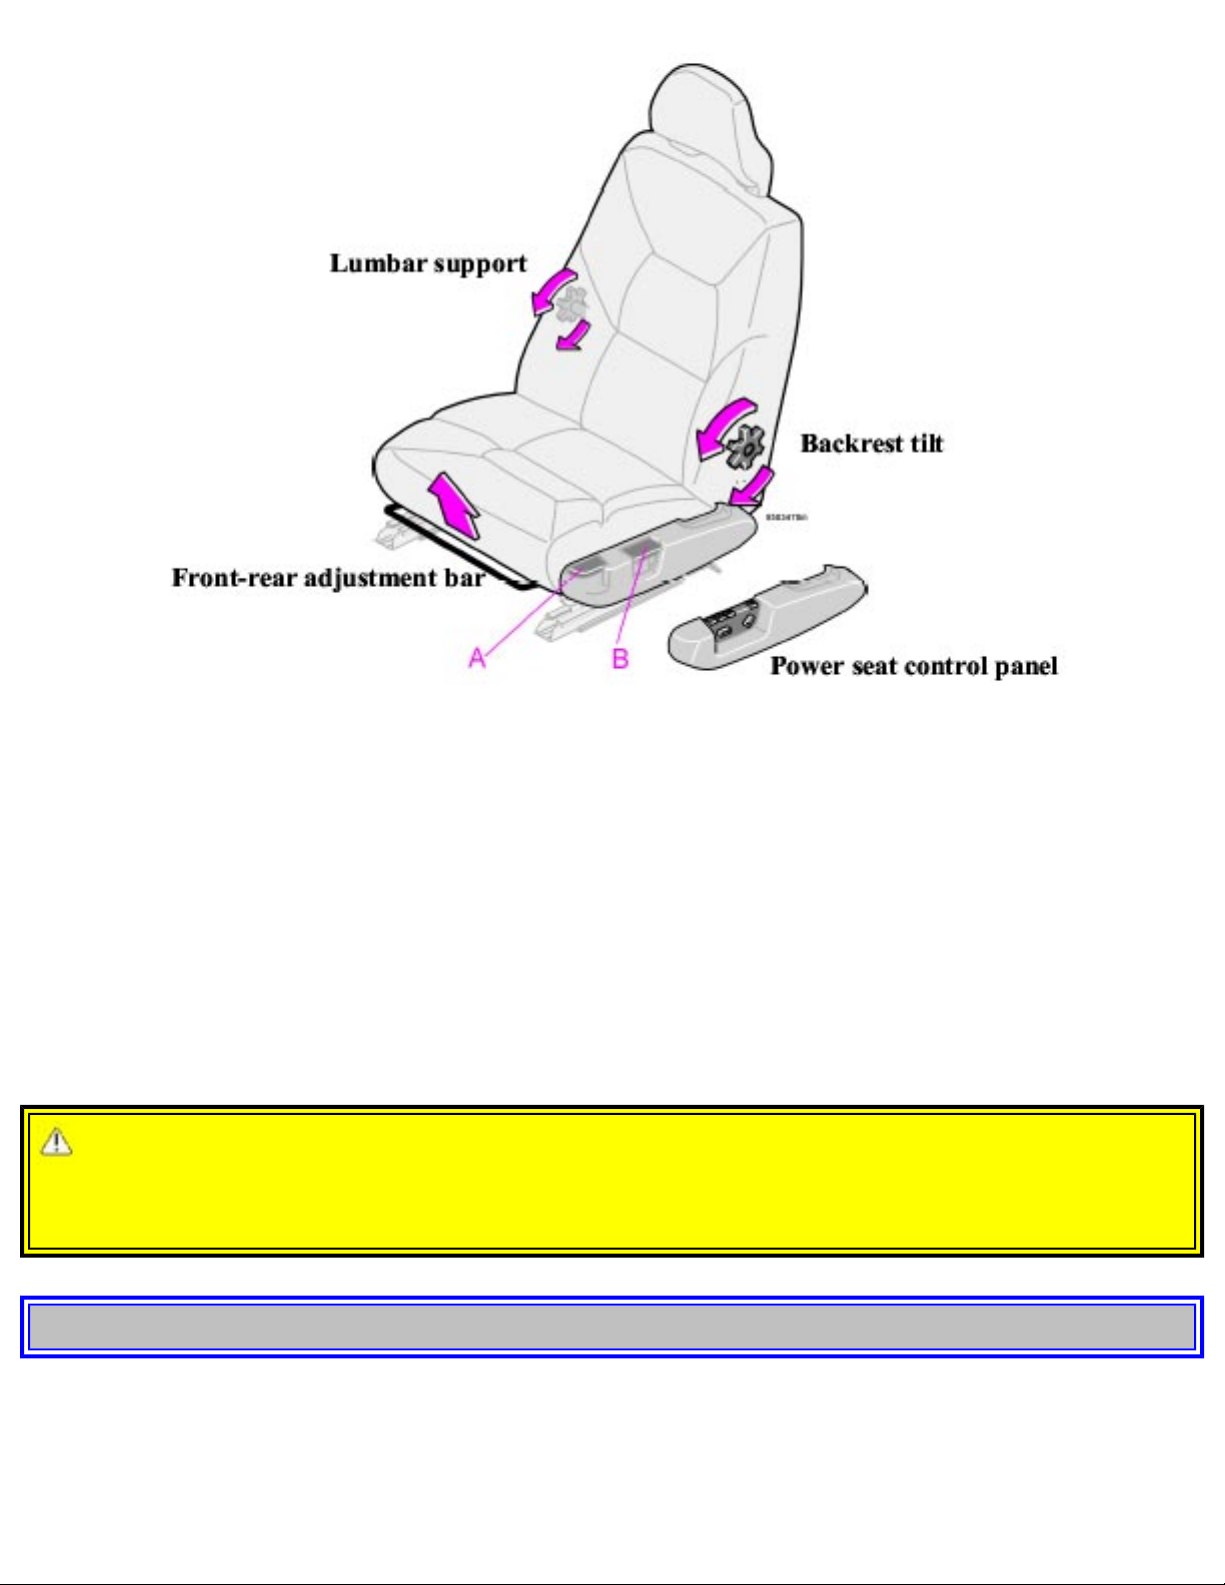
2003 VOLVO XC90
Manual height adjustment - front seat
The front edges of passenger seat cushions can be adjusted to seven different settings and the rear edges
to nine different settings.
Lever (A) - adjusting the front edge of the seat.
Lever (B) - adjusting the rear edge of the seat.
Manual front-rear adjustment
The seat can be moved forward or rearward by pulling up on the front-rear adjustment bar. Check that
the seat is securely locked into position after adjusting.
WARNING!
Do not adjust the seat while driving. The seat should be adjusted so that the brake pedal can be
depressed fully. In addition, position the seat as far rearward as comfort and control allow.
pg. 55 Interior
file:///K|/ownersdocs/2003/2003_XC90/03xc90_04a.htm (2 of 11)12/30/2006 4:18:54 PM
Page 74
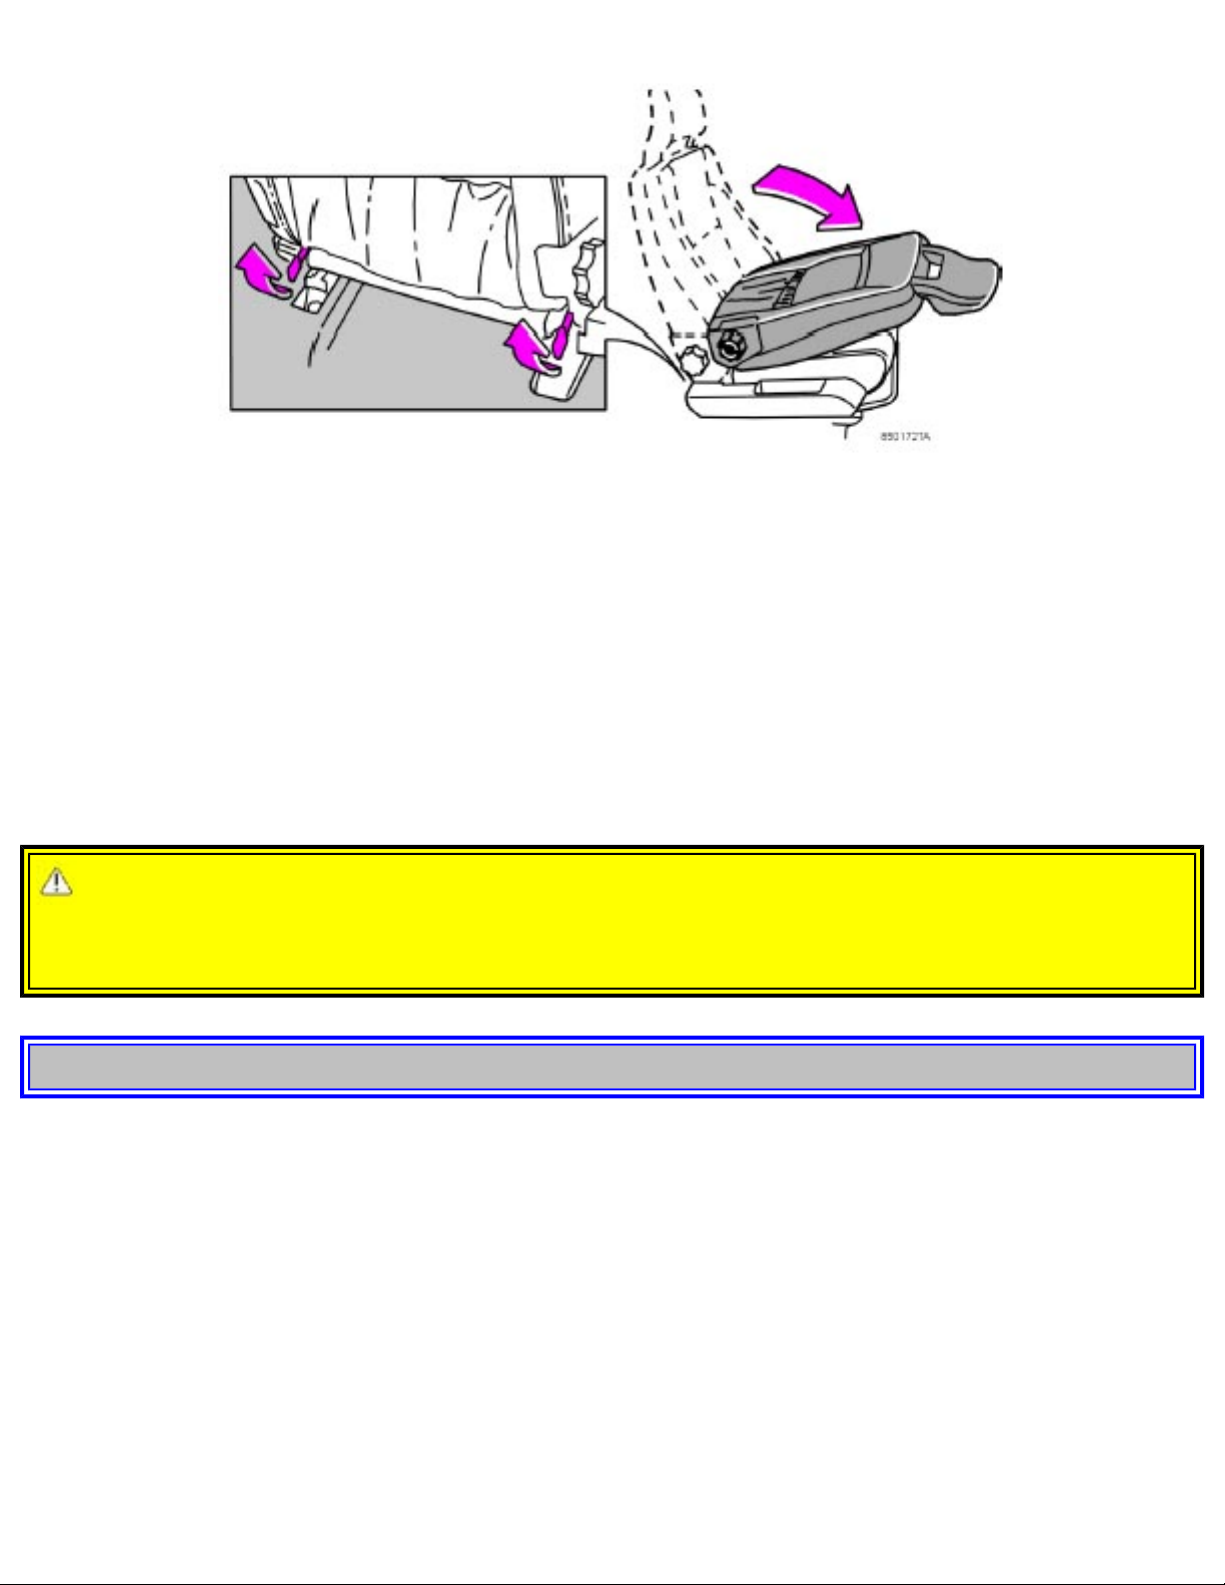
2003 VOLVO XC90
Folding the backrests in the front seat
The front passenger seat backrest can be folded to a horizontal position to make room for a long load.
Fold the backrest as follows:
● Move the seat as far back as possible.
● Adjust the backrest to the upright position.
● Lift the catches on the rear of the backrest.
● Without releasing the catches, push the backrest forward.
● Move the seat as far forward as possible.
WARNING!
Cover sharp edges on the load to help prevent injury to occupants. Secure the load to help prevent
shifting during sudden stops.
pg. 56 Interior
Front seats (contd)
Power seat
Operation
Passenger seat: The seat can only be adjusted if the ignition key is in position I, II or if the engine is
running.
Driver's seat: The seat can be adjusted if the ignition key is in position I, II or if the engine is running.
It can also be adjusted in the following circumstances:
file:///K|/ownersdocs/2003/2003_XC90/03xc90_04a.htm (3 of 11)12/30/2006 4:18:54 PM
Page 75
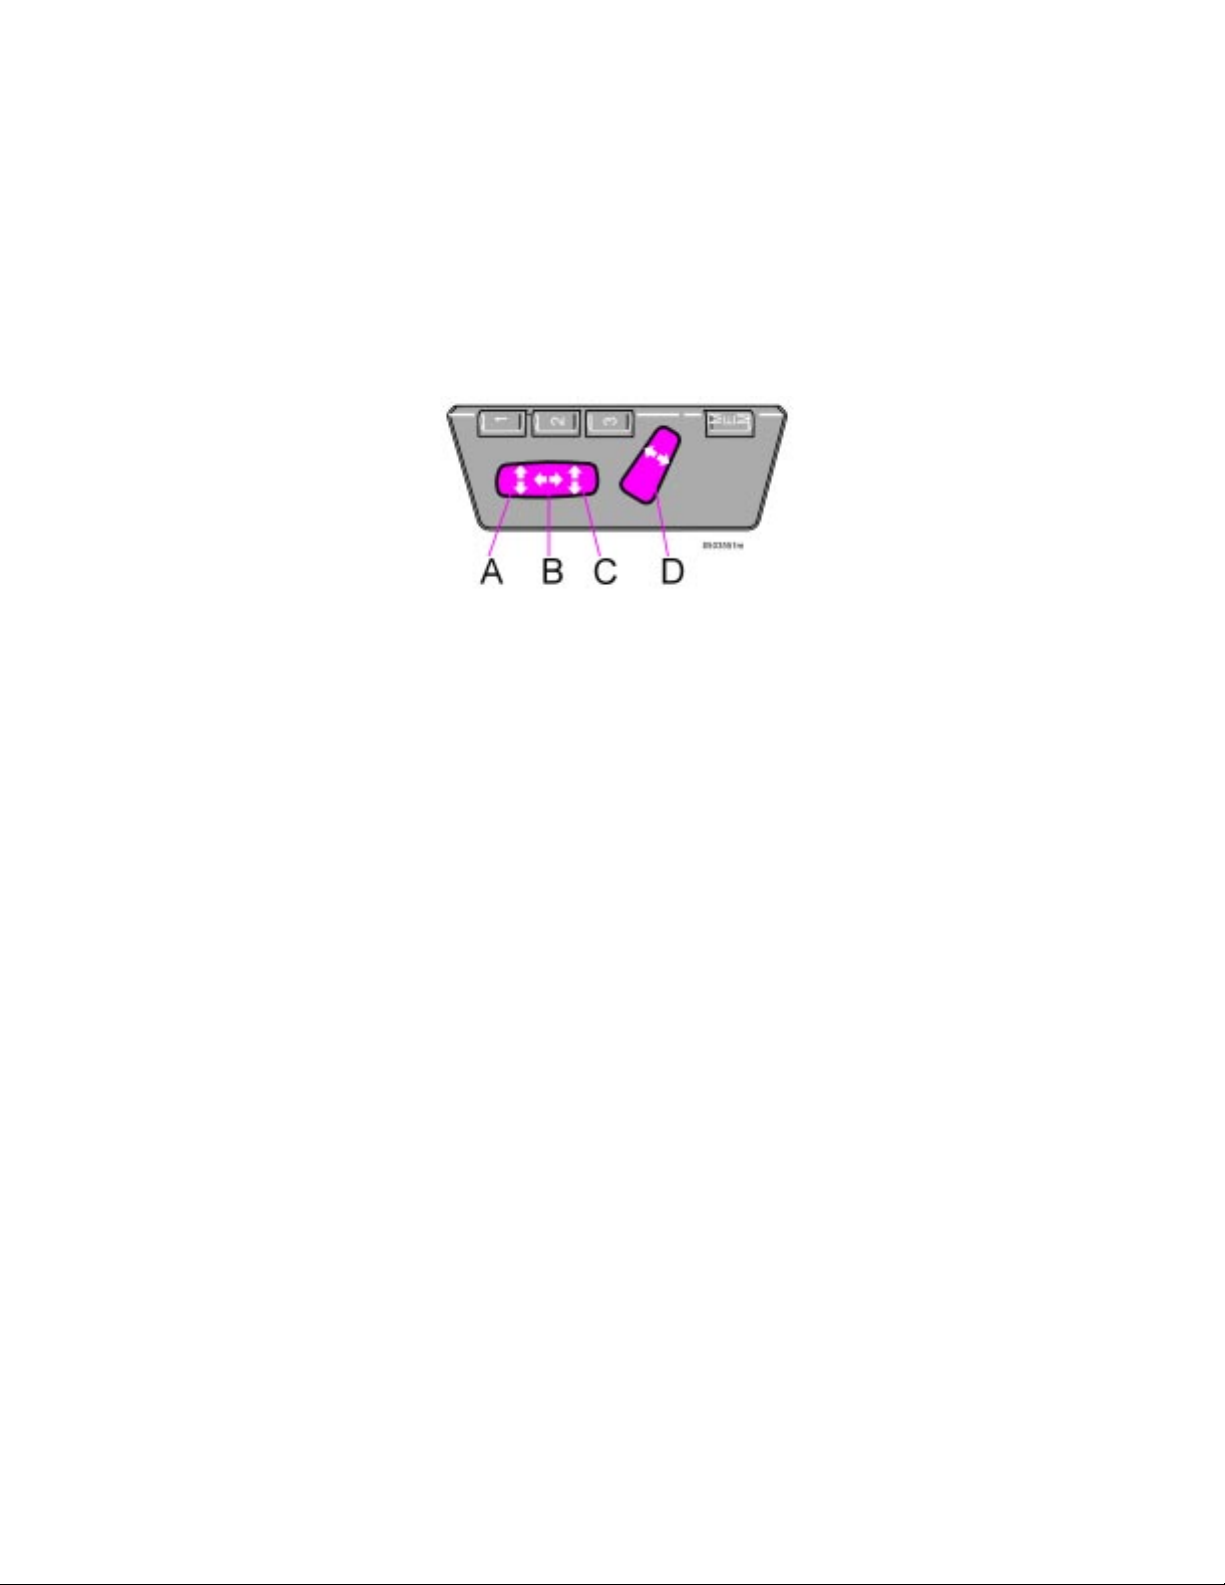
2003 VOLVO XC90
1. Within 40 seconds of the ignition key being turned to position 0 or removed from the ignition switch.
2. After you have unlocked the driver's door with the key or remote control, the driver's seat can be
adjusted during a 10 minute period if the door remains open. If the door is closed, the seat can be
adjusted for 40 seconds. The ignition key can be in position 0 or not yet inserted in the ignition switch.
Remote keyless entry system and driver's seat
The remote control transmitter also controls the electrically operated driver's seat in the following way:
● Adjust the seat to your preferences.
● When you leave your vehicle, lock it using the remote control.
Power seat control panel
The next time you unlock the driver's door with the same remote control (the one you used to lock the
doors with) and open the driver's door, the driver's seat will automatically move to the position in which
you left it.
The seat will move to this position even if someone else has adjusted it since you last unlocked the
vehicle with the same remote control.
NOTE: This feature will work in the same way with all of the remote control transmitters (up to 3) that
you use with your vehicle. This feature will not function if you lock your vehicle with the key.
Seat adjustment
Adjust the power seat(s) with the two switches at the side of the seat as follows:
A - Front edge of seat (raise/lower)
B - Forward - rearward
C - Rear edge of seat (raise/lower)
D - Backrest tilt
NOTE: The power seats have an overload protector that activates if a seat is blocked by any object. If
this occurs, switch off the ignition (key in position 0) and wait about 20 seconds before operating the
seat again.
Please refer to the following page for information on programming the memory function in the
driver's seat.
file:///K|/ownersdocs/2003/2003_XC90/03xc90_04a.htm (4 of 11)12/30/2006 4:18:54 PM
Page 76
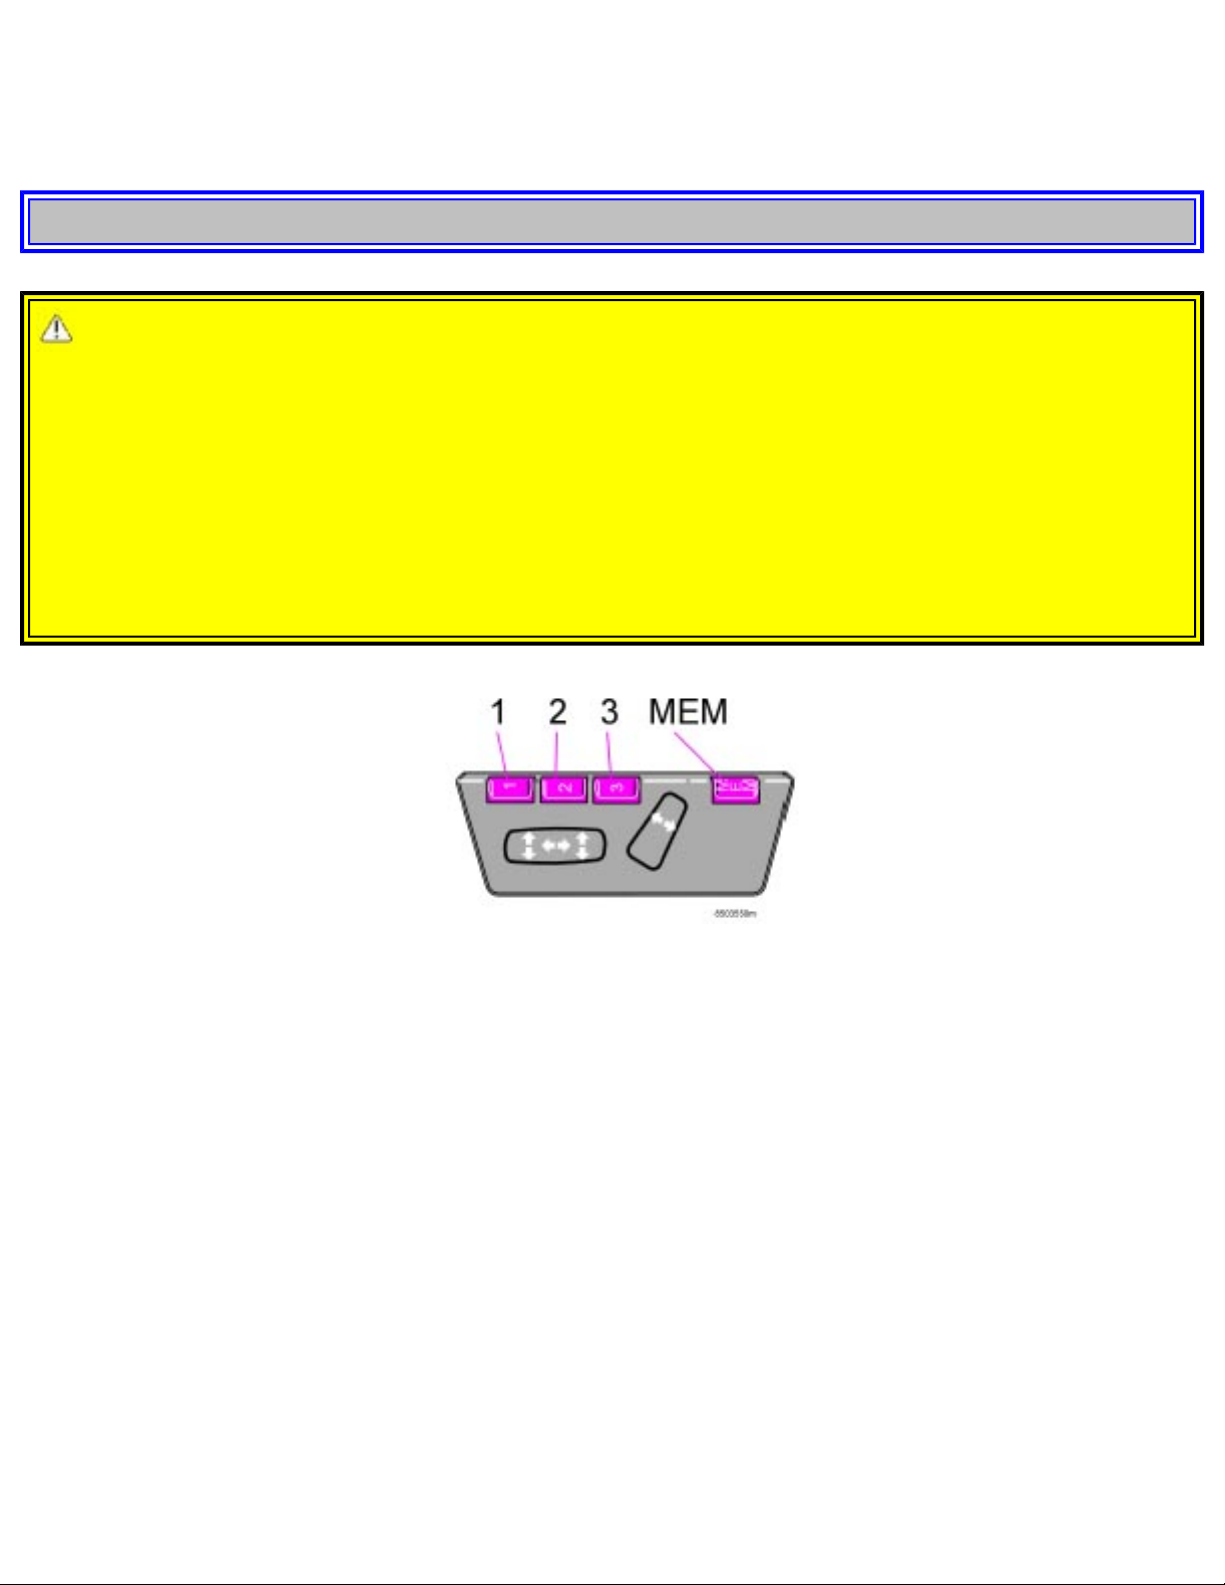
2003 VOLVO XC90
Emergency stop
If the seat accidentally begins to move, press one of the buttons to stop the seat.
pg. 57 Interior
WARNING!
- Because the driver's seat can be adjusted with the ignition off, children should never be left
unattended in the vehicle.
- Movement of the seat can be STOPPED at any time by pressing any button on the power seat
control panel.
- Do not adjust the seat while driving.
- The seat should be adjusted so that the brake pedal can be depressed fully. In addition, position the
seat as far rearward as comfort and control allow.
- The seat rails on the floor must not be obstructed in any way when the seat is in motion.
Programming the memory
Please note that only the driver's seat is equipped with the memory function.
Three seat positions can be programmed. To program a seat position:
1. Adjust the seat to the desired position.
2. Hold down the MEM button.
3. While holding down the MEM button, press button 1 to program the current position of the seat.
Buttons 2 and 3 can be programmed in the same way.
To move the seat to a programmed position, press and hold down button 1, 2 or 3 until the seat moves to
the preset position and stops.
As a safety precaution, the seat will stop automatically if the button is released before the seat has
reached the programmed position.
file:///K|/ownersdocs/2003/2003_XC90/03xc90_04a.htm (5 of 11)12/30/2006 4:18:54 PM
Page 77
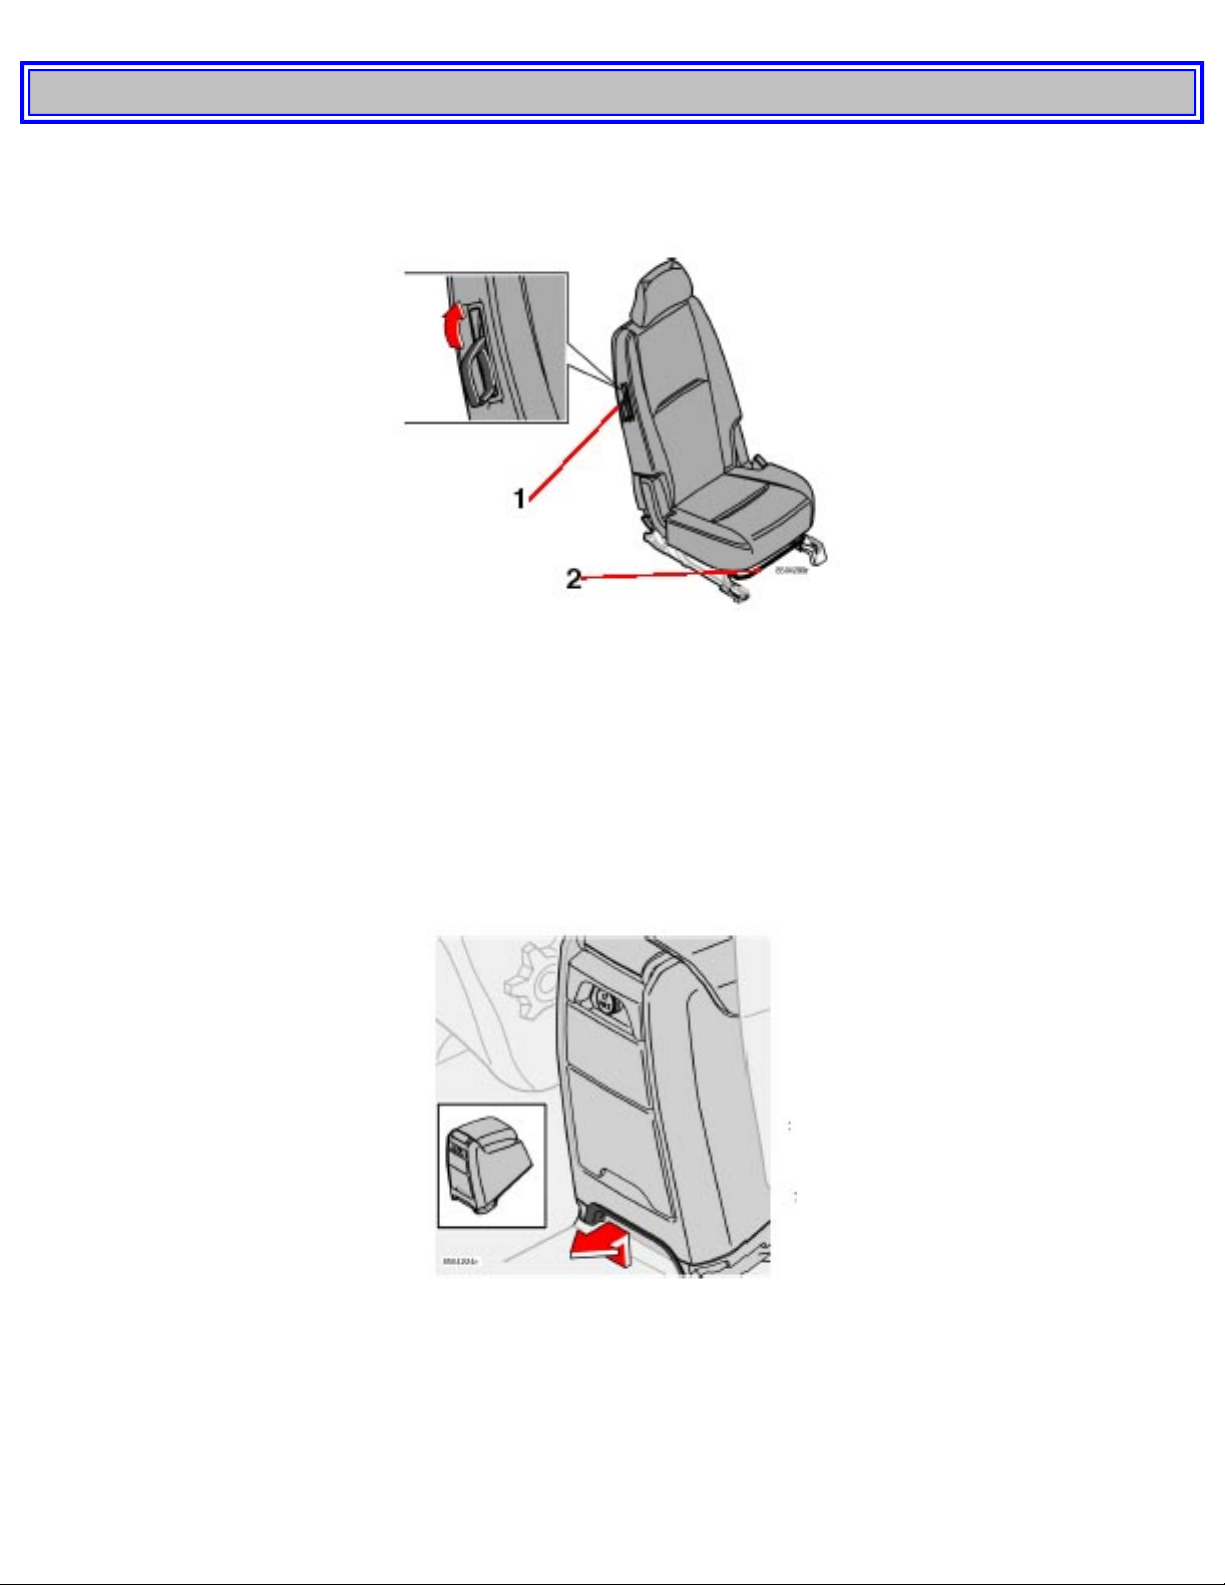
2003 VOLVO XC90
pg. 58 Interior
Rear seats
Entering the optional third row of seats
Tilting the outboard backrests in the second row of the seats:
Pull up the handle (1), hold it up, and tilt the backrest forward to move the seat. Return the backrest to
the upright position to slide the seat back to its original position.
Forward/rearward seat adjustment
Lift the adjustment bar (2) to move the seat forward or rearward.
Removing the center console (seven-seat models only)
In order to make it possible to move the center seat in the second row of seats as far forward as possible
(seven-seat models only), the rear section of the center console can be removed.
● Pull the handle (see illustration above) and lift out the console.
● To return the console to its original position, slide it back into position until it clicks into place.
file:///K|/ownersdocs/2003/2003_XC90/03xc90_04a.htm (6 of 11)12/30/2006 4:18:54 PM
Page 78
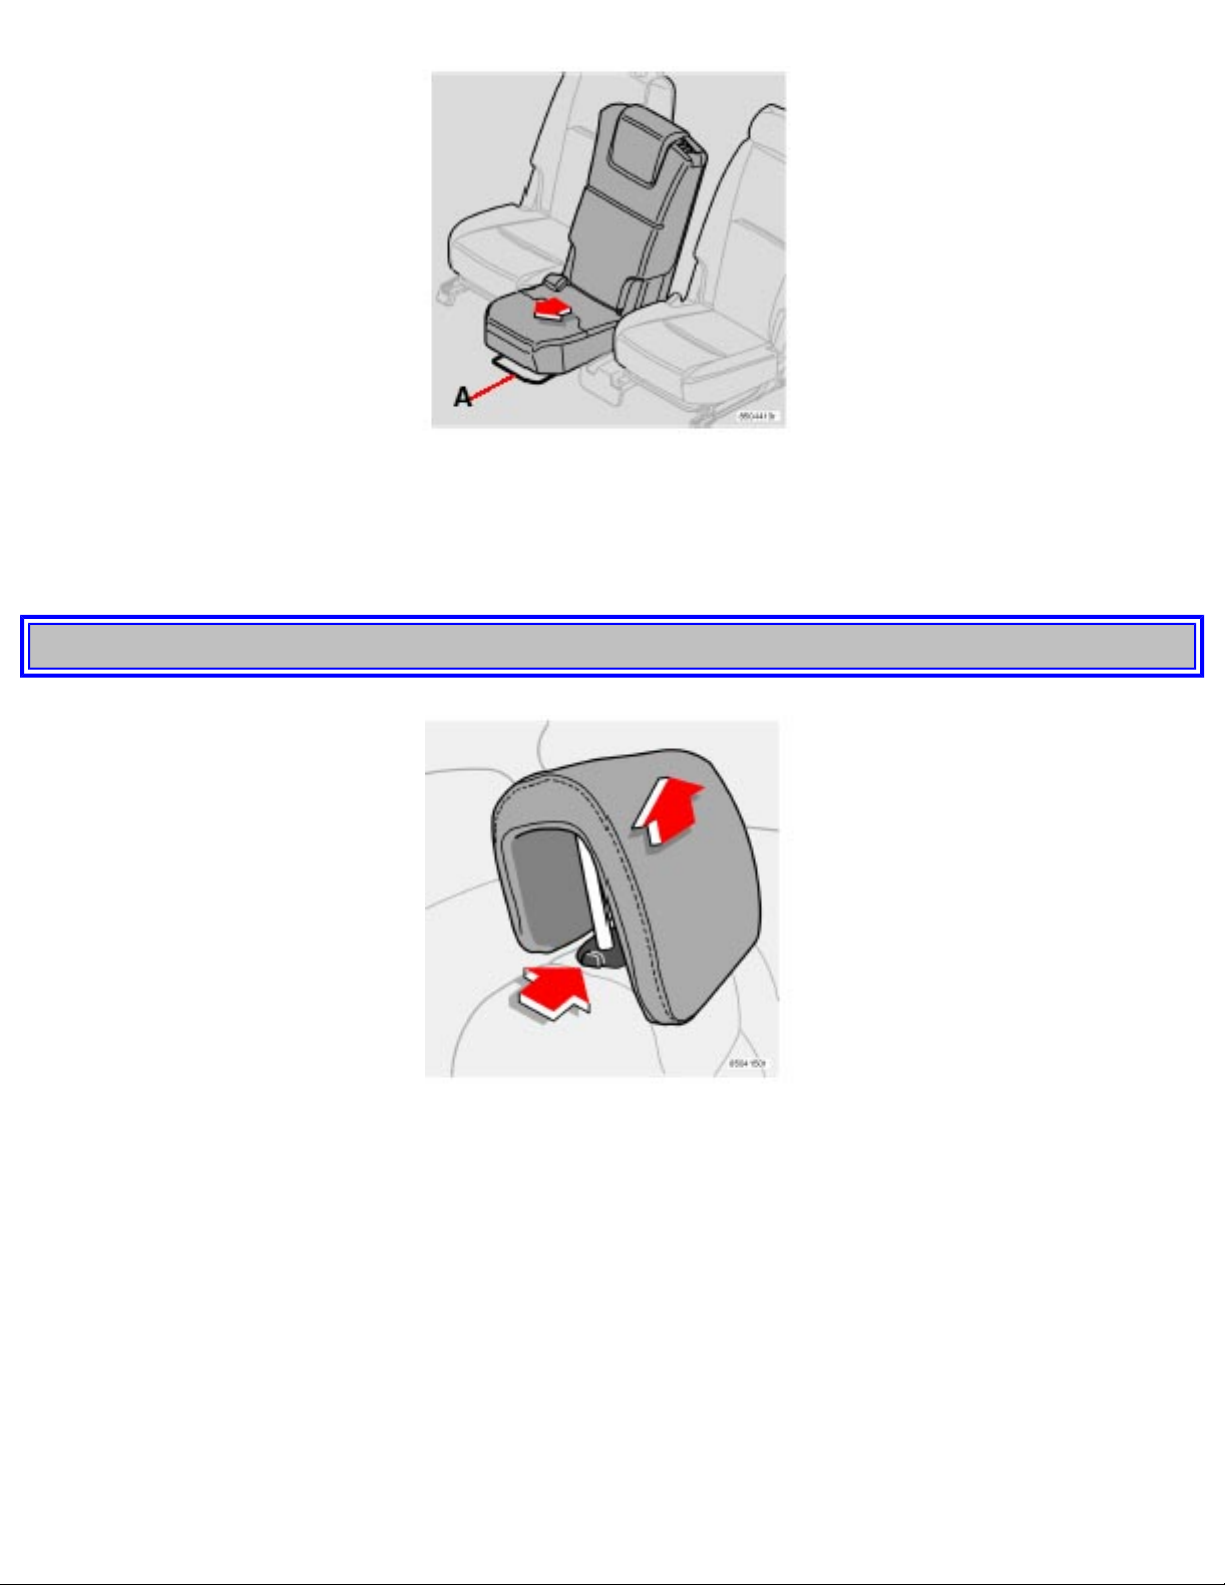
2003 VOLVO XC90
Sliding center seat - second row (seven-seat models only)
The center seat in the second row can be moved farther forward than the outboard seats. This makes it
possible for a child seated in this position to sit closer to the people in the front seats.
pg. 59 Interior
Head restraint - second row, center position
The head restraint in the center position can be adjusted to 4 different heights.
To raise - pull the restraint up until it clicks into one of the four heights positions.
To lower - press the button at the base of the support (see illustration above) and press the head restraint
down.
file:///K|/ownersdocs/2003/2003_XC90/03xc90_04a.htm (7 of 11)12/30/2006 4:18:54 PM
Page 79
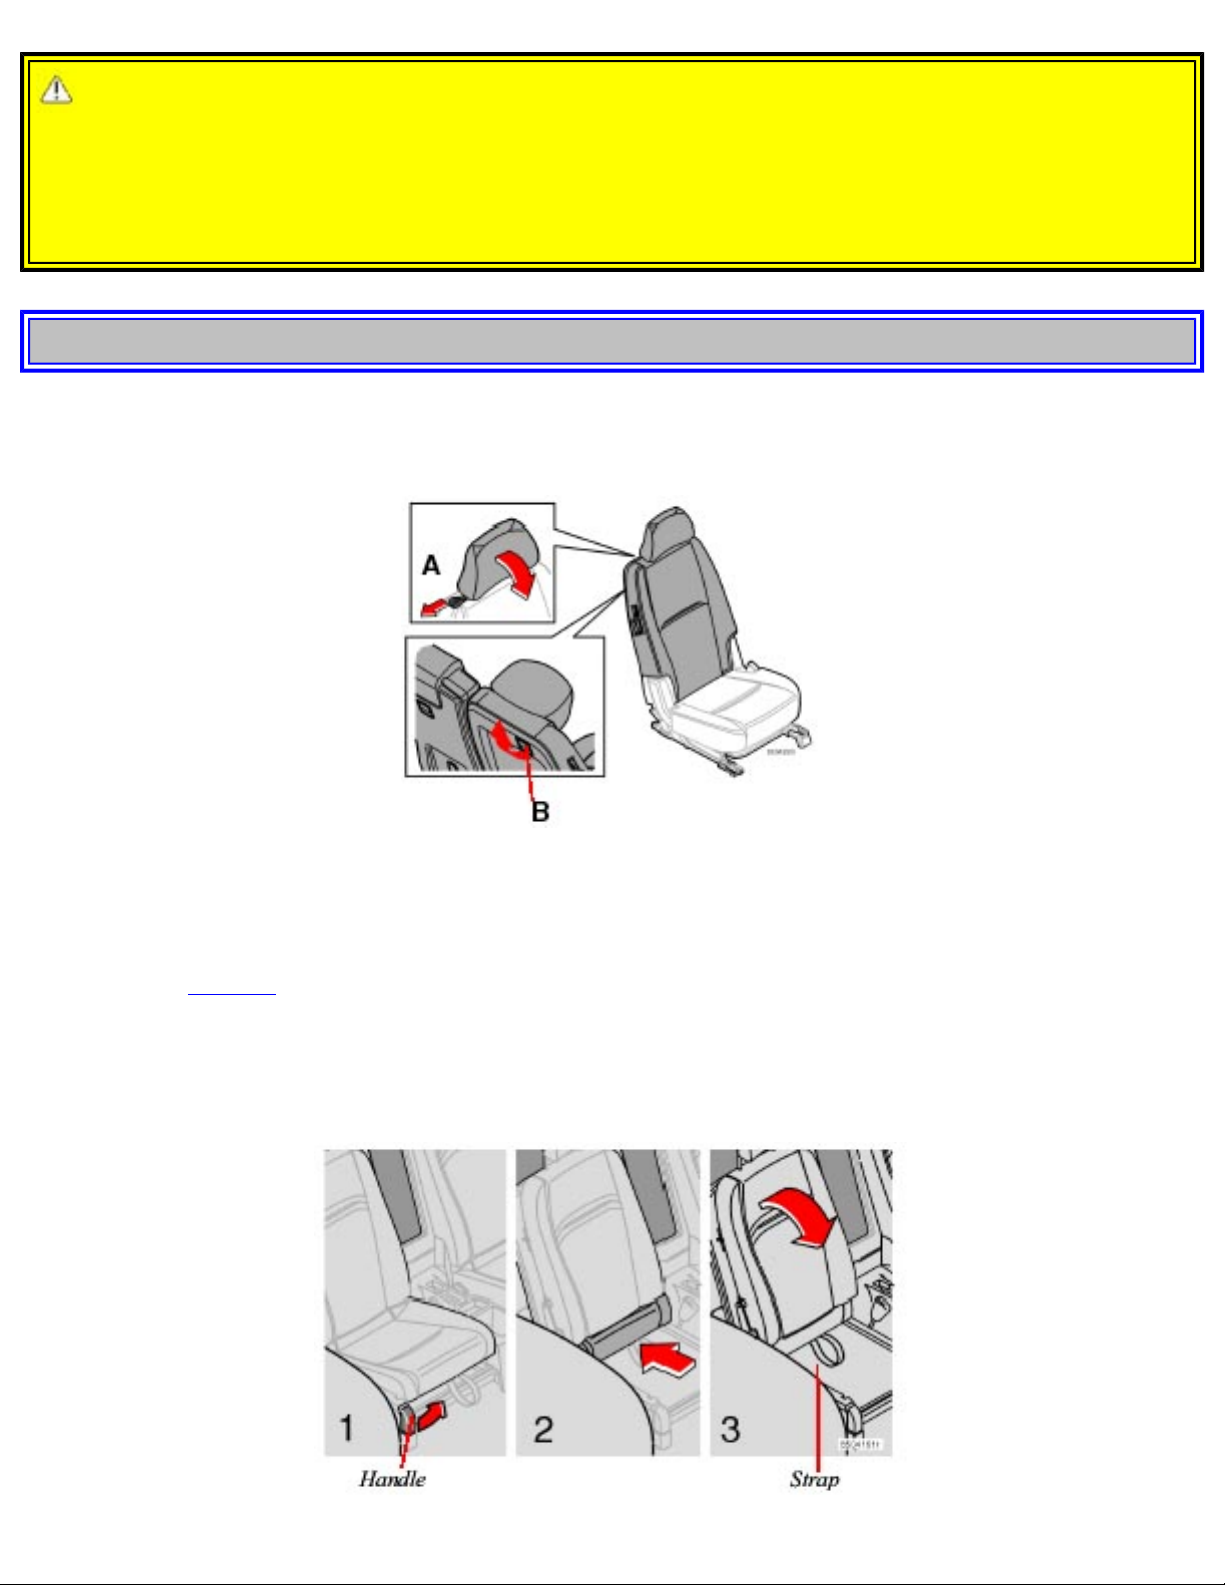
2003 VOLVO XC90
WARNING!
- Please note that the lowest head restraint position is only intended for use when the backrest is to be
folded down, or when the seat is not occupied.
- The head restraint is intended to help protect the head/neck in a collision. Ensure that it is properly
adjusted for the occupant of the seat.
pg. 60 Interior
Rear seats (contd)
Folding the backrests - second row of seats
1. Move the seat(s) to their rearmost position (seven-seat models only).
2. Pull the loop (A) to fold down an outboard head restraint. Press down the center head restraint if
necessary (see
page 59).
3. Pull the handle (B) outward to release the backrest. The backrests are designed to lock at a 45 degree
angle. Pull the handle again to continue pressing it down until it locks in the horizontal position.
To return the backrests to the upright position, pull handle B and pull the backrest up.
file:///K|/ownersdocs/2003/2003_XC90/03xc90_04a.htm (8 of 11)12/30/2006 4:18:54 PM
Page 80
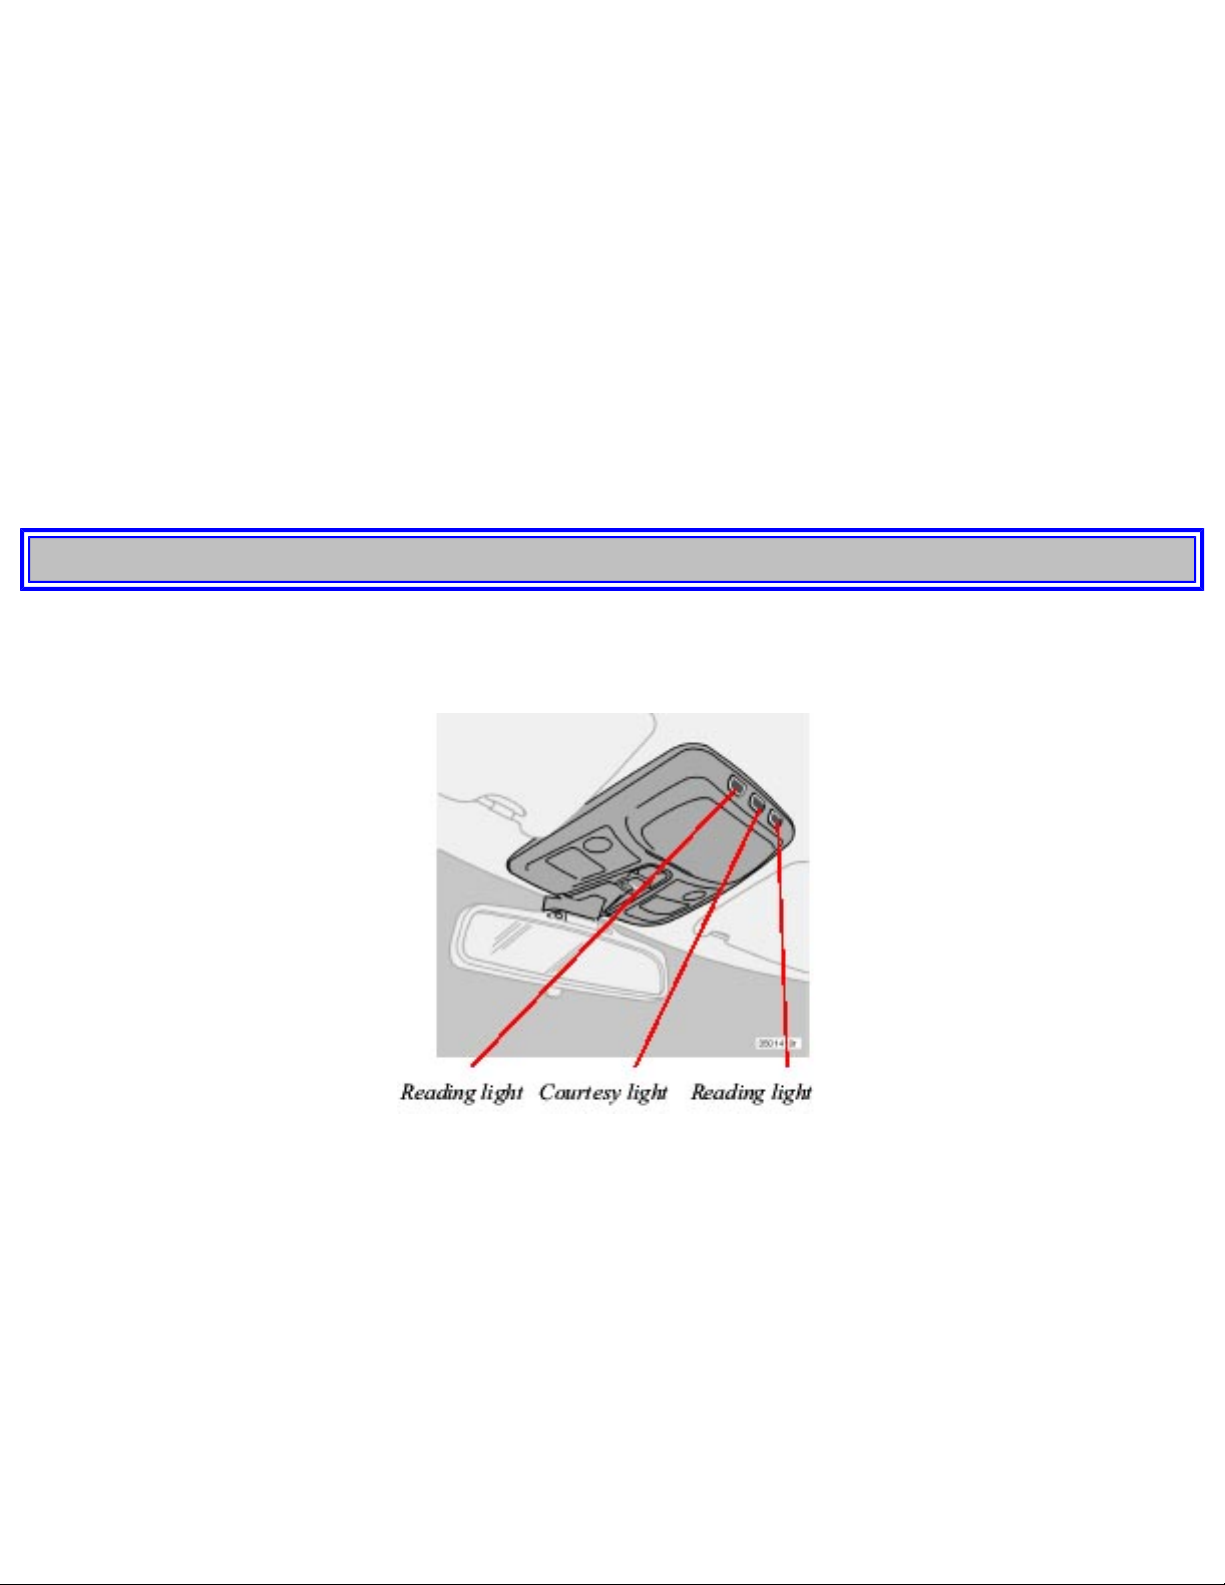
2003 VOLVO XC90
Folding the backrests - third row of seats (option)
Folding down the backrest
If necessary, fold in the load anchorage eyelets before folding down the backrests.
1. Pull up the handle in illustration 1 above.
2. Push the seat cushion rearward, under the backrest.
3. Fold down the backrests* (the head restraints fold down automatically) to the horizontal position.
* Please note that the head restraints in this row cannot be vertically adjusted.
Returning the backrest to the upright position
● Fold up the backrest to the upright position.
● Grasp the strap (see illustration 3 above) and pull the seat cushion out until it locks in place. This also
locks the backrest in the upright position.
pg. 61 Interior
Interior lighting
Courtesy light/front reading lights
The courtesy/reading lights can be turned on or off by pressing the respective buttons. The courtesy light
has a timer function which turns the light on for 30 seconds if:
● You unlock the vehicle from the outside with the key or remote control.
● You switch off the ignition (turn the key to position 0).
The courtesy light stays on for 10 minutes if one of the doors is left open after the vehicle is unlocked.
The courtesy light switches off if:
● The engine is started.
● The vehicle is locked from the outside with the key or remote control.
file:///K|/ownersdocs/2003/2003_XC90/03xc90_04a.htm (9 of 11)12/30/2006 4:18:55 PM
Page 81
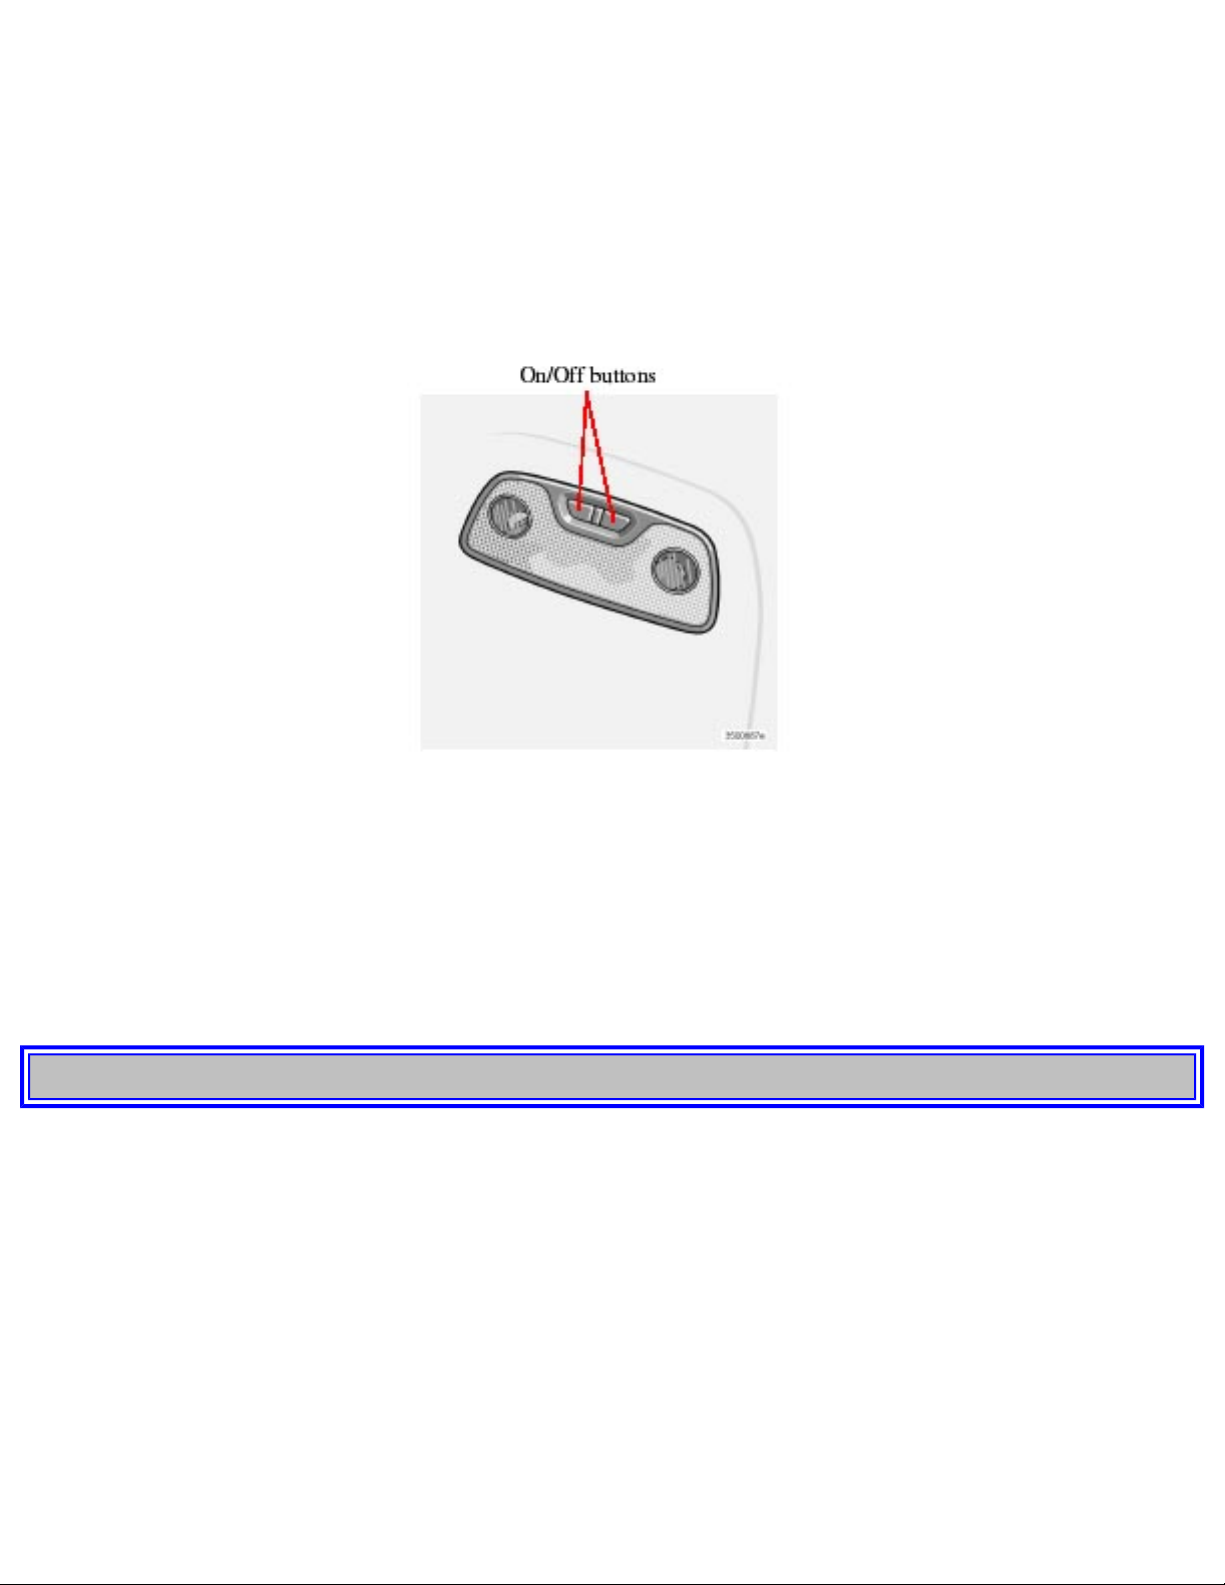
2003 VOLVO XC90
The courtesy light can be switched off or on in all situations by briefly pressing the button. When you
switch the light on, it remains lit for 10 minutes.
You can disconnect the automatic function by pressing the courtesy light button for more than 3
seconds. Briefly pressing the courtesy light button again automatically reconnects the function.
The courtesy light timer periods can be changed. Contact your Volvo retailer.
Rear reading lights
● The reading lights can be switched on or off by pressing the respective buttons.
● Seven-seat models: Both reading lights for the third row of seats will switch on if one of the buttons
is pressed.
● The reading lights switch off automatically after 10 minutes if the engine is not running.
● The lights can be switched off at any time by pressing the button.
pg. 62 Interior
file:///K|/ownersdocs/2003/2003_XC90/03xc90_04a.htm (10 of 11)12/30/2006 4:18:55 PM
Page 82
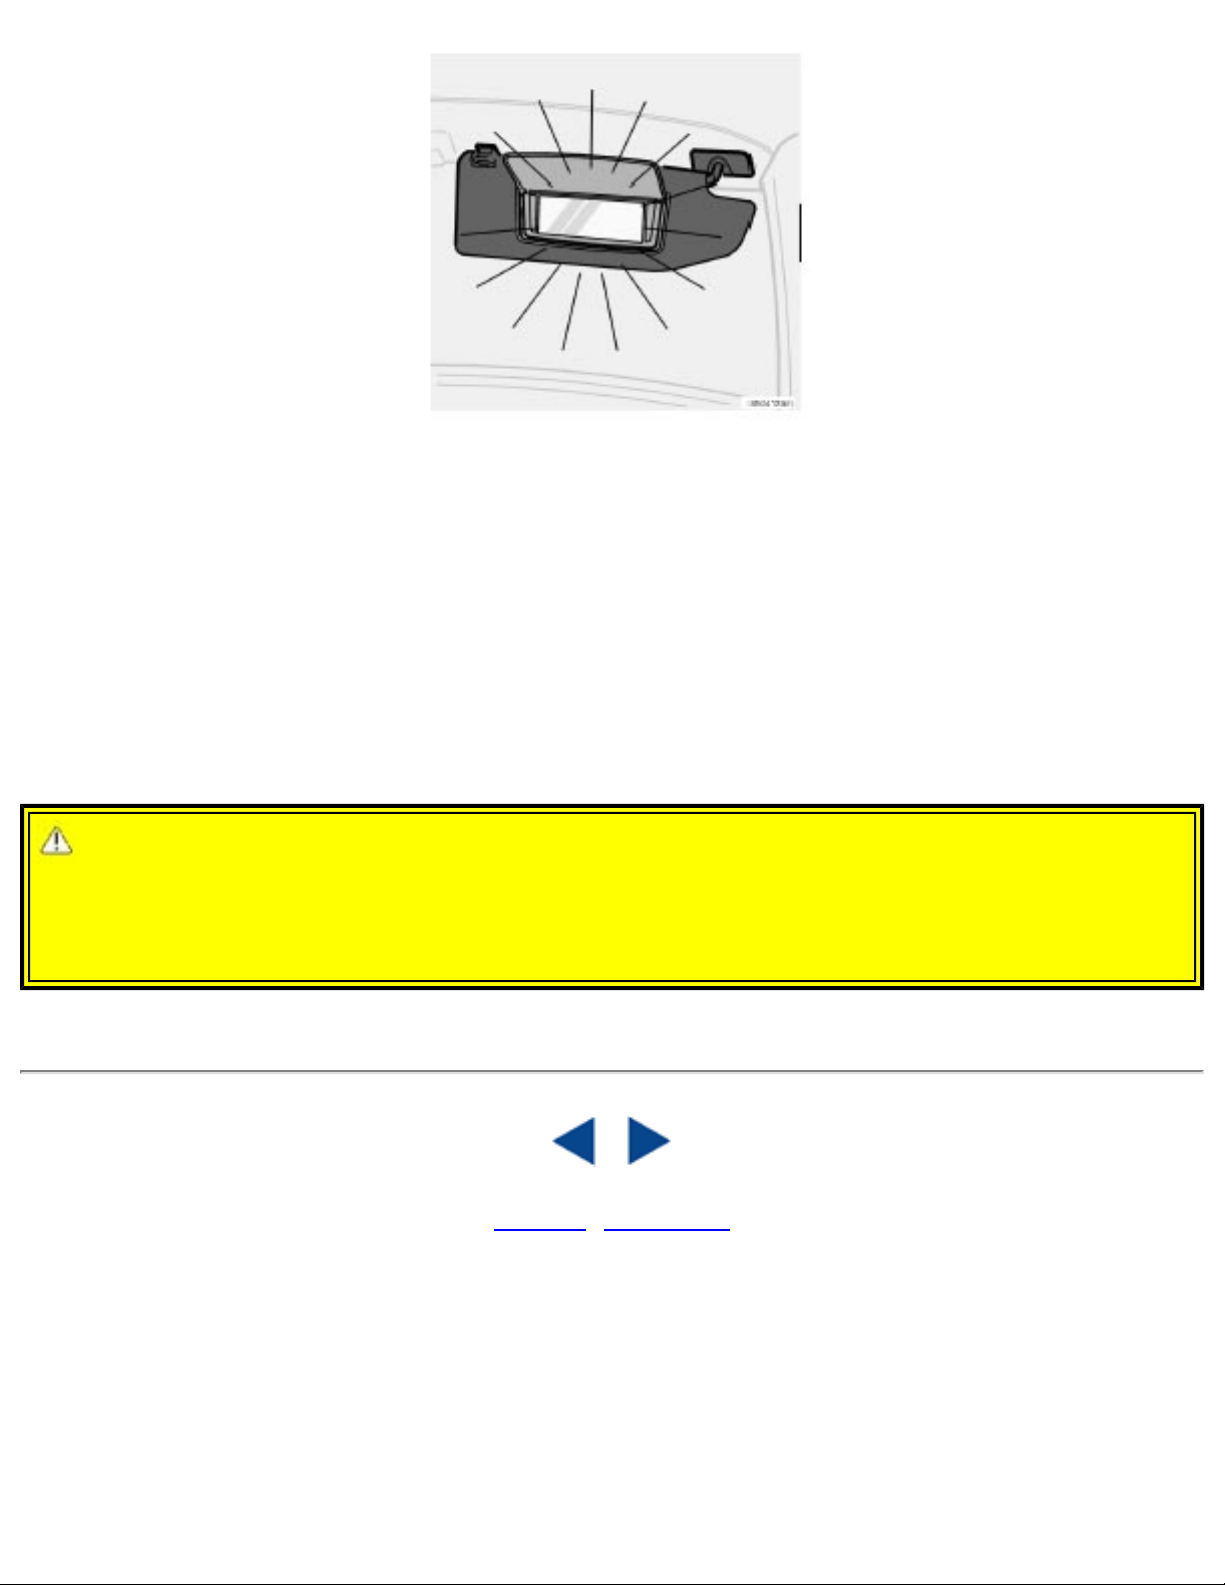
2003 VOLVO XC90
Vanity mirror
The light comes on when you open the cover.
Floor Mats
Volvo offers floor mats specially manufactured for your vehicle. They must be properly placed and
secured in the mat clips.
WARNING!
An extra mat on the driver's floor can cause the accelerator pedal to catch. Check that the movement
of the accelerator pedal is not impeded. No more than one protective floor covering may be used at
one time.
Contents | Top of Page
file:///K|/ownersdocs/2003/2003_XC90/03xc90_04a.htm (11 of 11)12/30/2006 4:18:55 PM
Page 83
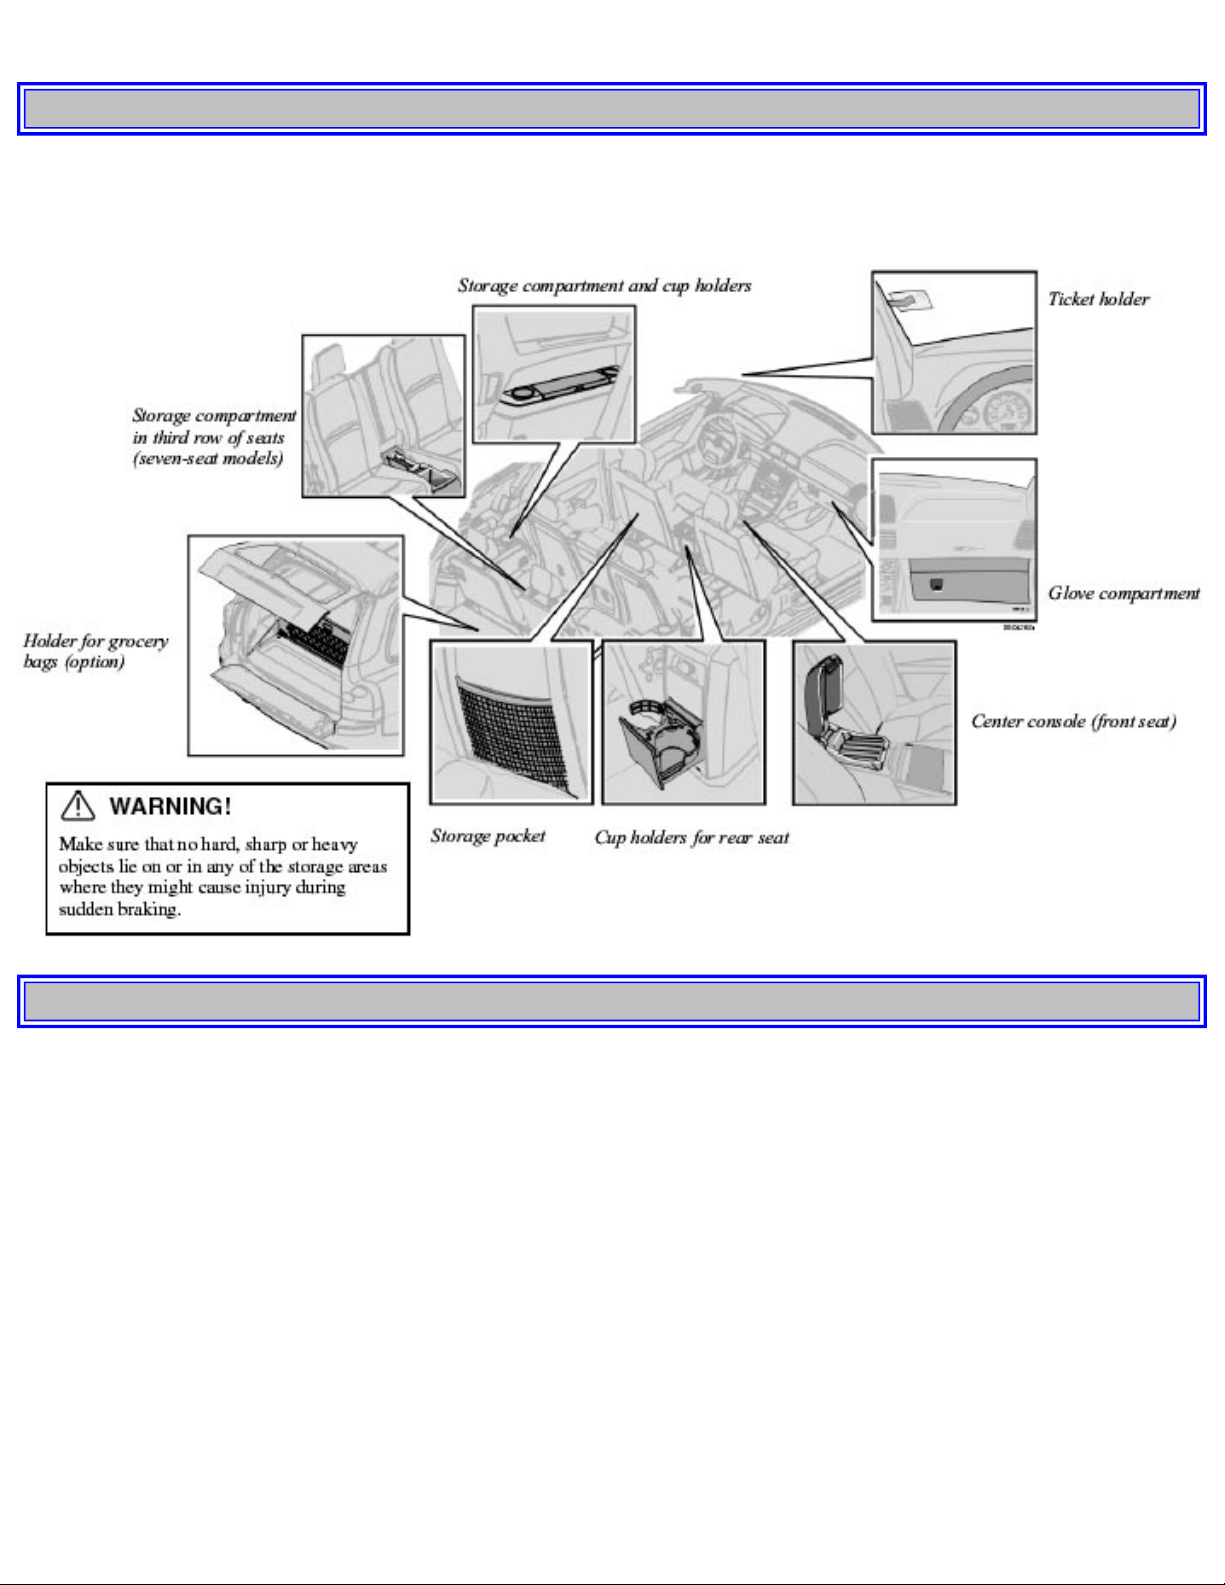
2003 VOLVO XC90
pg. 63 Interior
Storage compartments
pg. 64 Interior
Storage compartments (contd)
file:///K|/ownersdocs/2003/2003_XC90/03xc90_04b.htm (1 of 10)12/30/2006 4:18:55 PM
Page 84
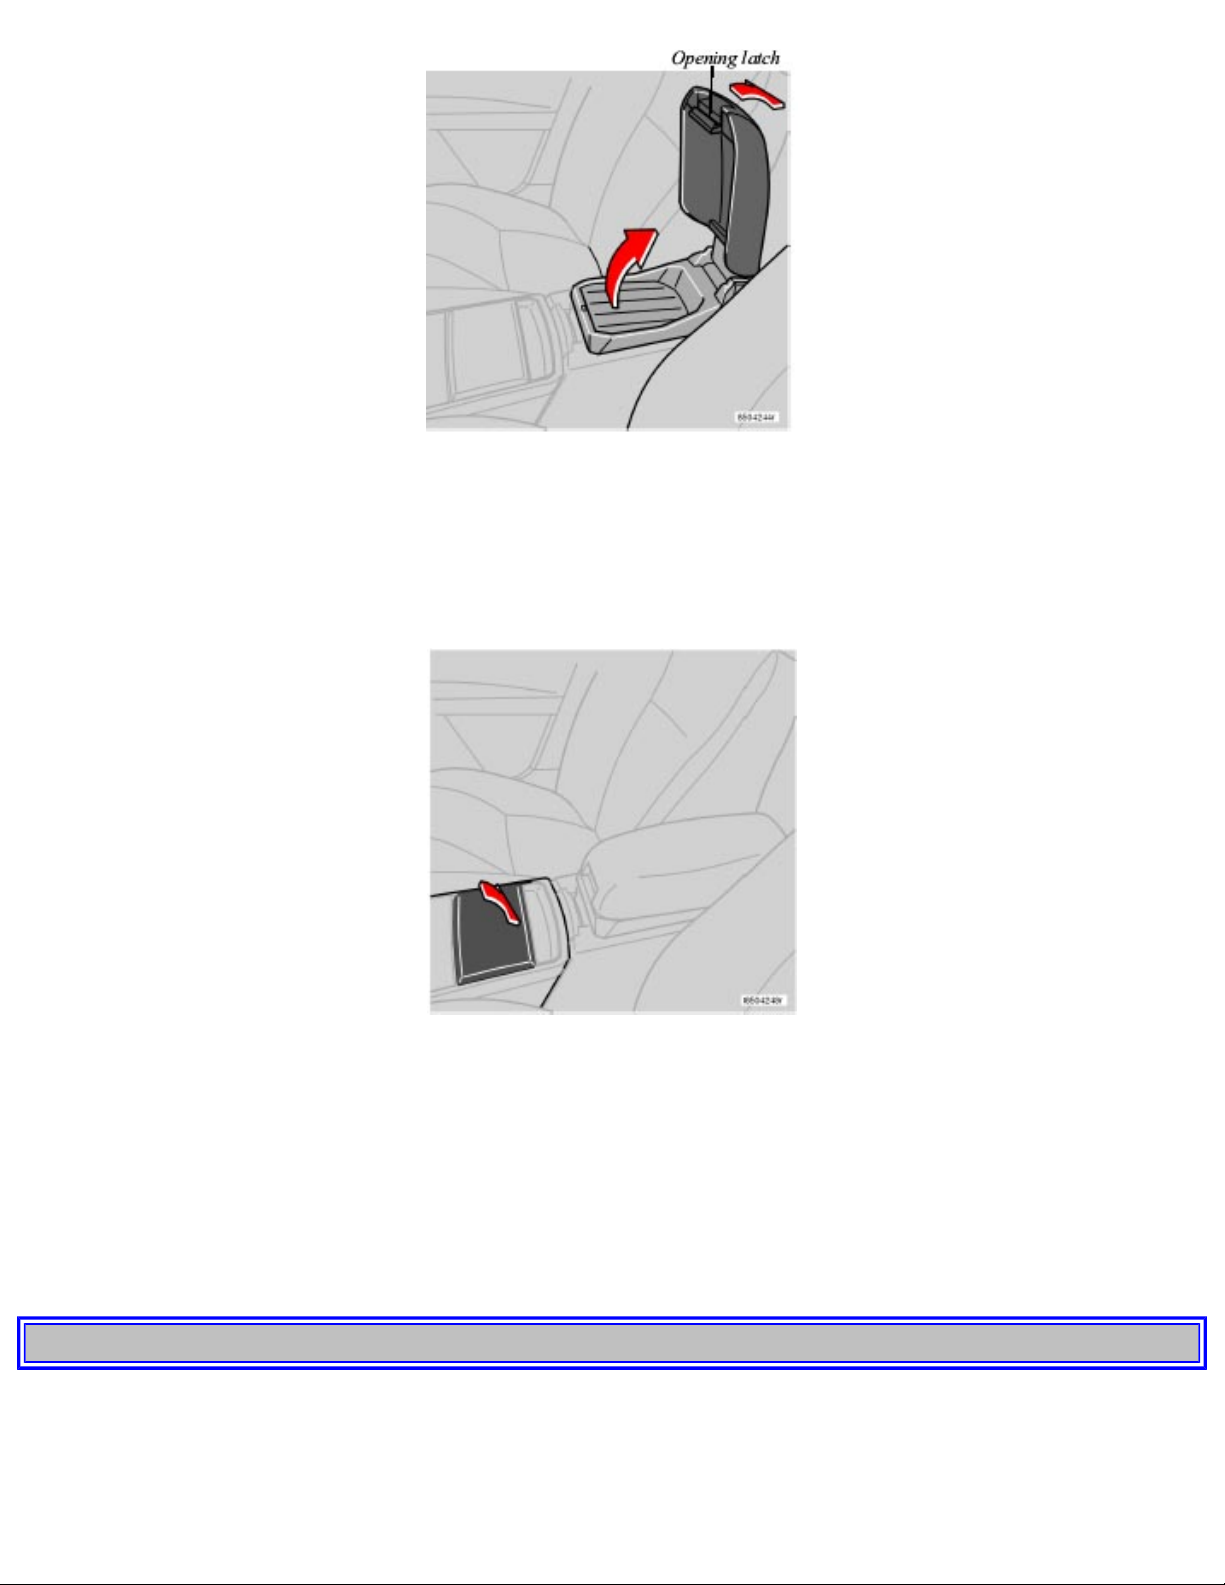
2003 VOLVO XC90
Storage compartment in the center console
To open the lid on the storage compartment, press the lower edge of the opening latch (see illustration above). This lid can
be folded back to form a small table area for rear seat passengers.
Lift the tray under the lid to expose the deep storage bin with slots for CD storage.
Cup holders for the front seats
Two cup holders are provided for the front seat occupants. Press lightly on the cover to open it.
Ashtray (accessory)
An ashtray insert is available from your Volvo retailer. This insert slides into either of the cup holders.
Pen holder
There is a pen holder in the center console, in front of the gear selector.
pg. 65 Interior
file:///K|/ownersdocs/2003/2003_XC90/03xc90_04b.htm (2 of 10)12/30/2006 4:18:55 PM
Page 85
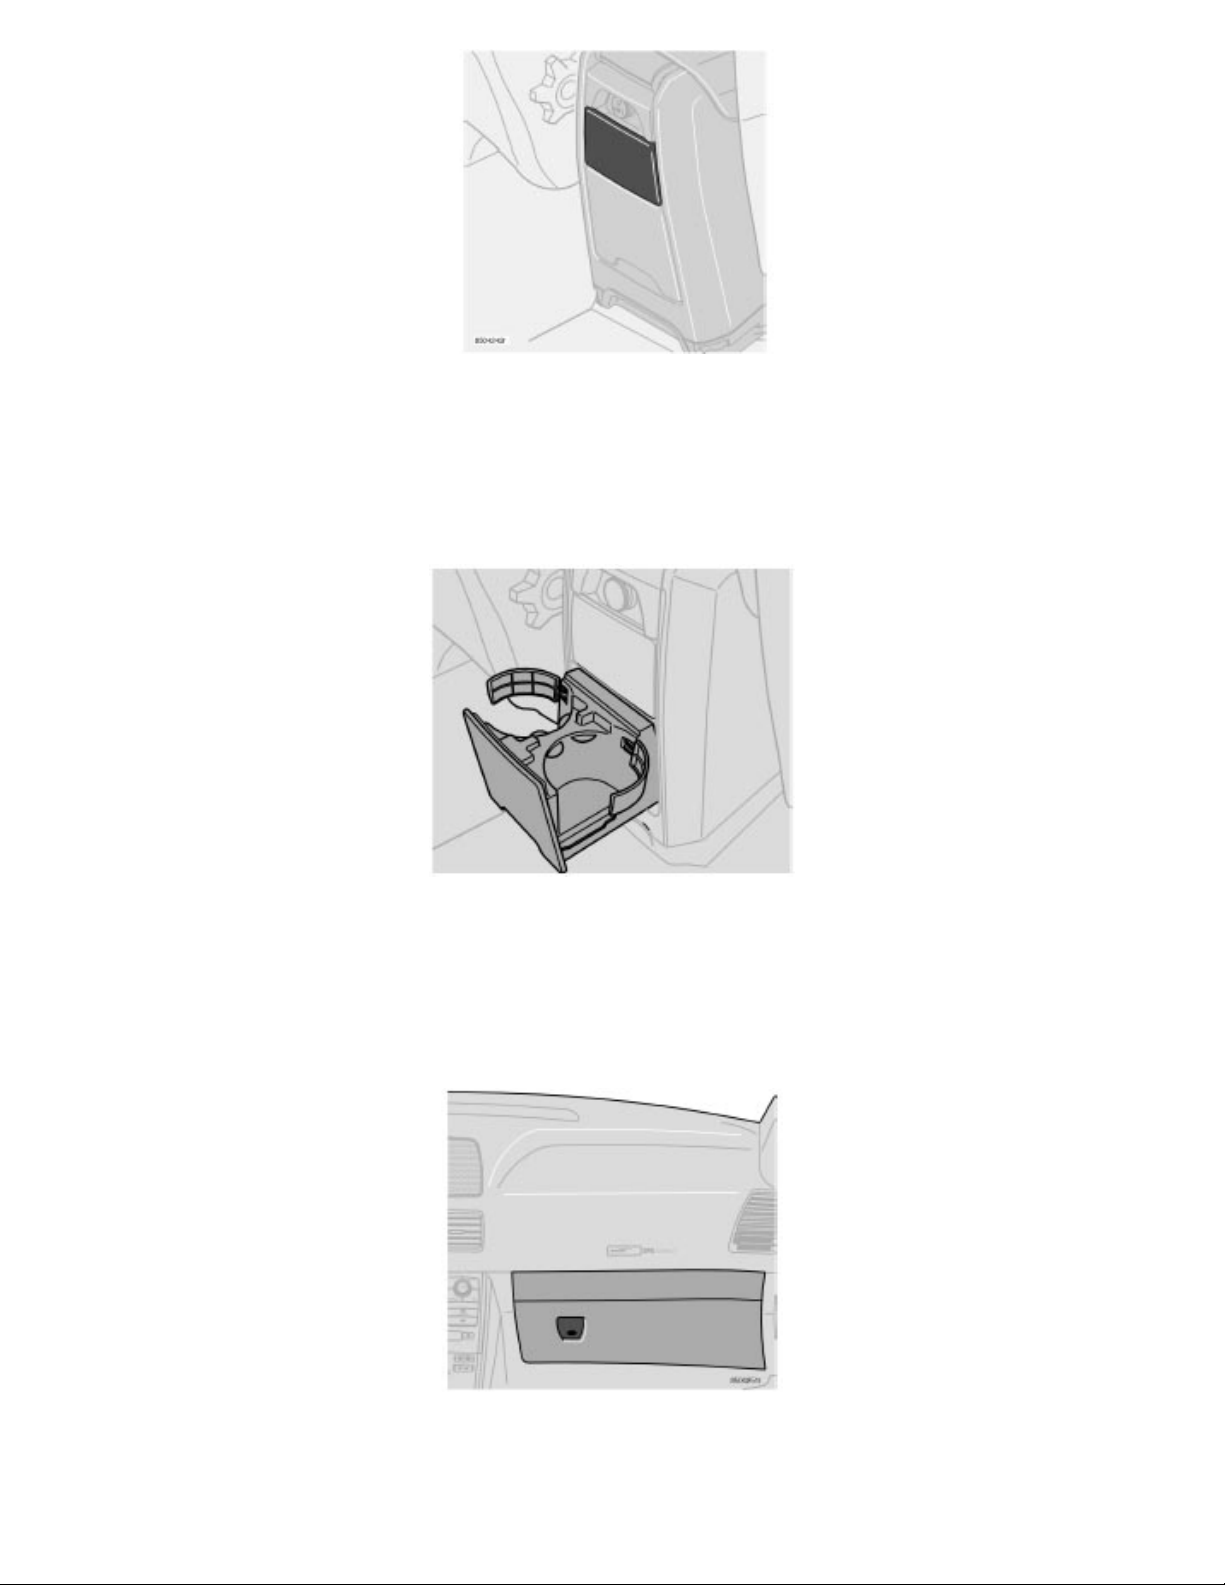
2003 VOLVO XC90
Storage compartment in rear side of center console
Grasp the upper edge of cover and pull to open this compartment.
Ashtray (accessory)
An ashtray insert is available from your Volvo retailer.
Cup holders for the rear seats
● Grasp the lower edge of the panel to pull out the cup holders in the rear side of the center console.
● The cup holder insert can be removed to provide space for a large plastic bottle. Pull the insert straight up to remove it.
Press down to reinsert it.
Glove compartment
The glove compartment can be used to store things such as the owner's manual, maps, pens, etc.
file:///K|/ownersdocs/2003/2003_XC90/03xc90_04b.htm (3 of 10)12/30/2006 4:18:55 PM
Page 86
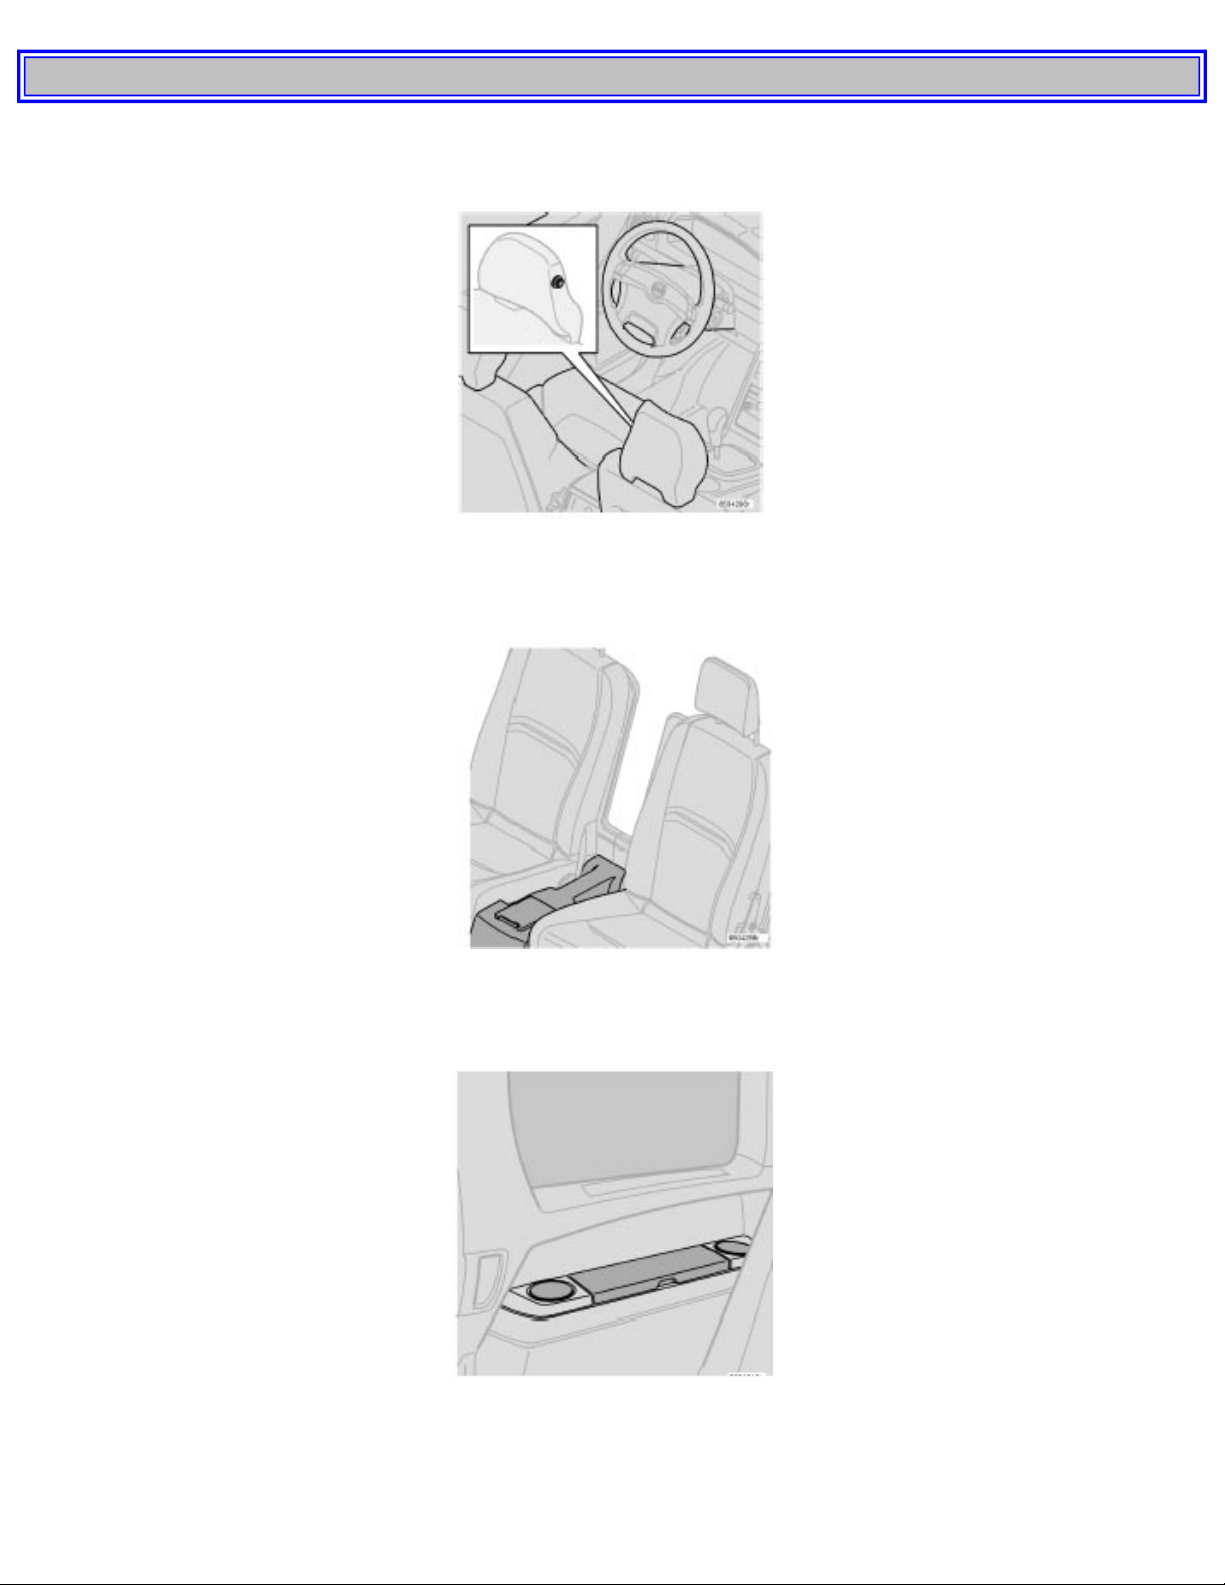
2003 VOLVO XC90
pg. 66 Interior
Storage compartments (contd)
Coat hanger
Use the coat hanger for clothes of normal weight.
Storage space between rear seats (seven-seat models) - option
This storage space provides compartments for pens or other small items.
Rear side storage compartments and cup holders (seven-seat models)
Lift the lid to access the storage compartment.
file:///K|/ownersdocs/2003/2003_XC90/03xc90_04b.htm (4 of 10)12/30/2006 4:18:55 PM
Page 87
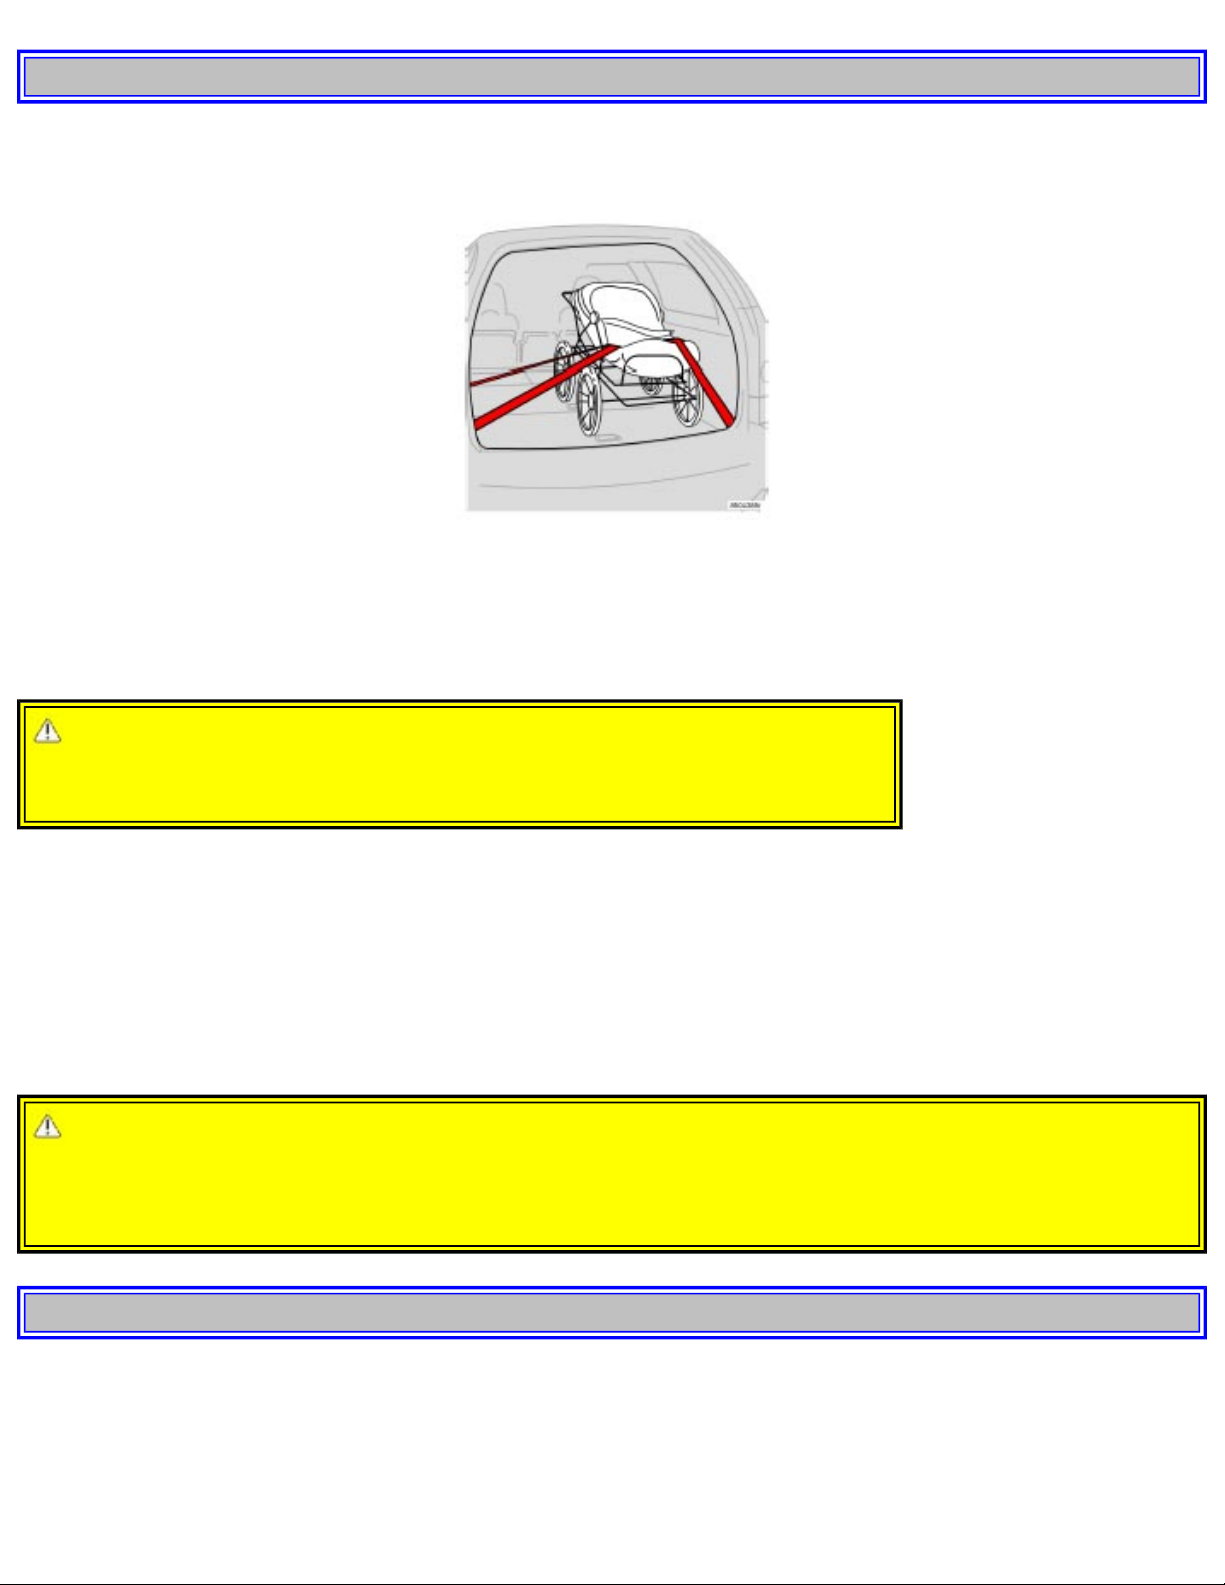
2003 VOLVO XC90
pg. 67 Interior
Securing cargo
Securing cargo
As a safety precaution, all cargo in your vehicle should be securely anchored to keep it from being thrown forward in the
event of sudden braking, etc. The vehicle is equipped with eyelets in the cargo space to which straps or other cargo
restraints can be attached. Consult your Volvo retailer about suitable accessories for this purpose.
WARNING!
The eyelets are not to be used as passenger restraints or as anchorages for child
restraints.
Remember that an object weighing 44 lbs (20 kg) produces a force of 2,200 lbs (1,000 kg) in a head-on collision at 30
mph (50 km/h)!
Keep the following in mind when loading the vehicle:
● Load the cargo against the backrest.
● Load heavy cargo as low as possible.
● If no one is sitting in the outboard rear seat(s), reinforce the backrest by fastening the seat belts.
● Never load cargo above the backrest without a cargo net.
WARNING!
When the rear backrest(s) are folded down, the vehicle should not be loaded to a level higher than 2 in. (5 cm) below the
upper edge of the rear side windows. Objects placed higher than this level could impede the function of the Inflatable
Curtain.
pg. 68 Interior
file:///K|/ownersdocs/2003/2003_XC90/03xc90_04b.htm (5 of 10)12/30/2006 4:18:55 PM
Page 88
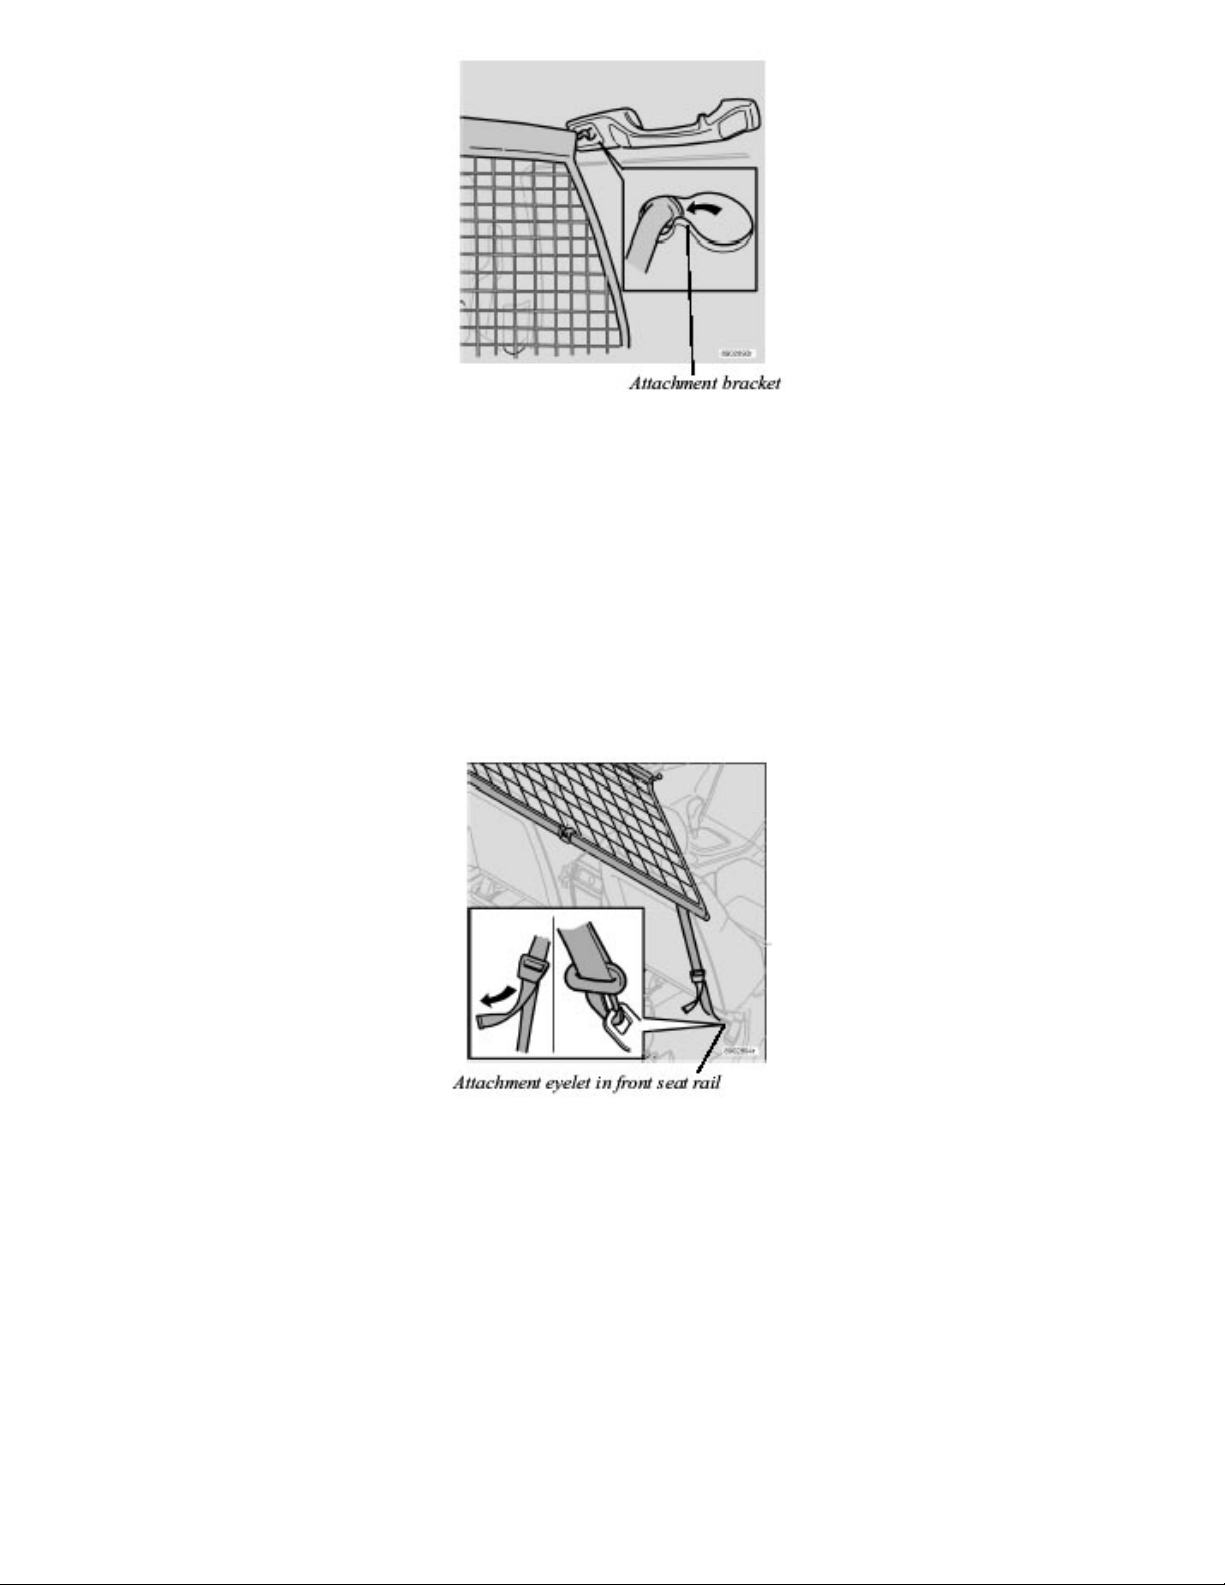
2003 VOLVO XC90
Nylon cargo net (option)
The Volvo XC90 can be equipped with a cargo net made of strong nylon fabric.
This net can be installed in two places:
● Behind the rear seat backrests (the second row of seats in seven-seat models)
● Behind the front seat backrests if the rear seat backrests (the second row of seats in seven-seat models) have been folded
down.
If the vehicle is equipped with the cargo area cover, lift the cover out of the vehicle before installing the cargo net.
1. The upper and lower rods of the cargo net are hinged. Position the rods so that they are straight and lock in position.
2. Insert the end of the upper rod in one of the attachment brackets (see illustration above).
3. Insert the other end of the rod in the attachment bracket on the opposite side of the vehicle.
4. Attach the lower straps to the eyelets on the floor if the net has been installed in the rear attachment brackets.
Use the eyelets in the front seat rails if the net has been installed in the forward attachment brackets.
NOTE: On seven-seat models: When using the net in the rear attachment brackets, be sure it is installed in front of the side
armrests.
5. Adjust the straps to pull the net taut.
file:///K|/ownersdocs/2003/2003_XC90/03xc90_04b.htm (6 of 10)12/30/2006 4:18:55 PM
Page 89
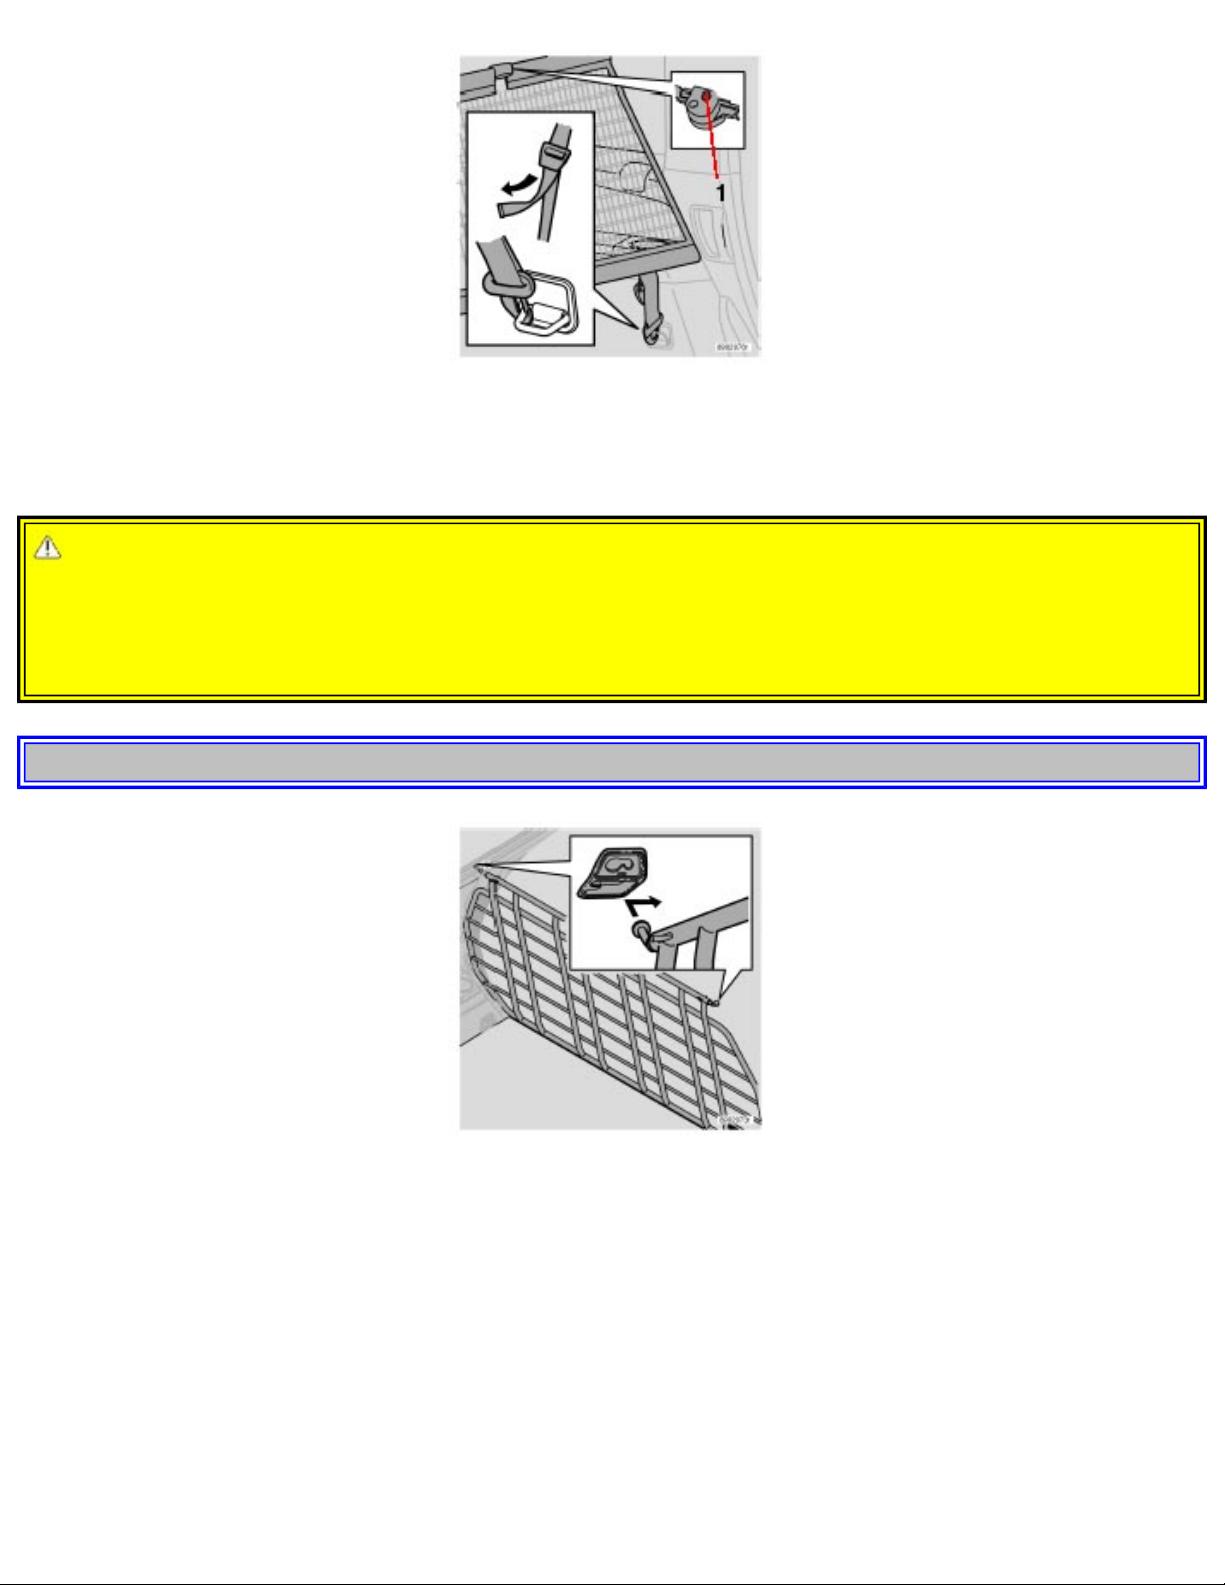
2003 VOLVO XC90
Folding and storing the cargo net
Press the release buttons on the hinges (1 in the illustration above) and fold the net.
The cargo net can be stored under the floor of the cargo area on five-seat models.
WARNING!
Be sure the cargo net is properly inserted in the attachment brackets and the straps are correctly attached to the eyelets
and pulled taut.
Do not use the net if it is damaged in any way.
When it is not in use, store the net so that it cannot be thrown forward in the event of sudden braking, etc.
pg. 69 Interior
Steel grid (accessory)
To install the grid:
Upper attachments
1. Lift in the grid through the tailgate or through one of the rear passenger doors (in this case, fold down the rear seat
backrests/backrests in second row of seats in seven-seat models).
2. Insert one of the grid's upper attachments into an attachment bracket above one of the rear passenger doors (see
illustration above).
3. Push the grid's attachment into the forward position in the attachment bracket (see inset illustration above) to lock the
attachment in place.
4. Insert the grid's other upper attachment in the attachment bracket above the opposite rear passenger door, and press the
attachment into the forward position in the attachment bracket to lock it in place.
file:///K|/ownersdocs/2003/2003_XC90/03xc90_04b.htm (7 of 10)12/30/2006 4:18:55 PM
Page 90
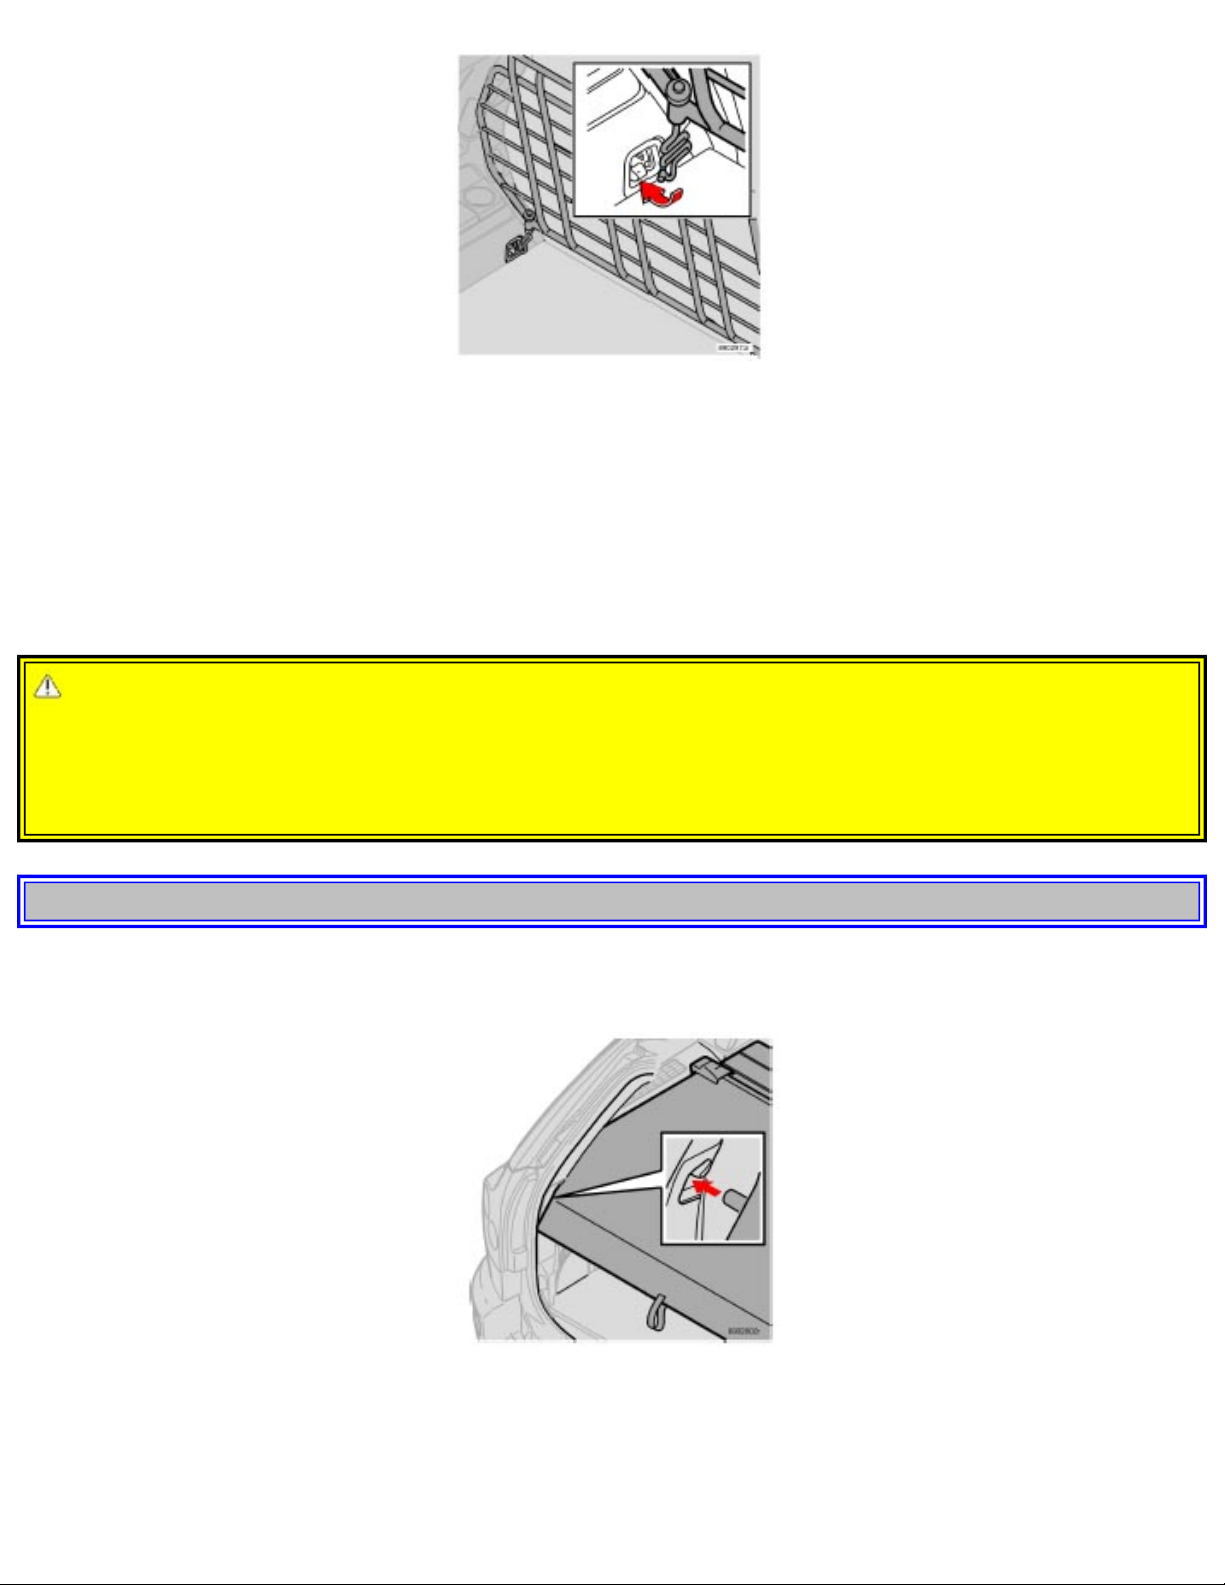
2003 VOLVO XC90
Lower attachments
1. Insert the lower attachment bracket through the steel grid's lower mount from underneath.
2. Install the spring on the attachment bracket and tighten the knob.
3. Secure the attachment bracket hook in the lower cargo eyelet. Turn the knob to tension the attachment bracket in the
cargo eyelet.
4. Repeat the operation on the opposite side.
5. Tighten both attachment brackets alternatively.
6. Place the protective caps on the threads above the knobs.
WARNING!
Seven-seat models:
- The backrests of the optional third row seats must be folded down when installing the steel grid.
- The steel grid is installed behind the second row of seats in seven-seat models. To avoid the risk of injury, no one
should be allowed to sit in the third row of seats when the steel grid is in place in the vehicle.
pg. 70 Interior
Securing cargo (contd)
Cargo area cover
Installing the cargo area cover:
Press the end pieces of the cargo area cover down in the holders.
file:///K|/ownersdocs/2003/2003_XC90/03xc90_04b.htm (8 of 10)12/30/2006 4:18:55 PM
Page 91
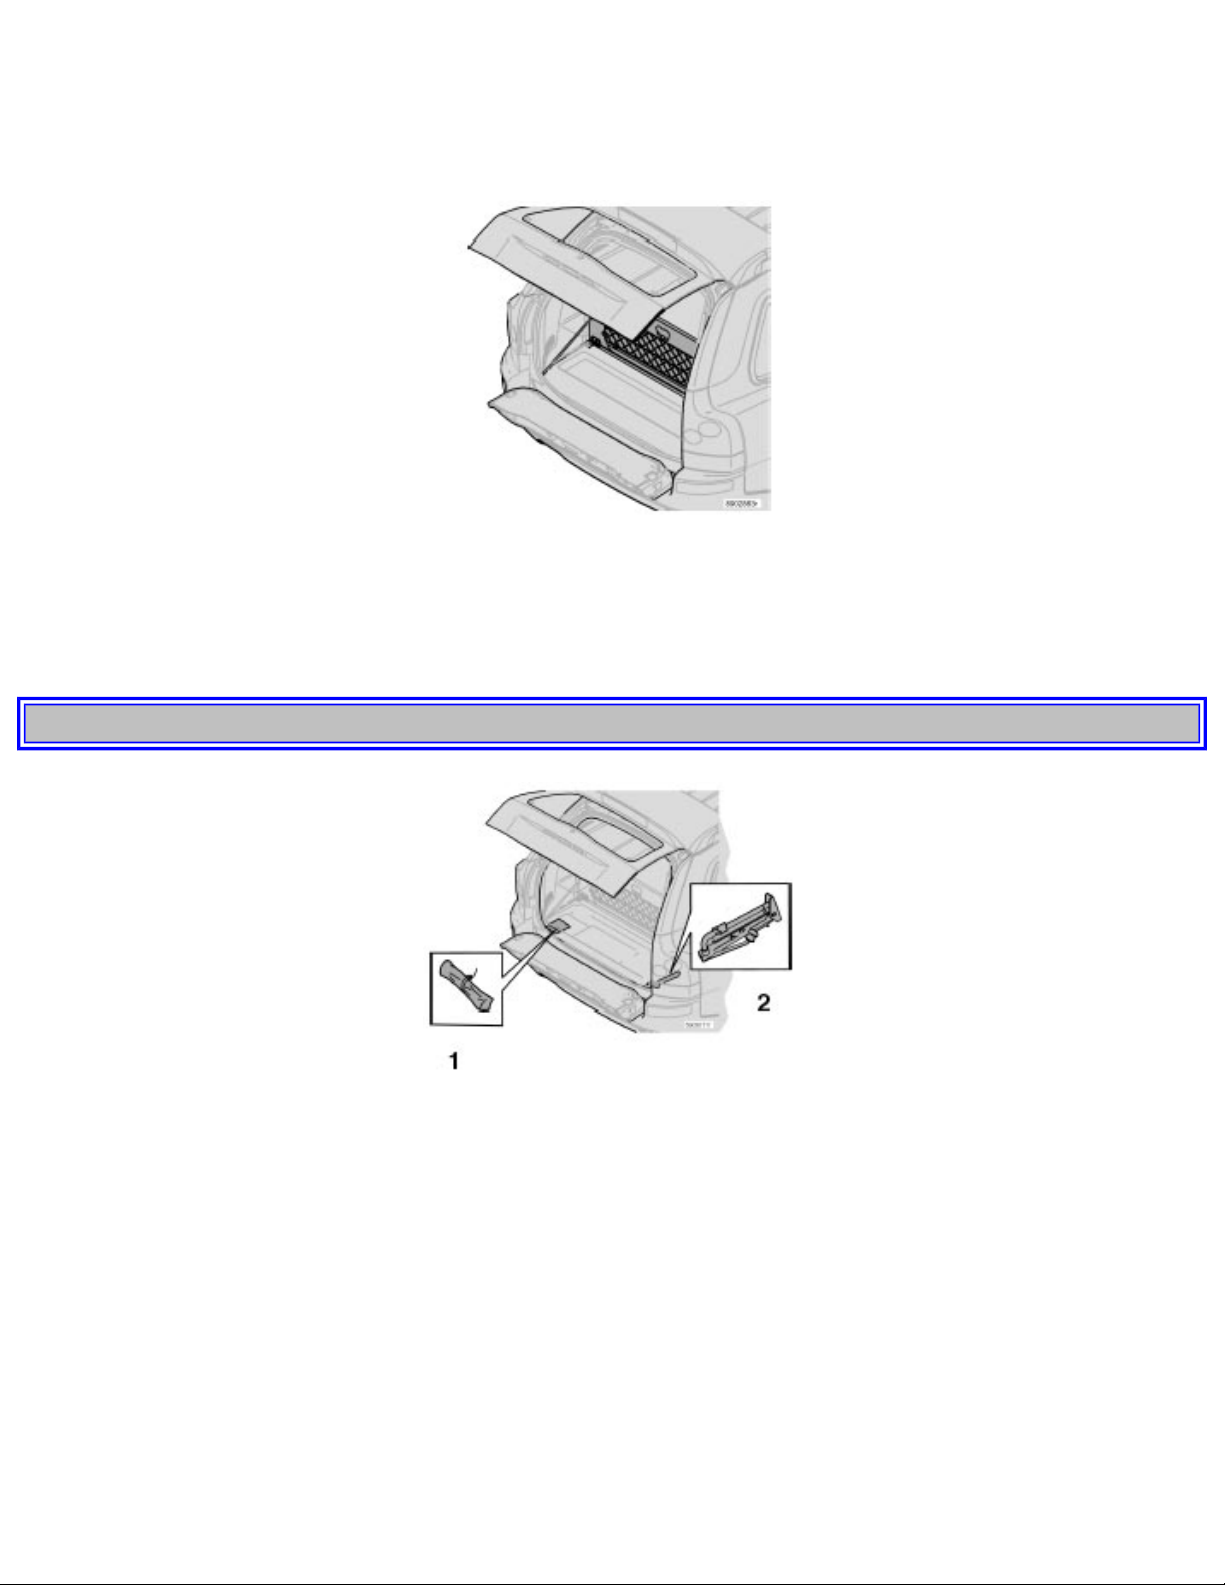
2003 VOLVO XC90
Pull out the cargo area cover and hook it in the holes in the rear cargo area pillars (see illustration above).
Removing the cargo area cover:
Press the end pieces of the cover inward. Pull up and lift out.
Grocery bag holder (five-seat models only)
1. Fold down the lower section of the tailgate.
2. Fold up the rear section of the cargo compartment floor.
3. Hang or secure your grocery bags by means of the straps or holders.
pg. 71 Interior
Compartments under the cargo area floor - five-seat models
Fold up the rear section of the cargo area floor and lift out the recessed cover to access these compartments.
If the vehicle is equipped with the optional grocery bag holder:
Fold up the rear section of the cargo area floor, disconnect the grocery bag holder's retaining cords and lift out the grocery
bag holder.
The following items are stored under the cargo area floor:
1. Tool bag (including the crank for the jack)
2. Jack
file:///K|/ownersdocs/2003/2003_XC90/03xc90_04b.htm (9 of 10)12/30/2006 4:18:55 PM
Page 92
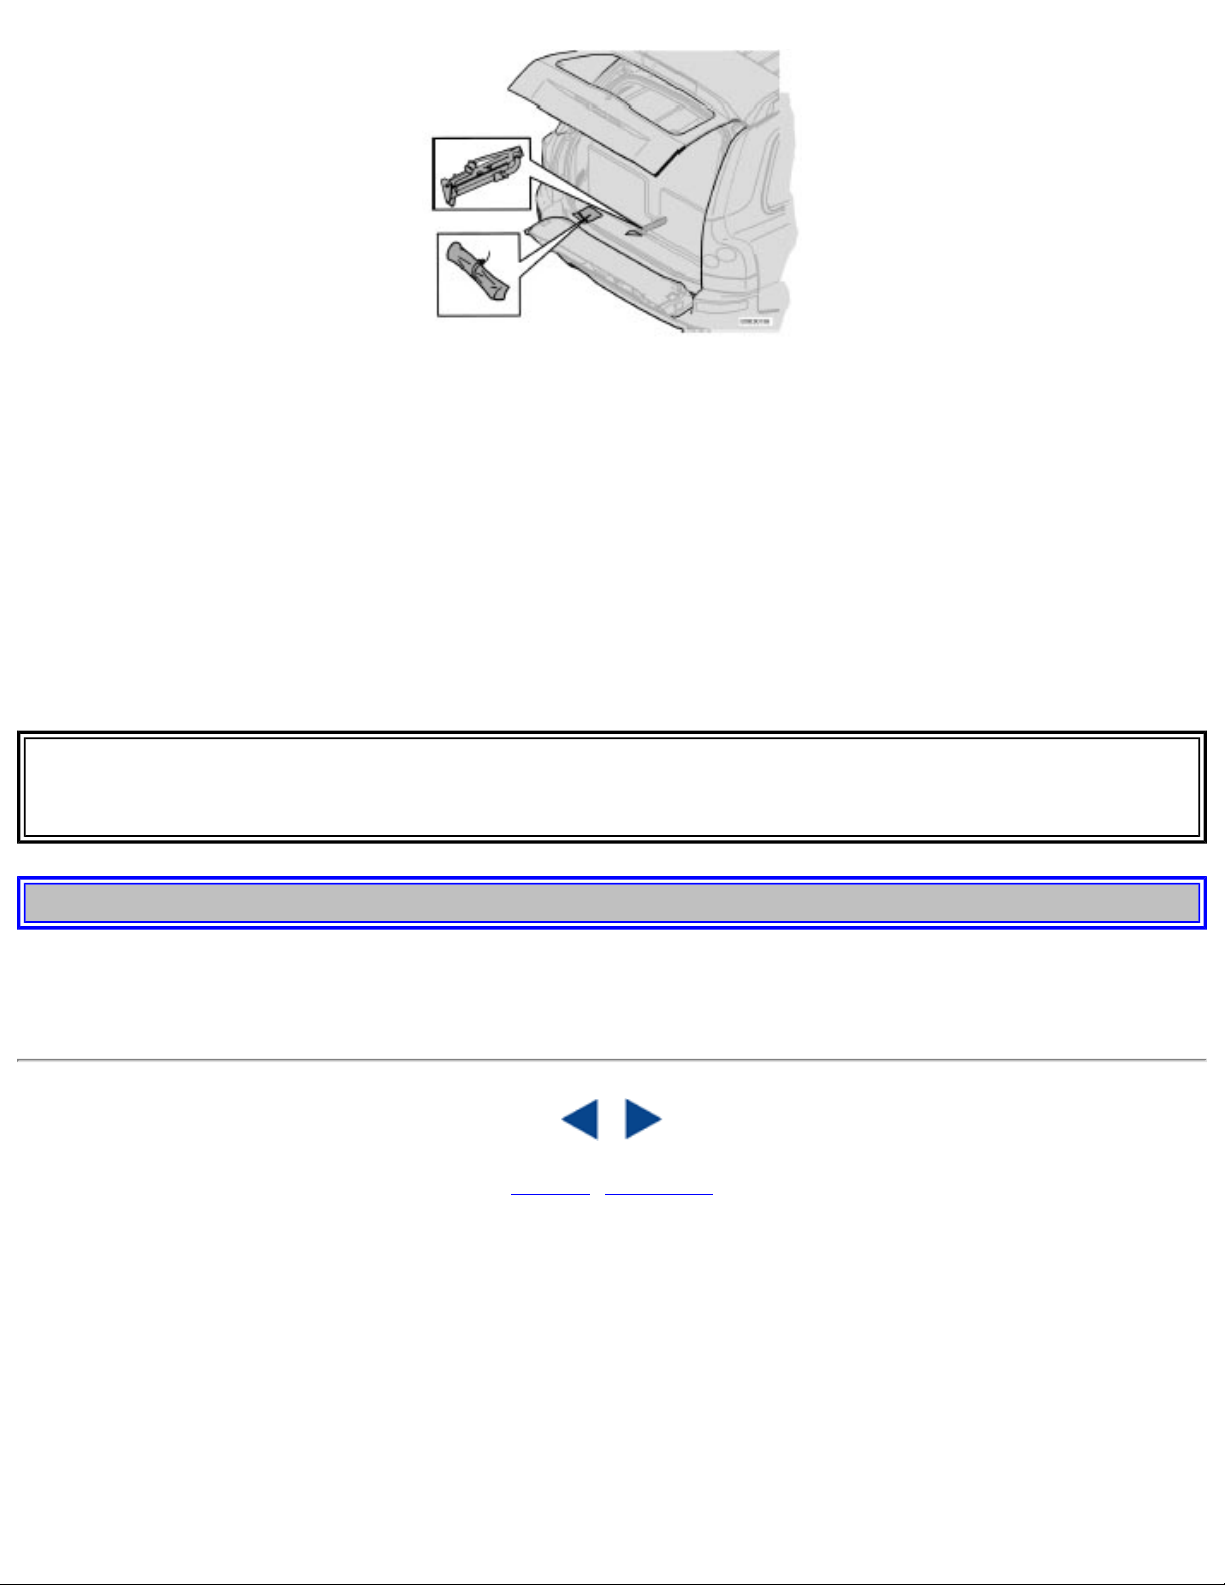
2003 VOLVO XC90
Compartments under the cargo area floor - seven-seat models
Fold up the rear section of the cargo area floor to access these compartments.
If the vehicle is equipped with the optional grocery bag holder:
Fold up the rear section of the cargo area floor, disconnect the grocery bag holder's retaining cords and fold up the lower
section of the floor.
The following items are stored under the cargo area floor:
1. Tool bag (including the crank for the jack)
2. Jack
CAUTION
Do not store objects in the area for the rear seat cushions (when the backrests are to be folded down). This could damage
the cushions.
pg. 72 Interior
This page intentionally left blank
Contents | Top of Page
file:///K|/ownersdocs/2003/2003_XC90/03xc90_04b.htm (10 of 10)12/30/2006 4:18:55 PM
Page 93

2003 VOLVO XC90
2 0 0 3
VOLVO
XC90
Locks and Alarms
pg. 73 Locks and Alarm
Keys and remote controls 74
Locking and unlocking 77
Child safety locks 79
Alarm 80
pg. 74 Locks and Alarm
Keys and remote controls
file:///K|/ownersdocs/2003/2003_XC90/03xc90_05.htm (1 of 11)12/30/2006 4:18:56 PM
Page 94
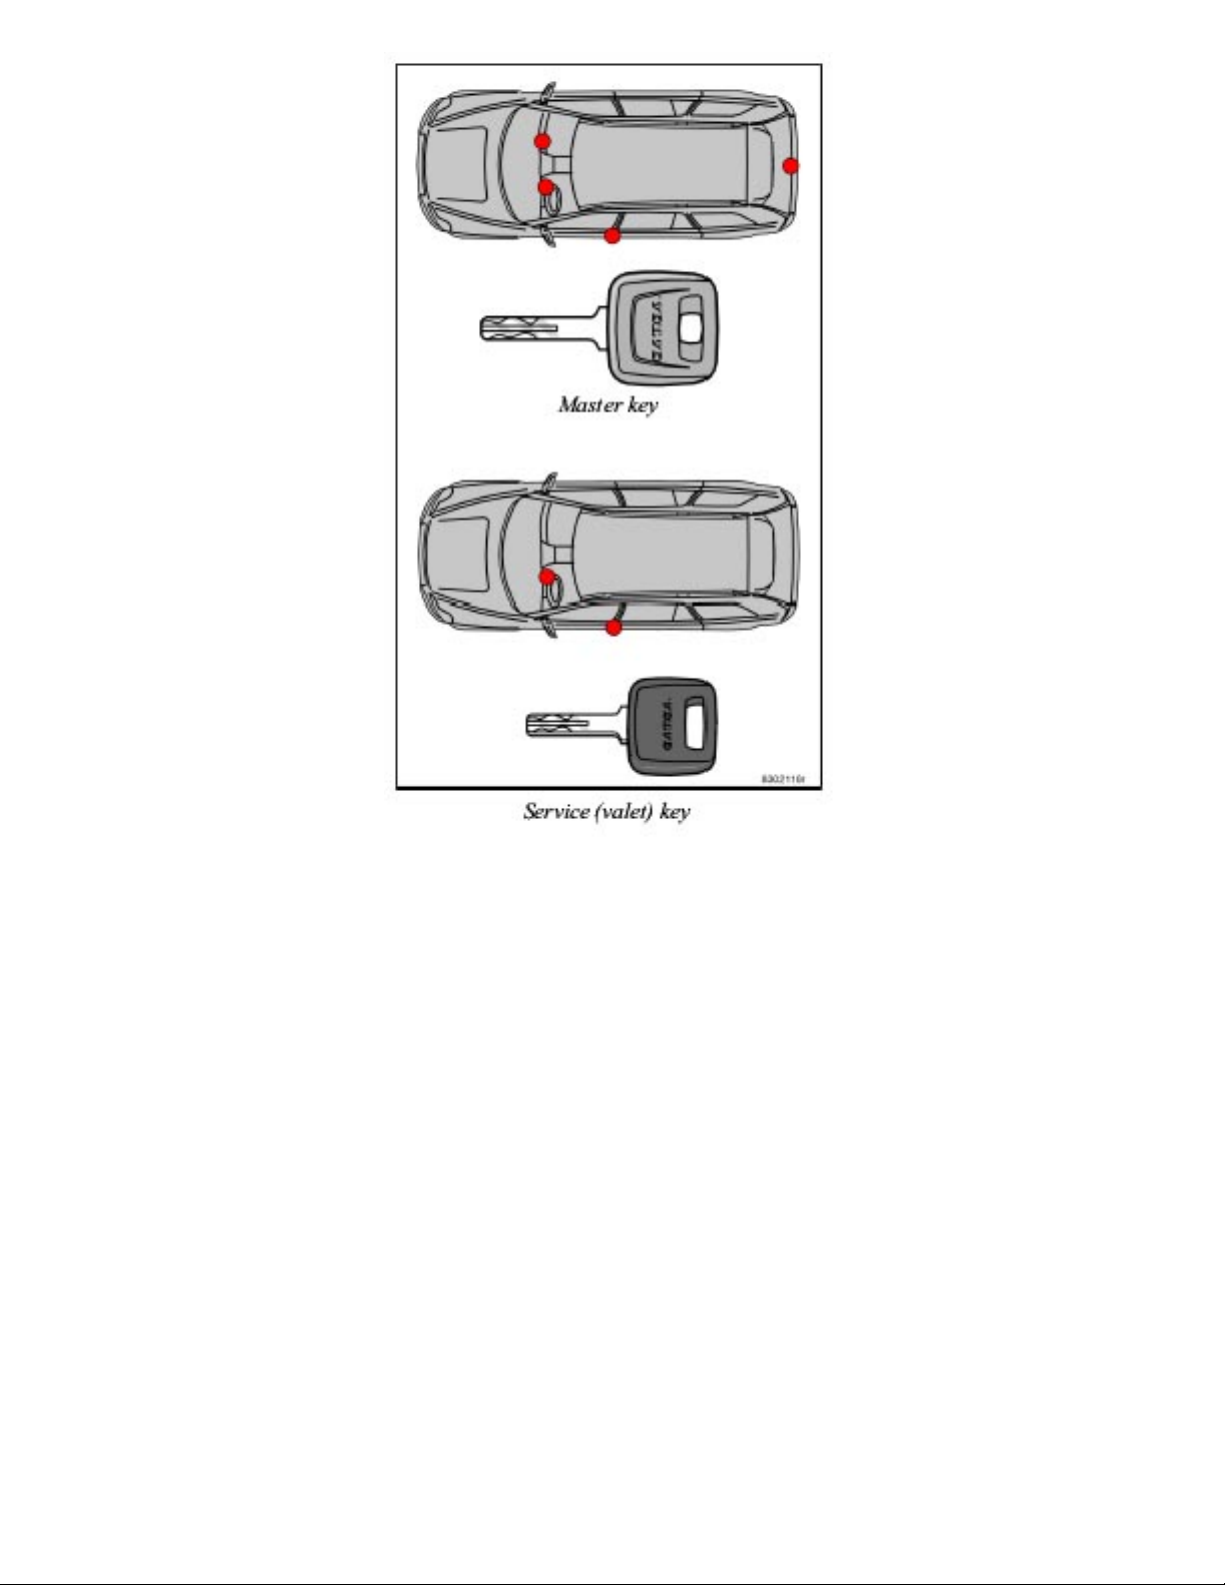
2003 VOLVO XC90
Keys
Two keys are provided with your vehicle; a master key and a service (valet) key. The master key, the
remote control, and the central locking button may all be used to lock and unlock all of your vehicle's
locks.
The service key will operate only the driver's door and the ignition switch. It is intended to help deter
unwanted entry into the glove compartment and tailgate.
To use your keys:
● Turn the key once to unlock the driver's door only.
● Turn the key again (within 10 seconds) to unlock all doors and the tailgate.
● One turn with the key towards lock in the drivers door locks all doors, tailgate.
● Use the switch on the driver's door armrest to lock/unlock the vehicle from the inside.
file:///K|/ownersdocs/2003/2003_XC90/03xc90_05.htm (2 of 11)12/30/2006 4:18:56 PM
Page 95
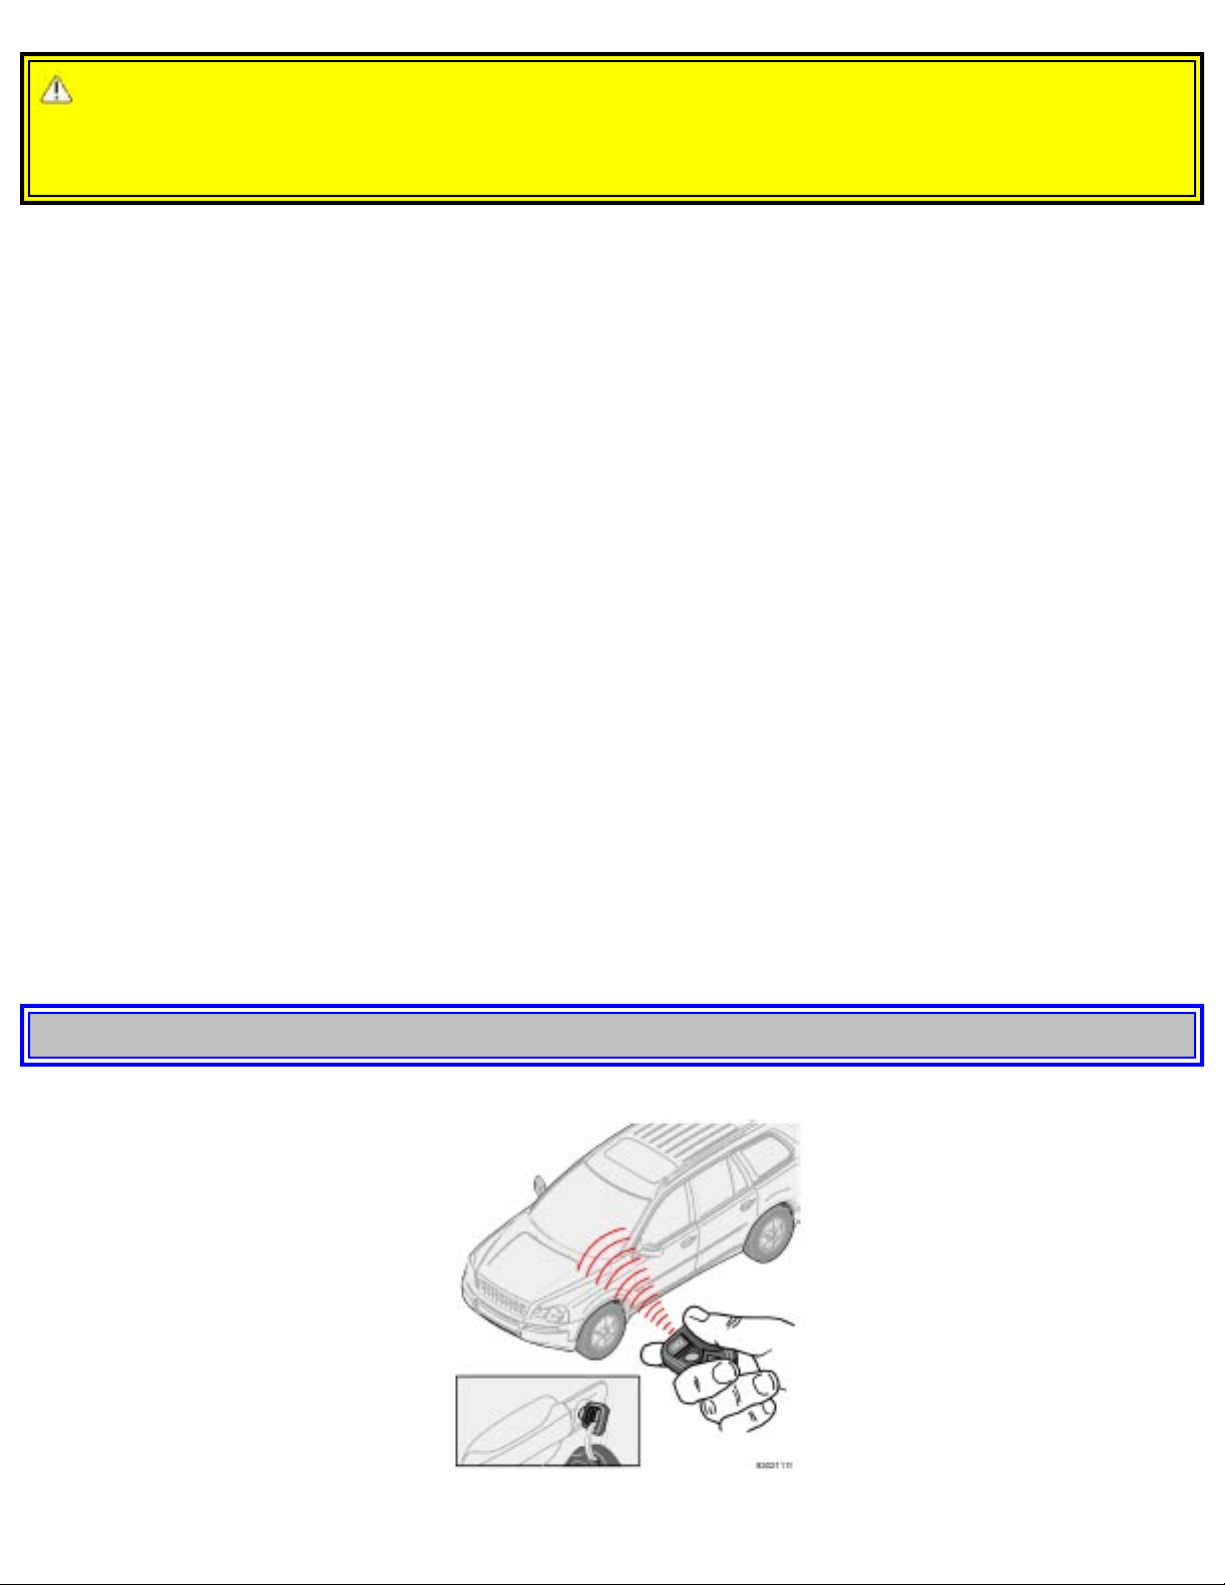
2003 VOLVO XC90
WARNING!
If the doors are locked while driving, this may hinder rapid access to the occupants of the vehicle in
the event of an accident. (Also see information on "Child safety locks").
NOTE: To help prevent accidentally locking the keys in the vehicle, the central locking system is
designed to unlock the doors immediately if the key is left in the ignition switch, the vehicle is locked
using the lock button on the door and the door is then closed. A sound from the lock will be audible at
this time.
Please note that this function will not unlock the doors if the engine is running.
Immobilizer (start inhibitor)
Each of the keys supplied with your vehicle contains a coded transmitter. The code in the key is
transmitted to an antenna in the ignition switch where it is compared to the code stored in the start
inhibitor module. The vehicle will start only with a properly coded key. If you misplace a key, take the
other keys to an authorized Volvo retailer for reprogramming as an antitheft measure.
NOTE: If two of the keys to your vehicle are close together, e.g., on the same key ring, when you try to
start the vehicle, this could cause interference in the immobilizer system and result in the vehicle not
starting. If this should occur, remove one of the keys from the key ring before trying to start the vehicle
again.
This device complies with part 15 of the FCC rules. Operation is subject to the following condition: (1)
This device may not cause harmful interference, and (2) this device must accept any interference
received, including interference that may cause undesired operation.
pg. 75 Locks and Alarm
file:///K|/ownersdocs/2003/2003_XC90/03xc90_05.htm (3 of 11)12/30/2006 4:18:56 PM
Page 96
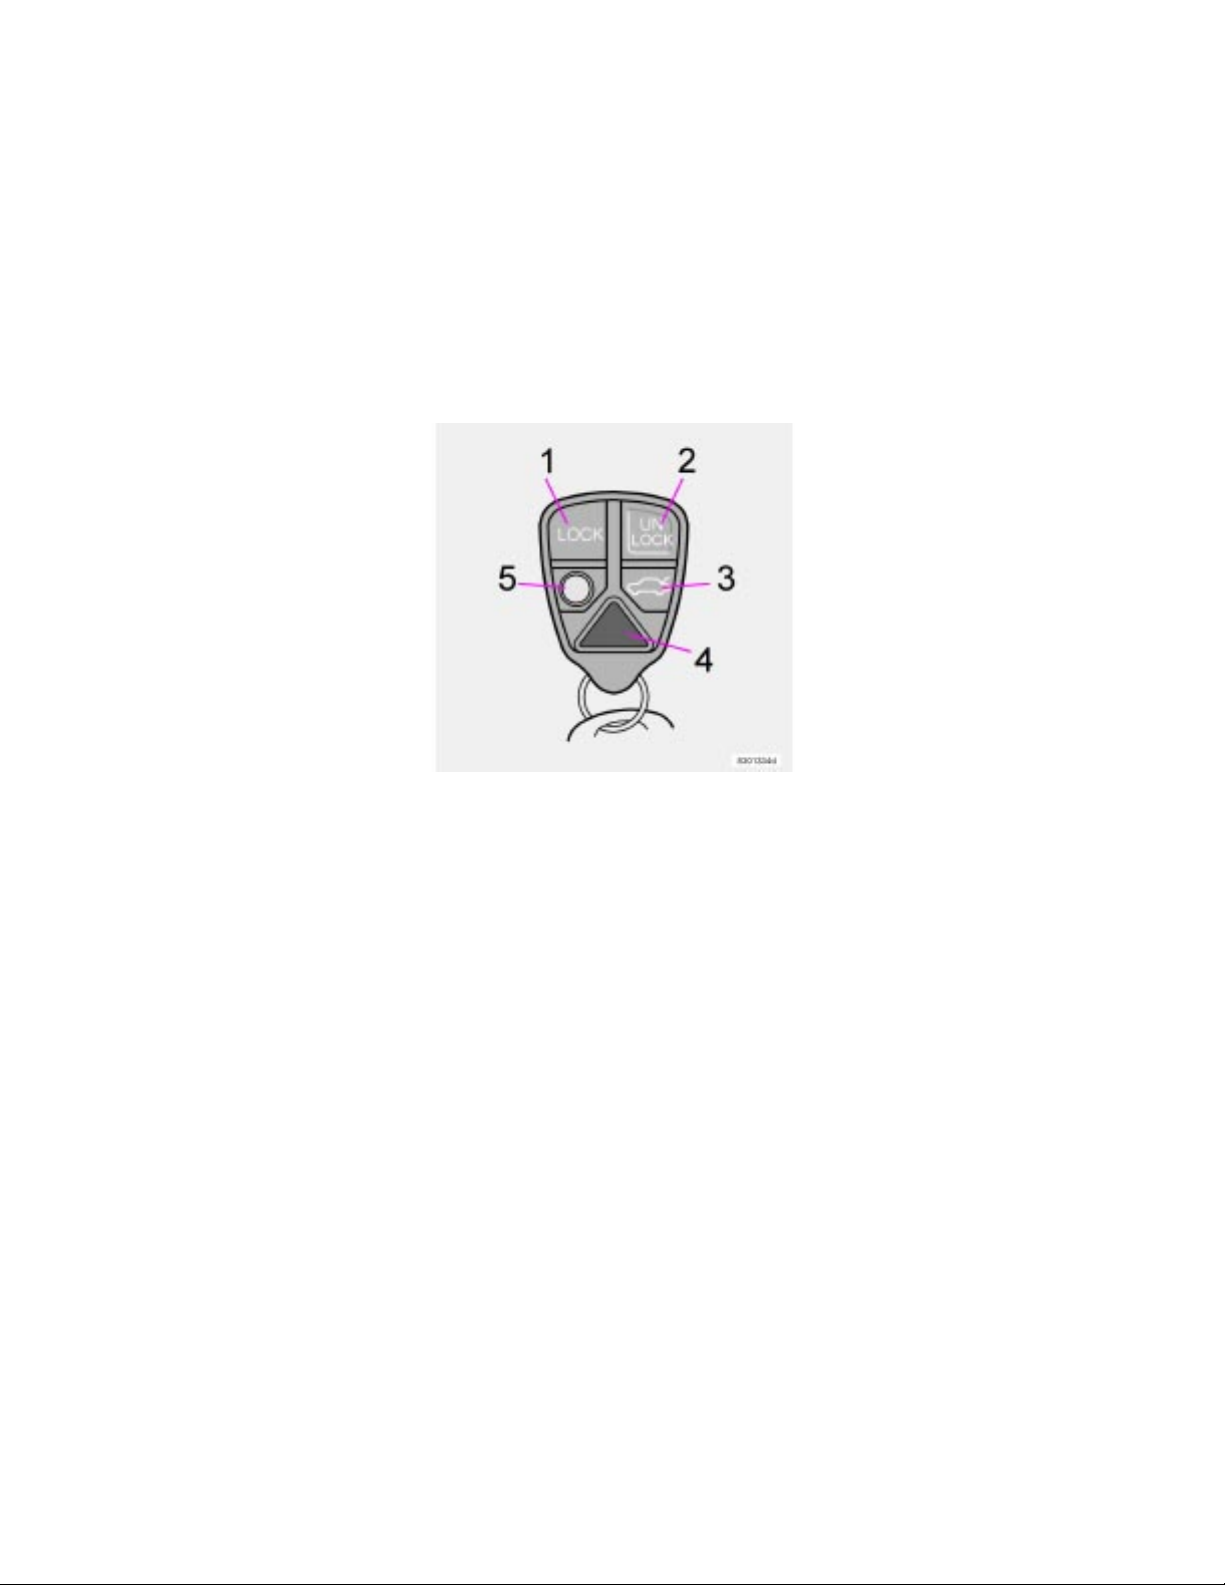
2003 VOLVO XC90
Remote controls
Your vehicle is equipped with a remote control transmitter. This transmitter uses a radio signal to allow
"keyless" entry into the passenger compartment or the tailgate. You will be supplied with two coded key
ring transmitters, which will enable you to lock/unlock all doors and the tailgate from a distance of 1015 feet (3- 5 meters).
On vehicles equipped with an alarm, the alarm will also be activated/deactivated by this system.
The vehicle can also be locked/unlocked with the key.
Buttons in remote control:
1-Lock, 2-Unlock, 3-Unlock tailgate,
4-"Panic" function,*, 5-Approach lighting
As an extra security precaution in certain situations (valet parking, etc.), Volvo recommends that the
transmitter not be included when the keys are given to anyone. The service key can be used instead. If
one of the transmitters is misplaced, contact the nearest authorized Volvo retailer for assistance.
Using the remote control
● Press the LOCK button once to lock all doors and tailgate.
● Press the UNLOCK button once to unlock the driver's door and fuel filler door. Wait for at least 1
second and press this button again (within 10 seconds) to unlock all doors and the tailgate.
● To unlock the tailgate (without unlocking the doors), press the Unlock tailgate button twice within 3
seconds.
NOTE:
● Airbag deployment will automatically unlock the doors.
● The keys may also be used to lock and unlock the doors, and to activate and deactivate the alarm
system.
● To avoid leaving your keys in the vehicle, make a habit of always locking the vehicle with the remote
control.
file:///K|/ownersdocs/2003/2003_XC90/03xc90_05.htm (4 of 11)12/30/2006 4:18:56 PM
Page 97

2003 VOLVO XC90
Automatic re-locking
If the doors are unlocked, the locks will automatically reengage (re-lock) and the alarm will rearm after
2 minutes unless a door or the tailgate has been opened.
* See
page 80 for more information on this function.
pg. 76 Locks and Alarm
● FCC ID:LQNP2T-APU This device complies with part 15 of the FCC rules. Operation is subject to
the following conditions: (1) This device may not cause harmful interference, and (2) this device must
accept any interference received, including interference that may cause undesired operation.
● Canadian 2306104388 Model 504 2927 by Donnelly Operation is subject to the following conditions:
(1) this device may not cause interference, and (2) this device must accept any interference, including
interference that may cause undesired operation of the device.
● Canadian 2306104388A Model 509 977 by Connaught Electronics Operation is subject to the
following conditions: (1) this device may not cause interference, and (2) this device must accept any
interference, including interference that may cause undesired operation of the device.
WARNING!
Never use the transmitter to lock the doors from inside the vehicle.
Doing so would ACTIVATE:
- the break-in alarm, which would sound if one of the doors were opened
- the optional interior motion and inclination alarm sensors.
Doing so would DEACTIVATE:
- the moonroof and interior courtesy light controls.
- the central locking buttons on the front door armrests, although the interior door handles would still
function to allow occupants to leave the vehicle.
Disabled features would remain disabled until the remote were used again to unlock the vehicle.
In addition, locking an occupied vehicle would hinder rapid access to the occupants in an accident or
emergency.
file:///K|/ownersdocs/2003/2003_XC90/03xc90_05.htm (5 of 11)12/30/2006 4:18:56 PM
Page 98
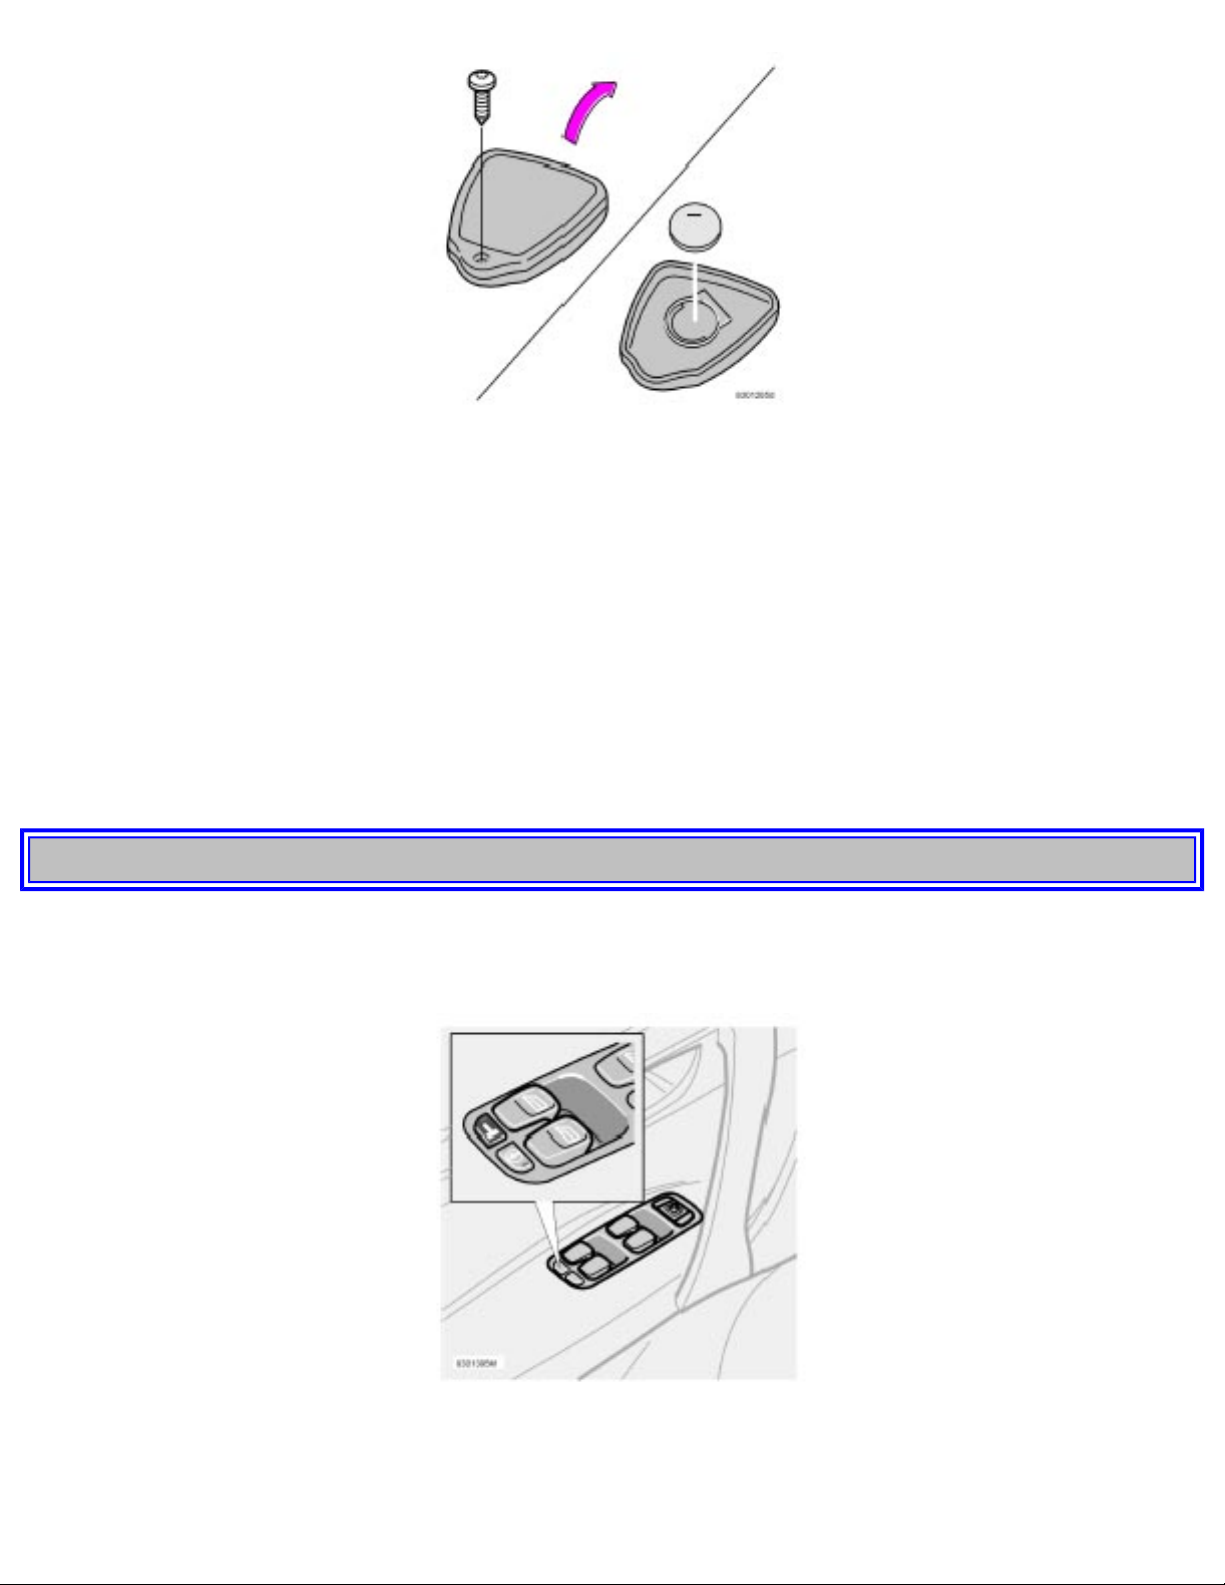
2003 VOLVO XC90
Replacing the battery in the remote control
If the range of the transmitter is noticeably reduced, this indicates that the battery is weak and should be
replaced.
To replace the battery
● Remove the screw on the transmitter cover with a small screwdriver.
● Remove the cover carefully pressing it rearward/upward.
● Replace the battery with a new 3-volt, CR 2032 battery. The battery should be inserted with the minus
side upward. Avoid touching the contact surfaces of the battery with your fingers.
● Reinstall the cover and tighten the screw to help protect the transmitter.
pg. 77 Locks and Alarm
Locking and unlocking
Locking and unlocking the vehicle from the inside
The switch on the driver's door armrest can be used to lock or unlock all doors and the tailgate, and to
file:///K|/ownersdocs/2003/2003_XC90/03xc90_05.htm (6 of 11)12/30/2006 4:18:56 PM
Page 99
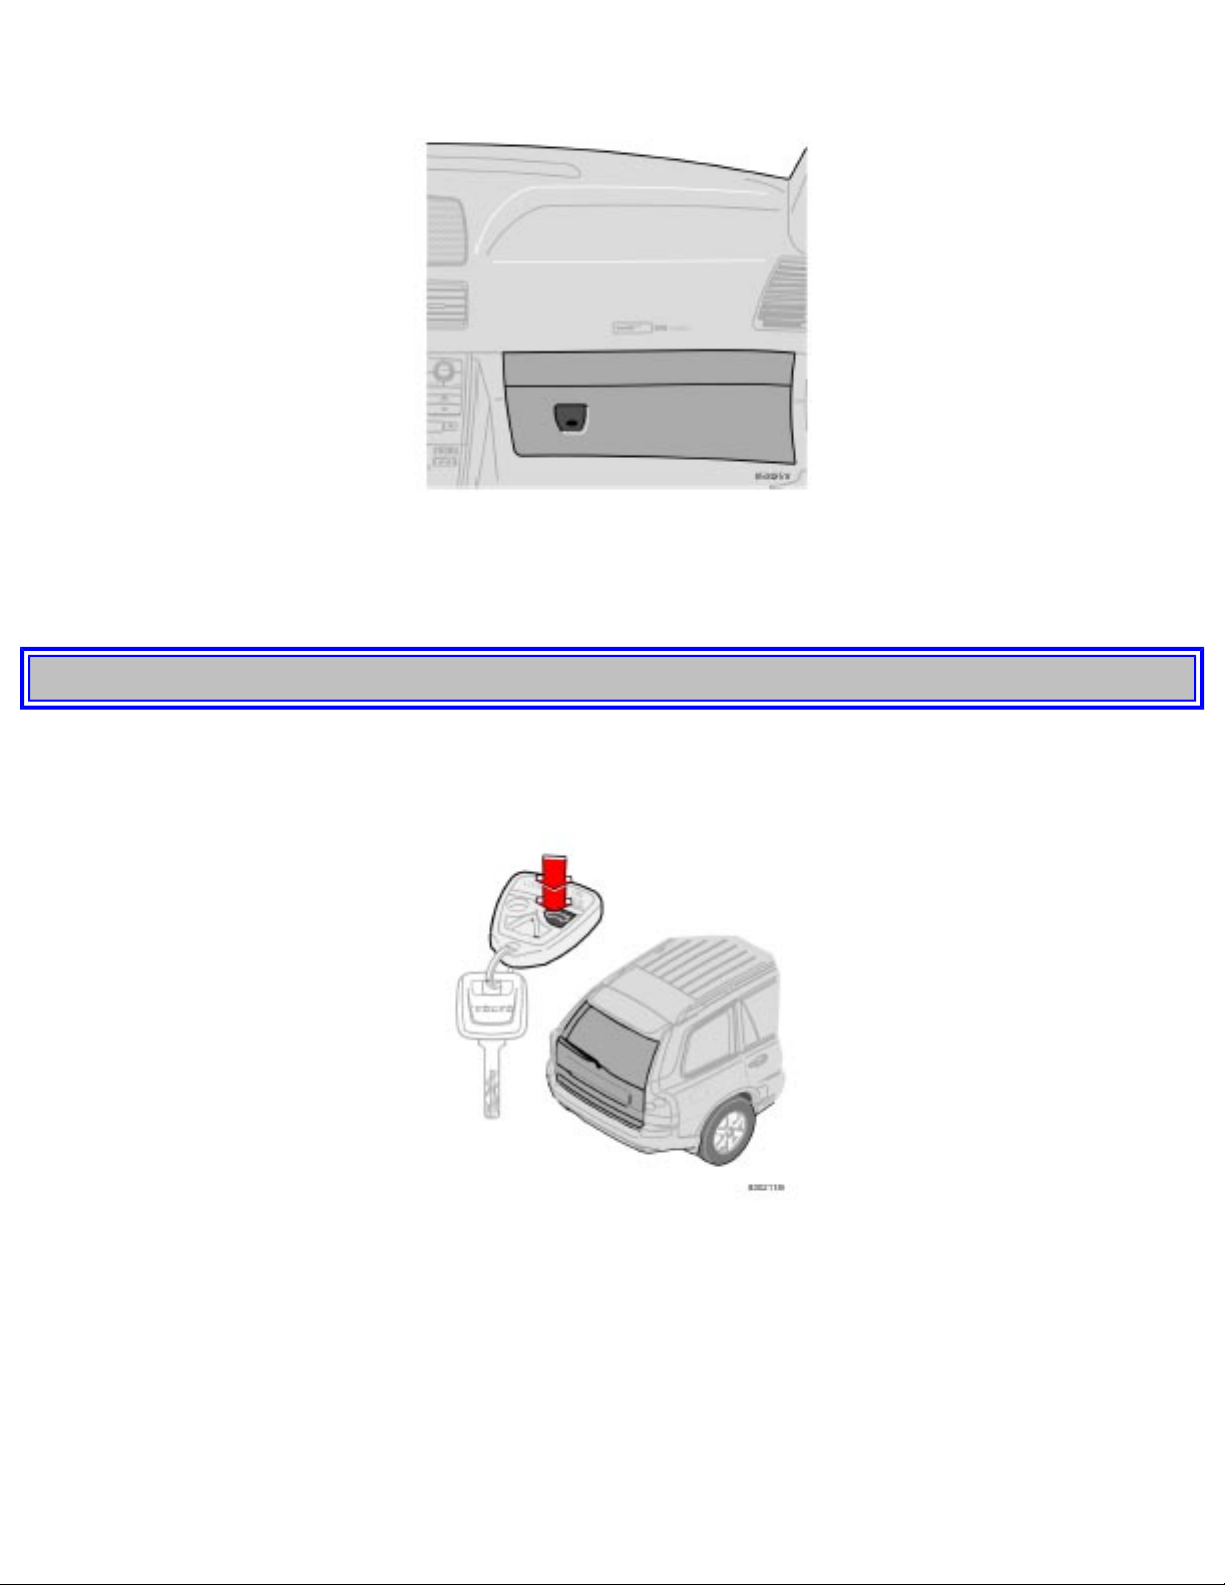
2003 VOLVO XC90
set the alarm.
Locking the glove compartment
The glove compartment can be locked with the master key.
pg. 78 Locks and Alarm
Locking and unlocking (contd)
Unlocking the tailgate
The tailgate lock is incorporated in the central locking system and is locked or unlocked when all doors
are locked/unlocked.
The tailgate can be unlocked by:
● Pressing UNLOCK on the remote control twice.
● Using the central locking button on the driver's door.
file:///K|/ownersdocs/2003/2003_XC90/03xc90_05.htm (7 of 11)12/30/2006 4:18:56 PM
Page 100
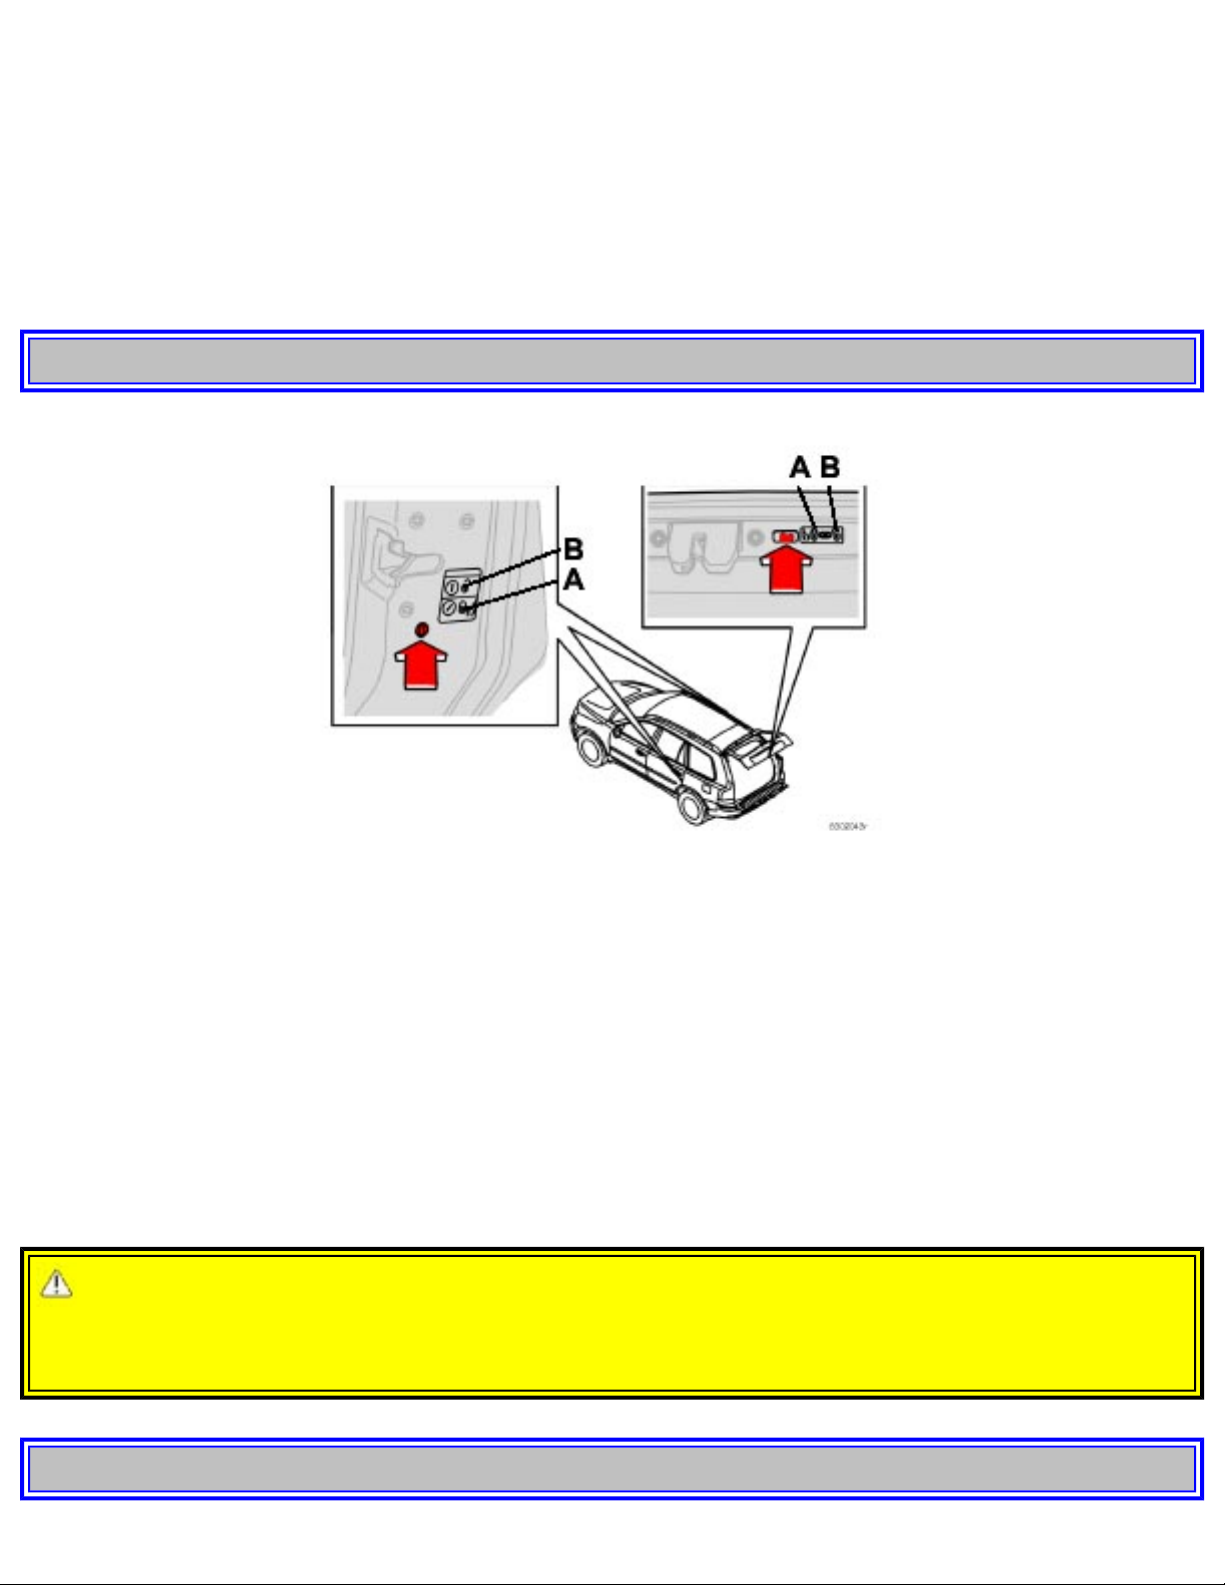
2003 VOLVO XC90
● Pressing twice on the remote control's tailgate unlock button (see illustration above).
Automatic relocking:
● If you use the tailgate unlock button to unlock the tailgate without opening it, it will automatically
relock after approximately 2 minutes.
● However, if you open the tailgate and close it again, it will remain unlocked and the alarm will not be
rearmed. Press the lock button on the remote control to relock the tailgate and rearm the alarm.
pg. 79 Locks and Alarm
Child safety locks
Manual child safety locks - rear doors/tailgate
The controls are located on the rear door jambs and at the lower edge of the tailgate. Use a screwdriver
to adjust these controls.
A The door/tailgate cannot be opened from the inside. Normal operation from the outside.
B The door/tailgate locks function normally.
WARNING!
Remember, in the event of an accident, the rear seat passengers cannot open the doors from the inside
with the buttons in position A.
pg. 80 Locks and Alarm
file:///K|/ownersdocs/2003/2003_XC90/03xc90_05.htm (8 of 11)12/30/2006 4:18:56 PM
 Loading...