

Page 1
5
5
Instruction No Version Part. No.
31414348 1.0 31359397
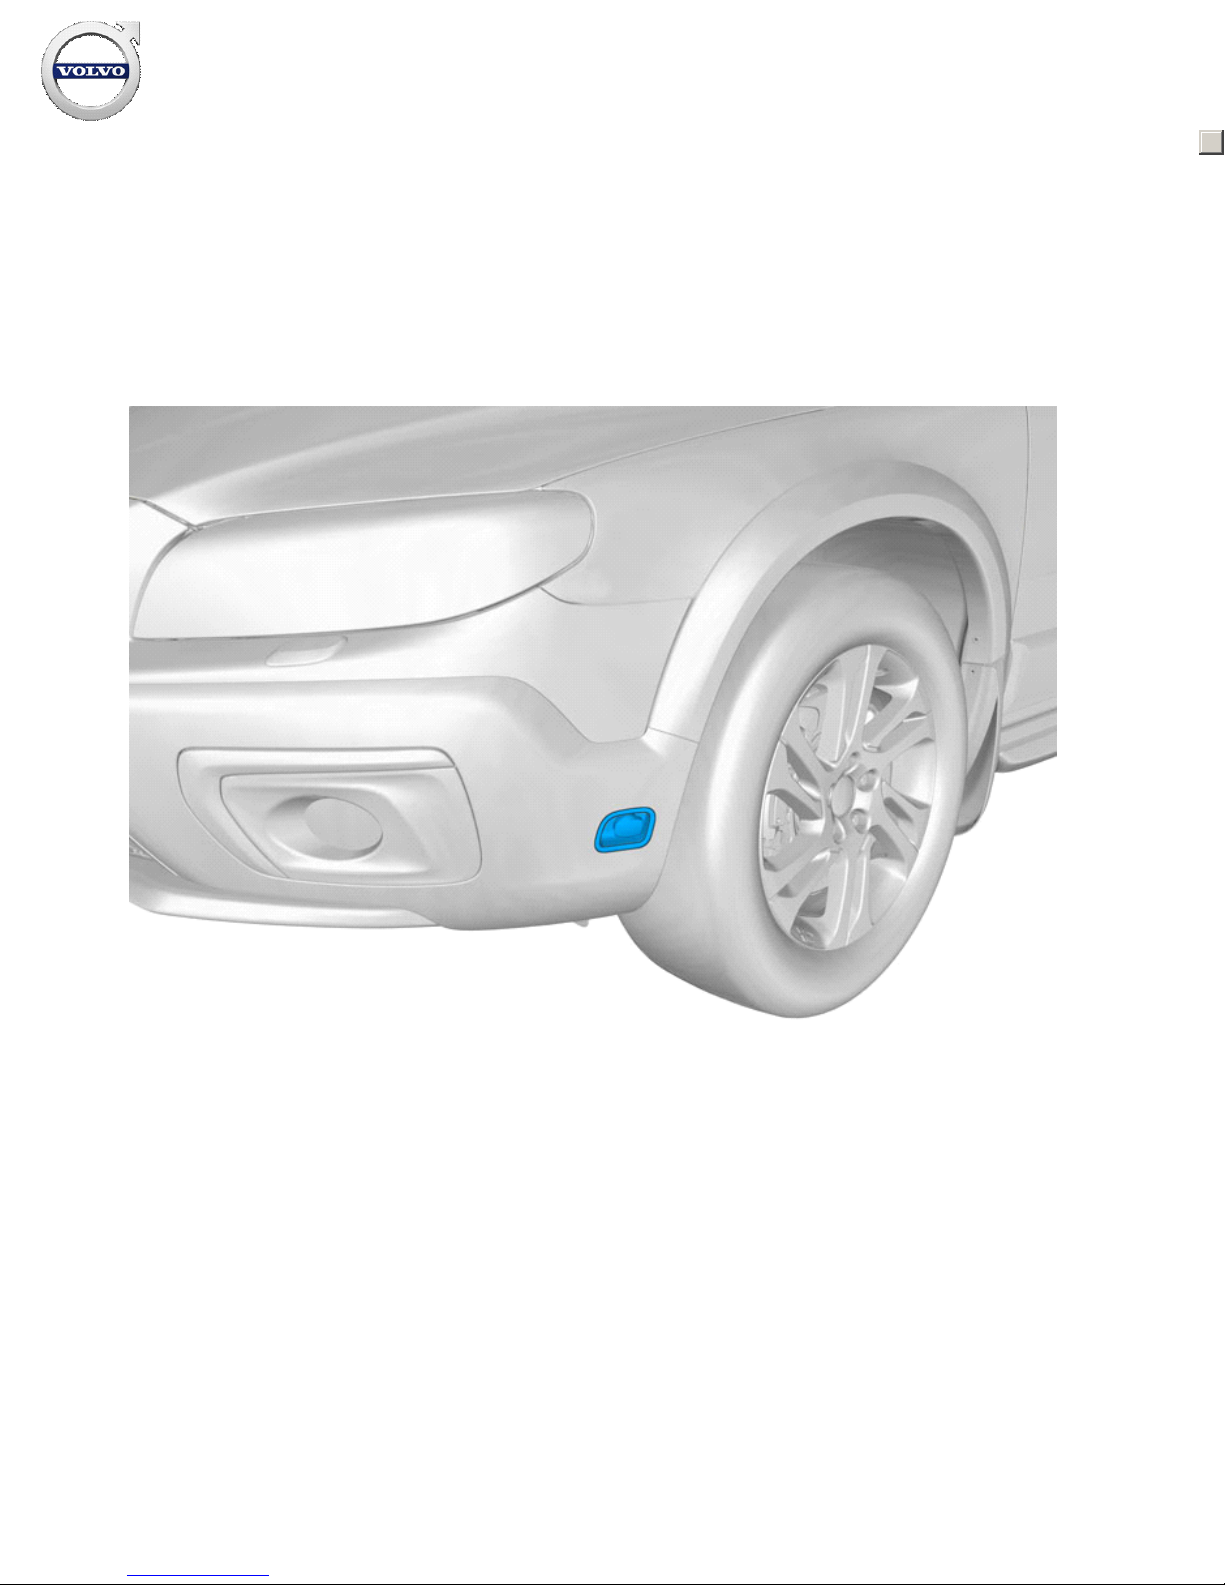
Electric engine heater, 230 V
IMG-
380063
5
5
Instruction No Version Part. No.
31414348 1.0 31359397
Electric engine heater, 230 V
IMG-
380063
Installation instructions, accessories
Volvo Car Corporation Gothenburg, Sweden
©
Volvo Car Corporation Electric engine heater, 230 V- 31414348 - V1.0
Page 1 / 22
Page 2
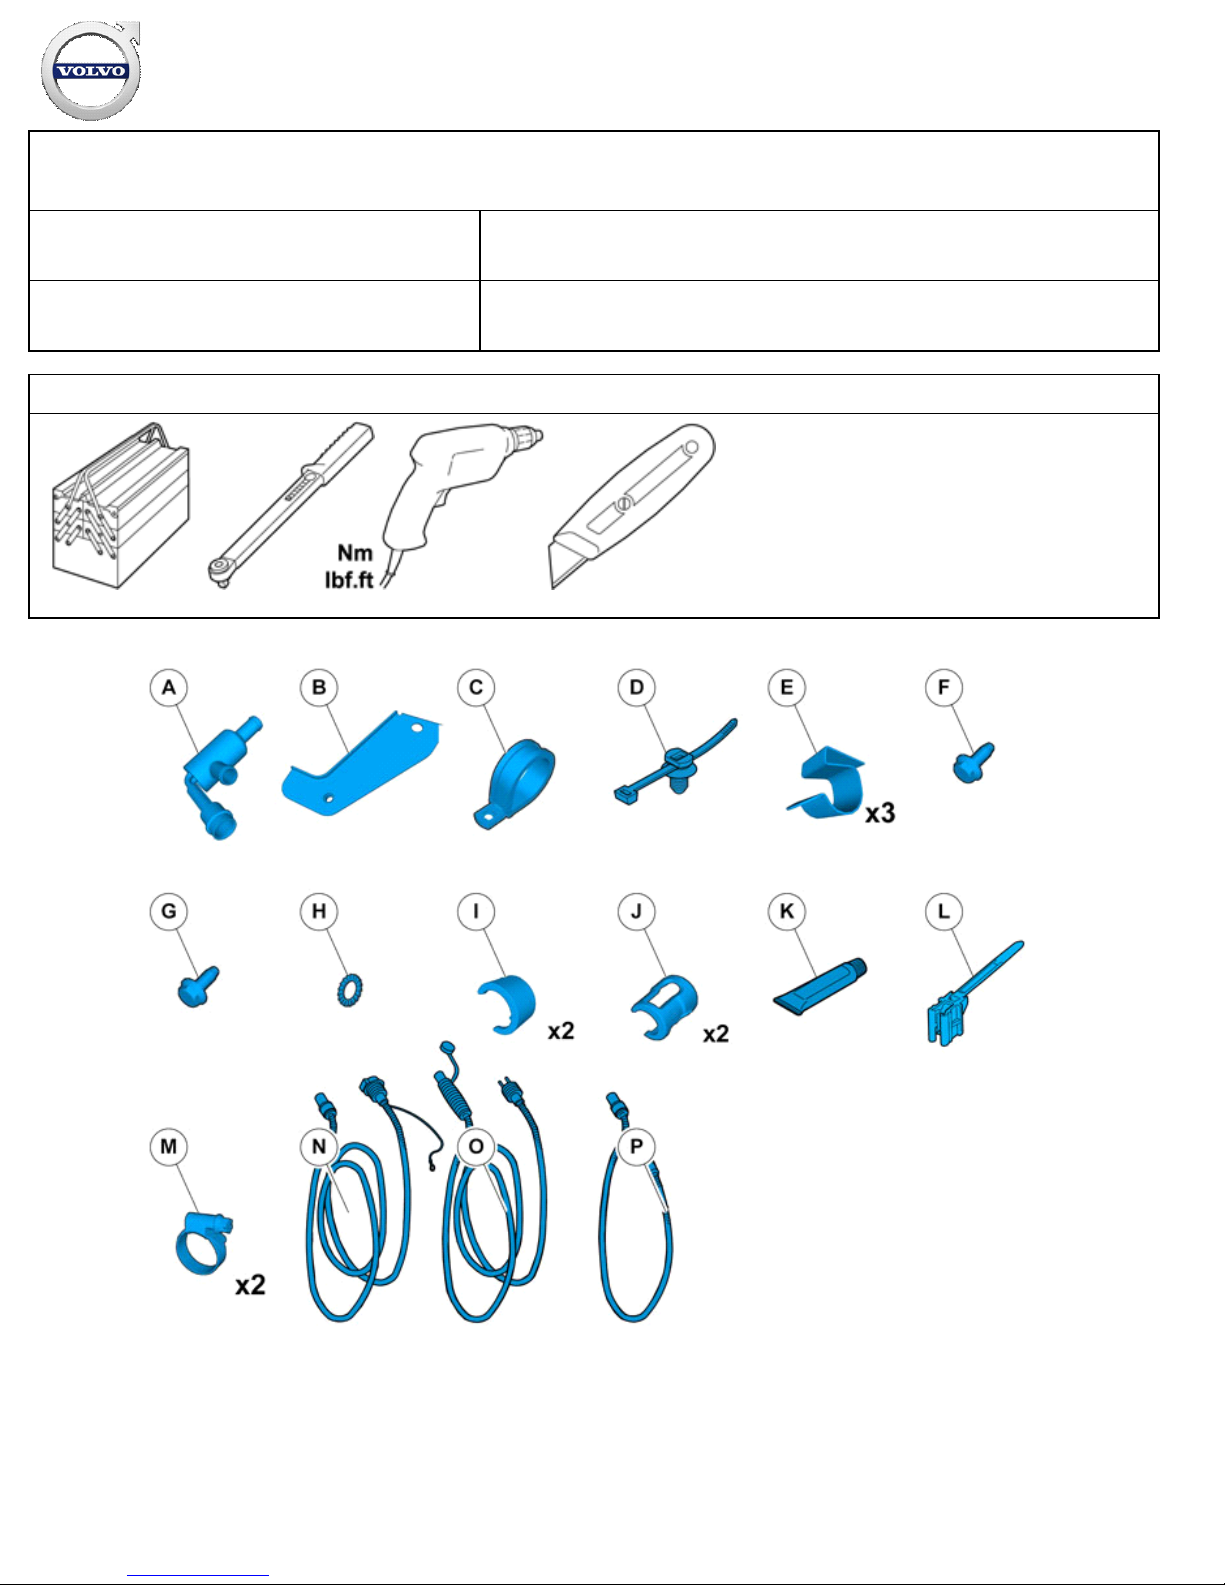
Materials
Designation
Part number
Grease 1161761
Equipment
IMG-
345497
IMG-
239664
IMG-
239660
IMG-
239980
IMG-
380580
Installation instructions, accessories
Volvo Car Corporation Gothenburg, Sweden
©
Volvo Car Corporation Electric engine heater, 230 V- 31414348 - V1.0
Page 2 / 22
Page 3

IMG-
380792
Installation instructions, accessories
Volvo Car Corporation Gothenburg, Sweden
©
Volvo Car Corporation Electric engine heater, 230 V- 31414348 - V1.0
Page 3 / 22
Page 4

Information
1
Read through all of the instructions before starting installation.
Notifications and warning texts are for your safety and to
minimise the risk of something breaking during installation.
Ensure that all tools stated in the instructions are available before
starting installation.
Certain steps in the instructions are only presented in the form of
images. Explanatory text is also given for more complicated
steps.
In the event of any problems with the instructions or the
accessory, contact your local Volvo dealer.
Conditions
2
When installing, the car must retain a temperature of 20 degrees
C.
Color symbols
3
IMG-
363036
Note!
This colour chart displays (in colour print and electronic version)
the importance of the different colours used in the images of the
method steps.
Used for focused component, the component with
which you will do something.
1.
Used as extra colors when you need to show or
differentiate additional parts.
2.
Used for attachments that are to be removed/installed.
May be screws, clips, connectors, etc.
3.
Used when the component is not fully removed from
the vehicle but only hung to the side.
4.
Used for standard tools and special tools.5.
Used as background color for vehicle components.6.
Removal
Installation instructions, accessories
Volvo Car Corporation Gothenburg, Sweden
©
Volvo Car Corporation Electric engine heater, 230 V- 31414348 - V1.0
Page 4 / 22
Page 5
4
IMG-
332193
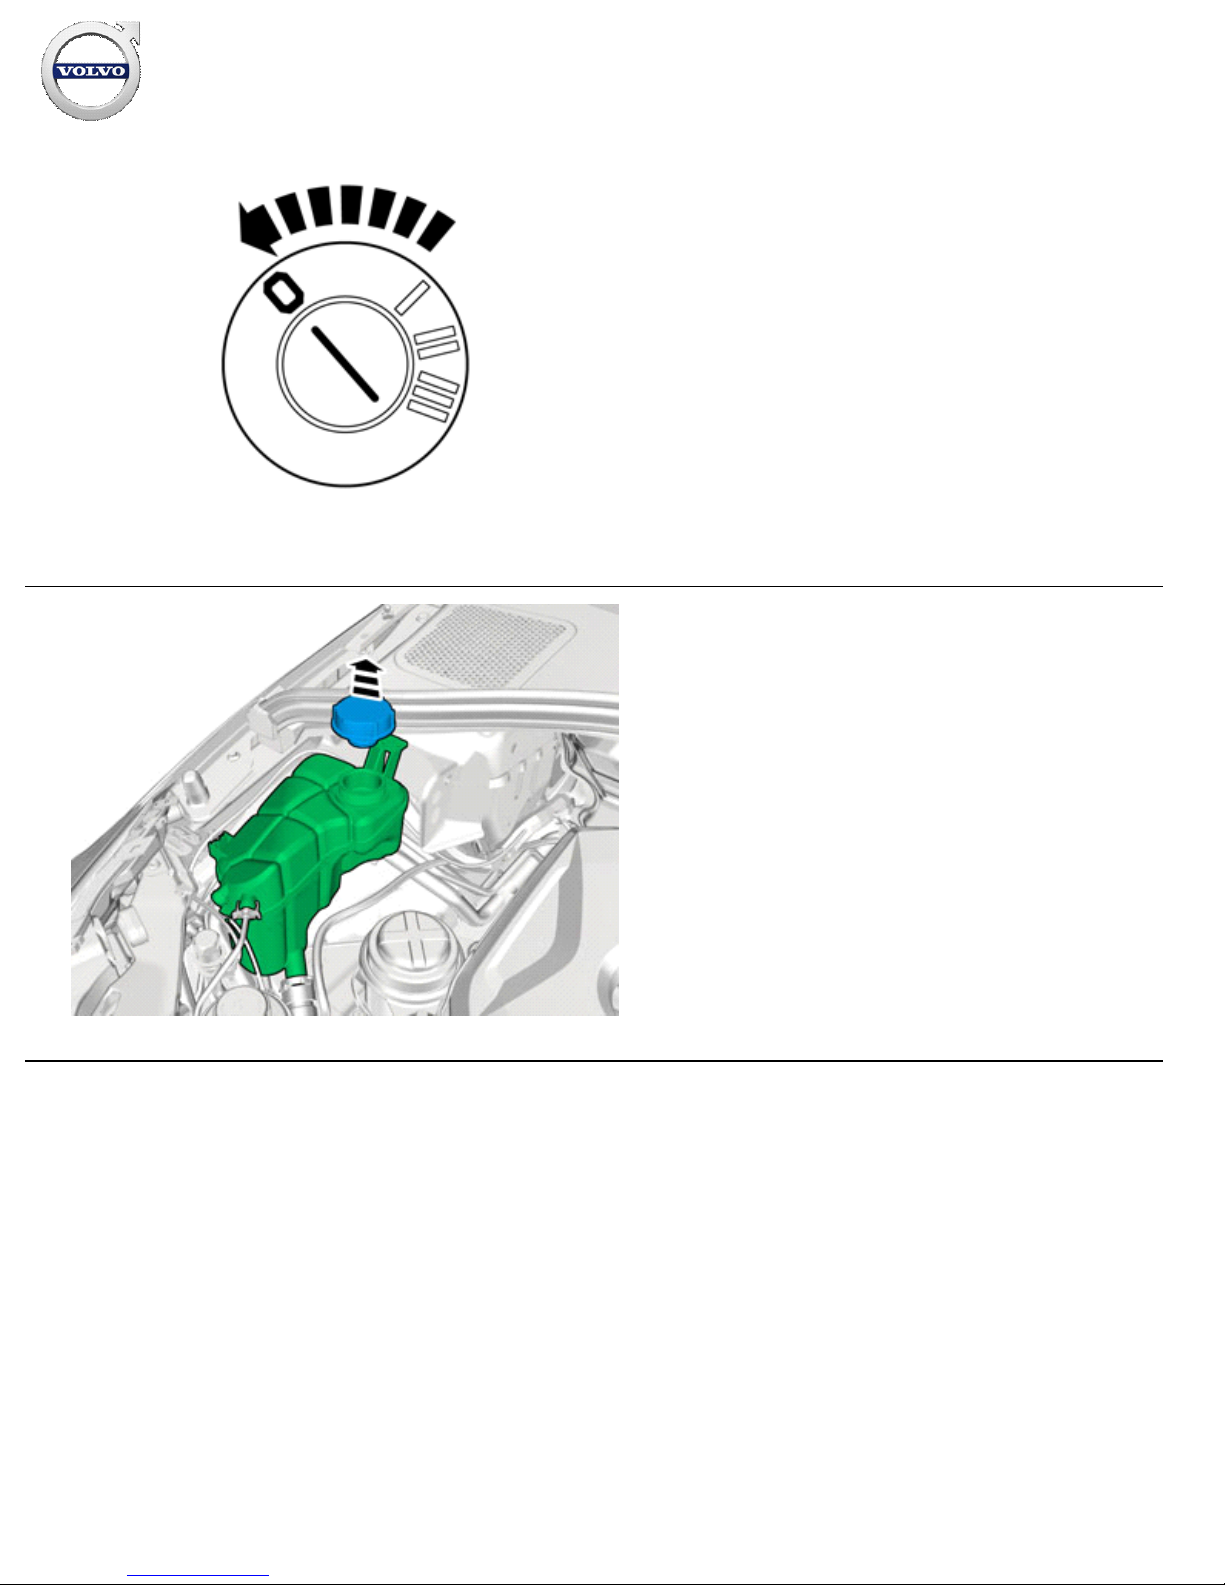
Set the ignition key to position 0.
5
IMG-
351277
Installation instructions, accessories
Volvo Car Corporation Gothenburg, Sweden
©
Volvo Car Corporation Electric engine heater, 230 V- 31414348 - V1.0
Page 5 / 22
Page 6
6
IMG-
380083
7
IMG-
380084
Installation instructions, accessories
Volvo Car Corporation Gothenburg, Sweden
©
Volvo Car Corporation Electric engine heater, 230 V- 31414348 - V1.0
Page 6 / 22
Page 7
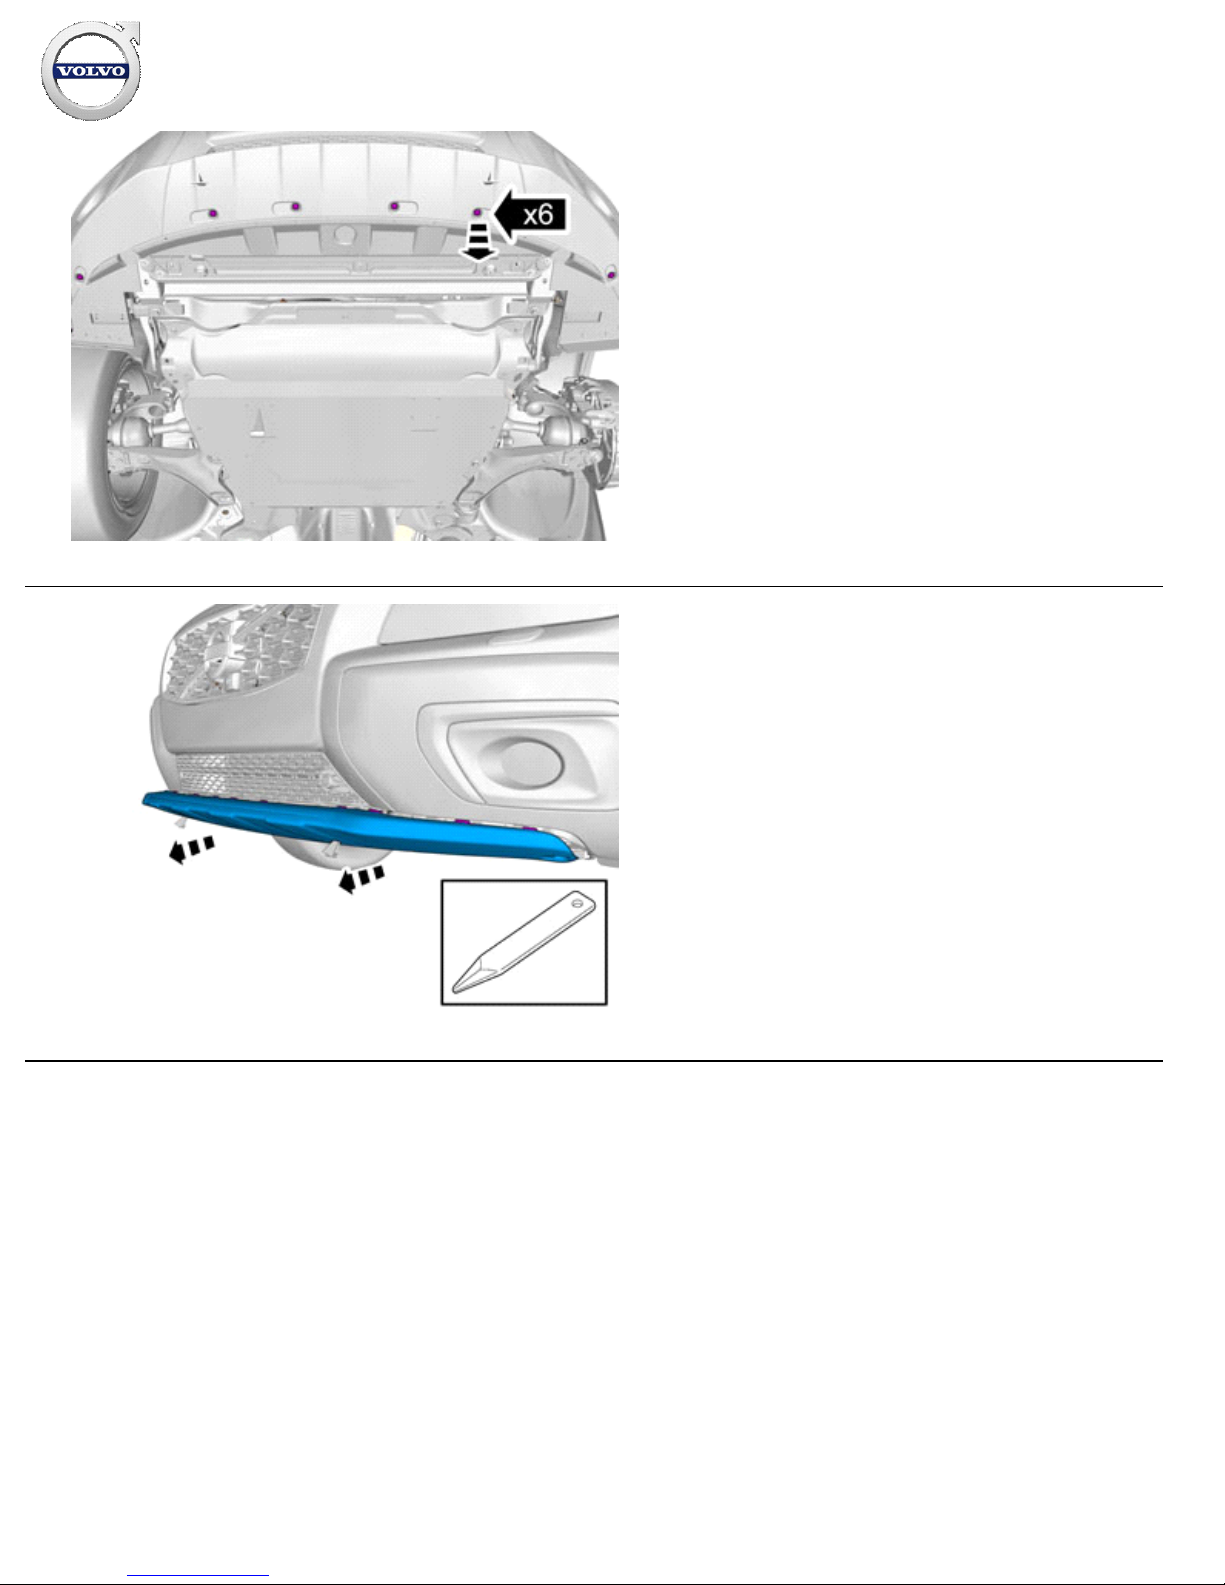
8
IMG-
380092
9
IMG-
380086
Installation instructions, accessories
Volvo Car Corporation Gothenburg, Sweden
©
Volvo Car Corporation Electric engine heater, 230 V- 31414348 - V1.0
Page 7 / 22
Page 8
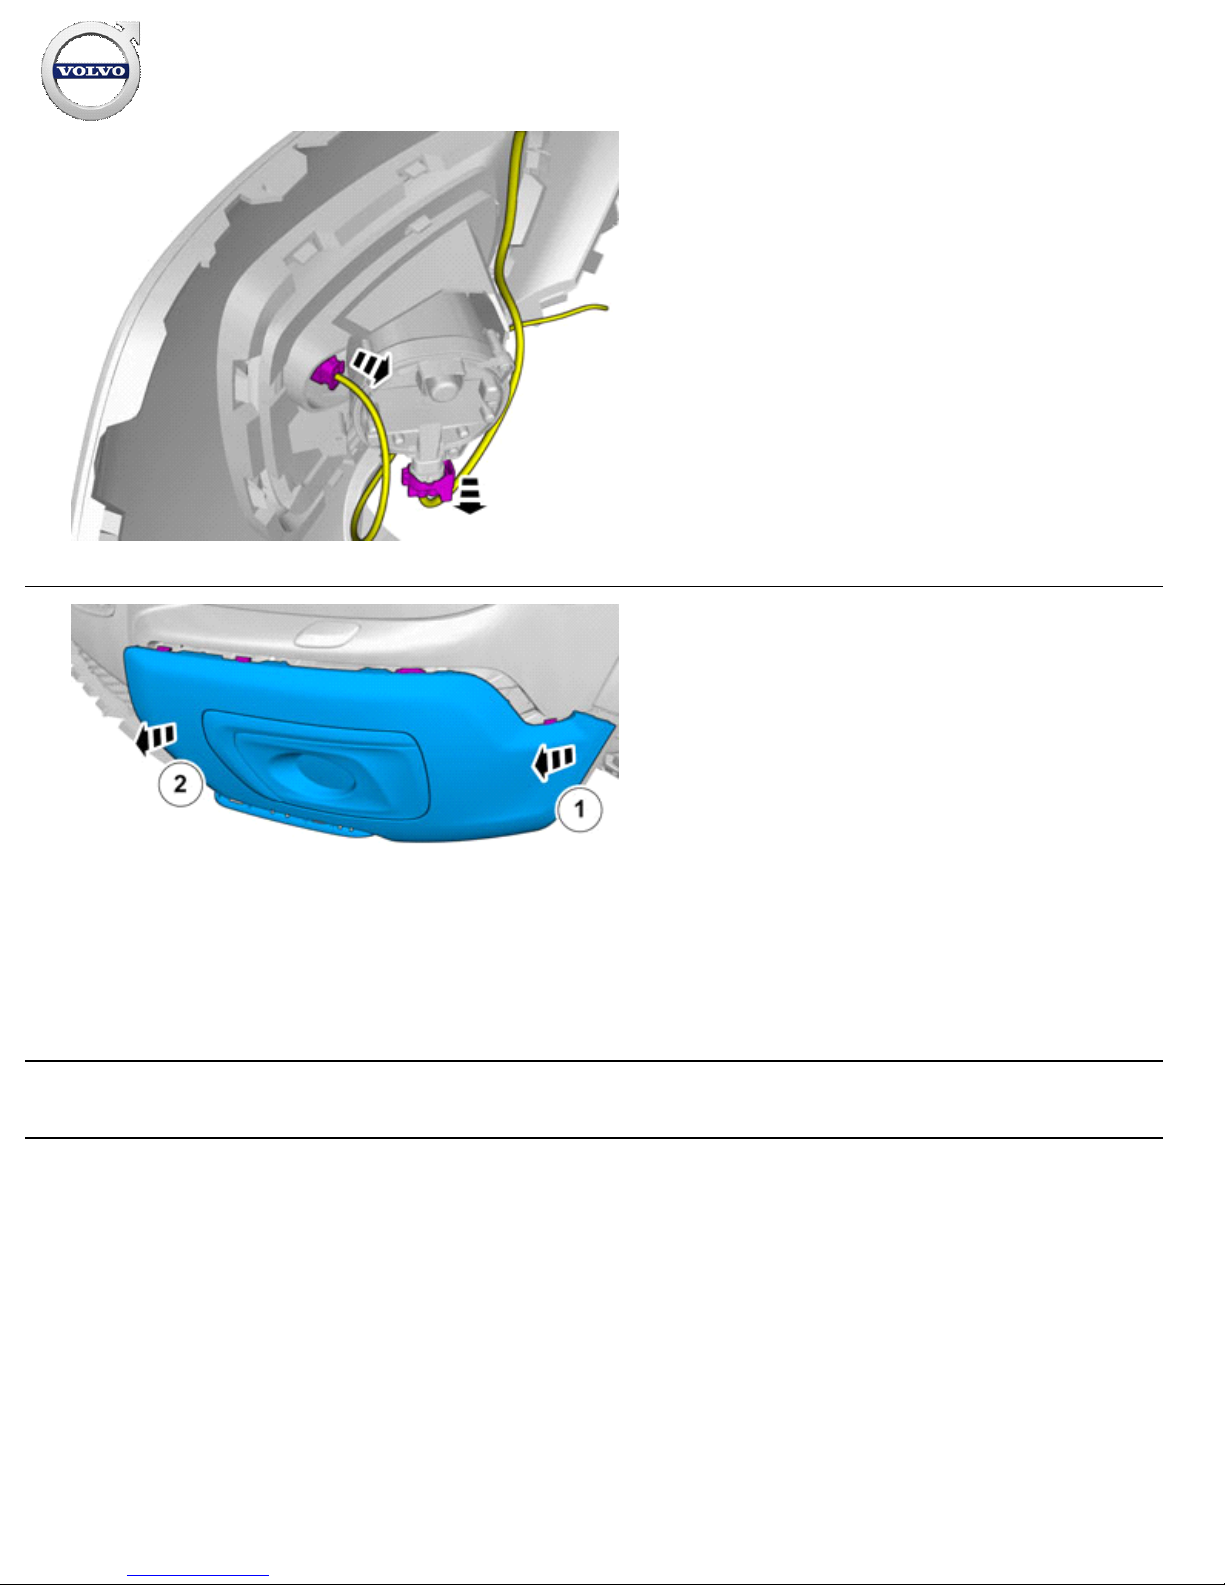
10
IMG-
380085
Disconnect the connector for the fog lamp.
Disconnect the connector.
11
IMG-
380087
Remove the panel.
Accessory installation
Installation instructions, accessories
Volvo Car Corporation Gothenburg, Sweden
©
Volvo Car Corporation Electric engine heater, 230 V- 31414348 - V1.0
Page 8 / 22
Page 9
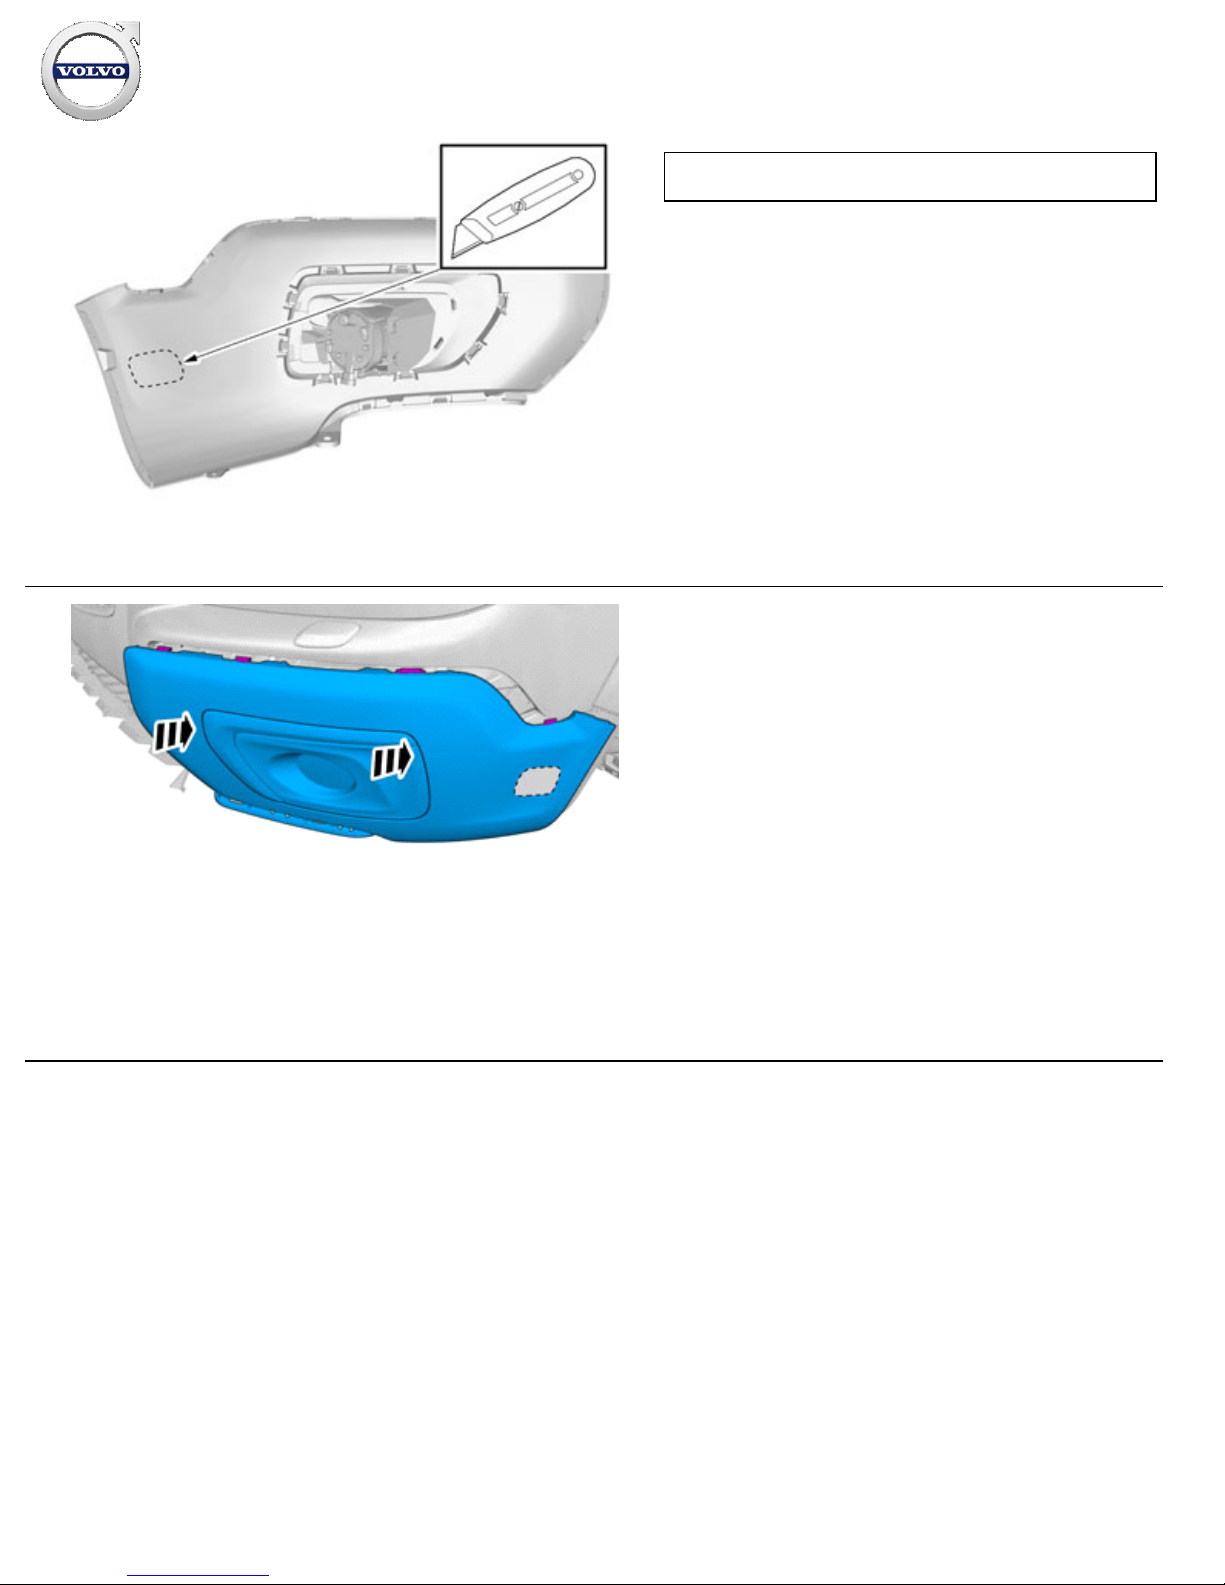
12
IMG-
380088
Caution!
Cut carefully to avoid unintentional damage or personal injury.
Locate relevant marking.
13
IMG-
380090
Install the panel.
Installation instructions, accessories
Volvo Car Corporation Gothenburg, Sweden
©
Volvo Car Corporation Electric engine heater, 230 V- 31414348 - V1.0
Page 9 / 22
Page 10
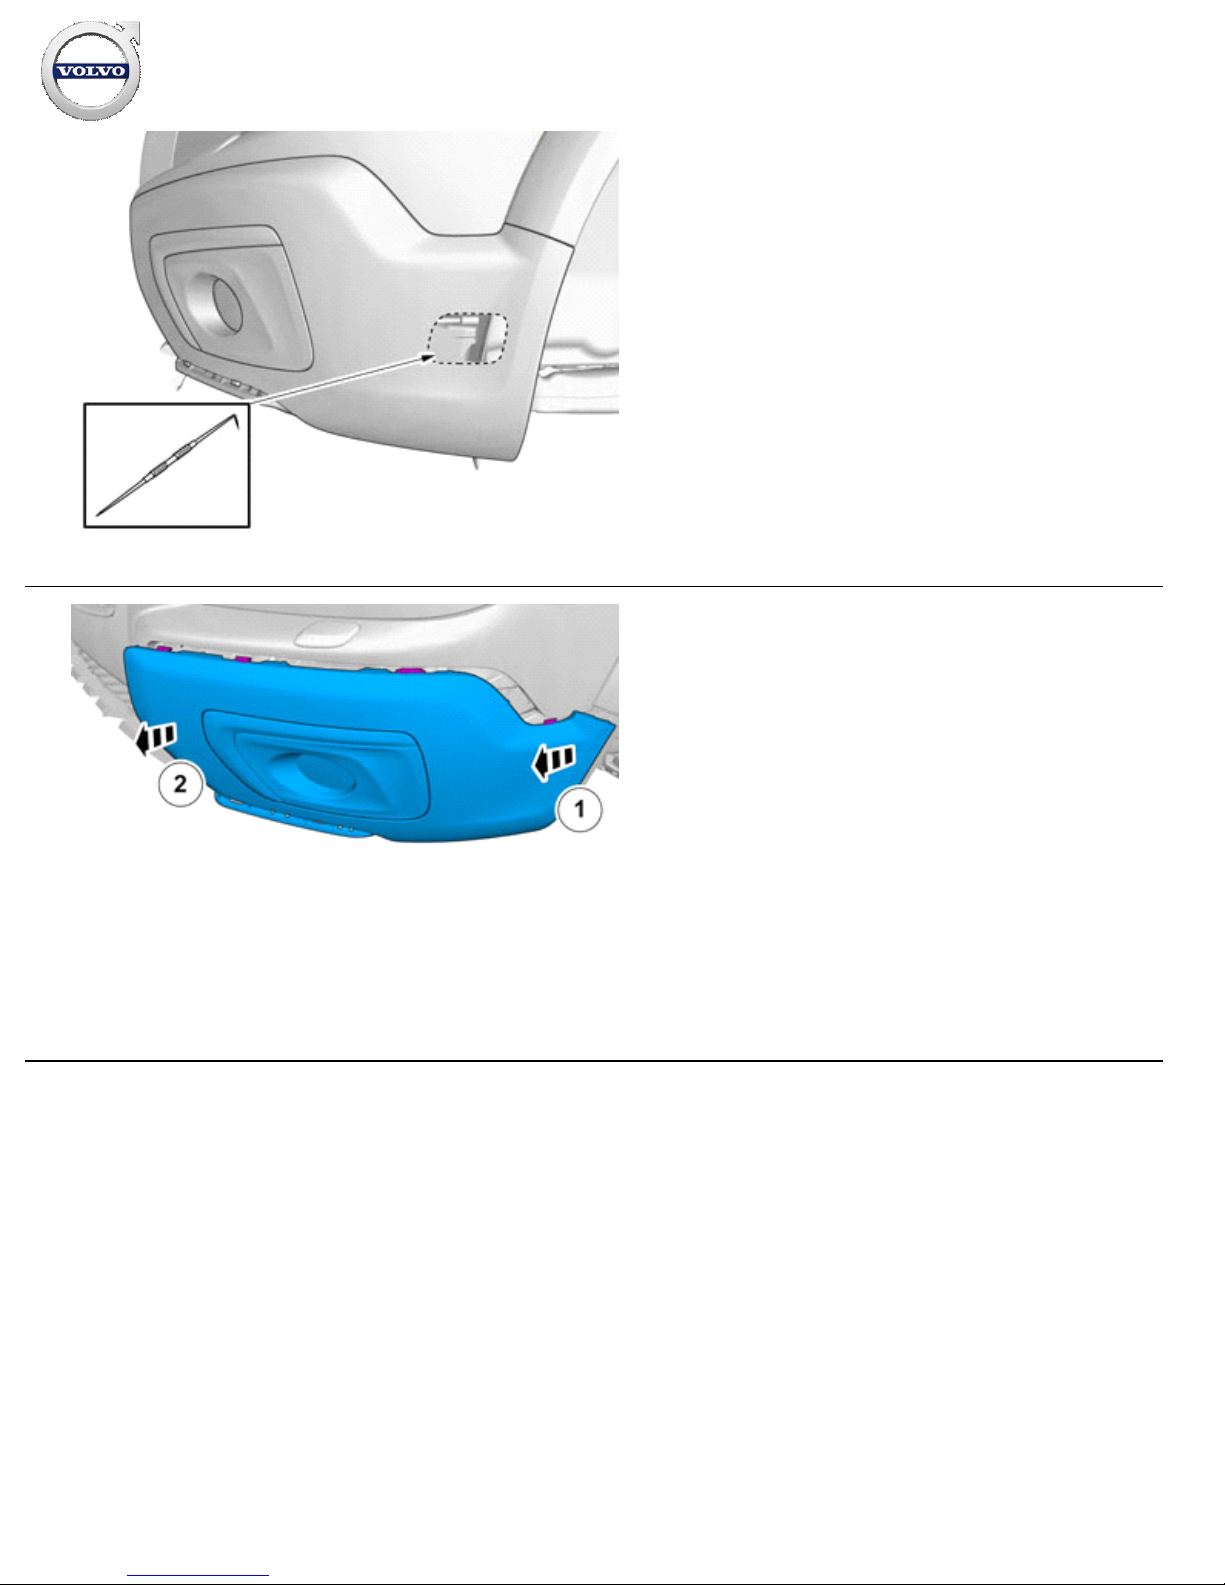
14
IMG-
380089
Scribe/mark up
15
IMG-
380087
Installation instructions, accessories
Volvo Car Corporation Gothenburg, Sweden
©
Volvo Car Corporation Electric engine heater, 230 V- 31414348 - V1.0
Page 10 / 22
Page 11
16
IMG-
380101
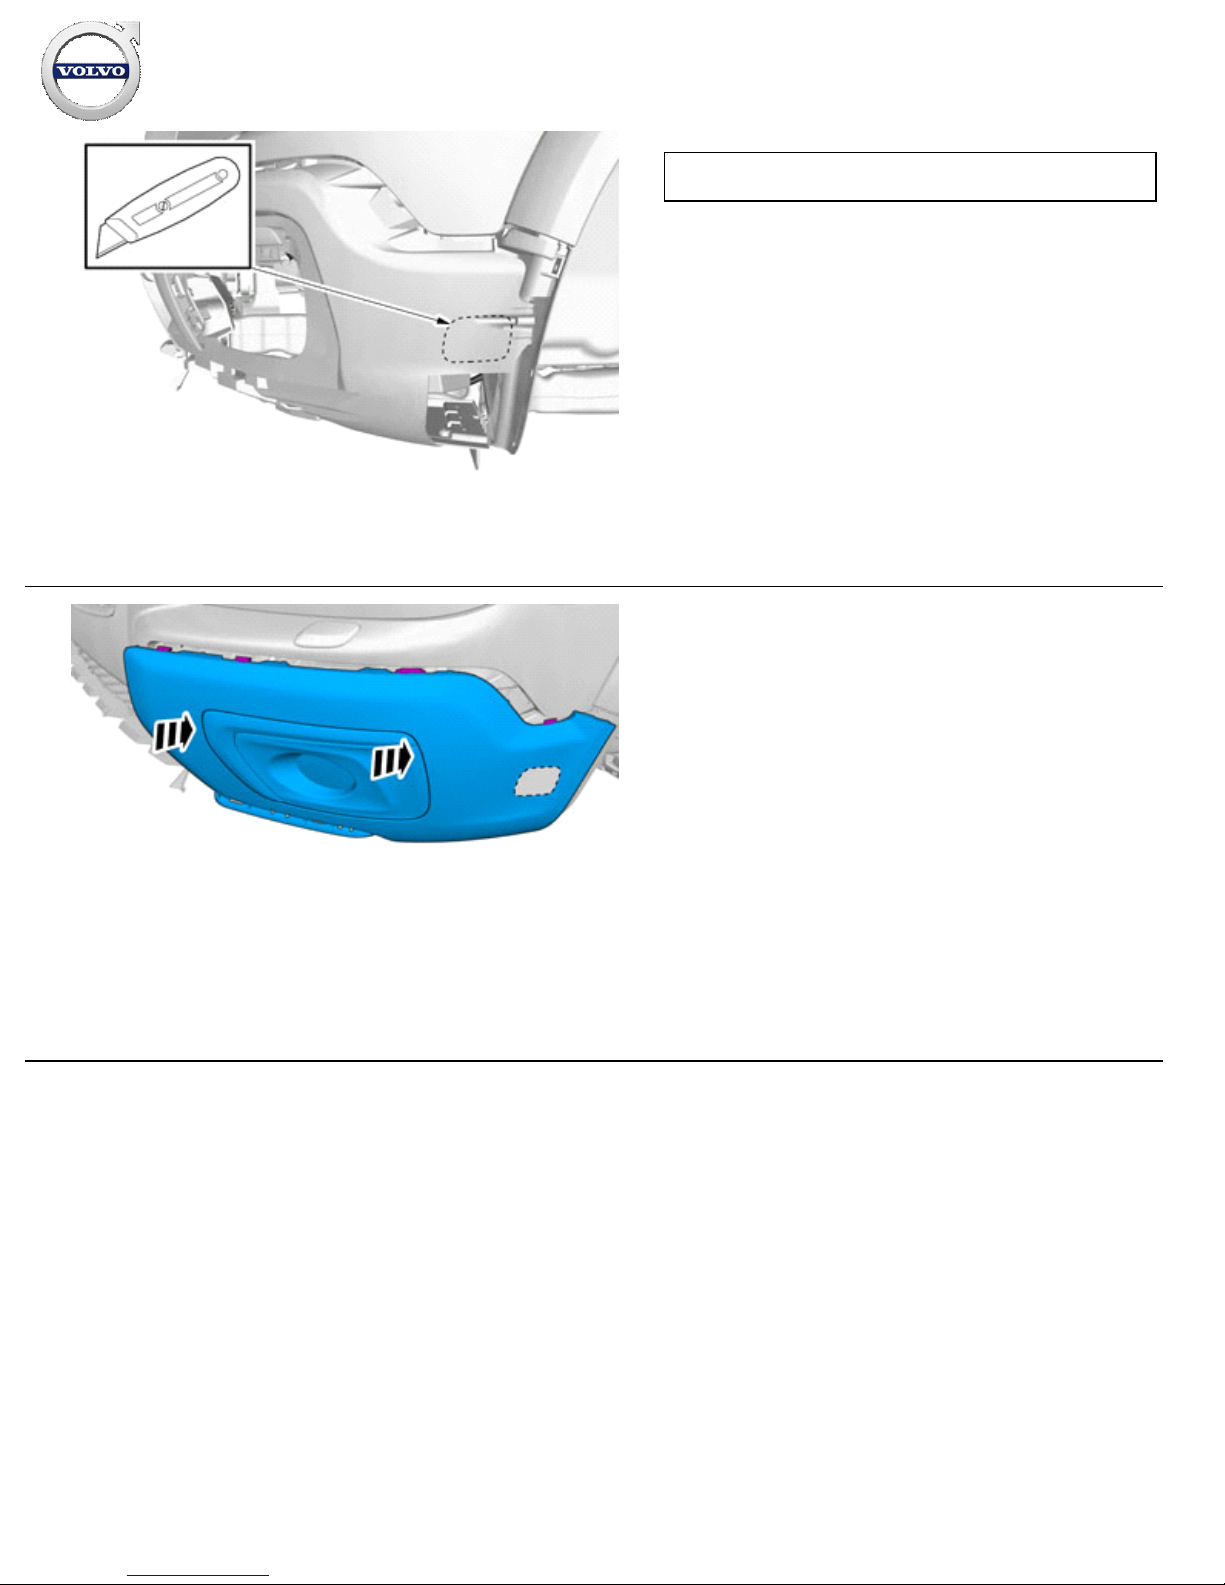
Caution!
Cut carefully to avoid unintentional damage or personal injury.
17
IMG-
380090
Installation instructions, accessories
Volvo Car Corporation Gothenburg, Sweden
©
Volvo Car Corporation Electric engine heater, 230 V- 31414348 - V1.0
Page 11 / 22
Page 12
18
IMG-
380611
19
IMG-
380613
Installation instructions, accessories
Volvo Car Corporation Gothenburg, Sweden
©
Volvo Car Corporation Electric engine heater, 230 V- 31414348 - V1.0
Page 12 / 22
Page 13
20
IMG-
363401
21
IMG-
380094
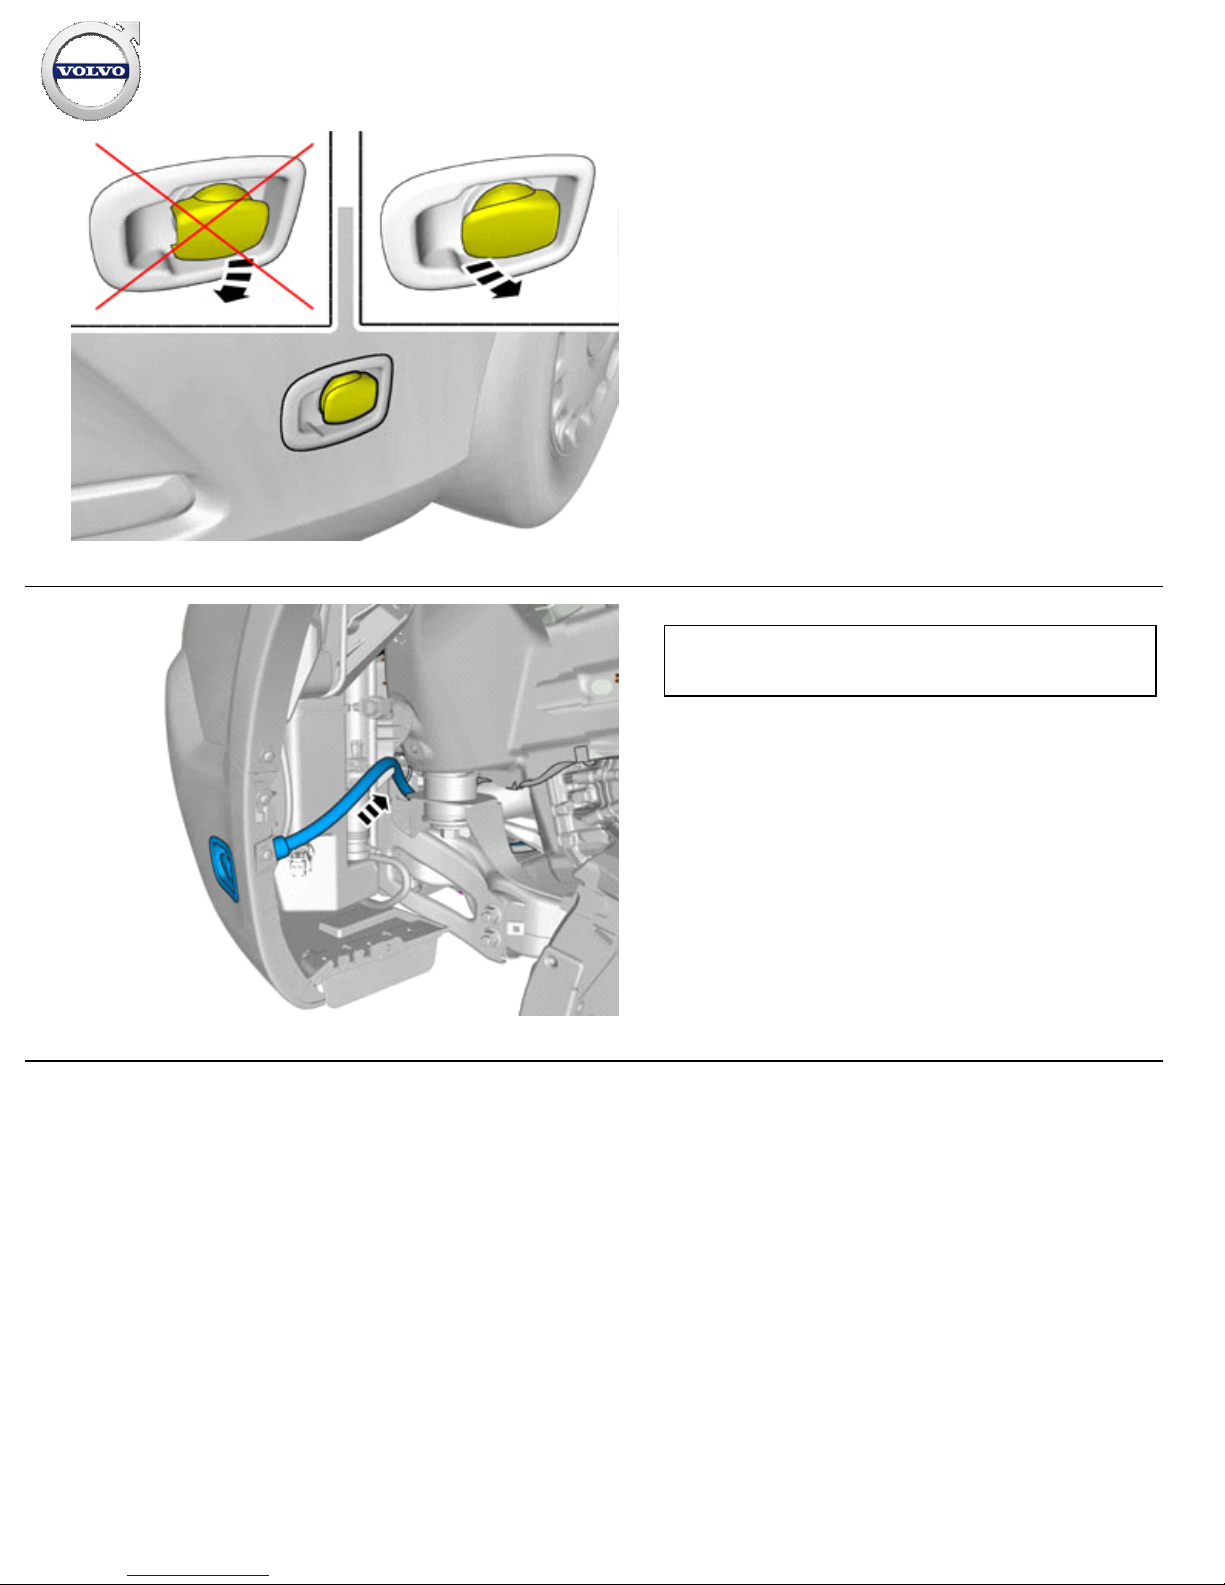
Caution!
Ensure that the wire or wiring harness cannot rub against
adjacent components.
Pull the wiring through.
Installation instructions, accessories
Volvo Car Corporation Gothenburg, Sweden
©
Volvo Car Corporation Electric engine heater, 230 V- 31414348 - V1.0
Page 13 / 22
Page 14
22
IMG-
380107
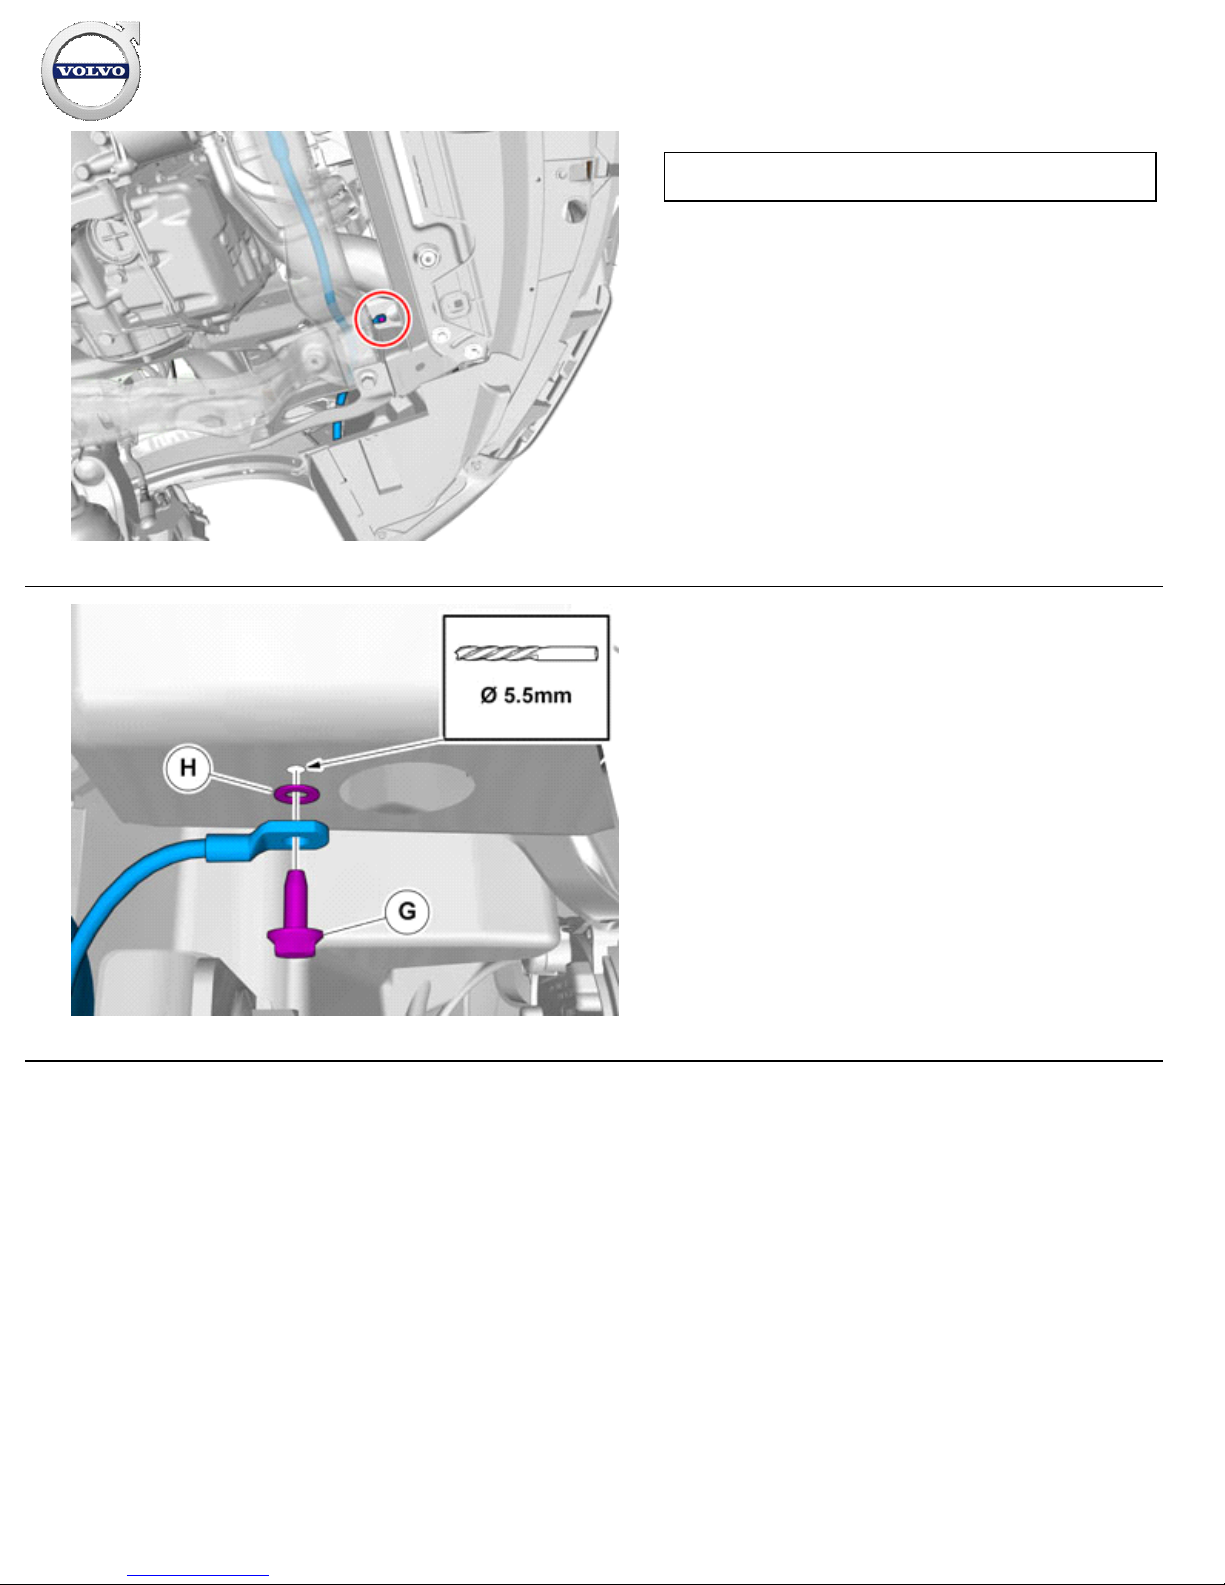
Note!
Orientation view
23
IMG-
380106
Installation instructions, accessories
Volvo Car Corporation Gothenburg, Sweden
©
Volvo Car Corporation Electric engine heater, 230 V- 31414348 - V1.0
Page 14 / 22
Page 15
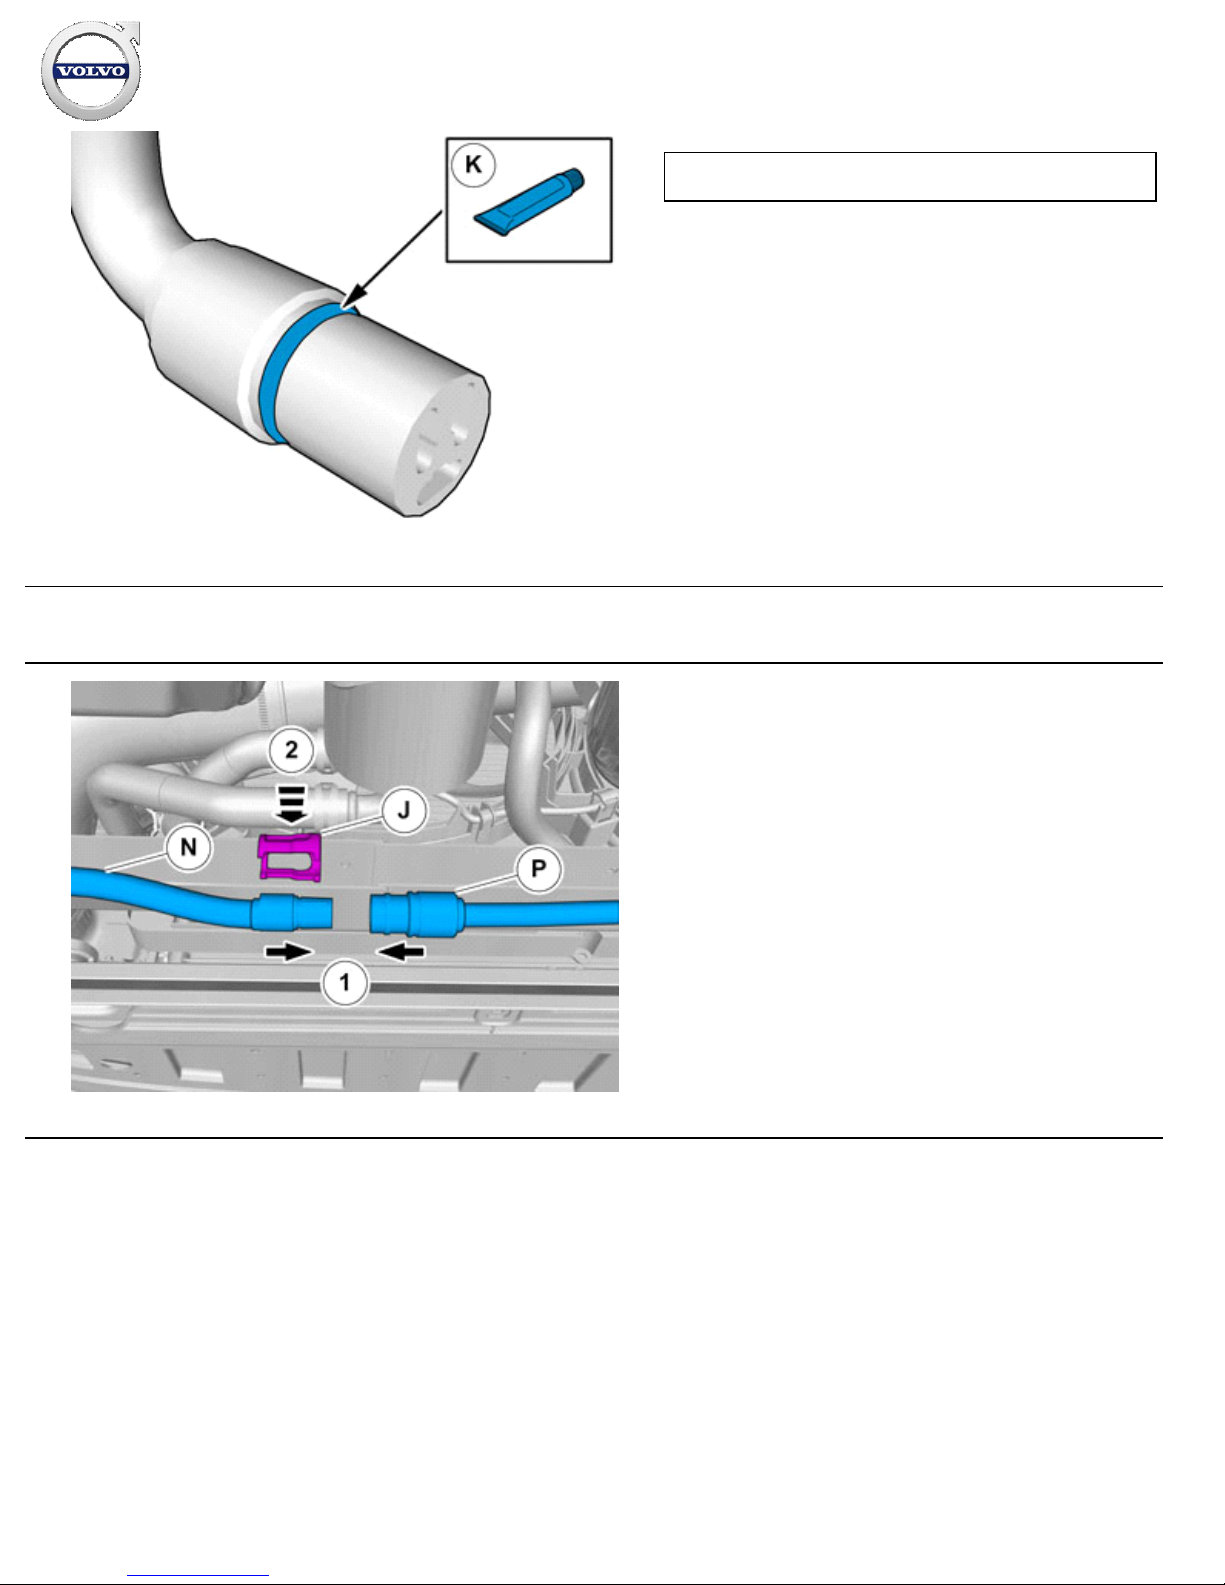
24
IMG-
362914
Caution!
No grease on contact surfaces.
Lubricate the O-ring.
Use: 1161761, Grease
Vehicles without passenger compartment connector
25
IMG-
380533
Installation instructions, accessories
Volvo Car Corporation Gothenburg, Sweden
©
Volvo Car Corporation Electric engine heater, 230 V- 31414348 - V1.0
Page 15 / 22
Page 16
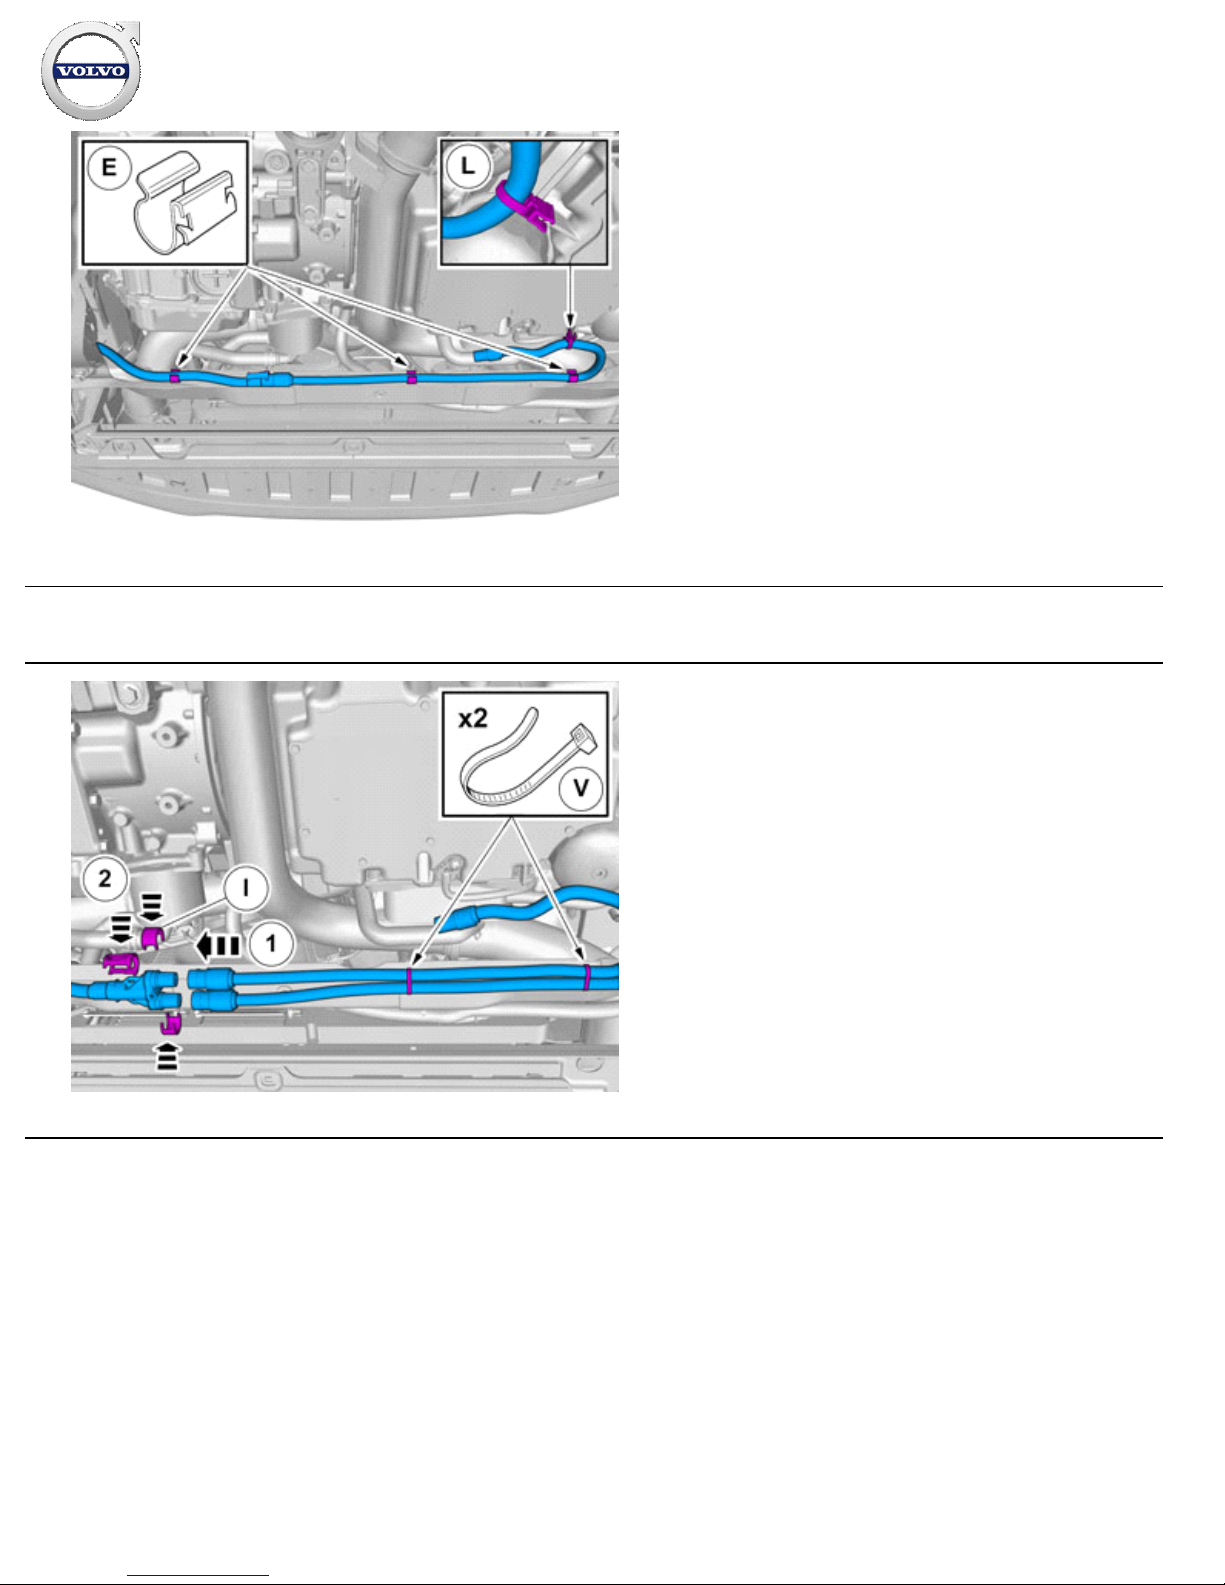
26
IMG-
380512
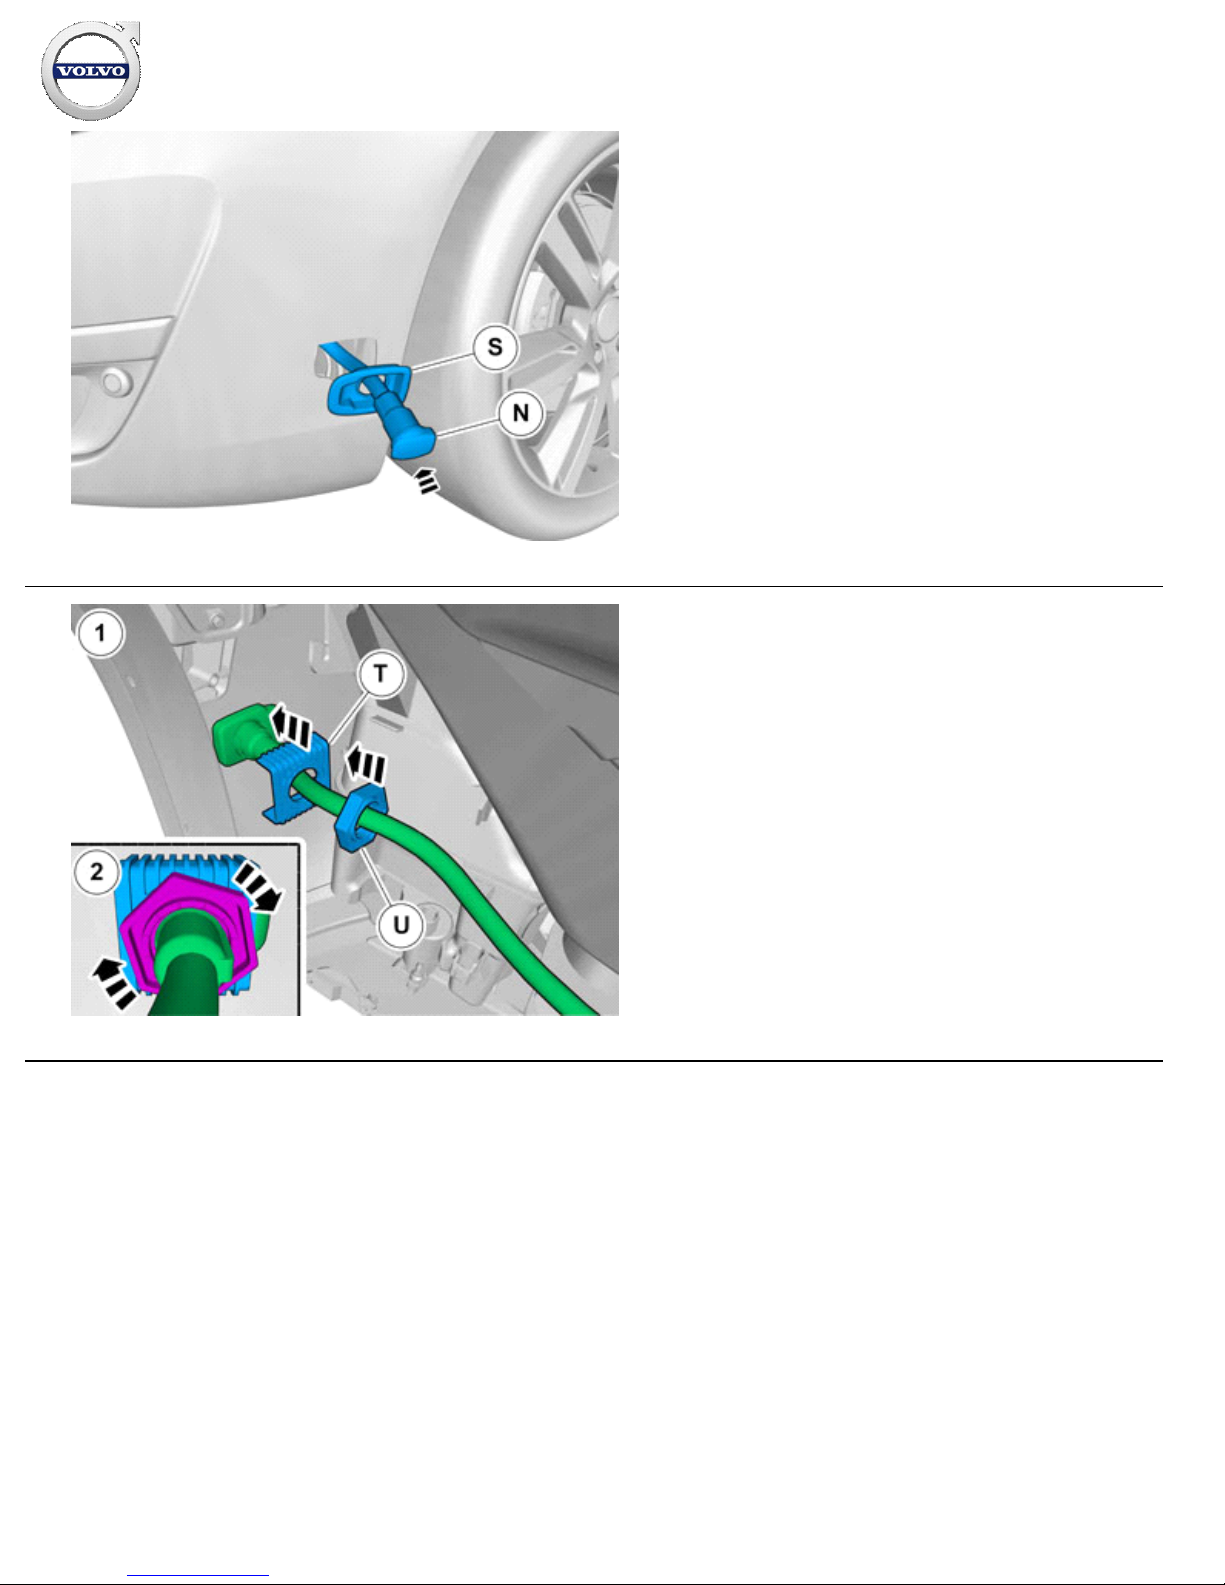
Install the clips as illustrated.
Vehicles with passenger compartment connector
27
IMG-
380539
Installation instructions, accessories
Volvo Car Corporation Gothenburg, Sweden
©
Volvo Car Corporation Electric engine heater, 230 V- 31414348 - V1.0
Page 16 / 22
Page 17
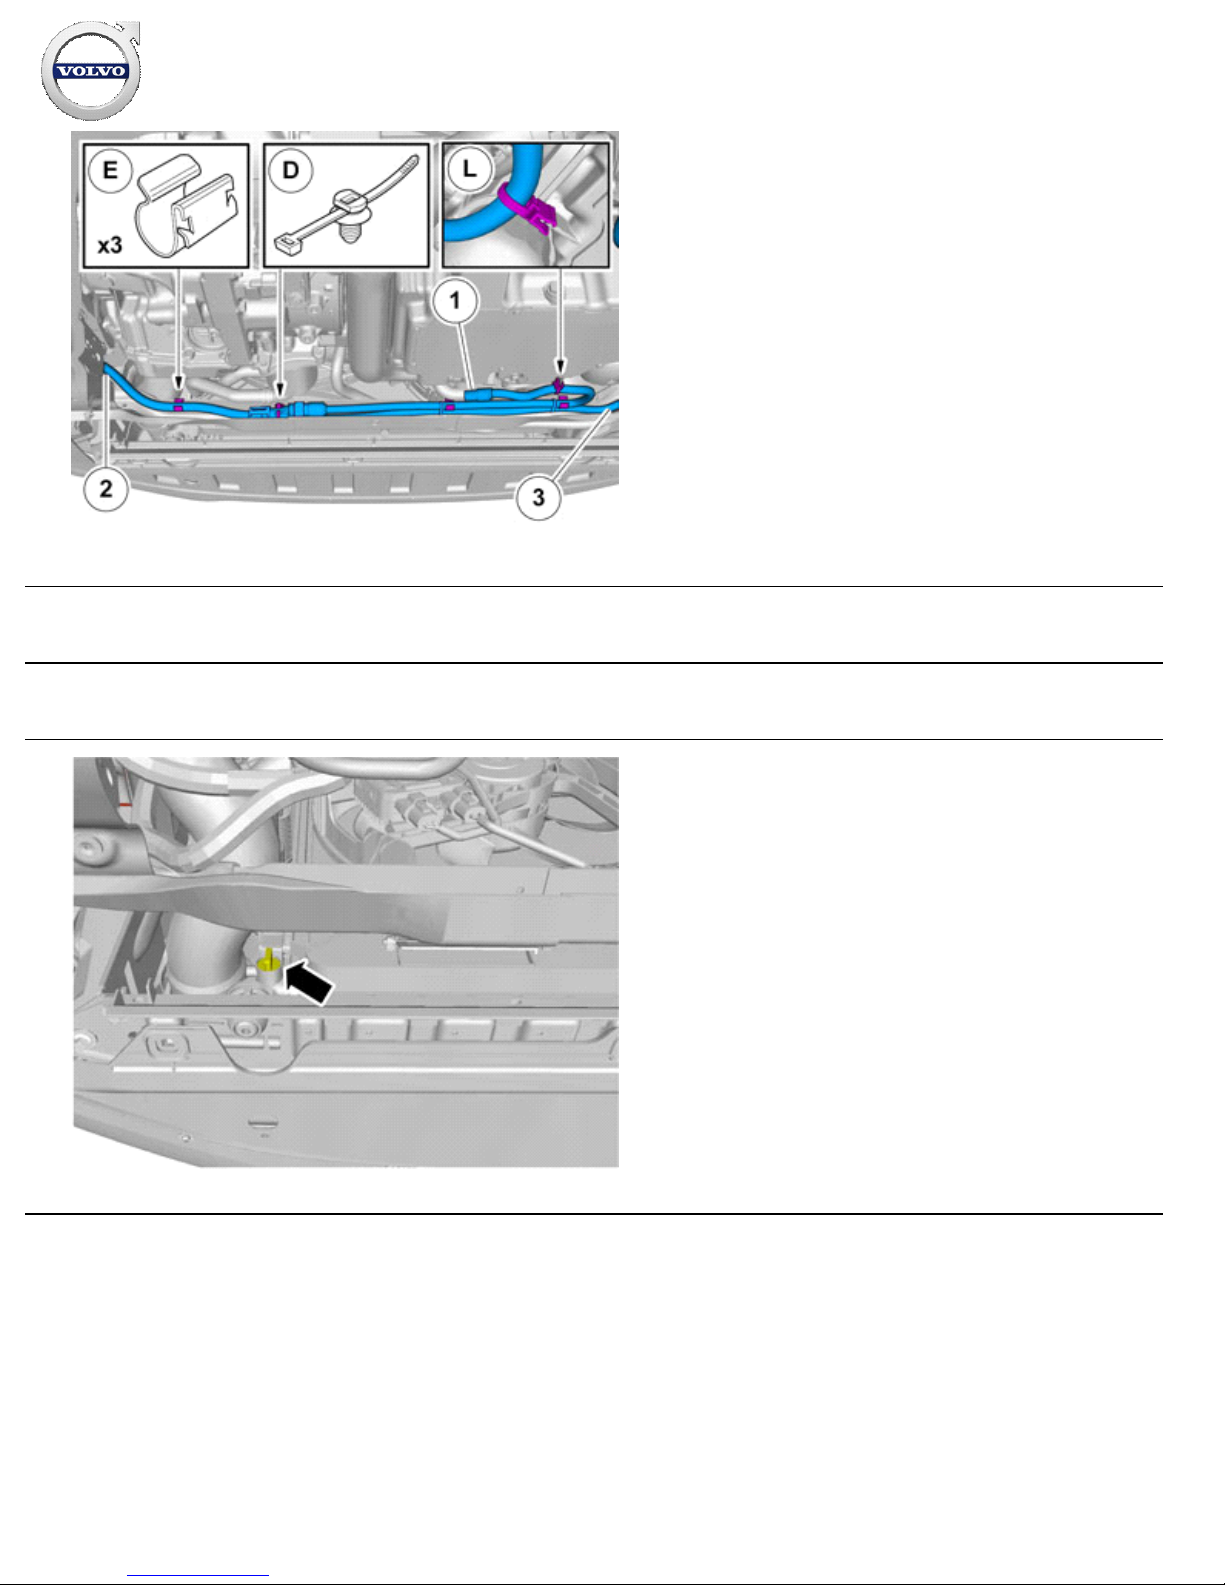
28
IMG-
380513
Install the clips as illustrated.
Cable from Engine block heater
1.
Cable from front socket2.
Passenger Compartment Connector Cable
3.
All vehicles
Removal
29
IMG-
316303
Place a container under the car.
Drain the coolant.
Tighten the nipple after draining the coolant.
Installation instructions, accessories
Volvo Car Corporation Gothenburg, Sweden
©
Volvo Car Corporation Electric engine heater, 230 V- 31414348 - V1.0
Page 17 / 22
Page 18
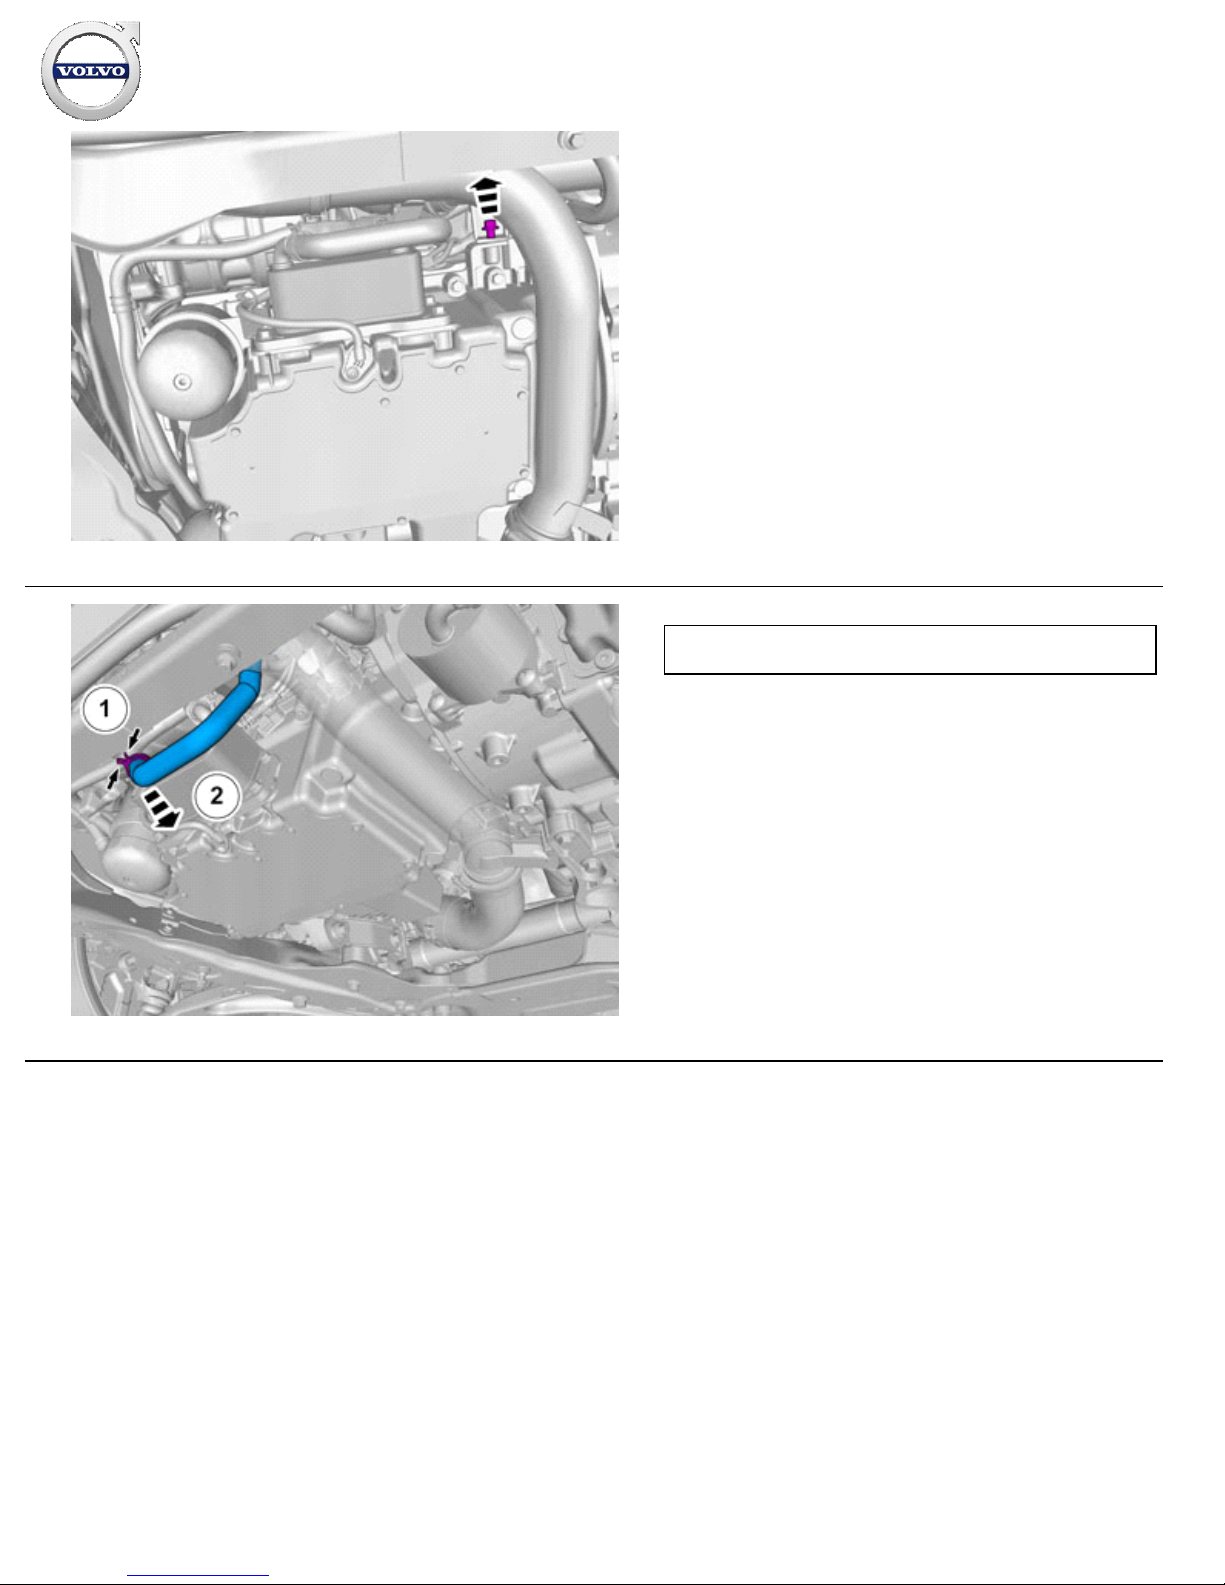
30
IMG-
380541
31
IMG-
380515
Warning!
Be prepared to collect escaping fluid.
Remove the hose.
Installation instructions, accessories
Volvo Car Corporation Gothenburg, Sweden
©
Volvo Car Corporation Electric engine heater, 230 V- 31414348 - V1.0
Page 18 / 22
Page 19
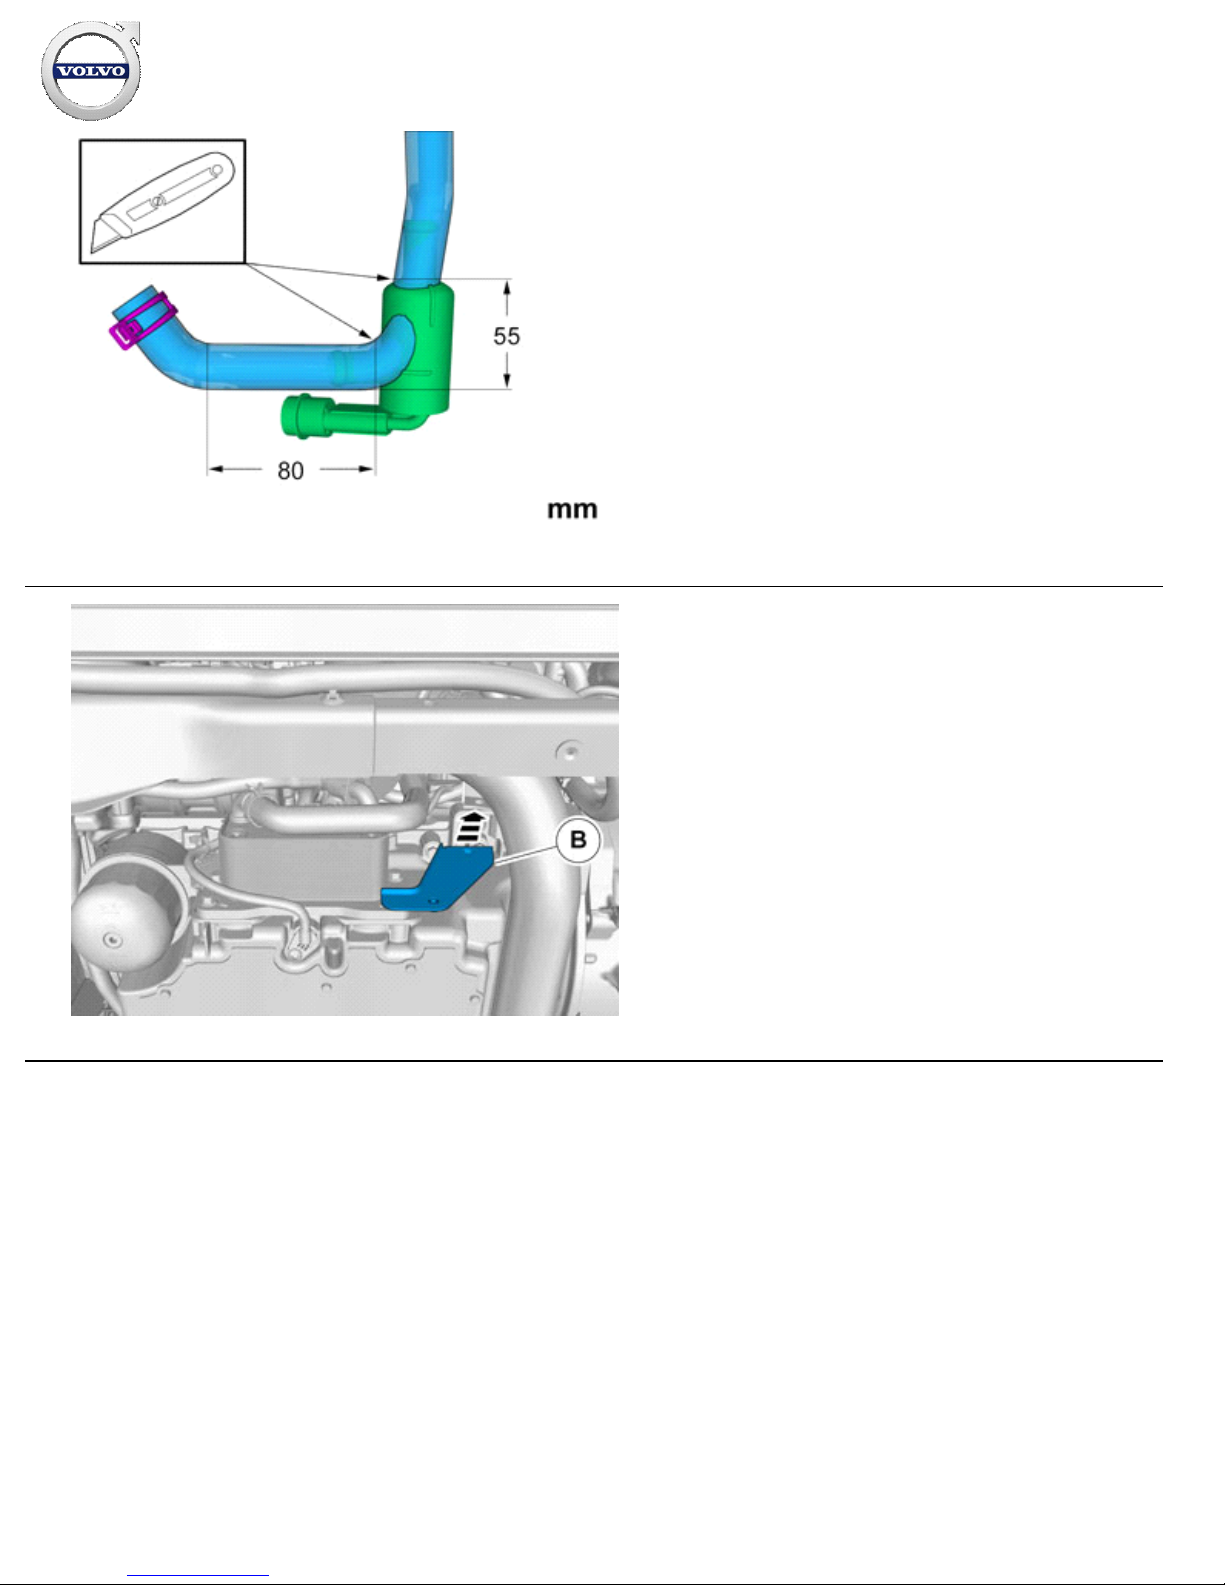
32
IMG-
380523
33
IMG-
381161
Installation instructions, accessories
Volvo Car Corporation Gothenburg, Sweden
©
Volvo Car Corporation Electric engine heater, 230 V- 31414348 - V1.0
Page 19 / 22
Page 20
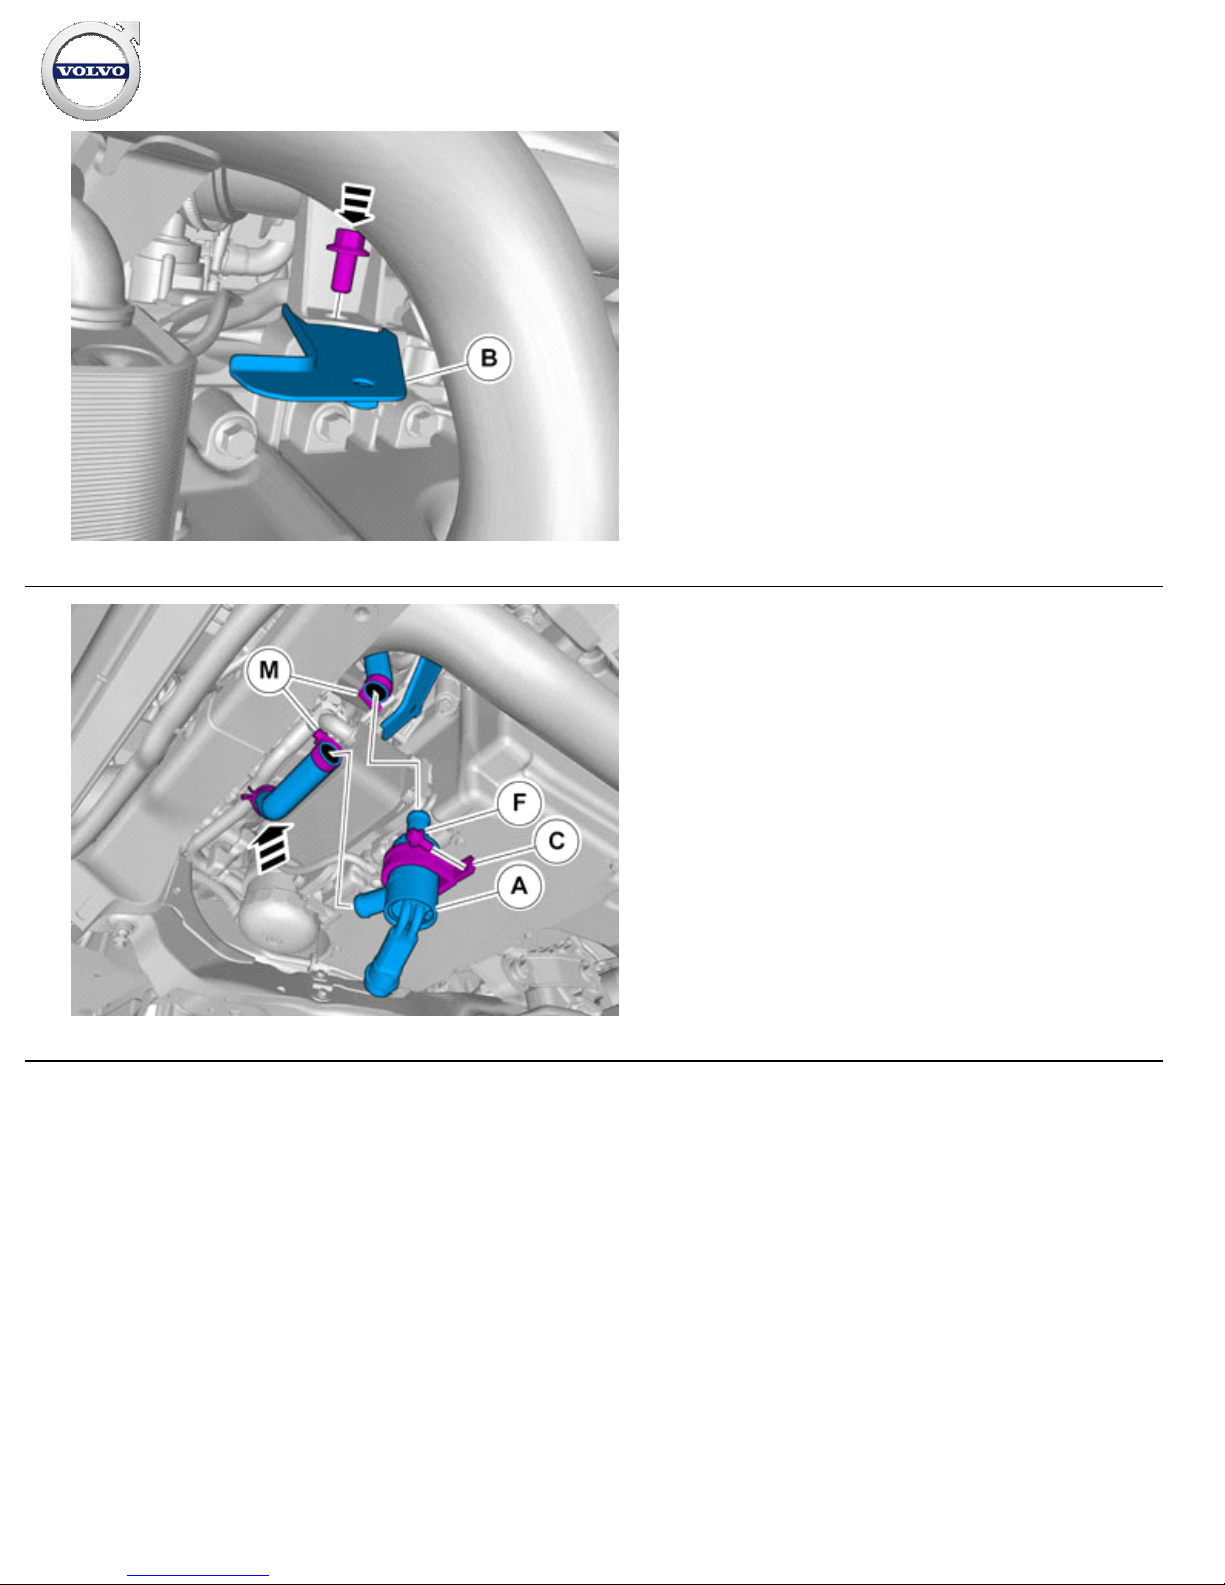
34
IMG-
381294
Reinstall the screw.
Tightening torque: M8
, 24 Nm
35
IMG-
380555
Installation instructions, accessories
Volvo Car Corporation Gothenburg, Sweden
©
Volvo Car Corporation Electric engine heater, 230 V- 31414348 - V1.0
Page 20 / 22
Page 21
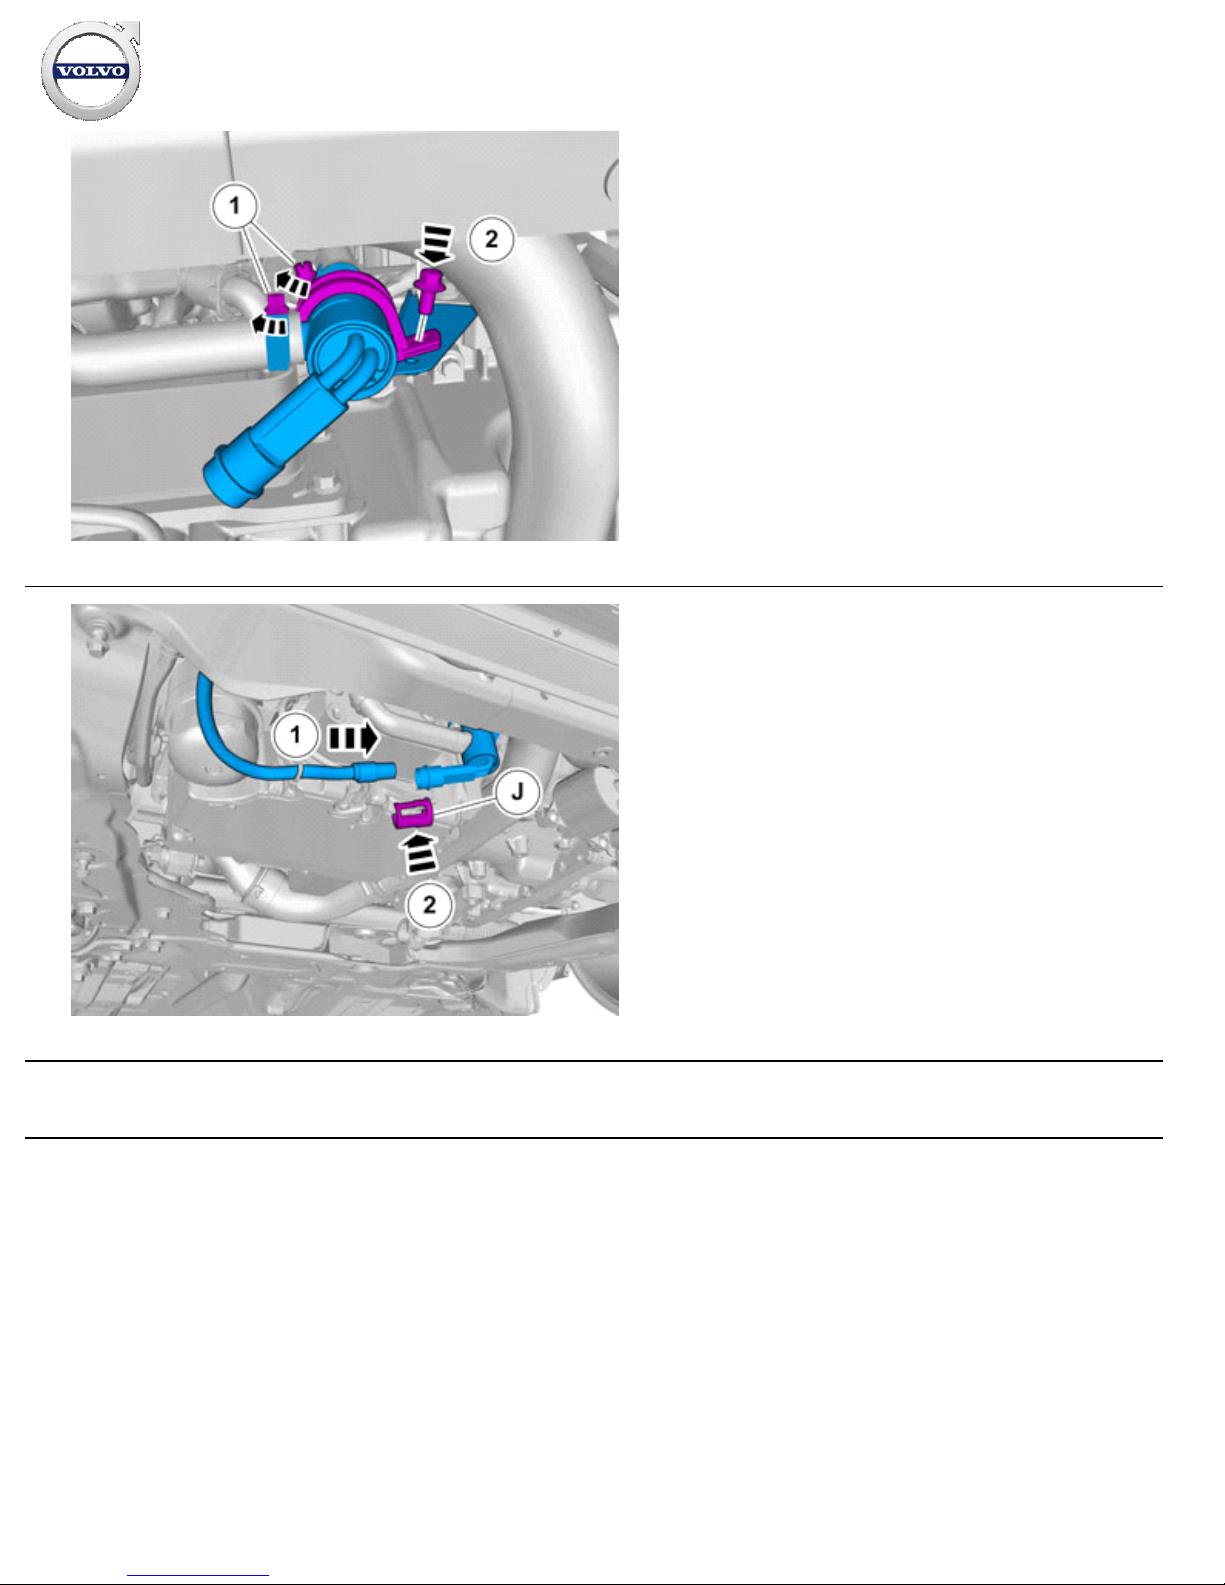
36
IMG-
380564
Tighten the hose clamps.
Install the screw.
Tightening torque: M6
, 10 Nm
37
IMG-
380572
Connect the prerouted cable.
Install the catch.
Installation
Installation instructions, accessories
Volvo Car Corporation Gothenburg, Sweden
©
Volvo Car Corporation Electric engine heater, 230 V- 31414348 - V1.0
Page 21 / 22
Page 22
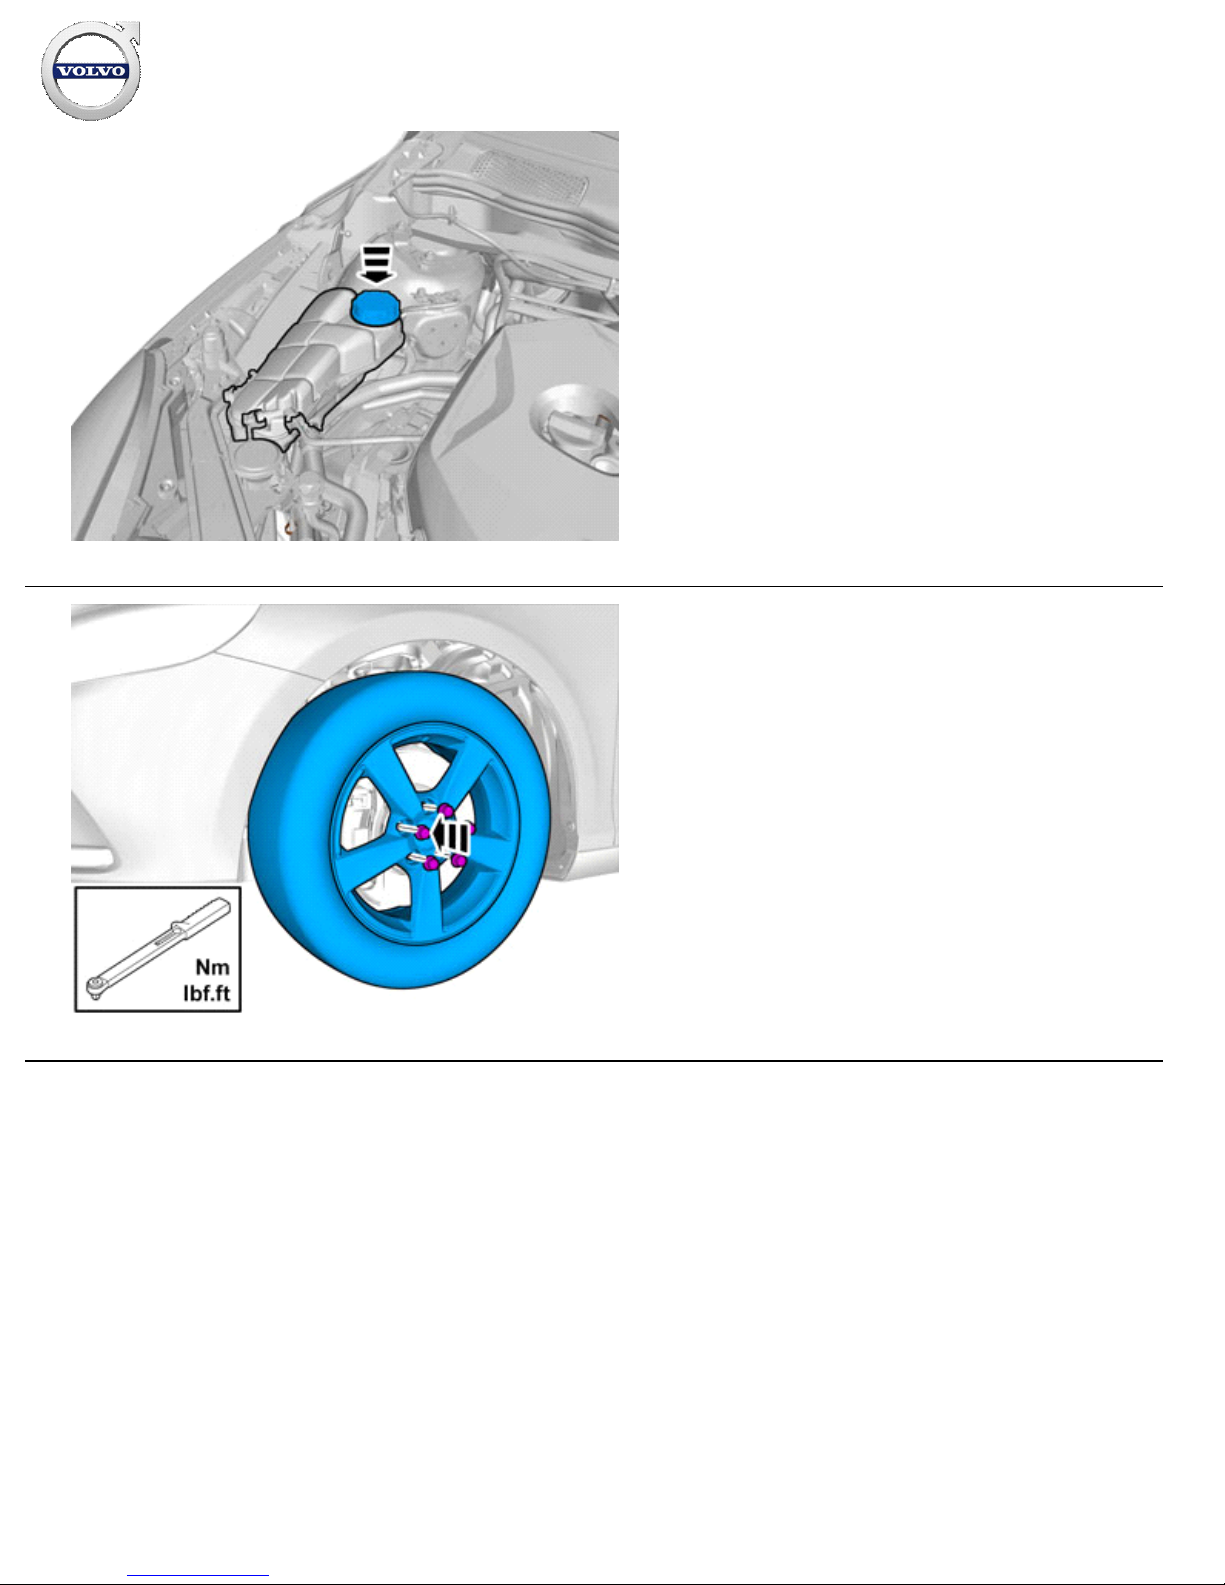
38
IMG-
363206
Reinstall the removed parts in reverse order.
Fill with coolant and run the engine to operating temperature.
Vent the cooling system and check for leakage.
Post
-fill the cooling system if necessary.
39
IMG-
370207
Tightening torque: Wheel to wheel hub
Stage 1: 20 Nm
Stage 2: 140 Nm
Installation instructions, accessories
Volvo Car Corporation Gothenburg, Sweden
©
Volvo Car Corporation Electric engine heater, 230 V- 31414348 - V1.0
Page 22 / 22
 Loading...