

Volvo 30752135 Installation Instructions Manual

Instruction No Version Part. No.
30752136 1.1 30752135
Subwoofer
Instruction No Version Part. No.
30752136 1.1 30752135
Subwoofer
Installation instructions, accessories
Volvo Car Corporation Gothenburg, Sweden
©
Volvo Car Corporation Subwoofer- 30752136 - V1.1
Page 1 / 33
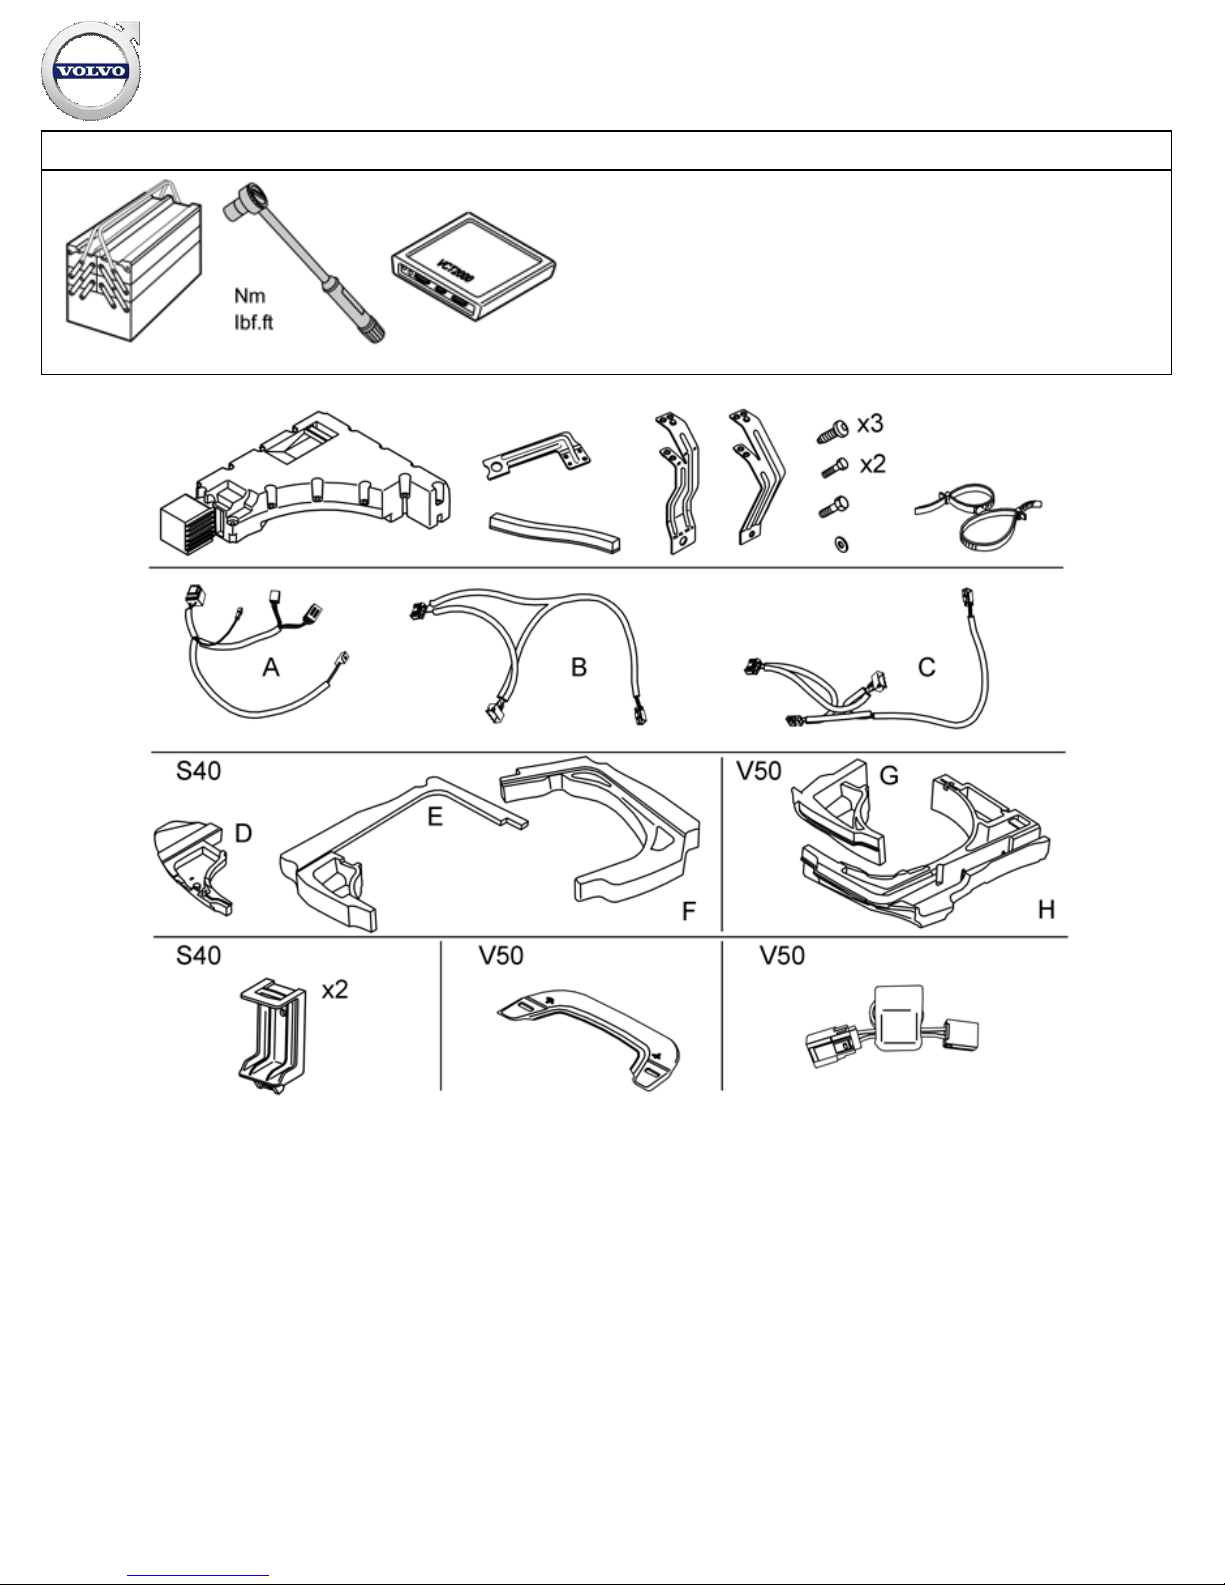
Equipment
A0000162 A0000161 A0801178
IMG-
216522
Installation instructions, accessories
Volvo Car Corporation Gothenburg, Sweden
©
Volvo Car Corporation Subwoofer- 30752136 - V1.1
Page 2 / 33

IMG-
213320
Installation instructions, accessories
Volvo Car Corporation Gothenburg, Sweden
©
Volvo Car Corporation Subwoofer- 30752136 - V1.1
Page 3 / 33

INTRODUCTION
Read through all of the instructions before starting installation.
Notifications and warning texts are for your safety and to
minimise the risk of something breaking during installation.
Ensure that all tools stated in the instructions are available
before starting installation.
Certain steps in the instructions are only presented in the form
of images. Explanatory text is also given for more complicated
steps.
In the event of any problems with the instructions or the
accessory, contact your local Volvo dealer.
Note!
Explanation of kit illustration
A Always required
B Required for cars without RTI and
EU cars with RTI and Vehicle Identification Number: S40 CH
80923-,
V50 CH 78749
C Required for
all cars with RTI and Vehicle Identification Number: S40 CH
-
80922, V50 CH
-78748
US cars with RTI and Vehicle Identification Number: S40 CH
80923-,
V50 CH 78749
D and E always required in S40
F required in S40 with low cargo compartment floor
G always required in V50
H required in V50 with low cargo compartment floor
Note!
This accessory is connected to the car's electrical system. It
requires software unique to the car.
Steps 1–27 apply to the S40
Installation instructions, accessories
Volvo Car Corporation Gothenburg, Sweden
©
Volvo Car Corporation Subwoofer- 30752136 - V1.1
Page 4 / 33
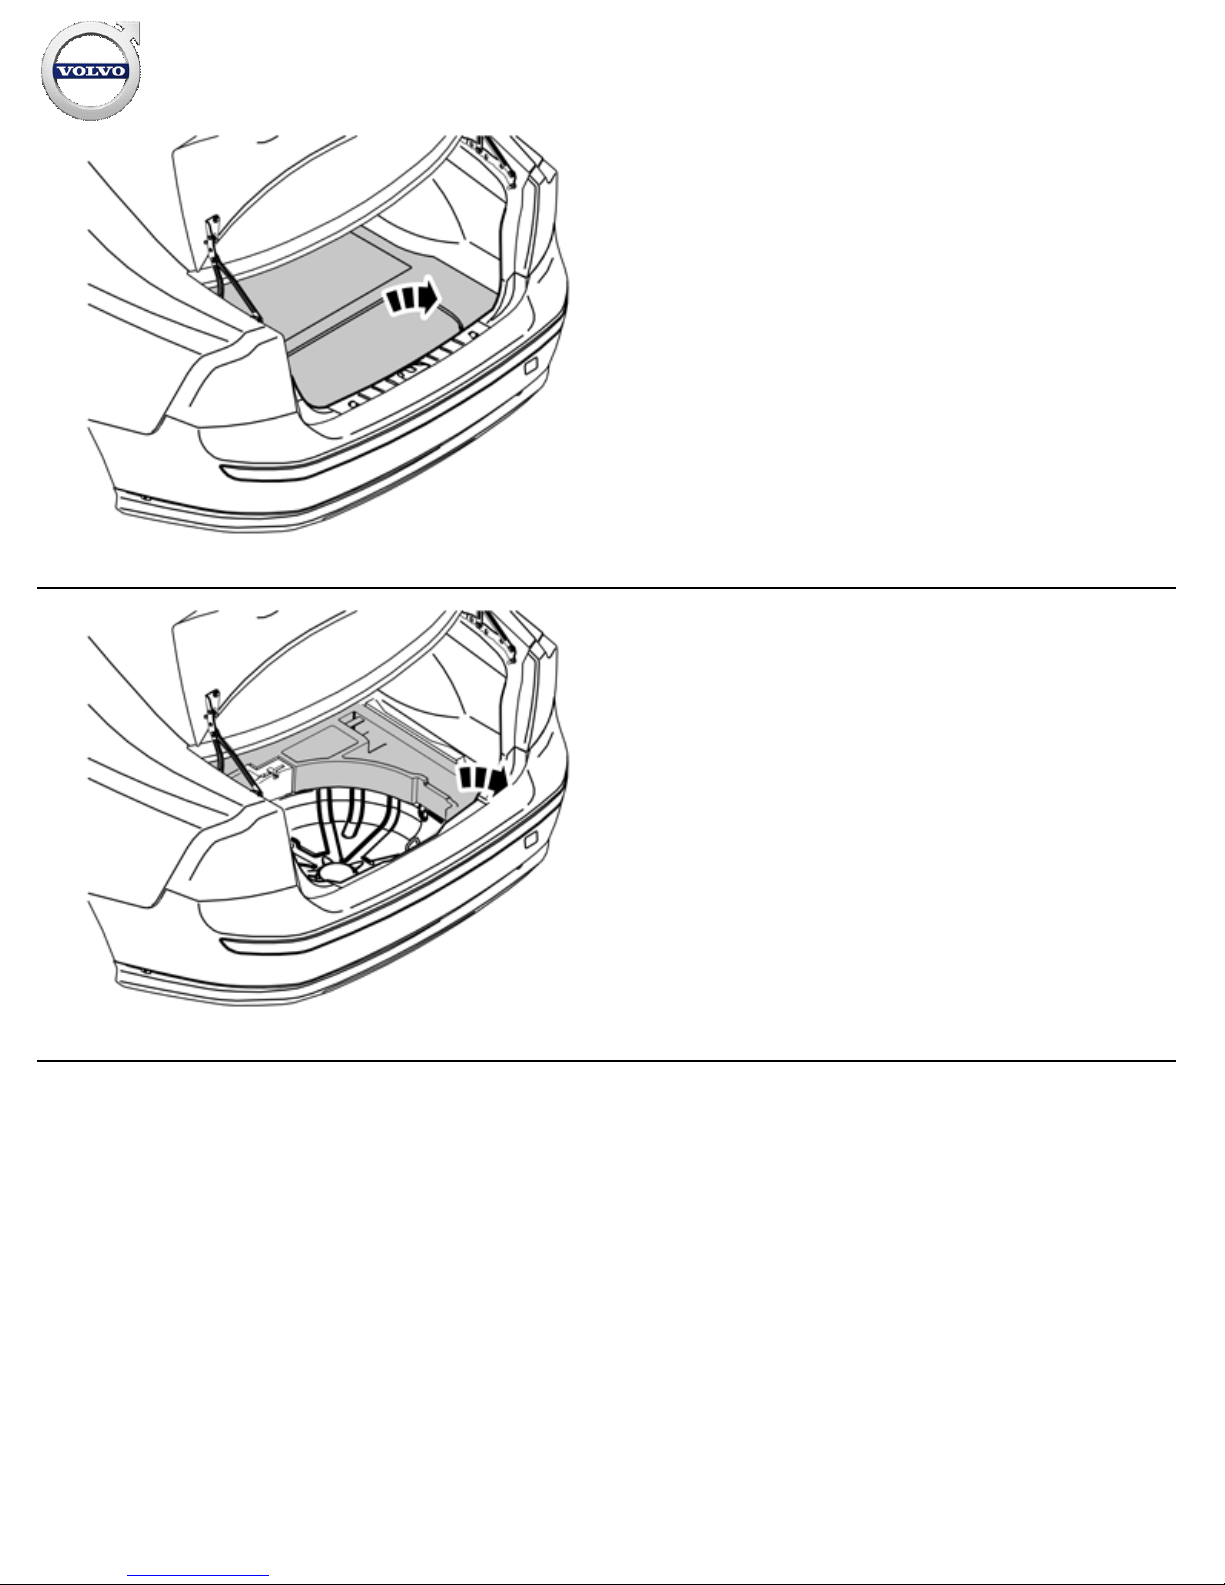
1
J8504553
Steps 1–27 apply to the S40
Turn the ignition switch to position 0.
Remove the cargo compartment carpet.
2
J8504552
Applies to cars with a high cargo compartment floor
Remove the upper floor supports on the right and left-hand
sides. The left-hand floor support shall not be used again.
Installation instructions, accessories
Volvo Car Corporation Gothenburg, Sweden
©
Volvo Car Corporation Subwoofer- 30752136 - V1.1
Page 5 / 33
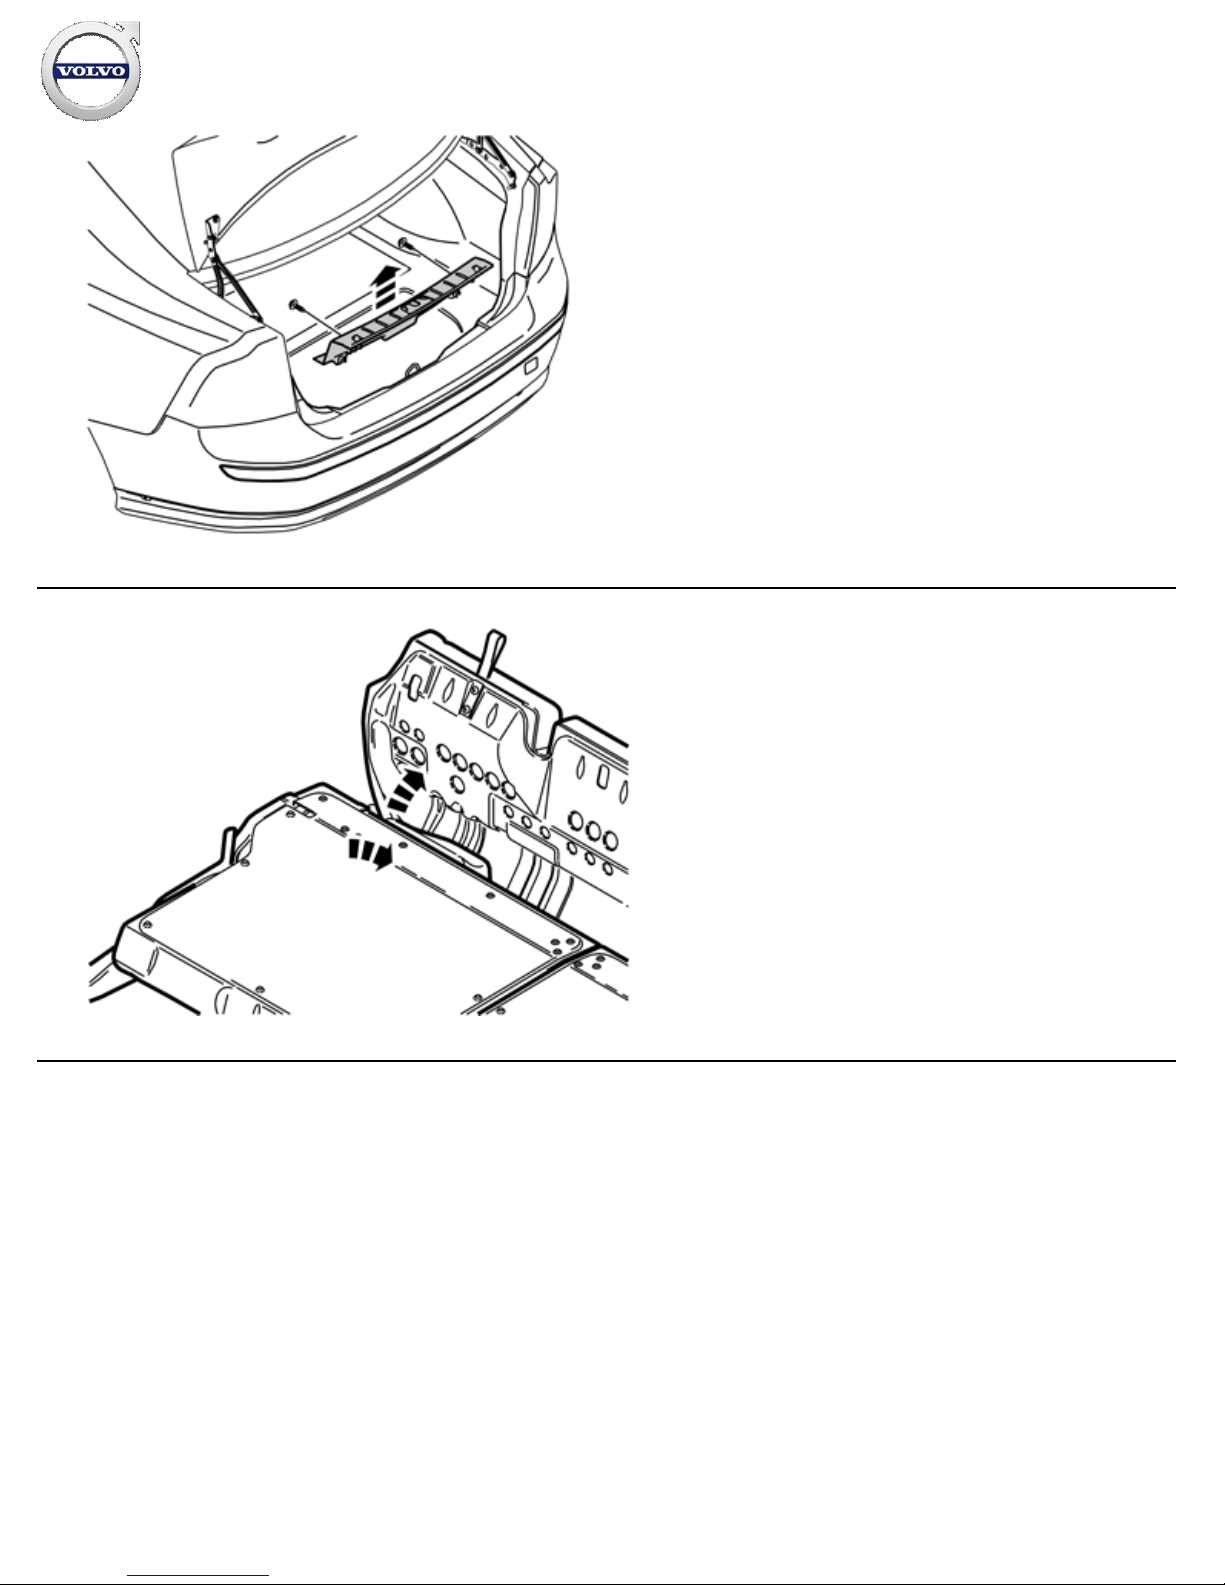
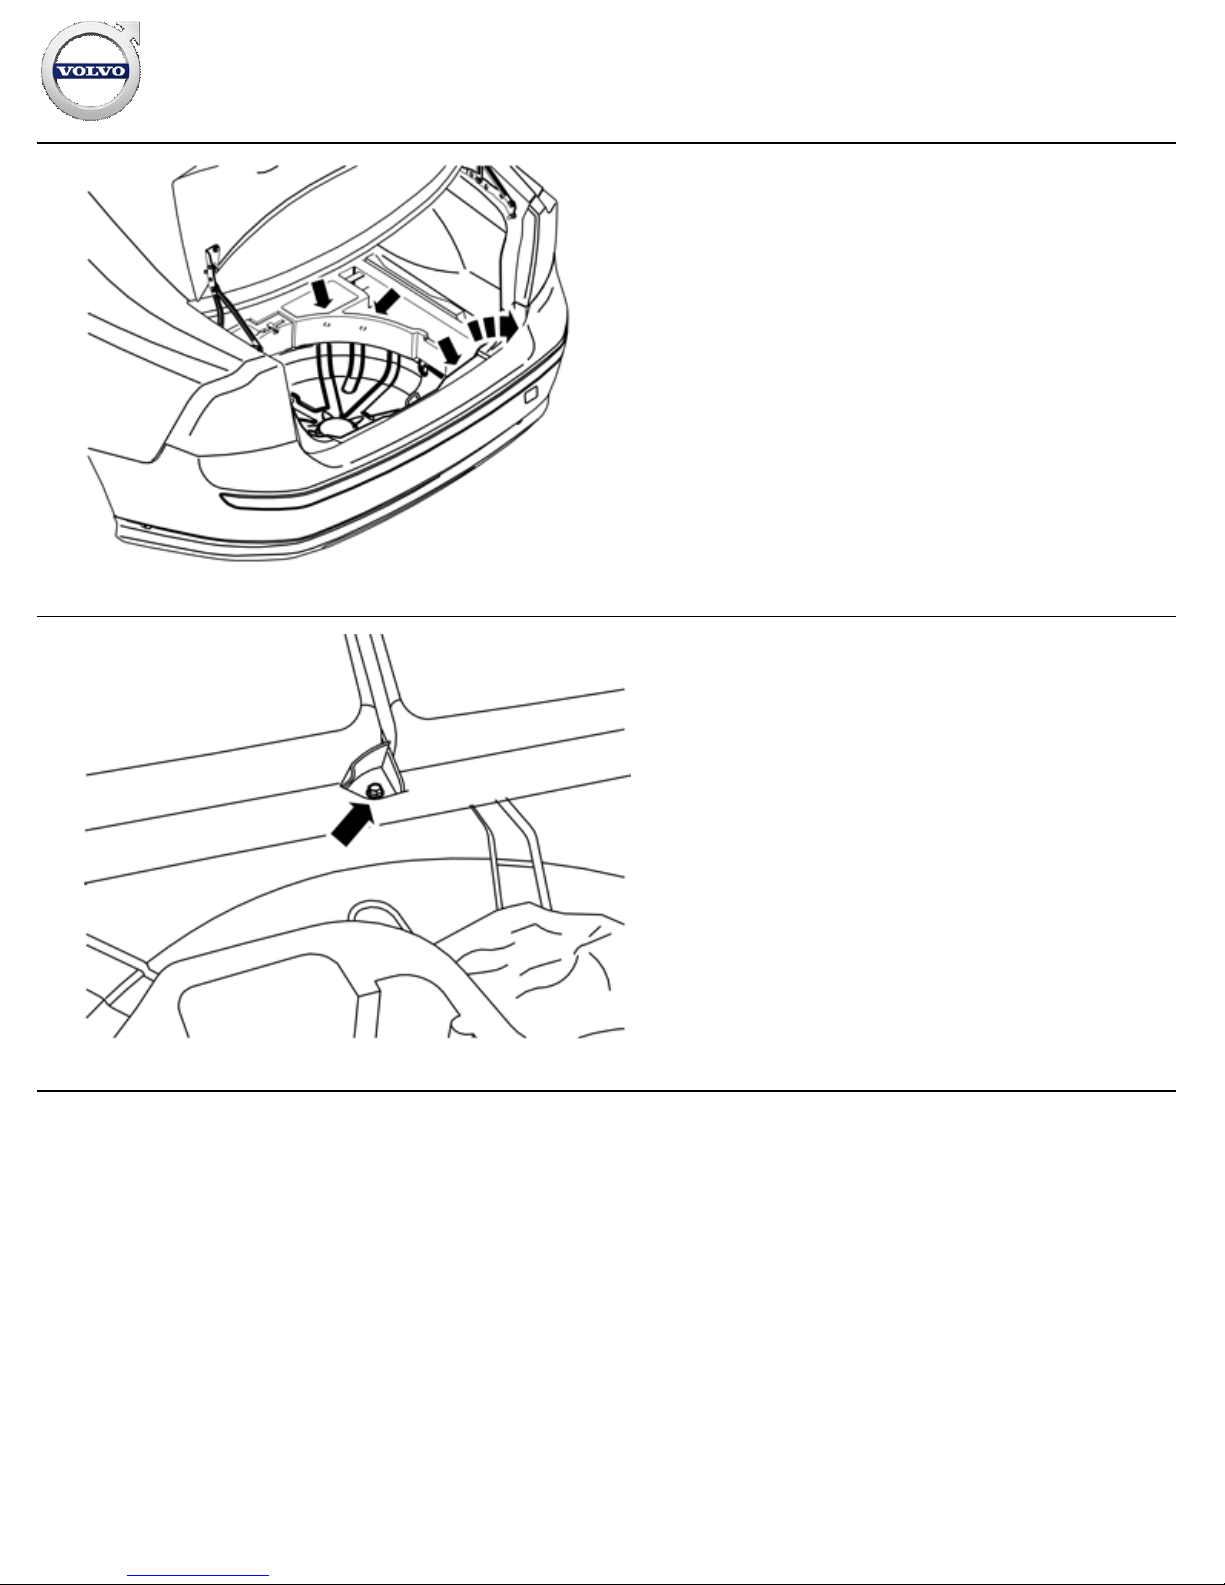
3
J8504554
Removing the sill trim panel from the boot lid:
Unscrew the two external clips at the front edge/bottom edge of
the sill trim panel on the boot lid.
Pry up one of the corners of the sill trim panel using a
weatherstrip tool so that the two clips at that end release.
Pull up the sill trim panel at the other end so that the remaining
two clips release. Remove the sill trim panel.
Remove the rubber strip from the boot lid opening where it
covers the side panels on the left and right-hand sides.
4
J8504621
Fold forward the seat cushions and backrests on both sides of
the rear seat.
Installation instructions, accessories
Volvo Car Corporation Gothenburg, Sweden
©
Volvo Car Corporation Subwoofer- 30752136 - V1.1
Page 6 / 33
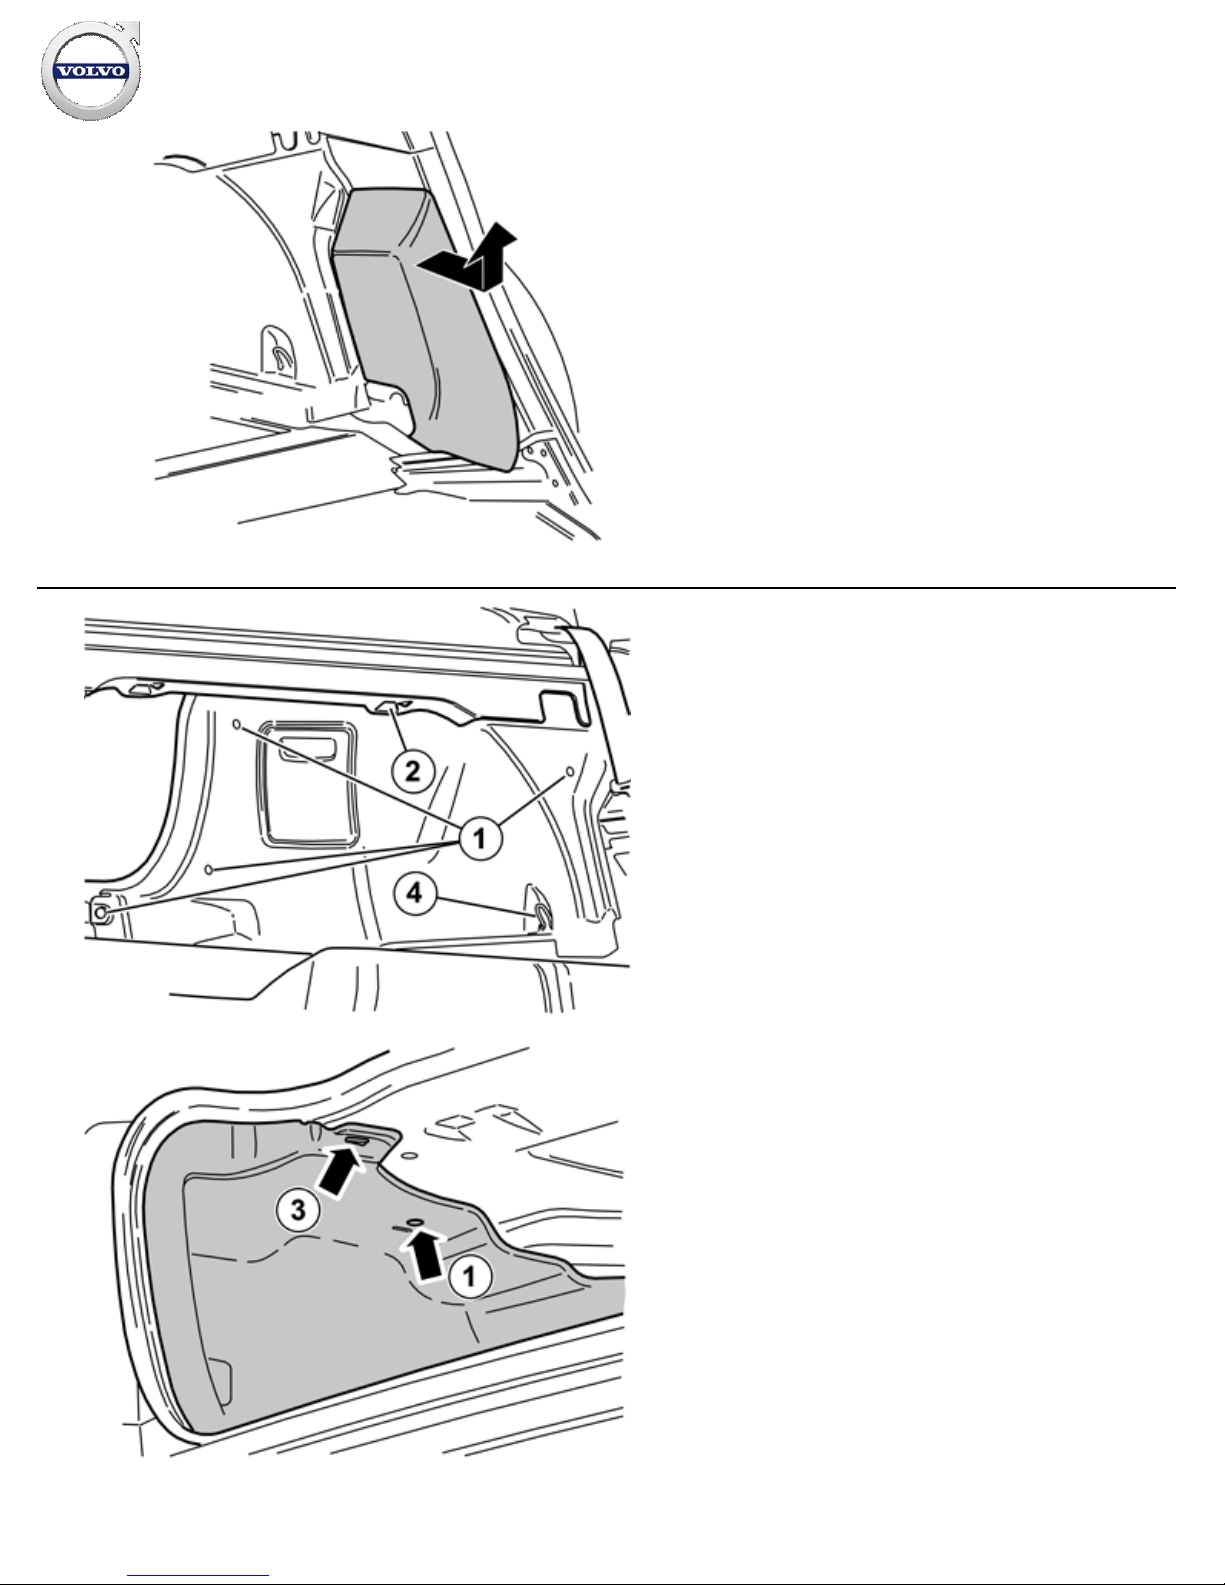
5
J8504626
Removing the side cushion:
Grasp the upper edge of the left-
hand side cushion. Pull the side
cushion forward so that the clip on the rear side releases.
Slide the side cushion upwards.
Remove the right
-hand side cushion in the same way.
6A
J8505017
6B
J8504629
Illustrations A and B
Removing the side panels:
Remove the five clips (1, illustrations A and B) holding the lefthand side panel in the bodywork.
Unhook the front edge of the parcel shelf panel at the mounting
(2, illustration A). Pull the side panel away from the parcel shelf
panel and the panel on the C
-post.
Unhook the side panel from the mounting (3, illustration B) on the
underneath of the parcel shelf.
Unhook the side panel from the load securing eyelet (4,
illustration A). Remove the side panel.
Remove the right
-hand side panel in the same way.
Installation instructions, accessories
Volvo Car Corporation Gothenburg, Sweden
©
Volvo Car Corporation Subwoofer- 30752136 - V1.1
Page 7 / 33
7
J8504616
Remove the lower floor supports on the right and left-hand sides
by unscrewing the three clips in the bottom of the compartments,
and then lifting them out. The left
-hand floor support shall not be
used again.
8
J8504717
Remove the screw in the bracket for the rear seat backrest.
Installation instructions, accessories
Volvo Car Corporation Gothenburg, Sweden
©
Volvo Car Corporation Subwoofer- 30752136 - V1.1
Page 8 / 33
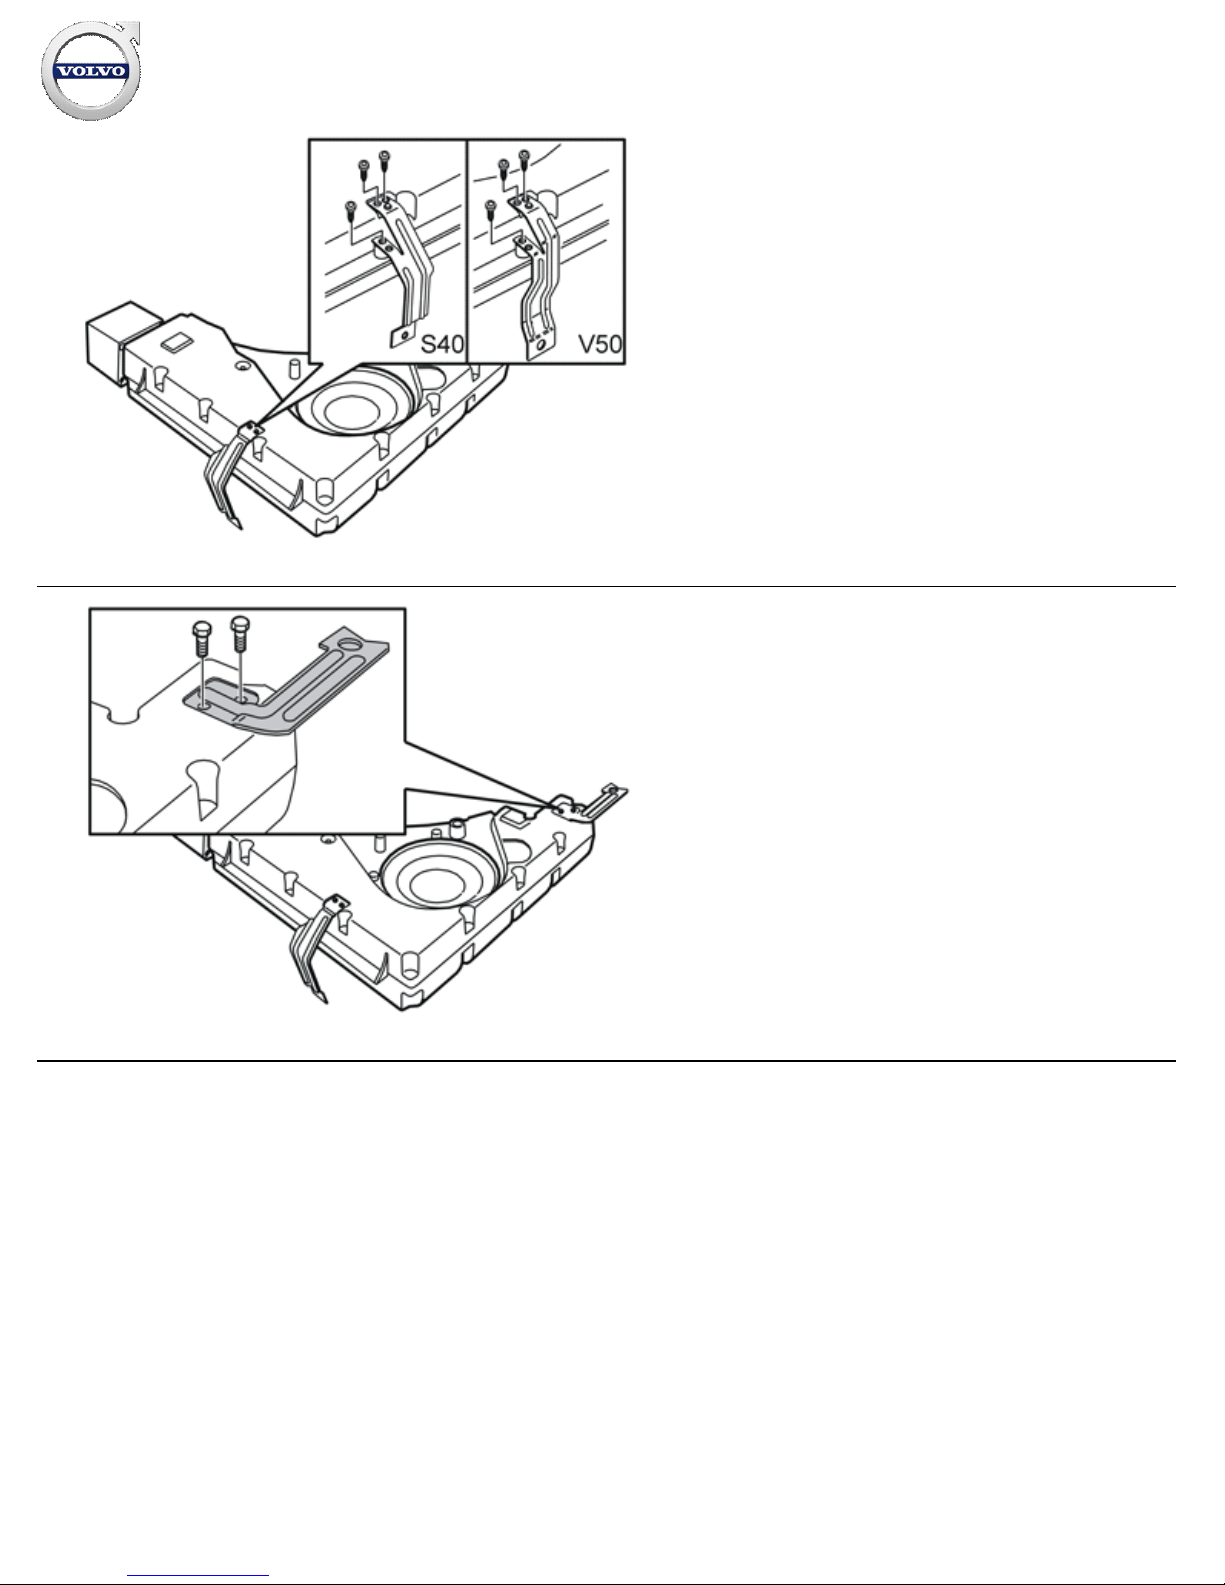
9
J3905342
Take the subwoofer from the kit and turn it so that the front of
the speaker faces up.
Take three screws from the same kit and install the bracket for
the S40 on the subwoofer as illustrated. (Foam padding and V50
bracket not used.)
10
J3905072
Take two screws from the kit. Install the front bracket on the
subwoofer.
Installation instructions, accessories
Volvo Car Corporation Gothenburg, Sweden
©
Volvo Car Corporation Subwoofer- 30752136 - V1.1
Page 9 / 33
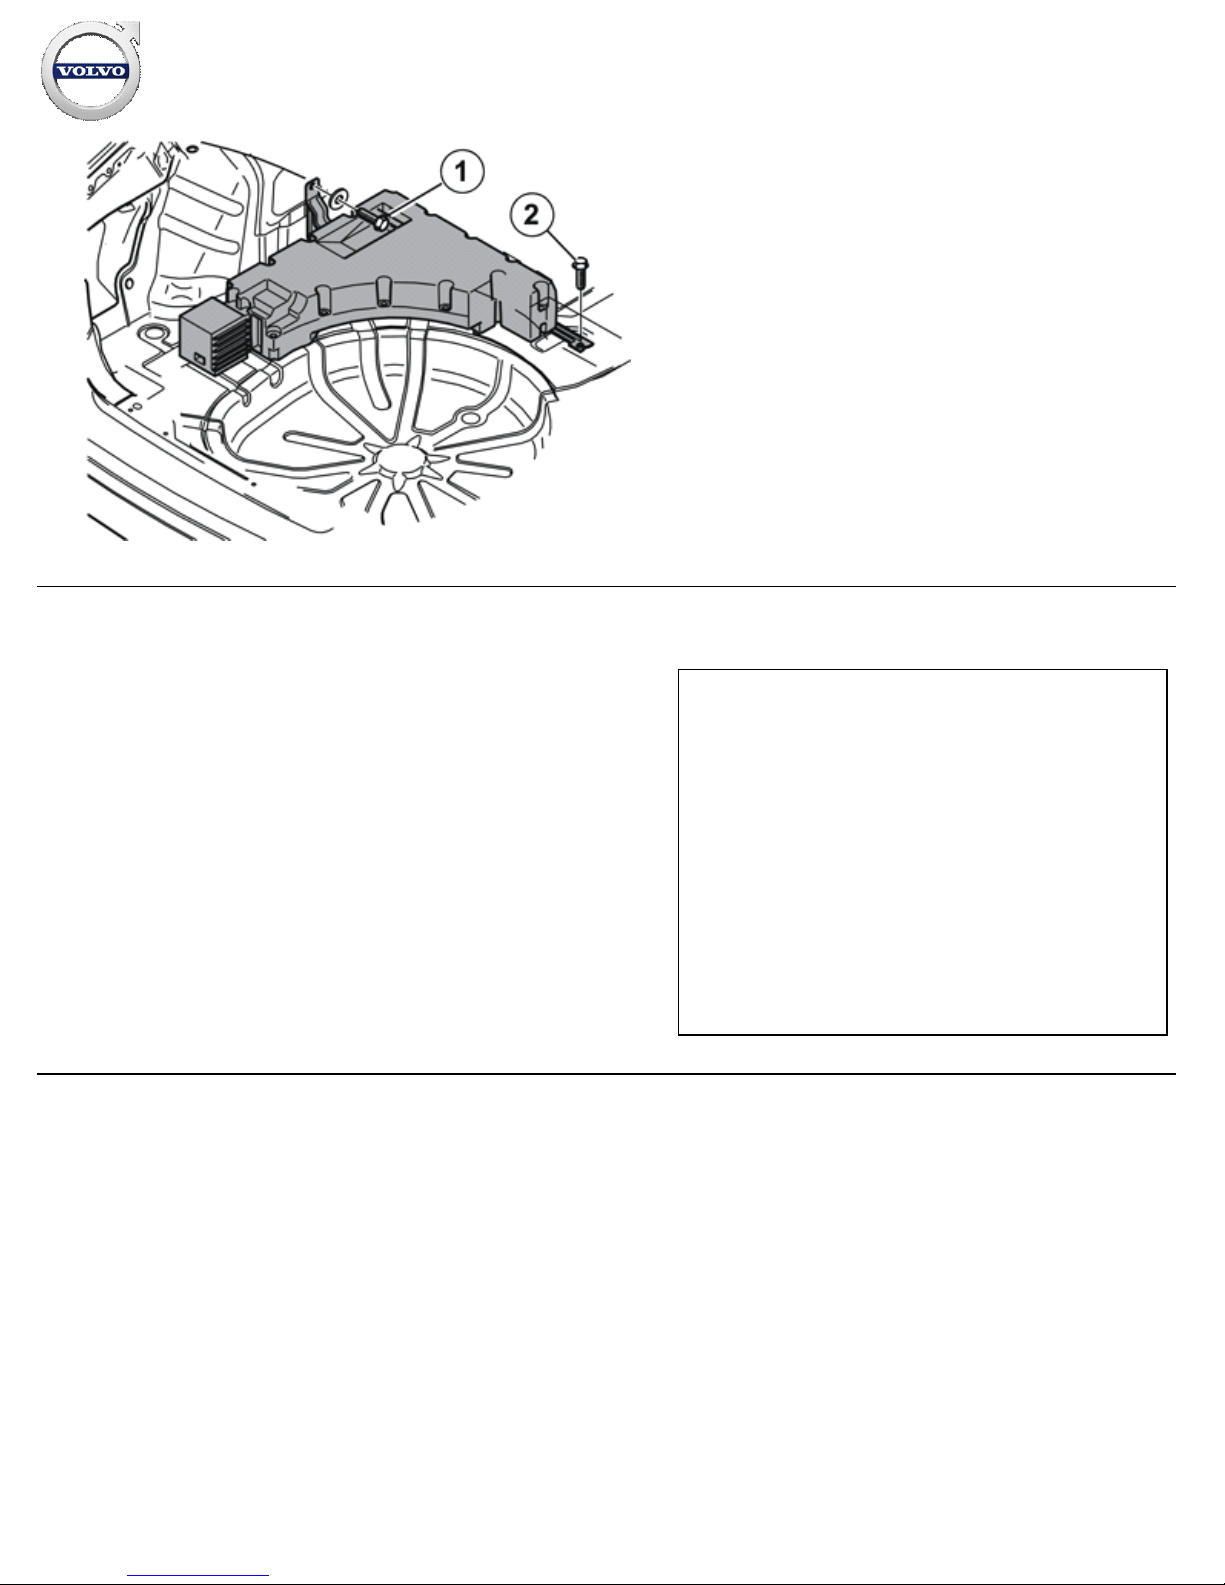
11
J3904728
Position the subwoofer in the left-hand side of the cargo
compartment.
Take the M8x24 screw (1) and washer from the kit. Install the
screw and washer in the left-hand bracket.
Take the screw (2) from the bracket for the backrests. Install the
screw in the right-hand bracket for the subwoofer.
Tighten the M10 screw. Tighten to 50 Nm (37 lbf.ft.).
Tighten the M8 screw. Tighten to 24 Nm (18 lbf.ft.).
12
Connecting fibre optic cables
Note!
Cars without RTI
see steps 13-14
US cars with RTI
see steps 15-17
EU cars with RTI
and CH
-80922, see steps 15-17
and CH 80923
-, see steps 18-19
Installation instructions, accessories
Volvo Car Corporation Gothenburg, Sweden
©
Volvo Car Corporation Subwoofer- 30752136 - V1.1
Page 10 / 33
 Loading...