

Volvo 10 CD Installation Instructions, Accessories

5
5
Instruction No Version Part. No.
30730089 1.0
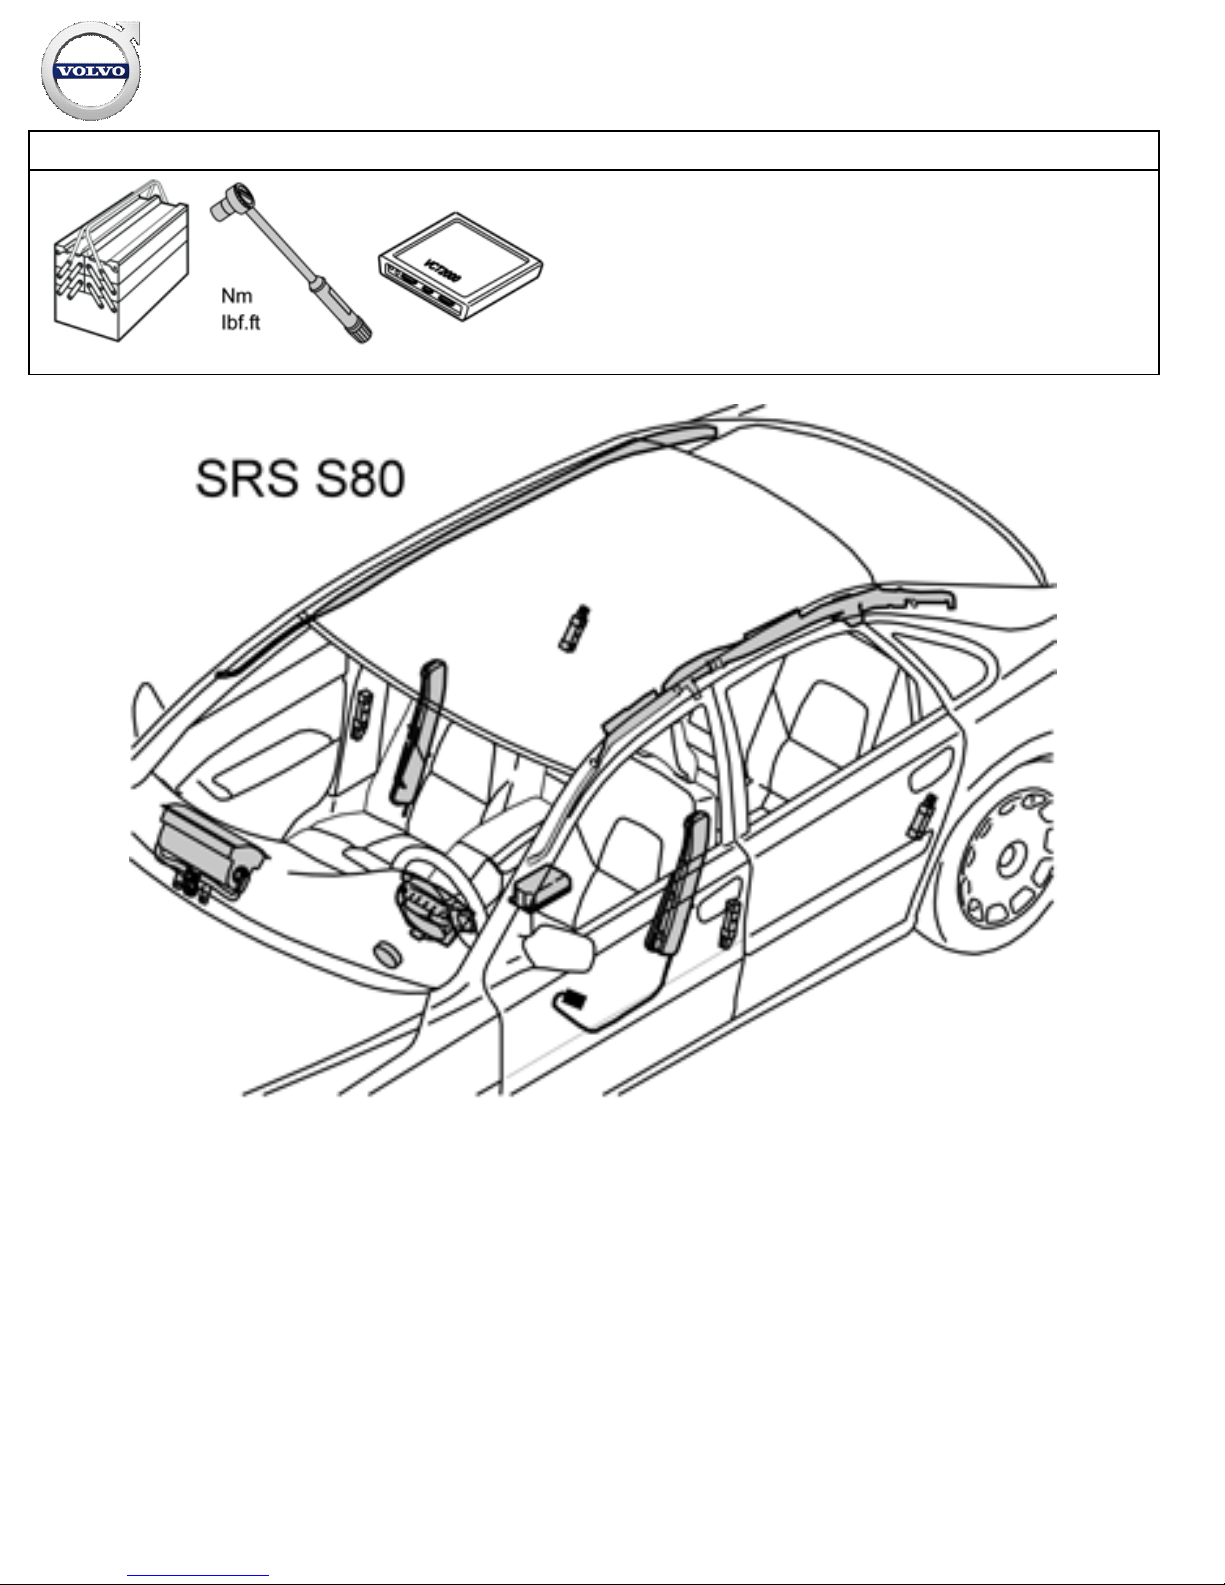
CD changer 10 CD
D3903690
5
5
Instruction No Version Part. No.
30730089 1.0
CD changer 10 CD
D3903690
Installation instructions, accessories
Volvo Car Corporation Gothenburg, Sweden
©
Volvo Car Corporation CD changer 10 CD- 30730089 - V1.0
Page 1 / 17
Equipment
A0000162 A0000161 A0801178
D8802049
Installation instructions, accessories
Volvo Car Corporation Gothenburg, Sweden
©
Volvo Car Corporation CD changer 10 CD- 30730089 - V1.0
Page 2 / 17

D3904947
Installation instructions, accessories
Volvo Car Corporation Gothenburg, Sweden
©
Volvo Car Corporation CD changer 10 CD- 30730089 - V1.0
Page 3 / 17

INTRODUCTION
Read through all of the instructions before starting installation.
Notifications and warning texts are for your safety and to
minimise the risk of something breaking during installation.
Ensure that all tools stated in the instructions are available
before starting installation.
Certain steps in the instructions are only presented in the form
of images. Explanatory text is also given for more complicated
steps.
In the event of any problems with the instructions or the
accessory, contact your local Volvo dealer.
Note!
This accessory requires software unique to the car.
Applies to cars with RTI (road traffic information)
For cars with RTI, the required cable harnesses are already
routed except for a DIN cable which must be connected
between the CD changer and the DVD reader or the TV
receiver.
This DIN cable must be purchased separately
Only the following points apply to cars with RTI: row 1, , , , , , ,
.
Preparations
1
Preparations
Applies to cars with power seats
Move the left front seat to its rearmost position.
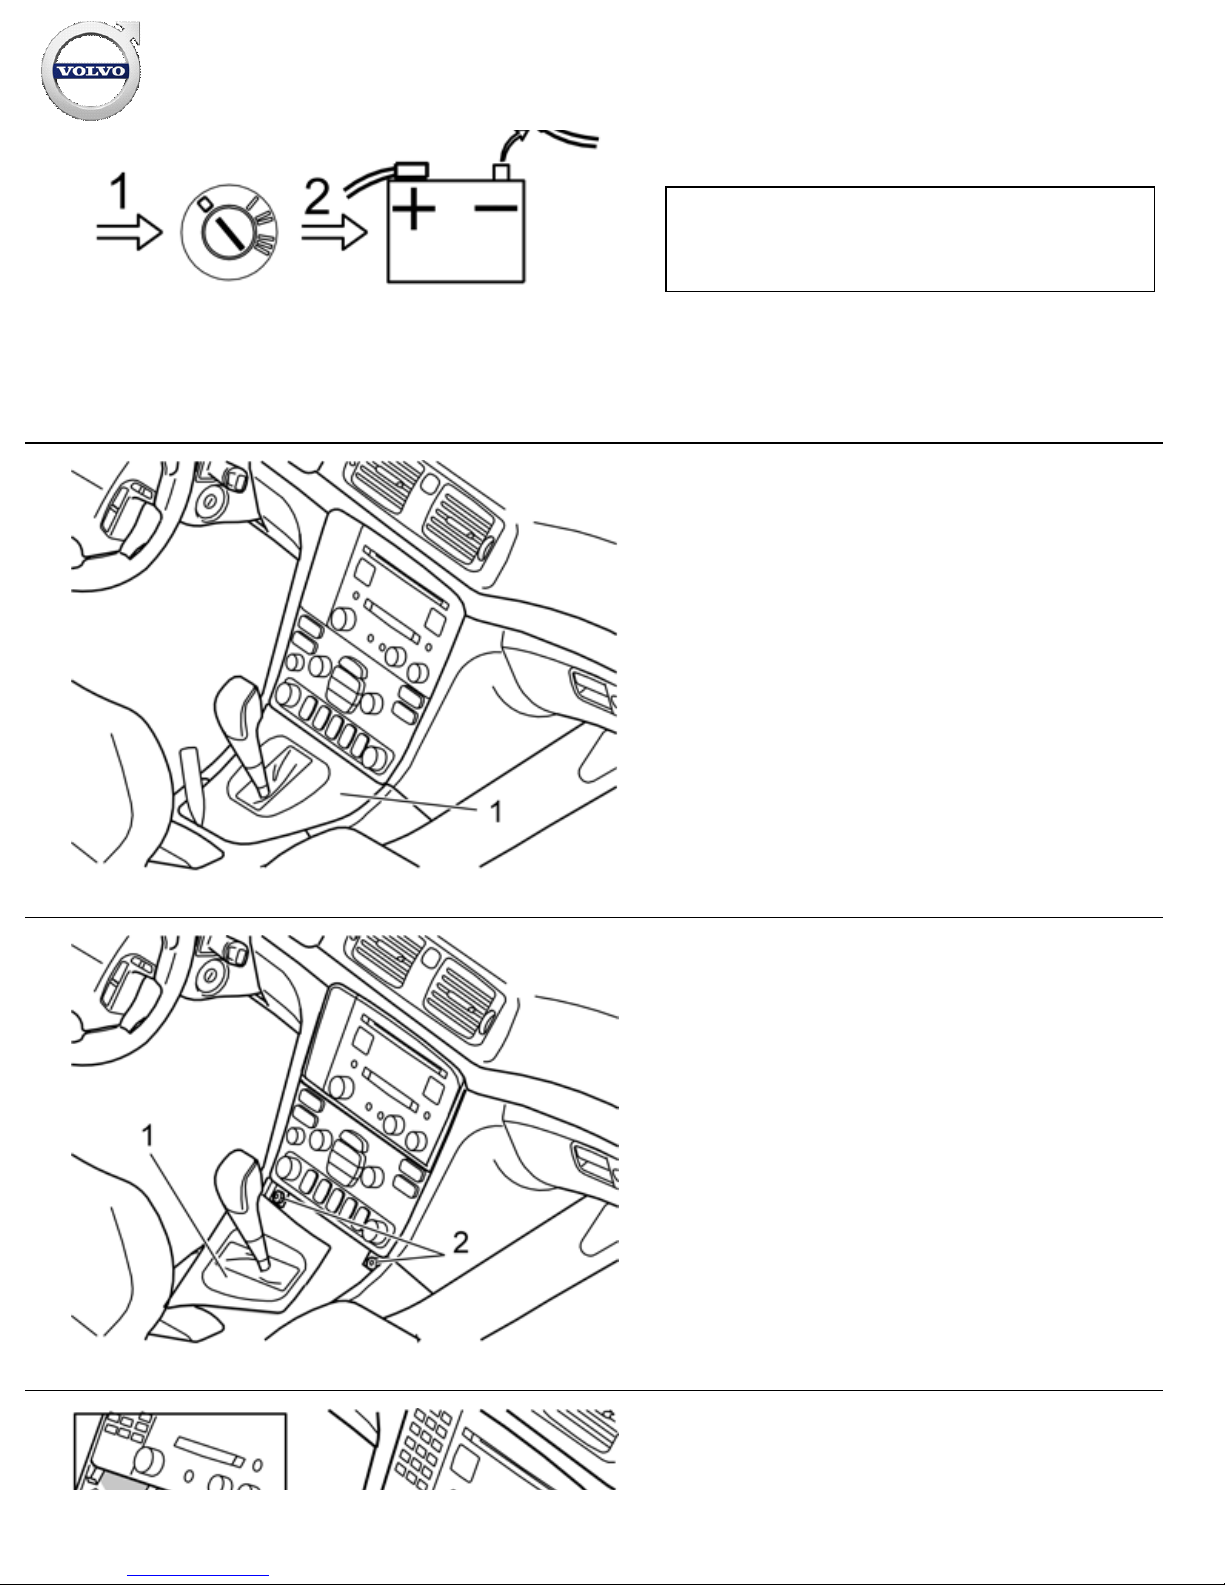
2
Turn the ignition key to position 0
Remove the key from the ignition switch (does not apply to cars
with automatic gearboxes)
Installation instructions, accessories
Volvo Car Corporation Gothenburg, Sweden
©
Volvo Car Corporation CD changer 10 CD- 30730089 - V1.0
Page 4 / 17
A8800136
Disconnect the battery negative lead.
Note!
Wait at least five minutes before disconnecting the connectors
or removing other electrical equipment.
3
D8502224
Detach the panel (1) and gear selector lever boot. Use a
weatherstrip tool.
4
M8503890
Move the gear selector lever to its rearmost position
Pull the panel (1) and the boot backwards. Turn the panel as
illustrated
Remove the screws (2) from the dashboard environment panel.
5
Angle the dashboard environment panel outwards so that it is
possible to insert a couple of fingers between the centre
Installation instructions, accessories
Volvo Car Corporation Gothenburg, Sweden
©
Volvo Car Corporation CD changer 10 CD- 30730089 - V1.0
Page 5 / 17

D8703527
console and the reverse of the panel
Detach the dashboard environment panel by pulling it
downwards while maintaining the same angle. Some force is
required because the panel is tightly installed
Disconnect the connectors on the reverse of the dashboard
environment panel. Place the dashboard environment panel to
one side.
Note!
If any of the outer hooks break off, these must be repaired. The
method for this can be found in the Workshop Manual in the
section about the dashboard.
6
D8503946
Remove the screws (1) from the radio bracket
Pull out the bracket with the radio. Pull the lower corner while
pressing downwards
Disconnect the connectors on the radio. Place the bracket and
the radio to one side.
7
D8502410
Move the left front seat to its rearmost position.
Remove:
the left-hand side panel (1) from the centre console. First turn
the clip. Pull the panel outwards and backwards
the sill trim panel (2) at the left front door
the cover (3) and the screws (4) for the front mountings in the
left-hand front seat.
Installation instructions, accessories
Volvo Car Corporation Gothenburg, Sweden
©
Volvo Car Corporation CD changer 10 CD- 30730089 - V1.0
Page 6 / 17
 Loading...