

Voltek CT200, 1880 Installation Instructions Manual
Setting the Roll Time
The AUTO switching time is factory set to 4 seconds. To change the switching time:
Press and hold both the AUTO and MANUAL button for the length of time you wish to set
for the new time. i.e. if you want a switching time of 12 seconds, hold both buttons for 12
seconds.
The LED will illuminate amber while you are changing the switching time and a
bleep will be heard from the TV set once every second.
The maximum switching time that can be set is 30 seconds.
INSTALLATION
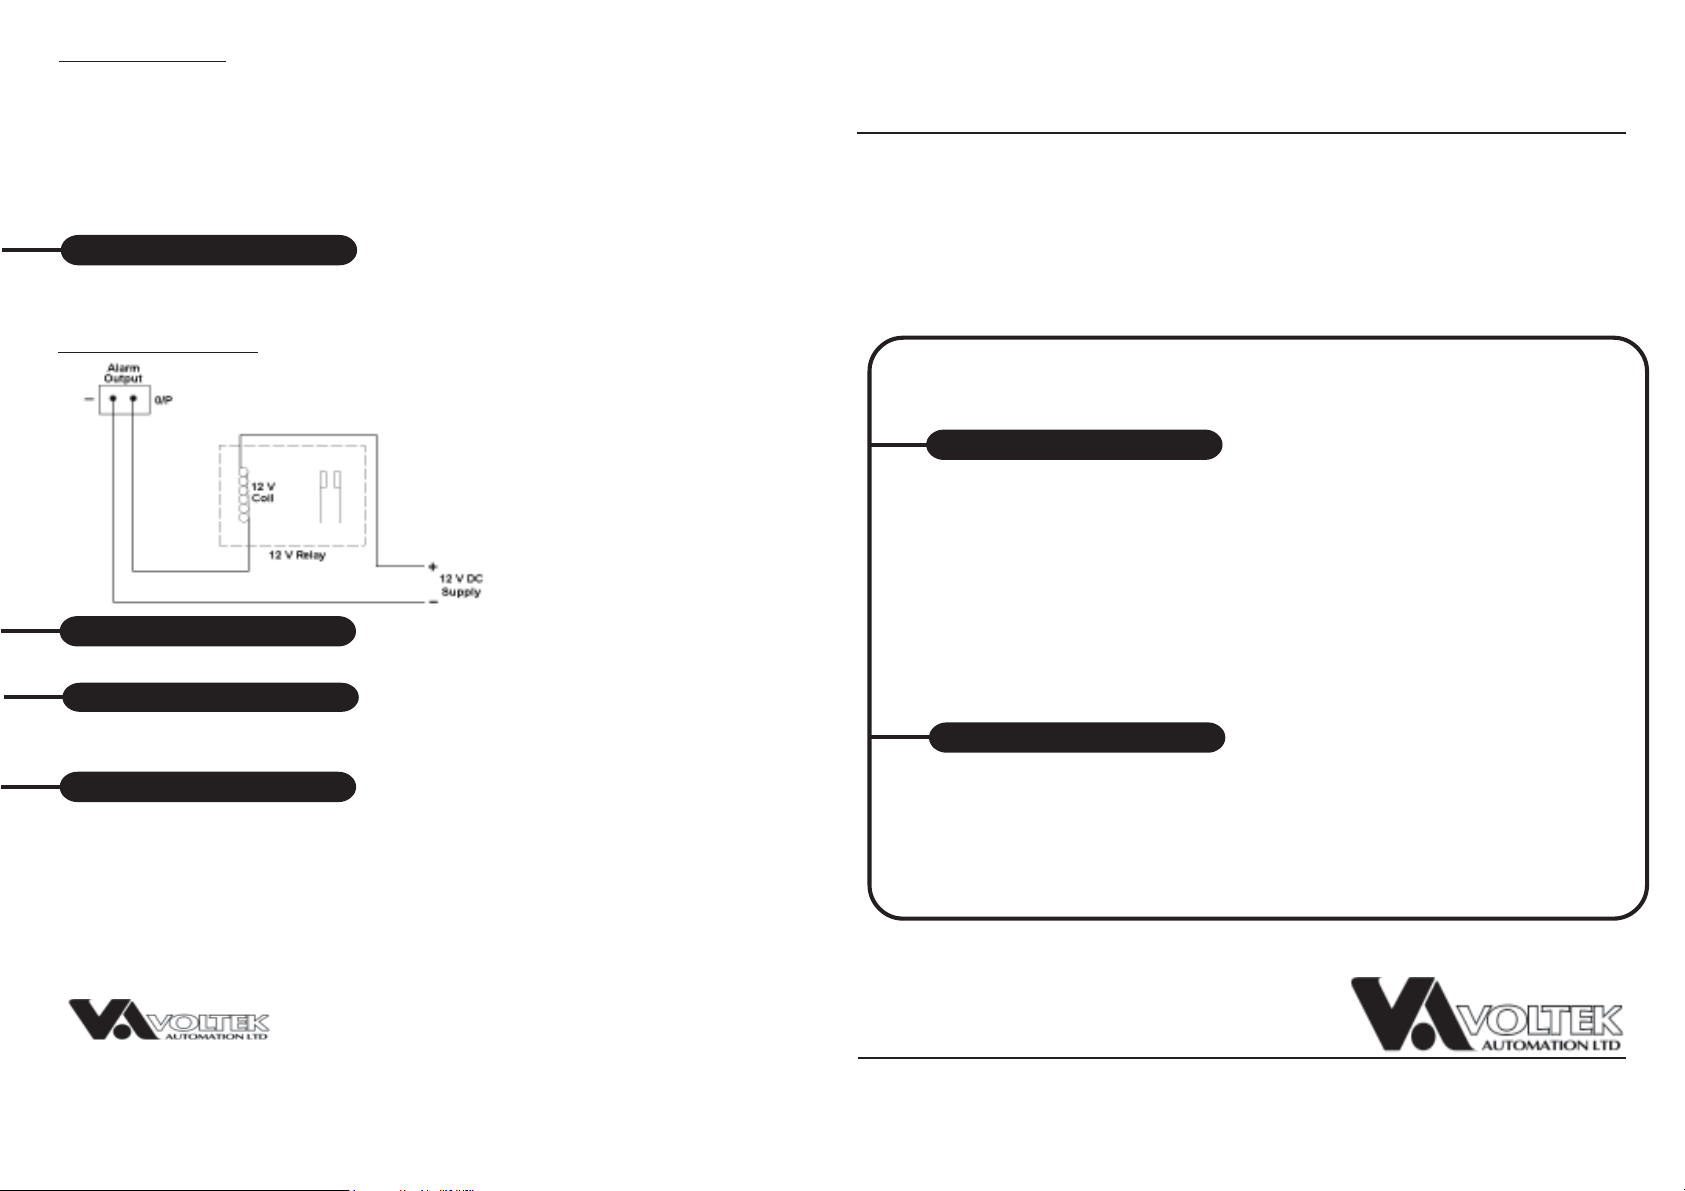
ALARM OUTPUT
In the event of a movement being detected by a Voltek PIR camera the LED on the front of
the unit will change to amber and the alarm output on the rear of the unit provides a negative
trigger.
CONNECTING A RELAY
WARRANTY
This product has a 1 year parts and labour warranty.
HELPLINE
Please telephone 09066 191 133* should you have any questions regarding the
use or installation of this product.
SPECIFICATION
Operating voltage
Current consumption
Operating temperature
Alarm Output
Weatherproofing
Size (excludes cables)
Total package weight
Carton size
12V dc nominal
20mA
-10ºC - +40ºC
0 V trigger max 60mA
IP30 (indoor use only)
158mm (W) x 35mm (H) x 129mm (D)
0.23Kg
180mm (w) x 50mm (H) x 150mm (D)
CT200 / 1880
Four Way Camera Switcher
Thankyou for purchasing the Four Way Camera Switcher. Please read these
instructions thoroughly before starting the installation.
PRODUCT FEA TURES
• Connect to up to four Voltek cameras to the scart socket of your TV or VCR.
• Compatible with the CT210 TV Modulator, CT220 VCR Activator & CT230
Time & Date Generator.
•12V dc operating voltage for simple and safe wiring.
• Auto facility allowing the picture to automatically switch between the cameras.
• Adjustable switching time.
• Manual control of camera’s using simple push buttons.
• Picture priority feature shows camera of interest when movement is
detected by a camera with a PIR sensor.
•Alarm output trigger
CONTENTS
Please check & and familiarise yourself with all the parts before proceeding
with the installation.
•Four way camera switcher.
•Scart plug connecting lead.
•Alarm output connector
Churchill Way, Lomeshaye Ind Est. Nelson. Lancashire. BB9 6RT
Tel (01282) 695 500 Fax (01282) 695 511 International (+44 1282)
Email: info@voltek.co.uk Website www.voltek.co.uk
*Helpline calls cost 60p/minute. Open 9am to 5pm, Mon to Fri.
Voltek reserves the right to change any product or
specification without notice (c) 2002
INSTRUCTIONS

INSTALLATION
CONNECTION METHOD 1
Standard CT200 connections
Before connecting any cameras to the CT200
4 way switcher make sure that all camera power
supplys have been disconnected from the mains
supply. In the event of later camera additions
again make sure that all power supplys have been
disconnected from the main supply before
connecting the additional camera / cameras
to the CT200 4 way switcher.
CONNECTION METHOD 2
Connecting a CT220 VCR controller or CT230 time & date generator
CONNECTION METHOD 3
Connecting a CT220 VCR controller and CT230 time & date generator
Please note the keypad shown
in all 3 diagrams is provided
with all Voltek PIR cameras.
If you are using cameras
without PIR’s the keypad is
not required.
OPERA TING THE SWITCHER
AUTO Mode
When power is first applied, the unit will be in the Auto mode, automatically switching
from one camera to the next every four seconds. If you leave AUTO mode and wish to
return simply press the button labelled AUTO. The green LED will be illuminated to
indicate AUTO mode.
MANUAL
To manually select a camera, press the MANUAL button. Each press will switch to the
next camera picture. The LED will illuminate red to indicate you are in MANUAL mode.
 Loading...