

Vollrath Refrigeration 40756 Installation Manual
ENGLISH
ENGLISH
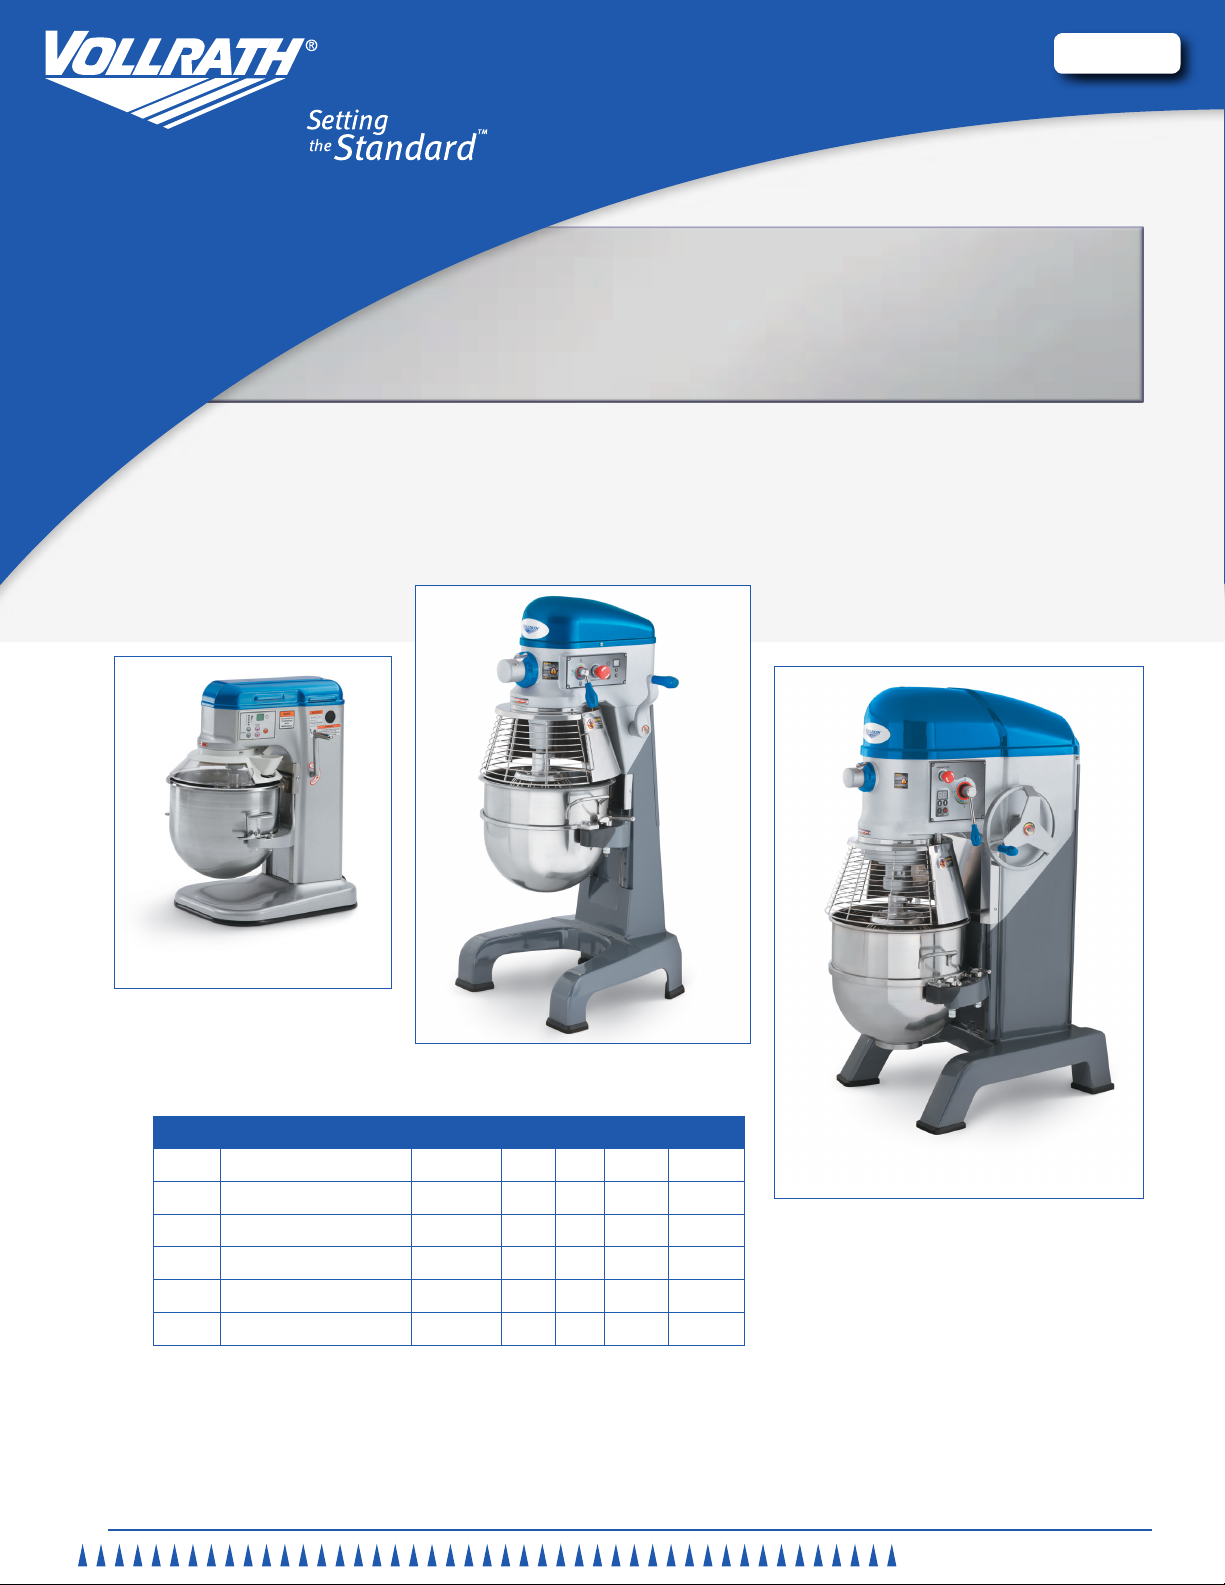
Operator’s Manual
Countertop Mixer
Floor/Bench Mixers
Item Description Voltage HP kW Amp Plug
40755 7 Quart Countertop Mixer 110-120 1/3 .25 6 5-15P
40756 10 Quart Countertop Mixer 110-120 1/3 .25 6 5-15P
40757 20 Quart Bench Mixer 110-120 1/2 .37 8 5-15P
40758 30 Quart Floor Mixer 110-120 1 .75 16 5-15P
40757 40 Quart Floor Mixer 220 1-1/2 1.1 12 6-15P
40757 60 Quart Floor Mixer 220 2 1.5 16 6-15P
Thank you for purchasing this Vollrath Food Processing Equipment. Before operating the equipment, read and familiarize yourself with the
following operating and safety instructions. SAVE THESE INSTRUCTIONS FOR FUTURE REFERENCE. Save the original box and packaging.
Use this packaging to ship the equipment if repairs are needed.
Item No. 2350045-1 en Rev 01/11
Food PreParation equiPment
saFety Precautions
To ensure safe operation, read the following statements and understand
their meaning. This manual contains safety precautions which are
Function and PurPose
Intended for mixing batters, doughs, cake mix, etc. It is not intended for
household, industrial or laboratory use.
explained below. Please read carefully.
WARNING
Features and controls
Warning is used to indicate the presence of a hazard that can cause
severe personal injury, death, or substantial property damage if the
warning is ignored.
CAUTION
Caution is used to indicate the presence of a hazard that will or can
cause minor personal injury or property damage if the caution is
ignored.
NOTE
Note is used to notify people of installation, operation, or maintenance
information that is important but not hazard-related.
For Your Safety!
These precautions should be followed at all times. Failure to follow
these precautions could result in injury to yourself and others or
damage the equipment.
To reduce risk of injury or damage to the equipment:
Plug only into grounded electrical outlets matching the nameplate rated
voltage.
Do not modify or tamper with safety switches.
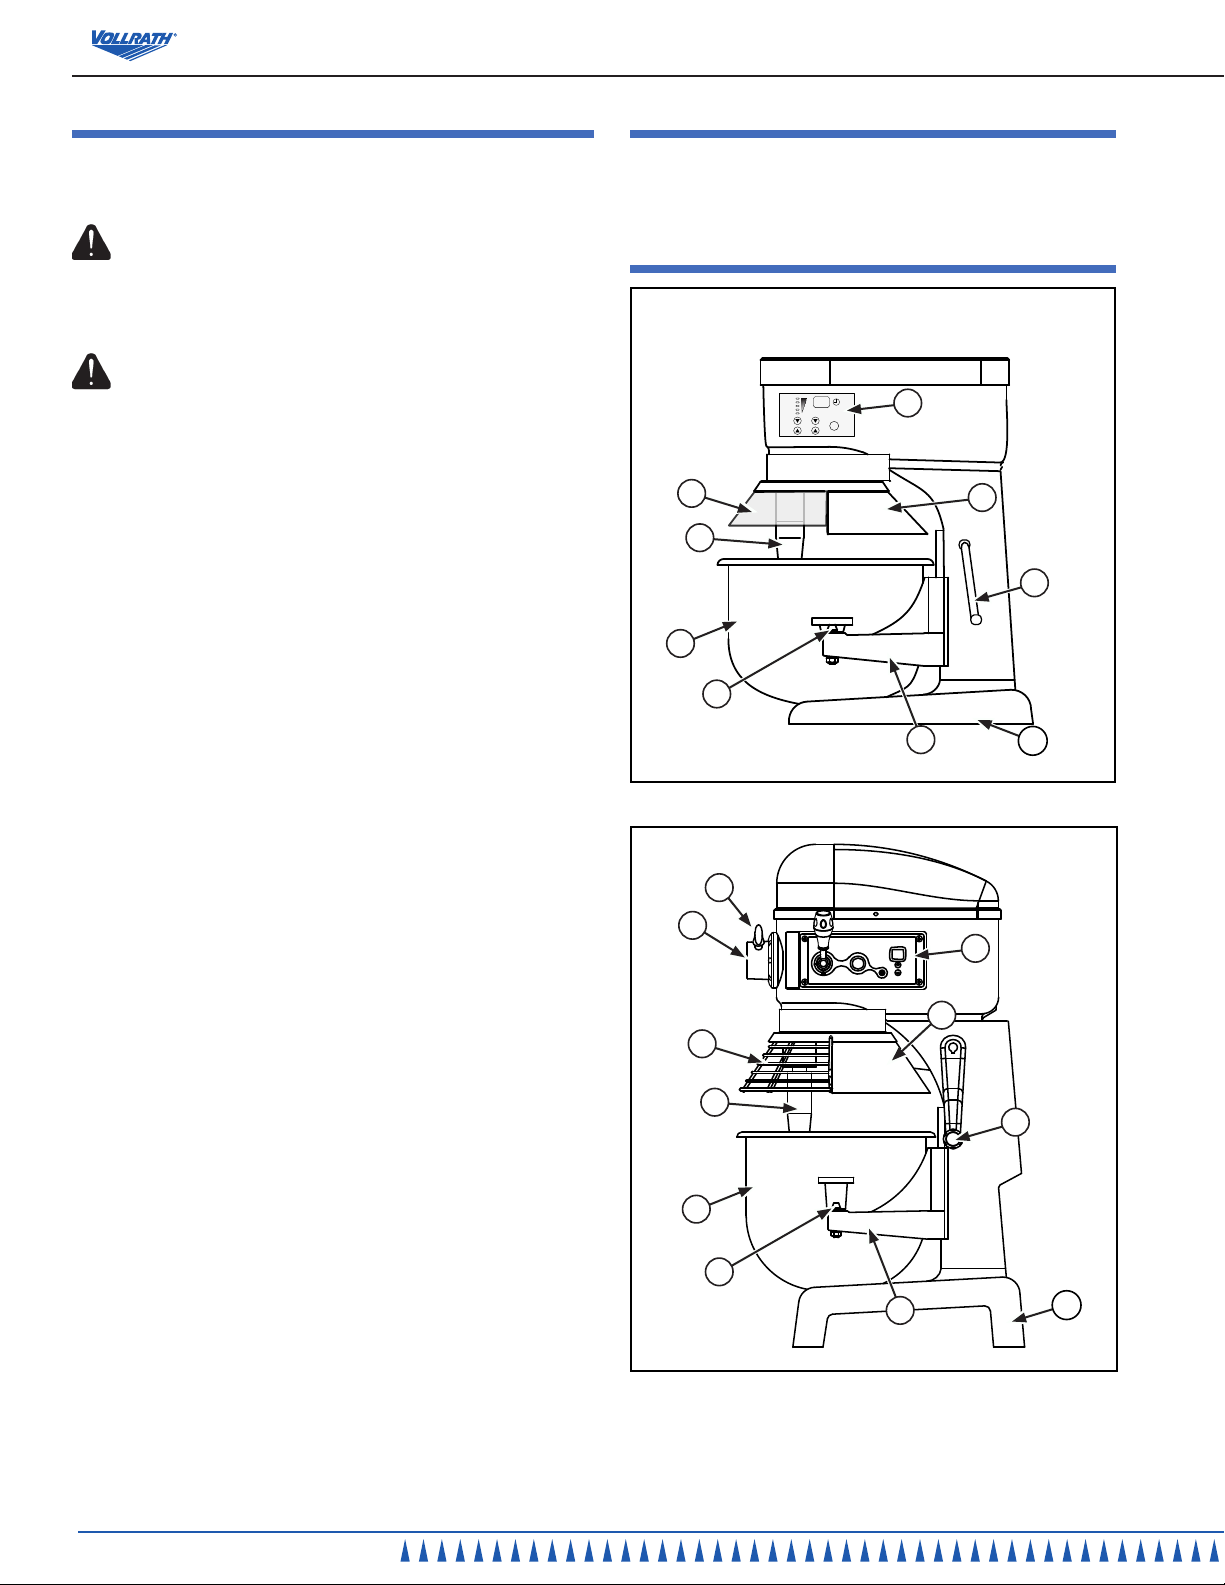
Figure 1. 7 Quart. and 10 Quart. Mixer, Features and Controls.
Do not operate unattended.
Do not operate equipment in public areas and/or around children.
Do not use an extension cord with this equipment. Do not plug this
equipment into a power strip or multi-outlet power cord.
Check equipment before each use to insure the equipment is clean.
Do not use a hose to clean mixer. Use a damp cloth to wipe down the
exterior of the mixer.
Wear proper apparel. Do not wear loose tting or hanging garments while
operating this equipment.
Have equipment installed by a qualied personnel in accordance with
local codes and ordinances.
Use equipment in a at, level position.
Unplug equipment, turn off and let it cool before cleaning or moving.
Do not spray controls or outside of equipment with liquids or cleaning
agents.
Do not clean the equipment with steel wool.
Keep equipment and power cord away from open ames, electric burners
or excessive heat.
Do not operate if equipment has been damaged or is malfunctioning in
any way.
Do not use the attachments on hub while mixing.
Figure 2. 20 Quart and 30 Quart Mixers, Features and Controls.
5
4
3
2
1
TIMER
ON/
SPEED
OFF
G
F
C
D
K
J
G
F
C
D
A
H
B
E
A
H
E
I
B
I
2
OperatOr’s Manual
Food PreParation equiPment
A
CONTROL PANEL. Includes the On/Off Button, Speed Control,
K
J
A
H
G
F
B
C
D
Timer Controls, Timer Display and Emergency Stop (some
models).
B
BOWL LIFT. Used to lower and raise the bowl cradle.
C
BOWL. Holds the food product mixing contents.
D
BOWL CLAMP. Secures the bowl to the bowl cradle.
E
BOWL CRADLE. Holds the bowl.
F
MIXING SHAFT. Holds the mixing attachment.
G
BOWL GUARD. Helps prevent injury or contact with mixing
shaft or attachment. This guard needs to be closed for
operation.
H
SPLASH GUARD. Helps prevent spillage of mixing contents.
Helps prevent injury or contact with mixing shaft or attachment.
E
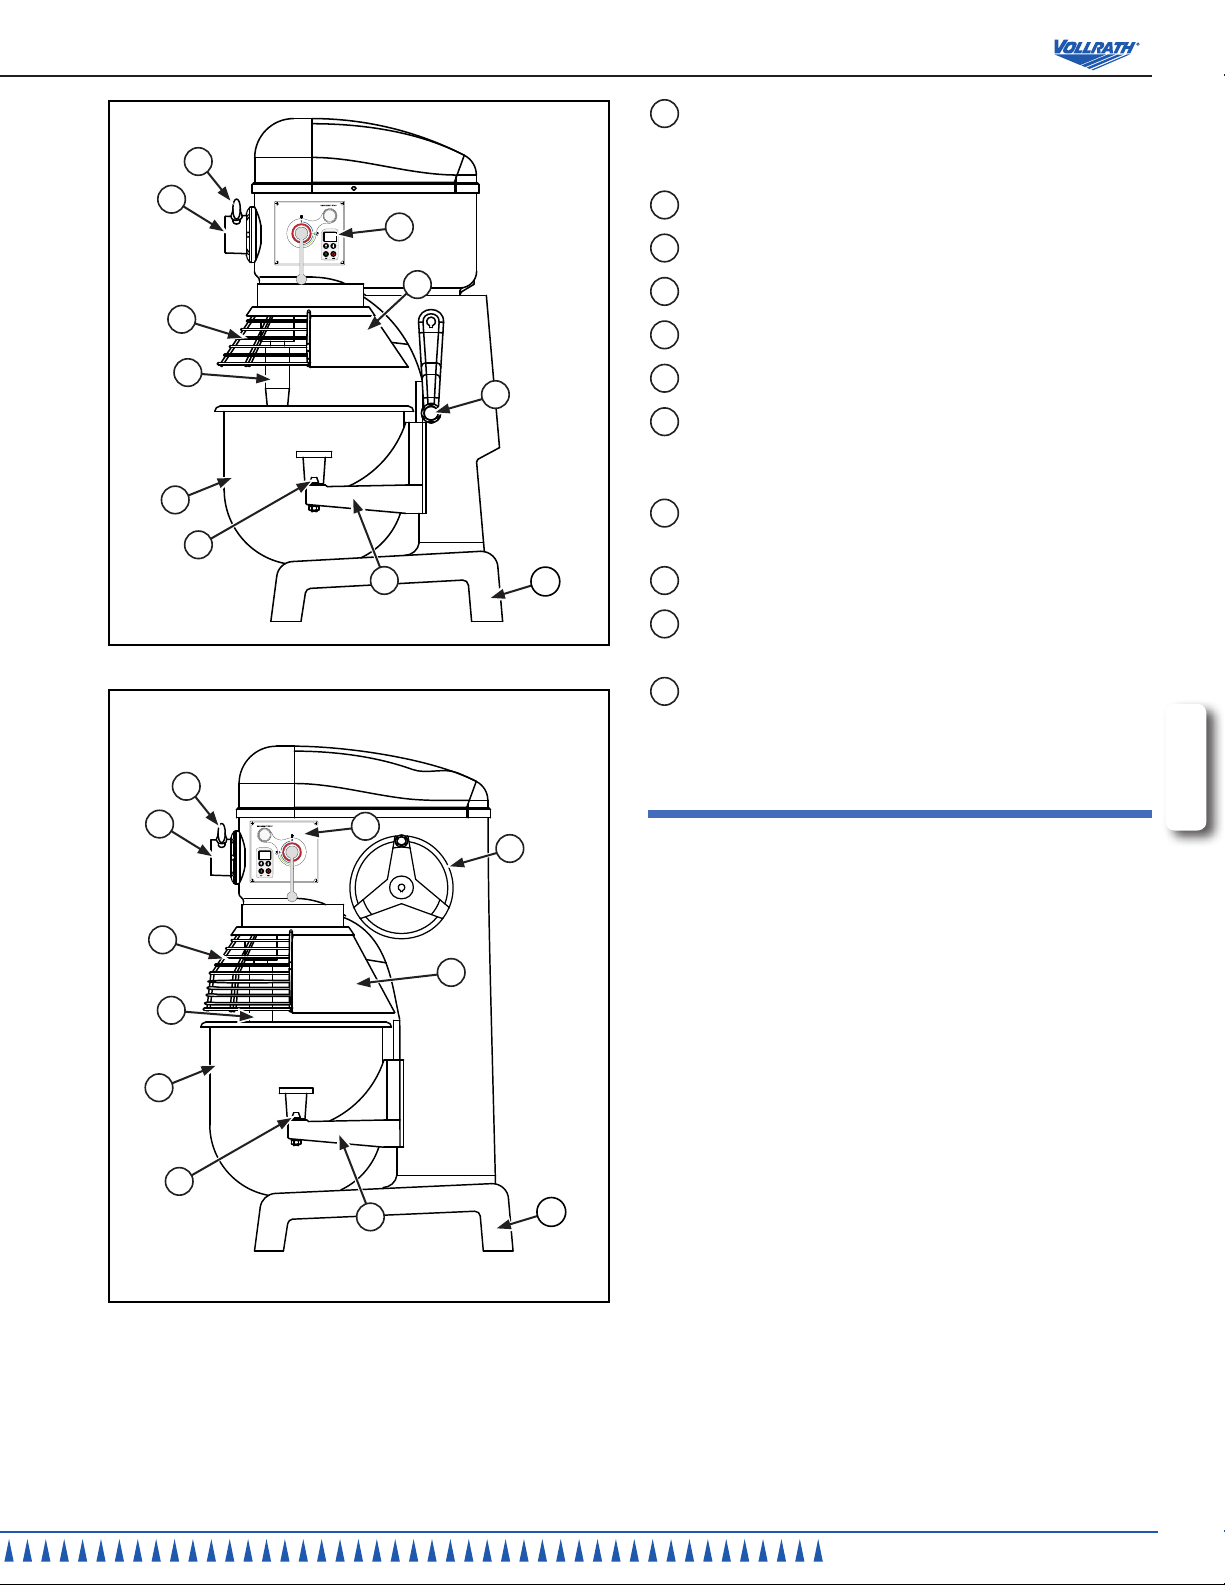
Figure 3. 40 Quart Mixer, Features and Controls.
K
J
G
F
C
A
H
I
I
BASE. Supports the mixer.
J
ATTACHMENT HUB (some models). Used to locate an
attachment to the mixer.
K
ATTACHMENT HUB THUMBSCREW (some models). Secures
ENGLISH
the attachment to the mixer.
unPacking the equiPment and initial setuP
B
Carefully remove crating or packaging materials from the equipment. Models
shipped on pallets are bolted to the pallet. Bolts must be removed to safely
separate the equipment from the pallet. When no longer needed, dispose of
all packaging, materials in an environmentally responsible manner.
Place the equipment on a at surface with sufcient space around the mixer
to allow for safe cleaning and service.
Plug only into grounded electrical outlets matching the nameplate rated
voltage. Do not use an extension cord with this equipment. Do not plug
this equipment into a power strip or multi-outlet power cord. Some models
require electrical connection to be installed by a qualies service personal in
accordance with local ordinates.
D
E
Figure 4. 60 Quart Mixer, Features and Controls.
I
OperatOr’s Manual
3
Food PreParation equiPment
oPeration
WARNING
Entanglement Hazard.
Rotating shaft or attachments can cause traumatic
amputations or sever lacerations. To avoid injury,
keep hands and clothing away from rotating parts.
Do not operate with guards modied or missing.
WARNING
Electrical Shock Hazard.
Keep water and other liquids from entering the
inside of the equipment. Liquid inside the equipment
could cause an electrical shock.
Do not spray water or cleaning products. Liquid could contact
the electrical components and cause a component failure or an
electrical shock. Do not use equipment if power cord is damaged or
has been modied.
Prior to rst use, it is important to clean the equipment. Wash new the
attachments, bowl, guards and other parts with warm soapy water and rinse
thoroughly to remove the thin protective oil lm.
The safety guard must be in the fully closed position in order to activate the
mixer. If the safety guard is not closed properly then the mixer will not start. If
the safety guard is opened during use then the mixer will switch off. In order
to restart the mixer the safety guard must be closed.
20 qt., 30qt., 40qt. and 60qt. mixers: The motor is tted with a safety shut
off device which will automatically turn off the mixer if the temperature of
the motor exceeds the manufacturers recommended operating limits. The
overload protection switch which will trip if the batch size being mixed is too
heavy. If this happens allow the mixer to cool for minimum of 30-60 minutes
and reduce the batch size by 10-15%.
7 qt and 10 qt mixers have an overload protection device which will
automatically turn off the mixer if the resistance of the motor exceeds the
manufacturers recommended operating limits. Al alarm will beep and the
display will ash. Pressing the OFF button will reset the mixer.
The mixer is tted with an If this happens then.
1. Before each use, check that the equipment is clean.
2. Before attaching the bowl select the mixing attachment you will be using.
Place your selected mixing attachment inside the empty bowl (C). Do not
attempt to t the mixing attachment onto the mixing shaft (F) before the
bowl is in position. See Figures 1, 2, 3 or 4.
3. Lower the bowl cradle to its lowest position by rotating the bowl lift (B) in
a clockwise direction.
4. Rotate the bowl clamp levers (D) to the out or back position.
5. Hold the bowl (C) so that the pin on the bowl is facing in towards the
mixer. Position the bowl so that the pin is lined up with the pin slot on the
bowl cradle (E). Slide the pin into the slot.
6. Align the holes on the bowl tabs with the pins on the bowl cradle (E).Set
the bowl (C) on the bowl cradle (E).
7. Rotate the bowl clamp levers (D) to the front over the bowl tabs to
secure the bowl (C) onto the bowl cradle (E).
8. Install the attachment to the mixing shaft (F). Ailing the grove on the
attachment with the pin on the mixing shaft. Push the attachment up and
rotate to lock onto the pin.
9. Raise the bowl (C) to its maximum height using the bowl lift (B) by
rotating in a counter clockwise direction until it snaps into place.
4
OperatOr’s Manual
oPerating the 10 quart mixer.
B
5
F
SPEED
E
4
3
2
1
TIMER
D
A
C
ON/
OFF
G
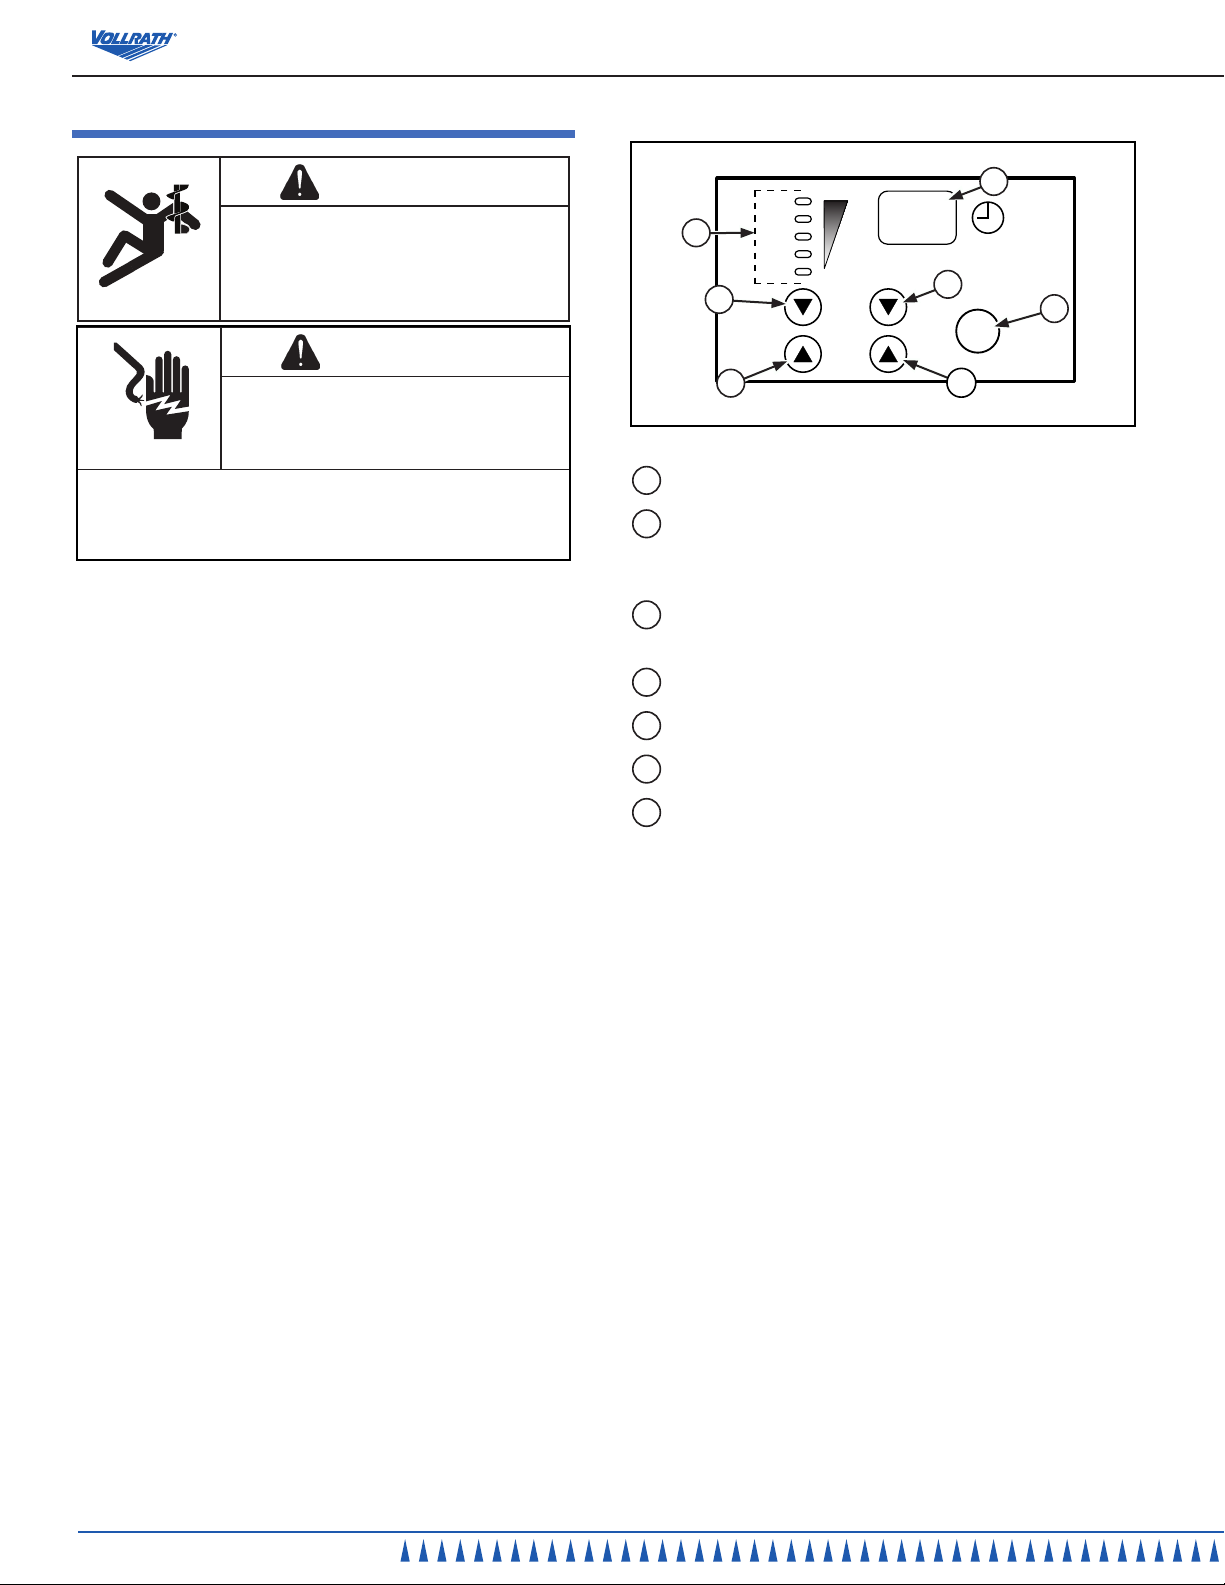
Figure 5. 7 Quart and 10 Quart Mixer Control Panel.
A
ON/OFF BUTTON. Switches the mixer on and off.
B
DIGITAL DISPLAY. Displays the time remaining in a timed
operation cycle, “on” when operating in an non timed cycle and
displays “off” equipment is plugged in and not operating.
C
TIME UP BUTTON. Increases the time. Maximum time of
30 minutes.
D
TIME DOWN BUTTON. Decreases the time.
E
SPEED UP BUTTON. Increases the mixing speed.
F
SPEED DOWN BUTTON. Decreases the mixing speed.
G
SPEED NUMBERS AND LIGHTS. Numbers and lights
correspond toe show speed. The larger the number the faster
the speed.
When mixing light batches it is recommended that the mixer is not used
continuously for a time period of more than 20 minutes and a brief cooling off
period of 10-15 minutes should be allowed between mixing cycles.
1. Close the bowl guard (G). See Figure 1. The safety guard must be closed
for the mixer to operate. If the safety guard is open or not closed properly
then the mixer will not operate.
2. Select the desired operating speed based on the ingredients. Use the
speed up (E) or speed down button (F) to program the speed. See
Figure 5.
Speed 1 – Use for slow mixing, mashing and kneading yeast dough.
Speed 2 – Use for mixing cookie and cake batters.
Speed 3 – Use for beating, creaming and medium fast whipping.
Speed 4 – For whipping heavy cream and egg whites.
Speed 5 – For whipping small amounts off heavy cream/egg whites.
3. Set the time cycle, if desired by using the time up button (C) and time
down button (D). The maximum time that can be set is 30 minutes.
4. To begin mixing cycle press the on/off button (A). The mixer will continue
to operate until the on/off button (A) is pressed again. Or, the mixer will
operate until the time cycle has been completed.
 Loading...