

Page 1
ENGLISH
ENGLISH
Operator’s Manual
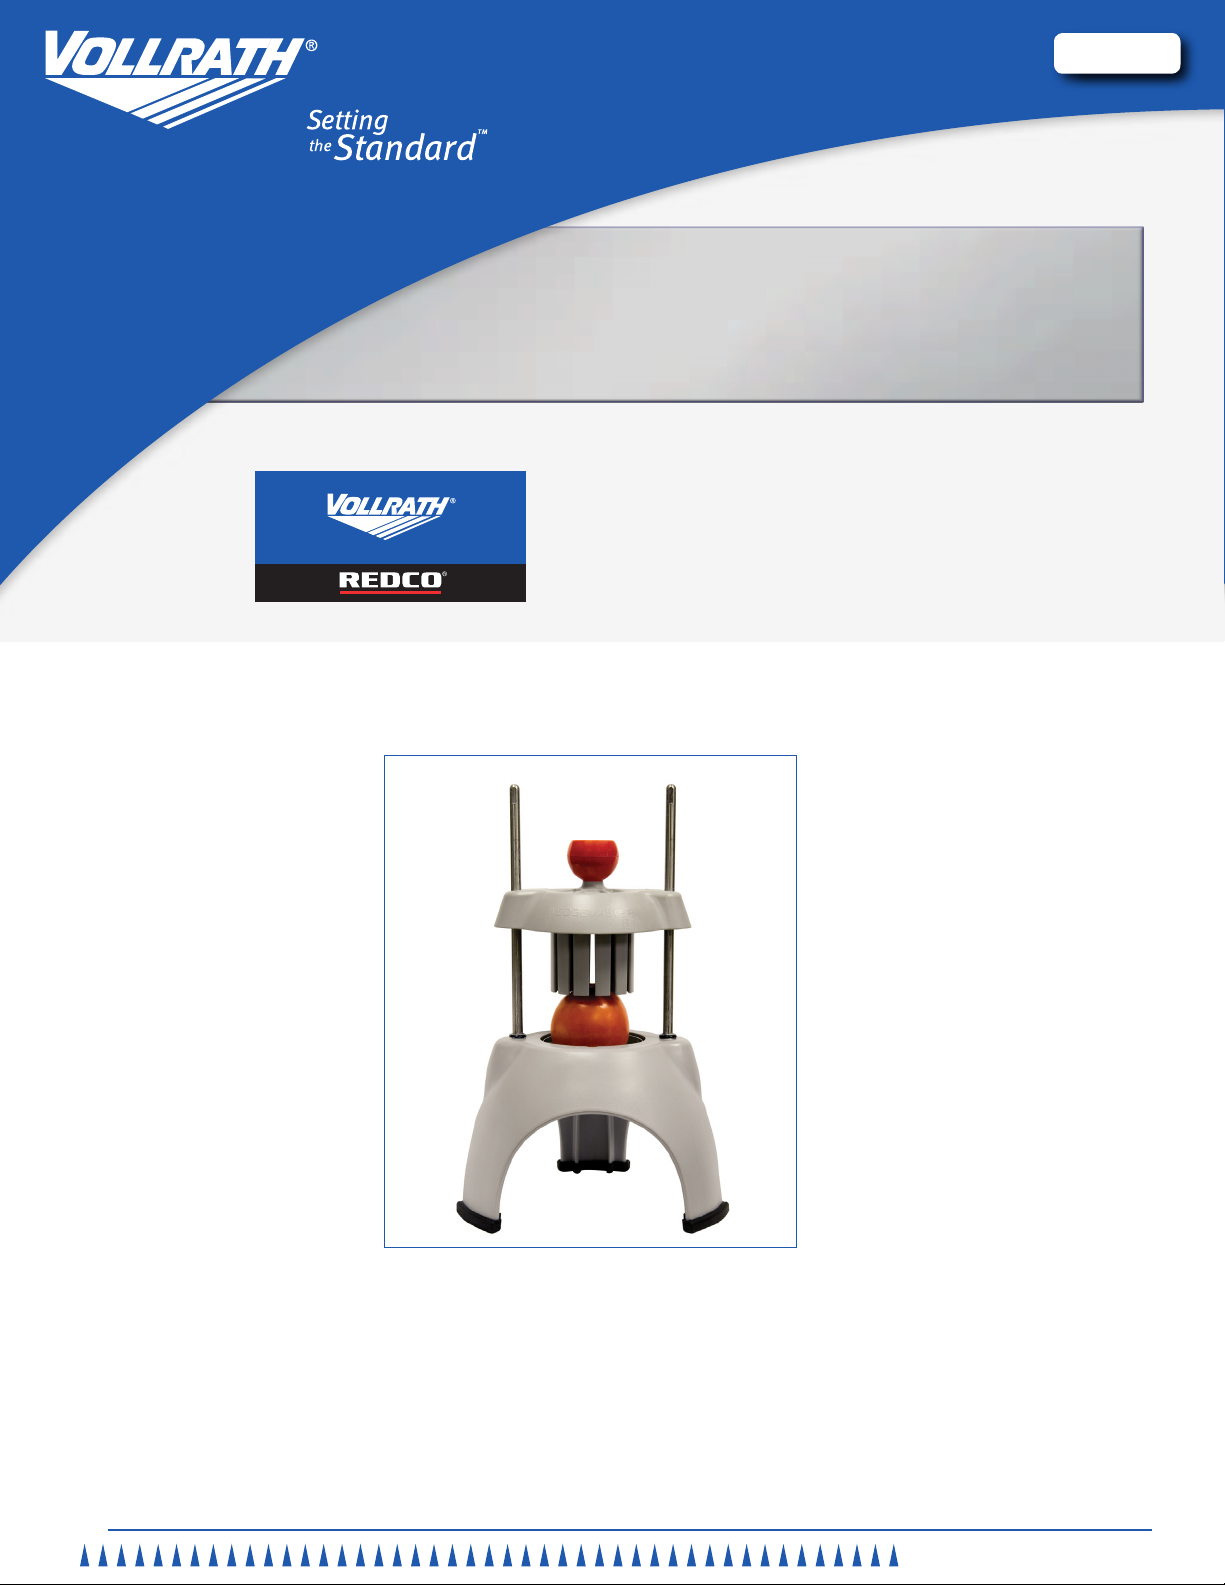
Wedgemaster®II
700-1
700-4
NDG700-1
NDG700-4
Thank you for purchasing this Vollrath Food Processing Equipment. Before operating the equipment, read and familiarize yourself with
the following operating and safety instructions. SAVE THESE INSTRUCTIONS FOR FUTURE REFERENCE. Save the original box and
packaging. Use this packaging to ship the equipment if repairs are needed.
Item No. 2350025-1 en Rev 01/11
Page 2
Manual Food Processing equiPMent
saFety preCautions
To ensure safe operation, read the following statements and understand
their meaning. This manual contains safety precautions which are
explained below. Please read carefully.
WARNING
Warning is used to indicate the presence of a hazard that can cause
severe personal injury, death, or substantial property damage if the
warning is ignored.
CAUTION
Caution is used to indicate the presence of a hazard that will or can
cause minor personal injury or property damage if the caution is
ignored.
Features and Controls
NOTE
Note is used to notify people of installation, operation, or maintenance
information that is important but not hazard-related.
For Your Safety!
These precautions should be followed at all times. Failure to follow
these precautions could result in injury to yourself and others.
To reduce risk of injury or damage to the unit:
Check unit before each use to insure the equipment is clean.
Check for broken, nicked or dull blades and if found, replace the blade
assembly.
Check to insure that the pusher head sits down completely on the rubber
bumpers.
If necessary, lubricate guide rods using a light coating of mineral oil, Petro
Gel, or food grade lubricant. DO NOT USE COOKING OIL AS IT WILL
BECOME STICKY AND MAY PERMANENTLY DAMAGE THE PUSHER
HEAD BEARINGS
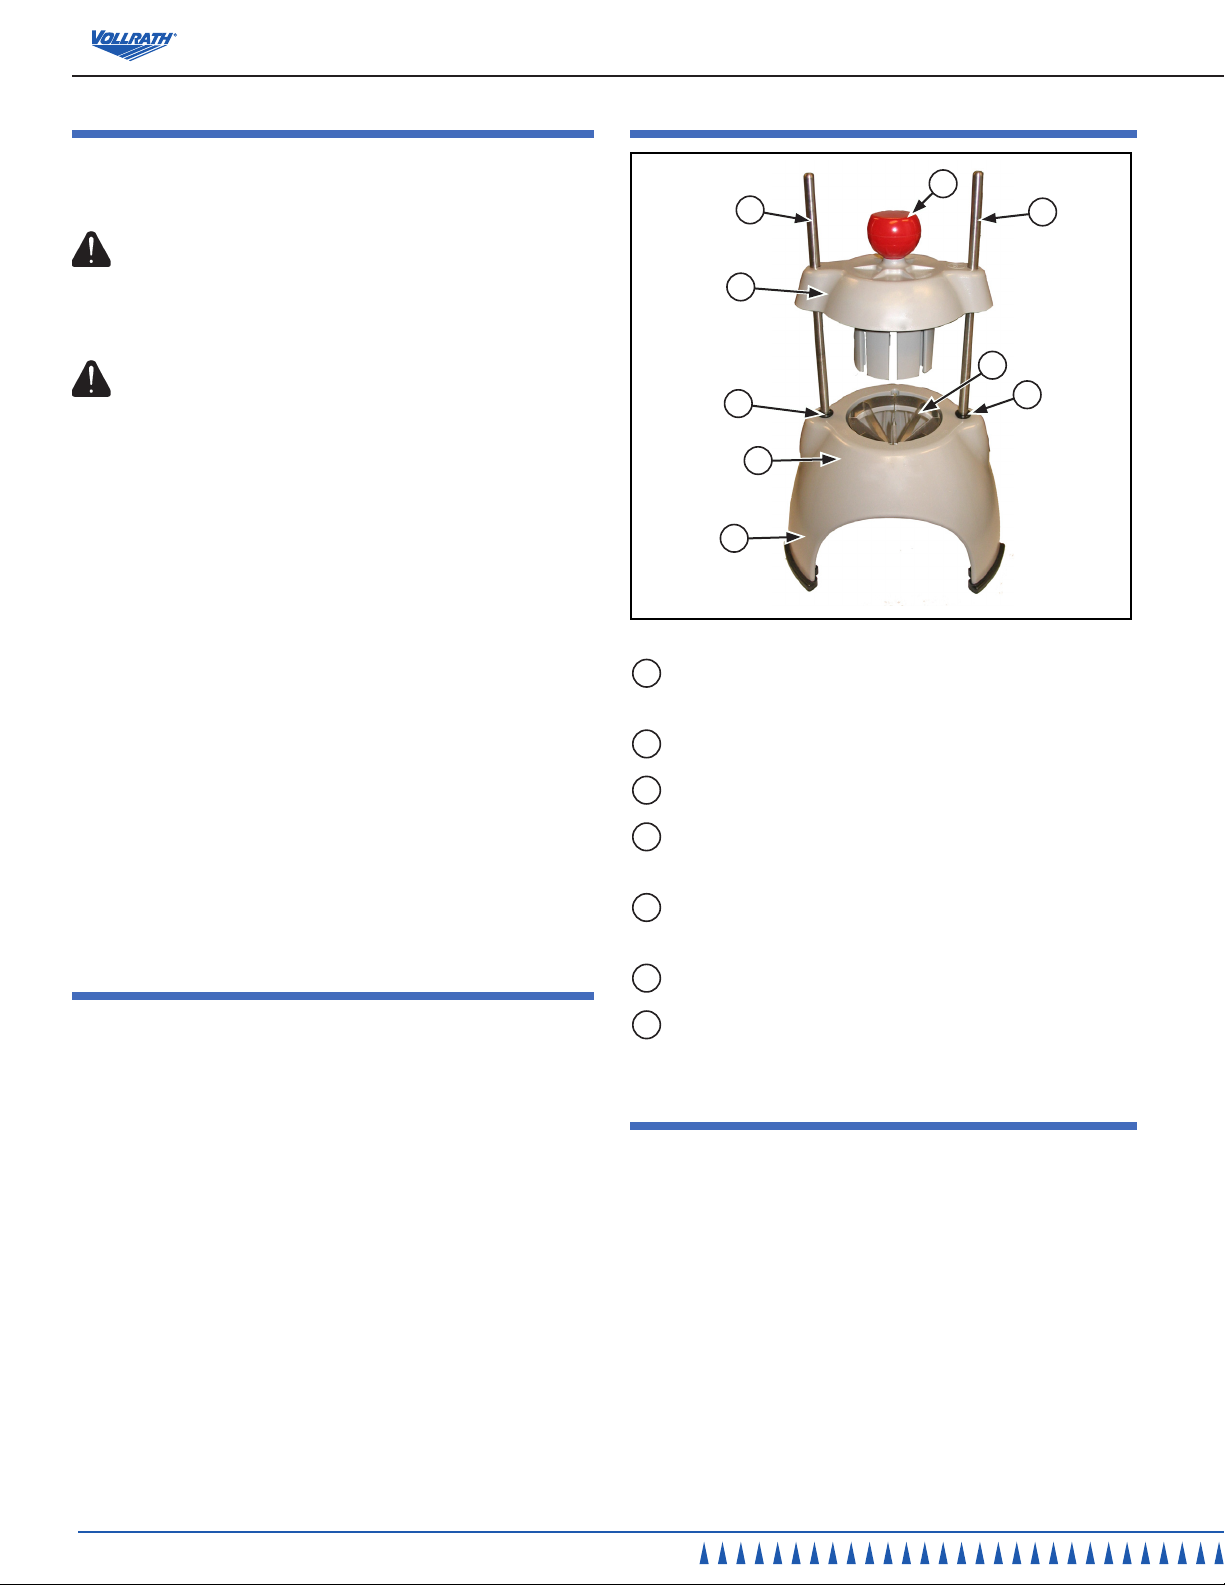
Figure 1. Features and Controls.
B
A
D
C
F
G
A
GUIDE RODS. Guides and align the pusher head onto the
blade set.
B
HANDLE. Used to lower and raise the pusher head.
C
BUMPERS. Cushions the stop of the pusher head.
D
PUSHER HEAD ASSEMBLY. Made up of the handle and the
pusher head block.
E
BLADE ASSEMBLY. Houses the blades. Specically sized to
match the corresponding pusher head block.
A
E
C
FunCtion and purpose
Intended for wedging vegetables and fruits.
2
OperatOr’s Manual
F
BASE ASSEMBLY. Holds guide rods and the blade assembly.
G
LEGS. Supports the unit and holds the blade assembly.
unpaCking the equipment and initial setup
Carefully remove crating or packaging materials from the unit. When no
longer needed, dispose of all packaging, materials in an environmentally
responsible manner.
Page 3
Manual Food Processing equiPMent
operation
WARNING
Sharp Blade Hazard.
Blades are sharp and can cause cuts. To avoid
injury from sharp blades, handle with caution.
Prior to rst use, it is important to clean the unit. Wash new blades with warm
soapy water and rinse thoroughly to remove the thin protective oil lm.
1. Place the unit on a clean, at work surface.
2. Before each use, check that the unit is clean and the blades are in good
condition. If loose or broken blades are found, blades must be serviced.
3. Before each use, check for proper blade alignment. Slowly set the
pusher head (D) onto the blade assembly (E). See Figure 1. They should
slide together with no obstructions. If there are obstructions, verify they
are a matching set. Rremove the obstruction.
4. Verify that the blade assembly and pusher head assembly are the
desired size.
5. Prepare the food product to be processed. For lemons, limes and some
other fruit the unit will work better if the ends are cut off. Remove the
stem scar on tomatoes.
6. Lift the handle (B) and place the food on the blade assembly (H) (center
spike for wedge blades).
7. Remove hand from the blade assembly (H) area and place that hand on
one of the legs (F).
8. Using a strong, quick, downward thrust, force the food product through
the blade assembly.
9. Repeat this process until you have prepared enough food product for
your daily needs.
10. Clean and lubricate your equipment immediately after each use. See the
CLEANING section of this manual for more information.
Cleaning
WARNING
Sharp Blade Hazard.
Blades are sharp and can cause cuts. To avoid
injury from sharp blades, handle with caution.
To maintain the appearance and increase the service life, clean your daily.
NOTE:
Food acids will make blades dull and corrode the metal.
Always clean this food preparation equipment immediately
after every use.
1. Slide the pusher head assembly (D) off the rod guides (A). Figure 1.
2. Remove the screws securing the blade assembly (E).
3. The blade assembly (E) is best cleaned by forcing water under pressure
through the blades from the unsharpened side. If necessary, use a nylon
bristle cleaning brush to push food particles out from the unsharpened
side of the blade assembly (E).
4. Wash the parts in warm soapy water and rinse thoroughly.
5. Allow the parts to air dry.
6. Do not put this equipment in a dishwasher or dish machine with soaps,
detergents, or other alkaline chemicals that can harm the equipment.
7. Install the blade assembly (E) so the tabs on the blade assembly slide
into the groves of the base assembly (F).
8. Secure the blade assembly to the base using the screws removed
earlier.
9. Lubricate the guide rods with mineral oil or Petro Gel after each use.
Do not use cooking oil as it will become sticky and may permanently
damage the equipment.
preventative maintenanCe
1. Clean the equipment after every use.
2. Use for intended purposes only.
3. Change the blades regularly - based on usage.
replaCing Blade assemBly
Wash new blades with warm, soapy water and rinse thoroughly to remove
the thin protective oil lm. Keep the sharp edge away from you when
handling blades.
1. Familiarize yourself with the parts diagram for your unit.
2. Remove the pusher head assembly (D) by sliding it off the rod guides
(A). Figure 1.
3. Remove the screws securing the old blade assembly (E) and discard
blade assembly and retain the screws.
4. Install the new blade assembly (E) so the tabs on the blade assembly
slide into the groves of the base assembly (F).
5. Secure new blade assembly to the base using the screws removed
earlier.
6. Lubricate the guide bar with mineral oil or Petro Gel after each use.
Do not use cooking oil as it will become sticky and may permanently
damage the equipment.
WARNING
Sharp Blade Hazard.
Blades are sharp and can cause cuts. To avoid
injury from sharp blades, handle with caution.
ENGLISH
OperatOr’s Manual
3
Page 4

Manual Food Processing equiPMent
trouBleshooting
If the equipment no longer processes food cleanly or without damage to the food product, the blades could be dull and be in need of replacement. Broken, bent,
or nicked blades must be replaced.
Problem It might be caused by Course of Action
Broken Blade. Blades were dull.
Pre-score whenever possible to avoid undue shock and stress to blades
Replace the blade assembly.
serviCe and repair
Please contact the qualied professional repair service listed below.
VOLLRATH Induction Repair Service • 1-800-825-6036 (USA) or www.vollrathco.com
When contacting the Authorized Professional Service Center, please be ready with the model number, serial number, and proof of purchase showing the date
the unit was purchased.
spare parts list - WedgWmaster® ii~ models 700-1, 700-4
LETTER PART NO. DESCRIPTION
379107
1
379108
2 379109 Base Assembly
3 379103 Foot Cover
4 305 ‘O’ Ring
5 702 Blade Screw
704 Blade Assembly, 4 Section
706 Blade Assembly, 6 Section
6
708 Blade Assembly, 8 Section
712
Pusher Assembly, 6/12
Section
Pusher Assembly, 4/8
Section
Blade Assembly, 12
Section
4
OperatOr’s Manual
Page 5

Manual Food Processing equiPMent
eXploded vieW - WedgWmaster® ~ models 700-1, 700-4
1
6
ENGLISH
4
2
3
5
OperatOr’s Manual
5
Page 6

Manual Food Processing equiPMent
Warranty statement For the vollrath Co. l.l.C.
The Vollrath Company LLC warrants the products it manufactures and distributes against defects in materials and workmanship for a period of one year, except as specically
provided below. The warranty runs 12 months from the date of original installation. (End user receipt)
1. Refrigeration compressors – The warranty period is 5 years.
2. Replacement parts – The warranty period is 90 days.
3. Fry pans and coated cookware – The warranty period is 90 days
4. EverTite™ Riveting System – The warranty covers loose rivets
only, forever.
5. Cayenne® Heat Strips – The warranty period is 1 year plus an
additional 1 year period on heating element parts only.
6. Ultra and Professional Induction Ranges – The warranty period
is 2 years.
7. Mirage and Commercial Induction ranges - The warranty period
is 1 year.
8. ServeWell® Induction Workstations – The warranty period is one
year on the workstation table and 2 years on induction hobs.
9. Slicers – The warranty period is 10 years on gears and 5 years
on belts.
10. Mixers – The warranty period is 2 years.
11. Extended warranties are available at the time of sale.
12. Boxer Mixers – 1 Year exchange Warranty.
13. Vollrath – Redco products – The warranty period is 2 years.
14. Optio / Arkadia product lines – The warranty period is 90 days.
15. All non-stick products (i.e. fry pans and surfaces) are 90 days for
the non stick surfaces.
All products in the Jacob’s Pride® collection, including
the following, have a lifetime warranty:
• NSF Certied One-Piece Dishers
• NSF Certied Spoodle® Utensils
• NSF Certied Heavy-Duty Spoons with Ergonomic Handle
• NSF Certied Heavy-Duty Basting Spoons
• Heavy duty Turners with Ergonomic handle
• One-Piece Tongs*
• Heavy-Duty One-Piece Ladles*
• Nylon Handle Whips
• One-Piece Skimmers
• Tribute®, Intrigue®, and Classic Select® Cookware*
*Jacob’s Pride® warranty does not cover Kool-Touch®,
non stick coatings and silicone handles.
Items sold having no warranty:
• Meat Grinder Knives
• Light Bulbs in Convection Ovens and Hot Food
Merchandiser
• Oven Door Seals
• Oven Door Glass
• Hot Food Merchandisers / Display Case Glass
• Calibration and set up of gas equipment
• Slicer / Dicer blades (table top food prep) –
Redco and Vollrath
THIS WARRANTY IS IN LIEU OF ANY OTHER WARRANTIES, EXPRESS OR IMPLIED, INCLUDING ANY IMPLIED WARRANTY OF
MERCHANTABILITY OR FITNESS FOR A PARTICULAR PURPOSE
As The Vollrath Company LLC’s only responsibility and the purchaser’s only remedy, for any breach of warranty, The Vollrath Company LLC will repair or, at its option, replace the
defective product or part without charge, except as otherwise provided below:
• For refrigeration compressors and the second year of the warranty on Cayenne® Heat Strips and mixers, The Vollrath Company LLC will provide the repaired
or replacement part only; and the buyer will be responsible for all labor charges incurred in performing the repair or replacement.
• To obtain warranty service, the buyer will be responsible to return to The Vollrath Company LLC any product (other than gas equipment that is permanently
installed) weighing less than 110 lbs. or located outside of a 50-mile radius of a certied technician designated by The Vollrath Company LLC to perform
warranty repairs. If a Vollrath Technician cannot be contacted check the website for service contact points. (Please refer to the Product Catalogue for weights
and sizes of product)
• No remedy will be available for products that have been damaged by accident, carelessness, improper installation, lack of proper setup or supervision when
required, neglect, improper use, installation or operation contrary to installation and operating instructions or other causes not arising out of defects in materials or workmanship. At the buyer’s request, The Vollrath Company LLC will repair and or replace such products at a reasonable cost.
• No remedy will be available for slicers where blade has not been sharpened (Refer to owner’s manual for sharpening instructions)
• No remedy will be available for mixers damaged by changing gears while unit is running or overloading, in either case as determined by a Vollrath Certied
Technician
• Warranty work must be authorized in advance by The Vollrath Company LLC. See the operating and safety instructions for each product for detailed warranty claim procedures.
• No remedy will be available for product returned and found to be acceptable to the product specication.
• No remedy will be available under any warranty not registered as required below.
LIMITATION OF LIABILITY:
THE VOLLRATH COMPANY LLC SHALL HAVE NO LIABILITY FOR INCIDENTAL OR CONSEQUENTIAL DAMAGES OF ANY KIND,
WHETHER BASED UPON NEGLIGENCE OR OTHER TORT, BREACH OF WARRANTY, OR ANY OTHER THEORY.
6
OperatOr’s Manual
Page 7

Manual Food Processing equiPMent
Warranty Procedure
On all warranty calls, the following process and information is required:
• All warranty claims will start with a call to Vollrath Technical Service support line.(800-628-0832).
• A technical support professional will work to diagnose the issues, and provide the details for the service solution.
• Name and phone number of person calling
• Business name, street address, city, state and zip
• Model and serial number
• Date of purchase and proof of purchase (Receipt)
• Name of dealer where unit was purchased
NOTE: Vollrath will not accept products sent without the proper procedure being followed.
Important:
TO MAKE A CLAIM FOR ANY REMEDY UNDER THIS WARRANTY, YOU MUST REGISTER YOUR WARRANTY.
register today
ONLINE: Register your warranty on-line now at www.Vollrathco.com
NO WEB ACCESS: If you do not have access to the web, kindly register by completing the warranty registration form and faxing it to The Vollrath Co. LLC ofce in the country of
purchase.
Warranty registration
Business naMe
Key contact naMe eMail
street address
city state ZiP code
country Phone Fax
Model iteM nuMBer
serial nuMBer - -
oPeration tyPe
R Limited Service Restaurant R Full Service Restaurant R Bars and Taverns R Supermarket
R Convenience Store R Recreation R Hotel/Lodging R Airlines
R Business/Industry R Primary/Secondary School R Colleges/University R Hospitals
R Long-Term Care R Senior Living R Military R Corrections
reason For selecting our Product
R Appearance R Full Service Restaurant R Availability R Sellers Recommendation
R Ease of Operation R Versatility of Use R Price R Brand
Would you liKe to receive our Full-line catalog and reMain on our Mailing list? R Yes R No
ENGLISH
OperatOr’s Manual
7
Page 8

The Vollrath Company, L.L.C.
1236 North 18th Street
Sheboygan, WI 53081-3201
U.S.A.
Technical Services: 800.628.0832
Service Fax: 920.459.5462
Canada Service: 800.695.8560
www.vollrathco.com
Main Tel: 800.628.0830
Fax: 800.752.5620
© 2011 The Vollrath Company, L.L.C.
 Loading...