

Vollrath Onion King 502N, Onion King 501N, Onion King 503N, Onion King 500N Installation Instructions Manual
Page 1
Onion King
WARNING
Sharp Blade Hazard
Blades are sharp and can cut skin. To avoid injury from sharp
blades, wear cut-resistant gloves when using or handling this
product.
TOOLS YOU WILL NEED
• Cut-resistant gloves • Mild dish detergent and warm water
• ³⁄₈" socket and socket wrench
• Torque wrench (optional)
WASH THE NEW BLADE ASSEMBLY
Wash new blades with warm, soapy water and rinse thoroughly to
remove the thin protective oil film.
NOTICE: Keep the sharp edge away from you when handling blades.
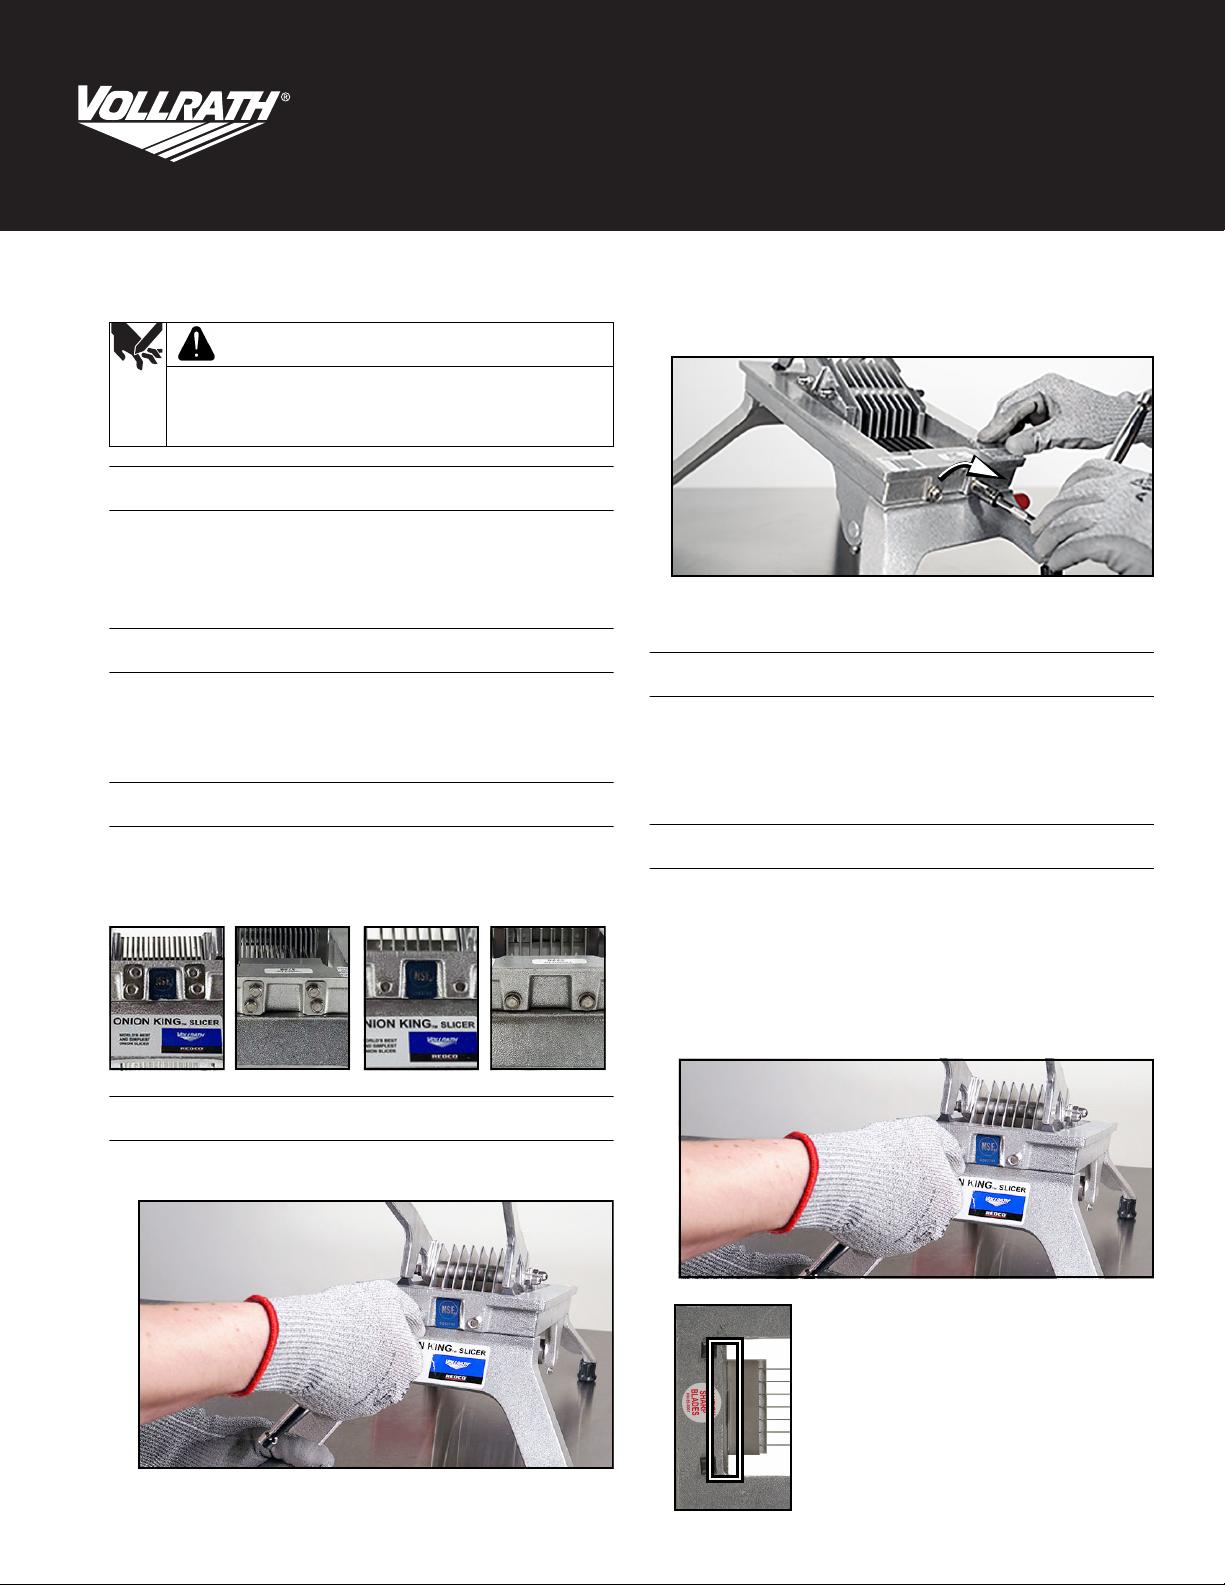
WHICH ONION KING™ SLICER DO YOU HAVE?
Installation Instructions
®
Blade Replacement
2. Remove the screws, washer plates, and o-rings from the short leg
side.
3. Remove the blade assembly by lowering it through the frame.
4. Retain the screws and o-rings for installing the new blade assembly.
INSTALL THE NEW BLADE ASSEMBLY
1. Place the new blade assembly into the base frame with the sharp
side up.
2. Reinstall all of the screws, washer plates, and o-rings to loosely
support the blade assembly in the base.
Inspect your slicer to determine which slicer you have.
500N and 501N:
4 Screws on Each End
502N and 503N:
2 Screws on Each End
REMOVE THE OLD BLADE ASSEMBLY
1. Remove the screws and washers or plates from the long leg side of
the base.
TENSION THE BLADE ASSEMBLY
NOTICE: It is important to perform the following steps in order.
Changing the sequence may damage the equipment.
NOTICE: HAND TIGHTEN ONLY. Do NOT use power tools to tighten
the screws on this equipment. Power tools may damage
the equipment.
Tension the Long Leg Side
1. Use the socket wrench to tighten the screws on the long leg side.
2. Tighten the screws until the assembly is tight against the frame.
©
2019 The Vollrath Company L.L.C. Part No. 2350115-1 ml 7/16/19
Page 2
Tension the Short Leg Side
502N and 503N Slicers
These slicers have two screws on each end that hold the blade
assembly to the frame. To tension the blades, tighten the screws on the
short leg end.
NOTICE: Hand tighten only. Do NOT use power tools. Using power
tools could damage the equipment.
1. Use the socket wrench to tighten the screws as tight as possible.
Notice the corresponding o-rings located between the blade
assembly and the frame. They should be compressed to
approximately ³⁄₃₂" thick. If you have a torque wrench, use it to verify
the screws are tightened to 70 in lbs.
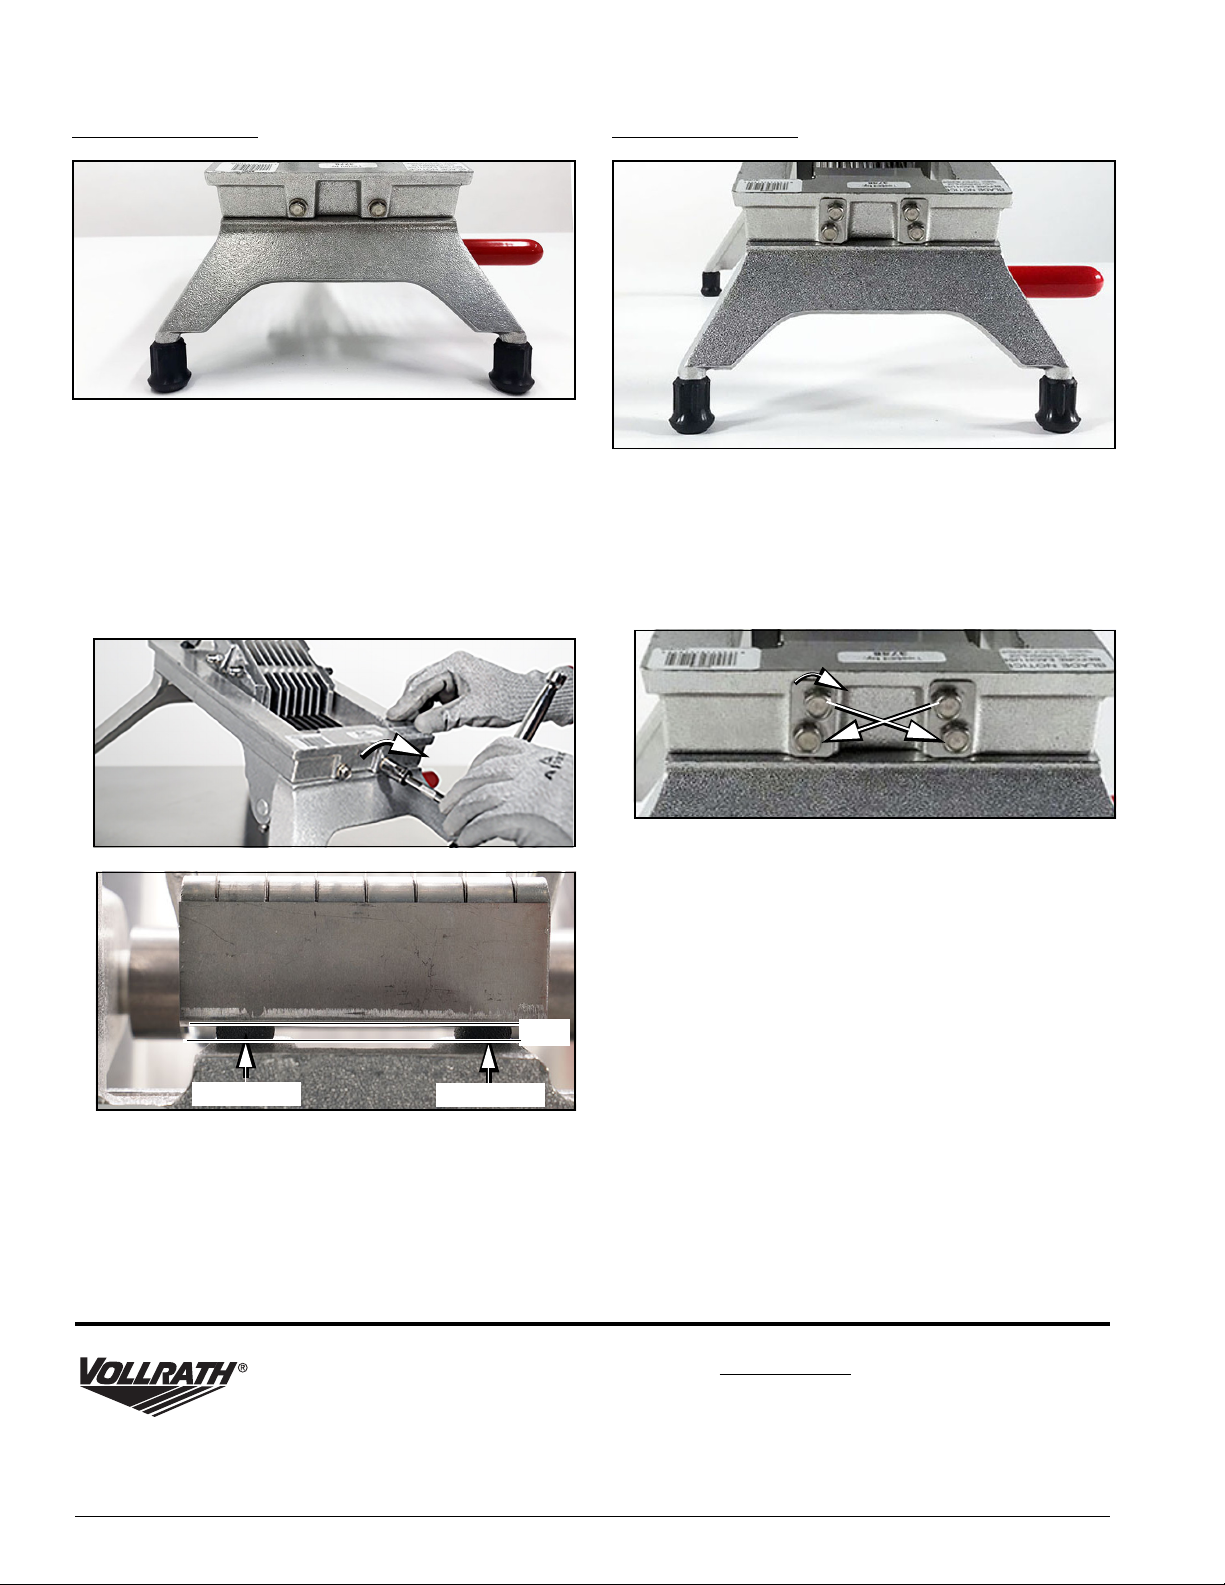
500N and 501N Slicers
These slicers have four screws on each end that hold the blade
assembly to the frame. To tension the blades, tighten the screws on the
short leg end.
NOTICE: Hand tighten only. Do NOT use power tools. Using power
1. Use the socket wrench to tighten the screws in a criss cross pattern.
tools could damage the equipment.
Repeat until all of the screws as tight as possible. If you have a
torque wrench, use it to verify the screws are tightened to 70 in lbs.
1
4
3
2
www.vollrath.com
Compressed
³⁄₃₂"
Compressed
The Vollrath Company, L.L.C.
1236 North 18th Street
Sheboygan, WI 53081-3201 U.S.A.
Main Tel: 800.624.2051 or 920.457.4851
Main Fax: 800.752.5620 or 920.459.6573
Customer Service: 800.628.0830
Canada Customer Service: 800.695.8560
©
2019 The Vollrath Company L.L.C. Part No. 2350115-1 ml 7/16/19
Technical Services
techservicereps@vollrathco.com
Induction Products: 800.825.6036
Countertop Warming Products: 800.354.1970
Toasters: 800-309-2250
All Other Products: 800.628.0832
 Loading...