

Page 1
Installation Instructions
A
F
G
E
I
B
D
C
J
H
G
A
E
F
A
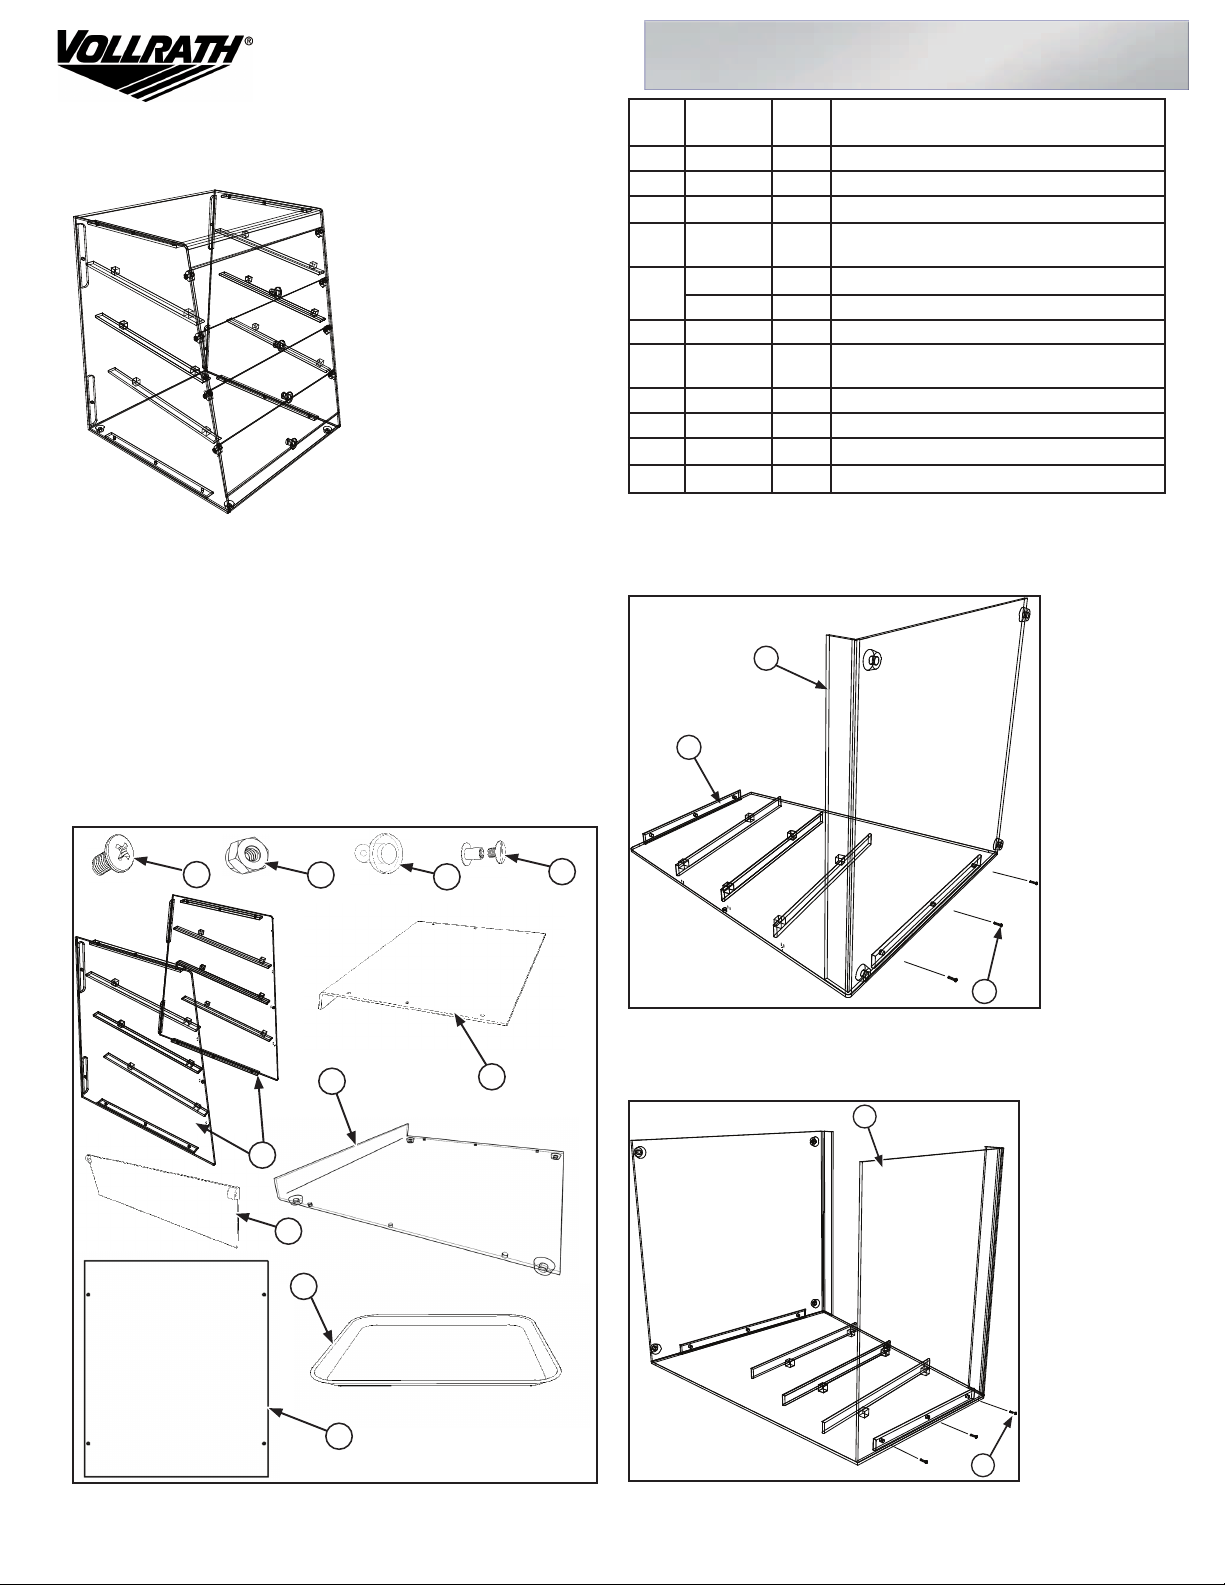
ITEM PART
Bakery Case Assembly Instructions
A N/A 20 Phillips Head Machine Screws (order 57980)
Item# KDC1418-4F-06 (Front Doors)
PLEASE READ INSTRUCTION AND IDENTIFY ALL PARTS BEFORE
ASSEMBLY.
CAUTION: To ensure correct assembly read the following instructions and
understand their meaning before beginning. Please read carefully. Handle all
parts carefully to prevent injury or damage. Although edges and corners have
been deburred, they should still be considered sharp.
NOTE: DO NOT OVERTIGHTEN SCREWS AND HARDWARE.
Tools Needed:
1 Medium Size Flat Head or Phillips screwdriver.
1 Clean cloth to cover work surface, this prevents the case from scratching
during assembly.
The bakery case contains the following parts:
B N/A 4 Self-Locking Nuts (order 57980)
C 8013571 4 Clear Handles
D 8013031 8 Post and Screws (Included with Front Door
E BC174B 1 Right Side Panel
F BC178B 1 Short Bent Top Panel
G BC177B 1 Large Bent Bottom Panel with (4) Clear
H BC179B 4 Front Door Panels
I 86128 4 Trays
J BC180B 1 Back Panel
1. Remove the bakery case and hardware from packaging.
2. Remove protective masking from display prior to assembly.
3. Lay one side panel (E) with rails facing up, at on table and attach large
bent bottom panel (G) using (3) machine screws (A). See Figure 2.
NUMBER
QTY: DESCRIPTION
Panels)
BC173B 1 Left Side Panel
Rubber Feet
57980 1 Hardware Kit (Includes items A, B, C, and D)
Figure 1. Bakery Case Parts
www.Vollrath.com
Figure 2. Install Large Bent Bottom Panel
4. Repeat the process attaching the short bent top panel (F) using (3) machine
screws (A). See Figure 3.
Figure 3. Install Large Bent Bottom Panel
Item No. 2350241-1 Rev 09/14
Page 2
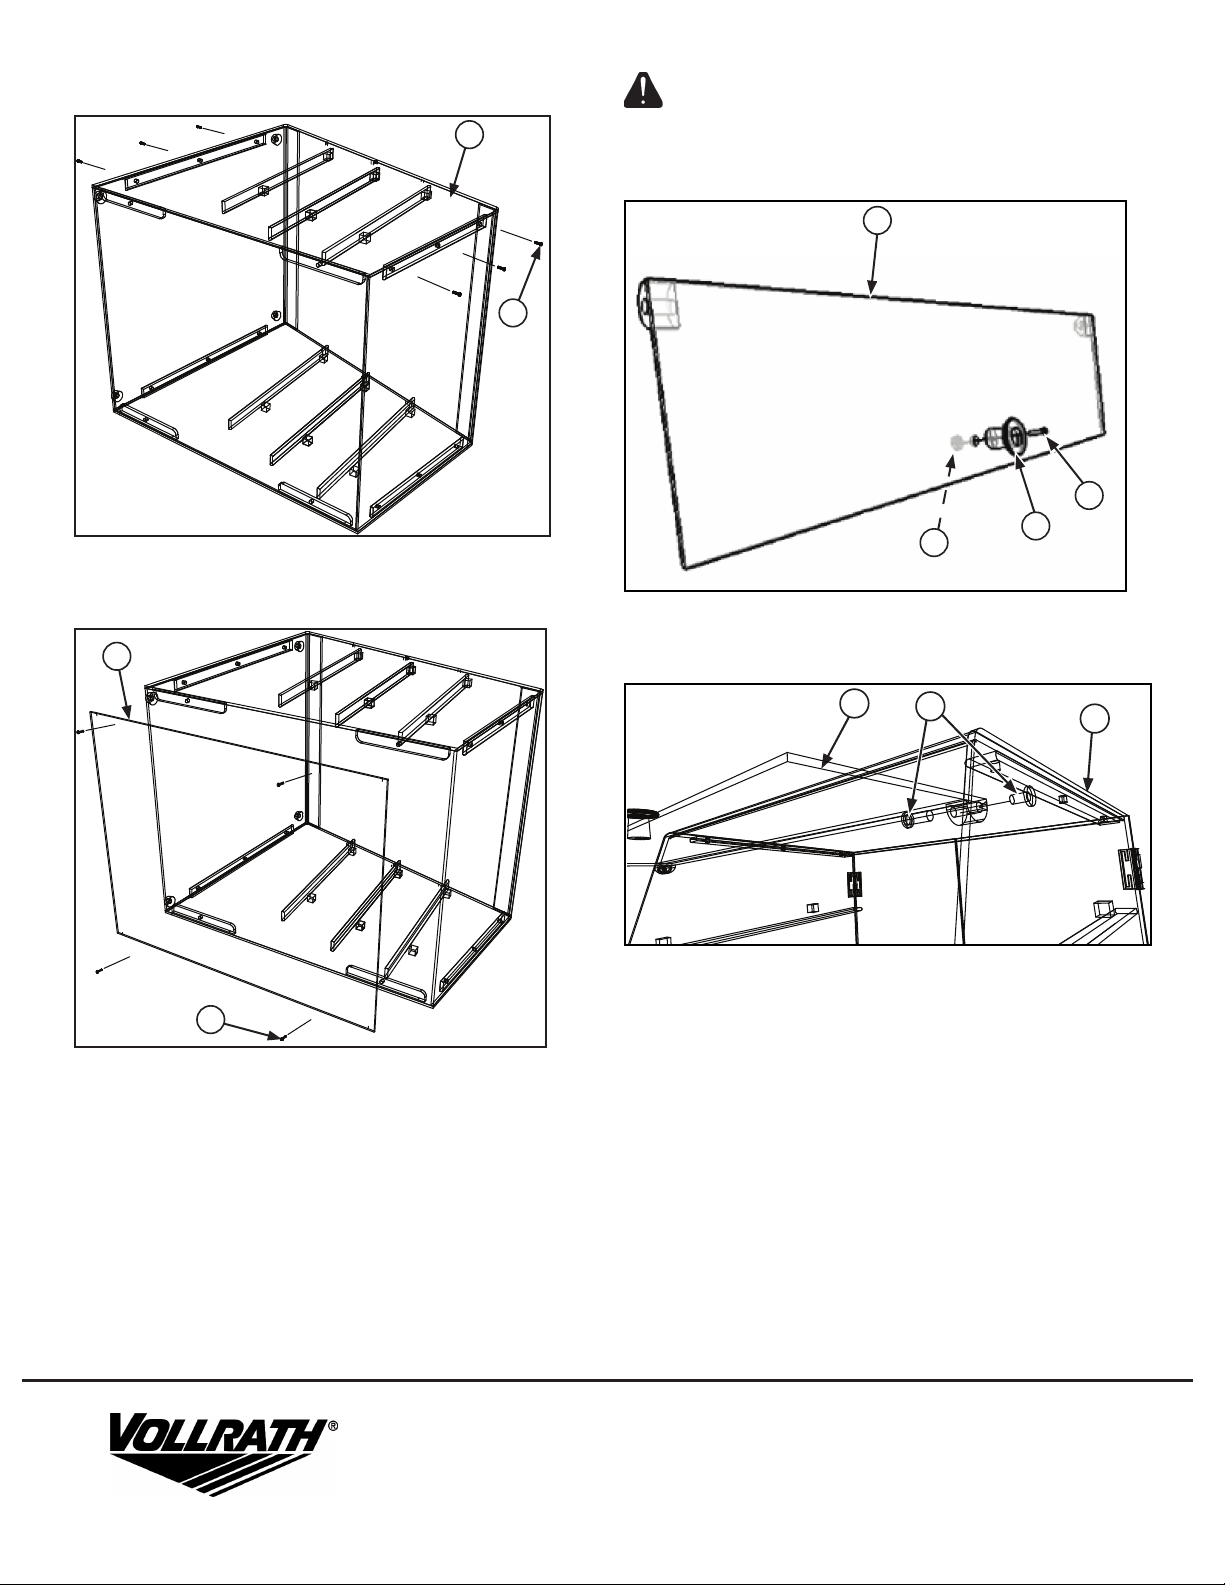
5. With rails facing inward, gently attach opposite side panel (E) to display
using (6) machine screws (A). See Figure 4.
E
CAUTION
DO NOT overtighten screws and hardware.
7. Attach clear handles (C) to four front door panels (H) using machine screws
(A) and self-locking nuts (B). See Figure 5.
A
Figure 4. Install Opposite Side Panel
6. Carefully place back panel (J) on case and attach using (4) machine screws
(A). See Figure 5.
J
Figure 5. Install Handles
8. Connect (4) front door panels (H) to side panels (E) using clear post and
screw sets (D). See Figure 6.
H
A
C
B
A
Figure 5. Install Front Panel
H
D
E
Figure 6. Install Front Door Panels
9. Open front doors, and install trays.
10. Clean using very soft cloth and clean water. Avoid abrasive chemical and
glass cleaners, ie: Windex®, Simple Green®. Clean using warm water and a
dilute mild dish soap (Dawn® or Joy®). Wipe acrylic lightly using soap mixture
and rinse with plain water using a soft cloth. A microber towel or clean
chamois is preferred. DO NOT USE PAPER TOWELS!
www.Vollrath.com
The Vollrath Company, L.L.C.
1236 North 18th Street
Sheboygan, WI 53081-3201
U.S.A.
Main Tel: 920.457.4851
Fax: 800.752.5620
Technical Services: 800.628.0832
Service Fax: 920.459.5462
Canada Service: 800.695.8560
© 2014 The Vollrath Company, L.L.C.
 Loading...