


LED STREET LIGHTING
60W SOLAR
SECTION 1: GENERAL DESCRIPTION
Model Number:
Voltage
Power
Diffuser Type
Base Material
Light Output
Beam Angle
Correlated Colour Temperate
(CCT) Fixture Lifespan
IP Rating
Dimensions
Weight
Charge Time
Battery Type
Working Temperature
Mounting Height
Space Between Lights
Hue
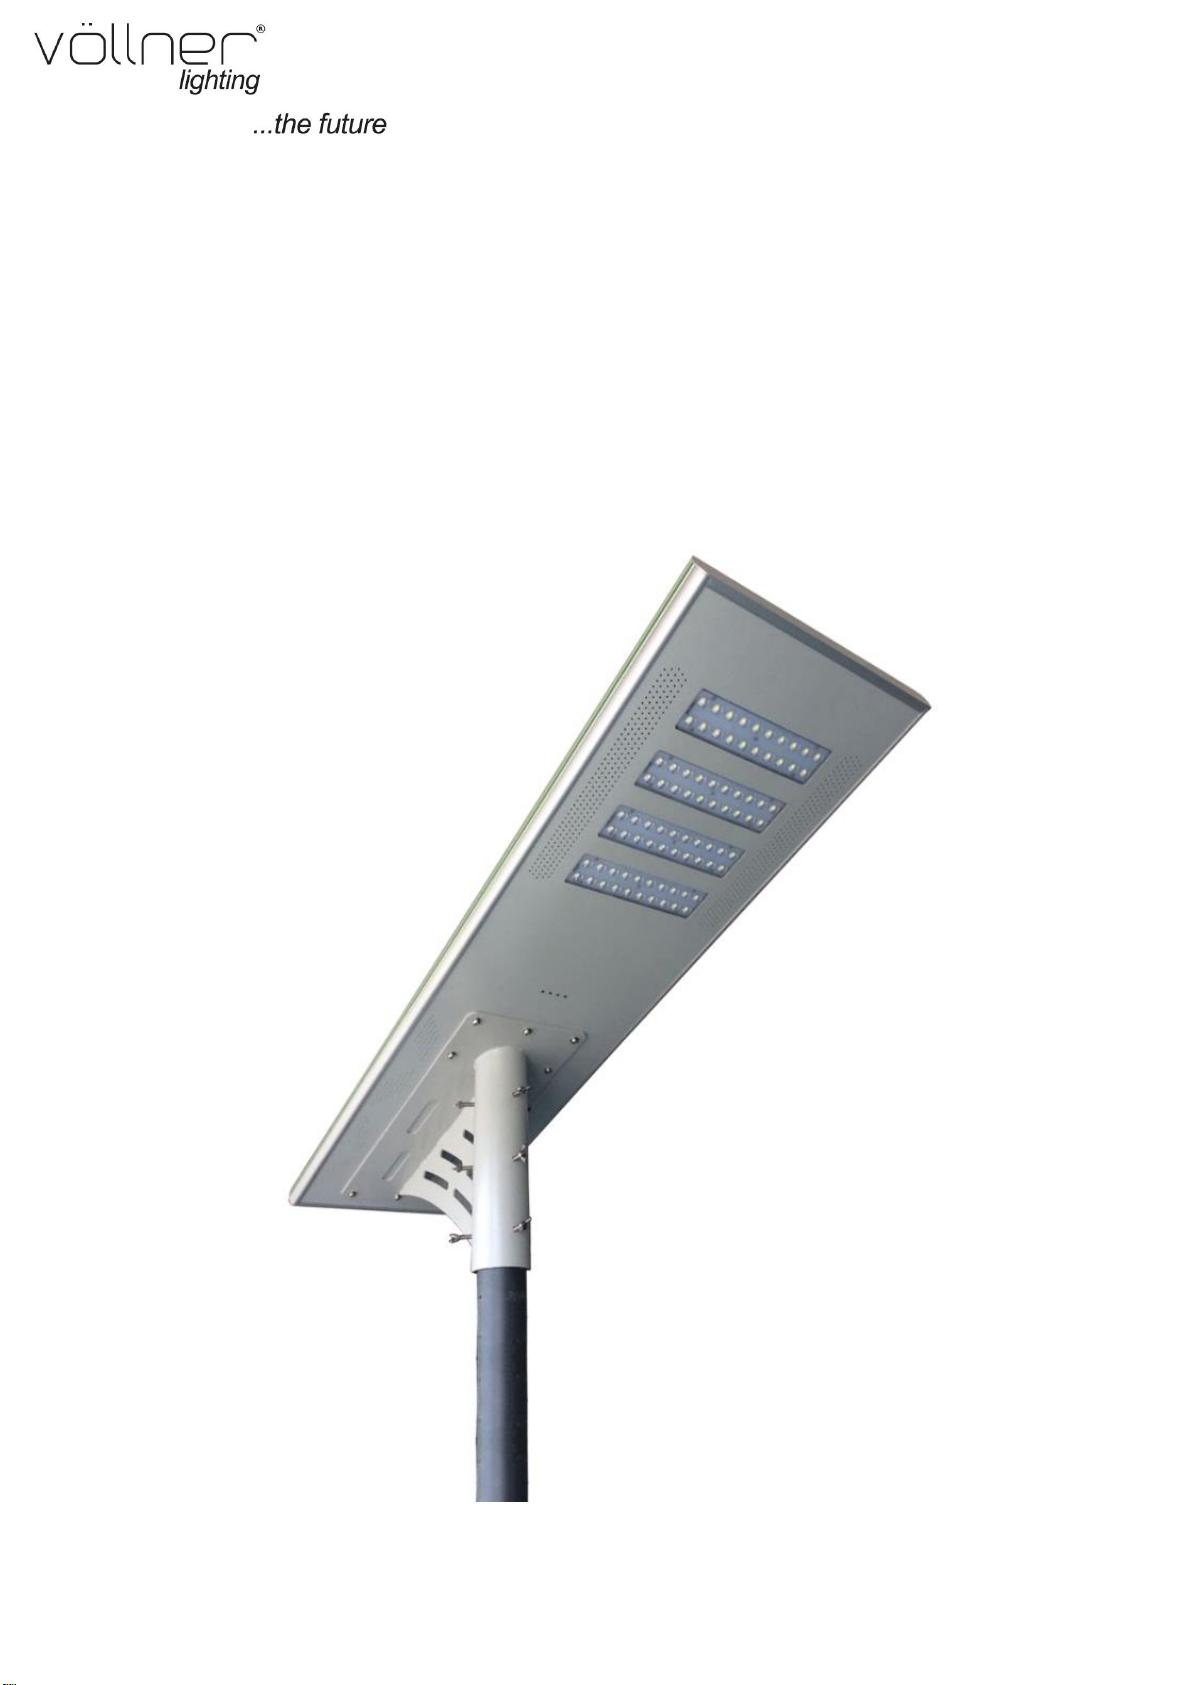
VOL-SSL-060-CW
12V
60 Watts
Sealed Glass
Die Cast Aluminum Alloy
6600 Lumens
120 Degrees
6500-7000K
50,000 Hours
65
1136*420*144mm
21.8 kilograms
6 -7 hours (Temperate Country Average Sun)
Lithium Battery 12V 24ah
-20~+60
7-9 metres
25-28 metres
C/W
SECTION 2: CERTIFICATIONS MET
1) CE Certification: Conformity European, Ensuring that this product can be within the strictest standards of Europe.
2) RoHS- Restriction of Hazardous Substances- Ensuring no toxic chemicals or materials are used in the manufacturing.
3) ISO 9001: Ensuring the manufacturer has the highest possible standards at the facility.
This light is LED which is environmentally friendly compared to traditional lighting.
SECTION 3: INTERNAL ASSEMBLY
Page 1 of 9

SECTION 4: COMPARABLE OLDER LIGHT SOURCE
60W Solar Street Light 250W High Pressure Sodium Light
60 Watts Power 250 Watts Power
50,000 Hour Lifespan
Carries Warranty Carries no warranty
Withstands voltage surges Destroyed with small voltage surges
Available in Warm or Cool Only Available in Warm
900 Hour Lifespan
Page 2 of 9
Instruction Manual
Integrated Solar Street Light
Page 3 of 9

All in one solar street light
Specifications
Light source
40/60/80W
Solar panel
110W(Mono)
Human body sensing
No
Product size
Net weight
Luminous
Visual angle
Color temperature
Work time
≥12Hr
Work temperature
charging:0°C~+60°C discharging :-20°C~+60°C storage:-30°C~
+45°C
Install height
Light space
Instruction Manual
Thanks for using all in one solar street light.
The design of the all in one solar street light comes from the inspiration and power of
the universe, combined the best energy saving parts---solar panel, and led lamp and
special battery. With the help of the controller, it realizes the functions of high
brightness with low energy, long lifespan and free maintenance. At the same time, it
is very convenient to ship and install. It is one of the best patent products of our
company.
1136*420*144mm
21.8kg
>6000lm
120°
□6500k-7000k
6~8m
25~28m
The data of its working time was measured at latitude 22 °, 113 ° east longitude in
sunny days. The working time will be affected by the surroundings.
The following are tips and directions for all in one solar street light, please pay
attention.
1. “All in One solar street light” would not work without sunshine, please select
the suitable model according to the local sunshine radiation and the annual
total radiation. We suggest use the both AC and DC charging model in those
places where lack of sunshine or have long-time rainy days.
Page 4 of 9

2. “All in One solar street light” adopts the long life Lithium battery for storing
energy, charging temperature at day time is between: -20°C~+60°C,when
temperature goes lower than -20°C ,the control system will stop automatically
to protect the battery, and it will revive to charge the battery while
temperature goes higher than-20°C. Discharging temperature at night is
between: -20°C~+60°C, any ambient beyond will take damage to the battery.
So please check these factors while selecting the street light.
3. Battery of the “All in One solar street light” can be stored for 6 months long
after fully charged. Therefore please examine and charge it periodically after
long transportation period or storage to prevent damaging.
4. The surface of the All in One solar street light can be kept clean with normal
detergent to get maximum power generation, clear the dust or tree leaves or
any grease.
5. All in one solar street light have got the standard of IP65.The vents on the
surface is designed for radiating. The materials are made of aluminum alloy
which can survive in the environment of seaside and desert.
6. The knob of the fuse is at the left rear end of the light; please insert the fuse
when in use. In addition there is one more fuse to be used as a backup. (If the
fuse don’t work, then the switch should be turned on)
Installation Instructions:
1. Place the light pole into the best spot with good day lighting. The light pole
should be the length of 7-9m, the thickness 3.75-5.0mm with material iron
or steel, the up diameter 80 mm tapered light pole.
2. Please check to ensure all the components have been received.
3. Unfold the knob of fuse (see below) and check if the fuse works or not, then
tighten. (If not just turn on the switch)
4. Place the lamp on the pole by its sleeve, and ensure it is steady.
Page
5 of
9

Installation steps
Lamp assembly
1. Open the cartons to take out the integrated solar street light and parts, put
the light flatwise (solar panels face down);
2. Placed the support base to the light installation position, adjust the screw
holes with light’s alignment;
Screw with the M8 round head hex socket screws, then tighten with a
wrench.
Page
6 of 9

The installation on the light pole
Item name
QTY(pcs)
Lamp system
1
Bolts
Cup head m8*30mm
9
Round head m8*30mm
9(Reserve 1PCS)
Support Base
1
Tool
2
1. First turn ON the switch;
2. Set the light which has been assembled with the support base on the light
pole and adjust the direction;
3. Screw with the M8 Cup head hex socket screws on the tube of the support
base;
4. Tighten with a wrench and make the light firmly fixed on the light pole.
We have the right to improve the structure of our products without any special
notice. If there is anything different from the data here, kindly take note.
We guarantee that we have done what we can to improve the contents of the
instruction, so we will not assume any loss of this.
Page
7 of 9

PHOTOMETRIC DISTRIBUTION
LUMINOUS INTENSITY DISTRIBUTION
±180°
-90°
-120°
-60°
-150°
-30°
150°
120°
90°
474.69
949.37
60°
1424.06
1898.74
30°
2373.43
0°
2373.43
1898.74
1424.06
949.37
474.69
0.00
°0°0 45°-45° 90°-90° 135°-135° 180°-180°
C90(Max):
C0/C180:
C90/C270:
Field angle(10%Imax):C0/180Left:72.9 Right:72.7
:C90/270Left:79.1 Right:79.3
Beam Angle(50%Imax):C0/180Left:37.8 Right:37.1
:C90/270Left:71.3 Right:72.1
Page
8 of 9

1.0m
2.0m
3.0m
4.0m
5.0m
6.0m
7.0m
8.0m
10.0m
11.0m
12.0m
EFFECTIVE AVERAGE ILLUMINANCE
7.6m1363.3lux
15.3m340.8lux
22.9m151.5lux
30.5m85.2lux
38.2m54.5lux
45.8m37.9lux
53.4m27.8lux
61.1m21.3lux
76.3m13.6lux
84.0m11.3lux
91.6m9.5lux
Page
9 of 9
 Loading...