

Page 1
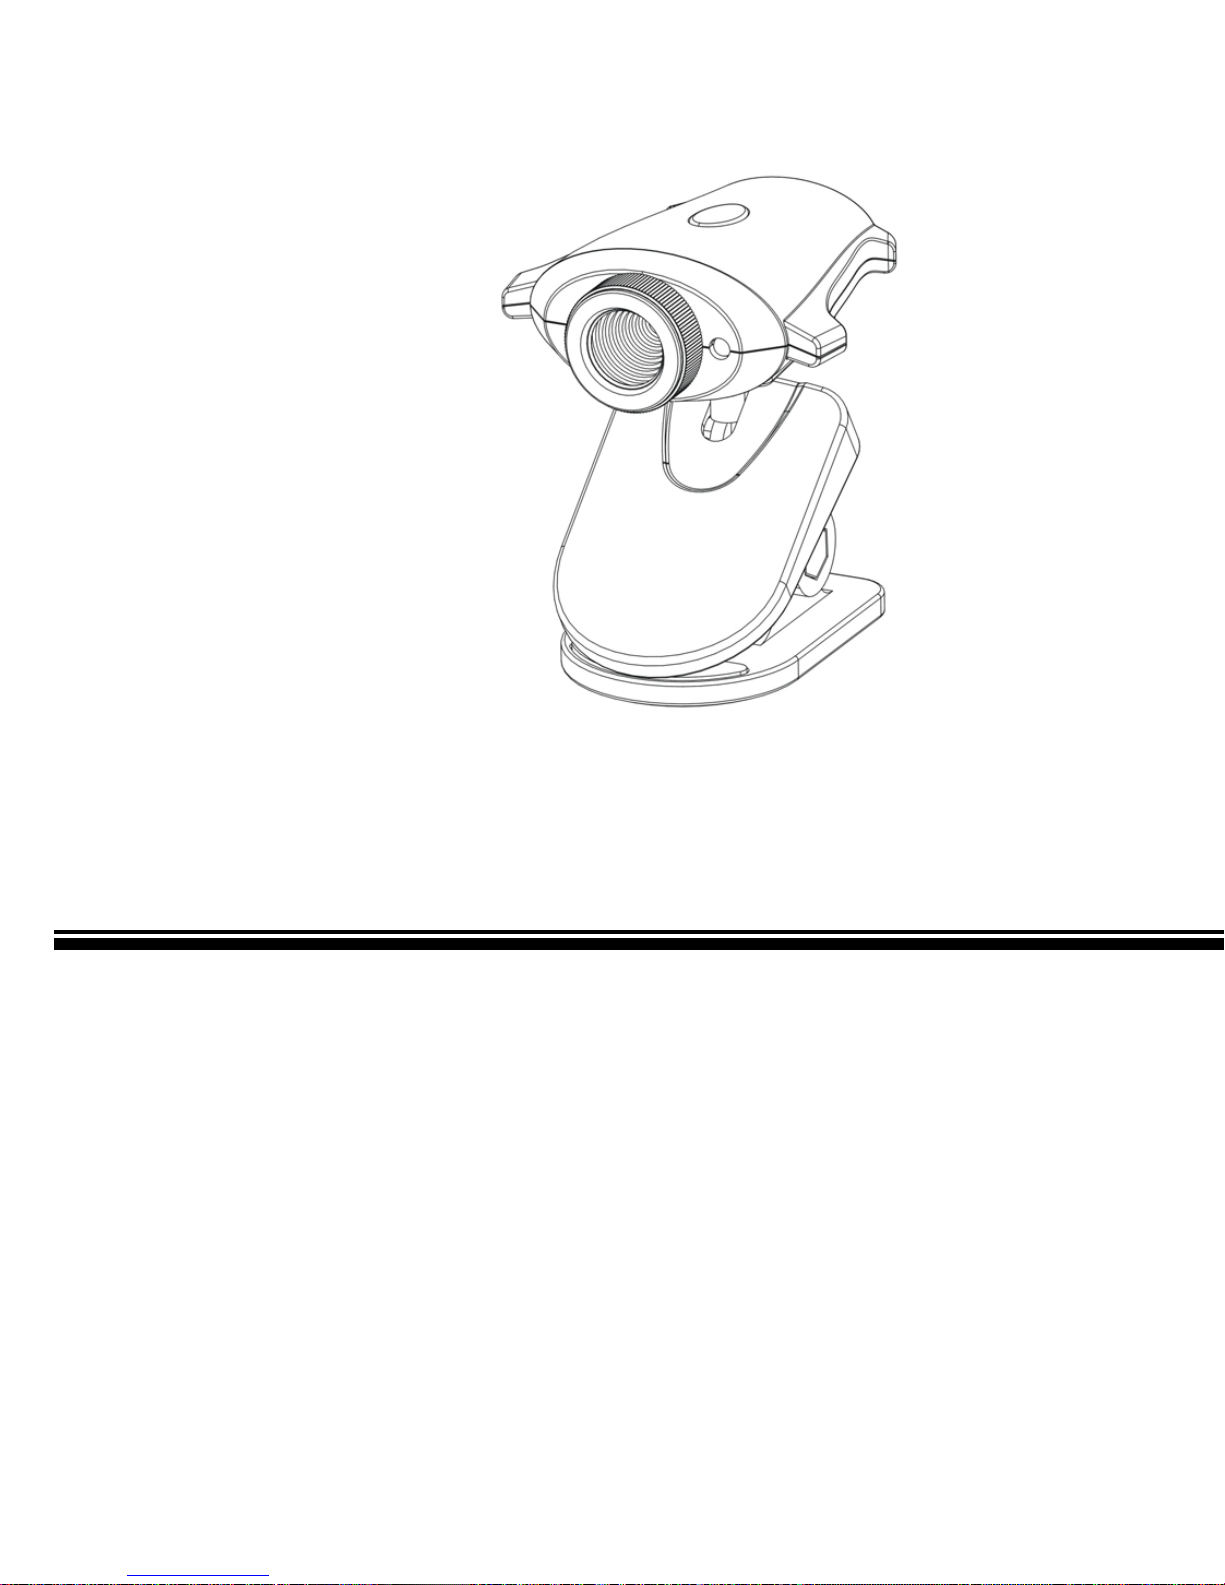
IC300
USB Camera
User’s Guide
Page 2
Features
z
Meet your friends or family over the Internet
z
Capture still pictures and video clips
z
Send video e-m ails
z
1/4-inch CMOS sensor captures 300K pixels resolution i mage
z
Fast frame rate up to 30 frame per second at 320 x 240 resolution
z
Support Windows 98/98SE/Me/2000 and XP
What Is Contained in the Package
1. USB Camera with USB cable
2. Base
3. Installation and software CD
4. User’s Guide (the document you are reading)
Overview
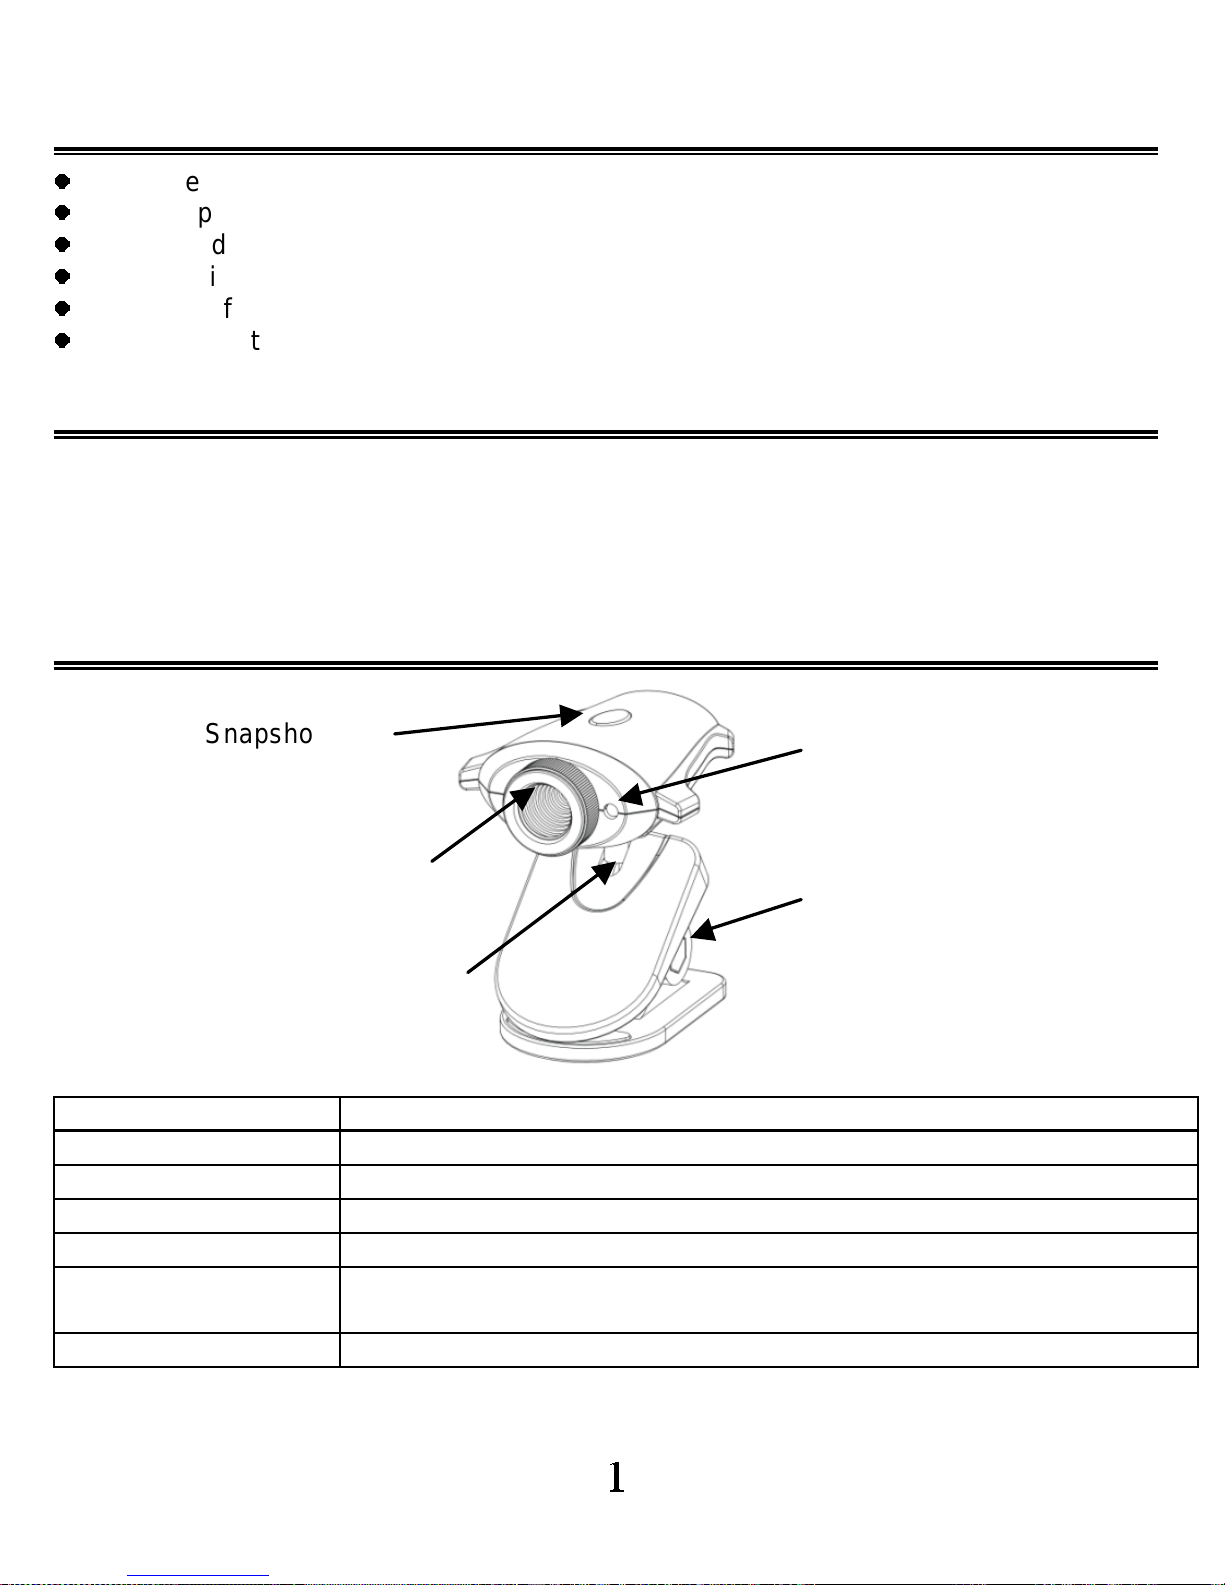
Function
Snapshot button Takes still picture with just one click
Focusing knob Adjusts the focus
Tilt head Provides 90 degree tilt range
Swivel base Pivots full 360 degree rotation
Base Works as a stand/clip dual purpose base for desktop and notebook
computers
Indicator Indicates the camera in active mode
B
Snapshot button
Focusing knob
Tilt head and Swivel base
I
ndicator
B
ase
Page 3
Installing Drivers and Software
Note: If you are using Windows 2000/ XP, there will be a warning screen ”Dig ital Signature N ot
Found”, please ignore it and click Next/ Continue Anyway to continue.
1. Turn on the power of your PC
2. Do NOT connect the USB Camera to the computer before the installati on is
completed.
3. Insert the installation CD into the CD-ROM drive.
4. The installation program should start automatically.
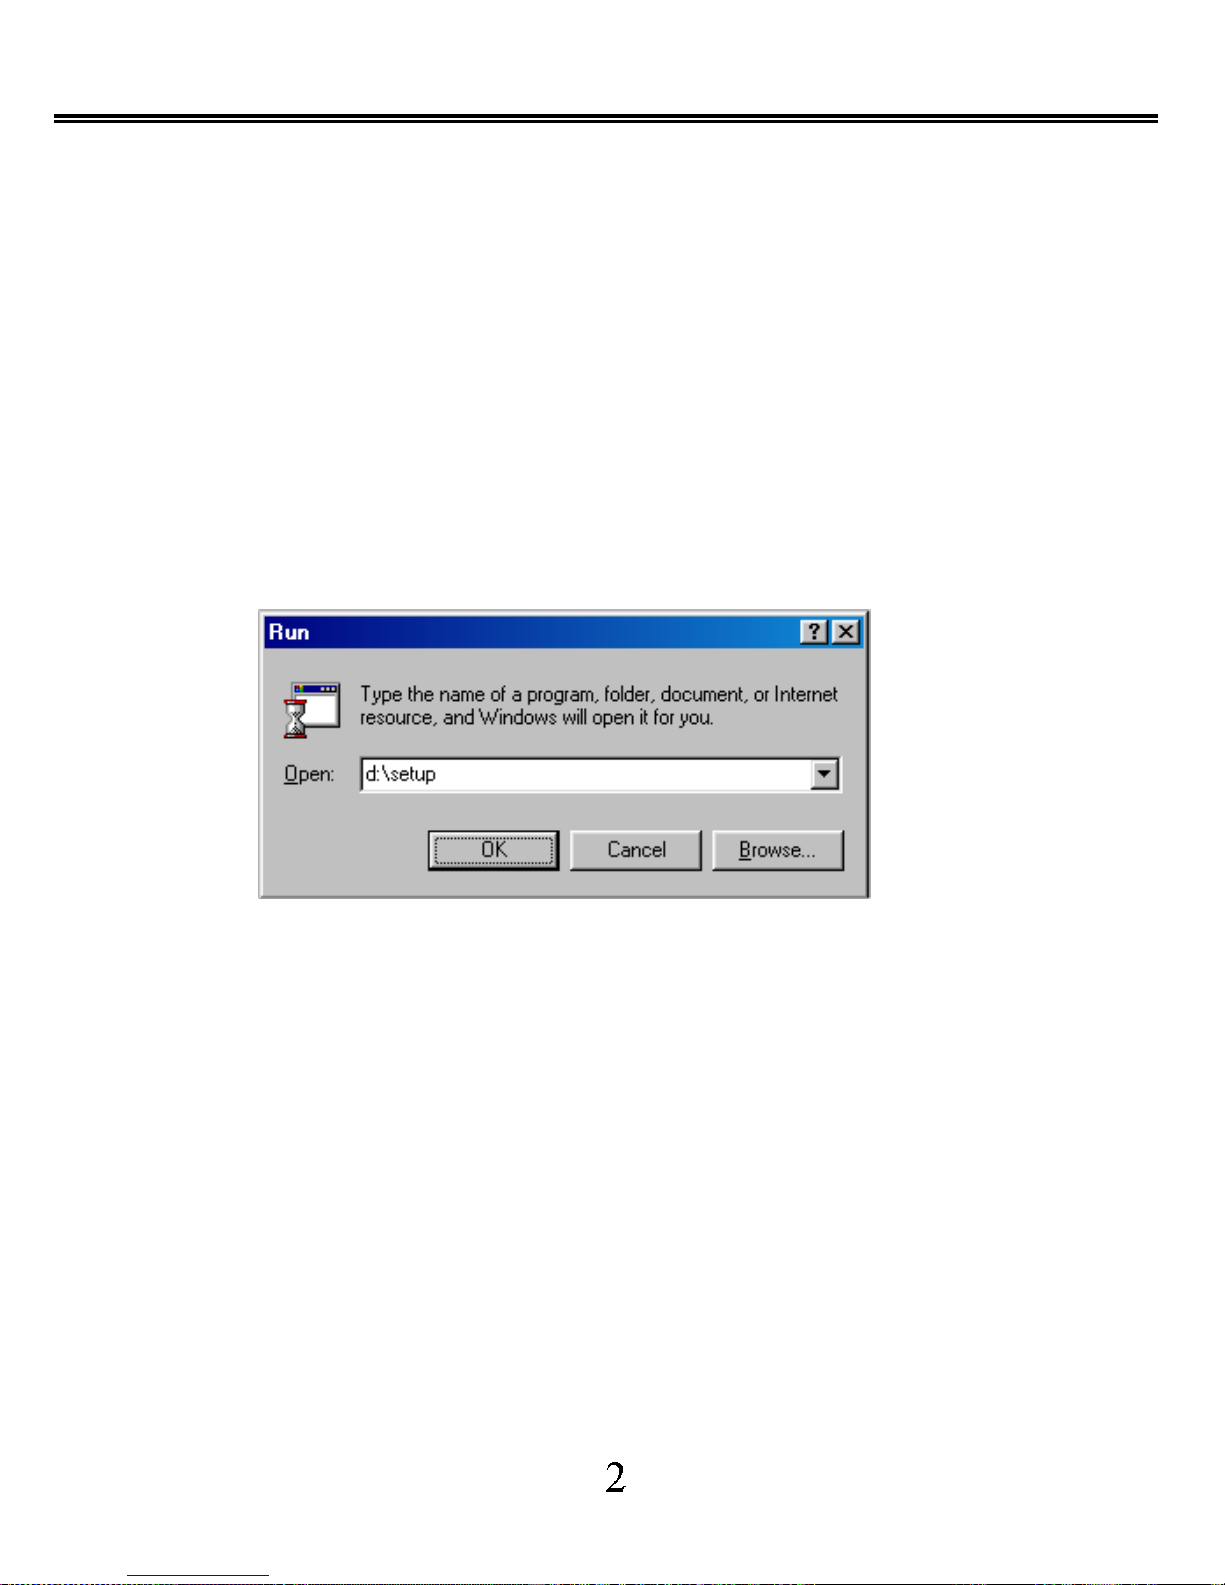
If not, click Start >Run button and enter
d:\setup
Note: d driver is supposed to be CD-ROM drive, please type your right CD-ROM drive.
Page 4
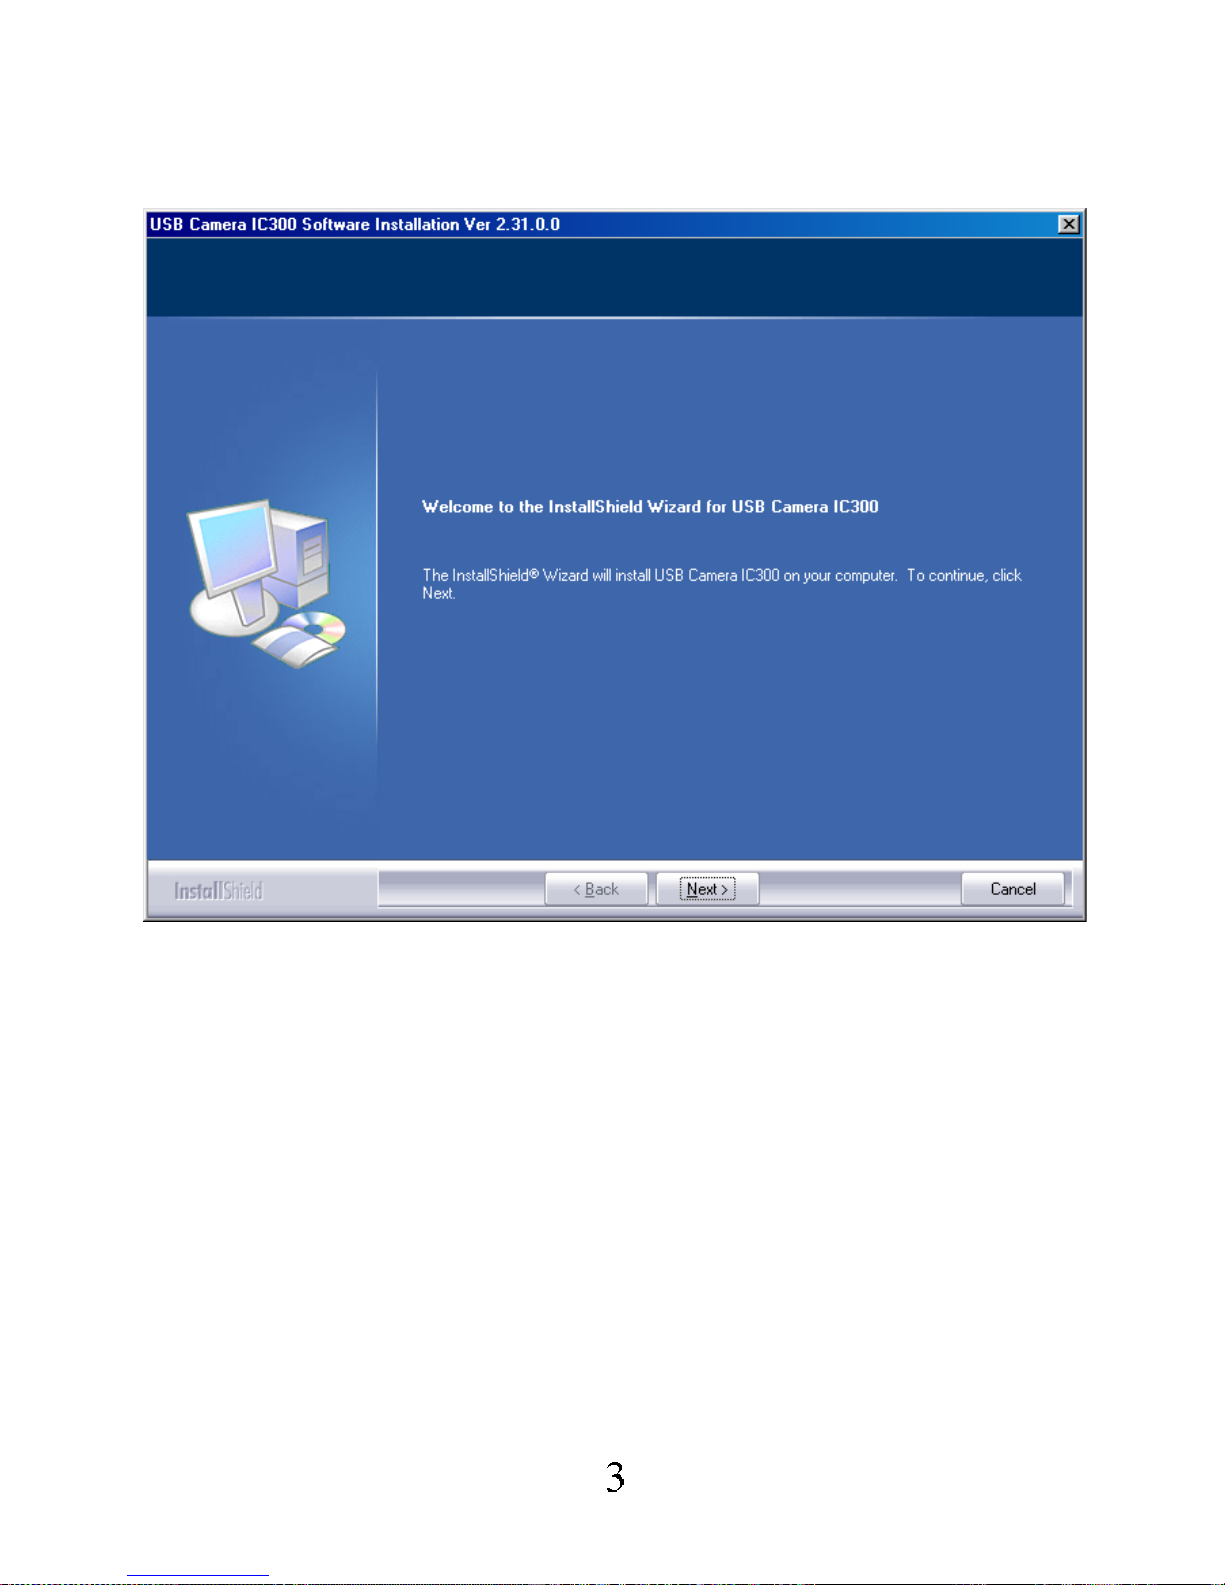
1. Please click Next to continue and follow the on-screen instruction to complete the
installation.
Page 5
Using the AMCap Software
Note: T he screens sho wn below app lies to Windo ws 98, other version of Window s may displa y
slightly different screens .
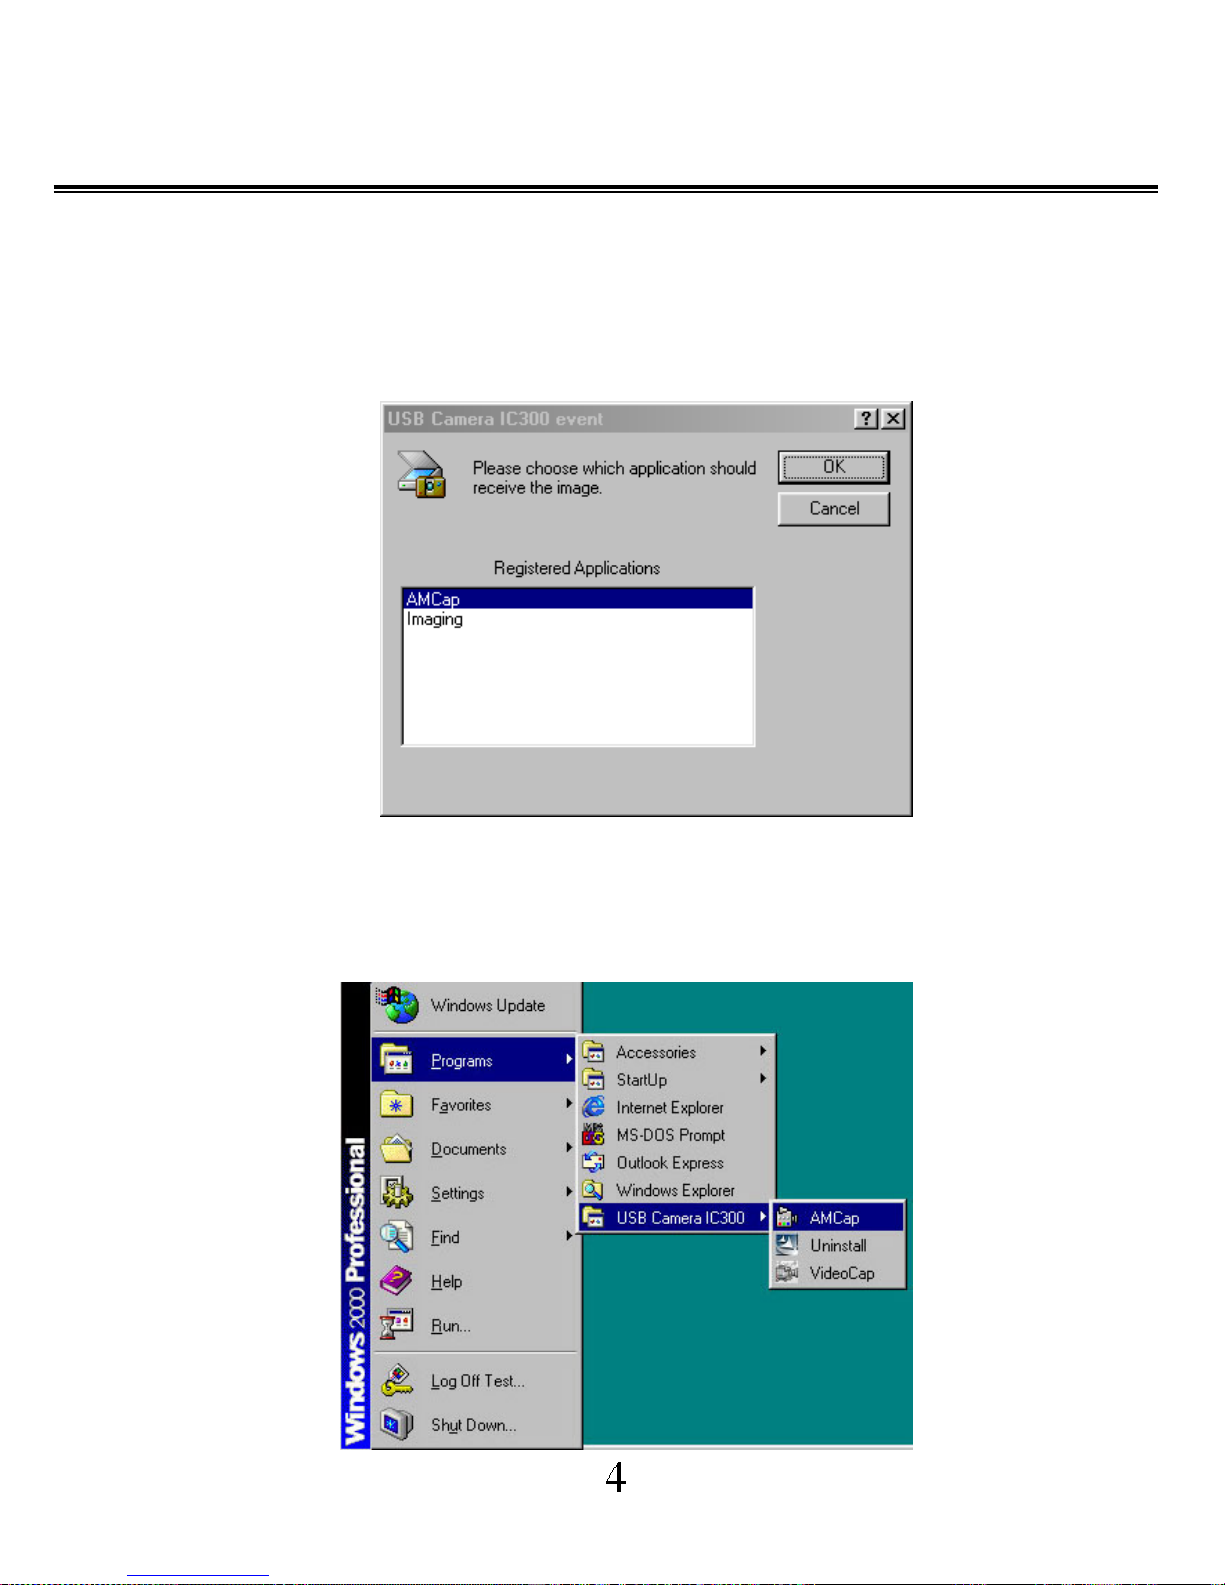
1. A dialog screen will prompt you to select on an application to receive the image.
Select AMCap, click OK to confirm selection.
Note: The above function is not supported by Windows 2000.
In W indows 2000, you should go to Start button and select Programs > USB Camera
IC300 > AMCap to start the applicati on program.
Page 6
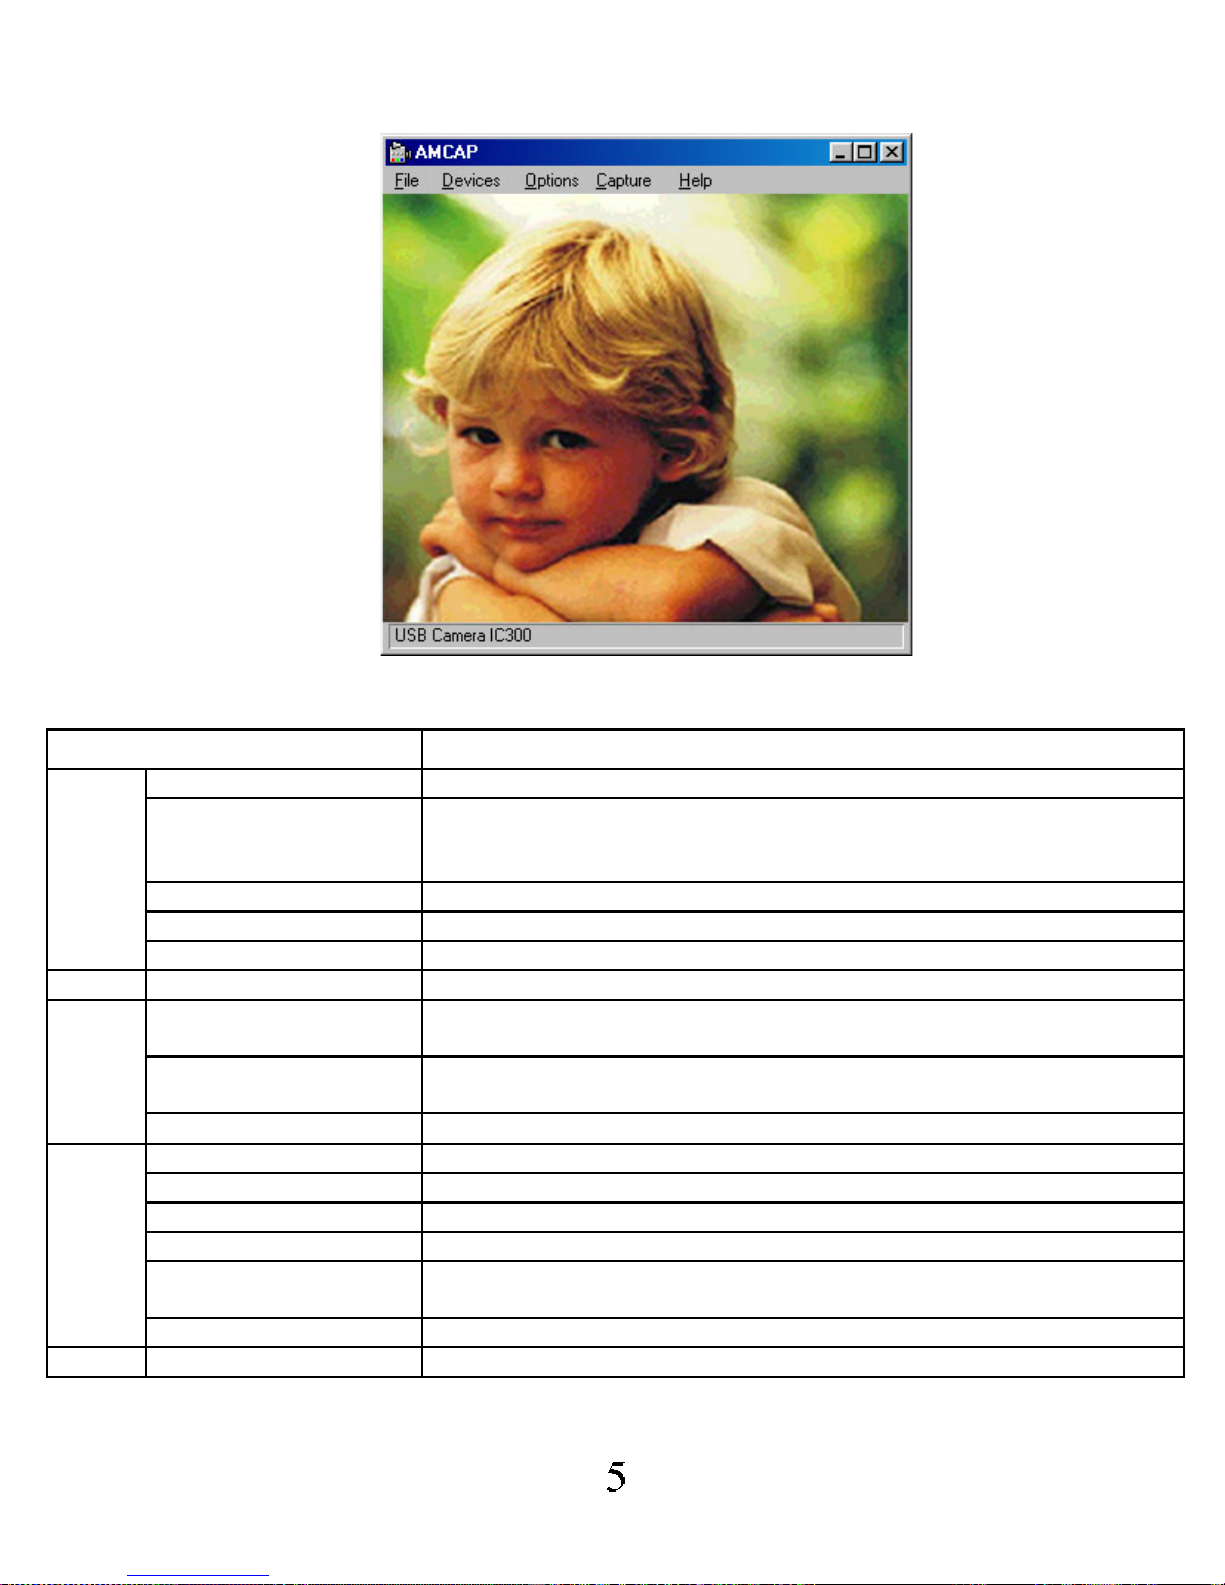
2. The AMCap will launch and display a sc reen as follow.
3. The table below explains each command.
Menu b a r Function
Set Capture File Set the filename of captured video in avi format.
Allocate File Space
Enter the amount of disk space in MB to set aside for the capture file.
Note: Free disk space is shown in MB and it is convenient for user to
allocate the file size within the amount of free disk space.
Save Captured Video As Save the captured video in avi format.
Save Snap Image As Save the captured image in bmp format.
File
Exit Exit the application program.
Devices
USB Camera IC300 The c onnected device will be automatically detected and enabled.
Preview
Enable/ disable preview.
Note: This feature is enabled in default mode.
Video Capture Filter
Configure the pro perties settings of video, including contras t, bright ness ,
auto exposure, etc.
Options
Video Capture Pin Set frame rate, color space and the window size.
Start Ca pture Start captur ing video.
Stop Captur e Stop capt uring video.
Snap One Image Capture a snap image.
Master Stream Choose master stream from three selections: None, Audio, Video.
Set Frame Rate
Set the frame rate fo r c a pturing video.
Note: The highest the frame rate, the more s mooth video will be captured.
Capture
Set Time Limit Set the maximum number of seconds f or capturing.
Help
About Show the version of the application program.
Page 7
Running Video Meeting
To start up Microsoft® NetMeeting
®
on Windows 2000/ XP
1. Click Start Button
2. Point to Programs > Accessories > Com munications > NetMeeting.
To start up Microsoft® NetMeeting
®
on Windows 98/ 98SE/Me/NT4.0, please install the
Microsoft® NetMeeting
®
3.01 included in the CD before using on-line video meeting.
Uninstalling Drivers and Software
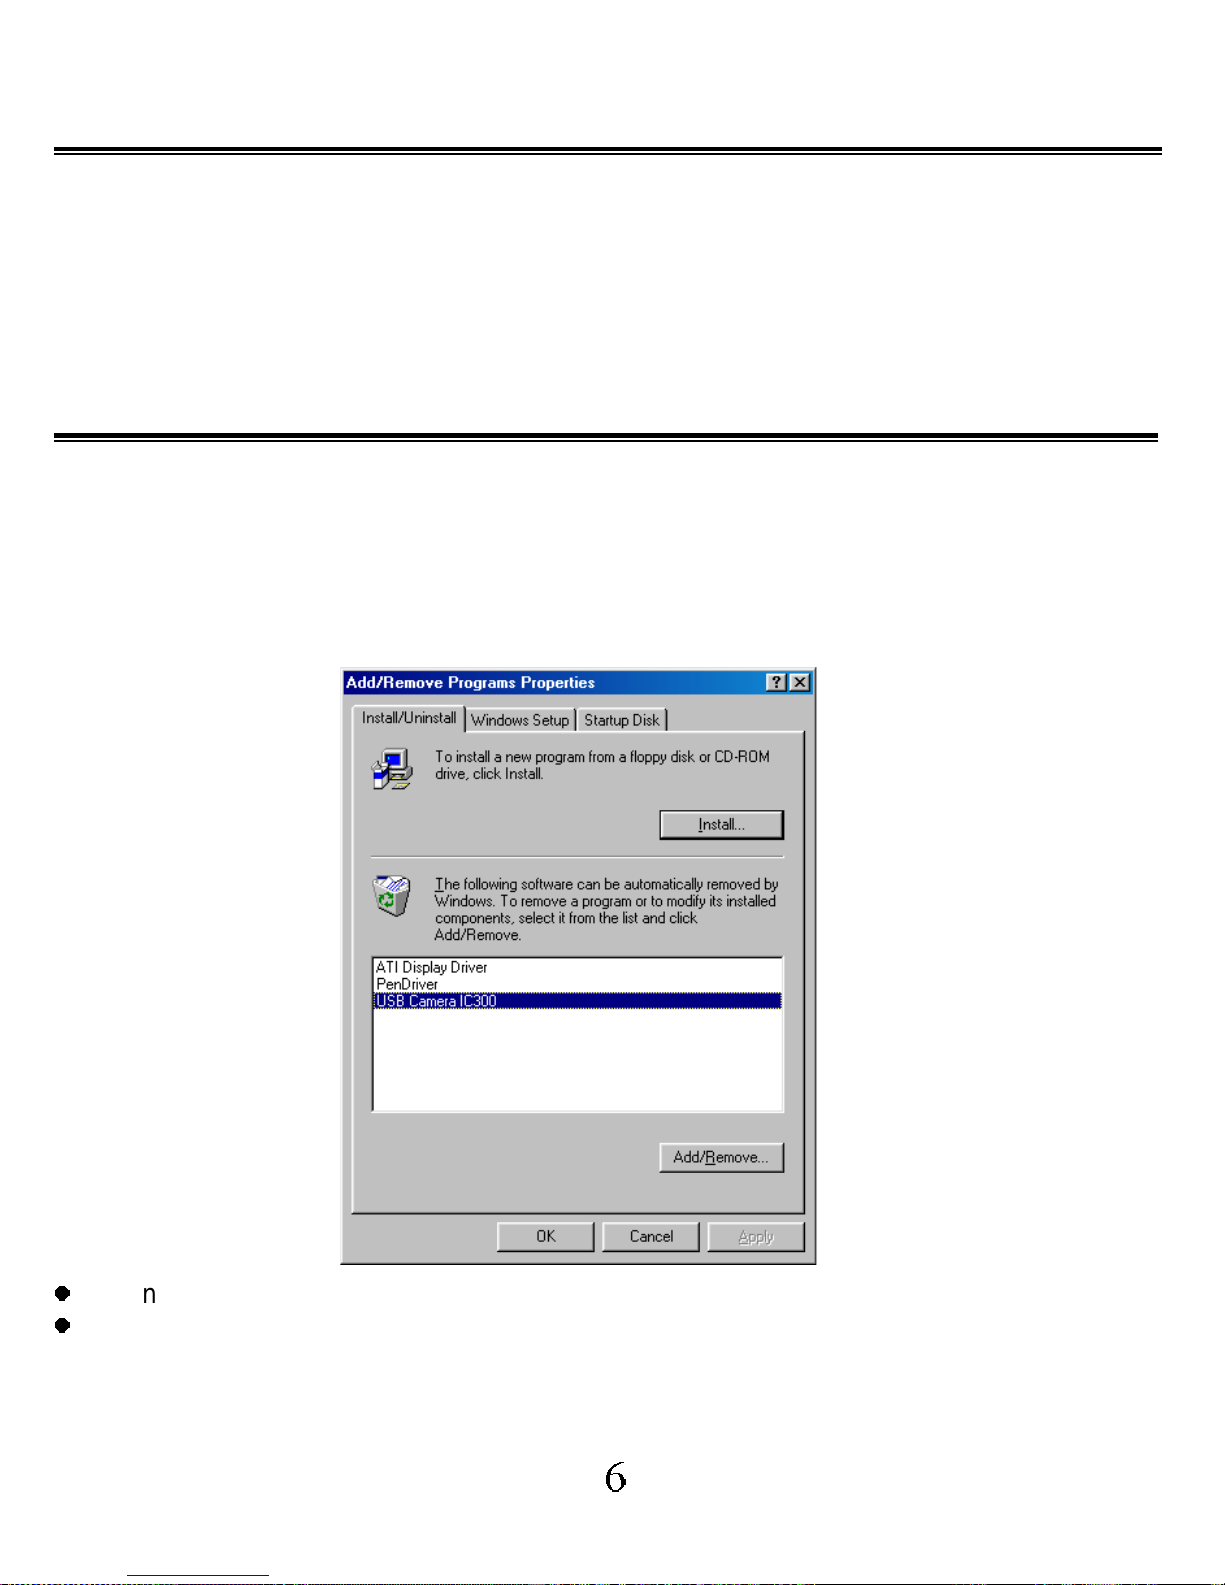
A. Removing the USB camera through the Device Manager
1. Connect the USB camera to the computer.
2. Click the Start button, point to Settings, and click Control Panel.
3. Double-click System and click on the Device Manager tab.
4. Select 'USB Camera IC300' from the Imaging Device list
z
In Windows 98/Me, click the Remove button and follow the on-screen instructions.
z
In Windows 2000/XP, right-click and select Uninstall, then follow the on-screen
instructions.
5. Close the Device Manager.
6. Unplug the camera and restart your computer.
Page 8
B. Removing the driver softw are
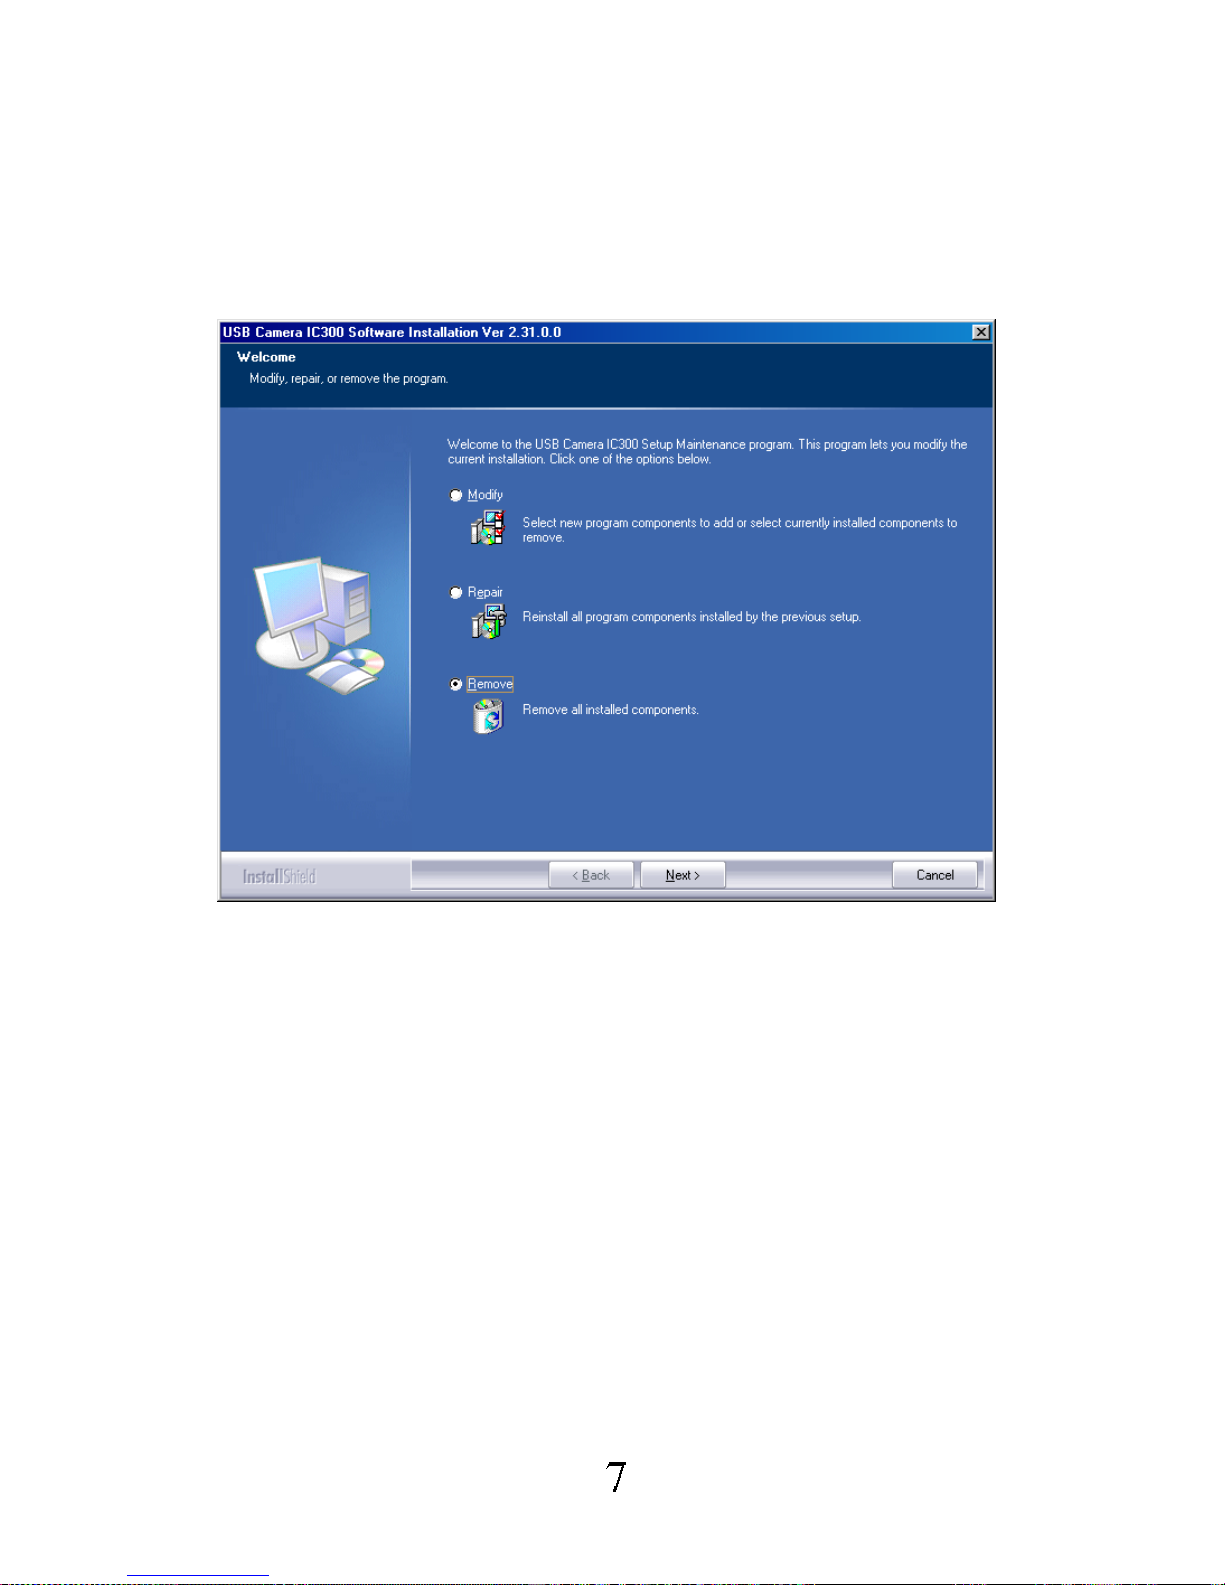
1. Click the Start button, point to Program s > USB Camera IC300 and click Uninstall.
2. The following screen will prompt you. Select Remove.
3. Follow the on-screen instructions to complete the uninstallation.
You have completely rem oved the drivers software and ass ociated registry entries. The next
time the device is plugged in to the computer it will require a reinstall ation.
Page 9

Technical Specification
USB Camera
Sensor 1/4 inch CMOS sensor, 300K pixels
Image resolution VGA-size 640 x 480 pixels
Lens F2.8, f = 6.2mm fixed focus
Focal distance 5cm – infinity
Video frame rate CIF-size 320 x 240 pixels, up to 30 fps
VGA-size 640 x 480 pixels, up to 12fps
Image compression RGB24/I 420
Exposure Auto
SNR ratio 42dB max
View angle > 50 degree
Interface USB1.1
USB cable length 1.5m
Power From USB port of host computer
Operating system Windows 98/98SE/Me,
Windows 2000 or Windows XP
Dimensions 53 x 65.5 x 74 mm (W x H x D)
Weight 72 g (USB cable and base included)
Page 10

FCC Information
T his equipment has been teste d and foun d to comply with the li mits for a C lass B digit al dev ice,
pursuant to Part 15 of the FCC Rules. These limits are designed to provide reasonable
protection against harmful interference in a residential installation. This equipment generates,
uses, and can radiate r adio frequency energy and, if not installed and used in accordance wit h
the instructions, may cause harmful interference to radio communications. However, this
notice is not a guarantee that interference will not occur in a particular installation. If this
equipment does cause harmful interference to radio or television reception, which can be
determined by turning the equipment off and on, the user is encouraged to try one or more of
the following measures:
Reorient or relocate the receiving antenna.
Increase the distance between the equipment and receiver.
Connect the equipment to an outlet on a circuit different from that to which the receiver
is connected.
Consult the dealer or an experienced radio/TV technician.
Caution: To comp ly with the limit s for the Class B dig ital device, pur suant to Part 15 of the FCC
Rules, this device must be insta lled in co mputer equip ment certif ied to comply w ith the Cla ss B
limits.
All cables used to connect the computer and peripherals must be shielded and grounded.
Operation with non-certified computers or non-shielded cables may result in interference to
radio or television reception.
Modifications: Any change or modifications not expressly approved by the grantee of this
equipment could void the user's authority to operate the equipment.
Information in this document is s ubject to change without notice.
No part of this document may be reproduced or transmitted in any form or by any means,
electronic or mechanical, including photocopying and recording, or translated to another
language, for any purpose without the prior written consent of the manufacturer.
2003. All rights reserved.
Version 3.00
2003. All Rights Reserved. All brands and product names are trademarks or regis tered trademarks of their
respective owners.
Printed in China MAN-IC300000-EN-V3
 Loading...