

Page 1
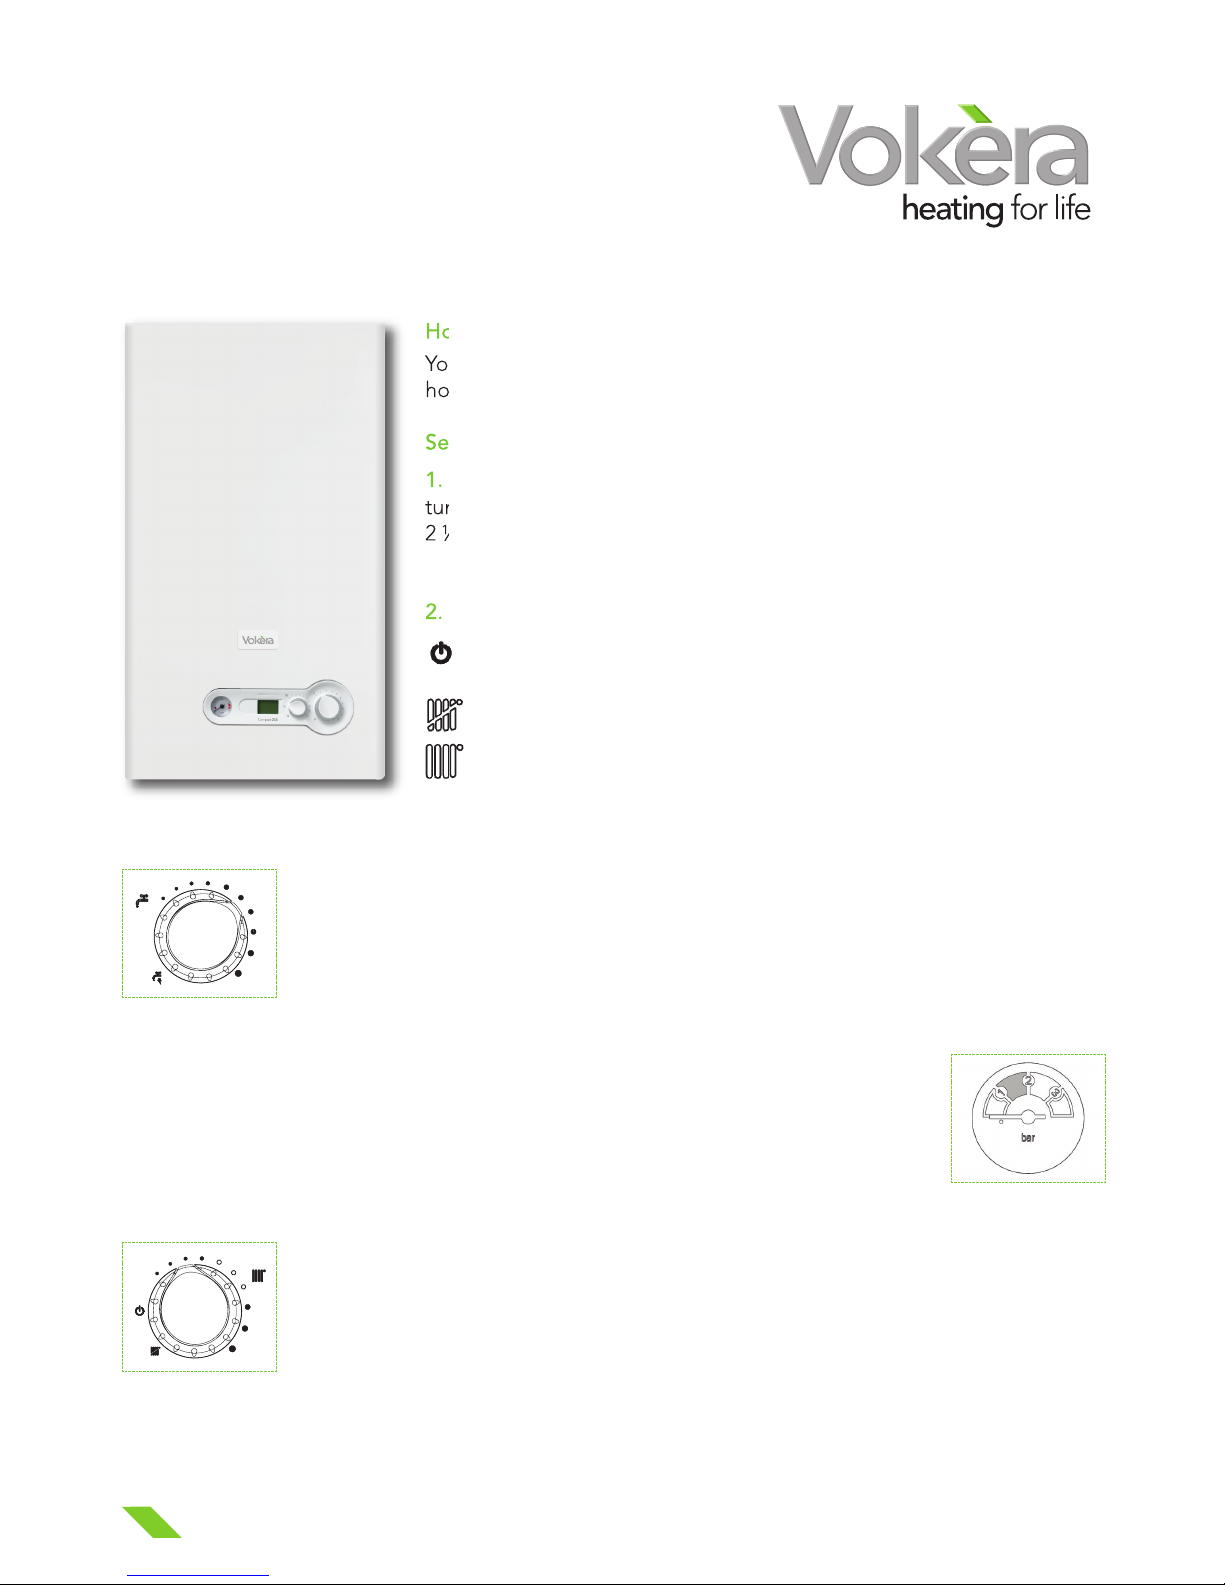
Your Vokèra Compact A combi boiler
How to use your Vokèra Compact A
Your boiler is a combi boiler, it therefore provides hot water whenever a
hot tap is opened, and central heating when required.
Setting the heating and hot water
1. Check
that the boiler is turned on at the electricity supply. If it is not,
turn the boiler ON. It will go through a self-test cycle that will last about
2 ½ minutes. Wait for this to end before adjusting the boiler.
2. Choose with the selector knob:
Standby - no heating or hot water but boiler will protect itself
against frost if cold
Summer position - no heating, just hot water
Winter position - heating and hot water
VOKERA COMPACT A
3. The temperature of the domestic hot water can easily be adjusted using the hot
water temperature selector.
Rotate the temperature selector clockwise to increase the temperature and counterclockwise to decrease the temperature - until you reach your desired setting. The
temperature can be set from a minimum of 37°C to a maximum of 60°C.
The central heating (radiator) temperature can easily be adjusted using the heating
temperature selector.
Rotate the temperature selector clockwise to increase the temperature and counter
clockwise to decrease the temperature - until you reach your desired setting. The
temperature can be set from a minimum of 40°C to a maximum of 80°C.
4. Boiler pressure. When the needle is between 1 and 2 on the pressure gauge the
boiler pressure is adequate, if the needle falls below 1 the boiler will need to be
topped up using the filling loop.
Page 2
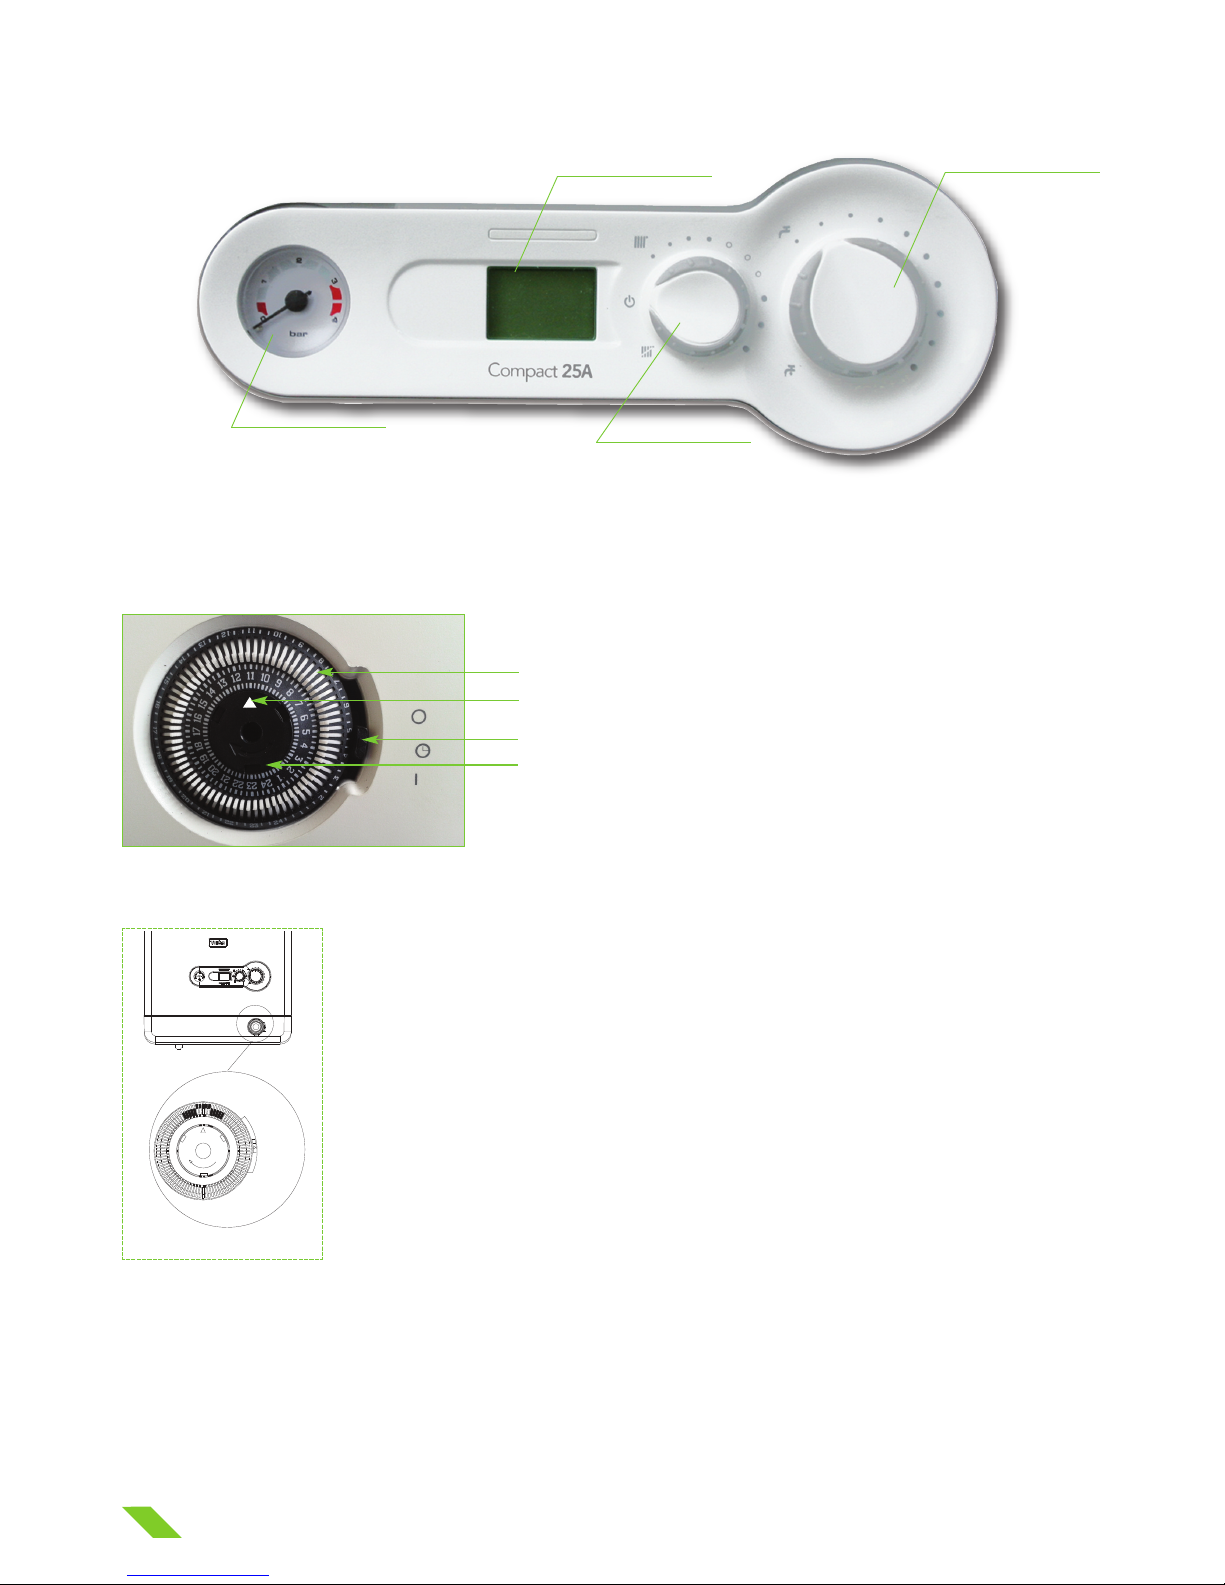
VOKERA COMPACT A
C
ontrol overview
Display
Hot water
t
emperature selector
Pressure gauge
Mode selector switch
Heating temperature selector
Setting the Vokèra Mechanical Clock
If your boiler has been installed with the Vokèra mechanical clock, it can be
adjusted as follows:
The time of day can be set by grasping the outer edge of the black dial and
turning it in a clockwise direction until the correct time is in line with the pointer.
Setting the “switching times”
The “ON” periods are set by sliding the white tappets, adjacent to the time
periods required, to the outer edge of the dial. The tappets that remain at the
centre of the dial will be the “OFF” periods.
Note: each white tappet is equivalent to 15 minutes and this is the shortest
switching time for ON or OFF periods.
- To select “AUTO” mode move the selector switch in central position.
- To select “ON” mode move the selector switch in the bottom position.
- To select “OFF” mode move the selector switch in the upper position.
AUTO
ON
OFF
The mechanical clock
Tappets
Selector switch
Black dial
A
UTO
ON
O
FF
Pointer
Page 3
VOKERA COMPACT A
Customer Care Team
Our customer care centre in the UK is open Monday – Friday, 8.15am – 5pm and Saturday, 8am – 12pm.
Y
ou can contact them via telephone on: 0344 391 0999 option 2 or email: service@vokera.co.uk.
If you are experiencing a problem with your appliance, we ask that you follow the simple initial checks
below before logging a call with us:
-
Check that you have an electricity supply to your appliance and the power switch is on
- If you have a pre-pay gas/electric meter, check that there is sufficient credit left
- If possible check that your mains gas is turned on
- Check that your mains water supply is on and you have sufficient water supply of water to the boiler
- Check any boiler controls/programmers/thermostats are on and if battery operated the batteries are
not flat
- If your problem relates to one water outlet, we advise that you contact your local plumber first to check
the pipework
If you have checked all of the above and everything is in order, please have the following information
to hand so that we can handle your request efficiently:
-
Have you got hot water?
- Have you got central heating?
- Is there any visible damage to the flue outlet?
- Boiler Model Name
- Boiler Serial Number
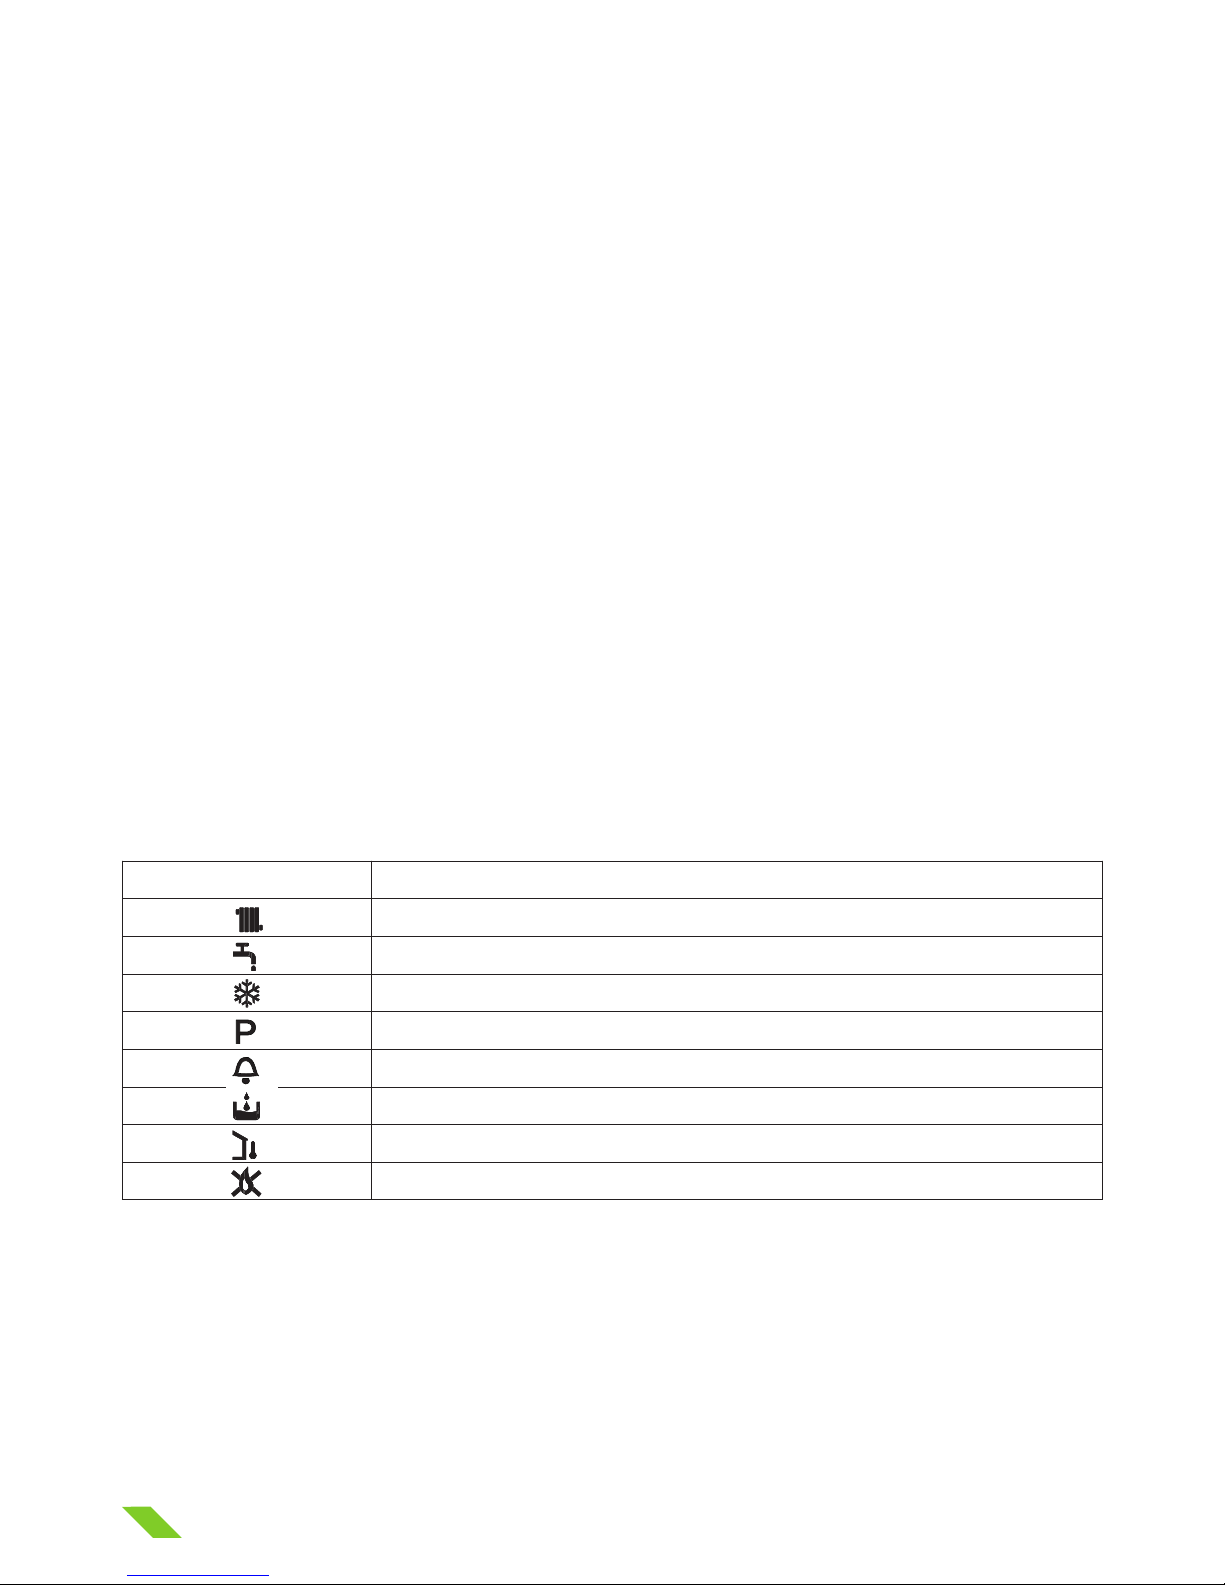
Symbol / Icon Description
Displayed when heating mode is active
Displayed when hot water mode is active
Displayed when frost protection function is active
Displayed when hot-water pre-heat function is enabled. Flashes when functioning
Displayed if an alarm or fault has been detected
Displayed when low system pressure has been detected
Displayed when an external sensor is connected to the boiler
Displayed if an ignition fault has been detected
Display descriptions
 Loading...