

Voigtlander Bessa III W Operating Instructions
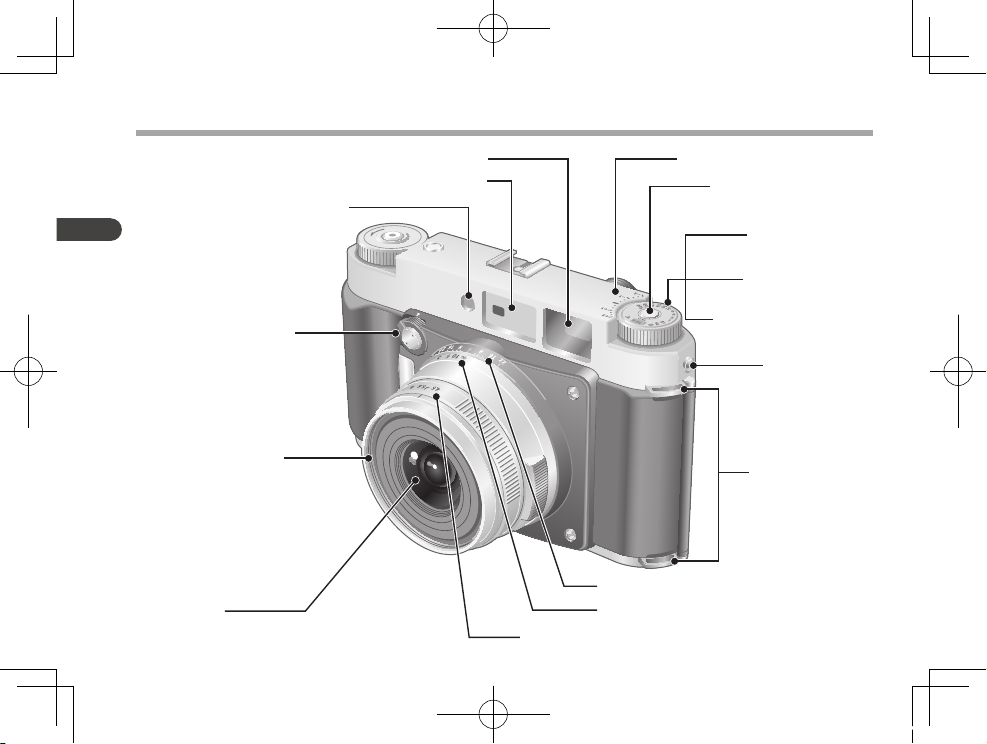
Power Switch
Lens
Bright Line Frame Illumination Window
Viewfinder Window
Synchro Contact
Depth of Field Index
Focusing Ring
Filter Mounting Screw
Rangefinder Window
Aperture Ring
Neck Strap Eyelets
Exposure Compensation Index
ISO/Filmspeed Dial
Exposure Compensation
Dial
Dial Lock Release Button
Shutter Speed Dial
8
English
Description of Controls
GF670W_TO_EFSC.indb 8 11.2.28 4:16:04 PM
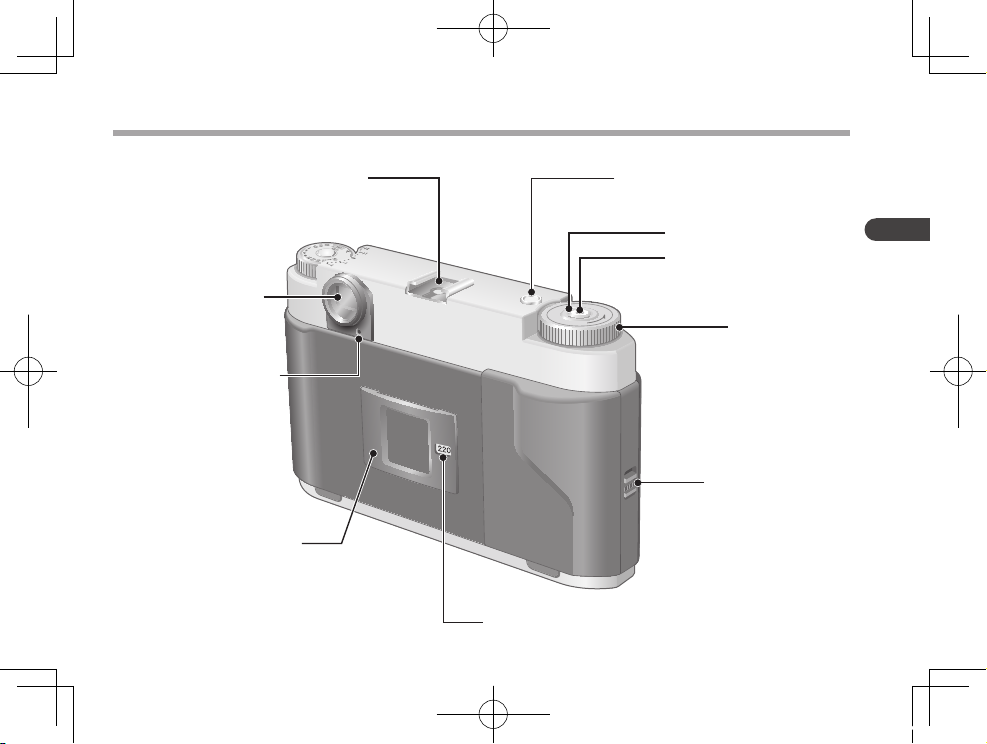
Film Type Indicator Window
Rangefinder Eyepiece
Shutter Opening Indicator
Back Door Lock Lever
Film Indicator Slot
Film Advance Dial
Shutter Release Button
Cable Release Screwthread
Frame Counter
Hot Shoe Contact/
Accessory Shoe
9
English
GF670W_TO_EFSC.indb 9 11.2.28 4:16:05 PM
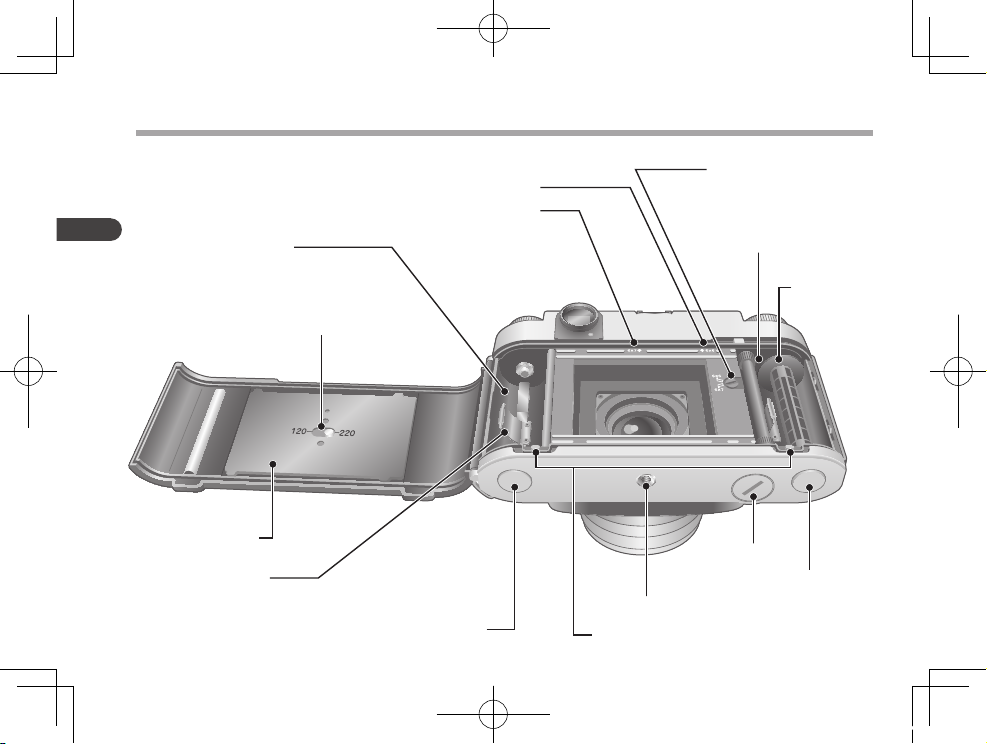
Start Mark (for 6X7)
Start Mark (for 6X6)
Film Spool Chamber
Film Type Selector
(120 or 220)
Film Spool
Pressure Spring
Film Pressure Plate
Film Loading Knob
Spool Release Buttons (Red)
Tripod Socket
Spool Release
Knob
Battery Chamber
Cover
Film Take-Up Spool
Chamber
Frame Size Selector
(6X6 or 6X7)
Film Take-Up
Spool
10
English
Description of Controls
GF670W_TO_EFSC.indb 10 11.2.28 4:16:05 PM
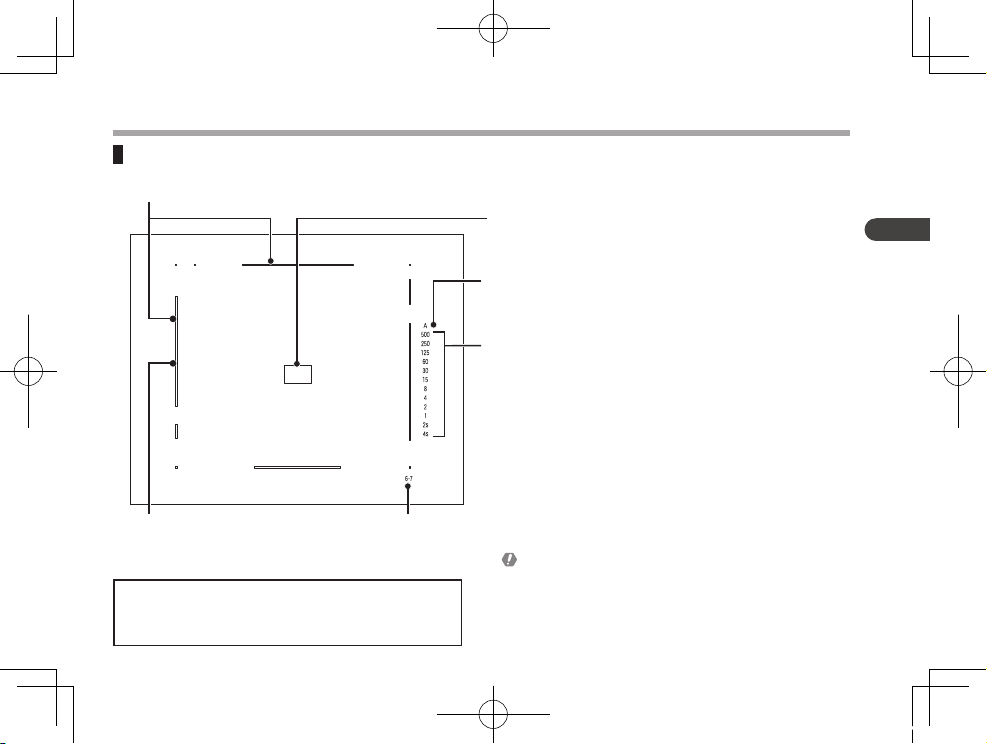
Bright Line Frame Frame Size Indicator
Shutter Speed Indicator
Aperture Priority AE Indicator
Rangefinder Patch
Moving Frame
When all the shutter speed indicators are illuminated,
or when none of them light up, low battery power may
be a concern.
11
English
Indicators in Viewfinder
When “500” indicator blinks rapidly, it means out of
measurment range due to over exposure.
When “4s” indicator blinks rapidly, it means out of
measurement range due to under exposure.
Adjust the aperture until the relative shutter speed
indicator is illuminated.
GF670W_TO_EFSC.indb 11 11.2.28 4:16:06 PM
12
English
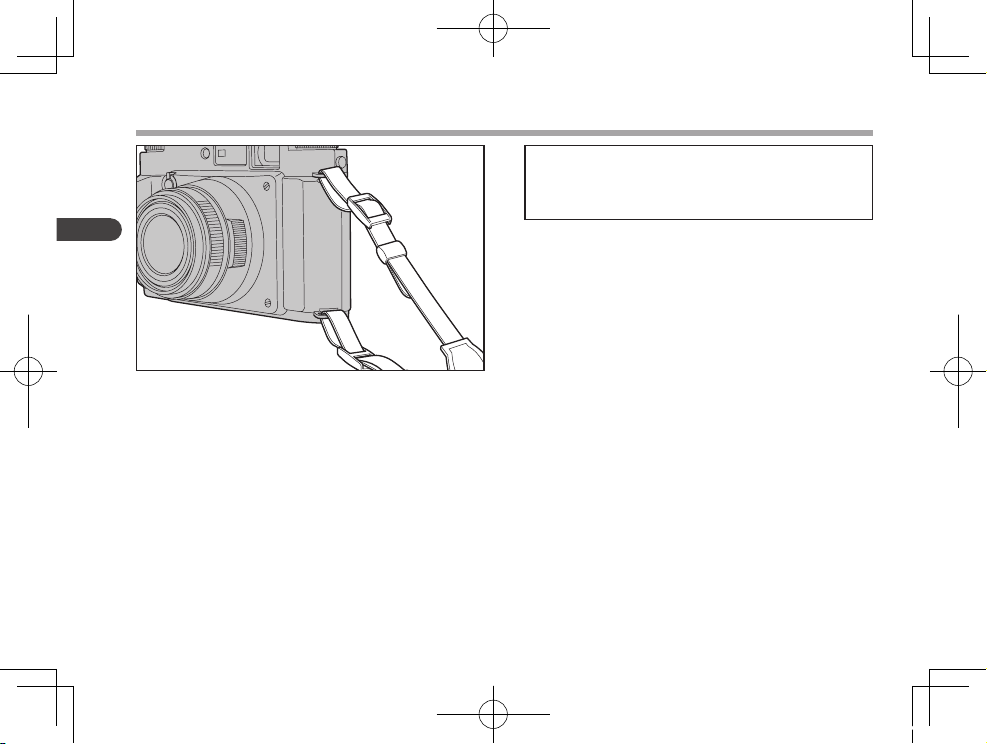
Attaching Neck Strap
]
When using a commercially available strap instead
of the supplied one, make sure it is strong enough
to use.
]
Do not use straps designed for cell-phones.
Attach the neck strap to the camera as illustrated.
GF670W_TO_EFSC.indb 12 11.2.28 4:16:07 PM

13
English
Attaching/Removing Finder Eyepiece
Turn the finder eyepiece clockwise to attach it.
Turn it counterclockwise when removing it.
GF670W_TO_EFSC.indb 13 11.2.28 4:16:07 PM
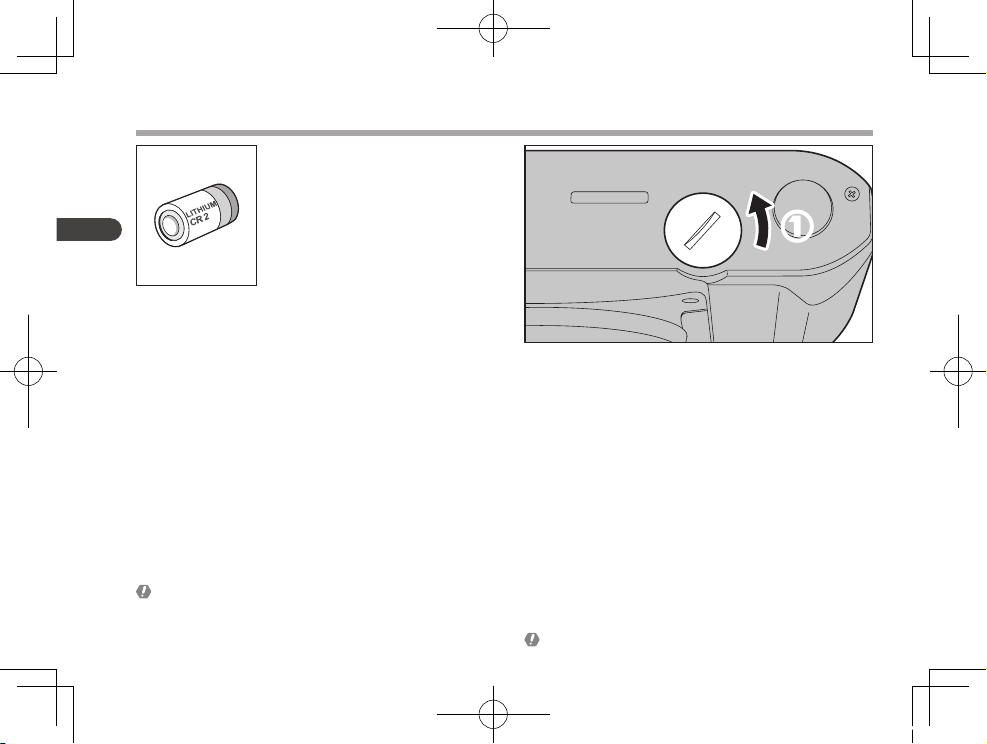
Turn the bat tery chamber cover counterclockwise
using a coin or something similar.
14
English
Inserting Battery
One CR2 (3V) lithium bat te ry is
used with this camera.
Turn the power switch off when replacing the battery.
Battery performance is impaired at low temperatures,
and may lead to significantly faster loss of bat tery
power. Prepare a ba cku p bat ter y kept at normal
temperature.
GF670W_TO_EFSC.indb 14 11.2.28 4:16:08 PM
3
2
15
English
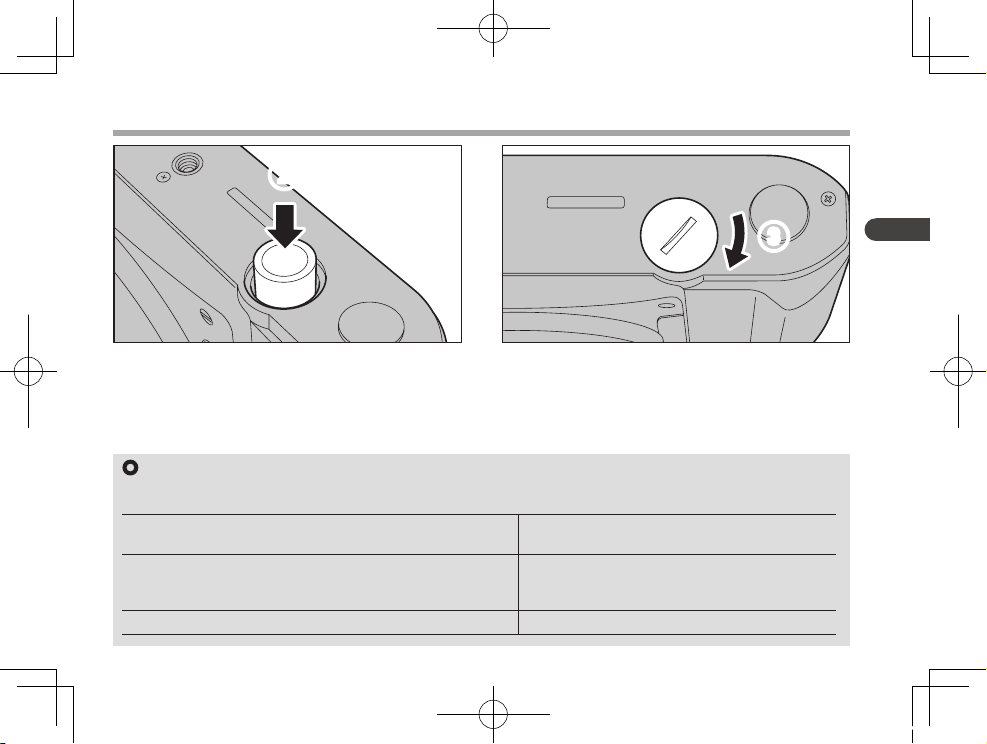
Inser t the batter y positive side + down into the
battery chamber.
3
Turn the battery chamber cover clockwise until it is
firmly closed.
Battery Check
The battery status may be checked by pressing the shutter release button halfway, and is indicated by the “A” and shutter speed
indicators in the viewfinder.
The “A” and /or shutter speed indicators are illuminated or blink
according to the exposure setting you selected.
The battery is fine.
The “A” and all shutter speed indicators are illuminated, and then,
the indicator(s) start blinking rapidly according to the exposure
setting you selected.
The battery is low. Replace the battery.
All indicators are illuminated, or none of indicators are illuminated. The battery is exhausted. Replace the battery.
GF670W_TO_EFSC.indb 15 11.2.28 4:16:09 PM
16
English
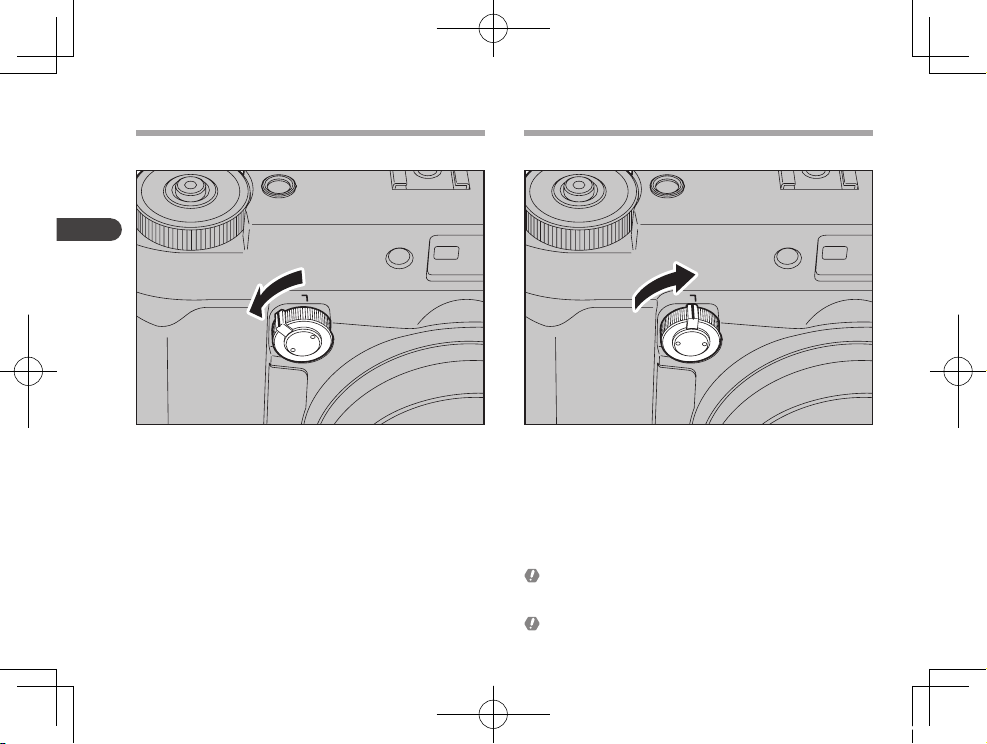
1
Turn the power switch counterclockwise to unlock.
\
The power will be switched ON, and camera readied
to shoot photos.
2
Turn the power switch clockwise, and align the white
line with “L” (Lock).
\
The power will be switched OFF, and the shutter
release button locked.
Power switch ON Power switch OFF
If the battery is removed when the shutter is open
during a long exposure or in Bulb setting, the shutter
will remain open.
Turn the power swi tch OFF when replac ing the
battery.
GF670W_TO_EFSC.indb 16 11.2.28 4:16:10 PM
17
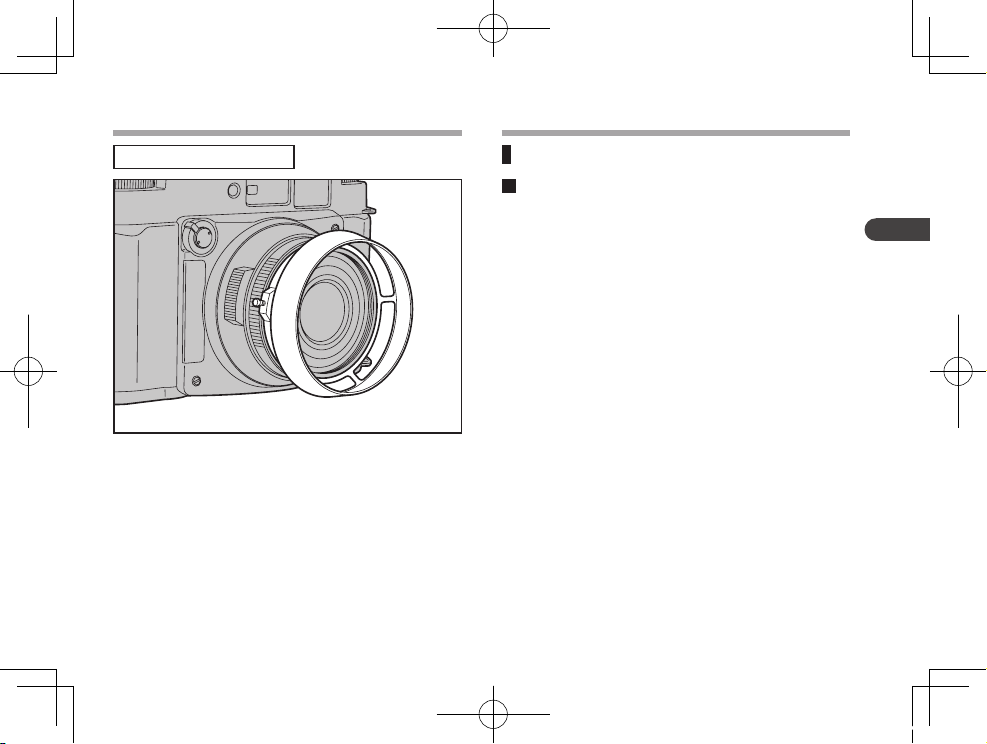
English
1
Loosen the lens hood mounting screw.
2
Mount the lens hood on the outer ring of the lens.
3
Tighten the lens hood mounting screw to lock the
lens hood onto the lens.
Attaching/Detaching Lens Hood
A lens hood is optional.
Filters
The filters usable for this camera
Use a 58mm diameter filter
]
layering of two filters or more will cause vignetting.
GF670W_TO_EFSC.indb 17 11.2.28 4:16:10 PM
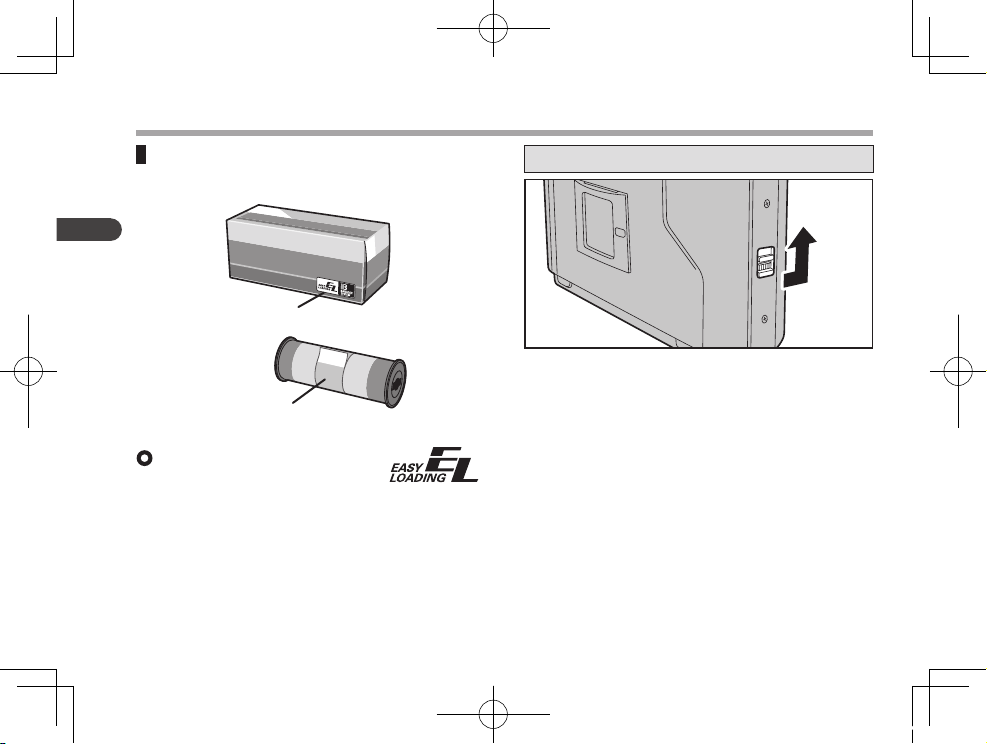
Easy Loading logo
Film
18
English
Easy Loading
With the Easy Loading system,
you ca n load film quickly and
easily by placing the hole on the film leader on the
hook in the spool slot. The Easy Loading system
prevents film slack and improper loading.
Loading Film
120/220 film to be used with this camera
Open/Close of the back door
1
To open the back door, slide the back door lock lever
to the front of the camera.
2
Move it upward as indicated by arrow.
3
When closing the back door, close it slowly and
gently until the lock clicks.
GF670W_TO_EFSC.indb 18 11.2.28 4:16:11 PM
 Loading...