

Page 1

VoiceAmp II
User Guide
Part Number VAHE18 Issue 1.0
VOICE
active
Page 2
Introduction
Congratulations on purchasing the Voice Active VoiceAmp II
- multipurpose headset adaptor. This unit is supplied to
make your office telephone “headset compatible”. Please
read the following instructions carefully to successfully set
up and operate your headset and adaptor.
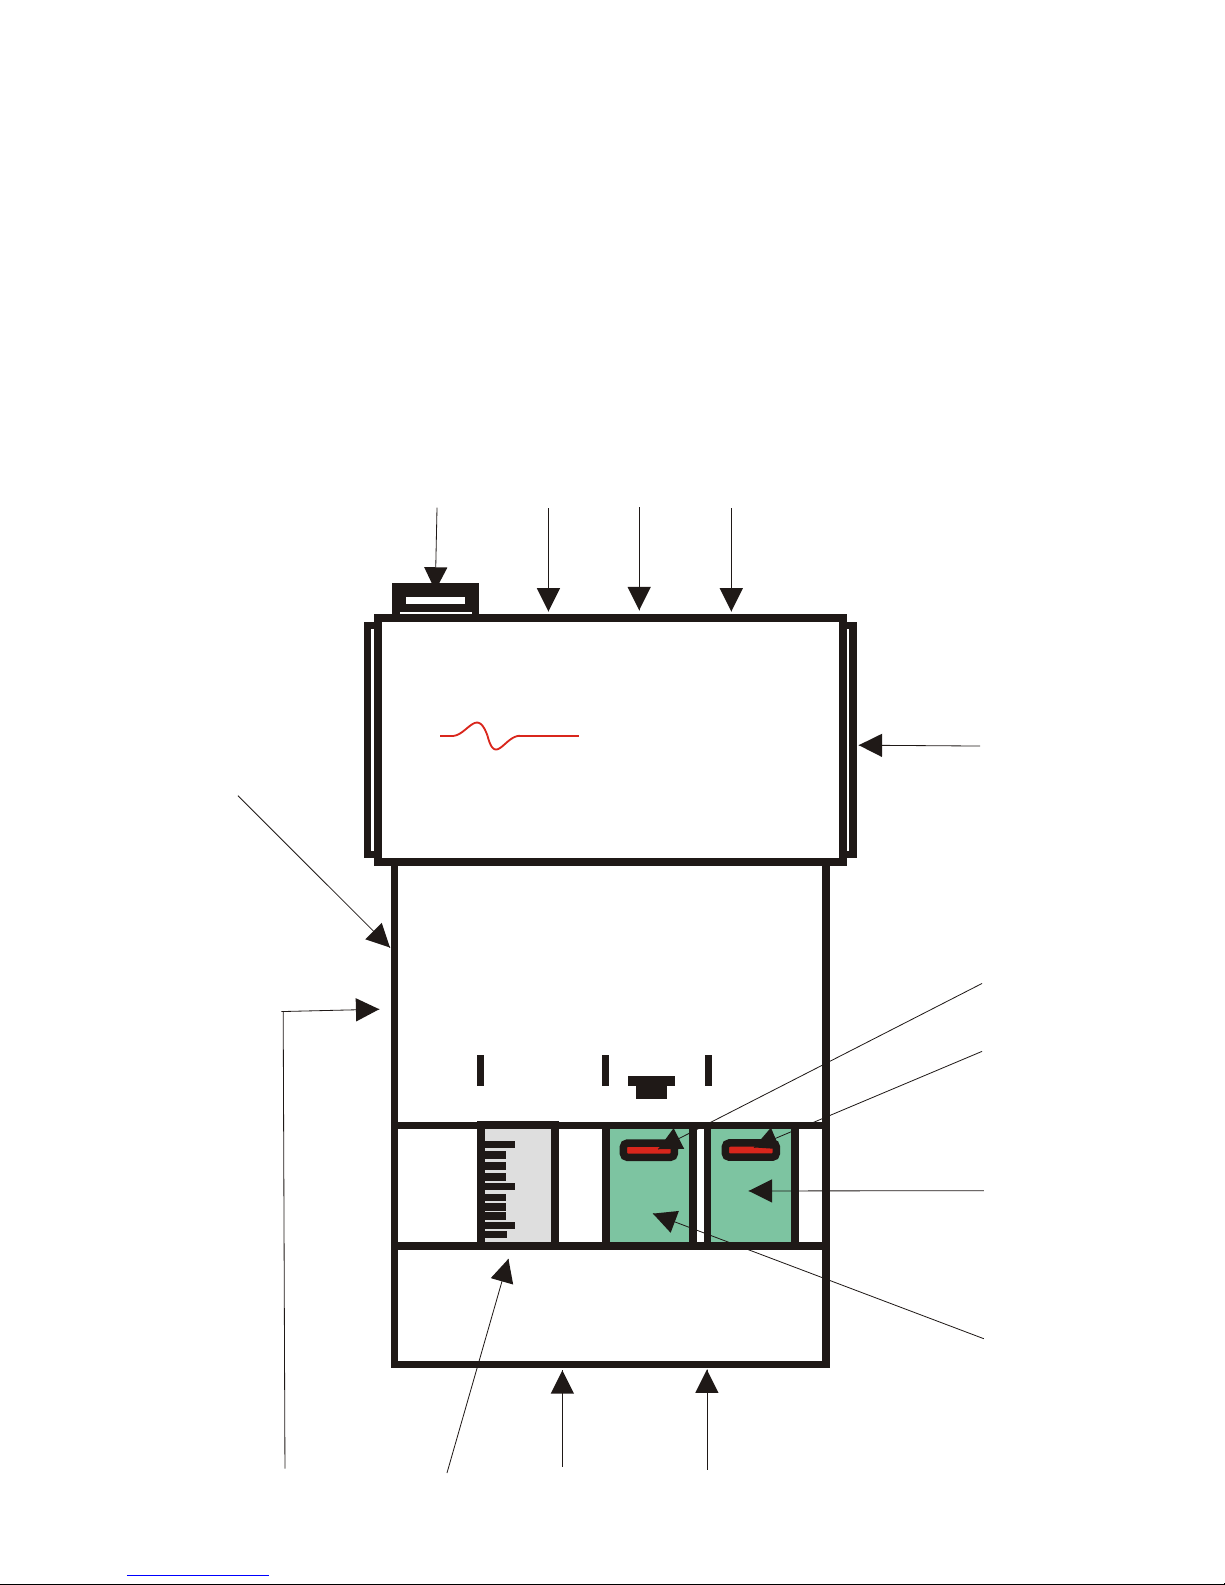
2
9
14
8
7
6
5
432
1
1011
1213
VOLUME
HEADSET
MUTE
VOICE
active
Page 3

Features
1. Mounting for headset stand
2. DC Power socket
3. Telephone jack socket
4. Handset jack socket
5. Battery compartment
6. Headset active/busy indicator
7. Mute indicator
8. Mute switch
9. Handset/Headset selection switch
10. Headset jack socket
11. Headset compatibility switch
12. Volume control
13. Additional control switches
14. Compatibility switch compartment
3
Pack Contents
1. VoiceAmp II Headset Adaptor
2. Standard Stub Cable
3. 2 x AA Batteries (Alkaline)
4. Instruction booklet
Page 4
Installation
4
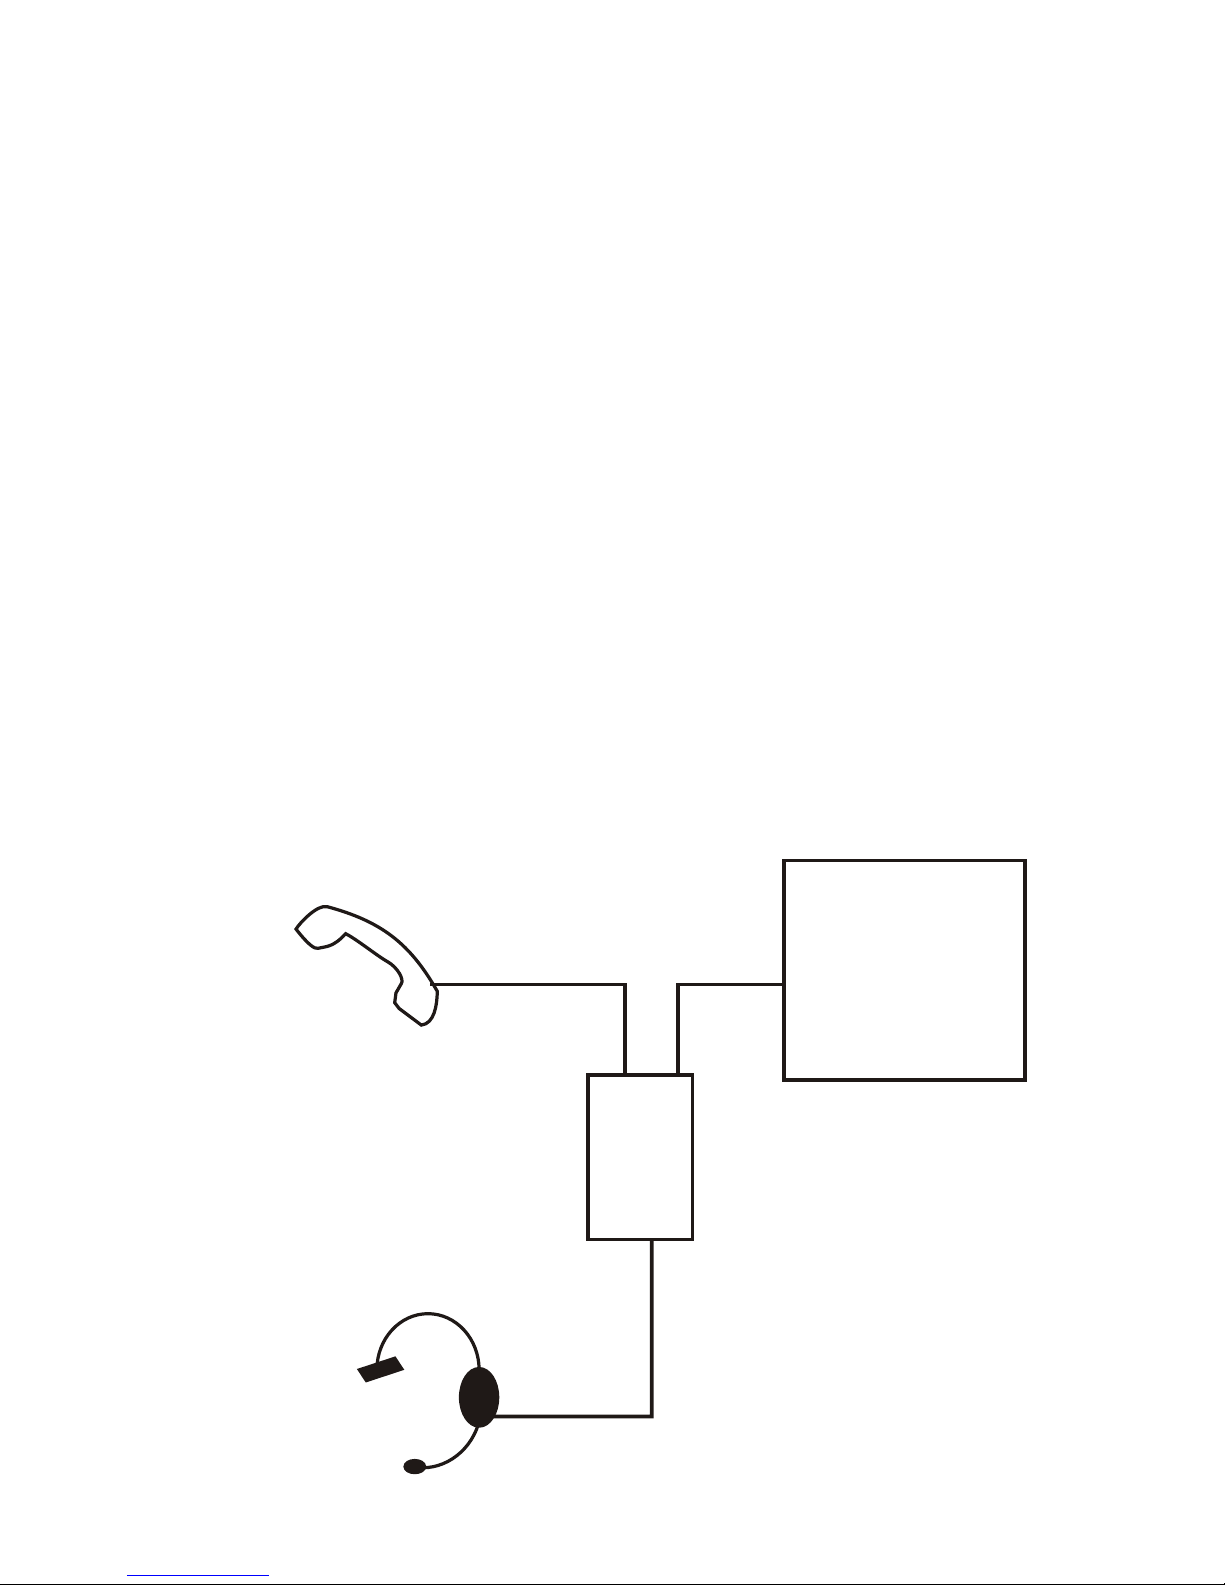
1. Unclip the battery compartment cover (5) and
install 2 x AA batteries (supplied) and replace the
cover.
2. Plug the stub cable (supplied) into the telephone
jack socket (3).
3. Unplug the coiled handset cord from the
base of your telephone and plug in the
free end of the stub cable instead.
4. Plug the coiled handset cord into the handset
jack socket (4).
5. Plug the headset lead into the headset jack
socket (10).
Telephone
Handset
Headset
Voice
Amp
Page 5

Operation
5
1. Lift the handset off the cradle, you may be able to
program a key to activate the hook switch instead.
Check with the instruction manual for your system.
2. You should hear dial tone in the handset, press the
handset/headset switch to change over to headset
mode. The Indicator will flash to show that the
headset is active.
3. Dial and speak as normal, when finished, hang up,
the indicator will extinguish.
Configuration
The VoiceAmp is factory set to be compatible with the
majority of telephones. It can be configured to work with
other systems using the compatibility switches.
1 2
E C
TX
1 = Pin out - TRRT
2 = Pin out - RTTR
E = Electric mic setting
C = Carbon mic setting
TX = Clockwise increase mic level
anti-clockwise decrease level
(Factory setting 1E)
14
Dip switches (underneath amp)
1. ON = 2 dB increase Rx level
2. ON = 2 dB increase Tx level
3. ON = disable power save
(for dynamic mic)
Page 6

6
Troubleshooting
Callers can’t hear me or I can’t hear my callers
Check all cables are connected correctly.
Check that the compatibility switches are correctly configured (factory setting
is 1E).
Check the handset/headset button (9). Push the button in for headset use
and push again to release for handset use.
Callers voice is low or distorted
Adjust the receiver volume (12) to a more suitable level.
Check the condition of your batteries - always use alkaline cells.
Boost the receive volume by changing dip switch 1 to ON.
Check that the compatibility switches are correctly configured (factory setting
is 1E).
Callers can’t hear me, but I can hear them
Make sure that your headset microphone is positioned correctly - it should be
approximately 25mm from the front of your mouth.
Adjust the mic gain (14) to the desired level.
Check that the mute switch isn’t depressed - the indicator (7) will be lit if the
microphone is muted.
Boost the receive volume by changing dip switch 2 to ON.
My voice echoes or sounds like I’m in a tunnel
Check the mic gain and receiver level and reduce either or both.
Make sure that dip switch 1 and 2 are set to OFF.
My VoiceAmp appears to be dead
Check the condition of your batteries and replace if necessary..
Change dip switch 3 to ON - to disable the battery saving feature.
Page 7

7
Warranty
This product is covered by a two year manufacturers
warranty which covers electronic/electrical failure only.
Voice Active endeavours to evaluate the warranty claim on
the day of receipt and to return any repaired or replaced
goods for delivery on the next working day wherever
possible.
Faulty product under warranty should be returned to:
Voice Active
11 Ferney
Dursley
Gloucestershire
GL11 5AB
Items should be securely packed, preferably within the
original packaging or suitable box or padded envelope and
should include either a completed return slip (below) or a
letter with full contact details and a description of the fault.
To ensure safe delivery we recommend that a Proof of
Delivery service is used.
NAME:
COMPANY
ADDRESS
POSTCODE
TELEPHONE
FAX
TELEPHONE SYSTEM
 Loading...