

Page 1

Wonderful Communication, Mobile Life.
Vodafone B970
3G Router from Vodafone
User Guide
Page 2

Notice
Copyright © 2008 Huawei Technologies
Co., Ltd.
All Rights Reserved
1 No part of this manual may be reproduced or
transmitted in any form or by any means without
prior written consent of Huawei Technologies
Co., Ltd.
2
Trademarks
3 and HUAWEI are trademarks of Huawei
Technologies Co., Ltd. All other trademarks and
trade names mentioned in this manual are the
property of their respective holders.
4
Notice
5 The information in this manual is subject to
change without notice. Every effort has been
made in the preparation of this manual to ensure
accuracy of the contents, but all statements,
information, and recommendations in this man-
ual do not constitute the warranty of any kind,
expressed or implied.
Huawei Technologies Co., Ltd.
Address:
6 Administration Building, Huawei Technologies
Co., Ltd., Bantian, Longgang Dist rict, Shenzhen,
P. R. China
Postal Code: 51812
9
Website:
http://www.huawei.com
Page 3
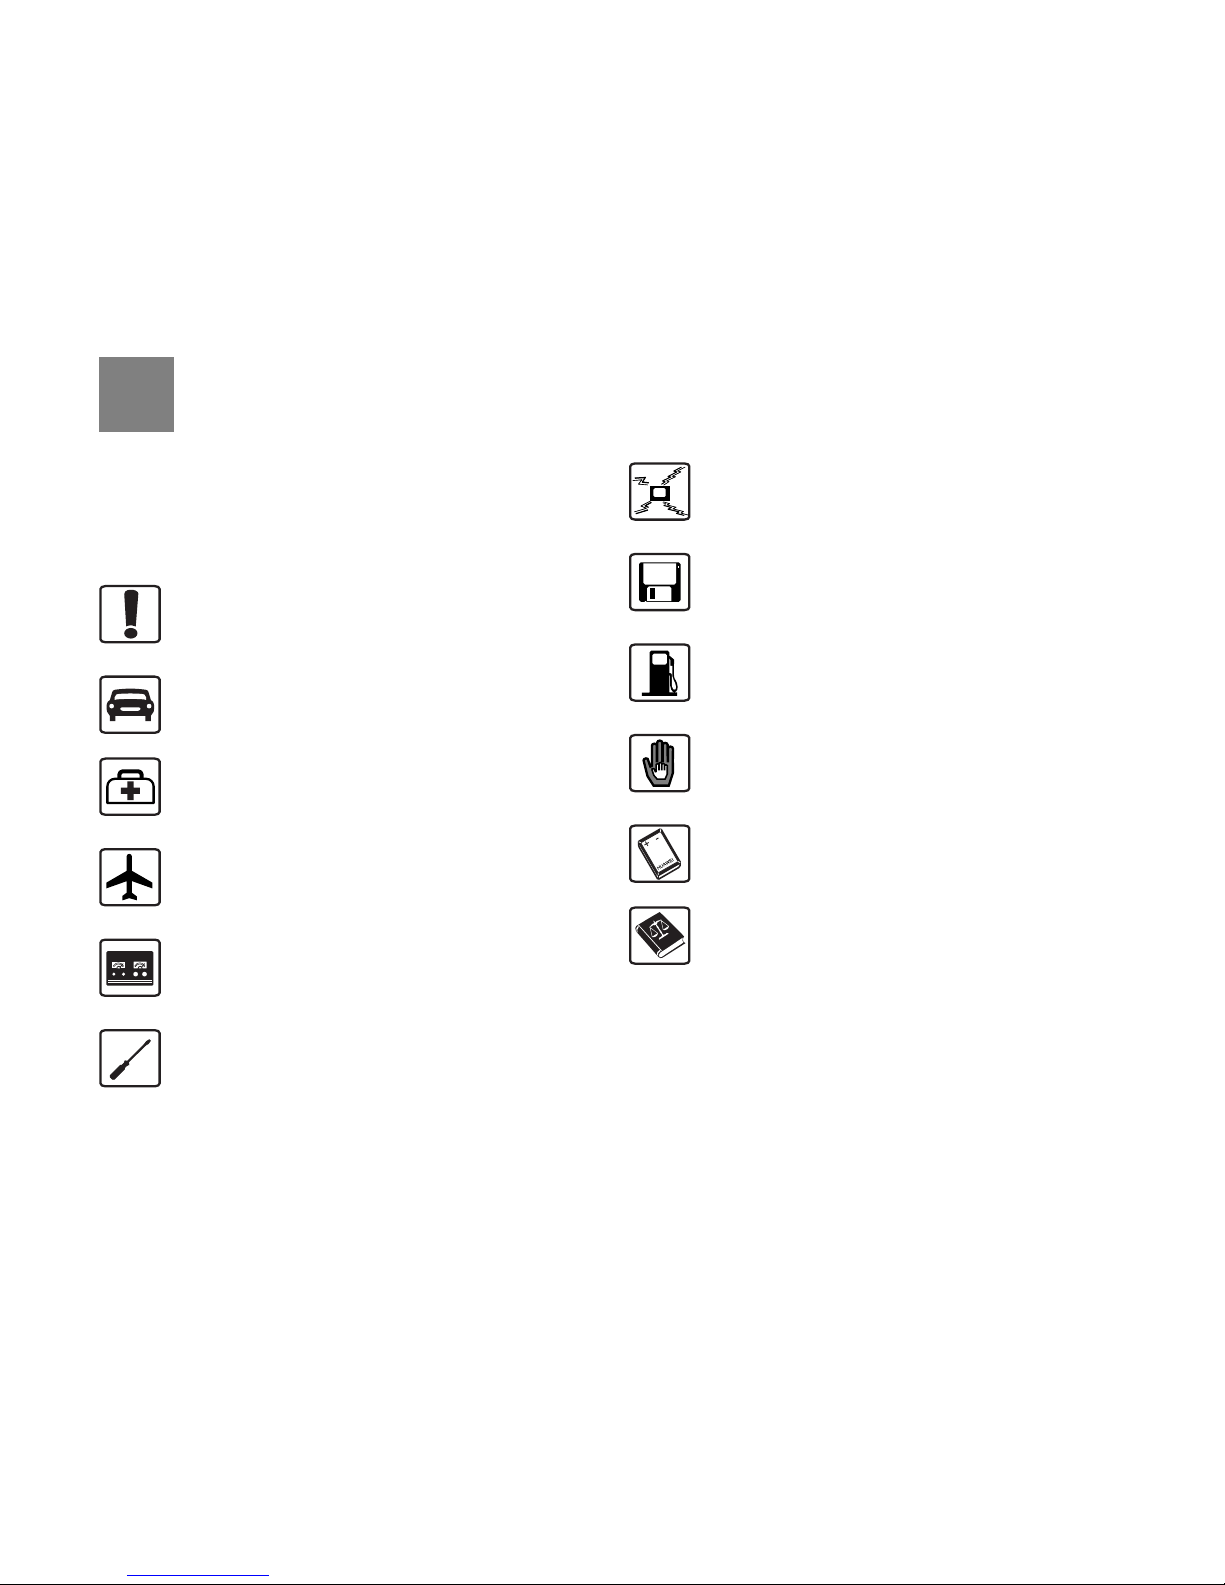
Read the safety precautions carefully to ensu re the
correct and safe use of your wireless device. For
detailed information, see "Warnings and
Precautions."
Do not switch on your device when the
d
evice use is prohibited or when the device
use may cause interference or danger.
Do not use your device while driving.
Follow the rules or regulations in hospitals
and hea
lth care facilities. Switch off your
device near medical apparatus.
Switch off your device in an air c r a ft. Th e
device may
cause interference to control
signals of the aircraft.
Switch off your device near high - p r ec is i on
elect
ronic devices. The device may affect
the performance of these devices.
Do not attempt to disassemble your device
o
r its accessories. Only qualified personnel
are allowed to service or repair the device.
Do not place your device or its accessori es
in containers with strong electromagnetic
field.
Do not place magnetic storage media near
your device.
Radiation from the device may
erase the information stored on them.
Do not put your device in a high-
te
mperature place or use it in a place with
flammable gas such as a gas station.
Keep your device and it s acc essori es away
fr
om children. Do not allow children to use
your device without guidance.
Use approved accessories only to avoid
explosio
n.
Observe the laws or regulations on device
use.
Respect others’ privacy and legal
rights when using your device.
Safety Precautions
Page 4

1
Table of Contents 1
Using the Management Page 1
Logging In to the Management Page........ 1
Management Page Overview.....................1
Viewing Configuration Info .........................2
Optimized Settings ............................. ........2
Quick Setup................................................2
Accessing the Internet................................4
Configuring Your Computer 6
Wireless Configuration...............................6
Configuring the PC Network.......................7
Advanced Settings 8
Overview ....................................................8
System Management .................................8
SIM Settings............... ..............................10
Mobile Network Setting s...........................11
Dial-up Settings........................................12
DHCP Settings ........................................
13
WLAN Settings.........................................14
Dynamic DNS Settings . .. ... .. ... ................. 17
Static Route Settings.. ..............................18
Security Settings (Optional) 19
Firewall Switch .........................................19
LAN MAC Filter ........................................19
LAN IP Filter.............................................19
Virtual Server............................................20
DMZ Settings. ... .. ... .. .................................21
UPnP Settings................... .......................21
Remote Management ..............................21
Troubleshooting 23
Abbreviations 25
Table of Contents
Page 5

1
1Using the Management Page
Logging In to the Management
Page
1 St art the Internet browser and enter the address
http://192.168.1.1 in the address bar.
2 Enter the password, and then click Login.The
default password is admin.
Note
To avoid the configuration conflict, only one
user is
allowed to log in to the management
page at a time.
Management Page Overview
Operation Functions
The following table shows the main operati ons in the
management page.
Device Status
The following table shows the status info rmation of
the device.
Item Description
Basic Status Displays the parameter configuration
stat
us of the device.
Optimize
Improves wlan's speed of transmission
an
d increases the upload speed of
I
nternet Explorer if its version is lower
than IE 6.0.
Quick Setup Quickly configures the device.
Connection Displays the network connection status
an
d connects to the network.
Advanced
Se
ttings
Configures the advanced settings.
Security Configures the security settings.
Logout
Log out of the management page.
Item Green icon Red icon
SIM The card is valid.
The card is not
inserted or is
invalid.
WAN The PPP dial-up
co
nnection is
established.
The PPP dial-up
connection is not
established.
Item Description
Page 6

Viewing Configuration Info
2
Viewing Configuration Info
On the configuration page, you can view the current
parameter configuration information and the network
connection status.
1 Click Basic Status.
2 Click Advanced on the right part of the page to
view the advanced status
.
3 Click Refresh to view the current statu s on the
advanced status page
.
Optimized Settings
In this page you can download a execut able pro gram
which will modify some parameters in system. These
parameters will improve wlan's speed of transmission
and increase the upload speed of Internet Explorer if
its version is lower than IE 6.0.
Note
The executable program just needs to run once
on ea
ch computer and the parameters will take
effect after your system is rebooted.
1 Click Optimize.
2 Click Optimize download a executable program .
Quick Setup
You can use the quick setup wizard to configure and
maintain the basic parameters of the device. Click
Quick Setup to access the welcome page. Click
Next to configure the PPP profile settings.
WCDMA The WCDMA
ne
twork is
available.
The WCDMA network
is unavailable.
Note
If the device is registered with
othe
r network modes, the
corresponding net work c onnecti on
status is displayed.
SIG
The signal strength from weak to strong
is shown as follows:
Item Green icon Red icon
Page 7

Quick Setup
3
1
Using the Management Page
Configuring PPP Profile Settings
• Profile Name: Enter a profile name when the text box
is empty.
• Dial-up Number/P
PP User Name/PPP Password:
Enter these three parameters provided by the internet
service provider (ISP). The dial-up number is used to
initiate the network call; the PPP user name and PPP
password is used to obtain the service authorization
provided by the ISP.
• APN/IP Address: Select the mod
e for obtaining the
access point name (APN) and IP address. If the service
provider provides the releva nt parame ters, select Static
and enter their values. Otherwise, select Dynamic and
the device automatically obtains them.
Configuring PPP Dial-up Settings
PPP Connection: Select the dial-up access mode.
• Auto: The device automatically connects to the Internet
and does not disconnect when no data is transmitted.
• On Demand: The device automa
tically connects to the
Internet when data transmission exists. When the
duration of no data transmission exceeds the maximum
idle time, the device disconnects the Internet
connection.
• Manual: The d
evice connects to the Internet after you
click Connect on the connection page. For details, see
"
Accessing the Internet".
PPP Authentication: This service is provided by
your ISP. For details, consult your ISP.
Configuring WLAN Settings
(Name) SSID: Enter a name for your wireless local
area network (WLAN).
• The service set identifier (SSID) is used to identify a
WLAN. A PC and the wireless device can perform
normal data communication only when they have the
same SSIDs. To ensure the WLAN security, do not use
the default SSID. You can enter a character string as
the SSID, such as MyHome.
SSID Broadcast: Enable or disable the SSID
broadcast.
• Enabled: The device broadcasts the SSID of the
WLAN and users can easily access the WLAN. In this
case, unauthorized users can also access the WLAN
because the SSID is broadcasted.
• Di
sabled: The device does not broadcast the SSID of
the WLAN. Before accessing the WLAN, a user must
obtain the SSID of the WLAN. In this case, the WLAN
security is improved.
Note
For the convenience of users accessing the
WL
AN, you can select Enabled for SSID
Broadcast when you configure the WLAN
Page 8

Accessing the Internet
4
setting. After the setting, you can select
Disabled to improve the WLAN security.
Configuring WLAN Encryption
To access the WLAN, you must set the wireless
security key on your PC to be the same as that of the
wireless device.
No Encryption
• For the convenience of users acces sing the W LAN, you
can select NO ENCRYPTION for the Encryption mode
when you set up a WLAN. It is not recommended to
select this option in daily use.
WPA-PSK/WPA2-PSK
• WPA-PSK: It is a 256-bit data encryption method that
can automatically change the key.
• WP
A2-PSK: It is a more secure version of WPA-PSK
and it supports the IEEE 802.11 standard.
• WP
A Encryption Algorithm: TKIP, AES, TKIP+AES.
• WP
A Pre-Shared Key: You can enter a 64-character
hexadecimal value or 8-63-character ASCII value as
the k
ey. The ASCII value contains all characters that
can be entered through the PC keyboard, and the
hexadecimal value contains numbers of 0-9 and
chara
cters of A-F. For example, you can enter the
ASCII
value of 1234abcde as the key.
• Networ
k Key Rotation Interval: It is used to set how
long a network key is dynamically changed. By default,
it is 0. To disable this function, you can set the value to
0 or null.
WEP
• Wireless Equivalent Priva cy (WEP) is a 64-bit or 128 -bit
data encryption method. The 128-bit WEP encryption
provides higher security level.
• Network ke
y 1: You can enter 5 ASCII characters or
10-character hexadecimal numeral to form a 64-bit key.
Y ou can also enter 13 ASCII character s or 26-character
hexadecimal numeral to form a 128-bit key.
Validating Quick Setup
The last page of the wizard displays all the settings
you have configured.
• To accept the settings, click Finish.
• To change the settings, click Back.
• To quit the settings, click Ca
ncel.
Accessing the Internet
1 Click Connection.
Note
• If you are required to enter the PIN code,
en
ter the correct one. If you fail to enter the
Page 9

Accessing the Internet
5
1
Using the Management Page
correct PIN or PUK code, the network-related
functions are unavailable.
• The SIM card is supplied by the service
provide
r. For details, contact your service
provider.
• When the Save PIN C
ode check box is
selected, the Auto validation is enabled.
• If Aut
o validation is enabled, the PIN code is
recorded and automatically validated after
each restart.
2 If PPP Connection is Manual, click Connect /
Disconnect to connect to or disconnect from the
network.
Note
If PPP Connection is Auto or On
Demand, ref
resh the page to view the
current network connection status.
3 Wait for several minutes. If you are notified that
the connection is successful, you can start the
browser and enter the website address to
access the Internet.
Page 10

6
2Configuring Your Computer
This takes the Windows XP operating system (OS)
as an example to describe how to configure your
computer. For other OSs, the configurations may be
different and you need to configure t hem as required.
Wireless Configuration
The wireless configuration allows your PC to connect
to the device through the wireless network. If you
need only the Ethernet to connect your PC, you can
skip this part.
Configuration Requirements
• To set up wireless network connection, your PC must
be configured with the WLAN adapter that supports the
IEEE 802.11 b/g protocol.
• If the encryption function is enabled, you need to
ensu
re that all PCs connecting to the device use the
same key as that of the device.
• For the use of WLAN adapter, refer to the WLAN
adap
ter user guide provided by the manufacturer.
• For the encryption configurations, see "
Configuring
WLAN Encryption
".
• For SSID parameters configuration, see "
Configuring
WLAN Settings
".
Configuring the Wireless Network
1 Choose Start > Control Panel > Network
Connections > Wireless Network Connection.
2 Click Show Wireless Networks to display the
wireless network connection list.
3 Select the network connection that the SSID is
the same as that of the device, and then click
Connect.
4 If the encryption parameter is set for the device,
the Wireless Network Connection dialog box is
displayed and requires the network key and
confirmation. The value you entered must be the
same as the WPA Pre-Shared Key or Network
Key of the device.
5 Wait for a while after you enter the correct
network key. The wireless connection icon
displays in the status area in the lower right
corner of the screen. Then, your PC can
automatically connect to the device.
Page 11

Configuring the PC Network
7
2
Configuring Your Computer
Configuring the PC Network
The recommended configurations of the PC are as
follows:
• Obtain an IP address automatically.
• Deselect Use a proxy server for your LAN.
Configuring the Network Connection
1 Choose My Network Places > Properties >
Local Area Connection.
2 Right-click the Local Area Connection icon and
select Properties.
3 In the Local Area Connection Properties
dialog box, select Internet Protocol (TCP/IP) in
the This connection uses the following items
list box, and then click Properties.
4 In the Internet Protocol (TCP/IP) Properties
dialog box, select Obtain an IP address
automatically and Obtain DNS server addres s
automatically, and then click OK.
Disabling Proxy Settings
1 St art the Internet browser, and then choose
Tools > Internet Options.
2 Select the Connections tab, and then click LAN
Settings.
3 In the LAN Settings dialog box, deselect Use a
proxy server for your LAN.
Page 12
8
3Advanced Settings
Overview
Click Advanced Settings, you can configure both
the basic attributes and advanced parameters of the
device, and also perform routine maintenance and
management to the device.
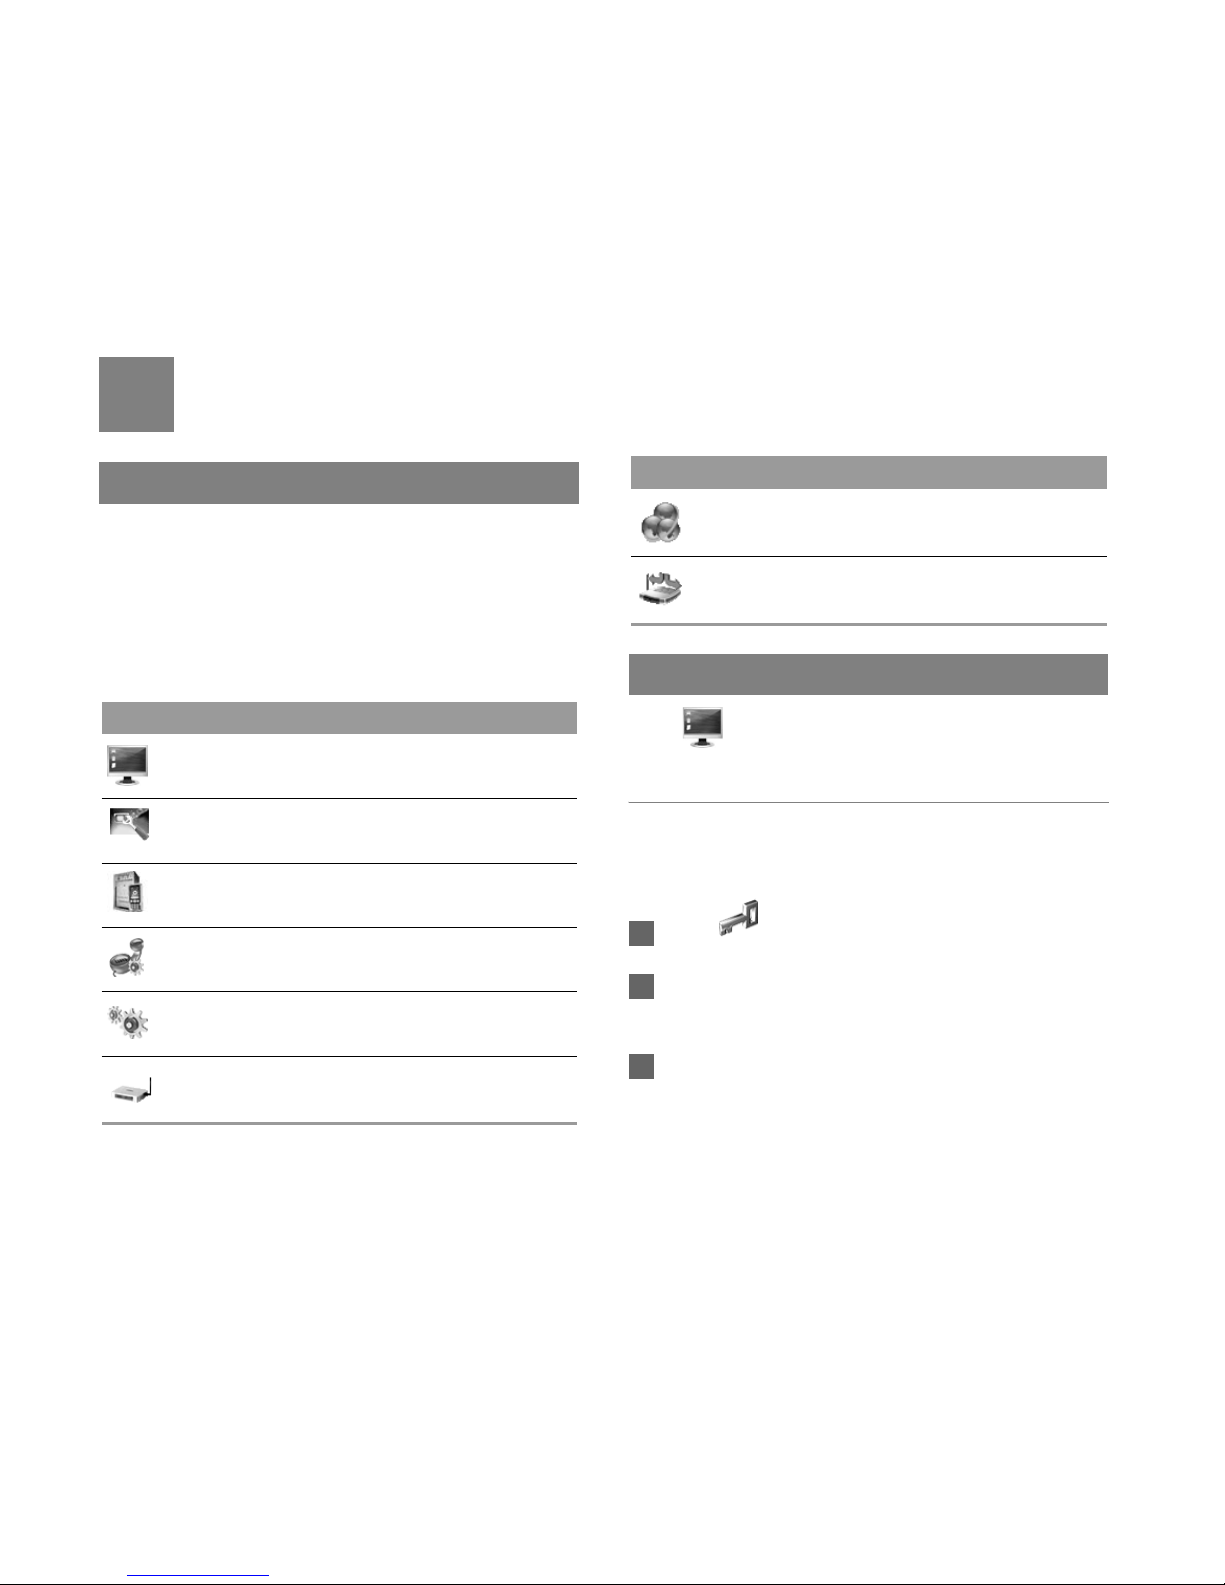
The following table shows the functio ns of the
sh
ortcut icons.
System Management
Click to access the System page.
Changing the Password
You can change the login password to prevent
unauthorized users from logging in to the
management page.
1 Click .
2 Enter the current password, and then enter the
new password and confirm it.
3 Click Modify.
Icon Description
Click to access the Sys
tem page.
Click to access the SI
M Settings page.
Click to access the M
obile Network
Settings page.
Click to access the Di
al-up Settings page.
Click to access the DHCP S
ettings page.
Click to access the WLAN Se
ttings page.
Click to access the Dynamic DNS Settings
page.
Click to access the Static Route Settings
page.
Icon Description
Page 13

System Management
9
3
Advanced Settings
User Control
In this page the administrator can set some
configuration for user.
1 Click .
2 Set the Status Page:
• Active: Y
ou can view the current parameter configuration information and the network connection
st
atus on the Login page.
• Inactive: T
he Login page does not display the
parameter configuration information and the network connection status.
3 Set the Connect/Disconnect Option:
• Enable: Y
ou can click the Connect/Disconnect
button to connect or disconnect t he network on the
Login page when the dial-up connection mode is
Manual.
• Disable: Th
e Login page does not display the
Connect/Disconnect when the d ial-u p conn ection
mode is Manual. You need enter the Connection
page to connect or disconnect the network.
4 Set the Redirect:
• Enable: The bro
wsed webpage goes to the
device’s login page automatically when the network connection is disconnected.
• Disable: The b
rowsed webpage displays error
when the network connection is disconnected.
5 Click OK.
Upgrading the device
1 Click .
2 Enter the path or click Browse to select the
software image file to be updated.
3 Click Upgrade.
!
Warning
• After the system is upgraded, the system
automatica
lly restarts.
• The software programs for upgrading must
come from th
e official website of Huawei or
the official website of the service provider.
• Upgrading the software does not change the
configuratio
n of the client.
Page 14
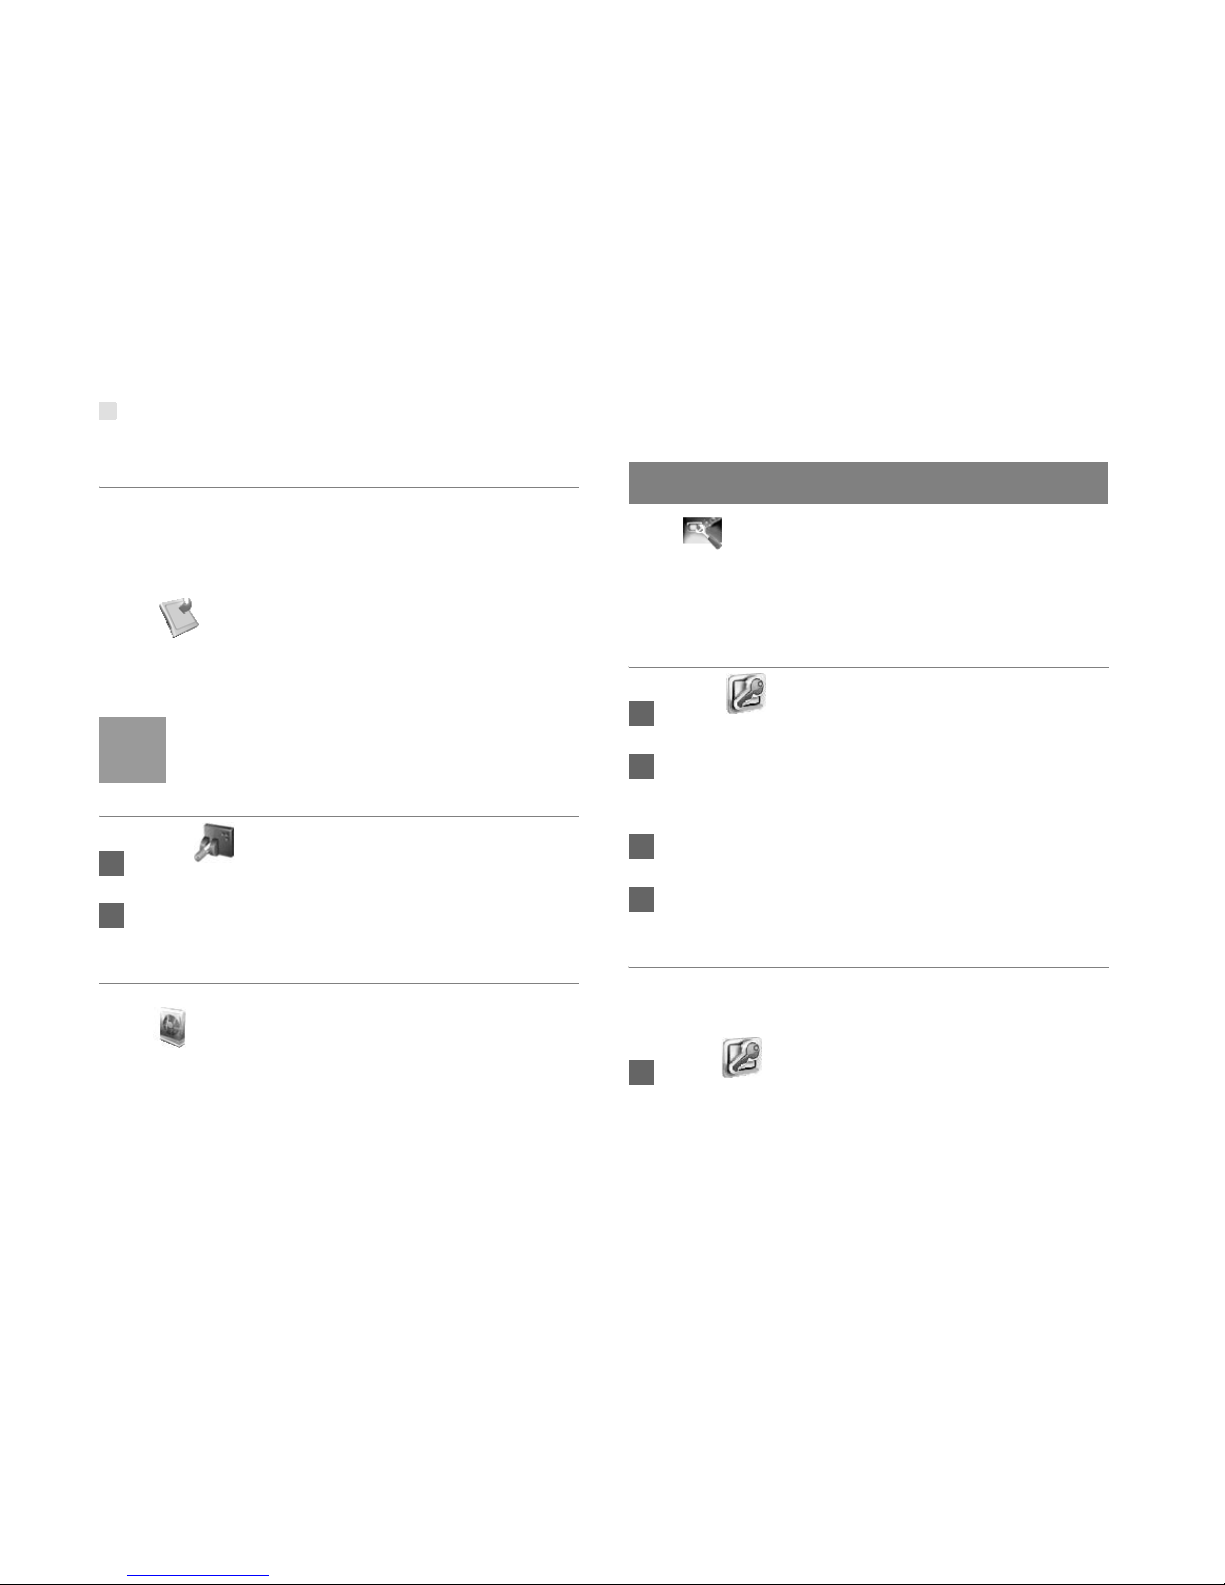
SIM Settings
10
Restoring the Factory Defaults
If you need to reconstruct the network or you forget
the changes of some parameters, you can choose to
restore factory defaults and reconfigure the device.
Click to access the Restor
e Defaults page,
and then click Restor
e.
Note
After this operation, all configurations are
restore
d to the defaults.
Restarting the Device
1 Click to access the Reboot page.
2 Click Reboot.
Viewing the Vers ion Information
Click to access the Version page.
SIM Settings
Click to access the SIM Settings page.
When the device works in the ROM-SIM mode, the
p
age is not available.
Enabling or Disabling the PIN Code
1 Click .
2 Select Enable/Disable in the PIN Code
Operation list box.
3 Enter the correct PIN code.
4 Click Apply.
Changing the PIN Code
When the PIN code protection is enabled, you ca n
reset the PIN code.
1 Click .
Page 15

Mobile Network Settings
11
3
Advanced Settings
2 Select Modify in the PIN Code Operation list
box.
3 Enter the current PIN code.
4 Enter the new PIN code and confirm it.
5 Click Apply.
Auto Validating PIN Code
You can enable or disable the auto validate PIN code
function.
1 Click .
2 Select Enable/Disable in the Auto Validate
option button.
3 Enter the current PIN code.
4 Click Apply.
Mobile Network Settings
Click to access the Mobile Network Settings
page.
Setting the Preferred Mode and Band
1 Click .
2 Select the preference of connection mode in the
Preferred Mode list box.
Note
• If the service provider provides only the
2G serv
ice and the preferred mode is
configured as 3G only, you cannot
access the Internet.
• If the service provider provides only the
3G serv
ice and the preferred mode is
configured as 2G only, you cannot
access the Internet.
• If the service provider provides neither
the 3G
nor 2G service, you cannot
access the Internet regardless of the
preferred mode.
Page 16

Dial-up Settings
12
3 Select the band to search the network in the
Band list box.
4 Click Apply.
Configuring the Mode for Searching
Network
1 Click .
2 Select the mode for searching the network.
• Auto: The device automatically searches the
network and registers with it.
• Manual: You need to manually search the network
and register with it.
3 Click Apply.
4 In Manual mode, select the searched network
and click Log on.
Dial-up Settings
Click to access the Dial-up Settings page.
Configuring the PPP Settings
1 Click to access the PPP Settings page.
2 Enter the correct parameters.
• Profile List: Select a profile from the established
dial-up connection list. If the drop-down list is
empty, you need to create a profile list.
• PPP C
onnection: Select the dial-up connection
mode.
• PPP A
uthentication: The service is provided by
your ISP. For details, consult your ISP.
• PPP M
ax Idle Time: The duration of the PPP
connection is in idle. In On Demand mode, if no
data is transmitted in this duration, the PPP
connection automatically disconnects.
• PPP M
TU: It is the maximum transmission unit
(MTU) of the PPP connection. It is used to set the
maximum number of bytes encapsulated in a
single data frame.
Page 17

DHCP Settings
13
3
Advanced Settings
• PPP Max Dial Time: Set the maximum waiting
time when connecting to the Internet.
3 Click Apply.
Managing the Profile List
Click to access the Profile Settings page.
◆ Creating a Profile
1 Enter the profile information in the text box
according to the prompts.
2 Click Save.
◆ Changing a Profile
1 Select a profile to be changed in the Profile List
drop-down list. Relevant information is displayed
in the corresponding text box.
2 Enter the profile information.
3 Click Save.
◆ Deleting a Profile
1 Select a profile to be deleted in the Profile List
drop-down list.
2 Click Delete.
DHCP Settings
Click to access the DHCP Settings page, you
can set the mode for assigning IP addresses in a
LA
N. DHCP automatically assigns IP addresses to
the network devices. If you are using the DHCP
server, you need to do the configurations on the PC
connecting with the device. For details, see
"Configuring the Network Connection".
• IP Address: The default IP address of the device is
192.168.1.1.
• S
ubnet Mask: The combination of the subnet mask
and IP address enables the flexible sub netting. By
default, the subnet mask is 255.255.255.0.
• DH
CP Server: It is used to assign IP addresses
dynamically. If the DHCP server is Enabled, it can
automatically assign IP addresses for PCs. It is
recommended to select Enabled for the DHCP server.
Page 18

WLAN Settings
14
• Start IP Address/End IP Address: It is used to define
the IP address range that the host can use during the
IP address assignment. For example, in the network
segment 192.168.1.0/24, the default IP address of the
device is 192.168.1.1. The host IP address can range
from 192.168.1.2 to 192.168.1.254. The minimum
range is a single IP address.
• DHCP Le
ase Time: The DHCP server automatically
assigns an IP address to each device connected to the
network. When the leased time expires, the DHCP
server checks whether the device is connected to the
network. If the device is di sconnected f rom the net work,
the server assigns the IP address to another device.
Thus, the IP address is not wasted.
Note
• The S
tart IP Address must be smaller than
or equal to the End IP Address.
• If the DHCP Se
rver is Enabled, the
configurations of Start IP Address, End IP
address, and DHCP Lease Time are valid;
otherwise, you cannot configure them.
WLAN Settings
Click to access the WLAN Settings page.
Enabling or Disabling the WLAN
1 Click to access the WLAN Enable page.
2 Select Enabled/Disabled to enable or disable
the WLAN.
3 Click Apply.
WLAN Basic Settings
Click to access the WLAN Basic Settings
page.
◆ W
ireless Interface
• It refers to the SSID and MAC address, and is used to
identify the wireless device.
◆ SSID
• Entering a name (SSID) for your WLAN.
• Enabling or Disabling the S
SID Broadcast.
Page 19

WLAN Settings
15
3
Advanced Settings
◆ Enabling or Disabling the AP Isolation
• On: The terminals (PCs) connecting to the device
through the WLAN cannot communicate with each
other.
• Off: The termina
ls (PCs) connecting to the device
through the WLAN can communicate with each other.
◆ Selecting a Country
• Country: It is used to identify the country. Different
countries have different standards on channel usage.
◆ Selecting a WLAN Channel
• Channel: It refers to the channel that the device works
with. If you do not know which channel to select, select
Auto and the device can automatically search for the
channel.
◆ Configuring the 802.11 Mode
◆ Configuring the Transmission Rate
1 Select Auto, the device automatically searches
the transmission rate.
2 Click Apply to submit the setting.
WLAN Advance Settings
Click to access the WLAN Advance Settings
page.
Mode Description
54g Auto The WLAN has the best compatibility
in thi
s mode.
54g
Per
formance
The WLAN has the best performance
in this mode.
54g LRS If the device has difficulties in
communicating with devices
conforming to the IEEE 802.11b
standards, select this mode.
54g Only
The device can only work in the low
per
formance 802.11g standard
net
work mode.
802.11b Only
The device can only work in the low
performance 802.11b standard
network mode.
Mode Description
Page 20

WLAN Settings
16
A security key can protect your WLAN from illegal
data attacking. The secu rity key of your wireless
device must be consistent with that of the PC.
◆ Confi
guring the 802.11 Authentication
• Open: Open system authentication. A user accessing
the WLAN can choose WEP, WPA-PSK, or WPA2-PSK
key to pass the authentication or choose No
ENCRYPTION to skip the
authentication.
• Share
d: Shared key authentication. It can use only
WEP. The user accessing the WLAN must use the
WEP to authenticate.
◆ Configuring the Encryption Mode
• Encryption modes: No ENCRYPTION, WPA-PSK,
WPA2-PSK, WPA-PSK|WPA2-PSK and WEP.
• For details, refer to "
Configuring WLAN Encryption".
Configuring the MAC Filter
Click to access the WLAN MAC Filter
page.You can control and manage the clients
a
ccessing the WLAN, and improve the WLAN
security performance.
◆ M
AC Restrict Mode
The following table shows the MAC address filter
modes:
◆ M
AC Addresses
• Enter MAC addresses in the list. The device can
perform the access control over the clients whose MAC
addresses are in the list.
WLAN Bridge
Click to access the WLAN Bridge page .
• Preamble T ype: It has tw o options: Long and Short. In
the case that the client (PC) supports the Short type,
the WLAN can have a better performance if it is Short.
Parameter Description
Disabled The MAC address filter function is
d
isabled.
Allow The clients with addresses in the MAC
Addres
s list are allowed to connect wit h
the device through the WLAN.
Deny The clients with addresses in the MAC
Addr
ess list are not allowed to connect
with the device through the WLAN.
Page 21

Dynamic DNS Settings
17
3
Advanced Settings
• MAX Associations Limit: It refers to the maximum
number of connections. It is used to set the maximum
number of concurrent WLAN users on the device.
• Mode: It refers t
o the WLAN accessing mode. The
device can work in two modes, as shown in the
following table. The default value is Access Point.
• B
ridge Restriction: It refers to the li mitat ion to the peer
MAC addresses. When it is Disabled, the device can
access all the remote bridges; when it is Enabled, the
device can only access the remote bridges that the
addresses are in the address list.
• Bridges: It
refers to the physical address of the remote
peer bridge. The device supports the point- to-multipoint
(PTM) bridge mode.
• Peer MAC Addres
s: It refers to the physical address
list of the remote peer bridges.
• Link S
tatus: Up shows the successful connection and
Down shows the failed connection.
Dynamic DNS Settings
The DDNS feature will update Internet IP which
bound with registered Domain name periodically.
1 Click to access the DDNS page.
2 Configure the parameters of DDNS.
• Provider: By default, the service provider is
dyndns.org.
• Host Name/Username/Password: Enter the
value for DDNS re
gistration.
3 Click Ok.
• Validate: Click Apply to validate.
• Change: Click in the Modification column.
• Delete: Click in the Modification column
.
Mode Description
Wireless
B
ridge
It is used to connect two or more access
points.
Access
Po
int
The access points meeting the IEEE
802.11b/g standard or the wireless
terminals can connect the wireless
device.
Page 22

Static Route Settings
18
Static Route Settings
In this page you can configurate static routing. Static
routing specifies a fixed routing path to neighboring
destinations.
1 Enter the IP Address/ Netmask/Gateway/
Metric.
2 Click Ok.
• Validate: Click Apply to validate.
• Change: Click in the Modifi
cation column.
• Delete: Click in the Modification colu
mn.
Page 23

19
4Security Settings (Optional)
Click Security. You can configure the advanced
security settings.
Firewall Switch
Your device has a true firewall that controls the
incoming and outgoing data flow and protects your
computer from illegal intrusion.
1 Click .
2 Select the Enable the firewall (main switch of
the firewall) check box to enable the firewall.
Note
• Only when the Enable the fi
rewall
check box is selected, the other
functions such as the IP address filter
function, the MAC addres s filt er func tion,
and the WAN port ping function are
available.
• When the Enable LAN MAC add
ress
filter check box is selected, the default
filter rules are available.
3 Select other options as required, and then click
Apply.
LAN MAC Filter
Your device supports MAC filtering based on a list of
either denied or allowed computers. A common
method to restrict network access is to specify the
Media Access Control (MAC) address.
To locate the MAC address in the Windows OS,
ch
oose Start > Run , and then enter cmd.
The command window is displayed, enter ip
config /
all, and then press Enter.
The MAC address is displayed as the Phys
ical
Address.
1 Click .
2 Select LAN MAC Filter Mode.
3 Enter the MAC addresses of the client s and click
Apply.
LAN IP Filter
You can configure the device to block specific IP
addresses so that they cannot be accessed from
Page 24

Virtual Server
20
computers in the local network.
1 Click .
1 Select Protocol and Status.
2 Enter the IP address and corresponding port to
be blocked from accessing the LAN.
3 Click Ok.
• Validate: Click Apply to validate.
• Change: Click in the Modifi
cation column.
• Delete: Click in the Modification colu
mn.
Virtual Server
Your device supports the virtual server to enable
external computers to access WWW, FTP, or other
services provided by the LAN.
1 Click .
2 Select Protocol and Status.
3 Enter values in the following text boxes:
• Name: Enter a name to the service provided by
the LAN.
• WAN Port: Enter the WAN port of the LAN in
which the computer provides services.
• IP Addr
ess: Specify a computer in the LAN to
provide services.
• LAN Port:
Enter the LAN port of the computer that
provides services.
Note
You can also add a virtual server in the
following
way: select a port from the
Common Port list. The Protocol, Status,
Name, WAN Port, and LAN Port will be set
as the default values. If required, you can
change them.
4 Click Ok.
• Validate: Click Apply.
• Change: Click in the Modifica
tion column.
• Delete: Click in the Modification column.
Page 25

DMZ Settings
21
4
Security Settings (Optional)
DMZ Settings
If your PC cannot run network applications thro ugh
the device, you can set the computer to access the
Internet unlimitedly by configuring the IP address of
the computer in the demilitarized zone (DMZ).
However, the DMZ computer is not protected by the
fi
rewall. It is vulnerable to attack and may also put
other computers in the home network at risk.
1 Click .
2 Select Enable /Disable for DMZ Status to
enable or disable the DMZ service.
3 Enter the local IP ad dress of t he comp uter that is
specified as a DMZ host.
4 Click Apply.
Note
Only one computer can be specified as a DMZ
host at a time
.
UPnP Settings
The Universal Plug and Play (UPnP) service allows
other network users to control your device’s network
features to realize the intelligent interconnection.
1 Click .
2 Select Enable/Disable for UPnP Status to
enable or disable the UPnP service
3 Click Apply.
Remote Management
The remote web management allows the access and
control of the device either from th e h ome netwo rk or
from the Internet.
When you are on a trip, you can main tai n your device
t
hrough the remote web management service. I t also
allows your ISP to help you solve the device
problems from a remote location.
1 Click .
Page 26

Remote Management
22
2 Select Enable/Disable for Remote Status to
enable or disable the service.
3 Enter the IP address that can access and control
your device.
4 Click Apply.
Page 27

23
5Troubleshooting
What to do if a PC in the LAN cannot access the
Internet?
• If the power indicator is off, you need to check whether
the power adapter is normally connected.
• If the signal strength indicator is off, you need to check
wheth
er the area is covered by the network.
• If the area is covered by the network, you need to
check
whether the network mode is correct. For
information about network mode, see "
Mobile Network
Settings
".
• If the indicator of the Ethernet interfaces blinks, the
corresponding Ethernet interface is normally
connected. If the indicator is off, you need to check and
ensure that the related Ethernet connection is normal.
• You must configure the correct PPP user name and
PPP
password when you access the Internet through
the device. Check whether they are correct, and see
"
Configuring PPP Profile Settings" for details.
• If the DHCP service is disabled and the PC obtains the
IP
address dynamically, the PC also cannot access the
Internet. You can change the mode to manually assign
an IP address. See "
Configuring the Network
Connection
".
• Check whether the driver of the network adapter is
correct
ly installed.
• If the preceding methods cannot solve the problem,
consu
lt you service provider.
What to do if a PC in the WLAN cannot access the
WLAN?
• If interferences or shie lds near the device exist, y ou can
adjust the position of the device. When the signal
strength is strong, you can move to the next step.
• Check and record the following data on the network
adapter
of your PC: SSID, WEP type, and key.
• Check and record the following data on the device:
SSID, WEP
type, and key.
• Compare the recorded data, the SSID on the network
adapter
should be ANY or be the same as that on the
device. The WEP type and key on the network adapter
and device should be the same. Otherwis e, you need to
change the data on the network adapter.
What to do if I forgot the IP address of the LAN
interface?
• If you forgot the IP address of the LAN interface, you
can enter http://e.home and log in to the management
page when the PC obtains the IP address
automatically.
What to do if bridging between two devices is
unsuccessful?
• Make sure that the two devices work on the same
channel. For details, see "
Selecting a WLAN
Channel
".
Page 28

24
• Make sure that the MAC address of one device is in the
peer MAC address list of the other device. For details,
see "
WLAN Bridge".
When the signal strength is normal, what to do if
the downloading rate is low?
!
Warning
Only follow these instructions if you are
compe
tent at editing the Windows registry.
In this case, you need to set the value in the registry
as follows:
• Choose Start > Run.
•Enter regedit in the Op
en text box and then click OK.
• Select parameters in the following directory:
\HKEY
_LOCAL_MACHINE\SYSTEM\CurrentControl
Set\Services\Tcpip.
• Choose Edit > New >
DWORD Value.
• Rename New V
alue #1 to TcpWindowSize.
• Right-click T
cpWindowSize and then select Modify.
• Select Decimal and
enter 65535 in the Value data text
box, and then click OK.
• For the DWORD V
alue of DefaultRcvWindow, do the
same operations as that of TcpWindowSize.
What to do if I cannot make or receive a call from
a telephone connected to the device.
• If the phone is working, you can connect it to a fixed
line telephone network (PSTN).
• If a dial tone is heard when picking up the handset.
• If the SIM card is correctly inserted.
• Contact your service provider if problems remain.
Page 29

25
6Abbreviations
3G The Third Generation
AP Access Point
APN Access Point Name
CDMA Code Division Multiple Access
DHCP Dynamic Host Configuration Protocol
DNS Domain Name Server
EDGE Enhanced Data rates for GSM Evolution
GSM Global System for Mobile
commu
nications
GPRS General Packet Radio Service
HSPA High Speed Packet Access
HSDPA High Speed Downli nk Packet Access
HSUPA High Speed Uplink Packet Access
IP Internet Protocol
LAN Local Area Network
LED Light Emitting Diode
NAT Network Address Tr anslation
POTS Plain Old Telephone Service
VOIP Voice Over IP
UMTS Universal Mobile Telecommunications
Sy
stem
WAN Wide Area Network
WLAN Wireless Local Area Network
WCDMA Wideband CDMA
WI-FI Wireless Fidelity
Version:V100R001_01
 Loading...