

Vocera B3000n, B2000, B3000 Configuration Manual

Vocera Device Configuration Guide
Version 5.3.0

Notice
Copyright © 2002-2019 Vocera Communications, Inc. All rights reserved.
Vocera® is a registered trademark of Vocera Communications, Inc.
This software is licensed, not sold, by Vocera Communications, Inc. (“Vocera”). The reference text of the license governing this software can be found at http://www.vocera.com/legal/. The version legally
binding on you (which includes limitations of warranty, limitations of remedy and liability, and other provisions) is as agreed between Vocera and the reseller from whom your system was acquired and is available
from that reseller.
Certain portions of Vocera’s product are derived from software licensed by the third parties as described at http://www.vocera.com/legal/.
Microsoft®, Windows®, Windows Server®, Internet Explorer®, Excel®, and Active Directory® are registered trademarks of Microsoft Corporation in the United States and other countries.
Java® is a registered trademark of Oracle Corporation and/or its affiliates.
All other trademarks, service marks, registered trademarks, or registered service marks are the property of their respective owner/s. All other brands and/or product names are the trademarks (or registered
trademarks) and property of their respective owner/s.
Vocera Communications, Inc.
www.vocera.com
tel :: +1 408 882 5100
fax :: +1 408 882 5101
Last modified: 2019-04-03 13:28
VS-530-Docs build 509
ii VOCERA DEVICE CONFIGURATION GUIDE

Contents
Introduction..............................................................................................................................................................................................5
About This Guide..........................................................................................................................................................................................5
Product Applicability..................................................................................................................................................................................... 5
Configuration Hardware Requirements......................................................................................................................................................... 5
Related Documentation................................................................................................................................................................................ 5
Badge Configuration Workflow.........................................................................................................................................................6
Setting Up the Configuration Computer........................................................................................................................................ 7
Installing Badge Configuration Utilities.......................................................................................................................................................... 7
Badge Configuration Files Overview.......................................................................................................................................................10
Property and Profile Files for the Badge................................................................................................................................................ 11
Specifying TCP/IP Settings......................................................................................................................................................................... 11
Setting up Isolated Access Point................................................................................................................................................................12
Configuring a New Badge................................................................................................................................................................ 13
Using the Badge Properties Editor............................................................................................................................................................. 13
B2000 Badge Properties Configuration................................................................................................................................................. 14
B3000 Badge Properties Configuration................................................................................................................................................. 16
B3000N Badge Properties Configuration............................................................................................................................................... 21
Configuring a Test Badge...........................................................................................................................................................................26
Assigning Static IP Addresses.................................................................................................................................................................... 26
Configuring the Remaining Badges.............................................................................................................................................. 28
Using the Badge Configuration Utility......................................................................................................................................................... 28
Running the Badge Configuration Utility................................................................................................................................................ 28
Maintaining Properties and Firmware...........................................................................................................................................30
About Property and Firmware Maintenance............................................................................................................................................... 30
Updating Properties and Firmware............................................................................................................................................................. 30
Using the Badge Background Updater.......................................................................................................................................................31
Background Updater and Vocera Clusters............................................................................................................................................ 31
Background Update Status................................................................................................................................................................... 31
Using a Badge While a Background Update Is in Progress...................................................................................................................32
Interrupting a Background Update.........................................................................................................................................................32
Troubleshooting Badge Configuration..........................................................................................................................................33
Troubleshooting the Initial Badge Configuration..........................................................................................................................................33
Troubleshooting the Badge Property Settings............................................................................................................................................ 34
Using the Badge Configuration Menu.........................................................................................................................................................34
Displaying the Badge Configuration Menu............................................................................................................................................. 34
iii VOCERA DEVICE CONFIGURATION GUIDE

Displaying the Badge Configuration Menu (Older Software)...................................................................................................................34
Navigating in the Badge Configuration Menu.........................................................................................................................................35
Collecting Badge Data for Troubleshooting................................................................................................................................................ 36
Running the Quick Test..............................................................................................................................................................................36
Repairing the File System........................................................................................................................................................................... 37
Restoring Factory Default Settings............................................................................................................................................................. 38
Restoring a Badge to its Factory Image.....................................................................................................................................................38
Restoring the B3000n/B3000 Factory Image.........................................................................................................................................38
Restoring the B2000 Factory Image...................................................................................................................................................... 39
iv VOCERA DEVICE CONFIGURATION GUIDE
Introduction
This section introduces you to the details covered in this document, the product applicability, and the related documentation.
About This Guide
This document describes how to set up a Vocera Voice Server configuration computer, configure and update the firmware on badges using
the Badge Properties Editor and Badge Configuration Utility.
Use the following information relevant to you:
• If you are on the Vocera Voice Server, use the Badge Properties Editor section in this document.
• If you are using the standalone configuration computer, use the Badge Configuration Utility section in this document.
This document does not provide information about the infrastructure planning details you need to set to support your network environment,
or details on specific badge features, and commands. For a complete description of these topics, refer to Vocera B-Series Badge Guide
and Vocera Infrastructure Planning Guide.
Product Applicability
This section describes the applicable products, the supported firmware releases, and the supported Vocera Software.
Vocera Firmware Supported Badge
Up to Firmware Release 4.3 B3000, and B3000n
Configuration Hardware Requirements
Vocera requires specific hardware to set up the badges and the phones.
The following table provides details of the hardware required:
Component Requirement
Configuration Computer A dedicated computer that runs the Vocera Badge Configuration Utility (BCU). For more
Access Point An isolated access point that is not connected to the installation site’s network.
Cable An Ethernet crossover cable to connect the configuration computer and the access
information, refer to Vocera Voice Server Sizing Matrix.
point.
Related Documentation
The documents supporting the Vocera Badge Configuration Guide is listed in this topic.
The following documents support the Vocera Badge Configuration Guide:
• Vocera Infrastructure Planning Guide—Specifies the recommended configuration of infrastructure to support Vocera. You can also refer
to all the security information in the Vocera Infrastructure Planning Guide.
• Vocera Badge User Guide—Specifies the badge features and commands.
5 VOCERA DEVICE CONFIGURATION GUIDE

Badge Configuration Workflow
This section provides a workflow to configure badges.
To set up badges in your network, you must perform the following tasks:
1. Setting Up the Configuration Computer—In this step you set up a configuration computer, specify the TCP/IP properties and
connect it to an access point. For more information, refer to Setting Up the Configuration Computer on page 7.
a. Installing the Badge Configuration Utilities—Install the Badge Configuration Utility that allows you to specify the settings and
automatically generate a properties.txt file. You can then download the text file to your badges. For more information, refer to
Installing Badge Configuration Utilities on page 7.
b. Specifying TCP/IP Properties—Specify TCP/IP properties in the configuration computer to allow a new badge to connect to it.
For more information, refer to Specifying TCP/IP Settings on page 11.
c. Setting Up an Isolated Access Point—Connect the configuration computer directly to an access point that is set up without
security parameters. For more information, refer to Setting up Isolated Access Point on page 12.
2. Configuring a New Badge—After you set up the configuration computer, you must specify properties for your badge before it can
communicate with your network. You can then configure a test badge.
a. Creating a Property File—Use the Badge Properties Editor (BPE) to create a file specifying the property values your site requires.
For more information, refer to Using the Badge Properties Editor on page 13.
b. Configuring a Test Badge—Set up a single test badge to confirm that it connects to the network the way you intended. For more
information, refer to Configuring a Test Badge on page 26.
3. Configuring the Remaining Badges—After you have successfully configured and tested one badge, configure the remaining badges
for your site using the Badge Configuration Utility (BCU).
a. Using the BCU—Use the BCU to download properties and firmware settings from the configuration computer to the rest of the
badges. For more information, refer to Using the Badge Configuration Utility on page 28.
6 VOCERA DEVICE CONFIGURATION GUIDE
Setting Up the Configuration Computer
This section describes how to set up the computer and other equipment needed to configure Vocera badges.
A badge has no keyboard, and cannot be configured directly. You must configure it from a computer that is referred to as a configuration
computer. The configuration computer runs the Vocera Badge Configuration Utility (BCU) and is also called as the BCU computer.
A new badge is factory-programmed to establish a wireless connection to a computer with the IP address 10.0.0.1 using an SSID
vocera (all lower-case), with open authentication and no encryption. After the badge connects to the configuration computer, you can
customize the badge settings for your specific network requirements and security.
Note: The configuration computer must be a standalone computer that is not connected to the network of your site.
Tip: Any notebook, laptop, or desktop computer running Windows with an Ethernet network card can be used as a configuration
computer. If a Windows firewall or antivirus software with firewall capabilities is installed on this computer, either disable it or open
UDP ports 54000 and 5555.
Installing Badge Configuration Utilities
The Badge Utilities let you specify badge properties using the web UI. You can then download the properties to your badges.
If the Badge Configuration Utilities from a previous version of Vocera is installed on the configuration computer, remove it before installing
the current Badge Configuration Utility. Vocera does not support more than one version of the Badge Configuration Utilities on a
configuration computer. The Badge Configuration Utility version and Vocera Voice Server version must be the same.
To install the Badge Configuration Utilities, perform the following steps:
1. Log in to the computer with administrator privileges.
2. Locate and double-click the Vocera Launcher file.
The Welcome window is launched.
3. Click Next to continue with the installation program.
7 VOCERA DEVICE CONFIGURATION GUIDE
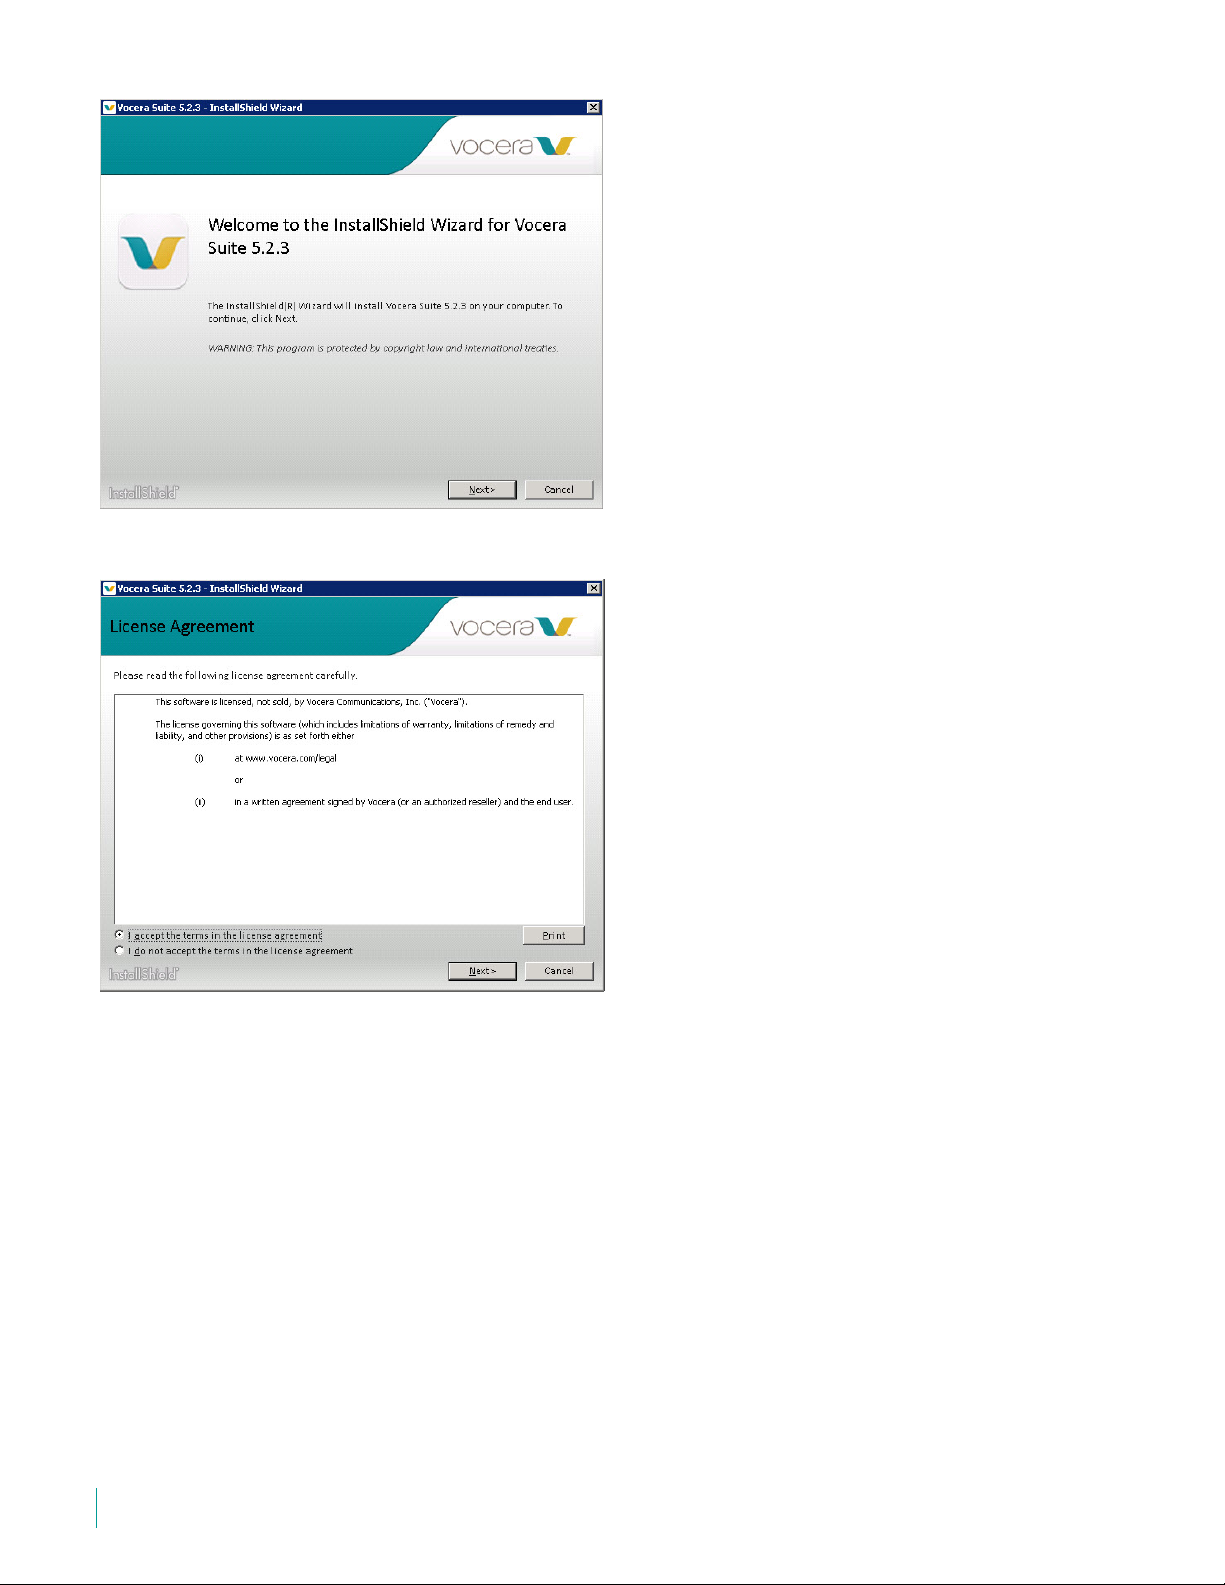
The License Agreement window is displayed.
4. Review the license agreement before accepting the terms and click Next.
SETTING UP THE CONFIGURATION COMPUTER
The Custom Setup Window opens.
5. Select the Badge Configuration Utility (BCU) radio button and click Next, in the Custom Setup window.
8 VOCERA DEVICE CONFIGURATION GUIDE
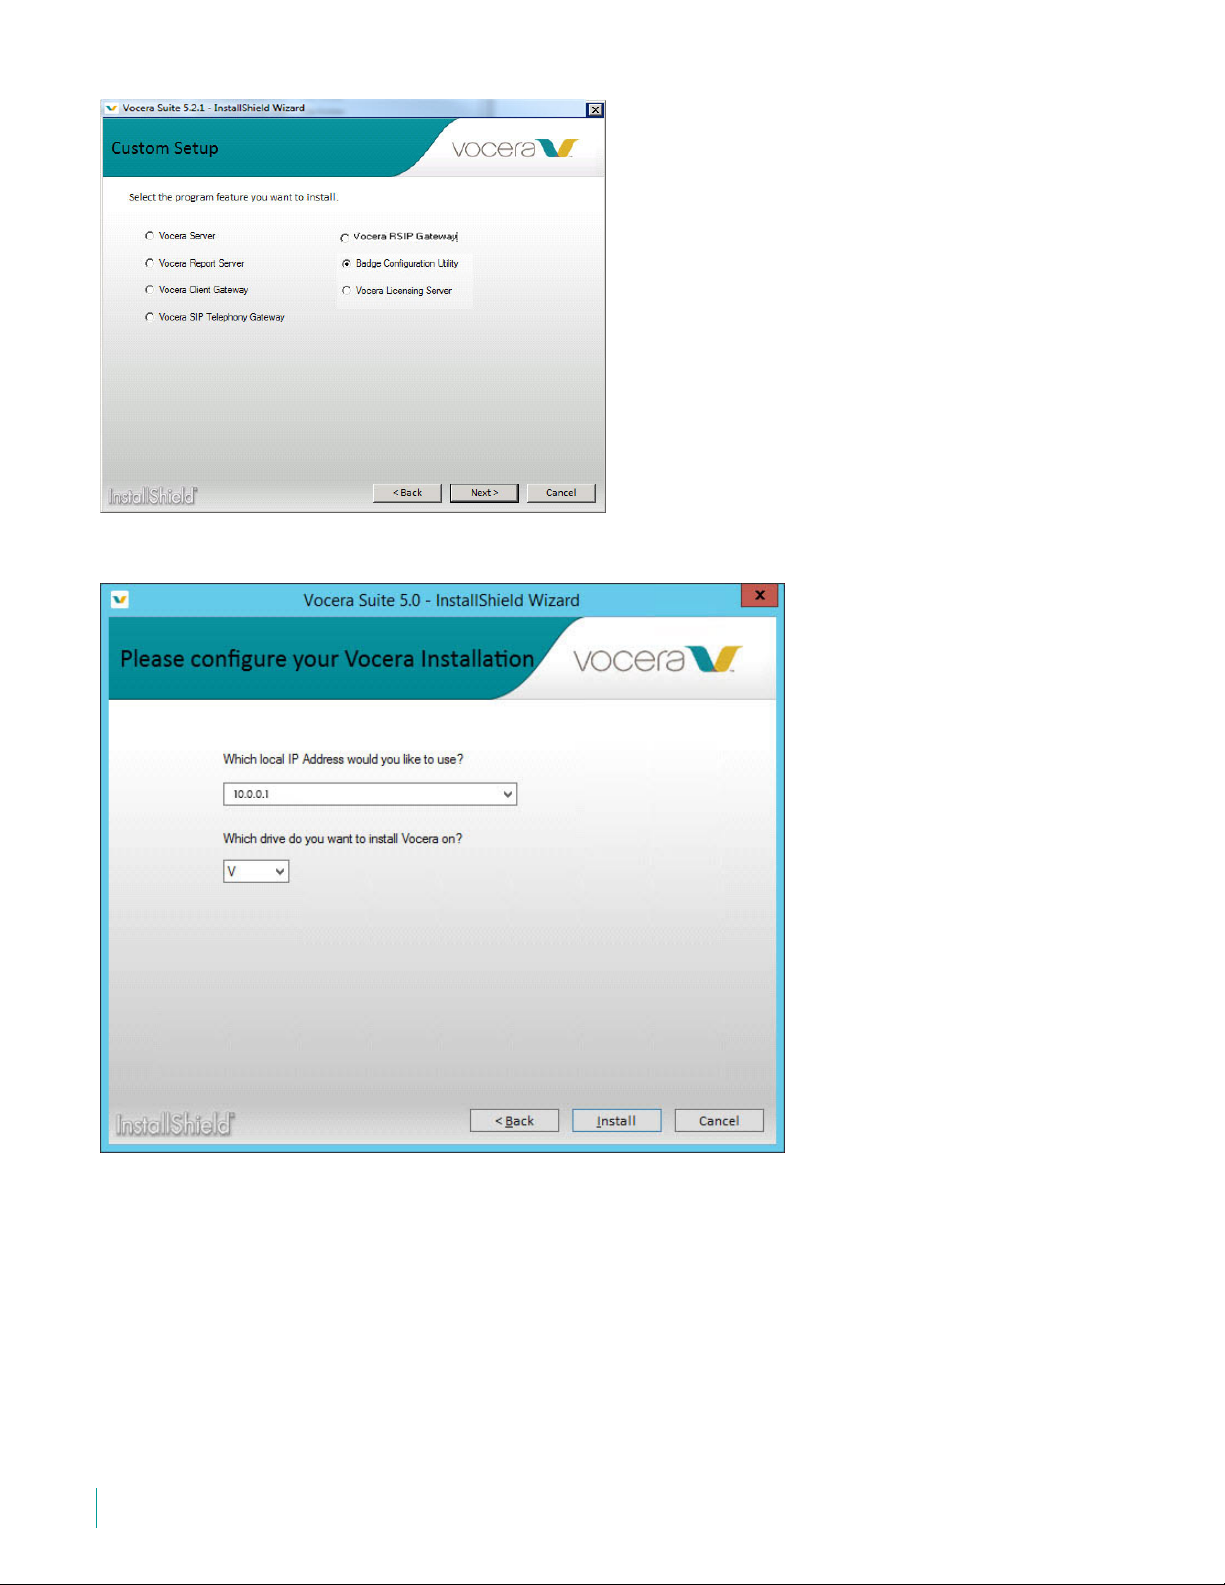
SETTING UP THE CONFIGURATION COMPUTER
The Installation Configuration window is displayed.
6.
Enter the IP address 10.0.0.1 and the drive where you want to install the Badge Configuration Utilities.
7. Click Install.
9 VOCERA DEVICE CONFIGURATION GUIDE
SETTING UP THE CONFIGURATION COMPUTER
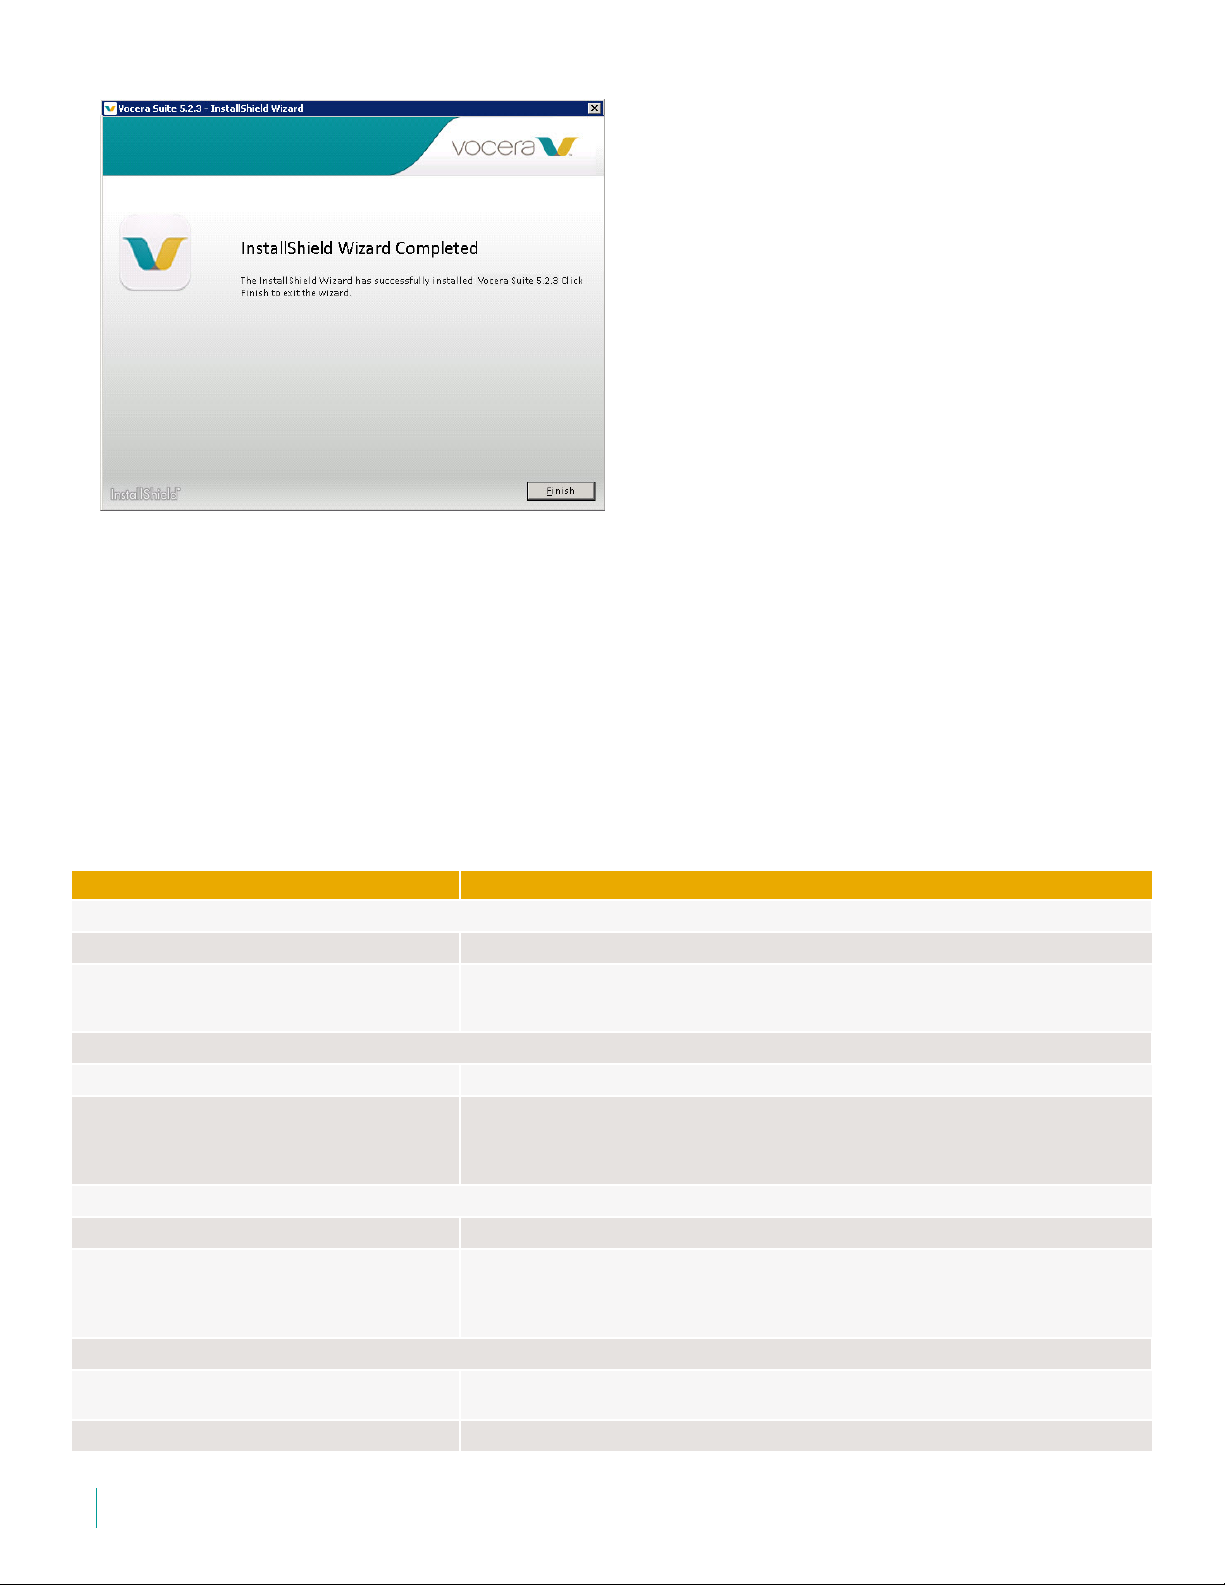
The Vocera installer launches with a progress bar that shows the status of the installation. When the installation is complete, a window
appears announcing that the installation is complete.
8. Click Finish.
Your installation is complete, and a shortcut icon is created on the desktop to access Badge Property Editor (BPE). The installation
creates some important badge configuration files at Vocera\config.
Badge Configuration Files Overview
The \vocera\config directory on the configuration computer contains the files used by the Badge Properties Editor and the Badge
Configuration Utility.
By default, the same set of files is also installed in this directory on the Vocera Voice Server computer.
The following directories and files in the \vocera\config directory are used by the Badge Configuration Utility and the Badge Properties
Editor:
Item Description
B2000
gen2 Directory containing B2000 firmware, resources, and related files.
gen2\metadata\filelist Auto-generated text file, created by both the Badge Configuration Utility and the Vocera Voice
B3000
gen3 Directory containing B3000 firmware, resources, and related files.
gen3\metadata\filelist Auto-generated text file, created by both the Badge Configuration Utility and the Vocera Voice
B3000n
gen3n Directory containing B3000n firmware, resources, and related files.
gen3n\metadata\filelist Auto-generated text file, created by both the Badge Configuration Utility and the Vocera Voice
Common Files
help Directory containing help systems for the Badge Configuration Utility and the Badge Properties
lib Directory containing the Badge Configuration Utility and the Badge Properties Editor applications.
Server, contains the list of files for B2000 firmware. The Badge Configuration Utility and the Vocera
Voice Server use this file to determine the files to download to a B2000 badge.
Server, contains the list of files for B3000 firmware.
The Badge Configuration Utility and the Vocera Voice Server use this file to determine the files to
download to a B3000 badge.
Server, contains the complete list of files for B3000n firmware.
The Badge Configuration Utility and the Vocera Voice Server use this file to determine the files to
download to a B3000n badge.
Editor.
10 VOCERA DEVICE CONFIGURATION GUIDE
SETTING UP THE CONFIGURATION COMPUTER
Item Description
badge.properties Text file, created by the Badge Properties Editor, contains properties that determine badge
behavior.
Note: Vocera recommends that you do not edit these files manually.
profiles.txt (For B3000n only) Text file, generated by the Badge Properties Editor when you create dynamic
bcu.bat A batch file that launches the Badge Configuration Utility.
wireless profiles for the badge.
The profiles.txt file contains details of WLAN configurations, each with its description and includes
the priority used by WLAN profiles when selecting a profile and attempting to associate to the
badge.
The information in this file is populated with data from the badge.properties file and based on
selections made when you create a new profile using the Badge Properties Editor user interface.
Note: Vocera recommends that you do not edit these files manually.
Property and Profile Files for the Badge
Badge properties enable a badge to communicate on the wireless network deployed at your specific site. Use the Badge Properties Editor
to create the badge.properties file to control general behavior and use the profiles.txt files for environments that require more than
one wireless profile in a dynamic campus-type setting.
Each Vocera badge has an independent profile that allows different types of badges to run on VLANs/SSIDs that have different network and
security settings. You can also tune different types of badges independently to optimize their performance or give them any combination of
property settings for specific purposes.
You can set corresponding properties for each badge type to the same values or different values, depending on the network security
protocols you want to use.
For example, suppose different badge types use different SSIDs:
• B3000n badges connect to the venus SSID using PEAP.
• B3000 badges connect to the mars SSID using a pre-shared key.
If your badges reside on a single voice SSID using the same authentication and encryption settings, configure all badge types identically.
About Dynamic WLAN Profiles
Dynamic Wireless LAN profiles are intended for campus environments where the network administrator plans to deploy multiple WLAN
configurations for different physical locations.
You can configure various WLAN configurations to be provisioned in the B3000n where the badge can select the correct WLAN profile
without requiring end-user intervention.
You can also use this feature during WLAN transitions or upgrades where B3000n badges are moved dynamically to a new WLAN
configuration where a previous WLAN configuration is disabled. In locations where the Wi-Fi of a facility is extended to home offices or
remote offices where a different WLAN configuration is required, B3000n badges can dynamically select the appropriate configuration.
Dynamic Wireless LAN implementations are intrusive that B3000n badges lose connectivity to an associated SSID before a scan for the
new profile is initiated. It is used in situations where the B3000n is transported between locations during which it will lose connectivity. It is
not intended for use inside a building where a rapid transition between SSIDs is desired.
An interruption and communication delay of 60 seconds or longer as the badge attempts to associate with a Wi-Fi network and transitions
between multiple WLAN configurations is an expected behavior. You can enable up to 4 WLAN profiles in your environment.
Specifying TCP/IP Settings
For a new badge to connect to the configuration computer properly, you need to specify the TCP/IP properties.
11 VOCERA DEVICE CONFIGURATION GUIDE
SETTING UP THE CONFIGURATION COMPUTER
The exact procedure for setting your TCP/IP properties depends upon the version of the operating system. Refer to your Windows
documentation for complete information.
In Windows, use the Network Connections control panel to specify the following TCP/IP properties for the network card in your
configuration computer:
1. Set the IP address to 10.0.0.1
When you boot a new badge, it automatically looks for a computer with this address that executes the Badge Configuration Utility.
2. Set the Subnet mask to 255.0.0.0
Note: The exact procedure for setting your TCP/IP properties depends upon the version of the operating system. Refer to your
Windows documentation for more information.
Setting up Isolated Access Point
The isolated access point allows a badge to connect to the configuration computer using default factory settings.
This access point is a temporary set up that you use only to configure badges. Configured badges can connect to your wireless LAN by
using your existing SSID and security system.
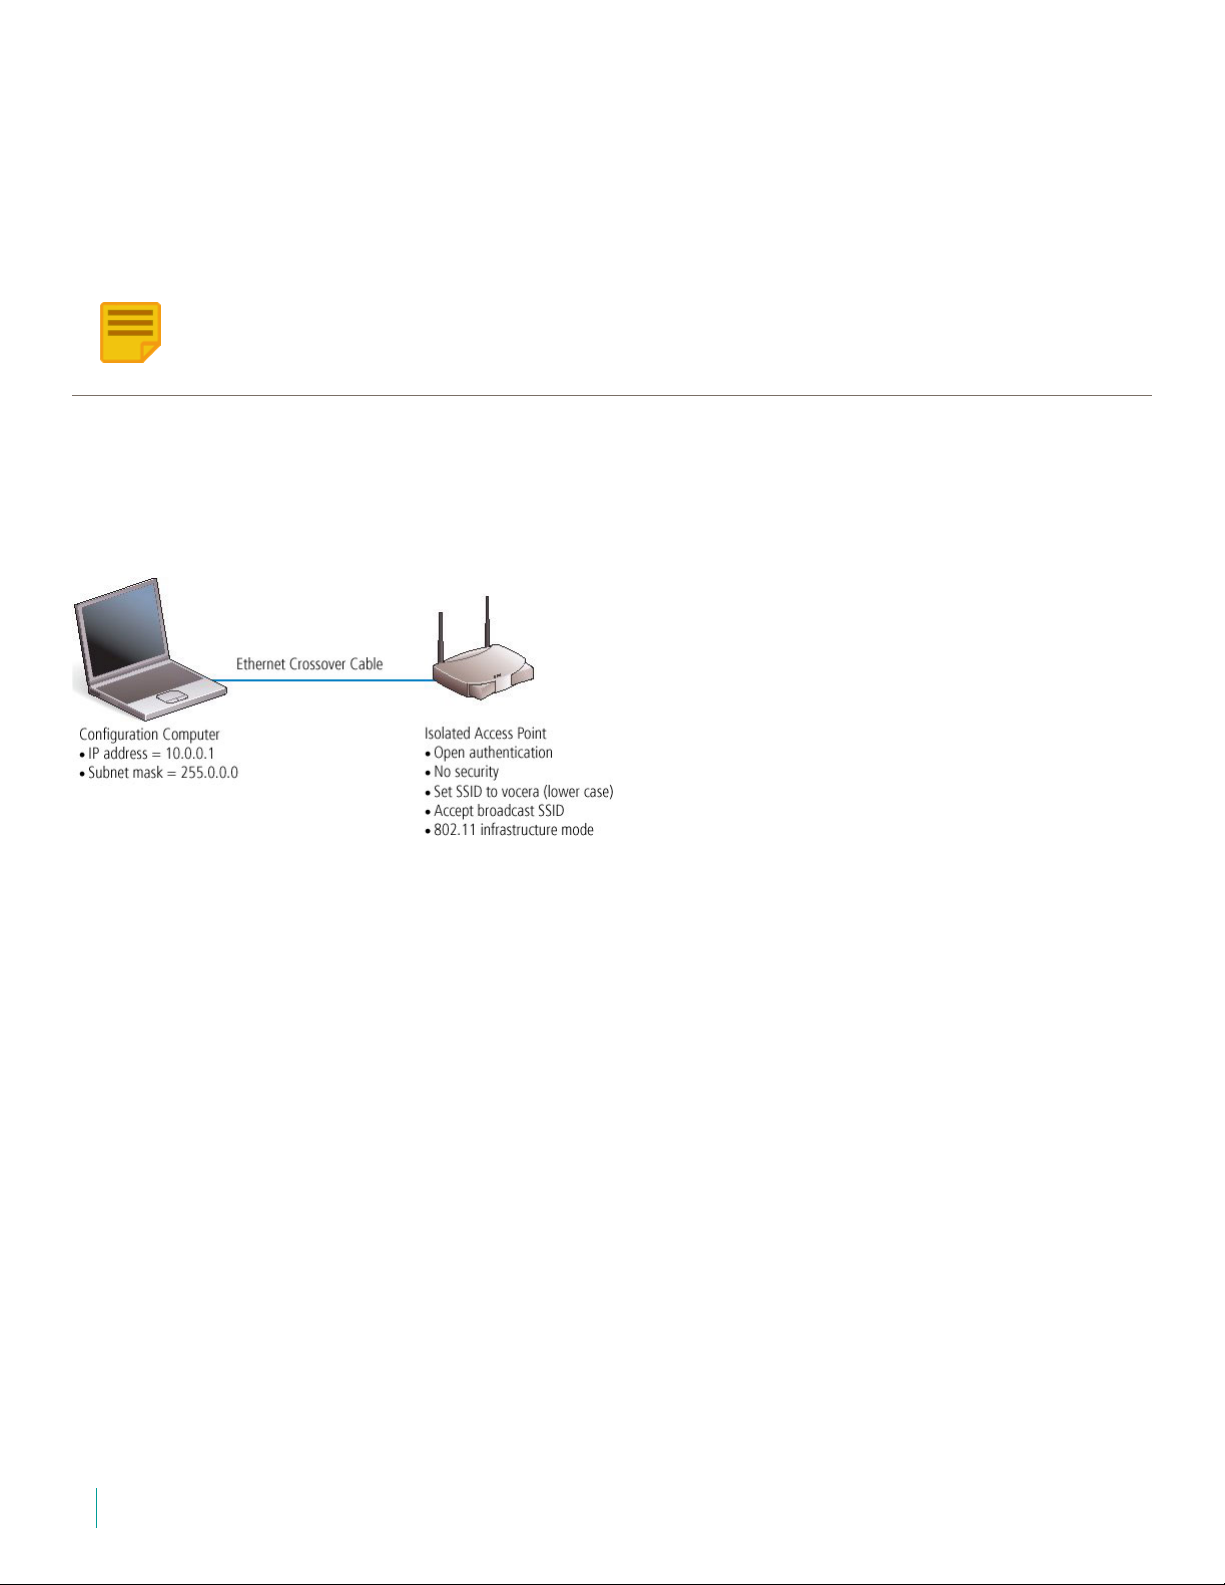
When you are finished, your badge configuration hardware should be set up as follows:
How to Set up an Isolated Access Point
The access point must be isolated so you can set it up with a different SSID, and without compromising the security of your site. Any
access point security will prevent unconfigured badges from connecting.
To set up an isolated Access Point, perform the following tasks:
1. Attach an Ethernet crossover cable to the network port on the configuration computer.
2. Connect the other end of the cable to the Ethernet port on the access point.
3. Install configuration software for the access point on the configuration computer.
Most access points require only a browser for configuration.
4. Ensure that your access point is set up as follows, using the access point configuration utility:
• Authentication—Allow open (typically the default)
• Security—Turn off all security (typically the default)
• SSID—Assign the value as vocera (using all lower-case letters)
• SSID broadcast—Allow a broadcast to associate (typically the default)
• Configuration Mode—Configure the Access Point in the infrastructure mode (typically the default)
The exact procedure for setting up your access point depends upon the hardware manufacturer. Refer to your access point
documentation for complete information.
When Vocera badges come from the factory, their SSID property is set either to vocera or to <no value>. If you configure your Access
Point as described above, both types of badges can connect to it.
12 VOCERA DEVICE CONFIGURATION GUIDE
 Loading...