

Page 1

Getting Started with vFabric Cloud Application
Platform
VMware vFabric Cloud Application Platform 5.0
This document supports the version of each product listed and
supports all subsequent versions until the document is replaced by
a new edition. To check for more recent editions of this document,
see http://www.vmware.com/support/pubs.
EN-000648-00
Page 2

You can find the most up-to-date technical documentation on the VMware Web site at: https://www.vmware.com/
support.
The VMware Web site also provides the latest product updates.
If you have comments about this documentation, submit your feedback to: docfeedback@vmware.com
Copyright © 2012 VMware, Inc. All rights reserved. This product is protected by U.S. and international
copyright and intellectual property laws. VMware products are covered by one or more patents listed at http://
www.vmware.com/download/patents.html.
VMware is a registered trademark or trademark of VMware, Inc. in the United States and/or other jurisdictions. All
other marks and names mentioned herein may be trademarks of their respective companies.
VMware, Inc., 3401 Hillview Avenue, Palo Alto, CA 94304
www.vmware.com
Page 3

Table of Contents
1. About Getting Started with vFabric Cloud Application Platform ....................................................................... 1
Intended Audience ......................................................................................................................... 1
2. Quick Start Guide .............................................................................................................................. 3
3. Introducing vFabric Cloud Application Platform 5.0 ..................................................................................... 9
vFabric Platform Application Services and Packages ................................................................................ 9
Simplified VM-Based Licensing Model .............................................................................................. 15
Integration with vSphere ................................................................................................................ 16
Engineered for Spring-Built Applications ............................................................................................ 16
4. vFabric Licensing ............................................................................................................................. 17
How Licensing Works with Standalone vFabric Components .................................................................... 17
How Licensing Works with vFabric Standard and vFabric Advanced ........................................................... 17
Using the vFabric License Check Tool ............................................................................................... 17
License Usage Reporting ............................................................................................................... 20
5. Installing vFabric Platform .................................................................................................................. 21
vSphere, JVM, and Operating System Support ...................................................................................... 21
Install vFabric License Server on Your vCenter Server ............................................................................ 21
Activate vFabric Platform Licenses ................................................................................................... 24
RHEL: Installing vFabric Components from the VMware YUM Repository ................................................... 25
Windows/Linux: Example Walkthrough of Installing Component from Download Page ..................................... 39
Monitor vFabric License Usage ........................................................................................................ 40
Upgrade vFabric License Server ....................................................................................................... 42
Uninstall vFabric License Server from vCenter Server ............................................................................ 43
RHEL: Upgrade vFabric Components From the VMware YUM Repository ................................................... 43
iii
Page 4

iv vFabric Platform
Page 5

About Getting Started with vFabric Cloud Application Platform
1. About Getting Started with vFabric Cloud Application
Platform
Getting Started with vFabric Cloud Application Platform describes product concepts and initial setup tasks for VMware®
vFabric™ Cloud Application Platform. Read this documentation for an overview of platform components; to familiarize yourself
with the licensing infrastructure; and to install the VMware® vFabric™ Standard or VMware® vFabric™ Advanced package.
Intended Audience
Getting Started with vFabric Cloud Application Platform is intended for experienced Windows and Linux developers and system
administrators who want to learn about vFabric platform and its included components; install the vFabric License Server on an
existing VMware® vCenter™ Server; and understand how vFabric licensing works.
1
1
Page 6

2 vFabric Platform
About Getting Started with vFabric
2
Cloud Application Platform
Page 7

Quick Start Guide 3
2. Quick Start Guide
This section guides you through the end-to-end process of installing vFabric Platform, or more specifically, installing two
vFabric components on a Red Hat Enterprise Linux (RHEL) virtual machine in the context of vFabric Platform. In particular,
the procedure describes how to perform the following tasks:
• Create an ODBC data source on the Windows computer running vCenter Server that connects to either the internal database
used by vCenter Server or to a separate database. You will later specify this data source when you install vFabric License
Server. vFabric License Server requires that certain properties be set on this data source, which is why you are required to
create one specifically for vFabric License Server use.
In this Quick Start Guide, it is assumed you are using a SQL Server database, although can also use other databases such as
Oracle.
• Install vFabric License Server on the same virtual machine (VM) as your vCenter Server.
• Activate a vFabric license.
• Install the vfabric-5-repo RPM on the RHEL virtual machine (VM), which makes it easy for you to browse the VMware
RPM repository.
• Install two vFabric components (vFabric tc Server and vFabric Web Server) on the RHEL VM from the VMware RPM
repository.
The procedure shows you how to complete the entire installation process as quickly as possible, with minimal explanation of
what each step means. For more details, see Installing vFabric Platform.
Prerequisites
• Install and configure vCenter Server and vSphere Client on a Windows 64-bit computer.
See vSphere Installation and Setup.
• Create a virtual machine (VM).
See vSphere Virtual Machine Administration.
• Install Red Hat Enterprise Linux (RHEL) as the guest operating system on the VM.
See Installing a Guest Operating System.
• Install VMware Tools on the VM.
See Installing and Upgrading VMware Tools.
• Ensure that the Windows computer on which vCenter Server is running has the SQL Server Native Client ODBC
driver installed on it; if not, download and install the driver from the Microsoft SQL Server Web site.
Procedure
1. Create an ODBC data source that connects to either the vCenter database, or an external database.
a. On the Windows computer on which you are running vCenter Server, invoke the ODBC Data Source Administrator
window using Start > Programs > Administrative Tools > Data Source (ODBC).
b. Click the System DSN tab.
c. Click the Add... button.
d. Select the SQL Server Native Client driver, then click Finish.
3
Page 8
4 vFabric Platform
e. Enter a name and description of the data source, then select the SQL Server you want this data source to connect to
from the drop-down list. The SQL server can be either the one used by the vCenter Server or a separate one, whichever
works best for your environment. Click Next.
f. Specify that you want SQL server to verify the authenticity using a login ID and password entered by the user, then
enter the Login ID and password of the SQL Server user.
Do not specify integrated Windows authentication.
g. Continue clicking Next, and then Finish, taking all default values, until you see a summary of the data source
configuration. Optionally test the data source to ensure you have configured it correctly, then click OK.
2. From the Windows VM on which you are running vCenter Server, download the vFabric License Server installer from the
VMware Download Center page and save it to your computer.
The installer program is called vFabric_License_Server-version.exe.
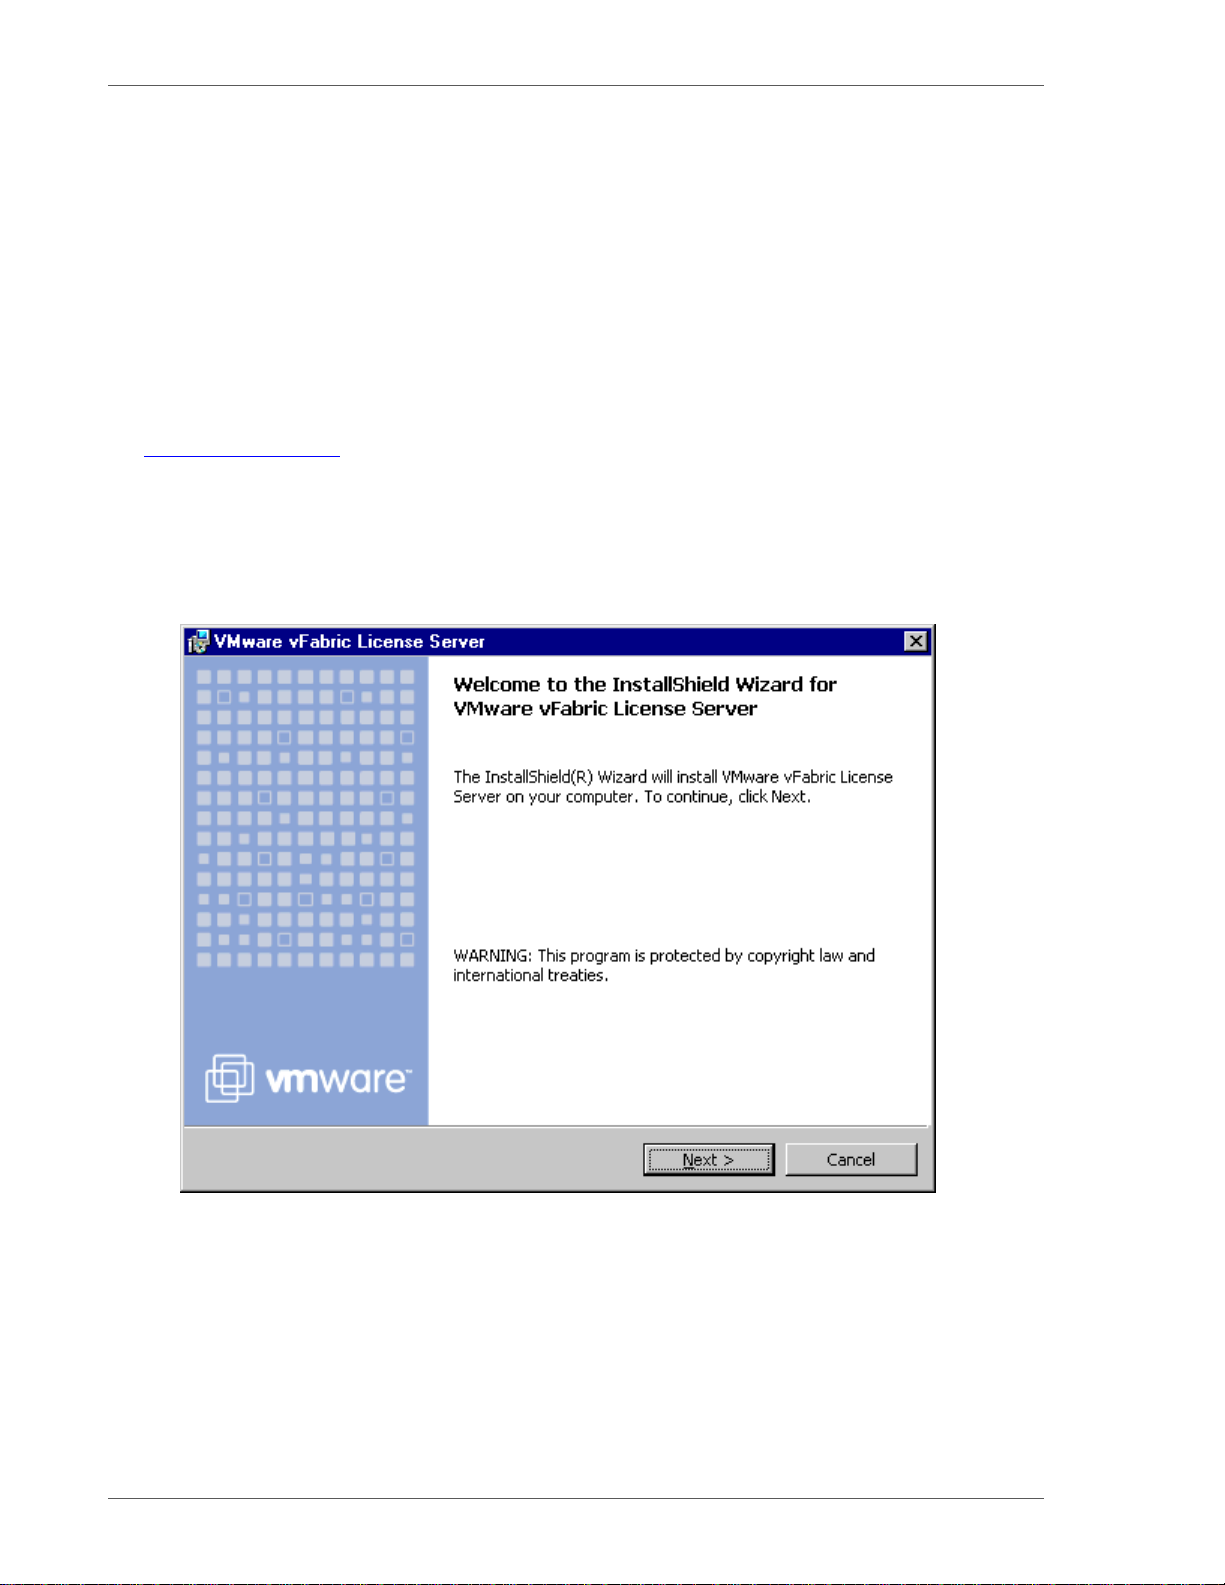
3. Install the vFabric License Server on the same VM as your vCenter Server.
a. Double-click on the installer from Windows Explorer to start the installation. After preparing the installation, the
vFabric Welcome Screen appears.
b. Continue clicking Next to accept the license agreement and view where the installer will install the vFabric License
Server.
c. Enter the login and password for the administrator of the vCenter Server installed on the same Windows VM, then click
Next.
d. Enter the login ID and password of the database user, and select the ODBC data source (DSN) that you created in a
preceding step.
e. Click Install to proceed with the installation.
4 Quick Start Guide
Page 9
Quick Start Guide 5
The installer program completes successfully when you see the message InstallShield Wizard Completed.
f. To view details of the installation, click Show the Windows Installer Log. Click Finish to complete the installation.
4. Make a note of the license key that you purchased for vFabric Platform. See VMware Licensing Help Center for additional
information about licensing.
VMware license keys consist of groups of characters separated by dashes, such as 15243-
E1352-082DK-0TCH2-28D3G.
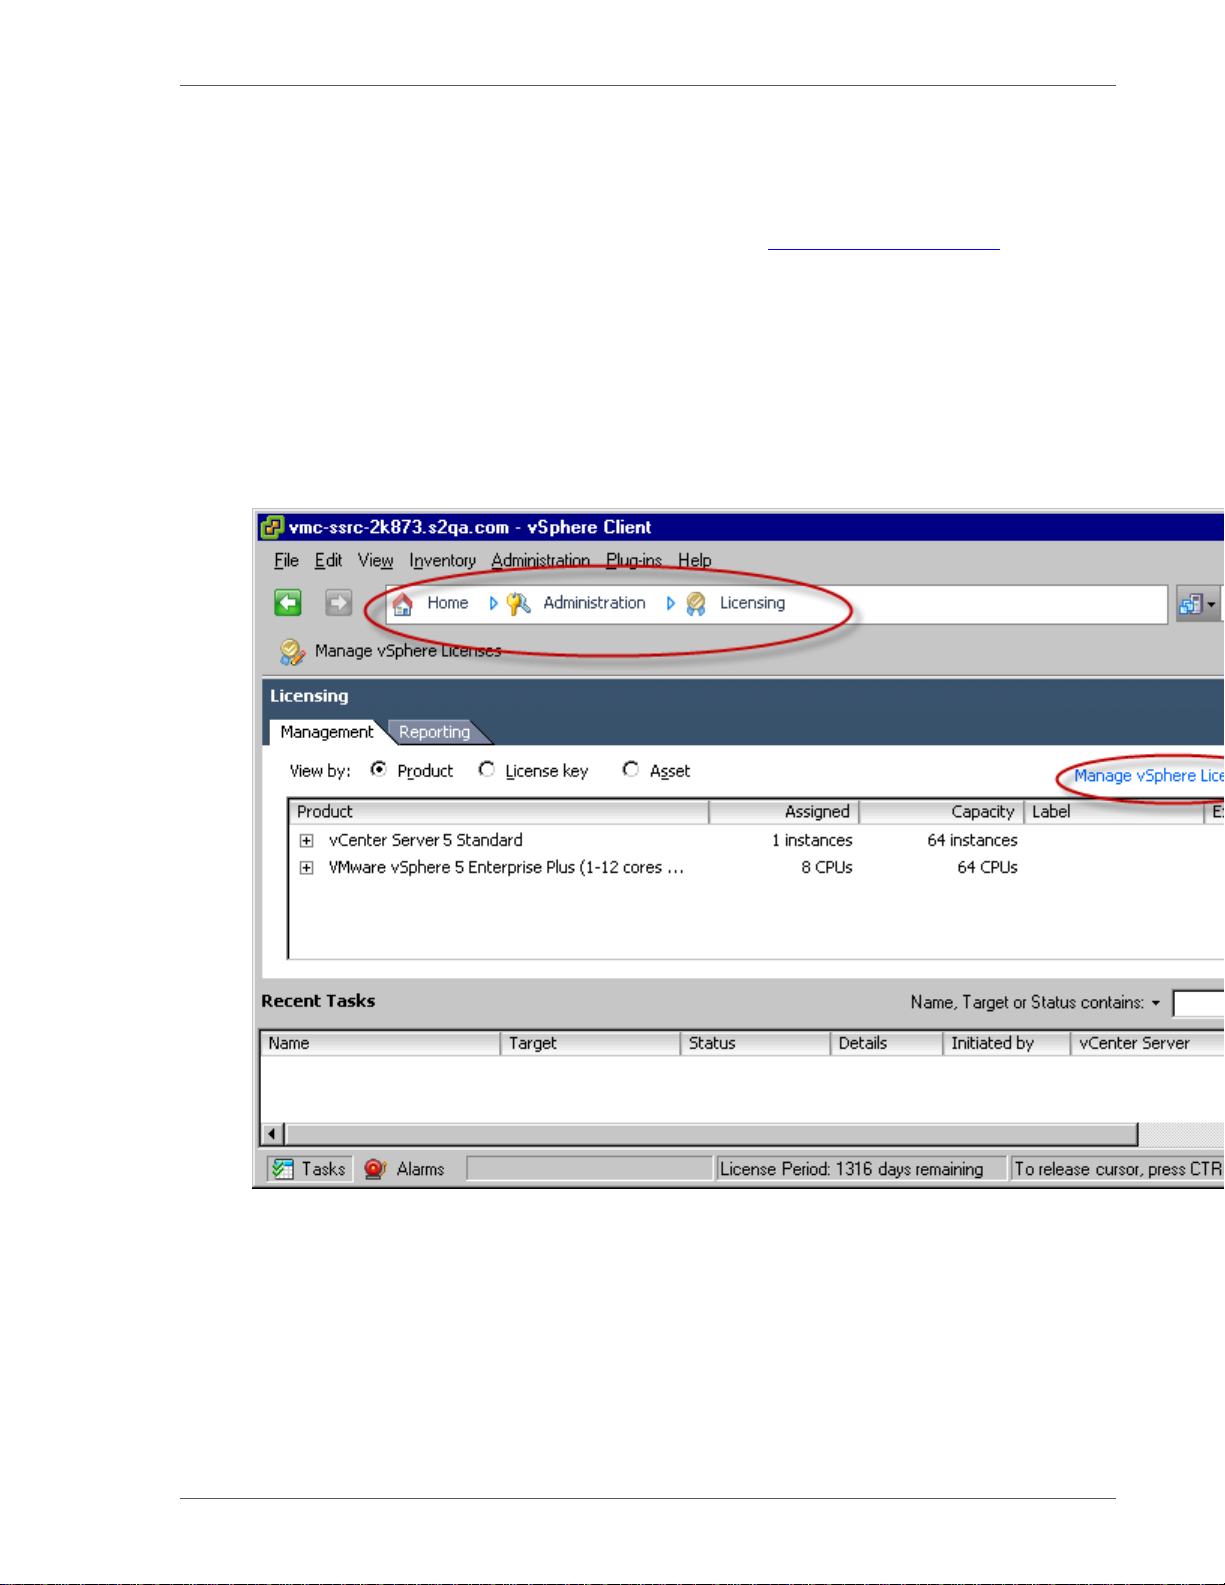
5. Activate the vFabric license keys in vCenter Server.
a. Start vSphere Client 5 and log in to the vCenter Server in which you installed vFabric License Server.
b. Select Home>Administration>Licensing to invoke the vCenter Licensing page, then click the Manage vSphere
Licenses link in the top-right corner, as shown in the screenshot.
c. Click Add License Keys on the left, then enter the license key in the text window to the right. Enter an optional label.
d. Click the Add License Keys button.
The license key shows up in the review window.
e. Repeat the preceding step to add any additional license keys.
f. Follow the prompts until you get to the Confirm Changes window, verify changes, and click Finish.
5
Page 10

6 vFabric Platform
The license keys are displayed in the main vCenter Licensing window under the name VMware vFabric
Standard|Advanced, depending on the vFabric Platform package you purchased.
6. Install the vfabric-5-repo RPM on the RHEL VM.
a. Log in to the RHEL VM as the root user and start a terminal.
b. Run the rpm command to install the vfabric-5-repo from the VMware repository:
prompt# rpm -Uvh http://repo.vmware.com/pub/rhel5/vfabric/5/vfabric-5-repo-5-2.noarch.rpm
You install the vfabric-5-repo RPM on each RHEL VM on which you want to install one or more vFabric
components.
7. Install vFabric tc Server and vFabric Web Server on the RHEL VM.
a. Log in to the VM as the root user and start a terminal.
b. Execute the following yum install command to install vFabric tc Server:
prompt# yum install vfabric-tc-server-standard
The yum command displays information about the contents of the installation.
c. Enter y at the prompt to begin the installation.
If the installation is successful, you will see a Complete! message at the end.
When the installation is complete:
• vFabric tc Server is installed in the /opt/vmware/vfabric-tc-server-standard directory.
• The installation is owned by the root user, but you manage the tc Server installation as tc-server, which is a
non-interactive user created by the RPM install.
d. Execute the following yum install command to install vFabric Web Server:
prompt# yum install vfabric-web-server
When the installation is complete:
• vFabric Web Server is installed in the /opt/vmware/vfabric-web-server directory
• The installation is owned by the root user.
What to do next
• Install a JDK or JVM on the RHEL VM on which you installed vFabric tc Server.
Update the JAVA_HOME and PATH environment variables of the tc-server user.
For example, to set the environment variables in a Linux profile after installing the JDK in /opt/java/jdk1.6.0_24:
export JAVA_HOME=/opt/java/jdk1.6.0_24
export PATH=$JAVA_HOME/bin:$PATH
• Optionally enable EM4J in the VM on which you installed vFabric tc Server and create a tc Runtime instance that uses the
elastic-memory template.
6 Quick Start Guide
Page 11

Quick Start Guide 7
See the Using Elastic Memory for Java (EM4J) section of the vFabric tc Server Administration
Guide.
After you start the instance and deploy a Web application to it, the memory management of the Java workload will be greatly
improved as compared to using a non-EM4J enabled tc Runtime instance.
• Create and start a vFabric Web Server instance.
See the vFabric Web Server Installation and Configuration.
• Install additional vFabric components on the RHEL VM, such as vFabric Hyperic or vFabric RabbitMQ. See Installing vFabric
Platform.
• Monitor the vFabric Platform license usage by querying the vFabric License Server. See Monitor vFabric License Usage.
7
Page 12

8 vFabric Platform
8 Quick Start Guide
Page 13

Introducing vFabric Cloud Application
Platform 5.0
3. Introducing vFabric Cloud Application Platform 5.0
The rise of cloud computing and IT as a service is driving dramatic changes in application infrastructure and development.
VMware® vFabric™ Cloud Application Platform (vFabric Platform) embraces this shift by integrating the familiar Spring
Developer Frameworks with a proven set of services that span the lifecycle of modern application development, deployment, and
management.
Engineered for Spring Framework and VMware vSphere® virtualization, vFabric Platform includes tc Server with EM4J, Spring
Insight Operations, GemFire Application Cache Node, Hyperic Server and Agent, RabbitMQ, SQLFire, and Web Server. The
platform brings significant benefits to stake holders throughout the enterprise:
• Application developers and architects get tools that let them build data-intensive, Web-oriented applications quickly and
reliably. A per-VM licensing model gives them more latitude to amend application architecture with fewer licensing
constraints.
• IT gets an agile platform that makes applications easy to deploy, instantly scalable, and portable across clouds.
• End users get applications that are data rich, quick to access, and always available.
Subtopics
vFabric Platform Application Services and Packages
9
Simplified VM-Based Licensing Model
Integration with vSphere
Engineered for Spring-Built Applications
vFabric Platform Application Services and Packages
vFabric Platform 5.0 is available in two packages, VMware® vFabric™ Standard and VMware® vFabric™ Advanced, as
indicated in the table. The sections that follow describe how each component is optimized to meet the demands of modern
applications in virtual and cloud environments.
Table 3.1. vFabric Platform 5.0 Components and Packages
Component and Version Description vFabric Standard Component vFabric Advanced Component
vFabric tc Server 2.6 Lightweight application server,
Elastic Memory for Java (EM4J
1.0)
fully compatible with Apache
Tomcat 7, that can be instantly
provisioned and elastically scaled.
Elastic Memory for Java (EM4J
1.0 ) is embedded with vFabric
tc Server (Spring Edition), and
Spring Insight Operations 1.5 is
available as a separate download.
Memory management technology
that enables you to run more Java
applications on your ESXi servers
than previously possible. EM4J
helps maintain Java application
performance and reliability while
freeing memory that allows you to
run more VMs per host. An EM4J
plug-in is now available for the
vSphere Web Client.
Yes. Yes.
Yes. Yes.
Spring Insight Operations 1.5 Performance monitoring with real-
time, multi-layered visibility into
applications running on tc Server.
Yes. Yes.
9
Page 14

10 vFabric Platform
Component and Version Description vFabric Standard Component vFabric Advanced Component
vFabric Hyperic 4.6 Proactive performance
management with complete and
constant visibility into applications
and infrastructure.
vFabric GemFire 6.6 Data management platform that
provides real-time, consistent
access to data across widely
distributed cloud architectures.
GemFire Application Cache Node
is the vFabric Platform offering for
vFabric GemFire.
vFabric Web Server 5.0 Precompiled and pretuned Web
server and load-balancing service
that dynamically routes requests
to an application server for
processing. vFabric Web Server
is fully compatible with Apache
Web Server.
vFabric RabbitMQ 2.4 De facto standard for cloud
messaging and leading
implementer of AMQP. Delivers
highly available, scalable,
and portable messaging with
predictable, consistent throughput
and latency.
vFabric SQLFire 1.0 Memory-optimized, distributed
database management system
that provides extremely high
throughput; predictable latency;
dynamic and linear scalability;
and continuous availability of
data.
Yes. Yes.
Yes. Yes.
Yes. Yes.
No. Yes.
No. Yes.
vFabric tc Server 2.6 (Spring Edition)
VMware® vFabric™ tc Server is 100-percent compatible with Apache Tomcat 7. It has all the runtime advantages of Tomcat,
plus operational management, advanced diagnostics, mission-critical support, and unmatched visibility into Spring-powered
applications — none of which are available in the open source product.
tc Server harnesses the power of traditional JEE architectures while eliminating their complexity and performance drawbacks,
making it easier, faster, and more cost-effective to build and run cloud-ready applications. With its lean architecture and small,
10MB memory footprint, tc Server requires significantly fewer resources than conventional servers, which allows for greater
server density in virtual and cloud environments. tc Server supports integration with VMware tools and vFabric Hyperic, and
provides templates for vFabric GemFire session replication.
Main features of vFabric tc Server Spring Edition:
• vFabric tc Server instances are compatible with existing Apache Tomcat applications, thus eliminating migration costs and
cycles.
• Parallel deployment. Deploy multiple revisions of the same application at the same time so you can roll out a new revision of
an application without affecting users.
• Automatic instance upgrades. A new script lets you easily upgrade tc Server 2.0 and 2.1 instances to function with tc Server
2.6.
• Automated deployment of applications to multiple instances of tc Server and standardized templates for rapid provisioning of
new instances.
10
Introducing vFabric Cloud Application
Platform 5.0
Page 15

Introducing vFabric Cloud Application
Platform 5.0
• Commercial support for vFabric tc Server and Spring Framework.
• Elastic Memory for Java (EM4J). Included with tc Server Spring Edition, EM4J allows Java workloads to cooperate more fully
with ESXi advanced memory-sharing technologies. EM4J helps maintain Java application performance and reliability while
freeing memory so you can run more VMs per host, improving your consolidation ratio.
• Spring Insight Operations, a Web application that gives you real-time, detailed visibility into application behavior and
performance. Insight Operations is optimized for monitoring and tuning Spring-built applications in production.
EM4J 1.0 for Improved Memory Management of Java Workloads
EM4J revolutionizes the virtualization of Java applications.
With EM4J and tc Server, you can run more Java applications on your ESXi servers than previously possible, and Java
applications can now leverage ESXi's industry-leading memory sharing technology.
Previously if you ran Java on VMware ESXi, you had to reserve 100% of the configured memory for a VM running Java
applications or risk serious performance problems. To determine the optimum size of the Java heap, you determined the
application's peak requirement. Allocating less could mean unacceptable performance, errors, or crashes; allocating more than
was necessary wasted memory.
EM4J changes all that. It is a balloon that sits directly in the Java heap and works with a new memory-sharing interface
introduced in ESXi 5.0. EM4J allows ESXi to share available memory in the Java heap among VMs as needed, while preserving
application performance and reliability. You can size the Java heap to accommodate the peak workload, without wasting or
running out of memory. Any excess memory is ballooned away and redistributed where it is needed.
11
This capability lets you create more VMs and pack more tc Server instances onto a single vSphere host. It also reduces the
likelihood of out-of-memory errors that can cripple applications.
A new EM4J plug-in is available for the vSphere Web Client. The plug-in enables you to monitor EM4J configuration and
memory performance for EM4J-enabled Java workloads in the vSphere Web Client. A Workloads tab displays statistics for
Java workloads on the virtual machine selected in the vSphere Web Client inventory tree. You can quickly verify that the virtual
machine and JVM are configured correctly for EM4J and see detailed information about the JVM process and memory usage.
Alerts warn of EM4J configuration problems and suggest best practices.
Spring Insight Operations 1.5 Engineered for vSphere, Spring, and Production Environments
Spring Insight Operations gives you real-time, granular visibility into application behavior and performance in production
environments. It is a Web application that runs with tc Server Spring Edition and is a separate download.
Insight Operations graphs the health of an application over time for the entire cluster and for each server in the cluster.
Administrators see application and server problems as they occur, with detailed information about contributing events, presented
in one unified dashboard. You can quickly identify under performing servers, server errors, and trace details for specific events
and exceptions.
VMware partners with Google to integrate Spring Insight data into SpeedTracer, a Google Chrome extension that analyzes
how your application is performing inside the browser and that ties browser performance to backend performance. If your Web
application uses Ajax and other rich open Web technologies, try SpeedTracer with Spring Insight.
Main features of Spring Insight Operations 1.5:
• Automatic instrumentation of Spring applications running on tc Server expose application performance from both general and
fine-grained perspectives.
• Isolation of performance problems by application, endpoint, application server, and method.
• Tracking of performance over time, to understand whether problems are chronic or spurious.
• Response-time histograms that reveal whether performance problems affect a many users, or a small subset.
11
Page 16

12 vFabric Platform
• Highly performant instrumentation with sub-microsecond impact to application response time, designed for applications in
production.
• Integration with Hyperic that enables operations and development teams to view a single set of both server-oriented and
application-oriented performance, and collaborate more effectively to fix performance problems faster. Spring Insight
metrics give Hyperic a broader range of data for triggering alerts and for control actions that implement automatic problem
remediation.
vFabric Hyperic 4.6
VMware® vFabric™ Hyperic® provides more than 50,000 performance metrics on more than 75 technologies at every layer
of the application infrastructure. It consolidates complete discovery, monitoring, analysis and control of all application, system,
and network assets -- including other vFabric platform components -- both inside and outside of virtual machines powered by
VMware. Hyperic provides proactive performance management through transparent visibility into dynamic applications deployed
across physical, virtual, and cloud environments. You can monitor all applications from a single console.
At startup, Hyperic automatically discovers and adds new servers and VMs to inventory; configures monitoring parameters; and
collects performance metrics and events. This level of automation lets you deploy fully monitored VMs with minimal effort and
scale out monitoring across your virtual infrastructure.
Main features of vFabric Hyperic 4.6:
• Simplifies management of virtualized applications by maintaining a continually updated inventory of vSphere ESXi and ESX
hosts, their virtual machines, and guest operating systems.
• tc Server plug-in for easier, remote management and monitoring of multiple tc Server instances and applications. See tc Server
Plug-In for Easier Management and Monitoring.
• Spring Insight plug-In for in-depth application monitoring. The plug-in makes it easier to discover whether a problem is
infrastructure or application-related. See Spring Insight Plug-In for In-Depth Application Metrics.
• Centralized plug-in manager that synchronizes Hyperic plug-ins between Hyperic Server and all Hyperic Agents in the
environment, enabling system administrators to easily configure and upgrade agents distributed across hundreds of servers.
• iPad and iPhone support.
• Deeper integration with LDAP that enables the automatic import of existing LDAP user groups to preassign roles to users.
• Auto-discovery across all operating systems that run on vSphere and in disparate run-time environments, from Java to .NET.
• Bridges the gap between virtual and physical: compares guest and host metrics (CPU, memory, disk utilization); relates
physical and virtual performance to individual applications.
• Advanced alerting: role-based, time-based (for geographically dispersed teams), server group-based, and so on. Automated
alert responses and alert escalation processes.
• Ability to resolve a broad range of issues without human intervention, often before end users notice, with automated
remediation that reduces mean time-to-resolution and ensures service level agreement (SLA) compliance.
• Plug-in framework that extends management and monitoring to any environment. Through the framework, Hyperic can
discover, monitor, and control any application or device using a straightforward Java/XML API.
• Scales dependably from the ground up — to more than 1,000 servers and one million metrics per minute with a single Hyperic
Server.
tc Server Plug-In for Easier Management and Monitoring
The Hyperic tc Server plug-in enables you to remotely manage vFabric tc Server instances and applications on multiple
computers. Hyperic provides a single console with powerful dashboards through which you can:
Introducing vFabric Cloud Application
12
Platform 5.0
Page 17

Introducing vFabric Cloud Application
Platform 5.0
• Manage the lifecycle of tc Runtime instances by starting, stopping, and restarting a local or remote instance.
• Manage the lifecycle of a group of tc Runtime instances that are distributed over a network of computers.
• Configure a single instance of tc Runtime. Configuration options include the various port numbers to which the tc Runtime
instance listens, JVM options such as heap size and enabling debugging, default server values for JSPs and static content,
JDBC datasources, various tc Runtime connectors, and so on.
• Deploy a Web application from an accessible file system, either local or remote. You can deploy to a single tc Runtime
instance or to a predefined group of servers.
• Manage the lifecycle of applications deployed to a single tc Runtime instance or group of servers. Application lifecycle
operations include start, stop, redeploy, undeploy, and reload.
Spring Insight Plug-In for Detailed Application Metrics
Hyperic 4.6 includes the Spring Insight plug-in. The plug-in enables a Hyperic Agent running on a tc Server instance to autodiscover web applications running on that instance and to obtain detailed, real-time application health and request metrics. You
can apply alerting on those metrics, as you can with other Hyperic resources and metrics. A new interface view of application
metrics associates the application to currently monitored Hyperic resources such as application servers, database servers, the
operating system, and specific resource types. By providing all of this information on one screen, Hyperic makes it easier to
pinpoint whether the problem is infrastructure- or application-related. If the application is the culprit, Hyperic-Insight integration
enables you to move from Hyperic to Insight, in the same application context, to diagnose the underlying problem.
13
vFabric GemFire 6.6 (Application Cache Node)
VMware® vFabric™ GemFire® is a high performance, in-memory distributed data management solution that scales elastically at
runtime, ensuring fast, reliable data access in the cloud and across the enterprise. GemFire is language- and infrastructure-neutral,
which enables data-sharing across existing process, software, and hardware boundaries.
Business events often require many people to see the same information at the same time in globally distributed environments.
These demands strain IT resources, degrade performance, and increase costs for bandwidth, hardware, and personnel. GemFire
addresses the problem by provisioning consistent data dynamically at the right place, at the right time, and in the right format in
memory. Using dynamic replication and data partitioning techniques, GemFire offers continuous availability, high performance
and linear scalability for data-intensive applications without compromising data consistency, even under failure conditions. Data
virtualization provides data location transparency and decouples data access logic from applications.
The vFabric Platform offering for vFabric GemFire is the Application Cache Node, which provides peer-to-peer
functionality. You can buy an additional, separate license, Data Management Node, which includes client/server
and global WAN functionality. For details, see the vFabric GemFire documentation.
Main features of vFabric GemFire 6.6:
• Applications run 4 to 40 times faster with no additional hardware.
• Data awareness and real-time business intelligence. If data changes as you retrieve it, you see the changes immediately.
• Re-engineered APIs and integration with Spring Framework speed and simplify the development of scalable, transactional
enterprise applications.
• HTTP session replication provides linear scalability, and integrates cleanly with tc Server.
• Fixed partitioned regions, for greater control of deployment options.
• Portable Data eXchange (PDX) serialization, which provides reduced object size to store more data with less memory, and
Language independence for better integration with .NET.
• Faster startup and recovery for persistent regions.
• Client-initiated transactions.
13
Page 18

14 vFabric Platform
• Client querying using parameters.
• Combines redundancy, WAN replication, and a “shared nothing” persistence architecture to deliver fail-safe reliability and
performance.
• Continuous querying to provide active data change notifications.
• Horizontally scalable to thousands of cache nodes, with multiple cache topologies to meet different enterprise needs. The
cache can be distributed across multiple computers.
• Support for asynchronous and synchronous cache update propagation.
• Optimized low latency distribution layer for reliable asynchronous event notifications and guaranteed message delivery.
HTTP Session Replication
The GemFire HTTP Session Management Module provides fast, scalable, and reliable HTTP session replication for vFabric tc
Server, Oracle WebLogic Server, and Apache Tomcat with minimal or no application changes. Depending on your usage model,
you can replicate session data across multiple peers, partition data across multiple servers, distribute session data across a WAN,
or manage your session data in many other customizable ways.
vFabric RabbitMQ 2.4
VMware® vFabric RabbitMQ™ delivers highly available, scalable, and portable messaging with predictable, consistent
throughput and latency. It is specifically designed to operate and scale in cloud environments, where applications leverage pools
of shared infrastructure and data is routed between widely distributed applications. RabbitMQ is the leading implementation of
AMQP, an open-standard messaging protocol created as an alternative to costly, proprietary commercial messaging technologies.
Main features of RabbitMQ 2.4.1:
• Offers customers and developers a consistent approach to messaging across multiple stacks and more than 70 developer
platforms.
• Supports all modern messaging patterns: point-to-point (RPC style), point-and-shoot, publish-subscribe, multicast, and more.
All are available as durable or non-durable message types.
• Protocol-based for better interoperability. Other messaging systems are API based, which limits their interoperability.
• Through protocol adapters, supports a full range of Internet protocols for lightweight in-browser messaging— including
XMPP, SMTP, STOMP, and HTTP.
• Transparent integration with Spring Batch and Spring Integration.
• Supported on all major operating systems and developer platforms, and open-sourced under the Mozilla public license.
vFabric Web Server 5.0
VMware® vFabric™ Web Server, which is compatible with Apache Web Server, distributes and dynamically balances
application load to ensure optimal performance. Unlike Apache Web Server, vFabric Web Server is precompiled, prepatched, and
pretuned, resulting in dramatically reduced time-to-deployment and substantially improved performance. vFabric Web Server
provides scalability, enhanced security, and performance without the complexity and cost of sophisticated Web infrastructures.
Support customers receive a standard, certified, easy-to-install software build, continual product updates, security alerts and
patches, guaranteed bug fixes, indemnification on all software in the bundle, and expert technical support.
vFabric Web Server is similar to vFabric ERS. However, vFabric Web Server runs only in a virtual environment,
on vSphere and vSphere guest operating systems. It is available exclusively as part of a vFabric Platform package.
ERS runs on both vSphere and physical infrastructure.
Main features of vFabric Web Server 5.0:
14
Introducing vFabric Cloud Application
Platform 5.0
Page 19

Introducing vFabric Cloud Application
Platform 5.0
• Sample template that automatically configures vFabric Web Server for a tc Server 2.6 instance.
• Precompiled builds that deliver up to 100% performance improvements, increasing uptime and reducing costs for hardware
capacity.
• Guaranteed binary drop-in bug and security-fix help for every supported platform, to reduce the time you spend on security
issues.
• Fast installation process that gets you up and running in minutes: consistent installation and directory structure across all
operating systems, seamless integration with existing infrastructures, and no preset installation requirements.
• Easy installation of multiple instances of on a single server.
• Scalable management of multiple Web sites and servers.
• In addition to Apache httpd and its core modules, support for mod_ftp, mod_fcgid, openssi, openldap, mod_ik, mod_bmx,
libexpat, libapr, zlib.
vFabric SQLFire 1.0
VMware® vFabric™ SQLFire is a memory-optimized, distributed database management system designed for applications with
highly demanding scalability and availability requirements. Applications can manage database tables entirely in memory, or they
can overflow table data from memory to disk.
15
A flexible architecture enables SQLFire to pool memory and disk resources from hundreds of clustered members. This clustered
approach provides extremely high throughput, predictable latency, dynamic and linear scalability, and continuous availability
of data. SQLFire's memory-speed write performance is well-suited for large-scale databases with high transaction volumes and
demanding Service Level Agreements. For systems that require deployment of a relational database across a cluster of machines,
such as a grid or cloud, SQLFabric's distributed, shared-nothing architecture can simplify the deployment while providing linear
scalability.
Because it leverages the SQL interface and tools, Java, and other widely implemented technologies, SQLFire is easily adaptable
to existing database applications. Moreover, a SQLFire distributed system can be scaled out using commodity hardware.
Main features of vFabric SQLFire 1.0:
• Enables applications to manage data entirely in memory through partitioning and synchronous replication that distributes data
across numerous SQLFire members.
• Optimized disk persistence mechanism with a non-flushing algorithm to maintain high performance in applications that require
stable, long-term storage.
• Memory-based data management that maintains consistently high application performance by eliminating lookup, read/write,
and network round-trip latencies.
• Elastically scaled so that SQLFire servers can dynamically go online and offline to serve a growing or shrinking demand
pattern.
• Collocation of application logic with data and execution of application logic in parallel substantially increases application
throughput. SQLFire also transparently re-executes application logic if a server fails.
• Supports global WAN connectivity with the option of replicating data to remote clusters for disaster recovery.
• Based on SQL, JDBC and ADO.net standards. Supports Hibernate, SQuirreL SQL Client, CDC, Spring JDBC, and more.
Simplified VM-Based Licensing Model
vFabric Platform packages are licensed on a per-VM and average-usage basis, exclusively for virtual and cloud environments.
Each licensed VM can run any or all vFabric software components.
15
Page 20

16 vFabric Platform
This licensing model enables you to revise your application architecture for maximum performance and scalability with no
licensing constraints. You do not need to track individual licenses for Web servers, application servers, and so on. You simply
have a pool of vFabric VMs that you can deploy as needed.
The dynamic nature of modern cloud and Web applications makes usage bursts typical and unavoidable. However, vFabric
licensing is based on average usage. Customers can license for steady state usage, rather than peak. This capability is enabled
through the vFabric License Server, which integrates with vCenter to capture and report total and average vFabric VMs in use.
To learn more about vFabric Licensing, see vFabric Licensing.
Integration with vSphere
vFabric Platform is the development layer of VMware's cloud computing IT stack. vSphere virtualization optimizes infrastructure
while vFabric streamlines application development and deployment. Tight integration between the two enables you to achieve
higher levels of software density, higher utilization rates on hardware, and the cost benefits of dynamic scalability. Through
integration with vSphere solutions, vFabric also offers application portability and vendor choice across private and public clouds.
Engineered for Spring-Built Applications
More than 3 million developers use Spring's well-understood, open-source platform to build enterprise integration and rich Web
applications for virtual and cloud environments. Spring minimizes vendor lock-in, enables code to run in diverse environments,
and helps applications retain value as environments and business priorities change. Spring's Inversion of Control (IoC) container
enables Java components to be centrally configured and wired together, making code more portable, reusable, testable and
maintainable. Spring's consistent programming and configuration model separates application logic from the complexity of
platform services and deployment. It
Spring Mobile, Spring Android, and Spring Social extend the framework with new capabilities and the ability to run on the
newest generation of devices.
vFabric Platform components are engineered to leverage the efficiencies of Spring-built applications.
• Spring Insight Operations, available with vFabric tc Server Spring Edition, provides a dashboard view of Spring application
performance metrics in real-time. Developers can test, tune, and debug applications from their desktops, without changing
code. Automatic instrumentation of Spring applications running on tc Server expose application performance from both
general and fine-grained perspectives.
• To encourage agile development and testing, vFabric tc Server and Spring Insight are tightly integrated with SpringSource
Tool Suite™ (STS), an eclipse-powered development environment that includes the latest Spring (Core, Rich Web,
Integration, Batch), Groovy, Grails, and Roo technologies as well as OSGi tools.
• vFabric tc Server Spring Edition includes commercial support for Spring-built applications, as well as for vFabric tc Server.
• Developers can incorporate vFabric GemFire data caching into their Spring applications with minimal code, providing globally
distributed, highly available data.
• vFabric RabbitMQ-based messaging solutions incorporate core Spring concepts, enabling developers to easily add AMQP
messaging to their applications.
16
Introducing vFabric Cloud Application
Platform 5.0
Page 21

vFabric Licensing 17
4. vFabric Licensing
What type of licensing you get and how you activate it depends on whether you purchased your vFabric product(s) standalone or
as part of a vFabric 5 package (Standard or Advanced). Production licensing in both cases requires a license key. A license key is
an alphanumeric sequence of 25 characters that encodes details of the associated product, the license expiration date, the license
capacity, and other information.
Subtopics
How Licensing Works with Standalone vFabric Components
How Licensing Works with vFabric Standard and vFabric Advanced
Using the vFabric License Check Tool
License Usage Reporting
How Licensing Works with Standalone vFabric Components
If you purchase a vFabric 5 component individually, rather than as part of a vFabric Standard or Advanced package, you install
license keys locally, on one or more physical or virtual machines. Local licensing does not involve integration with vCenter and
the vFabric License Server. It allows you to install and run the product on physical as well as virtual machines.
To license a vFabric product on an individual basis, refer to the documentation for that product. Each product
implements licensing in a slightly different way. To check the validity of a license key, see Using the vFabric
License Check Tool.
How Licensing Works with vFabric Standard and vFabric Advanced
vFabric Standard and vFabric Advanced packages are licensed on a per-VM and average-usage basis, exclusively for virtual and
cloud environments.
Each licensed VM can run any or all vFabric software components. Thus licensing is tied to VMs, rather than to component
installations. One license unit covers one virtual machine with a maximum of two VCPUs. For example, if you plan to install one
or more components on one VM with four VCPUs, you need two license units for that VM.
You obtain a pool of licenses that you activate by adding only one license key to vCenter Server through the vSphere client.
Rather than installing a license key on each VM, you register one license key with vCenter that represents the number of license
units that you have purchased. See Activate vFabric Platform Licenses.
To check the validity of a license key, see Using the vFabric License Check Tool.
The production license is a V8 license that is perpetual for a particular version and package of vFabric 5. If you do not install
a license, your component installation defaults to an evaluation license, which is valid for 60 days after you first start the
component.
Using the vFabric License Check Tool
You use the vFabric License Check Tool for two tasks:
• Check the Validity of an Existing License Key
• Display the Events File for a Particular vFabric Component in Readable Format
Check the Validity of an Existing License Key
If you have previously installed one or more vFabric components, such as vFabric GemFire or vFabric Hyperic, you might
already have a license key (also referred to as a serial number in the following procedure). However, you need to confirm
17
Page 22

18 vFabric Platform
whether it is valid for the latest release of the component or in the context of vFabric Platform. The vfabric-licensetool
checkserial utility checks the validity of your existing license key.
For each license key that you input, the utility displays detailed information such as the vFabric component to which it is
associated, the type of license key, the capacity, and its expiration date.
Procedure
1. From the Drivers and Tools tab of the download page for tc Server, Hyperic, or GemFire download the vfabric-
licensetool checkserialutility ZIP file onto the computer on which you want to run it.
2. Unzip the file into a directory.
The utility and supporting files are unzipped into the vfabric-vfchksn-version child directory.
3. If necessary, install a JDK or JRE on the computer.
Be sure the JAVA_HOME and PATH environment variables point to the JDK or JRE.
For example, if you installed the JDK in /usr/java/jdk1.6.0_24, you can set the environment variables in the user's
Linux profile as follows:
export JAVA_HOME=/usr/java/jdk1.6.0_24
export PATH=$JAVA_HOME/bin:$PATH
4. Open a command (Windows) or terminal (Linux) window, change to the directory in which you unzipped the utility, and run
the following (Linux):
prompt$ vfabric-licensetool checkserial [options] serial-number
On Windows:
prompt> vfabric-licensetool.bat checkserial [options] serial-number
You can specify the following options:
• -f input-filename : Read the license key from a text file called input-filename rather than from the
command line.
• -o output-filename : Print results to a file called output-filename rather than to the standard output.
• -? : Print usage information.
For example, to view information about the validity of a license key (G52D1-9FQ1K-48CLT-0CZK2-3RWJG in the
example) and write the output to a file called validity-output.txt, run the following (Linux):
prompt$ cd /opt/vfabric/utils/vfabric-vfchksn-1.0.1
prompt$ vfabric-licensetool checkserial -o validity-output.txt G52D1-9FQ1K-48CLT-0CZK2-3RWJG
In the preceding example, it is implied that you unzipped the ZIP file into the /opt/vfabric/utils directory.
The validity-output.txt file contains information similar to the following:
G52D1-9FQ1K-48CLT-0CZK2-3RWJG:
vFabric 5.0 License.
Product: vFabric
Edition: vf.pfm.adv
Description: VMware vFabric Advanced
Quantity: 50
ExpirationDate: never
Addons: none
18 vFabric Licensing
Page 23

vFabric Licensing 19
Display the Component Events File in Readable Format
Each vFabric component keeps an events file that records events such as when the component start and stop times, as well as
when it used its license. This events log file is difficult to read in its raw form, so you can use the vfabric-licensetool
printevents utility to display these events in a more readable format.
Procedure
1. From the Drivers and Tools tab of the download page for tc Server, Hyperic, or GemFire download the vfabric-
licensetool printevents utility ZIP file onto the computer on which you want to run it.
2. Unzip the file into a directory.
The utility and supporting files are unzipped into the vfabric-vfchksn-version child directory.
3. If necessary, install a JDK or JRE on the computer.
Be sure the JAVA_HOME and PATH environment variables point to the JDK or JRE.
For example, if you installed the JDK in /usr/java/jdk1.6.0_24, you can set the environment variables in the user's
Linux profile as follows:
export JAVA_HOME=/usr/java/jdk1.6.0_24
export PATH=$JAVA_HOME/bin:$PATH
4. On the VM on which the vFabric component is installed, open a command (Windows) or terminal (Linux) window, change
to the directory in which you unzipped the utility, and run the following (Linux):
prompt$ vfabric-licensetool printevents -f events-file
On Windows:
prompt> vfabric-licensetool.bat printevents -f events-file
In the preceding commands, events-file refers to the full pathname of the component events file that you want to
display. Each component names and stores its events file differently by default, as described in the following bullets (for
Linux):
• tc Server: /opt/vmware/vfabric-tc-server-standard/<instancename>/logs/vf.tc-
events.txt
• Spring Insight: /opt/vmware/vfabric-tc-server-standard/<instancename>/insight/data/
license/vf.ins-events.txt
• EM4J: /opt/vmware/vfabric/vfabric-tc-server-standard/<instancename>/logs/vf.emj-
events.txt
• Hyperic: /opt/hyperic/server-current/hq-engine/hq-server/webapps/ROOT/WEB-INF/
license/vf.hyp-events.txt
• GemFire Data Management Node: /var/log/vmware/gemfire/cacheserver/vf.gf.dmn-events.txt
• GemFire Application Cache Node: /var/log/vmware/gemfire/cacheserver/vf.gf.acn-events.txt
• RabbitMQ: /opt/vmware/vFabric/vf.rmq-events.txt
Note that the locations of the events files might differ for your particular vFabric component, depending on how exactly you
installed it.
19
Page 24

20 vFabric Platform
For example, to display event log information in readable fashion for a vFabric RabbitMQ component in which the events
file is in its default location, run the following (Linux):
prompt$ cd /opt/vfabric/utils/vfabric-vfchksn-1.0.1
prompt$ vfabric-licensetool printevents -f /opt/vmware/vFabric/vf.rmq-events.txt
In the preceding example, it is implied that you unzipped the ZIP file into the /opt/vfabric/utils directory.
You should see output similar to the following:
2011-11-28T11:16:40 [INFO] The license client's event manager has started.
2011-11-28T11:16:40 [INFO] A local license has been activated with serial number = AB123-AB123-AB123-AB123-AB123, total available = 65535,
expiration type = floating-eval, expiration date = unset, allowed components = vf.rmq-2.
2011-11-28T11:16:40 [INFO] A local license has been activated with serial number = DC456-DC456-DC456-DC456-DC456, total available = 60,
expiration type = floating-eval, expiration date = unset,
allowed components = vf.ins-2+vf.ins-1+vf.tc-3+vf.gf.acn-7+vf.hyp-5+vf.emj-2+vf.rmq-2+vf.hyp-4+vf.ws-5+vf.emj-1+vf.ws-6+vf.sf-2+vf.sf-1+vf.tc-2+vf.gf.acn-6+vf.rmq-3.
2011-11-28T11:16:40 [INFO] Component Instance "self" changed state to "on" at 2011-11-28T11:16:40.
2011-11-28T11:16:40 [INFO] Calculated new state for license with total available units = 65535, license type = local,
expiration date = 2011-12-28T11:16:40, enforcement = soft, addons = <empty> It now has a total used count of 1.
2011-11-28T11:16:40 [INFO] Component Instance "self" changed state to "off" at 2011-11-28T11:16:40.
2011-11-28T11:16:40 [INFO] Calculated new state for license with total availableunits = 65535, license type = local,
expiration date = 2011-12-28T11:16:40, enforcement = soft, addons = <empty>. It now has a total used count of 0.
You can also specify the -o output-file option to print the results to a file called output-file rather than to the
standard output. For example, to write the output to a file called events-output.txt:
prompt$ vfabric-licensetool printevents -f /opt/vmware/vFabric/vf.rmq-events.txt -o events-output.txt
License Usage Reporting
The vCenter License Reporting Manager displays the capacity of your vFabric Platform license, although it does not keep track
of the number of licenses currently assigned. To get the usage summary (both current and periodic) from the vFabric License
Server, you run Windows commands.
For details about how to monitor vFabric license usage, see Monitor vFabric License Usage.
20 vFabric Licensing
Page 25

Installing vFabric Platform 21
5. Installing vFabric Platform
Installing vFabric Platform is a multi-step process. The high-level steps are:
1. Install the vFabric License Server on the same VM on which your existing vCenter Server is installed.
2. Activate your vFabric licenses.
3. Install individual vFabric components (such as vFabric tc Server) on one or more virtual machines (VMs).
If you are installing vFabric components on Red Hat Enterprise Linux (RHEL), you can choose whether to install from
a ZIP or TAR file from the standard VMware download Web site or from an RPM file from a repository using the yum
command. For all other supported operating systems (such as Windows), you install the vFabric components from a package
that you download from the VMware download Web site. If you install from a download page, the package might be in a
*.zip, *.tar, or *.exe format, depending on the component.
The information that follows covers installation procedures for vFabric License Server and simple examples for
vFabric components. For additional information about installing an individual vFabric component, refer to the
product documentation.
Subtopics
vSphere, JVM, and Operating System Support
Install vFabric License Server on Your vCenter Server
Activate vFabric Platform Licenses
RHEL: Installing vFabric Components from the VMware YUM Repository
Windows/Linux: Example Walkthrough of Installing Component from Download Page
Monitor vFabric License Usage
Upgrade vFabric License Server
Uninstall vFabric License Server from vCenter Server
RHEL: Upgrade vFabric Components From the VMware YUM Repository
vSphere, JVM, and Operating System Support
See Supported Platforms and Configurations.
Install vFabric License Server on Your vCenter Server
The vFabric License Server is an extension of the vCenter License Server, and thus you install it into your existing vCenter
environment, or in other words, onto the same Windows virtual machine (VM) on which vCenter Server is installed.
vFabric License Server requires a database to store and organize its data. You can use the database that you have already
configured for VMware vCenter, or you can create and configure a new external database specifically for vFabric License Server.
However, you are required to create an ODBC data source specifically for use by vFabric License Server, as described in the
following section.
Prerequisites
• Install and configure vCenter Server on your Windows 64-bit computer and be sure it is running correctly.
21
Page 26

22 vFabric Platform
See vSphere Installation and Setup.
• If you plan to use a SQL Server database to store the vFabric License Server meta-data, ensure that the Windows computer on
which vCenter Server is running has the SQL Server Native Client ODBC driver installed on it; if not, download and
install the driver from the Microsoft SQL Server Web site.
If you plan to use a different database, such as Oracle, be sure you have downloaded and installed the appropriate ODBC
driver so that you can connect to the database. For example, for Oracle you might want to download and install Instant Client
for Microsoft Windows (x64).
• From the Windows VM on which you are running vCenter Server, download the vFabric License Server installer program
from the VMware Download Center and save it to your computer.
The installer program is called vFabric_License_Server-version.exe.
Procedure
1. Create an ODBC data source that connects to either the vCenter database or an external database:
a. On the same Windows VM on which you are running vCenter Server, invoke the ODBC Data Source Administrator
window using Start > Programs > Administrative Tools > Data Source (ODBC).
b. Click the System DSN tab.
c. Click the Add... button.
d. Select a driver from the list.
Important If you are going to use a SQL Server database, then be sure you select the SQL Server Native
Client driver.
Click Finish.
The next steps depend on the type of driver you selected. In this procedure it is assumed that you selected the SQL
Server Native Client driver.
e. Enter a name and description of the data source, then select the SQL Server you want this data source to connect to
from the drop-down list. Click Next.
The SQL Server can be the one used by the vCenter Server or another one, whichever works best for your environment.
f. Specify that you want SQL Server to verify the authenticity using a login ID and password entered by the user, then
enter the Login ID and password of the SQL Server user.
Important Do not specify integrated Windows authentication.
g. Continue clicking Next, and then Finish, taking all default values, until you see a summary of the data source
configuration. Optionally test the data source to ensure you have configured it correctly, then click OK.
2. On the same Windows VM on which you are running vCenter Server, login as the Administrator user (or user with
administrator privileges) if you have User Account Control (UAC) enabled. If UAC is disabled, you can login as any user.
3. Double-click the vFabric License Server installer program from Windows Explorer to start the installation. After preparing
the installation, the vFabric Welcome Screen appears.
22 Installing vFabric Platform
Page 27

Installing vFabric Platform 23
4. Continue clicking Next to accept the license agreement and view where the installer will install the vFabric License Server.
You cannot change the location of the vFabric License Server, which is a Web application and thus must be located in the
webapps directory of the vCenter Tomcat instance.
5. Enter the login and password for the administrator of the vCenter Server installed on the same Windows VM, then click
Next.
The installer program performs some minimal verification; this takes a few seconds.
6. Enter the login ID and password of the database user, and select the ODBC data source (DSN) that you created in a the first
step of this procedure.
7. Click Install to proceed with the installation. The installer program installs the vFabric License Server, showing you a status
of the installation as it performs its tasks.
The installer program completes successfully when you see the message InstallShield Wizard Completed.
8. To view details of the installation, click Show the Windows Installer Log. Click Finish to complete the installation.
What to do next
• Activate vFabric Platform licenses in your vCenter Server.
• Install one or more vFabric components, such as vFabric tc Server, on a new or existing virtual machine (VM.) If you are
installing on RHEL, see RHEL: Install vFabric Components from the VMware YUM Repository. If you are installing on
Windows or other Linux platform, see Windows/Linux: Example Walkthrough of Installing Component from Download Page
for an example, but refer to the installation instructions for the particular vFabric component for details.
• Monitor vFabric license usage by using the vFabric Platform command-line interface. See Monitor vFabric License Usage.
23
Page 28

24 vFabric Platform
Activate vFabric Platform Licenses
VMware offers VMware V8 production licenses for the vFabric Standard and vFabric Advanced platform packages. The license
is perpetual for a particular version and package of vFabric Platform. A vFabric Platform production license applies to virtual
machines only.
Prerequisites
• Install vSphere 5 and set up vCenter. See the VMware vSphere product documentation.
• Install vFabric license server on your vCenter Server.
• Decide how many vFabric Platform license units you need, purchase them, and then get your license key from the VMware
license portal. See How Licensing Works with vFabric Standard and Advanced.
Procedure
1. Start vSphere Client 5 and log in to the vCenter Server in which you installed vFabric License Server.
2. Select Home > Administration > Licensing to invoke the vCenter Licensing page, then click the Manage vSphere
Licenses link in the top-right corner, as shown in the screenshot.
3. Enter one or more license keys in the text window to the right, one license key per line. Enter an optional label.
4. Click the Add License Keys button. The license key shows up in the review window.
5. Repeat the preceding steps to add any additional license keys.
6. Click Next and follow the prompts until you get to the Confirm Changes window, verify changes, then click Finish.
24 Installing vFabric Platform
Page 29

Installing vFabric Platform 25
The license keys are displayed in the main vCenter Licensing window under the name VMware vFabric Standard|
Advanced, depending on the vFabric Platform package you purchased.
The vCenter Licensing page displays only the capacity of your vFabric Platform license; it does not actually keep
track of the number of licenses currently assigned. See Monitor vFabric License Usage for information on using
the monitoring commands.
What to do next
• Install one or more vFabric components on one or more VMs. See RHEL: Installing vFabric Components from the VMware
YUM Repository or Windows/Linux: Example Walkthrough of Installing Component from Download Page.
RHEL: Installing vFabric Components from the VMware YUM Repository
If your guest operating system is Red Hat Enterprise Linux (RHEL), VMware recommends that you use yum to install vFabric
components.
After you install the vFabric License Server in your vCenter environment, the high-level steps for installing vFabric components
using RPMs are as follows:
1. Read the important information about using RPMs to install vFabric components.
2. Install the vFabric repository RPMs so that your yum command can find the vFabric component RPMs.
3. Perform any required pre-installation tasks.
4. Install one or more vFabric component from RPM on one or more virtual machines (VM). The vFabric License Server
automatically keeps track of the number of VMs on which you install the components.
5. Perform any required post-Installation tasks.
Important Information About Installing Using RPMs
When you install vFabric components on RHEL from the VMware RPM repository, the components are installed into different
directories and are owned by different users in different groups. For example, the vFabric Web Server installation is owned
by the root user and the vFabric Hyperic Server installation is owned by the hyperic user, which is a non-interactive user
created by the RPM install.
The following table lists the vFabric components that you can install from the VMware RPM repository and their corresponding
RPM package name, which you will need when you use the yum install command. The table also includes important postinstallation information, such as the installation owner and group, and the directory in which the yum command installed the
component. You need this information later when you start to actually use the component.
In the table, the RPM package name for each component does not include the architecture suffix, such as .noarch or
.x86_64, but rather, just the base name, which is what you need to install the component.
Table 5.1. vFabric Components and RPM Package Information
vFabric Component RPM Package Name
vFabric tc Server
(Spring Edition)
vfabric-tc-serverstandard
Installation
Directory User Group Notes
/opt/vmware/
vfabric-tcserver-standard
root tc-server In addition to features
provided in the tc
Server Standard
Edition package,
the vFabric Platform
offering (tc Server
Spring Edition)
includes commercial
support for tc
Server and Spring
Framework, as well
25
Page 30

26 vFabric Platform
vFabric Component RPM Package Name
Spring Insight
Operations
(Dashboard)
vfabric-insightdashboard
Installation
Directory User Group Notes
as access to Spring
Insight Operations.
The RPM install also
adds a tc-server
non-interactive user
that you can use to
create tc Runtime
instances and so on.
/opt/vmware/
vfabric-tcserver-standard/
templates/
insightdashboard
root tc-server Spring Insight
(Dashboard) is
installed as a
template of vFabric
tc Server. This
means that it has
a dependency on
tc Server, and if
you install Spring
Insight (Dashboard)
using yum without
previously installing
tc Server, then the
install of Insight will
automatically install
tc Server for you.
You can use the
tc-server noninteractive user to
create tc Runtime
instances that use
the Spring Insight
templates; this user
is added by the RPM
install of tc Server.
Spring Insight
Operations (Agent)
vFabric Web Server vfabric-web-server /opt/vmware/
vfabric-insight-agent /opt/vmware/
vfabric-tcserver-standard/
templates/
insight-agent
vfabric-webserver
root tc-server Spring Insight (Agent)
is installed as a
template of vFabric
tc Server. This
means that it has
a dependency on
tc Server, and if
you install Spring
Insight (Agent)
using yum without
previously installing
tc Server, then the
install of Insight will
automatically install
tc Server for you.
You can use the
tc-server noninteractive user to
create tc Runtime
instances that use
the Spring Insight
templates; this user
is added by the RPM
install of tc Server.
root root
26 Installing vFabric Platform
Page 31

Installing vFabric Platform 27
vFabric Component RPM Package Name
vFabric GemFire vfabric-gemfire /usr/lib/vmware/
vFabric SQLFire vfabric-sqlfire /opt/vfabric/
vFabric Hyperic
(Agent)
vFabric Hyperic
(Server)
vfabric-hyperic-agent /opt/hyperic/
vfabric-hyperic-server /opt/hyperic/
Installation
Directory User Group Notes
gemfire
sqlfire
hyperic-hqeeagent
server-current
gemfire gemfire The /usr/lib/
vmware/gemfire
directory is a
symbolic link to a
sibling versioned
directory, such as /
user/lib/vmware/
vFabric_GemFire_66.
sqlfire sqlfire SQLFire requires a
Java JDK or JRE.
Either be sure your
VM has one already
installed, or install
one.
hyperic hyperic
hyperic hyperic The /opt/
hyperic/servercurrent directory
is a symbolic link to
a sibling versioned
directory, such as
/opt/hyperic/
server-4.6-EE.
You can change
the parent /
opt/hyperic
directory using the
HQ_SERVER_INSTALL_PATH
property in the
properties file. See
Pre-Installation
Instructions for
vFabric Hyperic
Server.
You must create
a properties file
before you can
install vFabric
Hyperic Server
using an RPM. See
Pre-Installation
Instructions for
vFabric Hyperic
Server.
vFabric RabbitMQ vfabric-rabbitmq-
server
/user/lib/
rabbitmq
rabbitmq rabbitmq You must install
Erlang before you
can install vFabric
RabbitMQ. See
Pre-Installation
Instructions for
vFabric RabbitMQ.
Install the vFabric Repository RPMs
Installing the vFabric repository RPMs makes it easy for you to browse the vFabric RPMs available in the VMware repositories.
There are two vFabric repositories, both located on repo.vmware.com:
• vfabric-5-repo: Contains the vFabric component RPMs that are certified for vFabric 5.
27
Page 32

28 vFabric Platform
• vfabric-all-repo: Contains additional vFabric component RPMs that have released after vFabric Platform 5 released,
such as maintenance releases of components. These RPMs may not necessarily be certified to work with those of vFabric 5
(stored in the vfabric-5-repo repository). Additionally, the RPMs in vfabric-all-repo might be used by customers
who have not bought a vFabric 5 Standard or Advanced license.
If you are using only RPMs certified for vFabric 5 Advanced or Standard, then you install only vfabric-5-repo. If,
however, you are upgrading a vFabric component to a version that has not yet been officially certified for vFabric 5, then install
both repositories.
Procedure
1. On the RHEL VM, start a terminal either as the root user or as an unprivileged user using sudo.
2. Run the rpm command to install vfabric-5-repo, and optionally vfabric-all-repo, from the VMware
repository:
prompt# rpm -Uvh http://repo.vmware.com/pub/rhel5/vfabric/5/vfabric-5-repo-5-2.noarch.rpm
prompt# rpm -Uvh http://repo.vmware.com/pub/rhel5/vfabric-all/vfabric-all-repo-1-1.noarch.rpm
You install the vFabric repository RPMs on each RHEL VM on which you want to install one or more vFabric components.
3. Use the yum search vfabric command to view the list of vFabric components that you can install from the VMware
repository. For example (with sample output):
prompt# yum search vfabric
Loaded plugins: rhnplugin, security
vfabric-5 | 1.9 kB 00:00
vfabric-5/primary_db | 11 kB 00:00
======================================== Matched: vfabric =========================================
vfabric-5-repo.noarch : vFabric repository configuration
vfabric-all-repo.noarch : vFabric All Repository Configuration
vfabric-eula.noarch : vFabric End User License Agreement
vfabric-gemfire.noarch : VMware vFabric GemFire
vfabric-sqlfire.noarch : VMware vFabric SQLFire
vfabric-hyperic-agent.noarch : VMware vFabric Hyperic Agent
vfabric-hyperic-server.x86_64 : VMware vFabric Hyperic Server
vfabric-insight-agent.noarch : VMware Spring Insight Agent
vfabric-insight-dashboard.noarch : VMware Spring Insight Dashboard
vfabric-rabbitmq-server.noarch : The RabbitMQ server
vfabric-tc-server-standard.noarch : VMWare vFabric tc Server Standard
vfabric-web-server.x86_64 : VMWare vFabric Web Server
Pre-Installation Instructions
The following sections describe required pre-installation instructions for some vFabric Components:
• Pre-Installation Instructions for vFabric Hyperic Server: Create Properties File
• Pre-Installation Instructions for vFabric RabbitMQ: Install Erlang
If the component you are installing using RPMs is not listed, then there are no pre-installation requirements for it.
Pre-Installation Instructions for vFabric Hyperic Server: Create Properties File
The installation of vFabric Hyperic Server typically requires that a user enter values for a number of configuration properties.
To automate this request for input when you install from an RPM, you create a properties file that contains values for all the
properties required by the vFabric Hyperic Server installation process.
Hyperic Server stores its meta-data in a database. Hyperic provides an internal PostgreSQL database that you can use for initial
testing purposes, but VMware recommends that for production purposes you use a remote external database, such as MySQL or
Oracle. See the Hyperic documentation for instructions on setting up an external database for use with Hyperic by searching the
vFabric Hyperic X.X section of this Documentation Center.
28 Installing vFabric Platform
Page 33

Installing vFabric Platform 29
Procedure
1. If you want to use an external database (instead of the internal PostgreSQL database) to store Hyperic meta-data, set up the
database and make note of the JDBC URL for connecting to the database as well as the database username and password.
See the vFabric Hyperic documentation for details on how to set up a MySQL or Oracle database for Hyperic use.
2. From the RHEL VM on which you will install vFabric Hyperic Server, log in as the root user and start a terminal window.
3. Create a file called vfabric_hyperic_server.properties in the /etc/vmware/vfabric/hyperic
directory.
Important: You must name the file exactly as described, and put it in the exact location, for the RPM installation to work
correctly.
4. Update the file with values for all the properties required by vFabric Hyperic Server installation, as described in the vFabric
Hyperic Server Properties table.
The following example shows a properties file that configures Hyperic Server to use the local built-in PostgreSQL database:
# Configuration of local built-in Postgresql database
BUILT_IN_POSTGRESQL=yes
HQ_ACCEPT_EULA=y
HQ_SERVER_INSTALL_PATH=/opt/hyperic
HQ_SENDER_EMAIL_ADDRESS=hqadmin@eng.mycompany.com
HQ_DB_CRYPT_KEY=12345678
HQ_ADMIN_USER=hqadmin
HQ_ADMIN_PASSWORD=hqadmin
HQ_ADMIN_EMAIL_ADDRESS=hqadmin@eng.mycompany.com
The following example shows a properties file that configures Hyperic Server to use a remote MySQL database rather than
the built-in PostgreSQL database:
# Configuration of a remote MySQL database
BUILT_IN_POSTGRESQL=no
HQ_ACCEPT_EULA=y
HQ_SERVER_INSTALL_PATH=/opt/hyperic
HQ_SENDER_EMAIL_ADDRESS=hqadmin@eng.mycompany.com
HQ_DB_TYPE=mysql
HQ_JDBC=jdbc:mysql://10.11.12.1345:3306/hqdb
HQ_DB_USERNAME=hqadmin
HQ_DB_PASSWORD=hqadmin
HQ_DB_CRYPT_KEY=12345678
HQ_ADMIN_USER=hqadmin
HQ_ADMIN_PASSWORD=hqadmin
HQ_ADMIN_EMAIL_ADDRESS=hqadmin@eng.mycompany.com
The following example shows a properties file that configures Hyperic Server to use a remote Oracle database:
# Configuration of a remote Oracle database
BUILT_IN_POSTGRESQL=no
HQ_ACCEPT_EULA=y
HQ_SERVER_INSTALL_PATH=/opt/hyperic
HQ_SENDER_EMAIL_ADDRESS=hqadmin@eng.mycompany.com
HQ_DB_TYPE=oracle
HQ_JDBC=jdbc:oracle:thin:@10.11.12.1345:1522:RH19
HQ_DB_USERNAME=bobhq
HQ_DB_PASSWORD=bobhq
HQ_DB_CRYPT_KEY=12345678
HQ_ADMIN_USER=hqadmin
HQ_ADMIN_PASSWORD=hqadmin
29
Page 34

30 vFabric Platform
HQ_ADMIN_EMAIL_ADDRESS=hqadmin@eng.mycompany.com
The following table lists all the vFabric Hyperic Server properties that you can include in the properties file.
Table 5.2. vFabric Hyperic Server Properties
Property Description
BUILT_IN_POSTGRESQL Whether Hyperic Server should use the local built-in PostgreSQL
HQ_ACCEPT_EULA Whether you accept the terms of the license agreement. Specify y or
HQ_SERVER_INSTALL_PATH Absolute home directory of Hyperic Server, such as /opt/hyperic.
HQ_SENDER_EMAIL_ADDRESS Email address that Hyperic Server uses as the sender for email
HQ_DB_CRYPT_KEY Encryption key that Hyperic Server uses to encrypt the database
HQ_ADMIN_USER Username of the initial Hyperic administration user.
HQ_ADMIN_PASSWORD Password of the initial Hyperic administration user.
HQ_ADMIN_EMAIL_ADDRESS Email address for the initial Hyperic administration user.
HQ_DB_TYPE Type of database server that the Hyperic Server will use. Possible
HQ_JDBC Full JDBC connection URL for the database used by Hyperic Server,
HQ_DB_USERNAME Username of the user that connects to the database. You specify this
database instead of an external database.
Specify yes or no. If you specify no, make sure you also specify
the HQ_DB_TYPE, HQ_JDBC, HQ_DB_USERNAME, and
HQ_DB_PASSWORD properties.
n.
addresses, such as hqadmin@eng.mycompany.com.
password.
values are postgresql, mysql, or oracle.
such as jdbc:mysql://10.11.22.3333:3306/hqdb. You
specify this property only if you are not using the built-in PostgreSQL
database.
property only if you are not using the built-in PostgreSQL database.
HQ_DB_PASSWORD Password of the user that connects to the database. You specify this
property only if you are not using the built-in PostgreSQL database.
Pre-Installation Instructions for vFabric RabbitMQ: Install Erlang
You must install Erlang on the RHEL VM on which you plan to install vFabric RabbitMQ.
Procedure
1. From the RHEL VM on which you will install vFabric RabbitMQ, log in as the root user and start a terminal window.
2. Execute the following two commands to set up the Erlang installation:
prompt# su -c 'rpm -Uvh http://download.fedoraproject.org/pub/epel/5/x86_64/epel-release-5-4.noarch.rpm'
prompt# wget -O /etc/yum.repos.d/epel-erlang.repo http://repos.fedorapeople.org/repos/peter/erlang/epel-erlang.repo
3. Install Erlang using the yum install command:
prompt# yum install erlang
Enter y at the prompts to start the installation. When the install successfully finishes, you will see a Complete! message.
Install vFabric Components: General Instructions
You install one or more of the vFabric Platform components on one or more virtual machines.
30 Installing vFabric Platform
Page 35

Installing vFabric Platform 31
Prerequisites
• Install vFabric License Server on your vCenter Server.
• Activate vFabric Platform licenses in your vCenter Server.
• Create a virtual machine and install the RHEL guest operating system.
See vSphere Virtual Machine Administration.
• Install the vFabric Repository RPMs.
• If you will install vFabric Hyperic Server, read Pre-Installation Instructions for vFabric Hyperic Server.
• If you will install vFabric RabbitMQ, read Pre-Installation Instructions for vFabric RabbitMQ.
Procedure
1. Log in as the root user to the RHEL VM on which you are going to install the vFabric component and start a terminal.
2. Execute the appropriate yum install component command to install the vFabric component, where component is
name of the RPM package for the component.
For the exact name of each RPM, see Important Information About Installing Using RPMs, or use the output of yum
search vfabric.
For example, to install vFabric tc Server:
prompt# yum install vfabric-tc-server-standard
To install the Spring Insight agent and dashboard templates:
prompt# yum install vfabric-insight-agent vfabric-insight-dashboard
To install vFabric Web Server:
prompt# yum install vfabric-web-server
The yum command begins the install process, resolves dependencies, and displays the packages it plans to install.
If this is the first time that you install a vFabric component on the VM, the yum command also installs the vfabric-eula
RPM and prompts you to accept the VMware license agreement.
The yum command automatically choses the appropriate RPM package based on your architecture (32- or 64-bit). You can
also install the RPM with a particular architecture by specifying the appropriate suffix. For example, to install the 64-bit
RPM of vFabric Web Server:
prompt# yum install vfabric-web-server.x86_64
3. Enter y at the prompt to begin the actual installation. Depending on the component, you may be asked additional questions;
answer as appropriate. If you need more detailed information, see the component documentation.
If the installation is successful, you will see a Complete! message at the end.
What to do next
• For post-installation details about each component, such as the owner of the installation and its home directory, see Important
Information About Installing Using RPMs.
• If you installed tc Server, see Post-Installation Instructions for tc Server.
31
Page 36

32 vFabric Platform
• If you installed Spring Insight Operations, see Post-Installation Instructions for Spring Insight Operations (Agent and
Dashboard).
• If you installed Web Server, see Post-Installation Instructions for Web Server.
• If you installed GemFire, see Post-Installation Instructions for GemFire.
• If you installed SQLFire, see Post-Installation Instructions for SQLFire.
• If you installed RabbitMQ, see Post-Installation Instructions for RabbitMQ.
• If you installed Hyperic Server, see Post-Installation Instructions for Hyperic Server.
• If you installed Hyperic Agent, see Post-Installation Instructions for Hyperic Agent.
Post-Installation Instructions
The following sections describe post-installation instructions for some vFabric Components:
• Post-Installation Instructions for tc Server
• Post-Installation Instructions for Spring Insight Operations (Agent and Dashboard)
• Post-Installation Instructions for Web Server
• Post-Installation Instructions for GemFire
• Post-Installation Instructions for SQLFire
• Post-Installation Instructions for RabbitMQ
• Post-Installation Instructions for Hyperic Server
• Post-Installation Instructions for Hyperic Agent
Post-Installation Instructions for tc Server
The yum installation of vFabric tc Server does not automatically create a tc Runtime instance, so you must manually create
one before you can start deploying Web applications to it. There are many options to creating a new instance, but this section
describes the simplest and quickest way.
Procedure
1. If you have not already done so, download and install a JDK or JRE on the RHEL VM on which you installed tc Server.
2. Set the JAVA_HOME environment variable of the tc-server user to point to the JDK installation and update the PATH
environment variable to point to the JAVA_HOME/bin directory.
3. Log in to the RHEL VM on which you installed tc Server as the root user, and then su to the tc-server user:
prompt# su - tc-server
You cannot login directly as the tc-server user because interactive login for the tc-server user has been disabled.
4. Open a terminal window and change to the /opt/vmware/vfabric-tc-server-standard directory:
prompt$ cd /opt/vmware/vfabric-tc-server-standard
5. Execute the tcruntime-instance.sh to create a new tc Runtime instance. Use the -i option to specify the full
pathname of the directory in which the new instance will be created; be sure the tc-server user can write to this
directory. For example:
32 Installing vFabric Platform
Page 37

Installing vFabric Platform 33
prompt$ ./tcruntime-instance.sh create -i /home/tcs/instances myserver
6. Execute the tcruntime-ctl.sh command to start the new tc Runtime instance. Use the -n option to specify the
directory in which you created the instance. For example:
prompt$ ./tcruntime-ctl.sh -n /home/tcs/instances myserver start
7. Confirm that the tc Runtime instance is running by invoking its Welcome page in a browser. Use the URL
http://host:8080, where host is the name or IP address of the computer on which the tc Runtime instance is running
(localhost if local).
What to do next
This section provides minimal information about how to get started with this vFabric component; for detailed information, see
the component-specific documentation by clicking on the vFabric tc Server X.X link in the left frame of this Documentation
Center.
Post-Installation Instructions for Spring Insight Operations (Agent and Dashboard)
The yum install of Spring Insight Operations (both the agent and dashboard) simply installs Insight templates into the vFabric tc
Server installation. If you have not previously installed vFabric tc Server, then the Spring Insight installation also automatically
installs tc Server. The yum install does not, however, create a tc Runtime instance, so you must manually create one before you
can use Insight.
This section describes the simplest and quickest way to get Spring Insight Operations up and running. It describes how to
create a tc Runtime instance that includes the Spring Insight dashboard on one RHEL VM, and then how to create a tc Runtime
instance that includes the Spring Insight agent on a different RHEL VM, and to ensure that the agent can communicate with the
dashboard.
Procedure
On the RHEL VM on which you want to run the Spring Insight dashboard:
1. If you have not already done so, download and install a JDK or JRE, version 1.6.
2. Set the JAVA_HOME environment variable of the tc-server user to point to the JDK installation and update the PATH
environment variable to point to the JAVA_HOME/bin directory.
3. Log in to the RHEL VM on which you want to run the Spring Insight dashboard as the root user, and then su to the tc-
server user:
prompt# su - tc-server
You cannot login directly as the tc-server user because interactive login for the tc-server user has been disabled.
4. Open a terminal window and change to the /opt/vmware/vfabric-tc-server-standard directory:
prompt$ cd /opt/vmware/vfabric-tc-server-standard
5. Execute the tcruntime-instance.sh to create a new tc Runtime instance that uses the insight-dashboard
template. Use the -i option to specify the full pathname of the directory in which the new instance will be created; be sure
the tc-server user can write to this directory. For example:
prompt$ ./tcruntime-instance.sh create mydashboard -i /home/tcs/instances -t insight-dashboard \
-p insight-dashboard.dashboard.jms.bind.uri=tcp://myDashboardServer:21234
Set myDashboardServer to the hostname or IP address of the RHEL VM on which you are creating the Spring Insight
dashboard.
33
Page 38

34 vFabric Platform
6. Execute the tcruntime-ctl.sh command to start the new tc Runtime instance. Use the -n option to specify the
directory in which you created the instance. For example:
prompt$ ./tcruntime-ctl.sh -n /home/tcs/instances mydashboard start
7. Confirm that the tc Runtime instance is running by invoking its Welcome page in a browser. Use the URL
http://host:8080, where host is the name or IP address of the computer on which the tc Runtime instance is running
(localhost if local).
On the RHEL VM on which you want to run the Spring Insight agent:
1. If you have not already done so, download and install a JDK or JRE, version 1.6.
2. Set the JAVA_HOME environment variable of the tc-server user to point to the JDK installation and update the PATH
environment variable to point to the JAVA_HOME/bin directory.
3. Log in to the RHEL VM on which you want to run the Spring Insight agent as the root user, and then su to the tc-
server user:
prompt# su - tc-server
You cannot login directly as the tc-server user because interactive login for the tc-server user has been disabled.
4. Open a terminal window and change to the /opt/vmware/vfabric-tc-server-standard directory:
prompt$ cd /opt/vmware/vfabric-tc-server-standard
5. Execute the tcruntime-instance.sh to create a new tc Runtime instance that uses the insight-agent template.
Use the -i option to specify the full pathname of the directory in which the new instance will be created; be sure the tc-
server user can write to this directory. For example:
prompt$ ./tcruntime-instance.sh create myagent -i /home/tcs/instances -t insight-agent
-p insight-agent.dashboard.jms.connect.uri=tcp://myDashboardServer:21234
Set myDashboardServer to the hostname or IP address of the RHEL VM on which you created the Spring Insight
dashboard. This is how the Spring Insight agent knows how to connect to the dashboard.
6. Execute the tcruntime-ctl.sh command to start the new tc Runtime instance. Use the -n option to specify the
directory in which you created the instance. For example:
prompt$ ./tcruntime-ctl.sh -n /home/tcs/instances myagent start
7. Confirm that the tc Runtime instance is running by invoking its Welcome page in a browser. Use the URL
http://host:8080, where host is the name or IP address of the computer on which the tc Runtime instance is running
(localhost if local).
8. Deploy a Web application to the tc Runtime instance on which the Spring Insight agent is running by copying its WAR file
into the webapps directory of the instance, such as /home/tcs/instances/myagent/webapps.
Invoke the Spring Insight dashboard in your browser so you can start monitoring the performance of the Web application you
deployed to the tc Runtime instance on which the Insight agent is running. To invoke the Insight dashboard, use the URL
http://myDashboardServer:8080/insight. Login using the default Insight username/password of spring/
insight.
What to do next
This section provides minimal information about how to get started with this vFabric component; for detailed information, see
the component-specific documentation by clicking on the vFabric tc Server X.X link in the left frame of this Documentation
Center, then on Spring Insight Operations.
34 Installing vFabric Platform
Page 39

Installing vFabric Platform 35
Post-Installation Instructions for Web Server
The yum installation of vFabric Web Server does not automatically create a Web Server instance, so you must manually create
one before you can start using it to serve up your Web pages.
Procedure
1. Log in to the RHEL VM on which you installed vFabric Web Server as the root user and open a terminal window.
2. Change to the /opt/vmware/vfabric-web-server directory:
prompt# cd /opt/vmware/vfabric-web-server
3. Run the newserver.pl command to create the new instance; the command prompts you for information about the new
server.
prompt# ./newserver.pl --server=myserver
In the preceding example, the new instance is called myserver and its server directory is /opt/vmware/vfabricweb-server/myserver.
4. Enter values for the newserver prompts as the command requests information about your new instance. You can use the
default values for many of the prompts, or even leave them blank.
5. Change to the instance-name/bin server directory, where instance-name refers to the name of the instance:
prompt# cd myserver/bin
6. Start the instance using the httpdctl command:
prompt# ./httpdctl start
You should see a message as follows:
Starting Apache:
Server started OK
7. Confirm that the vFabric Web Server instance started by navigating to the http://host:80 URL in your browser,
where host refers to the name or IP address of the host computer (you can use localhost if your browser is on the same
computer).
If the instance started correctly, you should see its Welcome page.
What to do next
This section provides minimal information about how to get started with this vFabric component; for detailed information, see
the component-specific documentation by clicking on the vFabric Web Server X.X link in the left frame of this Documentation
Center.
Post-Installation Instructions for GemFire
The GemFire documentation includes tutorials and sample applications for you to get started with the component. For details,
click on the vFabric GemFire X.X link in the left frame of this Documentation Center.
Post-Installation Instructions for SQLFire
1. If you have not already done so, download and install a JDK or JRE on the RHEL VM on which you installed SQLFire.
2. On the RHEL VM, start a terminal either as the root user or as an unprivileged user using sudo.
35
Page 40

36 vFabric Platform
3. Optionally specify that the vfabric-sqlfire process should automatically start when the operating system starts by
running the following command:
prompt# chkconfig --level 35 vfabric-sqlfire on
4. Optionally specify the configuration of the vfabric-sqlfire process by editing the file /etc/sysconfig/
sqlfire, which is the file sourced by the script that you will later use to start the SQLFire process (/etc/init.d/
vfabric-sqlfire.)
The /etc/sysconfig/sqlfire file includes many comments to help you decide if you need to modify it. The
following bullets provide additional pointers:
• If you do not modify the /etc/sysconfig/sqlfire file but simply use the one installed by default, then the
vfabric-sqlfire process starts up a server instance in a multicast configuration.
• If you want the vfabric-sqlfire process to start up using a locator-based configuration, change the LOCATOR
property in the /etc/sysconfig/sqlfire file to local, as shown:
LOCATOR=local
This configuration allows a local locator process to start along with a local server instance. To add additional remote
locators, add their IP address and port to the LOCATOR_IP_STRING as shown in the configuration file as a commentedout example.
• If you want to start up only a local locator process and not a local server instance, set the LOCATOR property to
locator_only. This sets up a redundant locator configuration; be sure you add the locator IP addresses and port
numbers to the LOCATOR_IP_STRING; an example is shown in the configuration file.
• Finally, set the LOCATOR property to remote if you want to start a local server instance that relies on having locator
processes running on one or more remote hosts. Specify these remote hosts using the LOCATOR_IP_STRING property.
5. Start the processes associated with SQLFire by running the following command:
prompt# /etc/init.d/vfabric-sqlfire start
By default, the process uses an evaluation license; if you have purchased a production license, see the SQLFire
User's Guide for information about configuring it in the /opt/vfabric/sqlfire/vFabric_SQLFire_10/
sqlfire.properties file. The RPM installation process creates a skeleton sqlfire.properties file to get you
started.
To stop, restart, and get status about the processes, pass the stop, restart, and status parameters, respectively, to the
/etc/init.d/vfabric-sqlfire script:
prompt# /etc/init.d/vfabric-sqlfire status
The SQLFire documentation includes tutorials and sample applications for you to get started with the component. For details,
click on the vFabric SQLFire X.X link in the left frame of this Documentation Center.
Post-Installation Instructions for RabbitMQ
You must first start the RabbitMQ server to use it. The default configuration for the server is usually adequate to start it.
Procedure
1. If you have not already done so, install a JDK or JRE (version 1.6) onto the RHEL VM on which you installed RabbitMQ.
2. Log in to the RHEL VM as the root user and open a terminal window.
3. Create a link between /usr/java/default and the directory in which you installed the JDK. For example:
36 Installing vFabric Platform
Page 41

Installing vFabric Platform 37
prompt# mkdir /usr/java
prompt# ln -s /opt/java/jdk1.6.0_23 /usr/java/default
You perform this step only once.
4. Become the rabbitmq user using the Linux su command:
prompt# su - rabbitmq
You cannot login directly as the rabbitmq user because interactive login for the rabbitmq user has been disabled.
5. Start and stop the RabbitMQ server using the /sbin/service rabbitmq-server command, passing it the
appropriate option. For example:
prompt# /sbin/service rabbitmq-server start
What to do next
This section provides minimal information about how to get started with this vFabric component; for detailed information, see
the component-specific documentation by clicking on the vFabric RabbitMQ X.X link in the left frame of this Documentation
Center.
Post-Installation Instructions for Hyperic Server
After you install vFabric Hyperic Server using the yum command, you start it and then invoke the Hyperic user interface in your
browser to actually start using it to monitor your resources.
The yum installation of Hyperic Server configured your RHEL VM so that Hyperic Server starts automatically when the VM is
booted; in particular, it created a /etc/init.d/hyperic-hq-server init script.
To start the Hyperic server manually, run the following procedure.
Procedure
1. Log in to the RHEL VM as the root user.
2. Open a terminal window and execute the /etc/init.d/hyperic-hq-server script, passing it the start
parameter:
prompt# /etc/init.d/hyperic-hq-server start
The first time Hyperic Server starts it may take a few minutes to initialize, although subsequent startups will be much faster.
3. Once the Hyperic Server starts, invoke the Hyperic user interface in your browser using the following URL:
http://host:7080
where host is the hostname of the RHEL VM on which you just installed Hyperic Server. If you are running your browser
from the same computer on which you installed Hyperic Server, you can use localhost:
http://localhost:7080
Log in using the default administration username/password of hqadmin/hqadmin; be sure to change the password after
you log into the Hyperic UI.
What to do next
This section provides minimal information about how to get started with this vFabric component; for detailed information, see
the component-specific documentation by clicking on the vFabric Hyperic X.X link in the left frame of this Documentation
Center.
37
Page 42

38 vFabric Platform
Post-Installation Instructions for Hyperic Agent
The yum installation of Hyperic Agent configured your RHEL VM so that Hyperic Agent starts automatically when the VM is
booted; in particular, it created a /etc/init.d/hyperic-hqee-agent init script.
Before you can start the Hyperic Agent, however, you must configure it so it can find the Hyperic Server to which you want it to
connect. The following procedure describes how to do this, and then how to start the Agent manually. Subsequently, the Agent
will start automatically each time you boot up the VM.
Procedure
1. If you have not already done so, install a JDK or JRE (version 1.5 or 1.6) onto the RHEL VM on which you installed
Hyperic Agent.
2. As the root user, log in to the RHEL VM on which you installed Hyperic Agent and edit the /etc/init.d/hyperic-
hqee-agent file, setting the HQ_JAVA_HOME to home directory of the JDK or JRE you want the agent to use.
3. Edit the /opt/hyperic/hyperic-hqee-agent/conf/agent.properties file to specify how the Hyperic
agent communicates with the server.
Important: Although there are many properties you can set in this file, this procedure describes only the minimum required
for the agent to communicate with your Hyperic Server.
Uncomment the properties that begin with agent.setup, such as agent.setup.camIP, then set the values of each
property as follows:
• agent.setup.camIP: The address or hostname of the Hyperic Server.
• agent.setup.camPort: The default value is the standard Hyperic listen port.
• agent.setup.camSSLPort: The default value is the standard SSL Hyperic listen port.
• agent.setup.camSecure: Whether you require that the agent use secure communications when contacting Hyperic
Server. The default value is "yes" (use SSL).
• agent.setup.camLogin: The username the agent should use when connecting to the server. If you change the value
from the default value ("hqadmin"), make sure that the user account is properly configured on the Hyperic Server.
• agent.setup.camPword: The password the agent should use, along with the username above, when connecting to
the server. Make sure that the password is the one configured in Hyperic for the user account.
• agent.setup.agentIP: The IP address or hostname that the Hyperic Server uses to contact the Agent. If you leave
the default setting (*default*), the Hyperic Agent will detect an IP address on the platform and choose it as its listen
address.
• agent.setup.agentPort: The listen port that the Hyperic uses when it contacts the agent. If you leave the default
setting (*default*), the Hyperic Agent will use the default listen port (either 7080 or 7443) as its listen address. If that
port is unavailable, the agent will detect a free port and choose it as its listen port.
• agent.setup.resetupTokens: Specifies whether the agent, at first startup after installation, will create a new
token to use to authenticate with the server each time it starts up. Regenerating a token is useful if the Agent cannot
connect to the server because the token has been deleted or corrupted.
• agent.setup.acceptUnverifiedCertificate: Controls whether or not a Hyperic Agent (version 4.6 or later)
issues a warning when the Hyperic Server presents an SSL certificate that is not in the agent's keystore and is either selfsigned or signed by a different CA than the one that signed the agent's SSL certificate.
For example:
agent.setup.camIP=10.111.222.333
38 Installing vFabric Platform
Page 43

Installing vFabric Platform 39
agent.setup.camPort=7080
agent.setup.camSSLPort=7443
agent.setup.camSecure=yes
agent.setup.camLogin=hqadmin
agent.setup.camPword=hqadmin
agent.setup.agentIP=*default*
agent.setup.agentPort=*default*
agent.setup.resetupTokens=no
agent.setup.acceptUnverifiedCertificate=yes
4. Open a terminal window and execute the /etc/init.d/hyperic-hqee-agent script, passing it the start
parameter:
prompt# /etc/init.d/hyperic-hqee-agent start
What to do next
This section provides minimal information about how to get started with this vFabric component; for detailed information, see
the component-specific documentation by clicking on the vFabric Hyperic X.X link in the left frame of this Documentation
Center.
Windows/Linux: Example Walkthrough of Installing Component from Download Page
After you install the vFabric License Server in your vCenter environment, you install one or more vFabric components on one or
more virtual machines (VM). The vFabric License Server automatically keeps track of the number of VMs on which you install
the components.
If you are installing the vFabric components on an RHEL VM, VMware recommends that you use the yum command to install
easily and quickly from the VMware repository, as described in RHEL: Installing vFabric Components from the VMware YUM
Repository. You can, however, also install components on RHEL VMs by downloading a package from the standard VMware
download page. If you are installing on Windows or non-RHEL Linux VMs, you must use the download page.
When installing from a download page, you perform the component installation in the same way you install the components on a
physical computer.
This section describes a typical example of installing vFabric tc Server (which includes EM4J) on a VM with an
RHEL guest operating system. The procedure shows typical steps but does not go into detail about the installation.
For complete installation instructions, see the vFabric tc Server documentation.
Prerequisites
• Install vFabric License Server on your vCenter Server.
• Activate vFabric Platform licenses in your vCenter Server.
• Create a virtual machine (VM) and install a guest operating system supported by vFabric Platform.
See vSphere Virtual Machine Administration.
• Install VMware tools on the VM.
See Installing and Upgrading VMware Tools.
Procedure
1. Log on to the VM with the credentials of the designated tc Server user who will create and start tc Server instances.
39
Page 44

40 vFabric Platform
2. Install a JDK or JVM on the VM's guest operating system. tc Server and EM4J require Java 1.6.
3. Update the JAVA_HOME and PATH environment variables of the user who installs tc Server.
For example, if you installed the JDK in /usr/java/jdk1.6.0_24, you can set the environment variables in the user's
Linux profile as follows:
export JAVA_HOME=/usr/java/jdk1.6.0_24
export PATH=$JAVA_HOME/bin:$PATH
4. Download the Standard Edition package distribution of tc Server from the VMware Download Center.
5. Open a terminal (Unix) and create the main tc Server installation directory, such as /home/tcserver.
For example:
prompt$ mkdir /home/tcserver
6. Extract the tc Server distribution file into the new directory.
This action installs tc Runtime; there is no installer program.
For example, if you created a directory called /home/tcserver in the preceding step, and downloaded the Standard
Edition file in the /home/Downloads directory:
prompt$ cd /home/tcserver
prompt$ tar xvf /home/Downloads/vfabric-tc-server-standard-2.6.0-M1.tar.gz
This action creates a directory called vfabric-tc-server-standard in the main tc Server installation directory that
contains the tc Runtime utility scripts, the templates directory, the Tomcat directory, and so on.
What to do next
• The component-specific next steps depend on the component you installed. For example, if you installed vFabric tc Server,
you might enable EM4J in the VM, create an instance, start it, and deploy a Web application to the instance.
See the vFabric component-specific documentation for details.
Monitor vFabric License Usage
vFabric Platform provides Windows command-line tools to monitor current and periodic vFabric license usage by the VMs. You
run these tools on the same Windows computer on which you installed vCenter Server.
Note: Although you previously activated vFabric licenses using the vSphere client, you cannot yet use the vSphere client user
interface to monitor the vFabric license usage; rather, you must use the commands described in this section.
Prerequisites
• Install a JDK or JVM on the Windows machine that is running vCenter Server (and into which you installed vFabric License
Server.) Update the JAVA_HOME environment variables to point to the installation directory of the JDK or JVM, then update
the PATH environment variable to point to the %JAVA_HOME%\bin directory.
Procedure
1. On the Windows computer on which vCenter Server is running, open a command window and change to the vCenter-
Install-Dir\vFabric Platform\Reporting, where vCenter-Install-Dir refers to the directory in
which you installed vCenter Server (default is C:\Program Files\VMware\Infrastructure.) For example:
prompt> cd c:\Program Files\VMware\Infrastructure\vFabric Platform\Reporting
40 Installing vFabric Platform
Page 45

Installing vFabric Platform 41
2. Run the desired monitoring command; see Command Reference for a table that lists all the commands along with their
required or optional parameters.
For example, run the usage-over-periods.bat command to display vFabric license usage over a period of time. You
must specify the start and end dates of the time period, as well as the period, such as monthly or yearly.
prompt> usage-over-periods.bat -startDate 08/01/2011 -endDate 08/31/2011 -period WEEKLY
The output will look something like the following:
License Key,Period,Minimum Usage,Maximum Usage,Average Usage
G52D1-9FQ1K-48CLT-0CZK2-3RWJG,"Aug 1, 2011 - Aug 7, 2011",2,4,1.1
G52D1-9FQ1K-48CLT-0CZK2-3RWJG,"Aug 8, 2011 - Aug 14, 2011",2,3,0.5
G52D1-9FQ1K-48CLT-0CZK2-3RWJG,"Aug 15, 2011 - Aug 21, 2011",0,1,0
G52D1-9FQ1K-48CLT-0CZK2-3RWJG,"Aug 22, 2011 - Aug 28, 2011",0,2,0.07
G52D1-9FQ1K-48CLT-0CZK2-3RWJG,"Aug 29, 2011 - Aug 31, 2011",1,4,1.3
The output shows the minimum, maximum, and average use of a single vFabric license for each week in the month of
August, 2011. If you had installed additional vFabric licenses, then these would also show up in the report.
Another example is to view the year-to-date usage of your vFabric licenses. For example, if today is July 31, 2011:
prompt> usage-over-periods.bat -startDate 08/01/2010 -endDate 07/31/2011 -period YEARLY
The output will look something like the following:
License Key,Period,Minimum Usage,Maximum Usage,Average Usage
G52D1-9FQ1K-48CLT-0CZK2-3RWJG,"Aug 1, 2010 - July 31, 2011",50,75,30.5
Run the current-usage.bat Windows command to get a report of the current vFabric license usage.
prompt> current-usage.bat
The output will look something like the following:
License Key,Quantity Licensed,Quantity Available,Current Usage
G52D1-9FQ1K-48CLT-0CZK2-3RWJG,500,498,2
The entry shows the 500-license vFabric license key, with 498 licenses available and 2 currently in use.
To limit the report to the current usage on the myVDC datacenter, run the following:
prompt> current-usage.bat -datacenter myVDC
To view a weekly report of the number of virtual machines on a cluster called mycluster that have run the vFabric
components from March 1, 2011 to March 31, 2011, run the following monitoring command:
prompt> versions-over-periods.bat -startDate 03/01/2011 -endDate 03/31/2011 -period WEEKLY -cluster mycluster
Command Reference
Table 5.3. vFabric License Server Monitoring Commands
Monitoring
Command Description
current-usage.bat Displays the current vFabric license usage and capacity, organized by license key. By default, the command displays
information for the entire vCenter Server.
You can specify the following optional parameters to limit the reporting to a particular cluster or data center of the
vCenter Server:
41
Page 46

42 vFabric Platform
Monitoring
Command Description
• -cluster cluster-name: Displays current usage and capacity information for the specified cluster.
• -datacenter datacenter-name: Displays current usage and capacity information for the specified virtual data
center.
current-versions.bat Displays the current number of virtual machines that are running each vFabric component included in vFabric Platform.
usage-overperiods.bat
By default, the command displays information for the entire vCenter Server.
You can specify the following optional parameters to limit the reporting to a particular cluster or data center of the
vCenter Server:
• -cluster cluster-name: Displays current number of virtual machines in the specified cluster that are running
each vFabric component.
• -datacenter datacenter-name: Displays current number of virtual machines in the specified data center that
are running each vFabric component.
Displays a report of vFabric license usage and capacity over a period of time, organized by license key. The report
includes the minimum, maximum, and average usage over the specified period. By default, the command displays
information for the entire vCenter Server.
You are required to specify the following parameters:
• -startDate MM/DD/YYYY : Start date of the report. For example, use -startDate 06/01/2011 for a start date
of June 1, 2011.
• -endDate MM/DD/YYYY : End date of the report. For example, use -endDate 12/31/2011 for the end date of
December 31, 2011.
• -period DAILY|WEEKLY|MONTHLY|YEARLY : Period the report covers, such as daily or monthly. For example, period DAILY.
Specify the following optional parameters to limit the reporting to a particular cluster or data center of the vCenter
Server:
• -cluster cluster-name: Displays periodic usage information for the specified cluster.
• -datacenter datacenter-name: Displays periodic usage information for the specified virtual data center.
versions-overperiods.bat
Displays a report of the virtual machines that have run each vFabric component included in vFabric Platform over a
period of time. The report includes the minimum, maximum, and average number of virtual machines over the specified
time period. By default, the command displays information for the entire vCenter Server.
You are required to specify the following parameters:
• -startDate MM/DD/YYYY : Start date of the report. For example, use -startDate 06/01/2011 for a start date
of June 1, 2011.
• -endDate MM/DD/YYYY : End date of the report. For example, use -endDate 12/31/2011 for the end date of
December 31, 2011.
• -period DAILY|WEEKLY|MONTHLY|YEARLY : Period the report covers, such as daily or monthly. For example, period DAILY.
Specify the following optional parameters to limit the reporting to a particular cluster or data center of the vCenter
Server:
• -cluster cluster-name: Displays periodic component version information for the specified cluster.
• -datacenter datacenter-name: Displays periodic component version information for the specified virtual data
center.
Upgrade vFabric License Server
Upgrade vFabric License Server to the latest version to get the latest features and bug fixes.
42 Installing vFabric Platform
Page 47

Installing vFabric Platform 43
Prerequisites
• From the Windows VM on which you are running vCenter Server, download the new version of the vFabric License Server
installer program from the VMware Download Center and save it to your computer.
The installer program is called vFabric_License_Server-version.exe.
Procedure
1. On the same Windows VM on which you are running vCenter Server, double-click the vFabric License Server installer
program from Windows Explorer to start the upgrade.
The installer program displays a message that this is an upgrade and asks if you want to continue; click Yes.
2. Continue clicking Next to accept the license agreement and finish the upgrade. The upgrade procedure keeps the same meta-
data as when you first installed the License Server.
3. When the upgrade completes, restart vCenter Server for the license server changes to take effect.
Uninstall vFabric License Server from vCenter Server
Uninstalling vFabric License Server removes the Web application from the vCenter Tomcat instance, but it does not remove the
vFabric licensing data from the database; you must perform that step yourself.
Procedure
1. Log on to the Windows computer on which you are running vCenter Server and on which you installed vFabric License
Server.
2. From the Windows Control Panel, start the window from which you add or remove programs. On Windows XP, the window
is called Add or Remove Programs. On Windows Server, the window is called Programs and Features.
3. Select VMware vFabric License Server in the list of programs and uninstall it.
Enter the vCenter Server administrator username/password if you want to unregister vFabric License Server from vCenter.
If you do not know the credentials, or you do not mind that vFabric License Server will stay registered, the click Next.
What to do next
• If you want to delete the vFabric licensing data from the database, you must do this manually. Consult the vCenter
administrator if you use the internal vCenter database to store license data, or the database administrator of the external
database.
RHEL: Upgrade vFabric Components From the VMware YUM Repository
When a vFabric component releases a new maintenance version, the appropriate VMware YUM repository is updated to include
the new RPM, and you can use yum to quickly upgrade the component.
Prerequisites
• Install the vFabric Repository RPMs.
• If appropriate, stop the vFabric component.
For example, to stop a tc Runtime instance called myserver, use su to become the tc-server user and run the following
commands:
prompt$ cd /opt/vmware/vfabric-tc-server-standard
43
Page 48

44 vFabric Platform
prompt$ ./tcruntime-ctl.sh myserver stop
See the specific vFabric component documentation for details about stopping a component or an instance of a component.
Procedure
1. On the RHEL VM on which you are going to upgrade the vFabric component, start a terminal either as the root user or as
an unprivileged user using sudo.
2. Execute the appropriate yum upgrade component command to upgrade the vFabric component, where component is
name of the RPM package for the component.
For the exact name of each RPM, see Important Information About Installing Using RPMs, or use the output of yum
search vfabric.
For example, to upgrade vFabric tc Server:
prompt# yum upgrade vfabric-tc-server-standard
Warning: The yum upgrade command shown in the preceding examples upgrades the vFabric component to the most
recent RPM it finds in all repositories the yum command knows about. If you want to upgrade to a version that is not
the most recent, then you must explicitly specify the version on the yum upgrade command line. Use yum search
vfabric-component --showduplicates to find all versions of a component in all repositories. For example, to
explicitly upgrade to version 2.6.2 of tc Server:
prompt# yum search vfabric-tc-server-standard --showduplicates
===================== Matched: vfabric-tc-server-standard ======================
vfabric-tc-server-standard-2.6.0-RELEASE.noarch : VMWare vFabric tc Server Standard
vfabric-tc-server-standard-2.6.1-RELEASE.noarch : VMWare vFabric tc Server Standard
vfabric-tc-server-standard-2.6.2-RELEASE.noarch : VMWare vFabric tc Server Standard
prompt# yum upgrade vfabric-tc-server-standard-2.6.2-RELEASE
3. Enter y at the prompt to begin the actual upgrade. Depending on the component, you may be asked additional questions;
answer as appropriate. If you need more detailed information, see the component documentation.
If the upgrade is successful, you will see a Complete! message at the end.
What to do next
The next steps depend on the specific component you upgraded.
• If you upgraded tc Server, then you will likely want to upgrade specific tc Runtime instances. To upgrade the myserver
instance to tc Runtime 7.0.22.A.RELEASE, su to the tc-server user and run the following commands:
prompt$ cd /opt/vmware/vfabric-tc-server-standard
prompt$ ./tcruntime-instance.sh upgrade -v 7.0.22.A.RELEASE myserver
prompt$ ./tcruntime-ctl.sh myserver start
See the specific component documentation for additional details about the next steps after upgrading the component.
44 Installing vFabric Platform
 Loading...