

Page 1
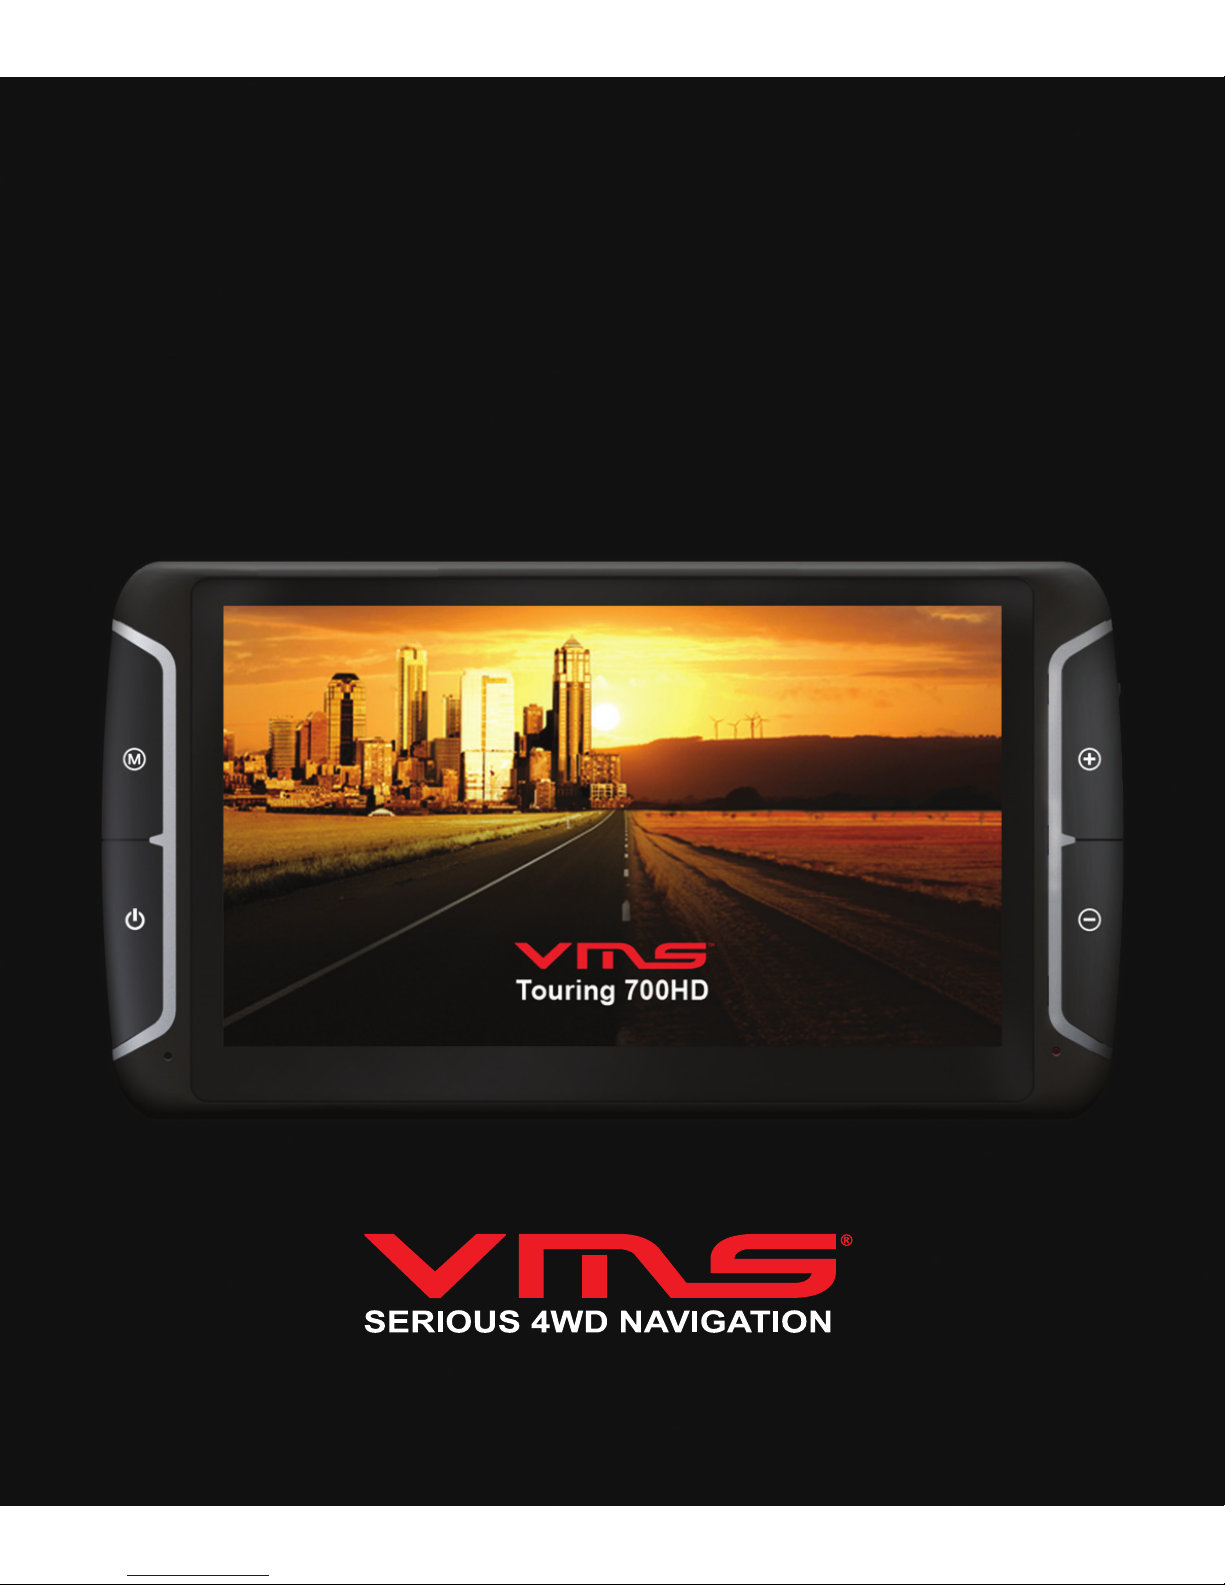
TOURING 700HD
Quick Start Guide
s
s
Page 2

quick start guide
2
Introduction
The VMS Touring 700HDs navigates just as well in the outback as it does around town!
Ideal for exploring the outback, the Touring Series features three of Australia’s most
popular map collections.
The Gregory’s range of activity maps are ideal for locating points of interest and activities to see and do. Beautifully illustrated, the maps also provide useful information such
as the locations of fuel stations, camp sites and caravan parks.
The 4WD enthusiast keen on tackling rough tracks can switch to the iTOPO 1:250,000
scale topographic maps. This map collection covers the entire country and displays the
majority of 4x4 tracks.
Last but not least the Westprint Heritage map collection focus on Central Australia, our
favourite four-wheel driving destination. With excellent track detail and points of interest,
the Westprint Heritage maps are a must for any four-wheel driving enthusiast.
Street navigation features the latest Navteq maps, the most trusted name in turn by turn
navigation. With spoken street names and easy to follow voice guidance the Touring
700HDs will get you to your destination in great time.
The Touring 700HDs can also be used as a display for reverse cameras. The optional
camera kits add the ability to use 1 or 2 reverse cameras.
Designed in Australia, the Touring 700HDs sets the benchmark for 4x4 Navigation!
Page 3

3
Contents
Introduction......................................................................................................................... 1
1. What’s in the Box............................................................................................................ 4
2. Device illustration............................................................................................................ 4
3. Prepare device for use
3.1 Inserting SD memory card.............................................................................. 5
3.2 Mounting the device........................................................................................ 5
3.3 Power ON/OFF............................................................................................... 5
4. Device Main Menu ......................................................................................................... 6
5. GPS Console.................................................................................................................. 6
5.1 Choosing off road navigation software........................................................... 7
6. Navigation Software User Manual.................................................................................. 7
7. Reverse Camera Setup.................................................................................................. 7
8. Reverse Camera Operation............................................................................................ 8
9. Safety & Product Information.......................................................................................... 8
9.1 Battery Warnings............................................................................................ 8
9.2 Map Data........................................................................................................ 9
9.3 Declaration of Conformity................................................................................ 9
10. Warranty........................................................................................................................ 10
10.1 Warranty Returns & Procedures................................................................... 10
10.2 Online Auction Purchases............................................................................. 10
10.3 International Purchases................................................................................ 10
11. Caring for your product................................................................................................. 11
11.1 Cleaning the unit........................................................................................... 11
11.2 Cleaning the Touch Screen........................................................................... 11
11.3 Avoiding Theft............................................................................................... 11
12. Software License Agreement...................................................................................... 11
13. Need further Help?........................................................................................................ 12
Page 4
quick start guide
4
1. WHAT’S IN THE BOX
- 1 x VMS Touring Series GPS unit - 1 x 12-24V DC charger
- 1 x Windscreen suction cup mount - 1 x USB Cable
- 1 x Stylus pen - 1 x Quick Start Guide
- 1 x 240V Charger - 1 x Navigation User Manual
- 1 x Micro SD card
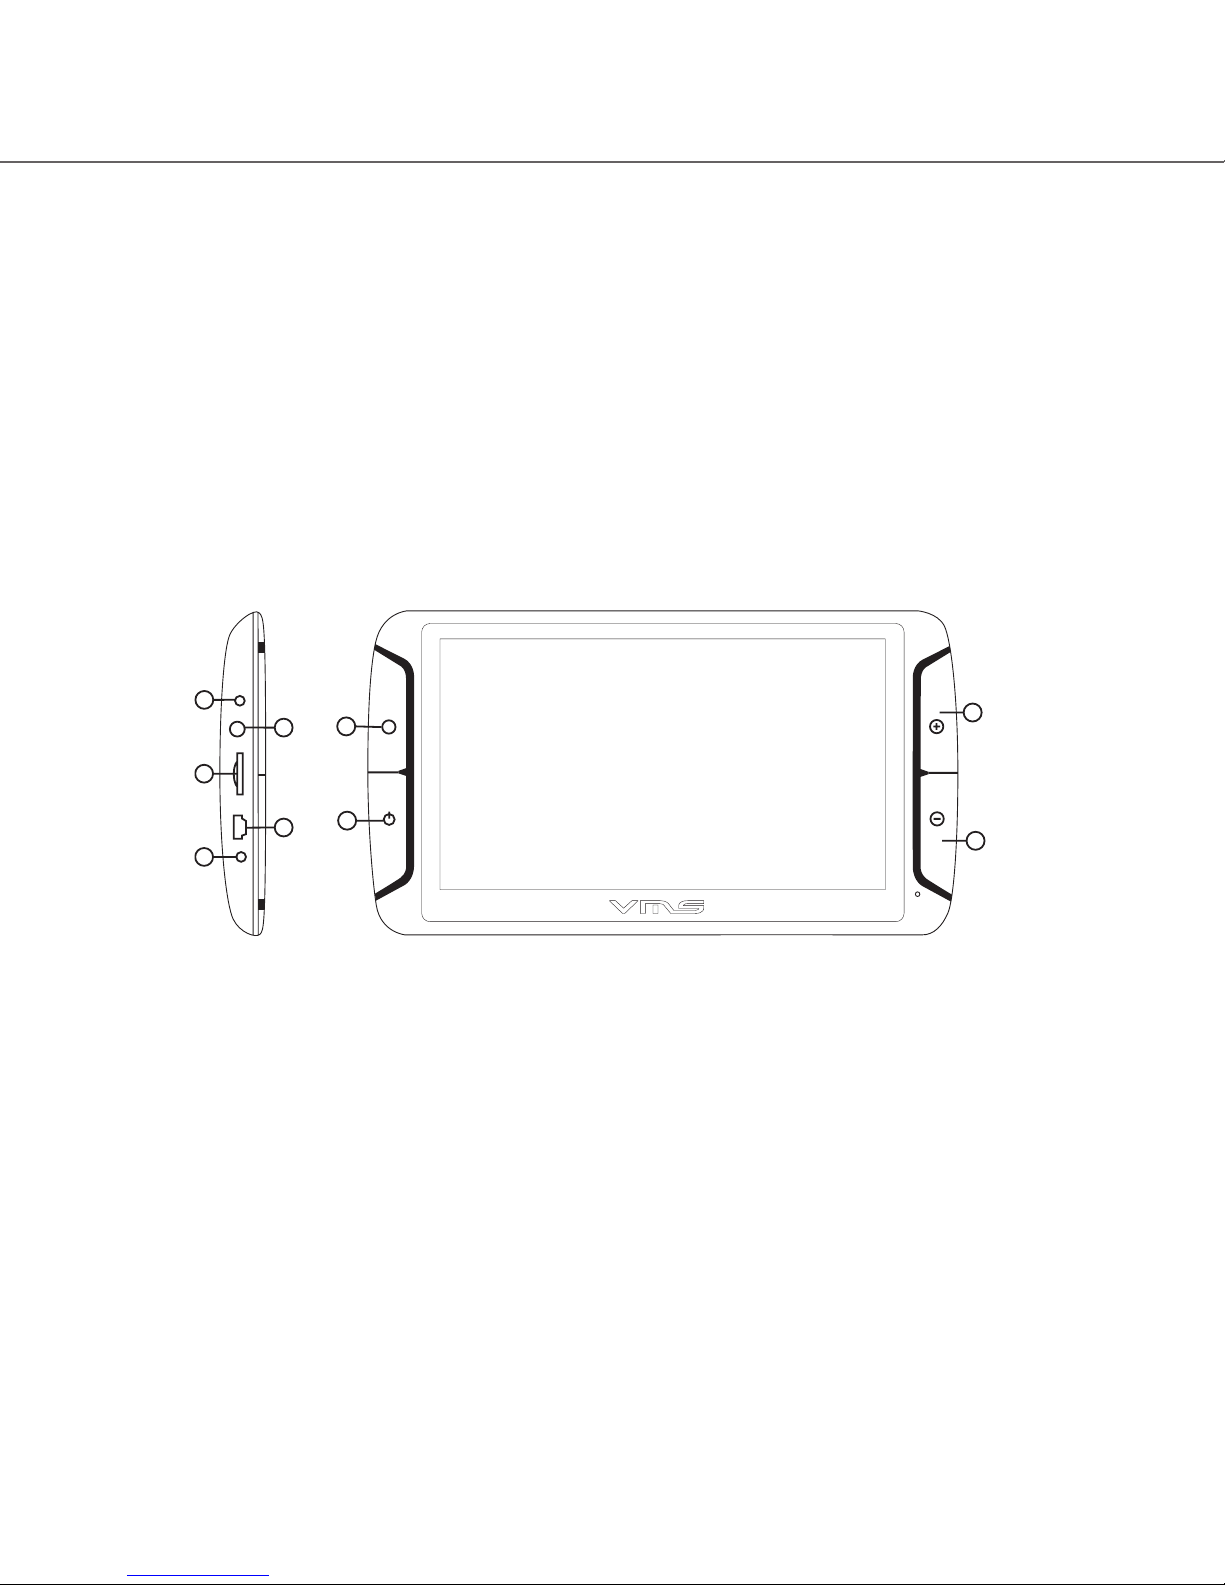
2. DEVICE ILLUSTRATION
1. Device Home Menu.............. Return to Device Home Menu.
2. Power .................................. While device is off, press & hold to turn on.
While device is on, press to power off or to put into sleep mode.
3. Volume Up........................... Device Volume Increase.
4. Volume Down...................... Device Volume Decrease.
5. Charging Port...................... For DC charger. 5V DC only.
6. Mini USB............................. Mini USB port.
7. Mini SD card slot................. 1 x micro SDHC memory card (up to 16GB Class4).
8. Audio Jack (3.5mm)............ Audio output.
9. Not in use............................ Not in Use.
M
1
2
3
4
6
8
Front Side
5
6
7
8
9
Side
Page 5
5
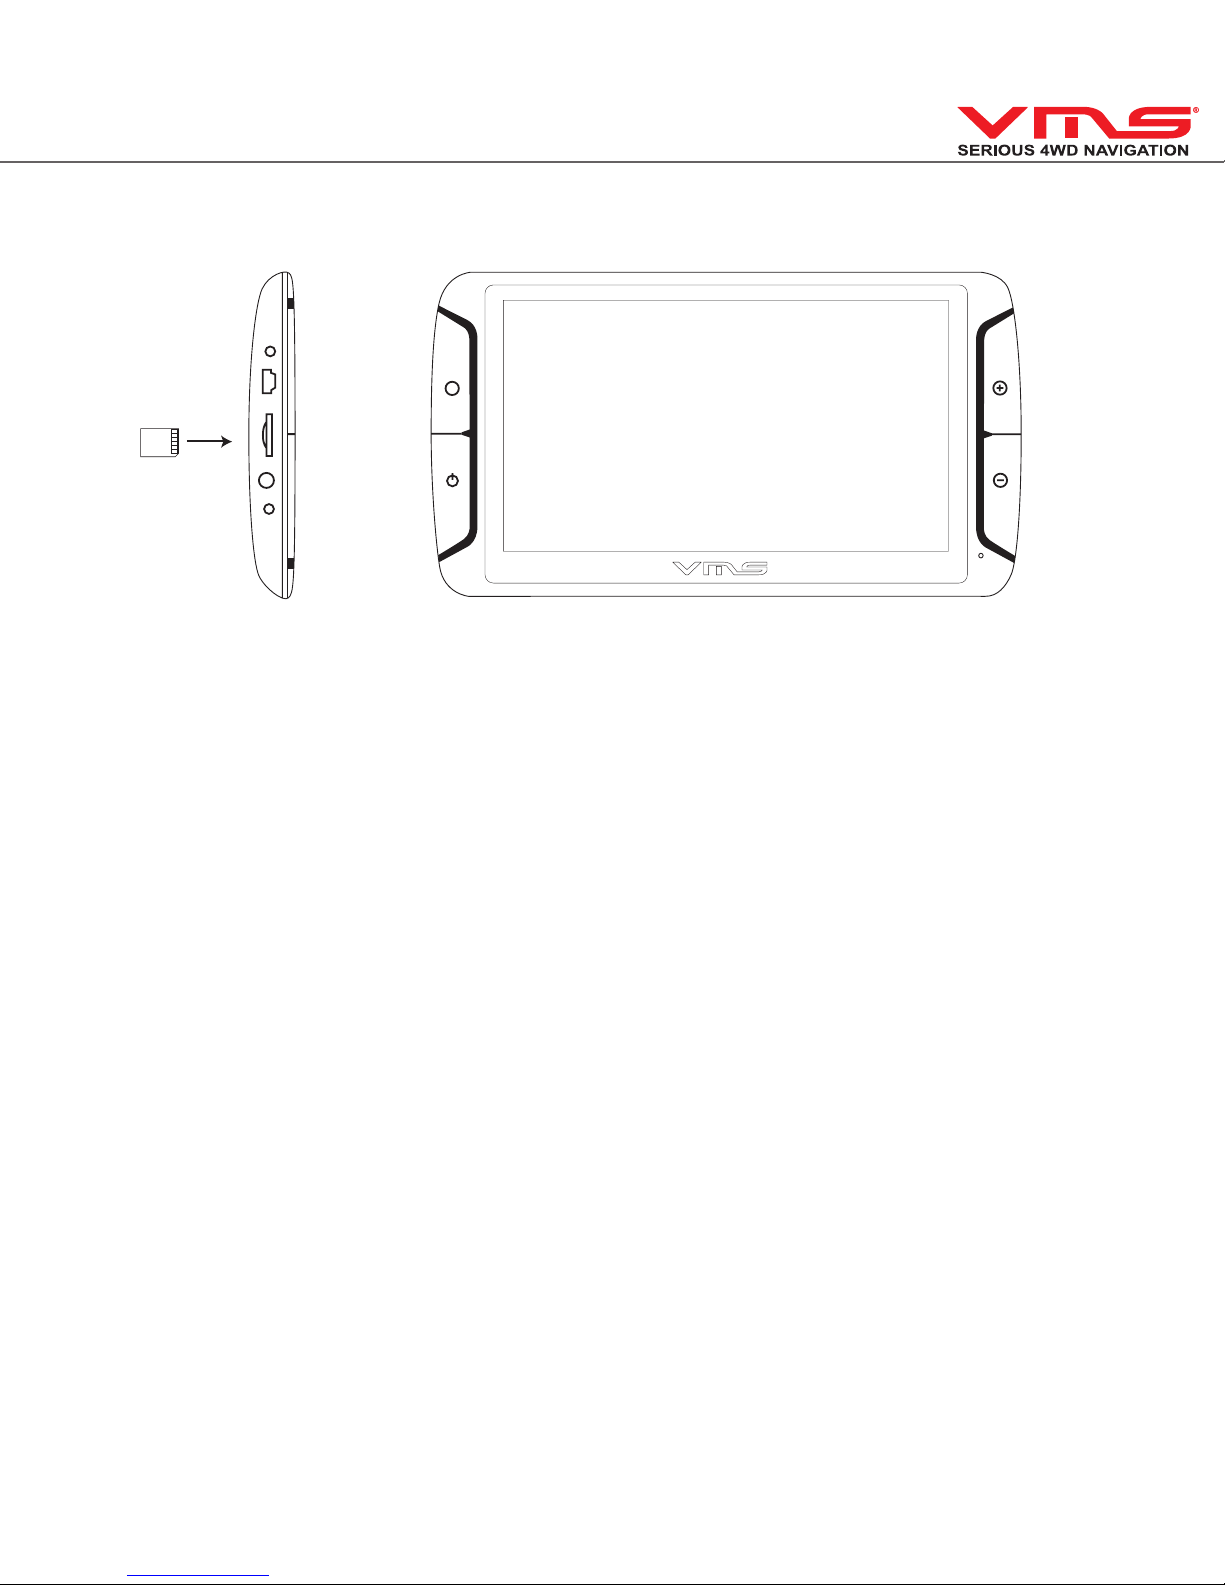
3.1 INSERTING SD MEMORY CARD
Step 1: Remove SD card from its plastic holder.
Step 2: Locate the SD card slot on the right side of the DEVICE.
Step 3: Ensure orientation of the SD card is correct.
Step 4: Insert the SD card by sliding it gently into the slot completely. The card will click indicating
correct installation.
3.2 MOUNTING THE DEVICE
1. Select a suitable location to mount the GPS on your windscreen.
2. Clean & dry the suction cup and select the area of your windscreen.
3. Plug the Car Charger into the side of the GPS.
4. Attached the cradle to the suction cup mount.
5. Adjust the angle with the rotary clamp if necessary.
6. Place the suction cup on the windscreen and secure with rotary latch.
7. Place the bottom of the GPS on to the cradle and gently click the top of the GPS into the cradle.
8. Plug the car charger into a 12V DC power outlet in your vehicle.
3.3 POWER ON/OFF & SLEEP MODE
Power on: press and hold the power button until the device turns on.
Power off / Sleep: press the power button until the unit displays “POWER OFF”, or press the power
button for 1 sec then release, the message “SLEEP” will appear on the screen to indicate it’s gone
into sleep mode. During sleep mode, the device is not completely switched off and therefore the battery will continue to consume power.
M
Page 6

quick start guide
6
4. DEVICE MAIN MENU
1. Device Volume options
2. Power Options
3. Photos, Videos
4. Display backlight options
5. Device Date/Tim options
6. About this device
7. Start GPS Console
9. Battery status
5. GPS CONSOLE - Starting Navigation Software
The GPS console is where you can
select to start Street or Off road
navigation software.
1. Street Navigation Software.
2. Off Road Navigation Software.
3. Choose default Off Road Software.
4. Back.
HINT:
When you select a navigation software,
the console will remember your choice
and automatically start that software
next time. You can return to the
console at anytime by exiting the
navigation software.
100% 0%
Charging
1
2
3
4
5
6
7
8
1 2
3
4
Page 7

7
5.1 GPS CONSOLE - Choose a off road navigation software
The VMS Touring is preloaded with a
choice of 2 off road softwares which
are VMS Off Road GPS and
OziExplorer CE (demo version). By
default, VMS is selected as the
software of choice. You can change
this preference in this menu at anytime.
1. VMS Off Road Software
2. OziExplorer CE
3. Back
6. GPS NAVIGATION USER GUIDE
For help and guides on topographic software, please refer to the GPS NAVIGATION USER GUIDE
included with this product or visit our website www.vms4x4.com/vms_support
7. Reverse Camera Setup
This device has the capability to display reverse camera images from up to two VMS cameras
Setting up reverse camera
1 2
3
Camera V
ideo Inpu
t
Page 8

quick start guide
8
8. REVERSE CAMERA OPERATION
Connect reverse camera to device according to the wiring diagram. The GPS will automatically
switch to camera mode when it detects a video signal from the camera.
VMS Dual Camera kit:
When the second camera on the trailer is plugged in, the image from the second camera will appear
automatically. If the trailer camera is not connected, the image will revert to the vehicle camera.
VMS Camera part numbers:
Universal Reverse Camera: P5501-0001 Dual Camera kit: P5501-0002N
Installation of cameras:
For camera installation procedures, please refer to the instructions included with the camera kits.
NOTE: the Touring Series has been tested to operate with VMS reverse camera kits. We cannot ensure compatibility with third party camera kits.
9. IMPORTANT SAFETY AND PRODUCT INFORMATION
Failure to avoid the following potentially hazardous situations could result in an accident or collision
resulting in death or serious injury.
• When installing the unit in a vehicle, place the device securely so it does not obstruct the
driver’s view of the road or interfere with vehicle operating controls, such as the steering
wheel, foot pedals, or transmission levers. Do not place in front of, or above any air bag.
• When navigating, carefully compare information displayed on the unit to all available naviga-
tion sources, including information from street signs, visual sighting, and maps. For safety,
always resolve any discrepancies or questions before continuing navigation and defer to
posted road signs.
• Always operate the vehicle in a safe manner. Do not become distracted by the unit while
driving, and always be fully aware of all driving conditions. Minimise the amount of time spent
viewing the unit’s screen while driving and use voice prompts when possible. Do not input
destinations, change settings, or access any functions requiring prolonged use of the device’s
controls while driving. Pull over in a safe and legal manner before attempting such operations.
• The unit is designed to provide route suggestions. It is not designed to replace the need for
driverattentivenessregardingroadclosuresorroadconditions,trafccongestions,weather
conditions, or other factors that may affect safety while driving.
9.1 BATTERY WARNINGS
If these guidelines are not followed, the internal, non user replaceable, rechargeable lithium-polymer
Page 9

9
battery may experience a shortened life span or may present a risk of damage to the GPS device,
re,chemicalburn,electrolyteleak,and/orinjury.
• Do not incinerate.
• Contact your local waste disposal department to properly dispose of the unit/battery
• Do not leave the unit exposed to a heat source or in a high temperature location, such as in
the sun in an unattended vehicle on a hot day. To prevent damage, remove the unit from the
vehicle or store it out of direct sunlight.
• When storing the unit for a limited length of time, store within the following temperature range:
• 0˚to55˚C.Whenstoringthedeviceforanextendedtime,storewithinthefollowingtemperaturerange:0˚to25˚C.
• Donotoperatetheunitoutsidethefollowingtemperaturerange:-20˚to55˚C.
• Do not remove or attempt to remove the battery.
9.2 MAP DATA
MAP DATA INFORMATION: One of the goals of the VMS Touring GPS is to provide customers with
the most complete and accurate cartography that is available to us at a reasonable cost. Along with
VMS’extensiveeldwork,weuseacombinationofgovernmentalandprivatedatasources,which
we identify in product literature and copyright messages displayed to the consumer. Virtually all data
sources contain some inaccurate or incomplete data. In some counties, complete and accurate map
information is either not available or is prohibitively expensive.
9.3 DECLARATION OF CONFORMITY
Hereby, VMS declares that this product is in compliance with the essential requirements and other
relevant provisions of Directive 1999/5/EC. FCC Compliance This product has been tested and
found to comply with Part 15 of the FCC interference limits for Class B digital devices FOR HOME
OR OFFICE USE. These limits are designed to provide reasonable protection against harmful interference in a residential installation, and are more stringent than ‘outdoor’ requirements. Operation of
this device is subjected to the following conditions:
(1) this device may not cause harmful interference, and
(2) this device must accept any interference received, including interference that may cause undesired operation.
This product does not contain any user-serviceable parts. Repairs should only be made by an
authorisedVMSservicecentre.Unauthorisedrepairsormodicationscouldresultinpermanent
damage to the equipment, and void your warranty and your authority to operate this device under
Part 15 regulations.
Page 10

quick start guide
10
10. LIMITED WARRANTY
This VMS product is warranted to be free from defects in materials or workmanship for one year from
the date of purchase. Within this period, VMS will, at its sole option, repair or replace any components that fail in normal use. Such repairs or replacement will be made at no charge to the customer
for parts or labour, provided that the customer shall be responsible for any transportation costs.
This warranty does not cover failures due to abuse, misuse, accident, or unauthorised alterations or
repairs. Batteries included is warranted for a period of 6 months from the date of purchase.
THE WARRANTIES AND REMEDIES CONTAINED HEREIN ARE EXCLUSIVE AND IN LIEU OF
ALL OTHER WARRANTIES EXPRESSED, IMPLIED, OR STATUTORY, INCLUDING ANY LIABILITY ARISING UNDER ANY WARRANTY OF MERCHANTABILITY OR FITNESS FOR A PARTICULAR PURPOSE, STATUTORY OR OTHERWISE. THIS WARRANTY GIVES YOU SPECIFIC LEGAL
RIGHTS, WHICH MAY VARY FROM STATE TO STATE. IN NO EVENT SHALL VMS BE LIABLE
FOR ANY INCIDENTAL, SPECIAL, INDIRECT, OR CONSEQUENTIAL DAMAGES, WHETHER
RESULTING FROM THE USE, MISUSE, OR INABILITY TO USE THIS PRODUCT OR FROM
DEFECTS IN THE PRODUCT.
Some states do not allow the exclusion of incidental or consequential damages, so the above limitations may not apply to you. VMS retains the exclusive right to repair or replace the unit or software
or offer a full refund of the purchase price at its sole discretion. SUCH REMEDY SHALL BE YOUR
SOLE AND EXCLUSIVE REMEDY FOR ANY BREACH OF WARRANTY.
10.1 WARRANTY RETURNS AND PROCEDURES:
To obtain warranty service, contact your local VMS dealer or call VMS product support to log an
Warranty Claim. You will be directed to http://www.vms4x4.com/warranty_request to complete the
RA form for approval. Once approved, VMS will issue a RA number & shipping instructions. Securely
pack the unit and a copy of the original sales receipt, which is required as the proof of purchase for
warranty repairs. Mark the RA number clearly on the outside of the package. Send the unit, freight
charges prepaid to any VMS service centre.
10.2 ONLINE AUCTION PURCHASES:
Products sold through online auctions are not eligible for rebates or other special offers from VMS.
Onlineauctionconrmationsarenotacceptedforwarrantyverication.Toobtainwarrantyservice,
an original or copy of the sales receipt from the original retailer is required. VMS will not replace
missing components from any package purchased through an online auction.
10.3 INTERNATIONAL PURCHASES:
Page 11

11
A separate warranty is provided by international distributors for units purchased outside of Australia
& New Zealand. This warranty is provided by the local in-country distributor and this distributor
provides local service for your unit. Distributor warranties are only valid in the area of intended distribution. Units purchased in Australia or New Zealand must be returned to the VMS service centre in
Australia.
11. CARING FOR YOUR VMS PRODUCT.
Your VMS Touring GPS contains sensitive electronic components that can be permanently damaged
if exposed to excessive shock or vibration. To minimise the risk of damage to your unit, avoid dropping your unit and operating it in high-shock and high-vibration environments.
• Do not store the unit where prolonged exposure to extreme temperatures can occur, as this
may cause permanent damage.
• The device is not water proof. Do not expose to water. Contact with water can cause this unit
to malfunction.
• Never use a hard or sharp object to operate the touchscreen, as this may cause damage to the
screen. Use of the provided stylus pen is recommended.
11.1 CLEANING THE UNIT
The Touring GPS is constructed of high-quality materials and should not require user maintenance
other than cleaning and general care. Clean the outer casing of the device using a cloth dampened
with a mild detergent solution, and then wipe dry. DO NOT wipe the touchscreen with chemical
cleaners and solvents that may damage plastic components.
11.2 CLEANING THE TOUCH SCREEN
Clean the touch screen with a soft, clean, lint-free cloth. Use isopropyl alcohol, or eyeglass cleaner,
if needed. Apply the liquid to the cloth, and then gently wipe the touch screen.
11.3 AVOIDING THEFT
To avoid theft, remove the unit and mount from sight when not in use. Remove the residue on the
windscreen left by the suction cup.
12. SOFTWARE LICENSE AGREEMENT
BY USING THE VMS Touring, YOU AGREE TO BE BOUND BY THE TERMS & CONDITIONS OF
THE FOLLOWING SOFTWARE LICENSE AGREEMENT. PLEASE READ THIS AGREEMENT
CAREFULLY.
Page 12

quick start guide
12
VMS & it’s software partners grants you a limited license to use the software embedded in this
device (the “software”) in binary executable form in the normal operation of the product. Title, ownership rights, and intellectual property rights in and to the software remains in VMS & it’s partners. You
acknowledge that the Software is the property of VMS & it’s partners and is protected under Australia
copyright laws and international copyright treaties. You further acknowledge that the structure,
organisation, and code of the software are valuable trade secrets of VMS and that the software in
source code form remains a valuable trade secret of VMS. You agree not to de compile, de scramble, modify, reverse assemble, reverse engineer, or reduce to human readable form, the software or
any part thereof or create any derivative works based on the software.
13. NEED FURTHER HELP?
See our website for more resources: www.vms4x4.com or get in touch with us via email:
support@vms4x4.com
Page 13

13
THIS PAGE HAS BEEN INTENTIONALLY
LEFT AS BLANK
Page 14

www.vms4x4.com
July 2012 / Rev 1.1
Printed in China
VMS © is a trademark of CREO INTERNATIONAL PTY LTD, registered in Australia and other countries and may not be
used without the express permission of CREO INTERNATIONAL PTY LTD.
Copyright © 2012
 Loading...