

Page 1
VIDEO MOUNT PRODUCTS
For more information, please contact us at:
345 Log Canoe Circle, Stevensville, Maryland 21666
Toll Free: 877.281.2169 Phone: 410.643.6390 Fax: 410.643.6615
www.videomount.com
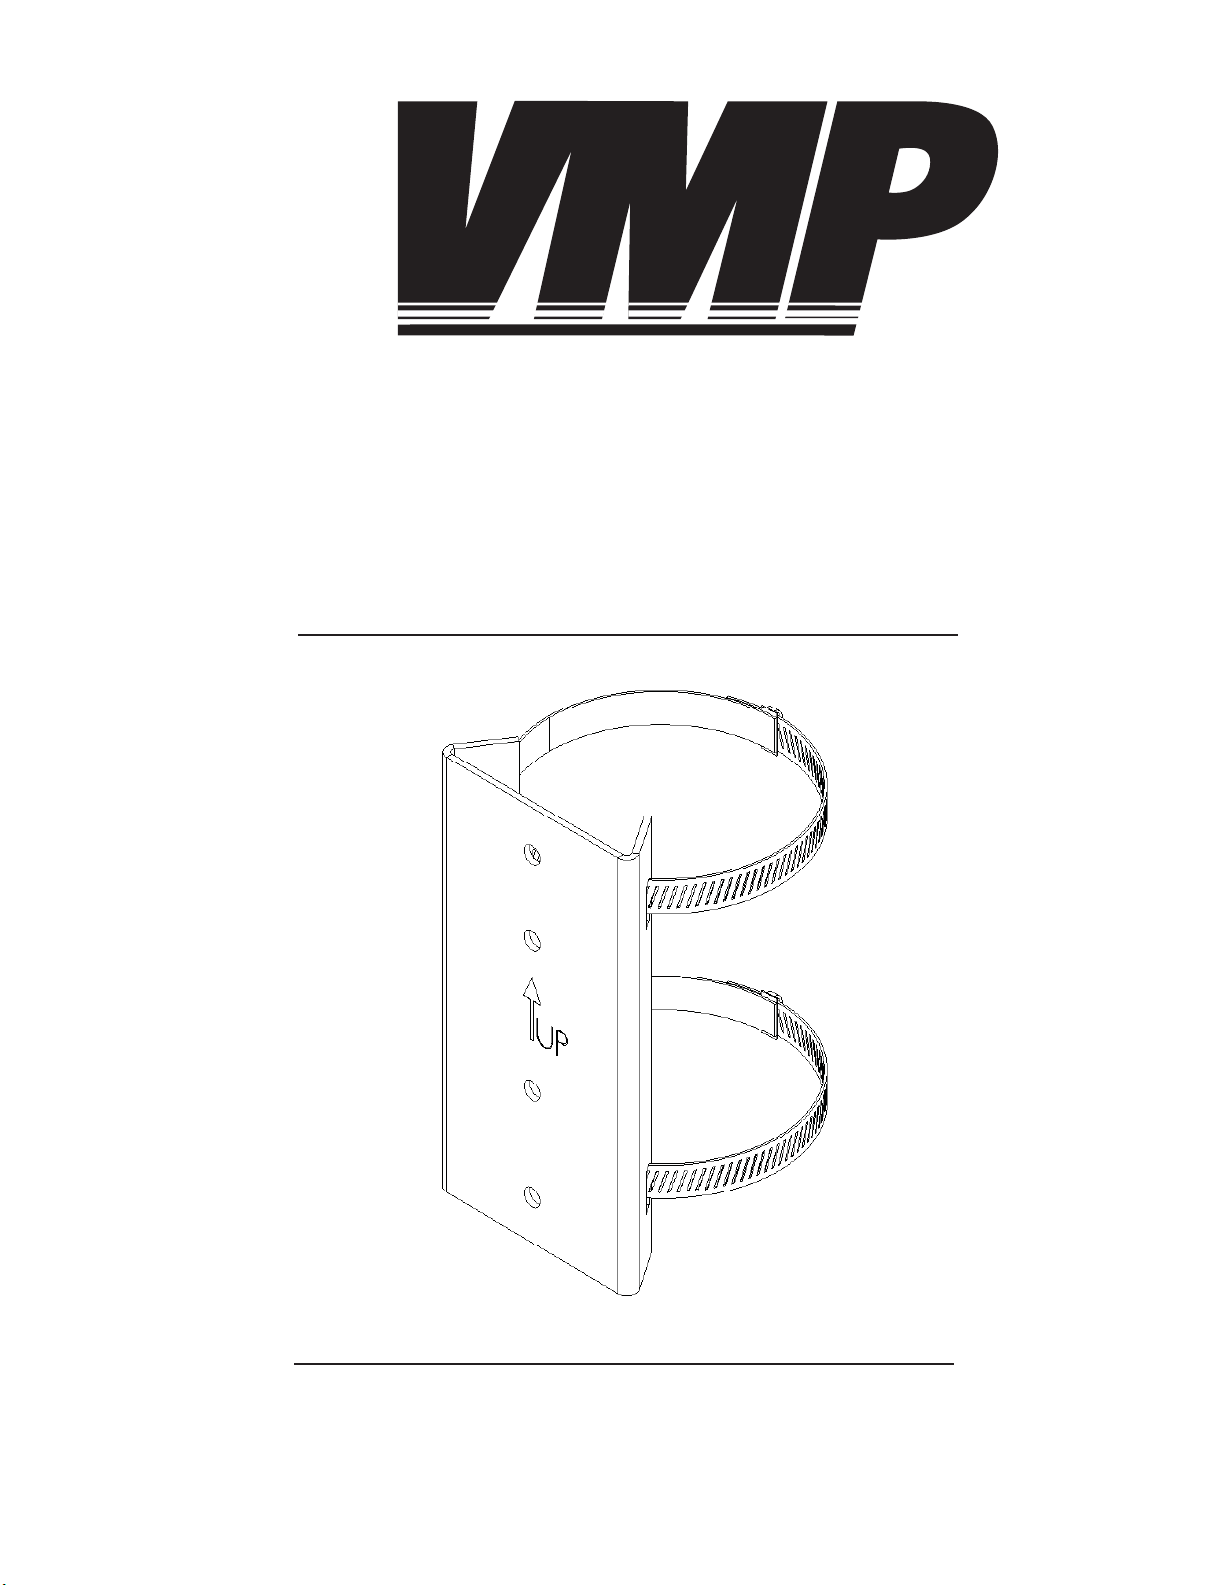
Instruction Sheet For:
LCD-PA
Page 2
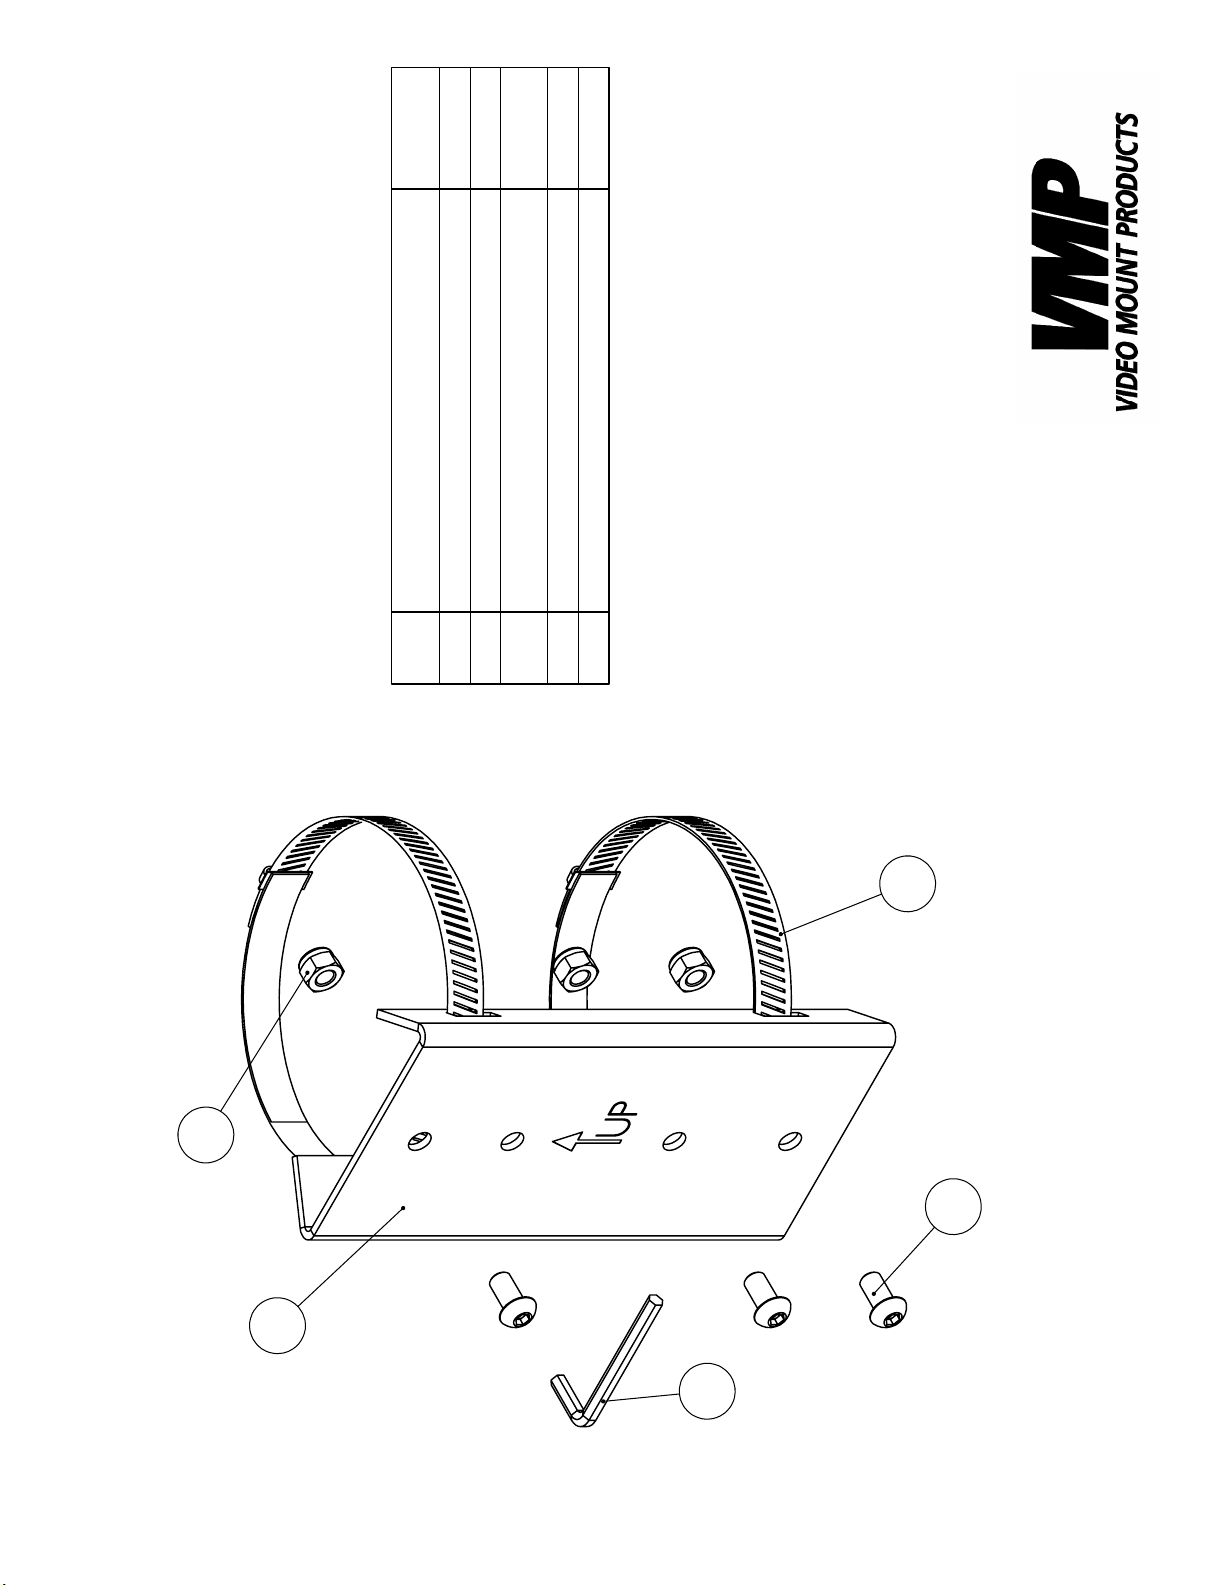
1
QTY.
2
3
1
3
DESCRIPTION
Mounting Plate
Variable Band Strap
M5 Allen Key
Nylon Nut M8*P1.25
LCD-PA
Socket Screw M8*P1.25*L16.5
1
2
3
4
NO.
ITEM
5
2
5
3
1
4
Page 3

Step 2: Attaching the wall plate to
the LCD-PA plate
Step 1
Before starting, lay out all parts to your mount and match them to
the parts list provided. Verify that you have all your parts before attempting to assemble the mount
Step 2
Attach the LCD-1 or LCD-2537 wall plate LCD-1 or LCD-2537 to the
LCD-PA plate using the socket screws and nylon nuts . Note:
When attaching the LCD-1 or LCD-2537 make sure the top hole of the
mount is attached to the top hole of the LCD-PA. The top of the LCD-PA
is indicated by the up arrow on the front of it.
1
1
3 5
Step 3
Thread the band straps through the slots cut into the LCD-PA
plate and around the desired mounting pole. Put the fl at end of
the strap underneath the screw on the other side of the strap. Then
tighten the band strap by turning the screw so the band strap feeds
under the screw and out the other side. Do this until you can not
tighten the band straps around the desired pole any further.
1
2
2
Step 3:Strapping the LCD-PA
around the pole
Step 4
Attach the remainder of the LCD-1 or LCD-2537 mount by using the
long 3/8” screw LCD-1 or LCD-2537 that works with the wall
plate LCD-1 or LCD-2537.
Please verify that all nuts and screws are securely tightened.
1
17
Step 4: Attaching the remained of the
mount to the wall plate
Enjoy Your Mount!
WARNING: The installer of these products must verify that the mount
surface, ceiling or wall, will safely support the combined weight of all
attached equipment and hardware. Video Mount Products will not
be held liable for the improper use or installation of its products.
 Loading...