

Page 1

Instruction Sheet For:
GEM-4060
For more information, please contact us at:
345 Log Canoe Circle, Stevensville, Maryland 21666
Toll Free: 877.281.2169 Phone: 410.643.6390 Fax: 410.643.6615
www.videomount.com
Page 2
PART NAME QTY.
*** GEM4060 ***
1 STAND BAR 2
3 HALF JIG 1 2
4 HALF JIG 2 2
5 HOLD SCREW 1/4" 2
6 NUT 5/16" 4
7 CROSS SCREW 5/16"x3/4" 4
8 CROSS SCREW M6x50 4
9 NUT 1/4"-20UNC 4
NO.
ITEM
8
3
10 LOCK WASHER C8.4xC15xT1.2 4
4
5
7
10
6
9
1
8
Page 3

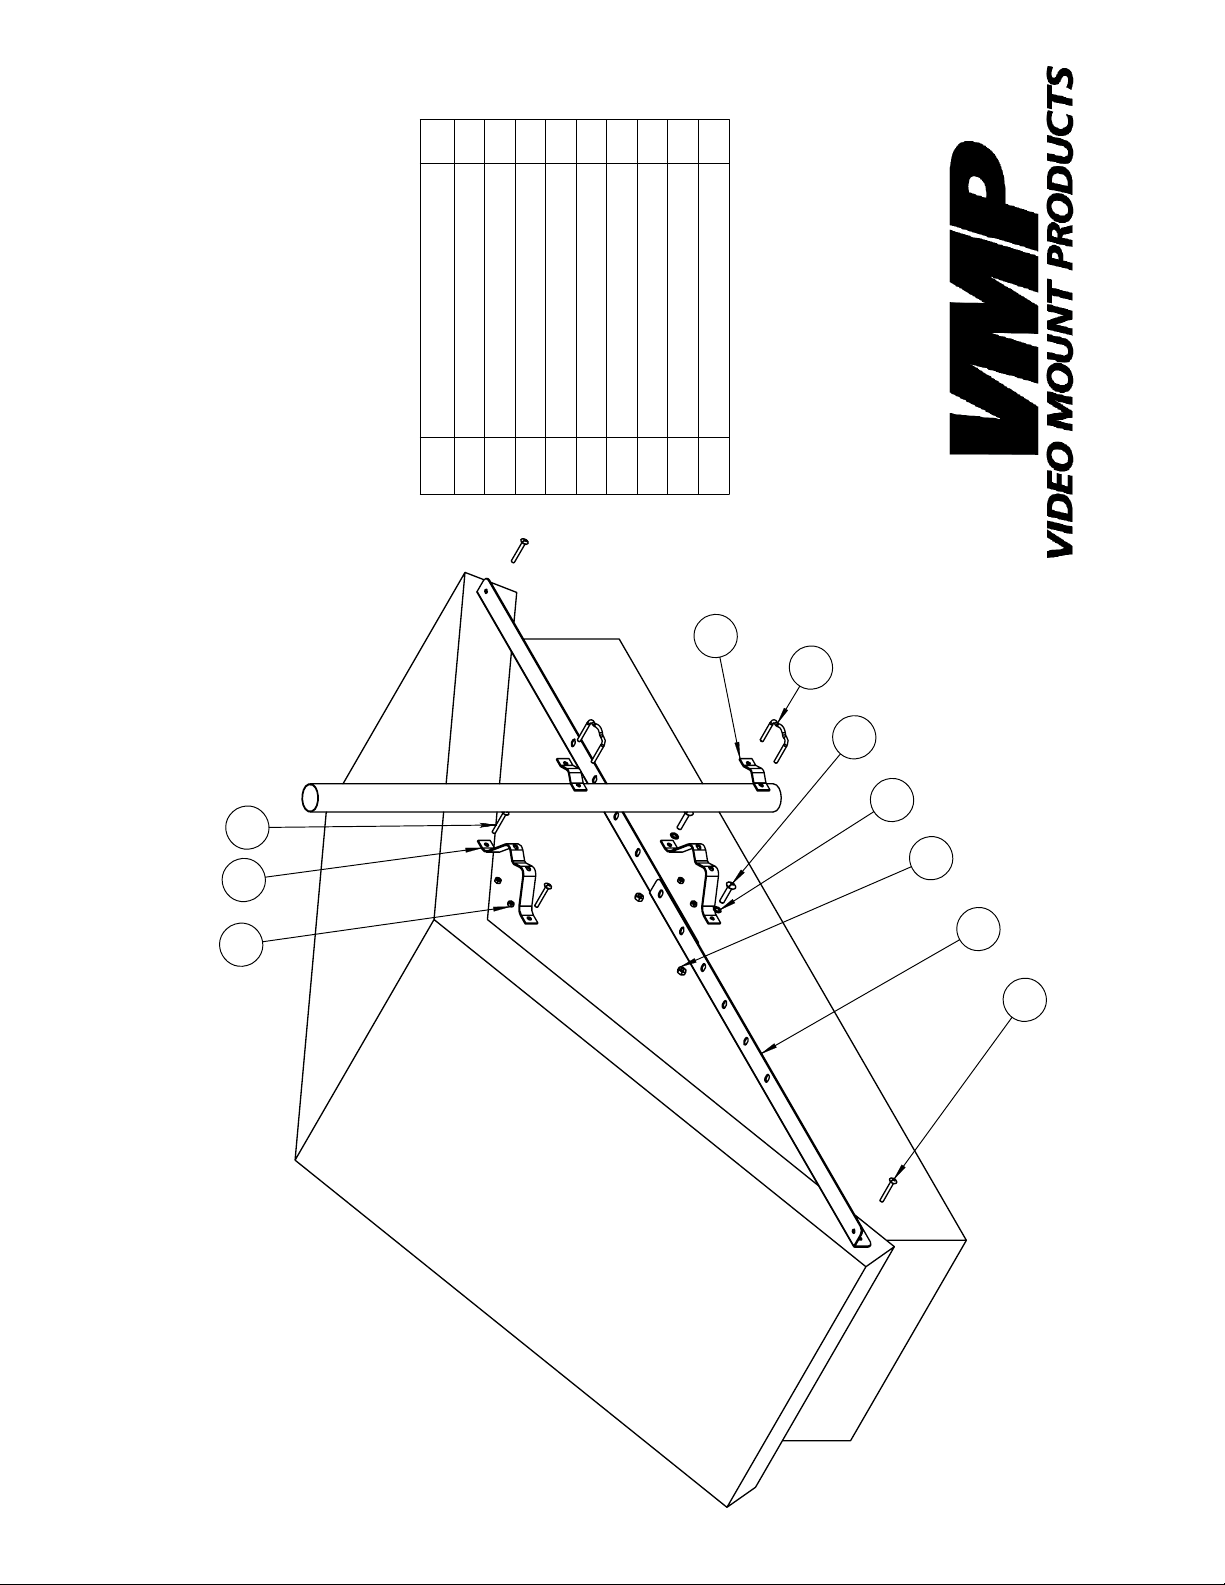
Step 2: Assembling the L brackets
Step 3: Attaching the W
bracket to the L brackets
Step 1
Before starting, lay out all parts to your mount and match them to
the parts list provided. Verify that you have all your parts before
attempting to assemble the mount. Note: It is highly recommend-
ed that the installation of the mount be done by a professional.
Step 2
Assemble the two L brackets at the desired span by using two of
the short 5/16” diameter screws, lock washers and hex nuts through
the slots cut into the L brackets.
Step 3
Attach the fi rst W bracket to the combined L brackets with the
other two short 5/16” screws, lock washers and hex nuts.
Step 4
Mark the wall or desired mounting surface in preparation of installation of the L brackets and remaining W bracket to the gable.
Pre-drill if necessary and mount the L brackets and remaining W
bracket to the gable.
properly as the antenna mast will be attached to them. Warning: Please
verify that your mounting surface will support the combined weight of
your mount, mounting hardware, and antenna mast. Also verify that
the mounting surface is safe to drill through. If in doubt, please contact
a professional installer.
Note: Make sure to line up the two W brackets
Step 4: Mounting the W
bracket and L brackets
Step 5: Attaching the
antenna mast
Step 5
Place the antenna mast into the notch in the W brackets. Place
clamp plate on the opposite side of the antenna mast and use
either the long ¼” diameter screws or the U bolts and hex nuts to
tighten down the clamp plate onto the antenna mast clamping it
in place. The ¼” diameter screws are show in the picture. Please
verify that all nuts and screws are securely tightened.
Enjoy Your Mount!
WARNING: The installer must verify the installation meets all applicable codes and survival requirements. Video Mount Products will not be held liable for the improper use or installation of
its products.
 Loading...