

Page 1
Instruction Sheet For:
EXT Series
For more information, please contact us at:
345 Log Canoe Circle, Stevensville, Maryland 21666
Toll Free: 877.281.2169 Phone: 410.643.6390 Fax: 410.643.6615
www.videomount.com
Page 2
2
1
QTY.
3
4
1
1
1
1
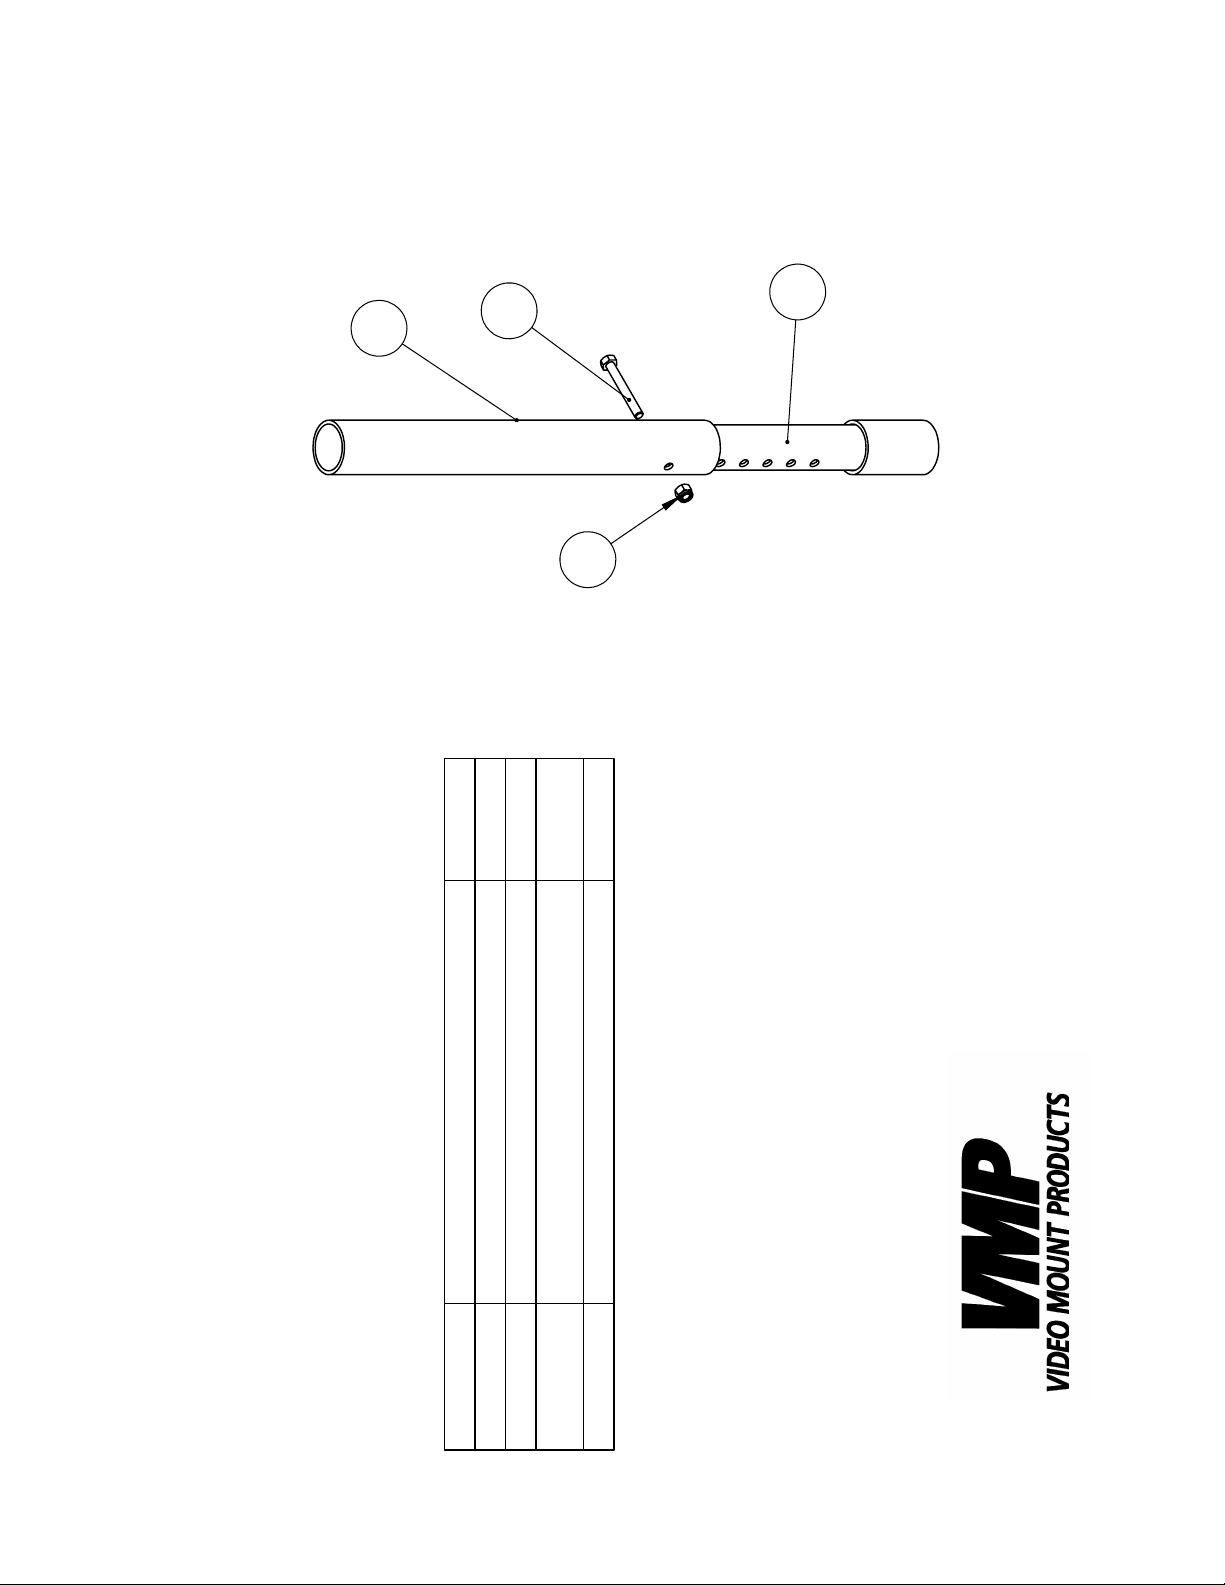
EXT-Series
Inner Mast
Outer Mast
DESCRIPTION
Nylon Nut 5/16"-18UNC
Hex Screw 5/16"-18UNC*L2.5"
1
2
3
4
ITEM NO.
Page 3
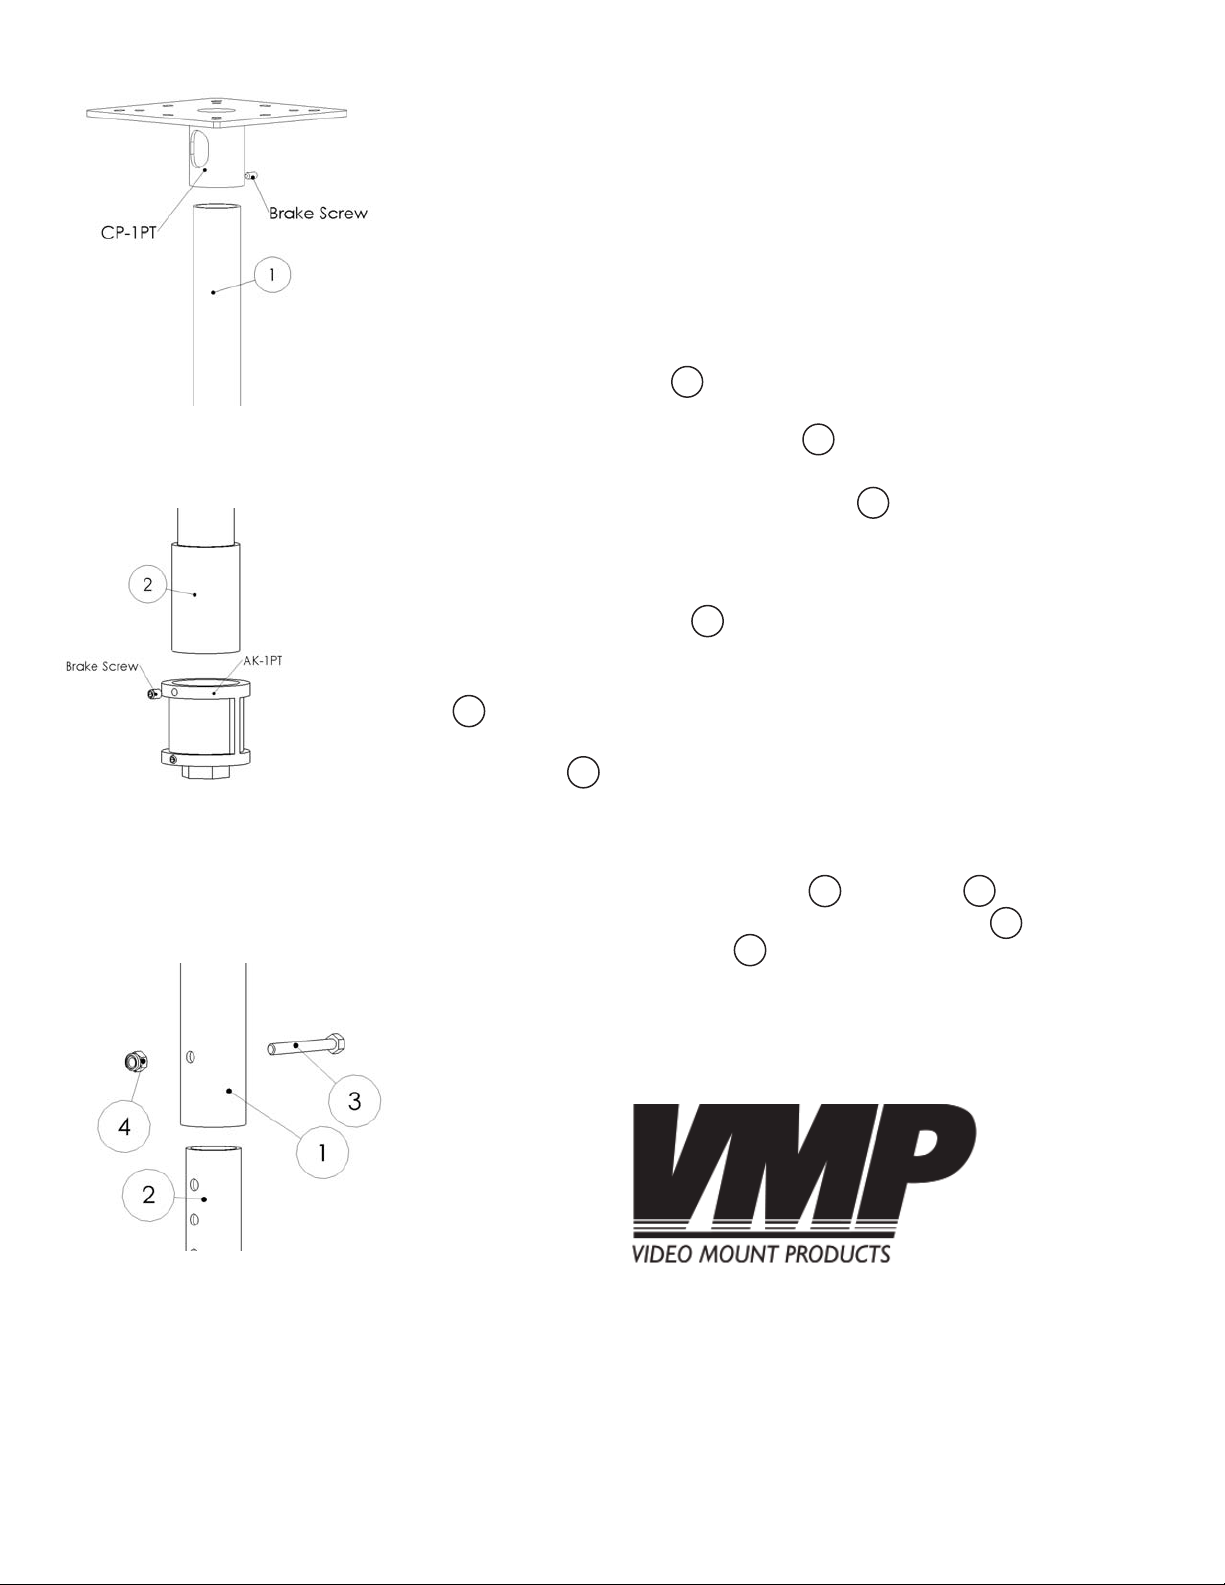
Step 2: Securing the outer mast
Step 1
Before starting, lay out all parts to your mount and match them to
the parts list provided. Verify that you have all your parts before
attempting to assemble the mount. Note: These instructions are
written for VMP products. If using another manufacturer’s product that uses a different method of securing pipe please refer to
that manufacturer’s specifi cations as to how to properly secure the
pipes into the pipe couples.
Step 2
Take the outer mast and thread it into the female pipe couple
1
attached to the mounting surface. The VMP model CP-1PT is used
in image. Tighten the outer mast into the pipe couple until you
1
can no longer turn the mast. Tighten brake screw provided with
the ceiling plate into the outer mast until you can no longer
1
tighten it further.
Step 3
Thread the inner mast into the other desired female pipe cou-
2
ple, usually attached to the remainder of the mount. The VMP
model AK-1PT is used in the images shown. Tighten the inner mast
into the pipe couple until you can no longer turn the mast.
2
Tighten brake screw provided with the other pipe couple into the
inner mast until you can no longer tighten it further.
2
Step 3: Securing the inner mast
Step 4: Attaching the two masts
Step 4
Choose the height at which you wish to have the ceiling mount at
and line up the holes in the inner and outer masts. Pin the
2
masts together using the 5/16” by 2.5” long screw and secure
by fastening the nylon nut onto the end of the screw.
4
1
3
Please verify that all nuts and screws are securely tightened.
Enjoy Your Mount!
WARNING: The installer of these products must verify that the mount
surface, ceiling or wall, will safely support the combined weight of
all attached equipment and hardware. Video Mount Products will
not be held liable for the improper use or installation of its products.
 Loading...