

Page 1
99-0063-000REV2
Page 2

Owner’s Manual
Welcome
Congratulations on your purchase of the SmartView™ camera system.
With this camera system, you get full view around your vehicle, especially
in your blind spots.
This manual contains information on getting familiar with your
SmartView™ camera operating system and how it functions as well as
installation of the product.
Important Safety Information:
This camera system product is designed and intended for the purpose of
providing full view camera video for the driver. Misuse of this product may
constitute a violation of your state’s vehicle code. Please check with your
local state law regarding the use of such a product.
Table of Contents
Getting Started . . . . . . . . . . . . . . . . . . . . . . . . . . . . . . . . . . . . . . . . . . . . . . . . . . . . . 2-3
SmartView™ Overview . . . . . . . . . . . . . . . . . . . . . . . . . . . . . . . . . . . . . . . . . . . . . . . . 4
Wire Harness Connections . . . . . . . . . . . . . . . . . . . . . . . . . . . . . . . . . . . . . . . . . . . . 5
Installation . . . . . . . . . . . . . . . . . . . . . . . . . . . . . . . . . . . . . . . . . . . . . . . . . . . . . . . . . . 5-6
Wire Diagram . . . . . . . . . . . . . . . . . . . . . . . . . . . . . . . . . . . . . . . . . . . . . . . . . . . . . . . . . 7
Other Products . . . . . . . . . . . . . . . . . . . . . . . . . . . . . . . . . . . . . . . . . . . . . . . . . . . . . 8-9
Notes . . . . . . . . . . . . . . . . . . . . . . . . . . . . . . . . . . . . . . . . . . . . . . . . . . . . . . . . . . . . . . . 10
1 | Owner’s Manual www.vizualogic.com
Page 3
Getting Started
The SmartView™ camera system comes with 4 cameras. One camera
for the front, one for the back, and two for both the left and right sides of
the vehicle. Viewing these cameras is controlled by the blinkers, hazards,
and putting the car in reverse.
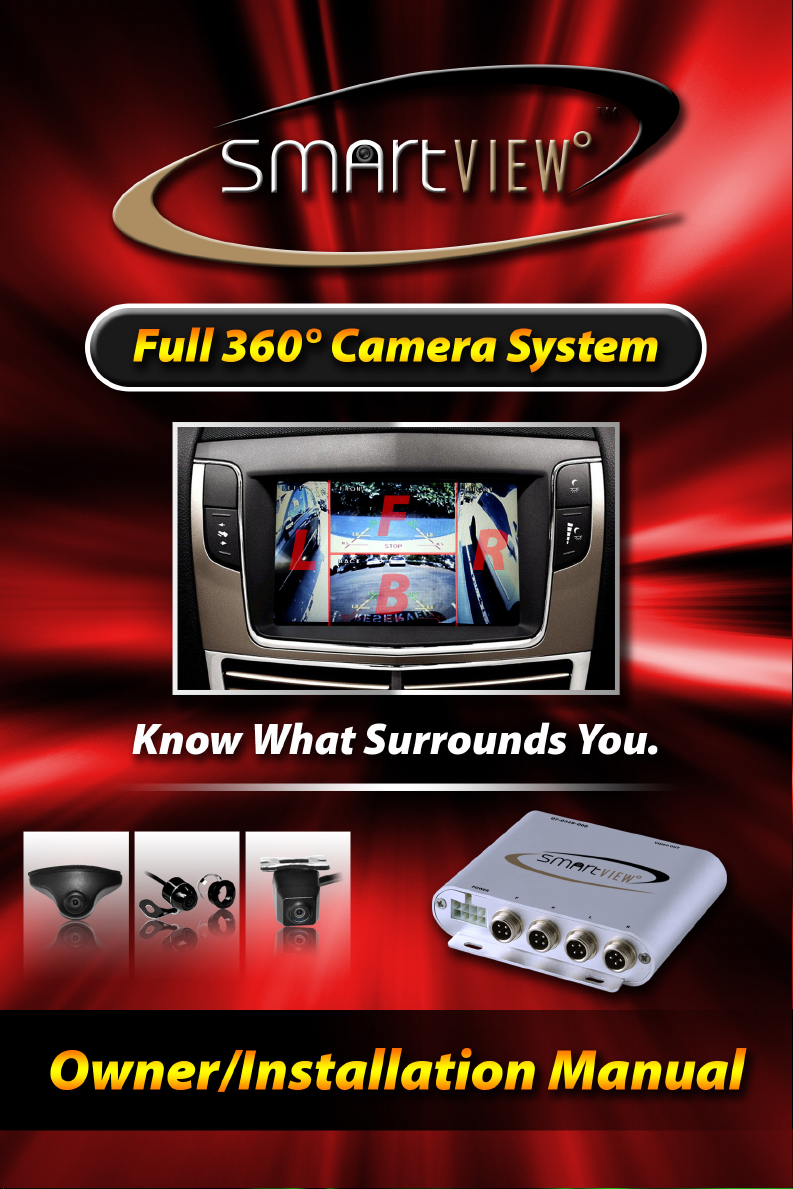
Left Blinker toggles the view of
the BACK and LEFT side cameras.
Right Blinker toggles the view of
the BACK and RIGHT side cameras.
Getting Started | 2 www.vizualogic.com
Page 4
Getting Started (cont.)
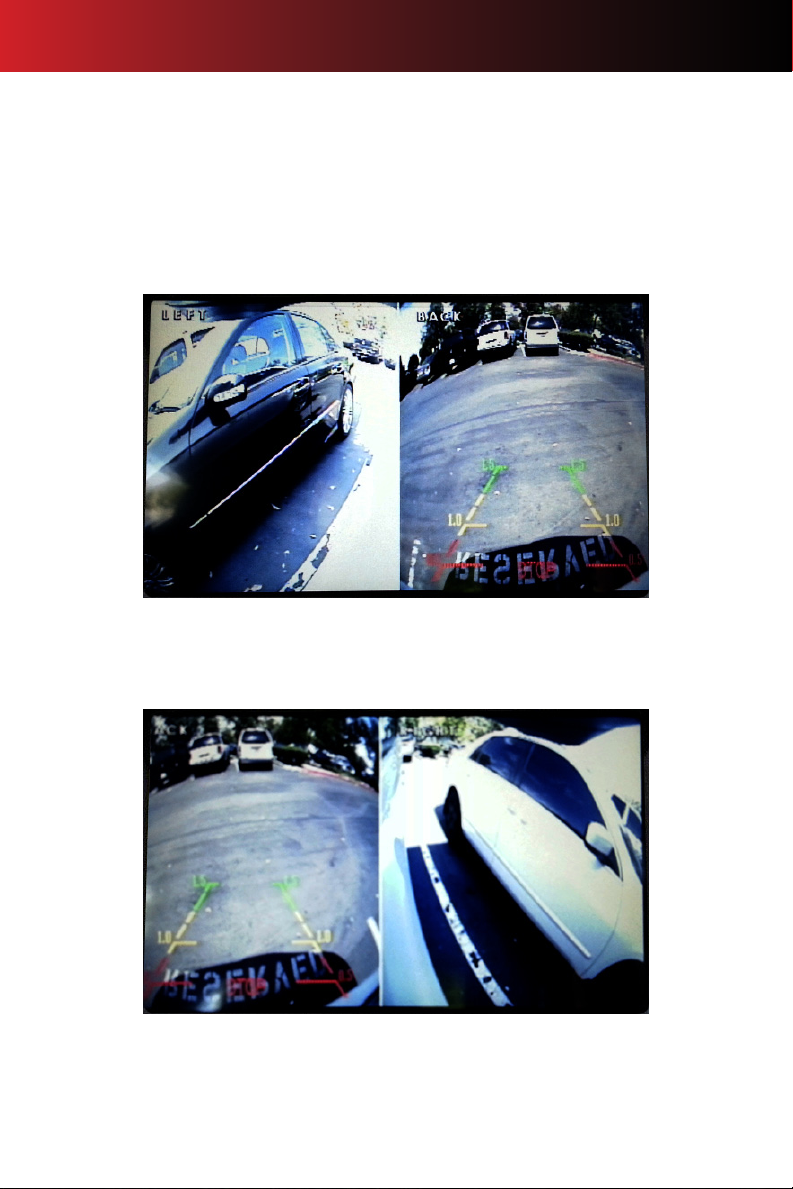
Hazards toggle the view of ALL
the cameras.
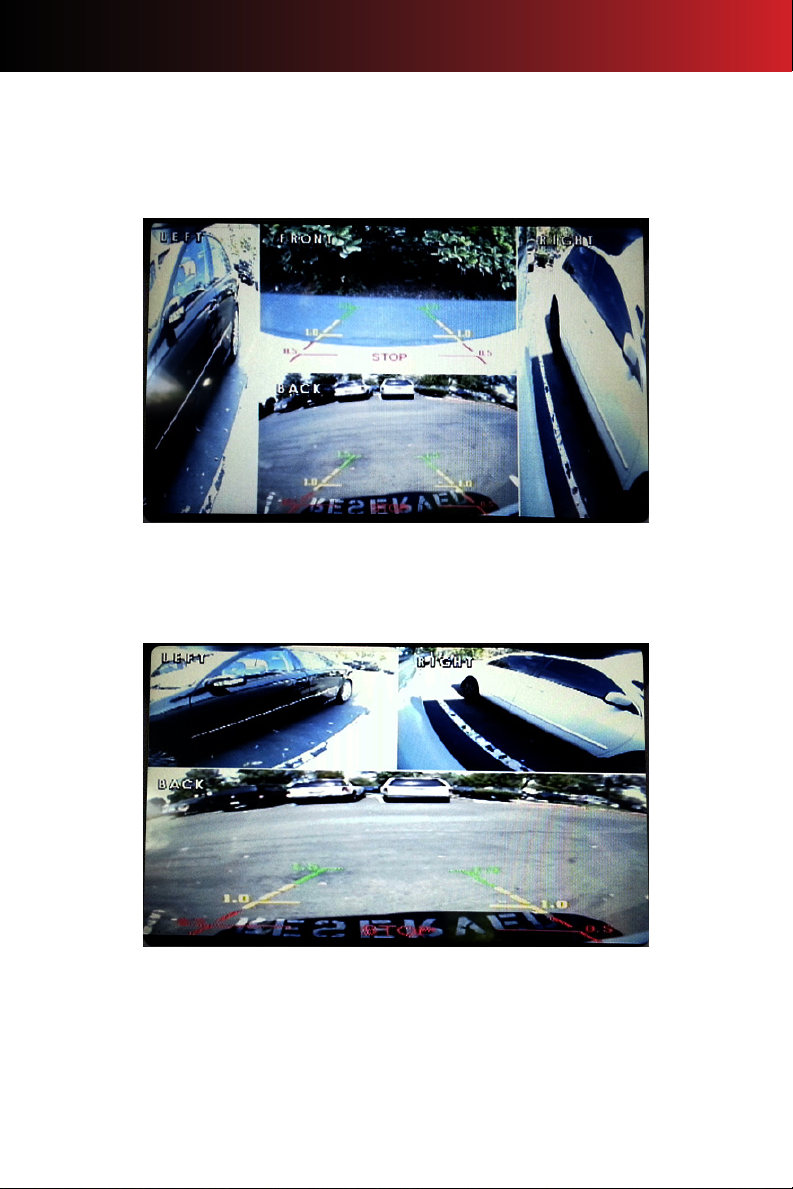
Putting the vehicle in Reverse
toggles the view of the BACK,
LEFT and RIGHT side cameras.
3 | Getting Started www.vizualogic.com
Page 5

Installing SmartView™
SmartView™ Overview
The SmartView™ Camera System Includes:
1. 2 Side Cameras for Left & Right of Vehicle
2. 1 Front Camera
3. 1 Back Camera
4. Control Box
5. Wire Harness
6. 4 Screws for Mounting Cameras
7. Plastic & Metal Open-end Caps for Flush-mounting Rear Camera
8. Hole Saw for Flush-mounting Rear Camera
9. RCA Video Cable
10. Remote Control
SmartView™ Overview | 4 www.vizualogic.com
Page 6

Wire Harness Connections
The SmartView™ wire harness has 7 wires which connect to the
vehicle’s existing wire system. The wires have corresponding tags on
them to know which wires to connect them to.
• RED - +12ACC (Accessory Power)
• BLACK - Ground
• WHITE - Left Control (Signal)
• BLUE - Right Control (Signal)
• GREEN - N/A
• YELLOW - Reverse Control
• ORANGE - Reverse Transfer Wire (For Aftermarket Double Din Stereo)
Installation
STEP 1 - Make sure front windows are down. Remove side mirrors and
interior side mirror cover. Install the side cameras through them. Cameras
should be mounted underneath the side mirror, close to where the side
mirror housing touches the side of the vehicle. Be sure to leave a little slack
from the cameras’ wire’s to adjust the viewpoint once connected to the
monitor. Remove door panels and any other parts in order to get to the
vehicle’s grommets to run the wires through into the inside of the vehicle.
STEP 2 - Next, open the trunk and remove the lining that is connected to
the trunk’s lid. Install rear camera. Use screws provided.
(Optional: You can have the rear camera ush-mounted by using the
hole saw screw and plastic with metal open-end caps.) Run rear camera
wire along existing wires of trunk and into the back seats. If vehicle is not
equipped with drop-drown back seats, you will have to remove back seats.
Remove door sill plates and run rear camera wire along side of vehicle.
5 | Wire Harness Connections/Installation www.vizualogic.com
Page 7

Installation (cont.)
STEP 3 - For the front camera installation, mount camera in a suitable area
in the front of the vehicle. Use screws provided. Run front camera wire
under hood along existing vehicle wires and into the rewall of the vehicle.
STEP 4 - Locate the vehicle’s wires for turn signals, reverse, hazards, etc.
Connect wire harness to the corresponding wires of vehicle. Remove
center dash console and run vehicle wires attached to wire harness in
the center dash area. Run all camera wires to the center dash area as
well. Connect wire harness to control box and the camera wires to the
corresponding inputs (F=Front, B=Back, L=Left, R=Right). Connect the
RCA Video cable as well to the control box and to the vehicle’s monitor.
Note: The SmartView™ remote control is used for vehicle’s that have a
separate monitor that is always on whenever the vehicle is on. Remote
control will not work with a double din stereo.
STEP 5 - After connecting all wires to the control box and the RCA Video
cable to the vehicle’s monitor, test the system and adjust the cameras
positions. Side mirror cameras should be in the viewpoint of the driver’s
blind spots.
Installation | 6 www.vizualogic.com
Page 8

Wire Diagram
7 | Wire Diagram www.vizualogic.com
Page 9

Other Products
HindSight™ Flip
The all-new Vizualogic®
Hindsight™ Flip is a revolutionary
new backup camera system.
Simply place your vehicle in
reverse and Hindsight’s monitor
automatically ips open and
shows any obstacles behind
your vehicle.
Reversing is easy using the
back-up assist lines to guide
you, and the monitor ips closed as soon as you place the vehicle in drive.
The Hindsight™ Flip comes with a fully adjustable 4.3” motorized monitor,
a back-up camera, and all the necessary wiring.
Rear View Mirrors
Vizualogic®’s rear view mirrors
come with a number of features.
Everything from GPS to a DVR
camera, our selection of mirrors
has got your back covered. For
more information, check out our
website.
Other Products | 8 www.vizualogic.com
Page 10

SmartLogic® Headrest System
The SmartLogic® system
features a 1 GHz processor,
4GB of storage, (upgradeable
with a MicroSD card to 32GB)
front facing camera, built in WiFi capability, a 7” screen, and
DVD playing capability. The
Operating System is Android 4.1
Jelly Bean, allowing passengers
to enjoy games, music, and
movies, along with email, web browsing, video chat, and streaming video
when paired with a Wi-Fi hotspot. Over 700,000 apps are available from
the pre-loaded Google Play Store.
The system is fully upgradeable for the next generation of tablets too!
9 | Other Products VIZUALOGIC
Page 11

Notes
Notes | 10 VIZUALOGIC
Page 12

For more info, visit our website at www.vizualogic.com
 Loading...