

Page 1
RF receiver controls peripheral AV and automation devices, powered by 230V supply i.e.: projection screen, projector
lift, shades and other automation accessories etc. RF receiver can be controlled by remote control (option) and/or
Trigger 230V(option) and/or Wall switch(option)
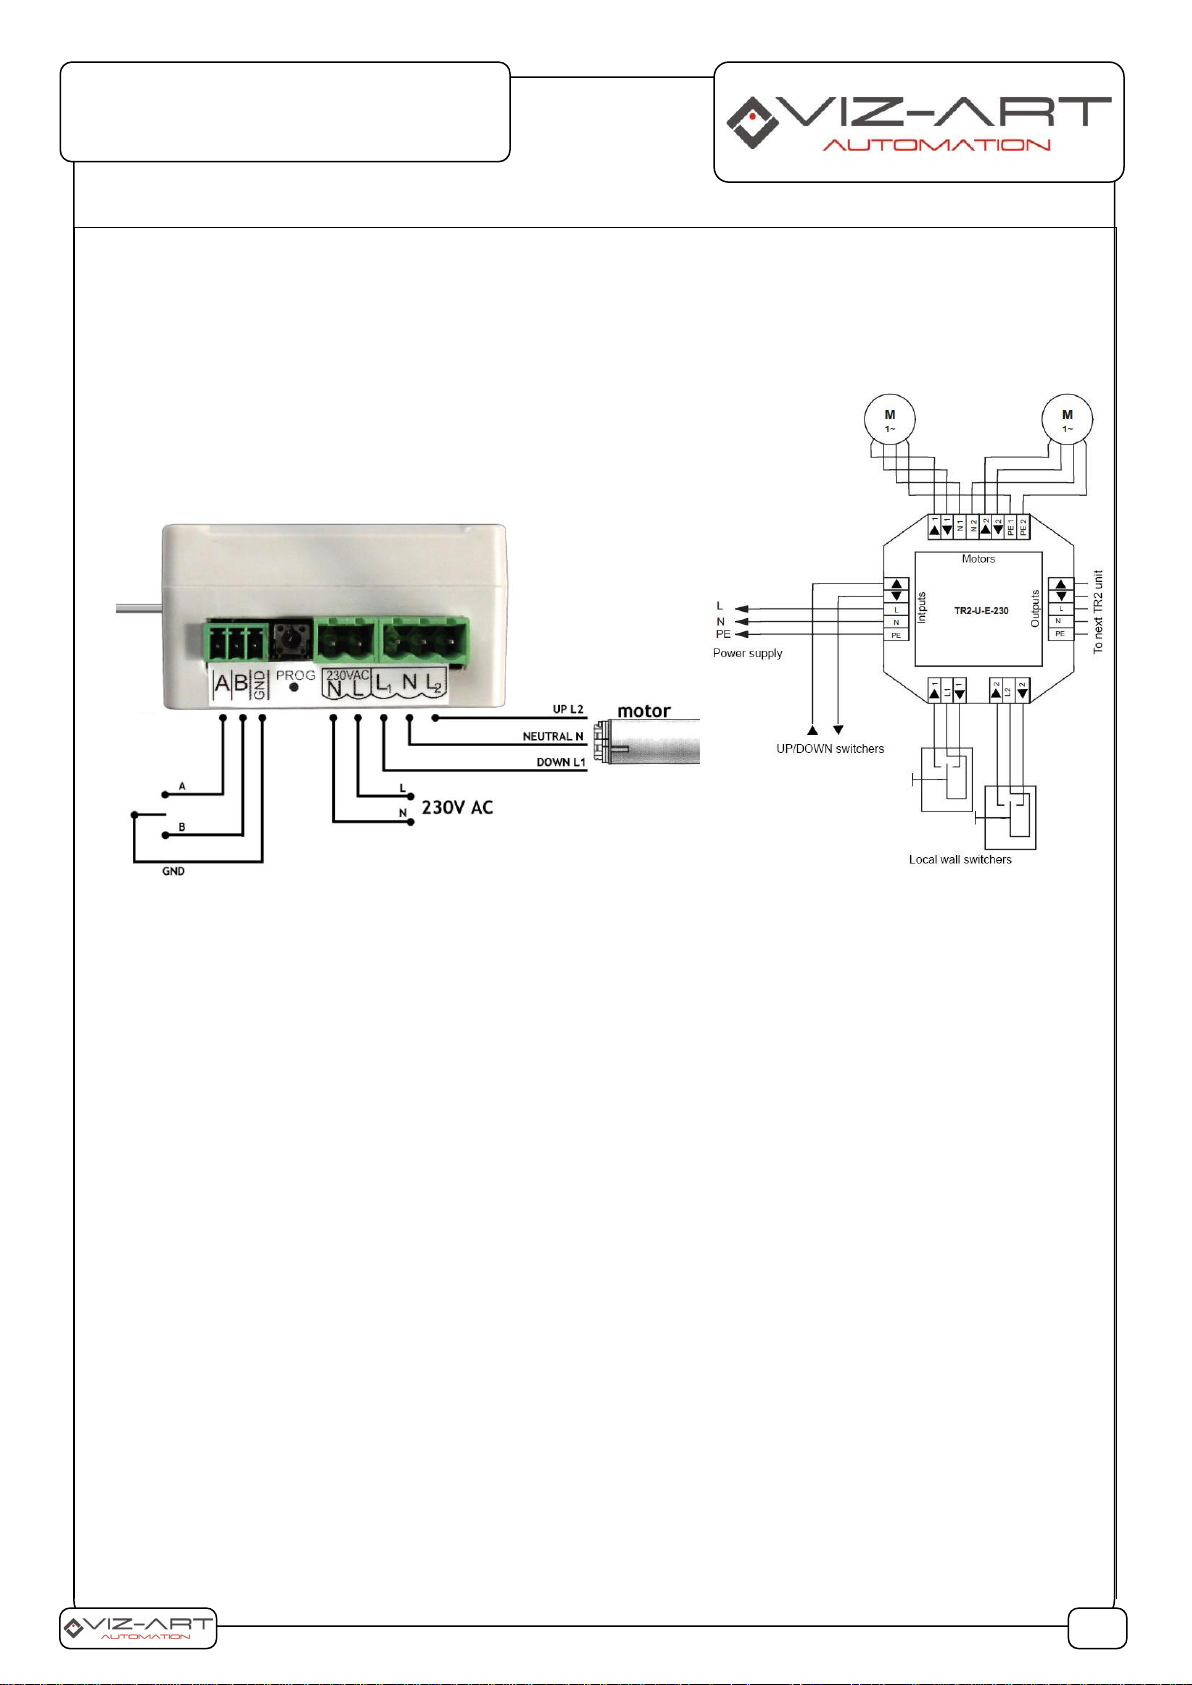
Connecting RF receiver
Connect 230V power supply to L-N 230VAC socket of RF receiver. Use L1-N-L2 socket to connect device to be
controlled by RF receiver. Connection scheme below:
RF receiver is programmable. Control commands can be executed immediately or with programmed delay.
RF receiver – pairing with VIZMOTE 1&5 remote control
Connect 230V power supply to L-N 230VAC socket of RF receiver, according to connection scheme above. LED Diode
will flash several times and turn off.
1) Press shortly PROG button, LED diode will flash several Times, confirming start of „programming mode”. Then LED
diode will light steady light waiting for pairing signal.
2) On a VIZMOTE 1&5 remote control Press shortly „UP” button 3 times. LED Diode will flash several times,
confirming pairing and turn off.
Pairing another remote or trigger
RF receiver can store maximum 8 RF remotes/triggers 230V AC. To pair next devices follow 1-2 steps as described
above.
Pairing with Delay
RF receiver can control device with programmed delay. It can be useful i.e. for shades to be rolled down with delay at
the end of sequence „start of projection” etc.
Time Delay can be used to set the Sequence Scenario. Sequence Scenario uses several control commands i.e. „start of
projection” to lower down projector lift at first, then roll down projection screen and shades at the end of scenario. It
can be run in reverse mode when turned off („end of projection”).
Programming Delay in „A” Direction (L1)
Press and hold PROG button in 3 flashes of LED Diode, then release button.
After that, LED Diode start to count delay period by the flashes(1 flash = 1 second). After expected delay, Press shortly
RF Receiver (RF)
Device controller
1/2
1. Principle of operation:
Page 2

PROG button. LED Diode will flash several times, confirming stored setup and turn off.
Programming Delay in „B” Direction (L2)
Press and hold PROG button in 4 flashes of LED Diode, then release button.
After that, LED Diode start to count delay period by the flashes(1 flash = 1 second). After expected delay, Press shortly
PROG button. LED Diode will flash several times, confirming stored setup and turn off.
RF receiver Memory Reset
- Reset of programmed DELAY in „A” and „B” direction from device memory: Press and hold PROG button in 5
flashes of LED Diode, then release button.
- Reset of paired remotes/triggers from device memory: Press and hold PROG button in 10 flashes of LED Diode, then
release button.
Sample connection of RF receiver in SMART Home/meeting control:
Producer: VIZ-ART Automation
tel.+48 22/6138899 www.viz-art.pl
RF receiver controlled via VIZMOTE 1&5
RF receiver controlled via Trigger 230V AC
2/2
 Loading...