

Viz-Art Automation PROTECT Series, PROTECT 54-80, PROTECT 72-116, PROTECT Slim Installation Manual
Page 1
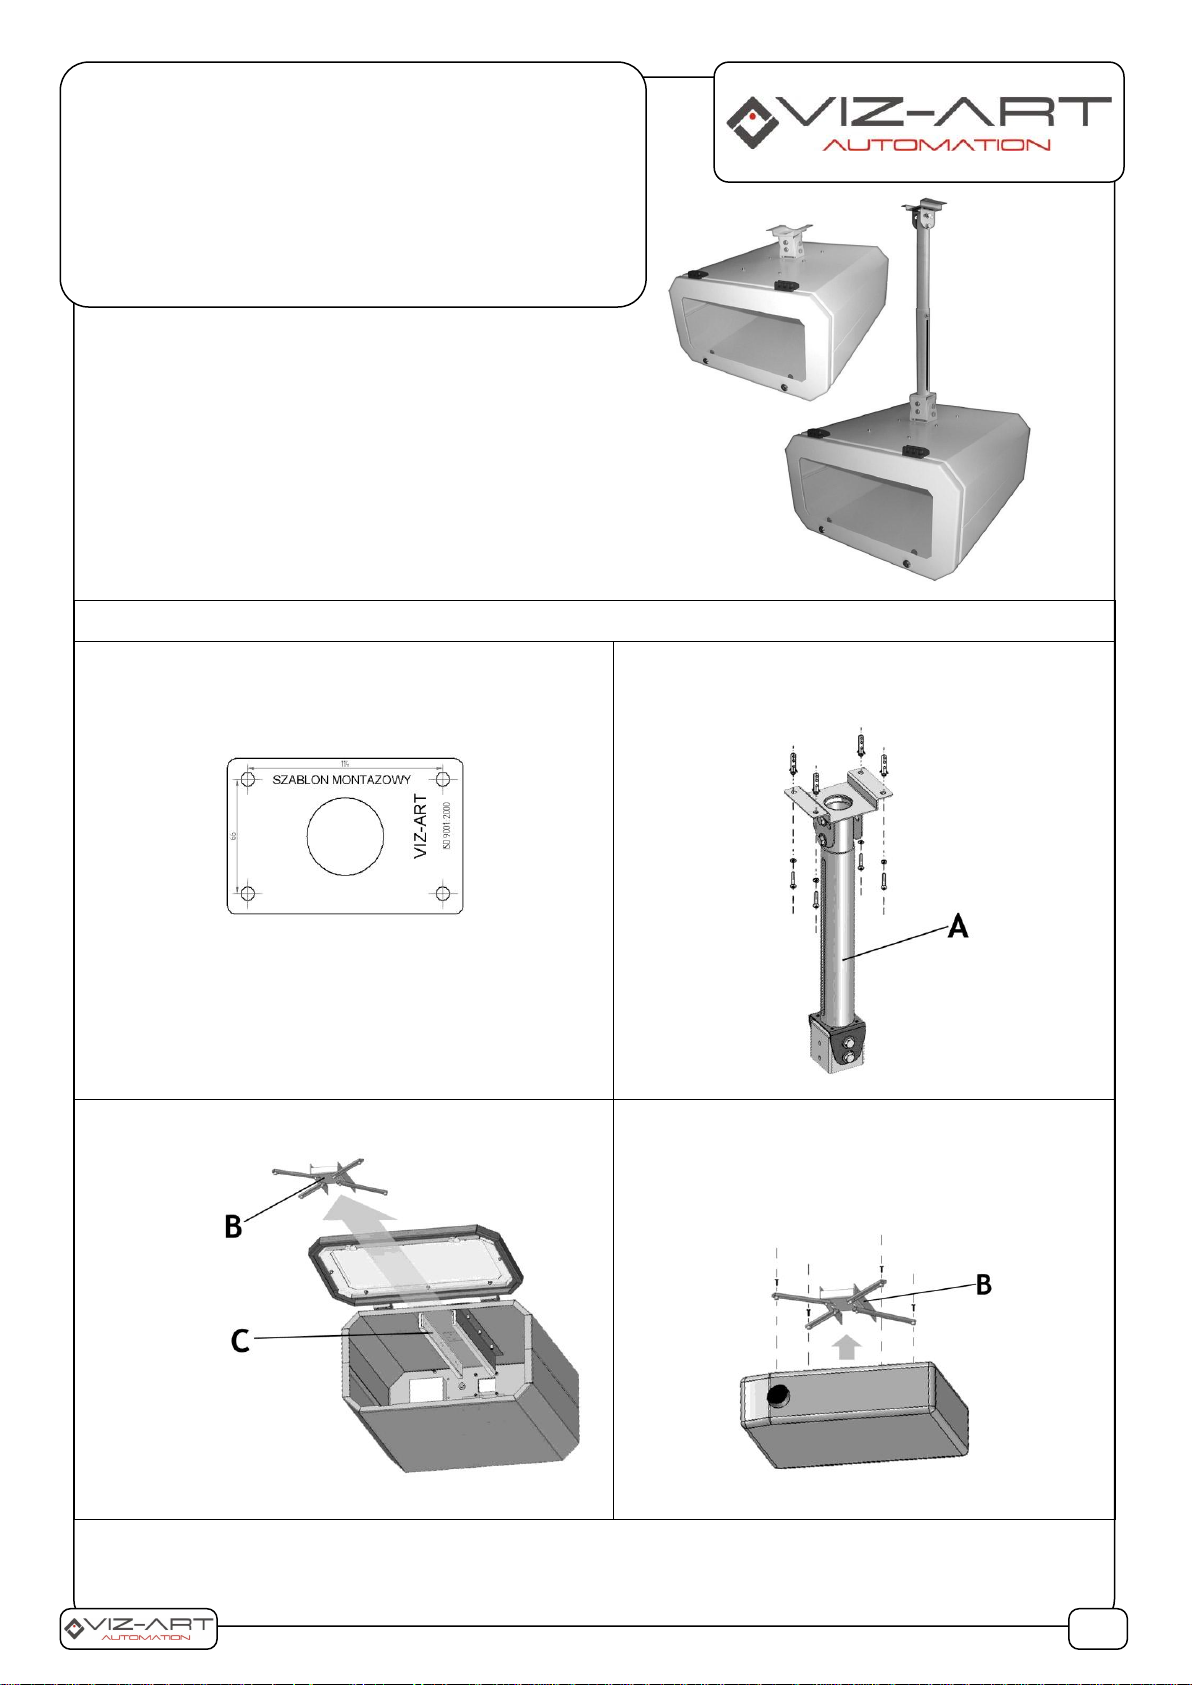
1. Installation:
A. Prepare an installation place and mark mounting
points using installation template as below:
B. Install element A to the ceiling. Use the selected
pins and screws from the assembly kit.
C. Remove element B from guide C from projector
enclosure.
D. Install projector on projector mount B.
Warning! To connect the mount with the projector, select
the appropriate screws from the mounting kit according to
the recommendations of the projector manufacturer.
PROTECT
Projector Enclosure:
• PROTECT Slim
• PROTECT 54-80
• PROTECT 72-116
1/2
LIST OF ITEMS::
Projector Enclosure
adjustable arm with mount
mounting set
installation manual
installation template
Page 2
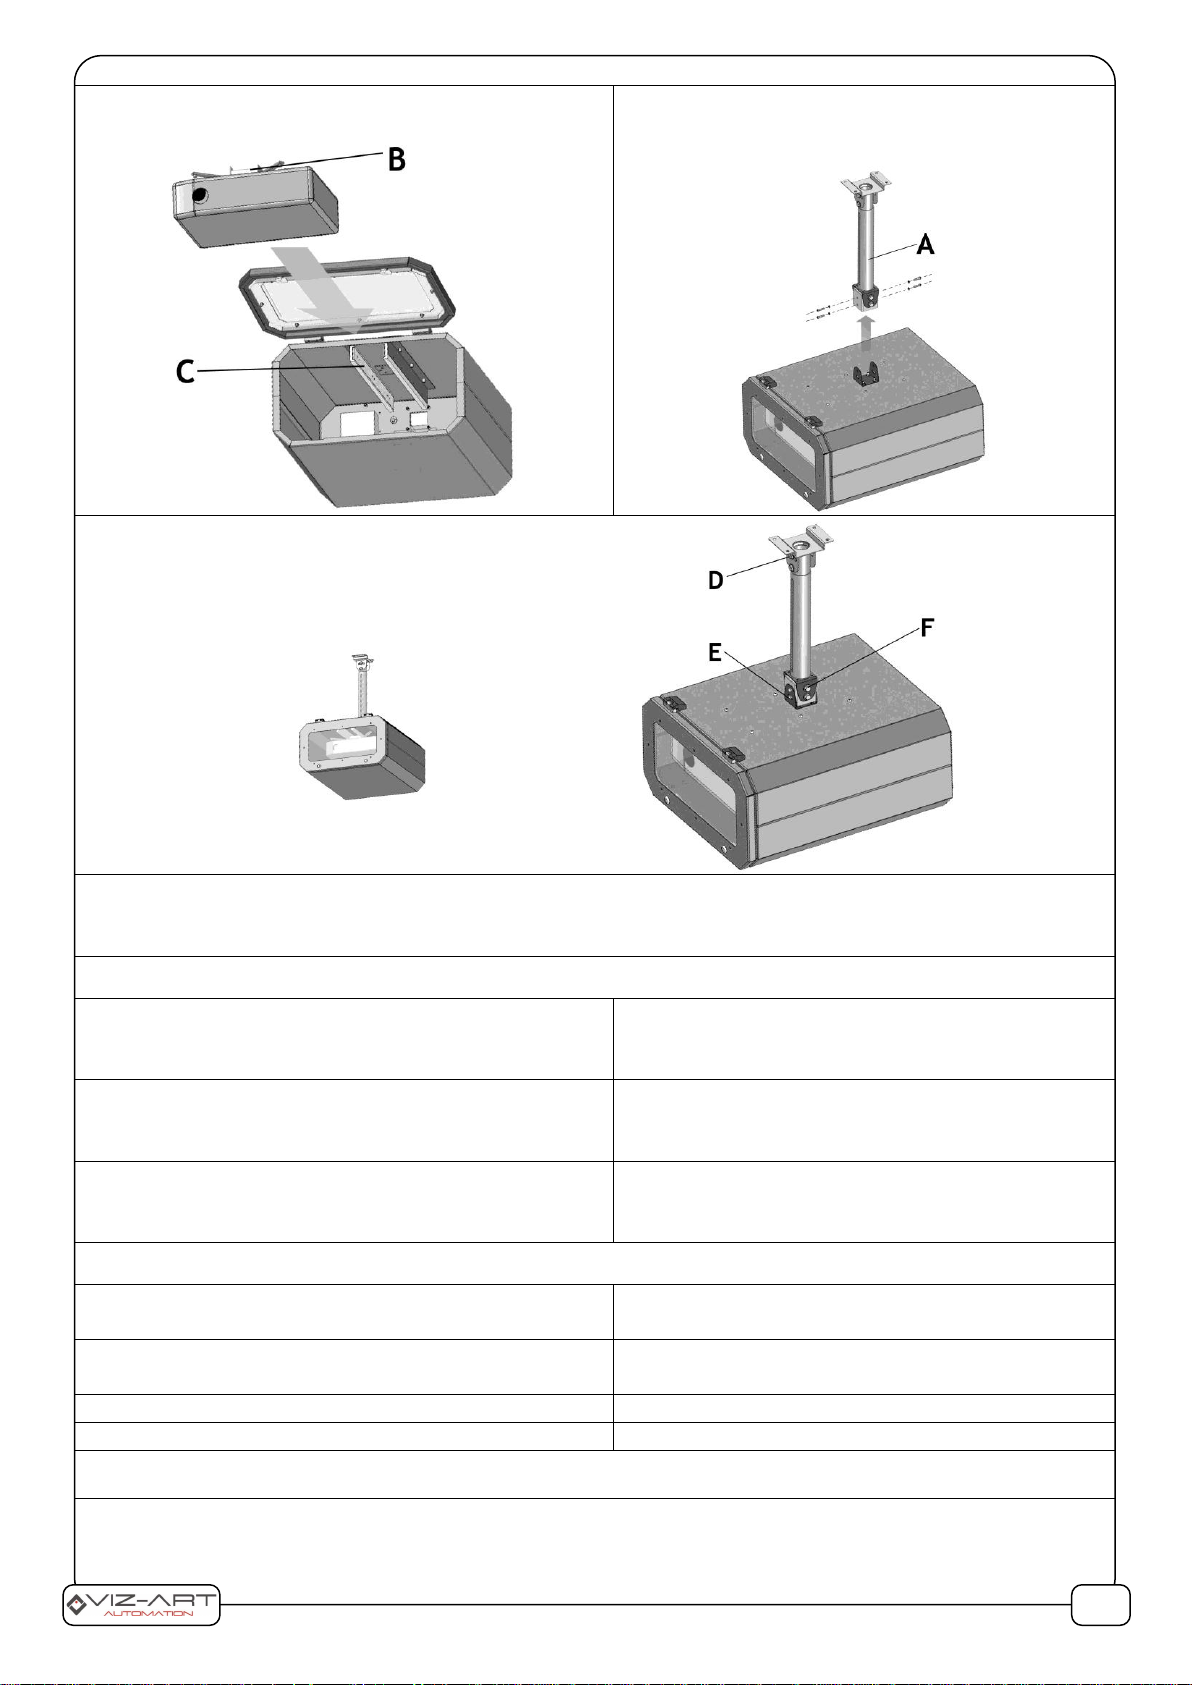
E. Install projector (mounted on element B) on guide
C in a cover.
F. Close enclosure. Then install enclosure with
projector inside to a element A (already installed
to the ceiling).
G. Adjusting projector image. If projected image needs to
be adjusted, loosen the appropriate screw E, F or G
and tilt the cover (with projector inside) into a proper
position. After obtaining the correct position of the
projector, tighten screws.
H. Power supply connections: Projector power supply cable connect to a trigger and enclosure power supply
cable to a power supply. TRIGGER and cooling fan with filter( filter should be checked etery 6 mitns and
Exchange to a new one if needed), is already installed on a back of enclosure.
2. Technical Specification:
Capacity:
PROTECT Slim - 17 kg
PROTECT 54-80 - 17 kg
PROTECT 72-116 - 17 kg
Adjustment:
Up-Down
Left-Right
Tilt
Weight of unit:
PROTECT Slim 25 kg
PROTECT 54-80 26,7 kg
PROTECT 72-116 27,5 kg
3. Mounting kit set :
bolts:
M4x20 – 4 pcs.; M5x20 – 4 pcs.;
M6x20 – 4 pcs.; M8x20 – 4 pcs.;
washers:
ø4x9 – 4 pcs.; ø5x10 – 4 pcs.;
ø6x12 – 4 pcs.; ø8x16 – 4 pcs.;
dowels :
ø8x40 – 4 pcs.
screws:
ø5x40 z flat head – 4 pcs.
manufactured: VIZ-ART Automation
tel.+48 22/6138899 www.viz-art.pl
2/2
 Loading...