

Page 1
1. Installation:
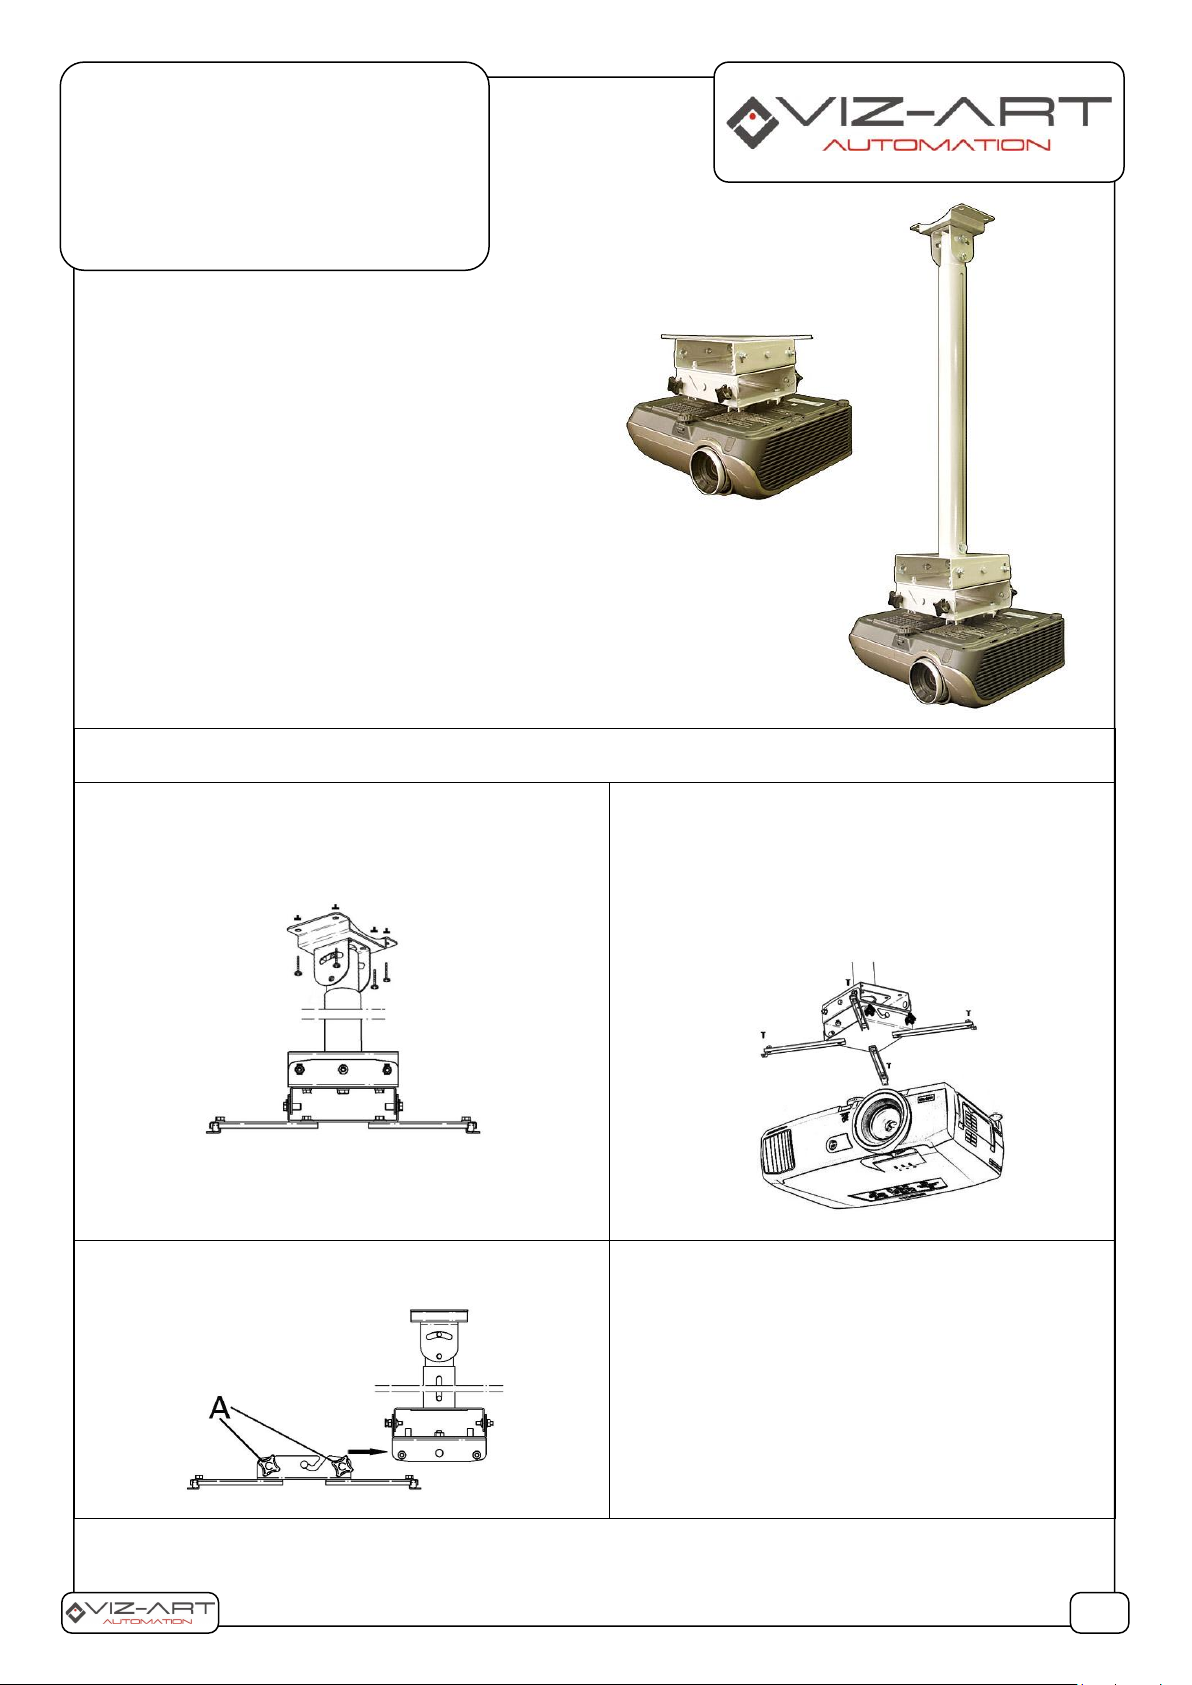
A. Prepare an installation place and mark mounting
points using installation template as below:
B. Install projector on universal projector
adapter. Use mounting screws from mounting
set.
Warning! To connect the mount with the projector, select
the appropriate screws from the mounting kit according to
the recommendations of the projector manufacturer.
C. Joint adapter with installed projector with projector mount
as described below using middle hanger. Block projector on
a mount with screws in holes A.
D. Check and adjust proper projected image. If needed
adjust projector image on a ceiling mount.
MIDI Mount
Universal projector mount:
• Direct
• Adjusted 50 - 76
• Adjusted 68 - 112
1/2
LIST OF ITEMS:
Projector mount:
Universal projector adapter
Adjusted arm (mount with arm)
Mounting set
Installation manual
Mounting template
Page 2
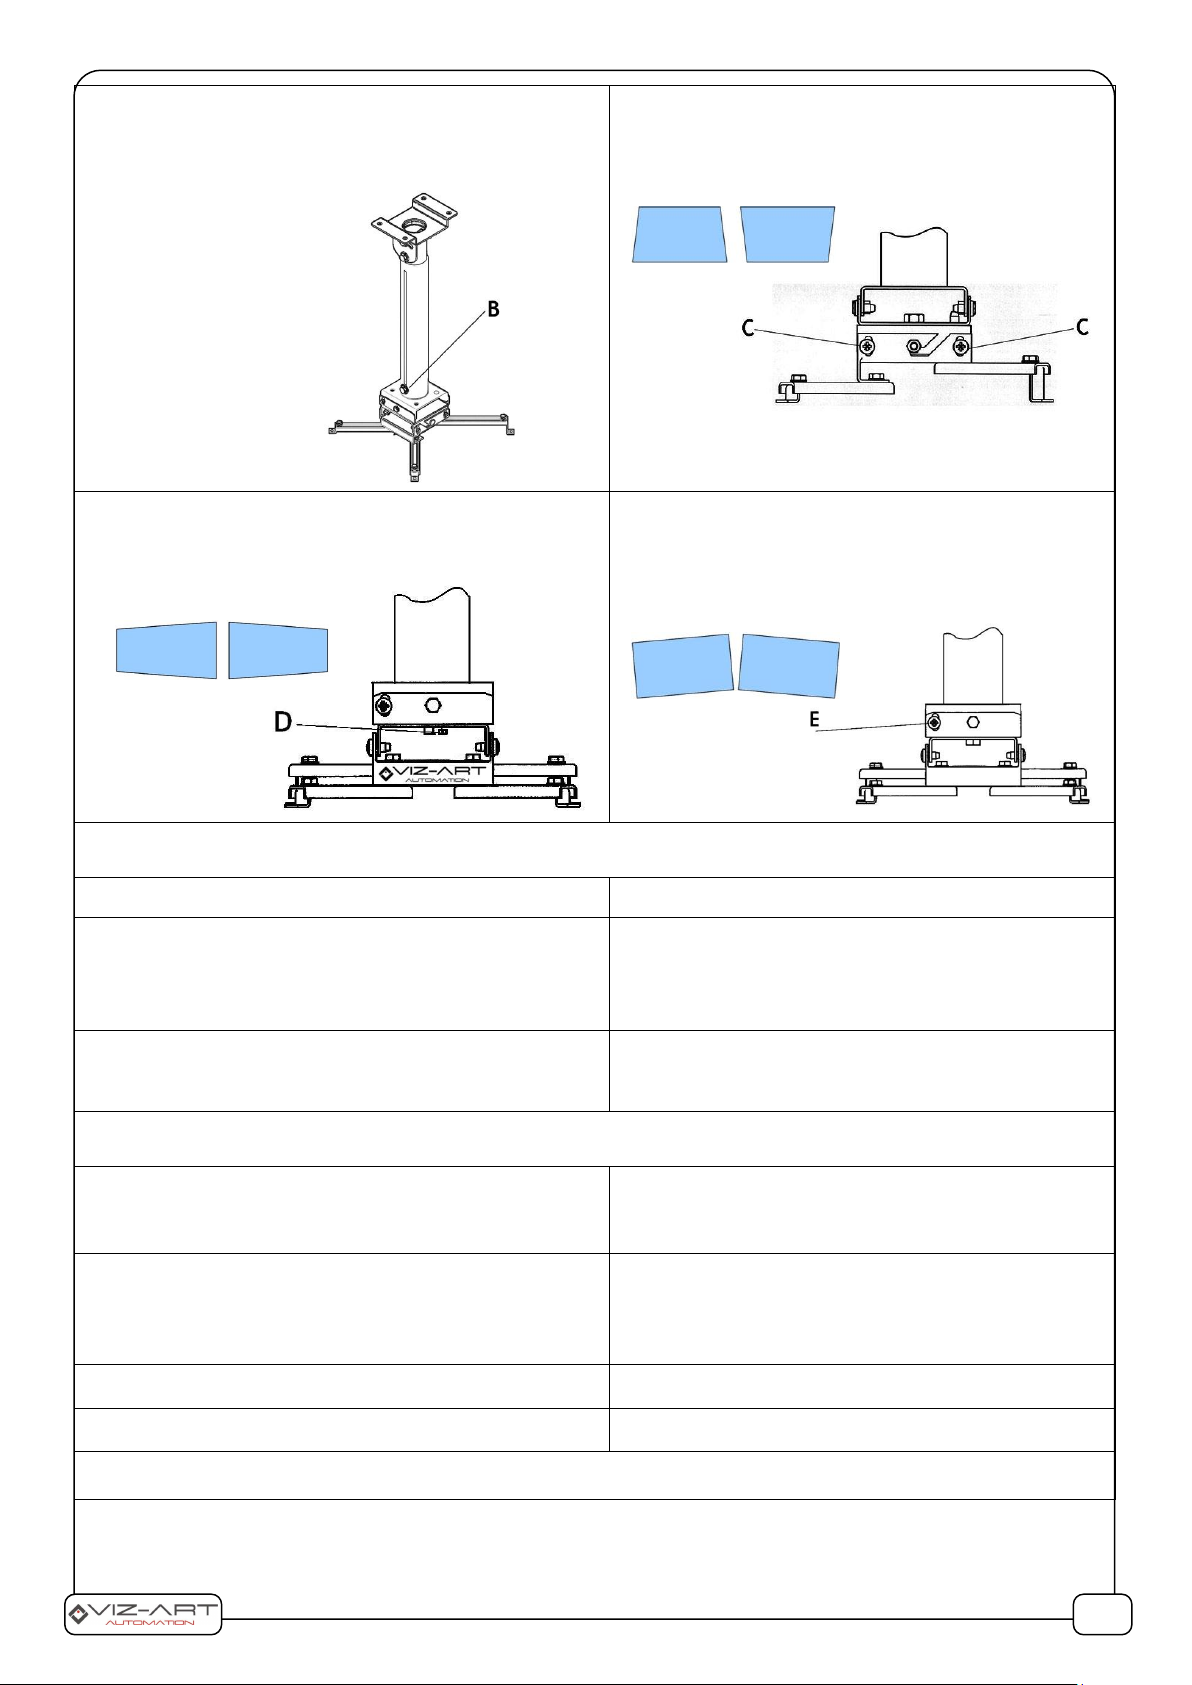
A. Adjusting height of installed projector: Loosen screw B and
adjust expected height of projector. tighten screw- B. In
Direct Mount height is non adjustable
B. Pitch axis adjustment.
If projected image is to low or high on the screen/vertical
distortion/, Loosen screws C and tilt projector to expected
vertical position. Tighten screws C, when finished
C. Yaw axis adjustment.
If projected image is to right or left on the
screen/horizontal distortion/,– rotate projector on a screw
D.
D. Roll axis adjustment.
Loosen screws E. then adjust the projector mount’s roll
adjustment such that the top and bottom edges of the
image are approximately horizontal and aligned with
the top and bottom of the screen. Tighten screws E,
when finished.
3. Technical Specification:
Product model:
MIDI Mount
Adjustment:
Up-Down 15 degree
Left-Right 10 degree
Horizontal 18 degree
Tilt 56 degree (with height)
Weight:
MIDI Mount direct 2,8 kg
MIDI Mount 50-76 adj. 4,7 kg
MIDI Mount 68-112 adj. 5,6 kg
4. Mounting kit set :
bolts:
M4x10 – 4 pcs.;
M5x12 – 4 pcs.;
M6x12 – 4 pcs.;
washers:
ø4x9 – 4 pcs.;
ø5x9 – 4 pcs.;
ø6x12 – 4 pcs.;
ø6x18 – 4 pcs.;
dowels :
ø10x50 – 4 pcs.
screws:
ø5x50 flat head – 4 pcs.
manufactured: VIZ-ART Automation
tel.+48 22/6138899 www.viz-art.pl
2/2
 Loading...