

Page 1
1. INSTALATION:
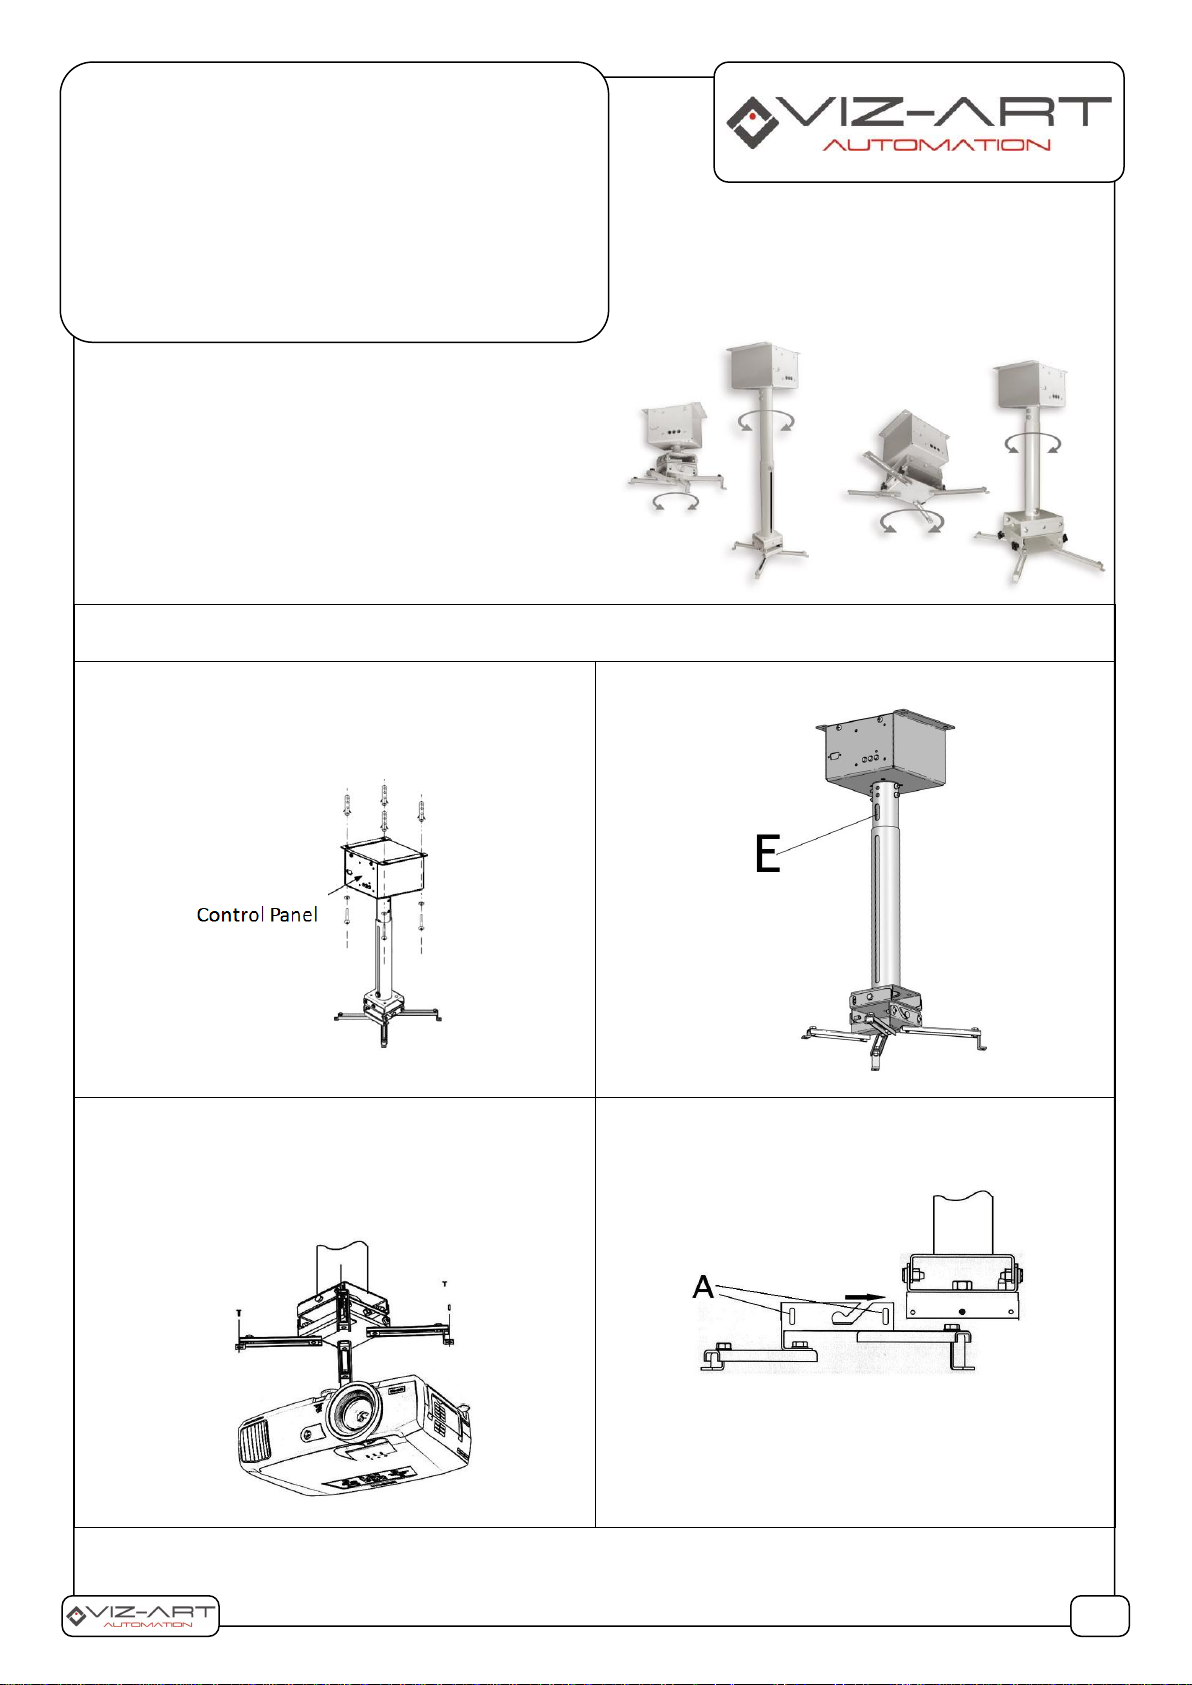
Choose a proper mounting area and using MOUNTING
TEMPLATE mark mounting holes for motion mount.
A. Mount connection panel should be faced to a main
projection screen/area .
B. Using hole E place and install projektor cables.
C. Install projector to adapter. Use mounting screws from
the set.
Attention! mounting screws for projector and adapter from
the set, should be property selected according to projector
producer recommendations.
D. Installing projector with adapter on the motion mount.
Install adapter with projector on the mount. In A holes
screw the screws to hold projector in dedicated position.
LEADER Motion Mount
MIDI Motion Mount
Universal motion mount for multimedia projectors:
• Direct
• Adjusted height. 56 – 82 (LEADER); 58 – 84 (MIDI)
• Wys. 74 – 118 (LEADER); 76 – 120 (MIDI)
1/3
LIST OF COMPONENTS:
PROJECTOR MOUNT:
o UNIVERSAL PROJECTOR ADAPTER
o HEIGHT ADJUSTED ARM
MOUNTING SET
MANUAL INSTRUCTION
MOUNTING TEMPLATE
Page 2
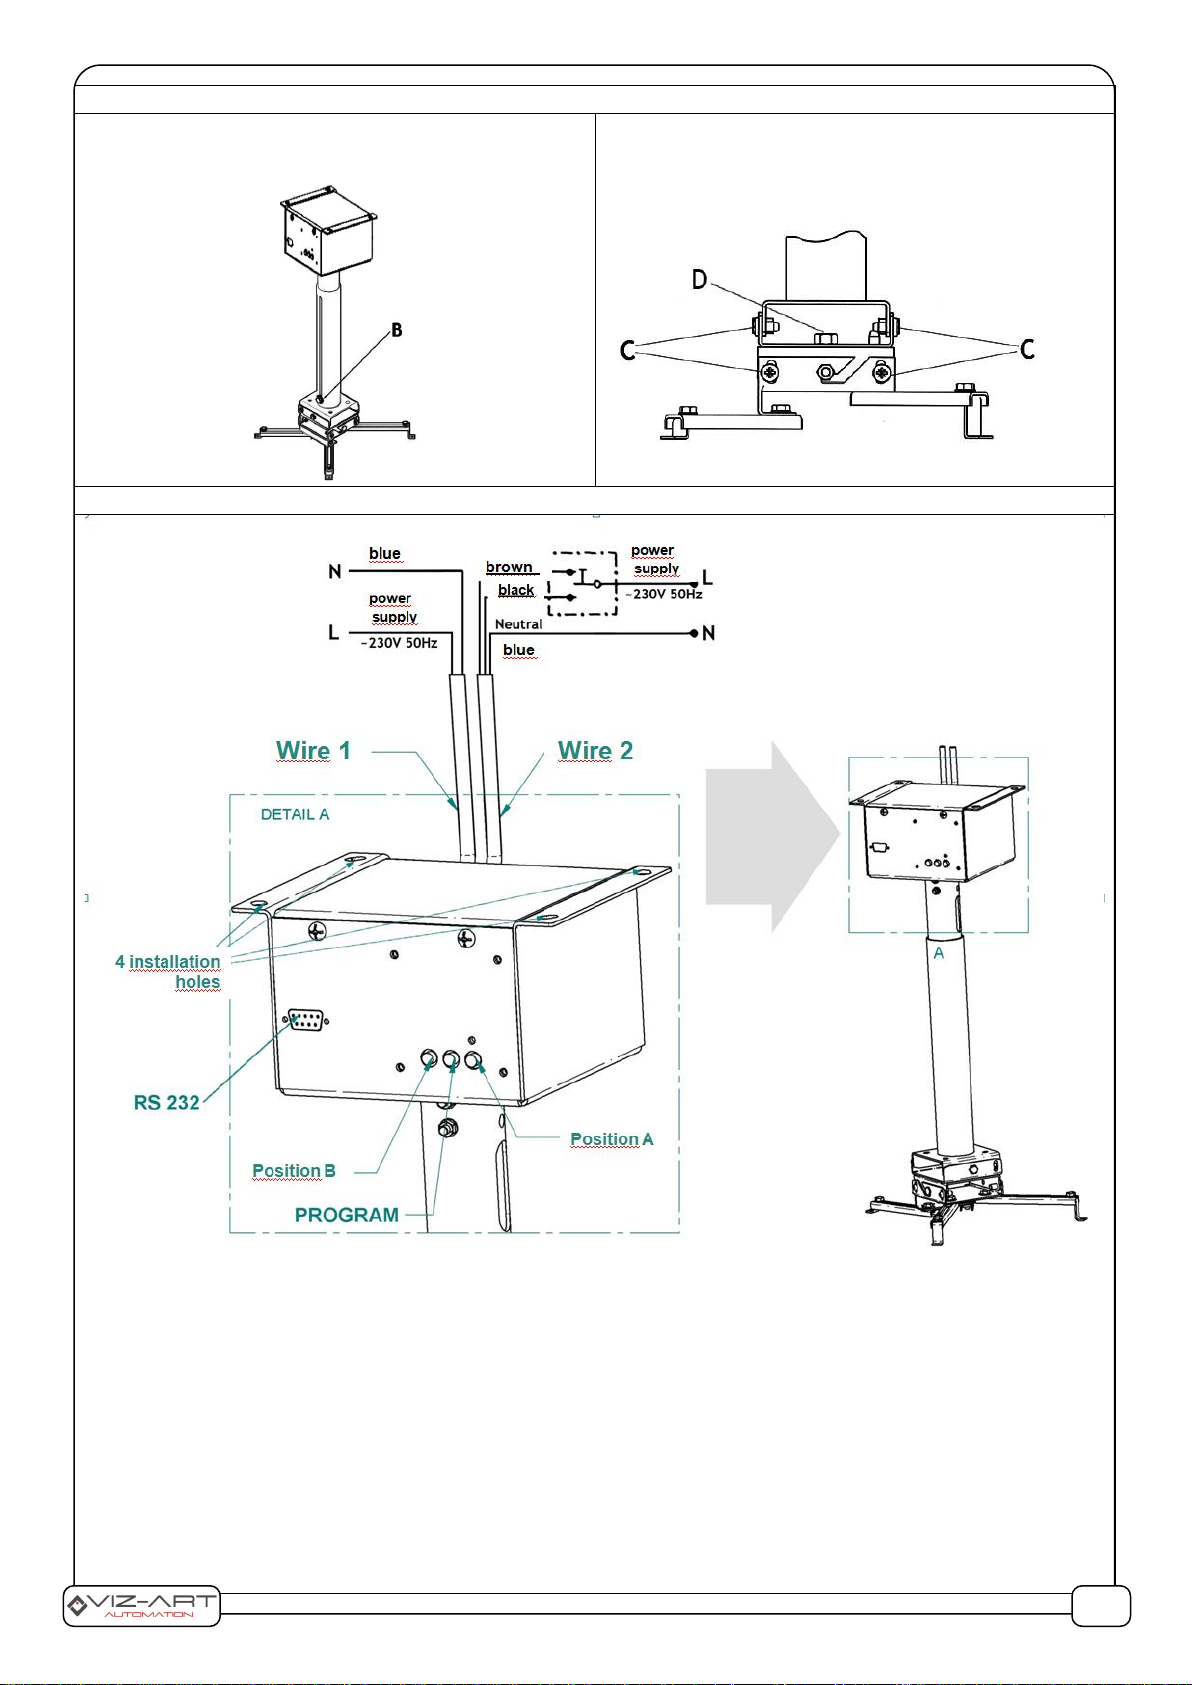
2. ADJUSTING PROJECTOR HEIGHT AND POSITION:
A. Adjusting projector height. Using screw B you can adjust
expected height of the projector arm. Lock screw B in
proper height. In direct version of mount height is fixed .
B. Adjusting projector position.
If projector position on a mount needs adjustment:
loosen srews C (if needed screw D), tilt the projector to
expected tilt position,
Then tighten all loosen screws .
3. CONNECTION & PROGRAMING
A. Using 2-wires cable(„Wire 1”) connect 230VAC power supply to Motion mount.
B. „Wire 2” controls direct of rotation, using wall switch (in the set) or: Trigger 230V, Trigger 5-30V, IR receiver, RF receiver. Connect
both cables according to scheme above.
C. After LEADER MOTION is connected to power supply 230VAC, Motion mount will run to „0” Base position.
D. Press and hold for 3 sec. PROGRAM button – LED diode will light constant light, waiting for adjusting „position A”.
E. By Press and hold, use switch to rotate motion mount to reach first position of mount and confirm by pressing „position A”
button (LED diode will blink several times). After that, motion mount automatically will run to „0” Base position.
NOTE: While programming, motion mount rotates only in one direction. If you miss your position you have to start programming
again.
F. Press and hold, use switch to rotate motion mount to reach second position of mount and confirm by pressing „position B”
button (LED diode will blink several times). After that, Motion mount automatically will run to „0” Base position.
G. To quit programming mode, Press and hold for 3 sec. PROGRAM button (LED diode will stop light). You left programming mode.
2/3
Page 3
RS232 codes for selecting positions ”A” and „B”:
Pozycja „A”- HEX: 00 FC FC ; Decimal: 000 046 252 252
Pozycja „B”- HEX: 00 E0 E0 ; Decimal: 002 046 224 224
4. Technical data:
Adjustment :
Up – Down - 15 degree
Left - Right - 15 degree
level 18 degree
Own weight:
LEADER Motion M. direct 3,5 kg
LEADER Motion M. 56 -82 adj. 4,5 kg
LEADER Motion M. 74-118 adj. 5,4 kg
MIDI Motion M. direct 5,5 kg
MIDI Motion M. 58 -84 adj. 6,5 kg
MIDI Motion M. 76-120 adj. 7,5 kg
5. Projector Mounting Set (LEADER):
screws:
M4x12 – 4 szt.;
M5x12 – 4 szt.;
M6x12 – 4 szt.;
Pads:
ø4x9 – 4 szt.;
ø5x10 – 4 szt.;
ø6x12 – 4 szt.;
Dowels:
ø8x50 – 4 szt.
Producer: VIZ-ART Automation
tel.+48 22/6138899 www.viz-art.eu
3/3
 Loading...