

Viza V2 Owner's Manual

OWNER’S MANUAL

Congratulations on your purchase of a Viza
motorized scooter!
RECORD OF IMPORTANT INFORMATION
Serial #
(stamped on front of scooter frame)
Engine #
(decal on bottom of engine)
Dealer Name & Phone #
Date of Purchase
Proper maintenance and safety precautions will
ensure years of safe, trouble-free operation.
GENERAL SAFETY PRECAUTIONS
Viza scooters can be hazardous to operate. If
you fail to take proper precautions, a collision or fall
may quickly occur. If you have any questions as to
the operating conditions of your Viza scooter, turn
off the engine and walk your scooter. Viza scooters
should not be ridden by persons without excellent
vision, balance, coordination, reflex muscle tone,
strength, and good decision making capability.
• Read this manual and all safety labels carefully and
follow correct operating procedures.
• Minors shall never operate without adult
supervision.

• Never operate your Viza scooter on surfaces
which are slick or unstable due to dampness, loose
gravel, etc.
• Never operate your Viza scooter on any public
street, road, or highway.
• Never operate your Viza scooter without wearing
proper safety equipment. To include: helmet, shoes,
protective clothing and pads.
• Never operate your Viza scooter under the
influence of alcohol or drugs.
• Always ride with both hands on the handles.
• Never operate at excessive speeds. Proper speed is
determined by terrain, visibility, operating
conditions, and experience.
• Never attempt wheelies, jumps, or other stunts.
• Always inspect your Viza scooter prior to each
use to make sure it is in safe operating condition.
Follow inspection and maintenance procedures and
schedules described in this manual.
• Never operate your Viza scooter on steep hills or
inclines.
• Do not turn at excessive speeds.
• Maintain proper tire pressure as described in this
manual.
• Fuel is highly flammable. Keep it safe away from
any source of fire, especially when refueling.
• Engine and muffler get hot while in use. Do not
touch.
• Keep all body parts and clothing away from belts or
chains.
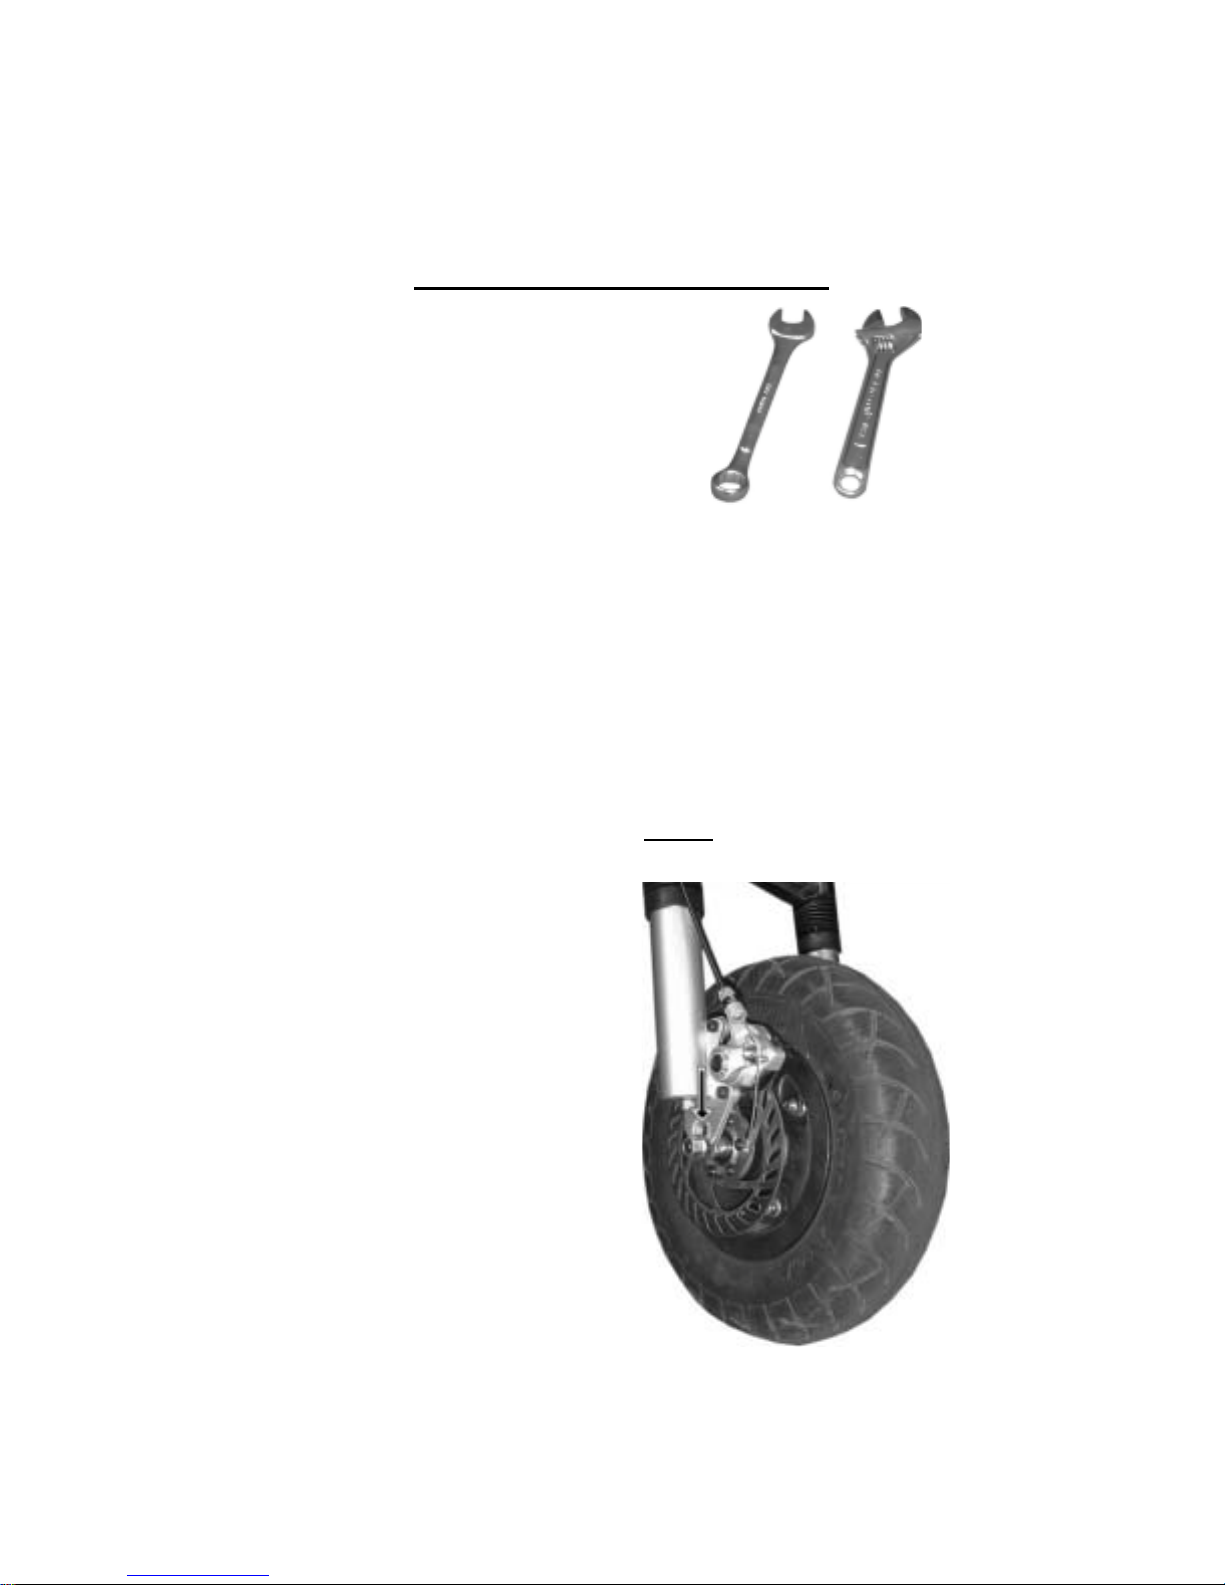
ASSEMBLY OF FRONT WHEEL
TOOLS REQUIRED
15mm open wrench, 15mm socket
wrench or an adjustable wrench.
1. Align front wheel assembly so that the disc brake rotor is on
the same side as the disc brake caliper mounted to the front
fork.
2. Slide front wheel assembly in place so that the brake rotor
slides up and in-between the two brake pads installed in the
disc brake caliper. (the slot in the middle)
3. The front axle protruding from both side of the front wheel
assembly should also line up with the slots on the bottom of
the front suspension fork.
4. Once the axle of the front wheel assembly is centered and
positioned as far up as possible on the bottom of the front
suspension fork, the axle bolts MUST be securely tightened.
A 15mm open ended wrench, 15mm scoket wrench or an adjustable wrench will suffice to
tighten the two front axle
nuts.
5. After securing the front wheel
assembly, check the adjustment of the brake assembly.
The front wheel should be
able to spin freely with little
drag from the disc brake.
POSITION WHEEL ASSEMBLY
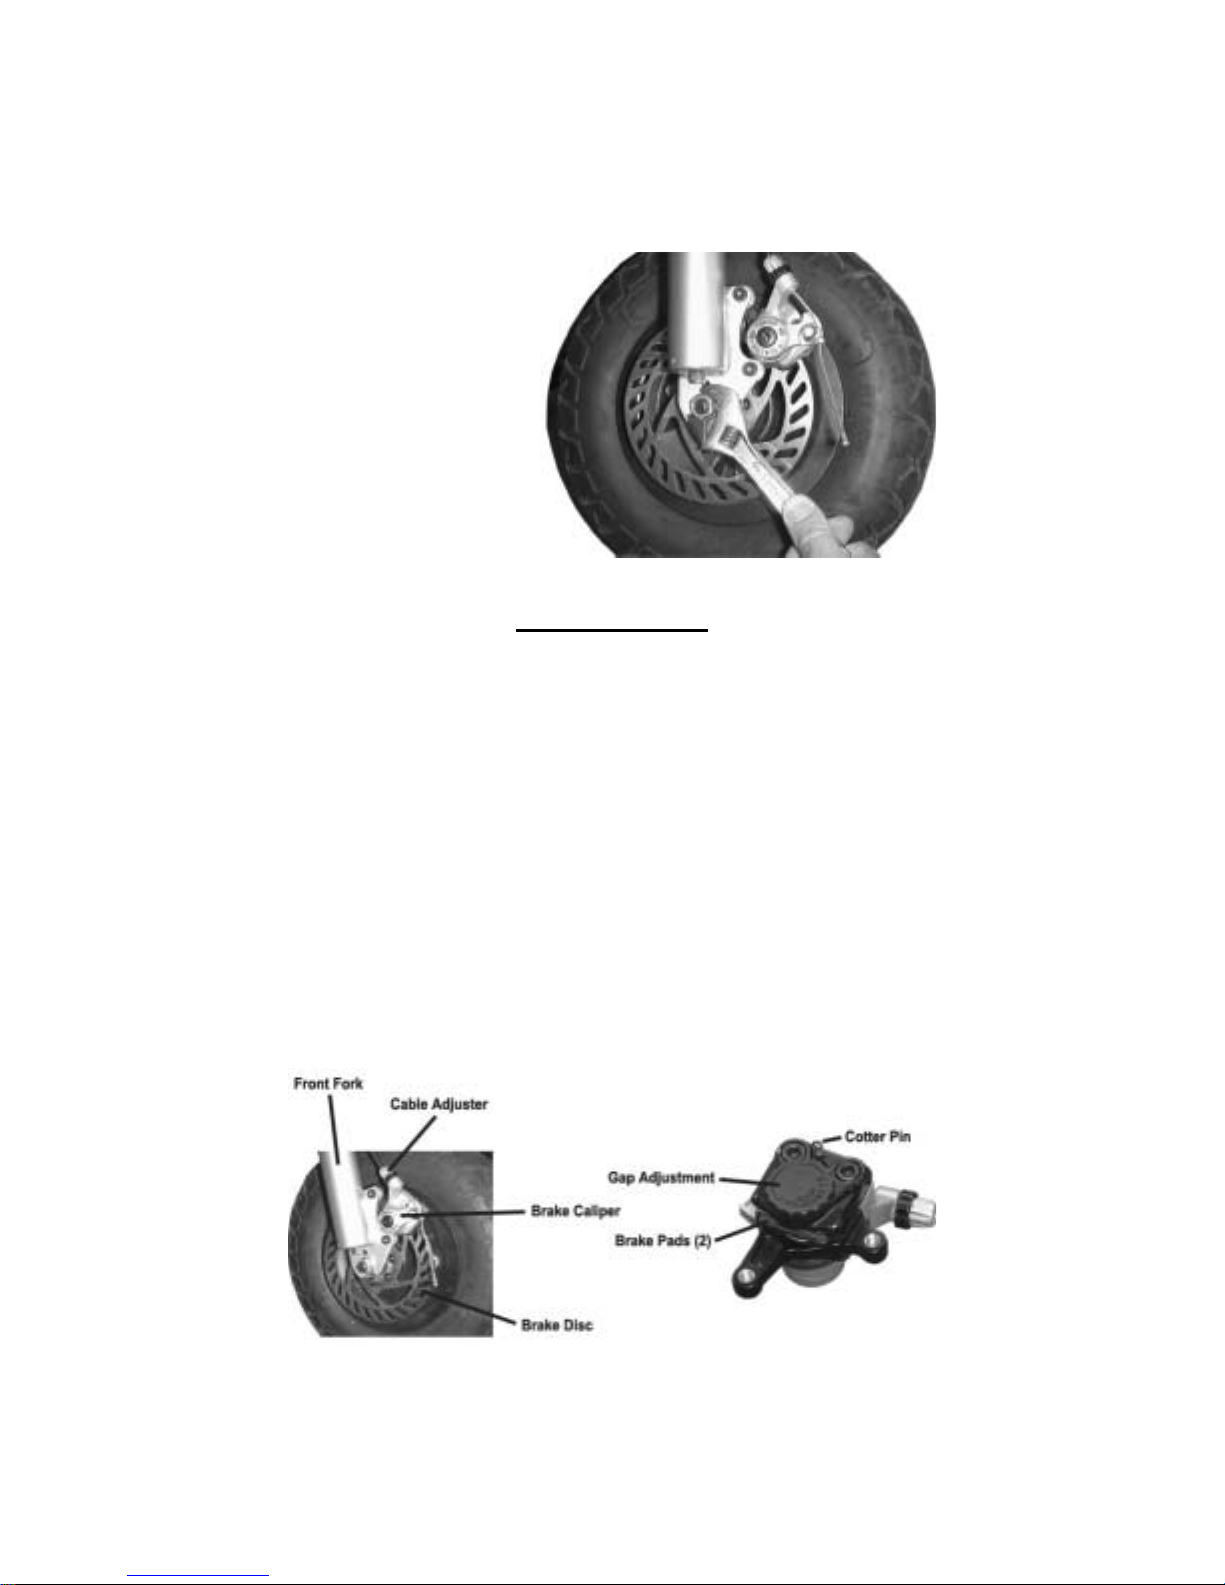
TIGHTEN AXLE NUTS
DISC BRAKES
The disc brakes on your Viza scooter are VERY powerful.
When riding your scooter, be careful of applying too much front
brake as this will stop you extremely fast and could cause you to
go over the handlebars. It is also not a good idea to apply to
strong of a rear brake as this is very hard on the belt drive system.
Beware that the brake disc also can get very hot from heavy use.
Do not touch the disc when it is hot! The brake pads in the brake
caliper assembly is easily replaceable when they wear out. Inquire about parts with your local Viza dealer. There is a gap
adjustment knob located on the tire side of the brake caliper unit.
Turning the knob clockwise will decrease the gap. Turning it
counter clockwise will increase the gap. Adjust as necessary so
that the tire will spin freely without the brake pads rubbing on the
brake disc.
 Loading...