

Page 1

Honey Extractor
Scan the QR code with your mobile device or follow the link
for helpful videos and specications related to this product.
Instruction Manual
https://vivo-us.com/products/bee-v003d
SKU: BEE-V003D
Page 2
2
If you do not understand these directions, or if you have any doubts about
the safety of the installation, please call a qualied technician. Check
carefully to make sure there are no missing or defective parts. Improper
installation may cause damage or serious injury. Do not use this product
for any purpose that is not explicitly specied in this manual and do not
exceed weight capacity. We cannot be liable for damage or injury caused by
improper mounting, incorrect assembly or inappropriate use.
WARNING: IMPORTANT SAFETY INFORMATION
READ AND FOLLOW ALL SAFETY REQUIREMENTS
PREPARATION
1. Aer carefully removing the machine from the packing carton, remove
all protective lm and clean the honey extractor thoroughly with mild
soap and water BEFORE rst use.
2. The honey extractor should be placed on a dry, at stable surface.
KEEP THIS MANUAL IN A SAFE AND DRY PLACE FOR FUTURE REFERENCE
CAUTION: SHARP EDGES
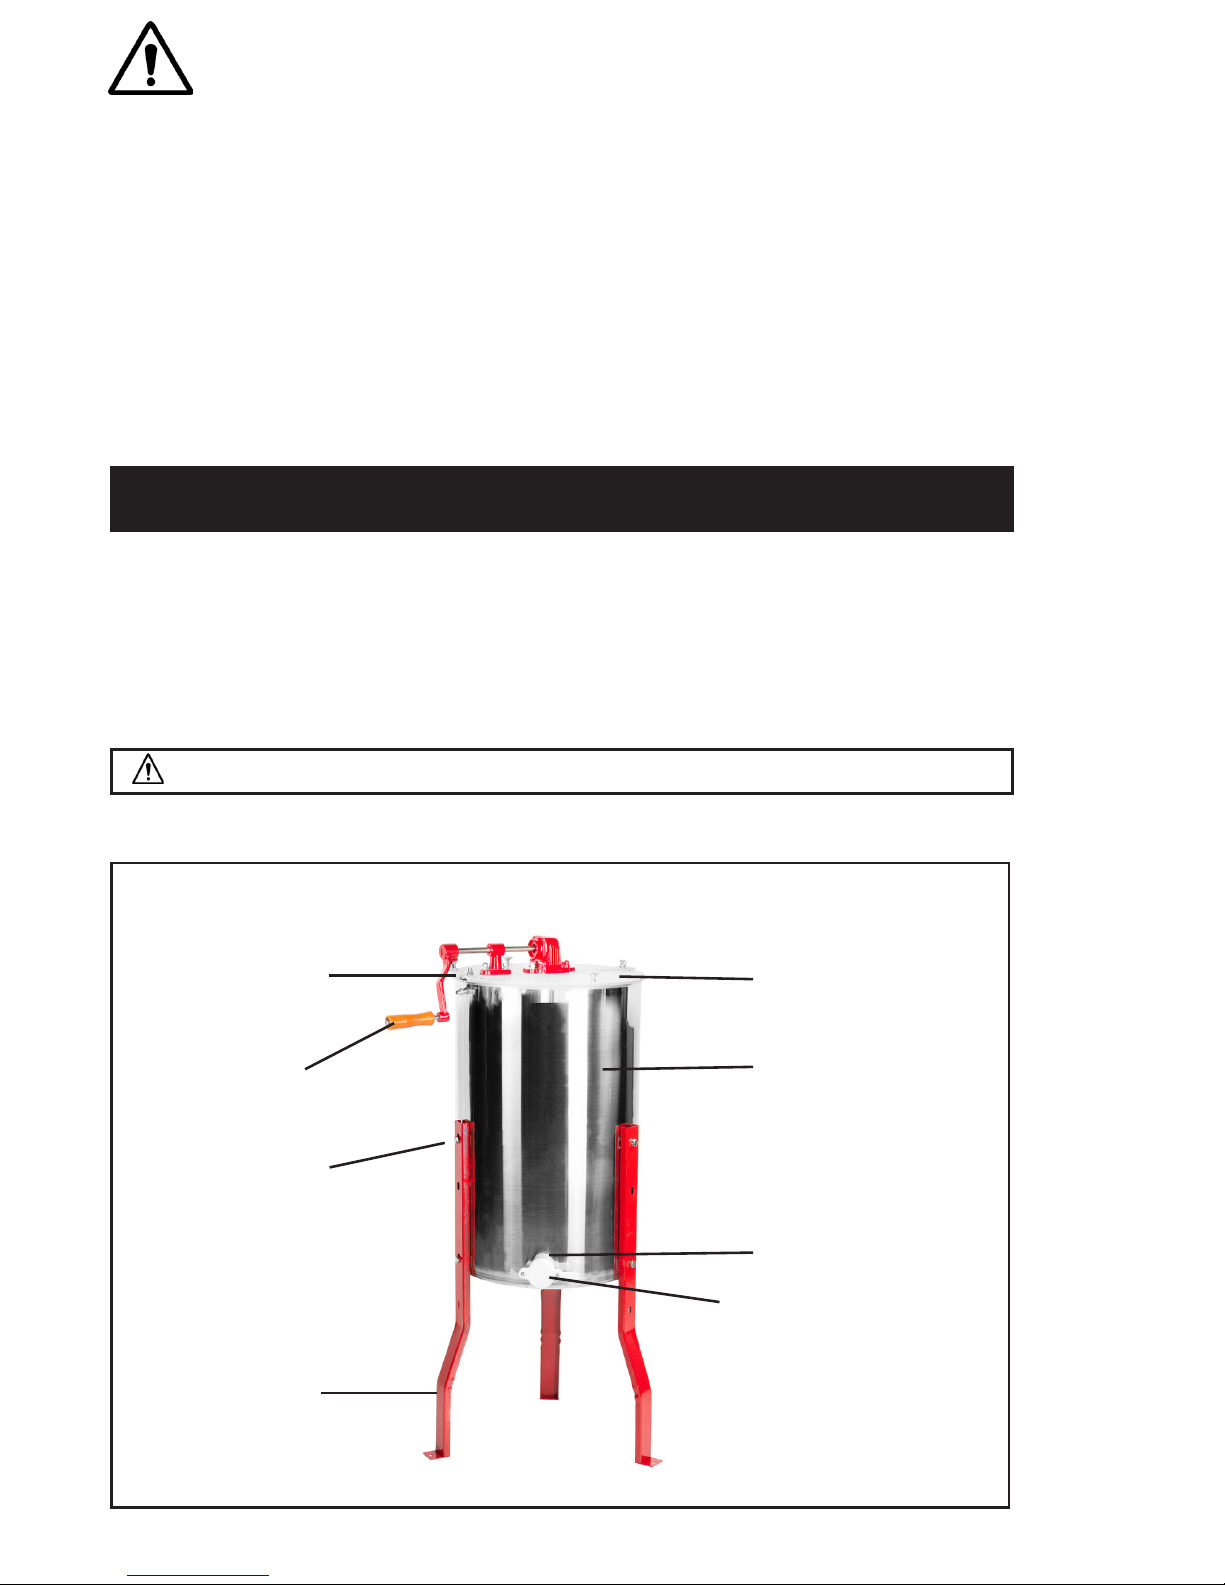
MACHINE STRUCTURE
HONEY EXTRACTOR
DRUM
CLEAR LIDS
O-RING
HONEY GATE
WING NUT
HANDLE
LEG BOLTS
LEGS
Page 3
3
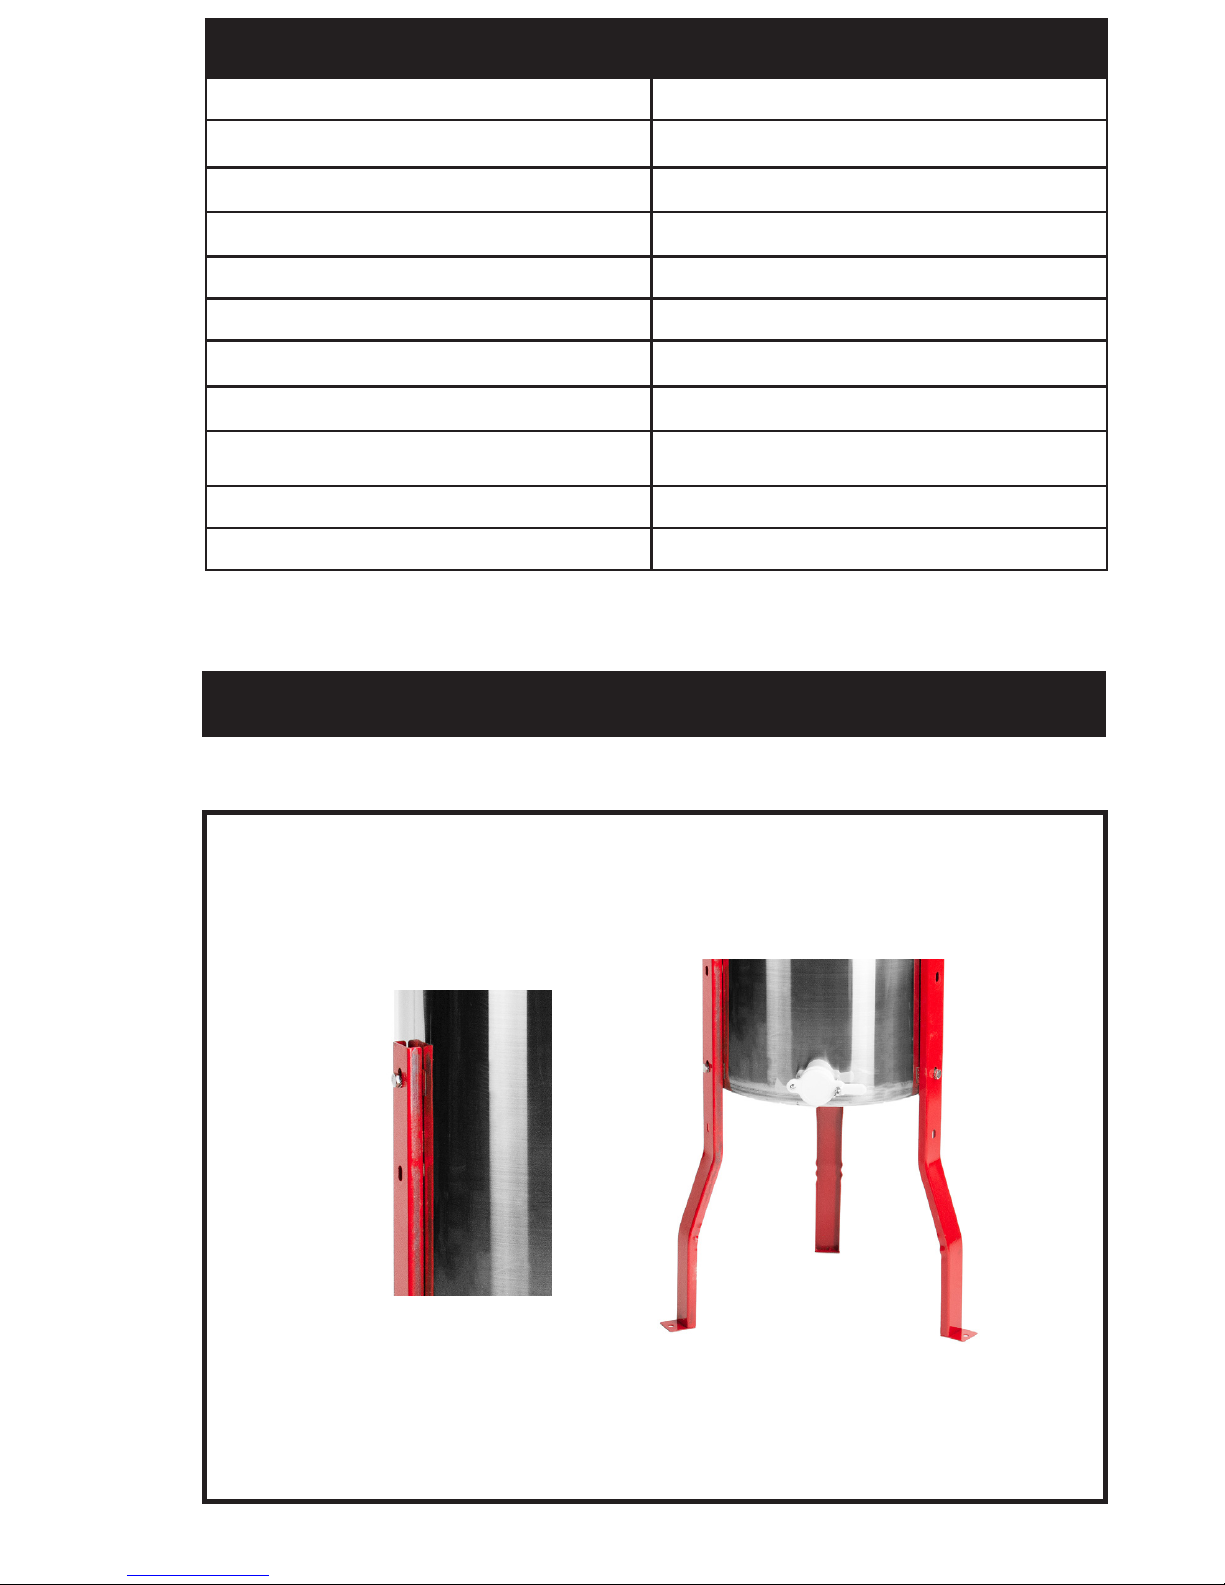
STEP 1
Attach legs to extractor using the included bolts (7) and washers (8).
ASSEMBLY STEPS
PACKAGE CONTENTS
1 (x1) Honey Extractor Drum
2 (x2) Clear Lid
3 (x1) Honey Gate with Lid
4 (x1) Hex Nut (on Honey Gate)
5 (x1) O Ring (Pre-installed on Honey Gate)
6 (x3) Leg
7 (x6) Leg Bolt
8 (x6) Washer
9 (x1) Wing Nut
10 (x1) Handle
11 (x3) Stability Bolt
Page 4
4
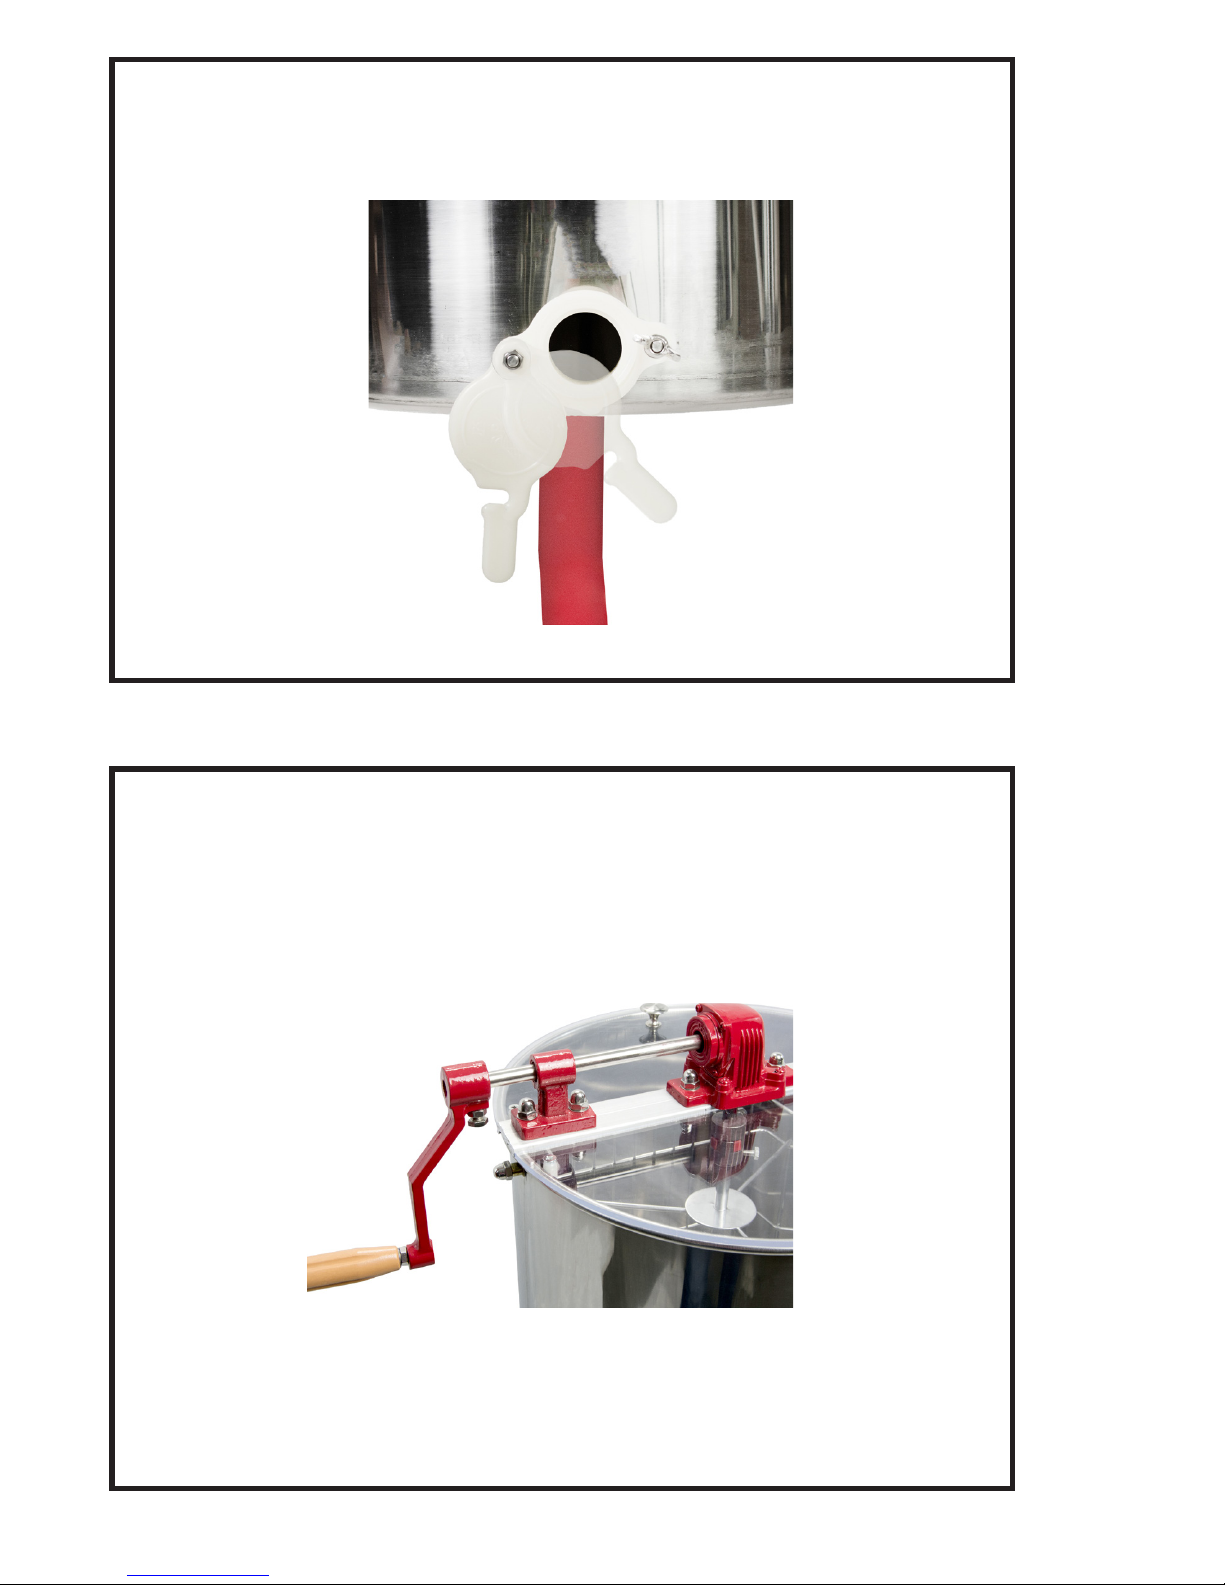
STEP 2
To install honey gate, remove large hex nut from gate piece. Insert gate through
the front side hole and secure backside with hex nut (tighten enough to seal O
ring).
STEP 3
Slide crank handle onto the sha and tighten bolt to the attened sha area.
Page 5
5
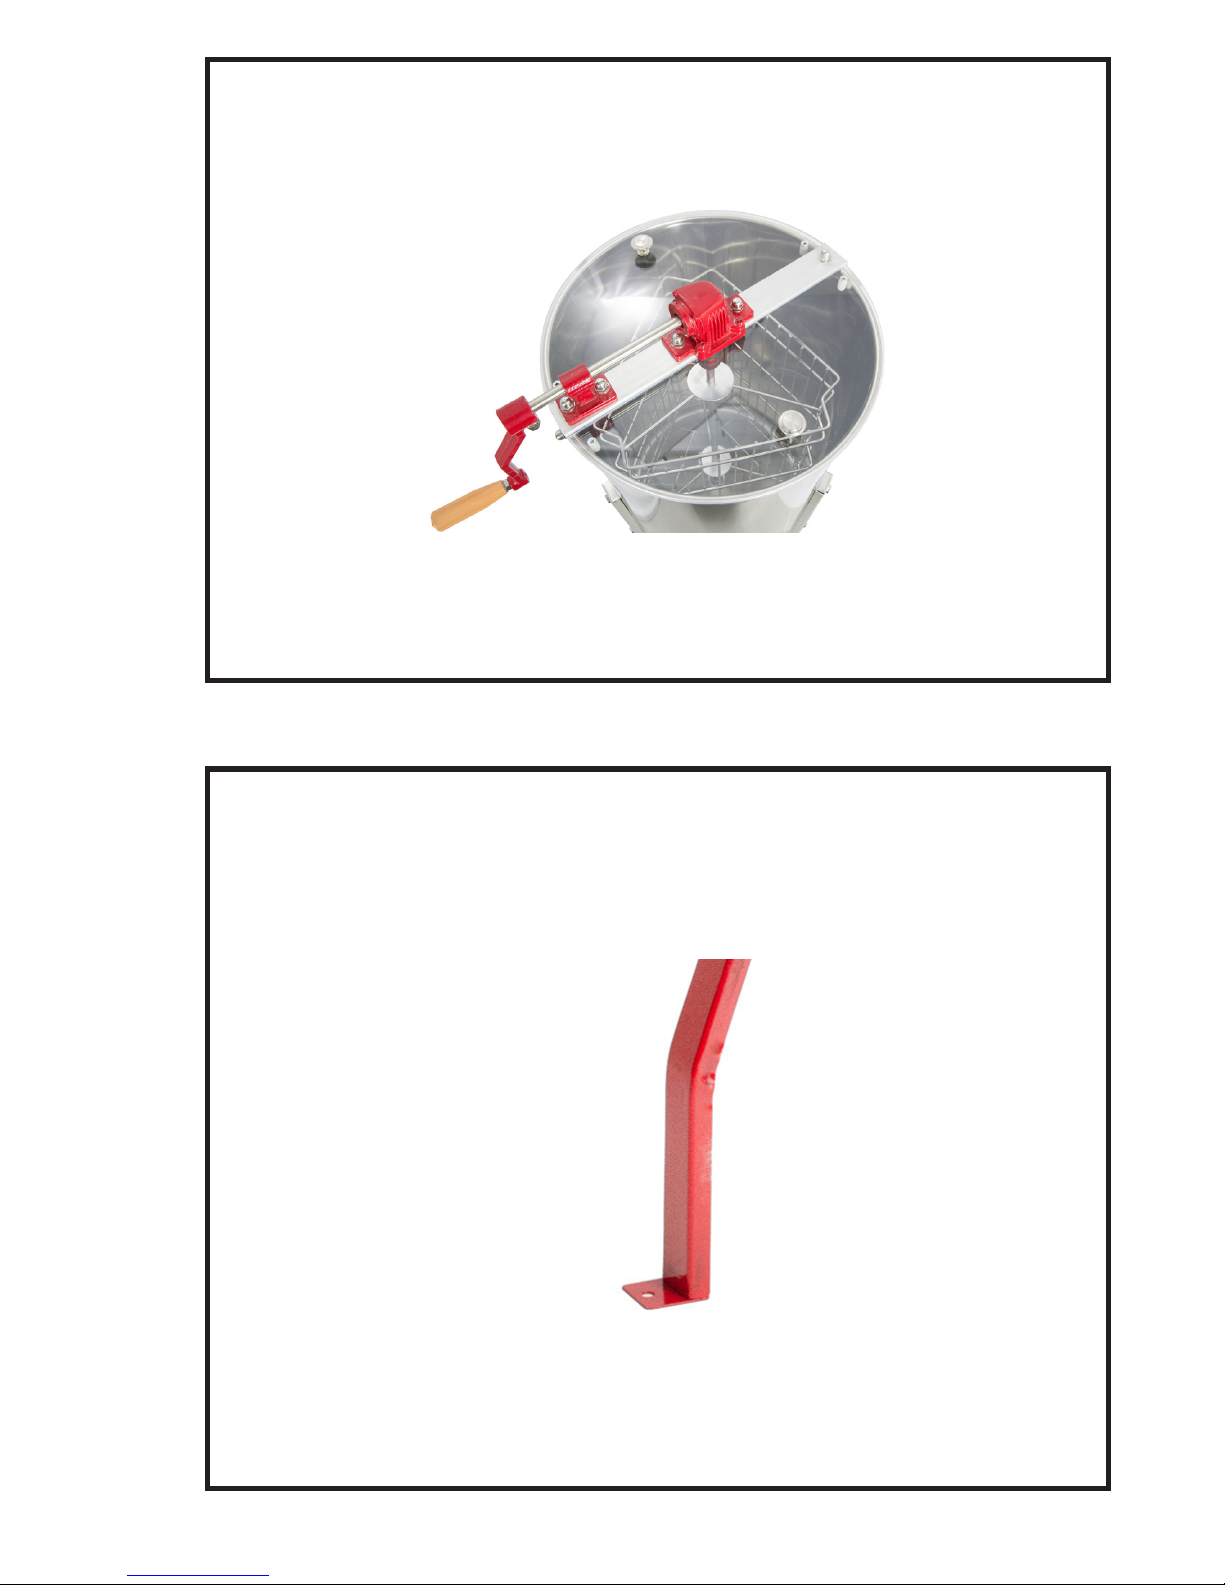
STEP 4
Place clear lids on top of honey extractor.
STEP 5 (Optional)
Bolt feet down to oor or surface for added stability (hardware included).
Page 6
6
OPERATING INSTRUCTIONS
1. Place honey frames in extractor basket. Load both sides to keep
extractor balanced as this will reduce any possible shaking.
2. Place lids on extractor and begin turning handle to extract honey.
3. Once the frames have been emptied on one side, remove the frames,
turn the frames around, and place them back in the extractor. Repeat
step 2, then remove the frames from the extractor.
4. With the drain positioned over a bucket or other container, open the
honey gate to begin draining honey. Tip the extractor forward to drain as
much honey as possible.
DISASSEMBLY
To disassemble the extractor, remove the two cap nuts on the top of the
extractor (one on each side), then pull the top brace up and o. The basket
can then be lied out.
A steel ball bearing rests below the basket sha to improve rotation. Set this
aside in a safe place (such as a cup) so it does not roll away and become lost.
WARNING: KEEP HANDS CLEAR OF MOVING
PARTS TO REDUCE RISK OF INJURY
Page 7

7
WARRANTY
We oer a ONE YEAR warranty for this product. If you have any problems
with the machine, please contact us directly. We have a 90 Day Return Policy.
CARE & MAINTENANCE
QUICK CLEANING
Option 1: Rinse extractor out with cold water from a hose. If available, a
pressure washer is very eective. Empty excess water to prevent possible
surface rust.
Option 2: Place open extractor next to hive. Bees will clean it out and use the
materials.
IN-DEPTH CLEANING
Disassemble extractor (see Disassembly instructions). Using mild dish soap
and warm water, scrub drum and basket clean. Completely rinse the parts
and dry with a so cloth. Reassemble the extractor when dry.
CARE
• When not in use, store the extractor in a dry place. Although stainless
steel is highly resistant to rust and corrosion, light surface rust can form
in wet conditions.
• If surface rust forms, clean with a light abrasive to remove rust.
• If the extractor begins making squeaking noises, lightly lubricate all
bearings with a food safe grease or oil. Wipe away any excess.
• If the roller bearing in the crank sha support block does not turn freely,
lubricate with a light grease (such as white lithium) or oil.
• The gearbox is permanently sealed and requires no maintenance.
Page 8

If any parts are received damaged or defective, please contact us. We are happy to
replace parts to ensure you have a fully functioning product.
For more VIVO products, check out our website at:
www.vivo-us.com.
Love your new VIVO setup and want to share?
Tag us in your photo! @vivo_us
Last Updated: 2/27/2019
 Loading...