

Page 1
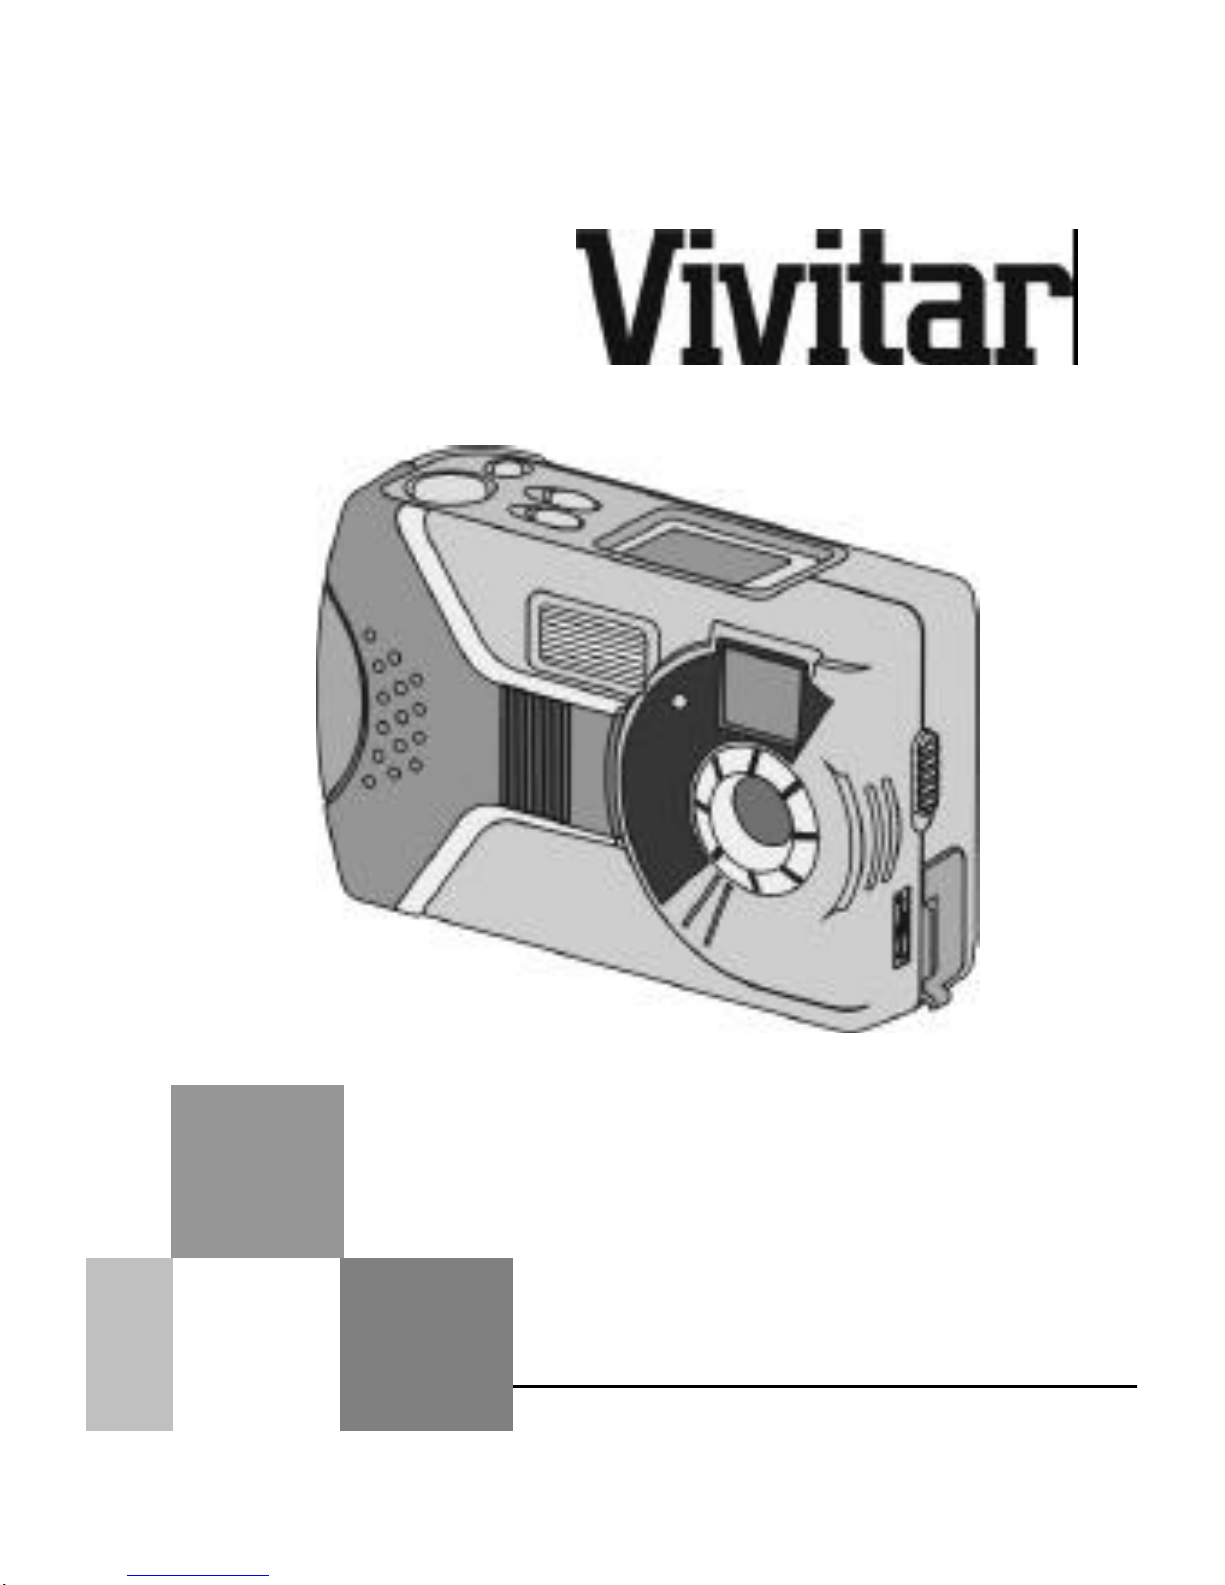
ViviCam 3340
Digital Camera
User's Mannual
Page 2

...............................................2
.............................................6
ETTING TO KNOW YOUR CAMERA..................8
........................................12
.........19
.....22
........27
09
Table of Contents
Page 3

INTRODUCTION
Please read through this manual carefully before using the
camera and follow the instructions to derive full benefit from
your camera.
-1 Safety Precautions
• The software CD-ROM disc packaged with the camera
is designed for PC use only.
• This product is a highly intricate device. Any attempt
to disassemble it may cause electric shock from the
internal components.
-2 Before Using Your Camera
Familiarize yourself with your new camera before taking
any images of an important occasion (such as a wedding,
graduation, or a trip). Test the camera beforehand to
ensure that it functions well. Learn the features and
characteristics of the macro function, movie mode, flash
operations, shutter timing, and the process of image
transfer (downloading) to your computer.
Consider purchasing a memory card to expand the
capacity of your camera. Consider also a memory card
reader to derive maximum benefit and ease of use of
your camera.
Page 4

Copyright Restrictions
Please observe copyright law and restrictions, as your
new camera is a recording device.
LCD (Liquid Crystal Display) status display
Your new camera includes an LCD information/status
display that contains a small amount of liquid. If the LCD
monitor is damaged, please observe the following
precautions:
1. If the liquid contacts the skin wipe the skin with a
cloth and wash with water.
2. If the liquid gets in the eye immediately rinse with
fresh water for at least 15 minutes and then consult a
physician as soon as possible.
3. If anyone accidentally swallows the liquid rinse the
mouth with water, drink large amount of water and
induce vomiting. Consult a physician as soon as
possible.
Page 5

1-3 Operational Cautions
• Extremely damp and dusty places.
• Sealed vehicles or places exposed to direct
sunlight
• Extreme high temperatures or heat.
• Mechanical shock or vibration.
• Smoke, fumes or steam.
• Locations subject to strong magnetic fields.
• Rain or snow.
er has entered the camera, immediately turn the
• If lens, LCD display, or viewfinder windows
become dirty, use a lens brush or soft cloth to
wipe clean. Avoid touching the lens with your
fingers.
• Do not use any detergent or volatile solution,
which will harm the camera case and paint. Only
use a soft cleaning cloth.
Page 6
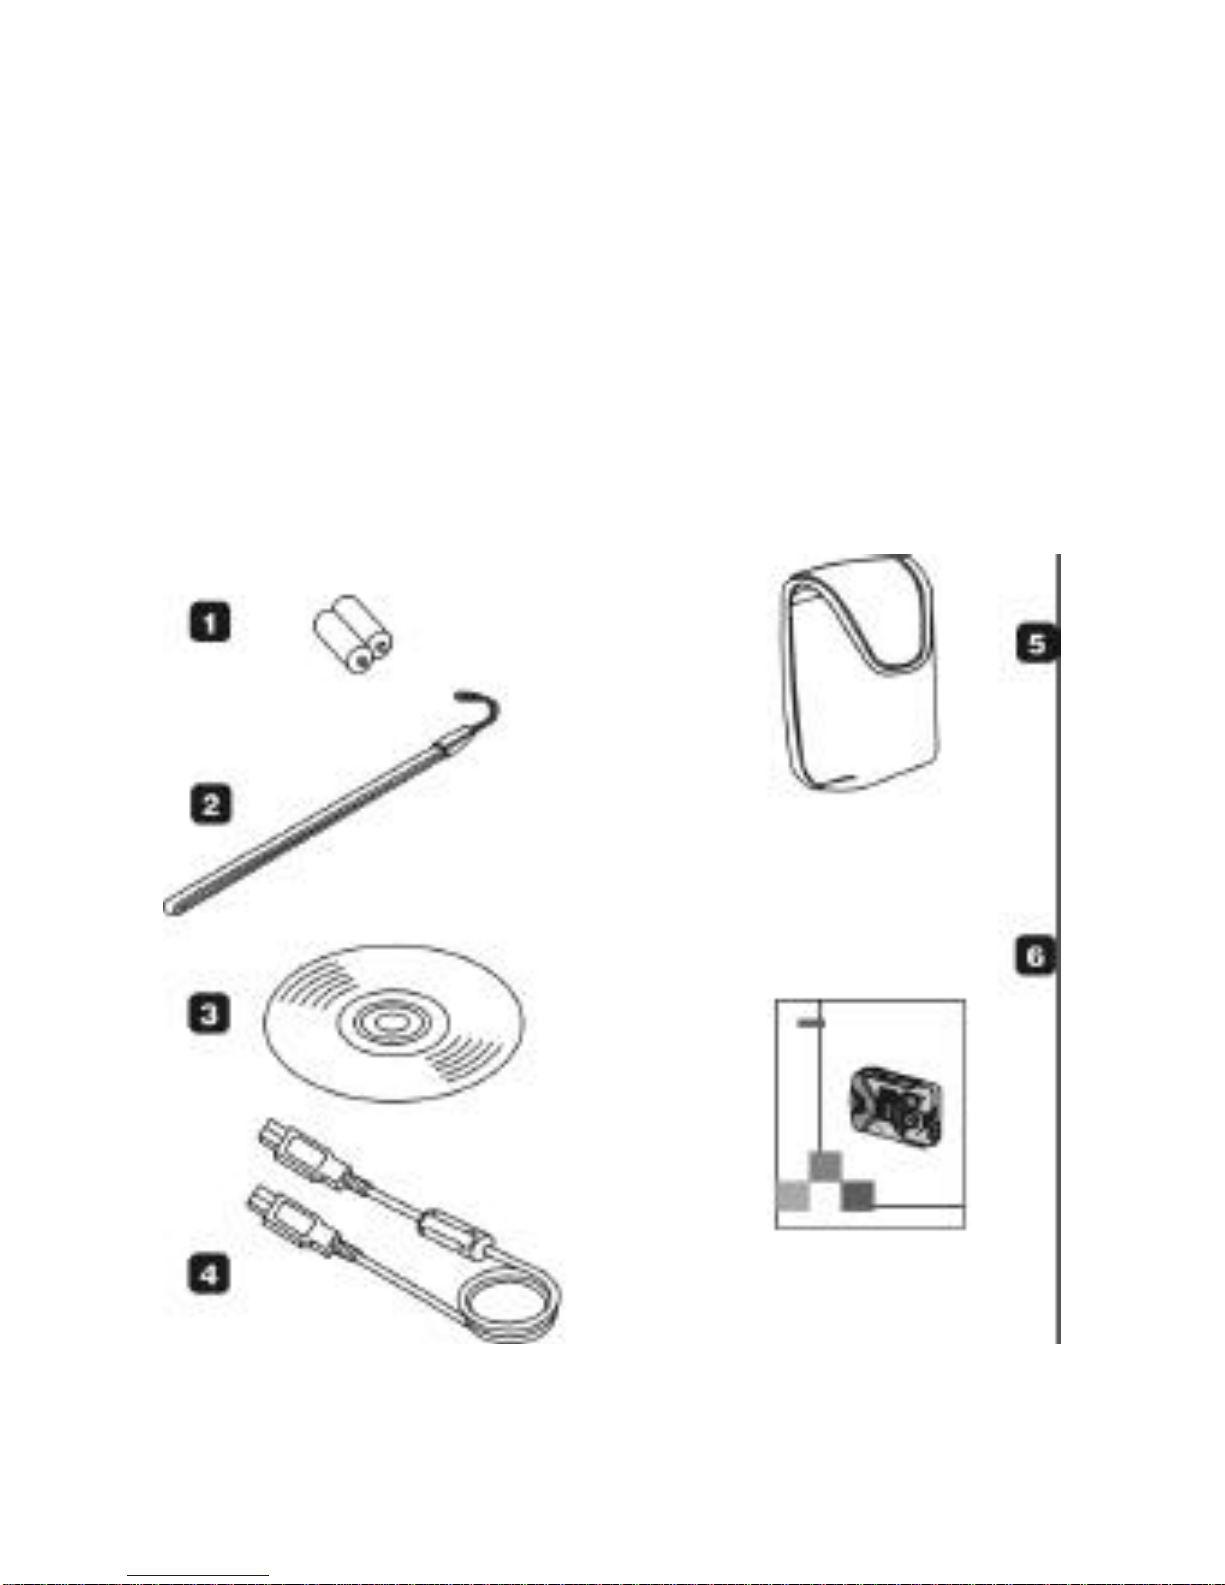
-4 Common Accessories
ailer.)
AA Batteries (2)
Wrist Strap
Software CD ROM (Driver and PC Applications)
USB Cable
Pouch
User’s Manual
Page 7

SPCIFICATIONS
Camera Specifications
• Image resolution: Still images: Fine = 1280 x 1024
(1.3M), Mid = 640 x 480 (VGA); Video = 320 x 240
• Range of Focus:
o Normal mode: 3 feet to Infinity
o Macro mode: 8 to 10 inches
• Internal Memory: 8M SDRAM. Note that 4 MB of
memory is allocated to image processing (buffering),
and 4 MB is available for image storage
• Image File Formats: JPEG (still images), AVI (movies)
• Flash modes: Automatic, Off
• Self-timer: 10 sec. delay
• Power Supply: AA battery x2; USB 5V (in PC-CAM
Mode)
• Computer Interface: USB
• Auto Power Off: The power will automatically turn off
if no buttons are pressed after 60 seconds.
• Memory Expansion slot: For Secure Digital (SD)
memory cards. (Also compatible with MMC cards.)
Page 8

2-2 System Requirements
s Storage Device function is available. PC users
System Requirements (Windows)
OS Microsoft Windows 98SE/Me/2000/XP
CPU Intel Pentium or higher
RAM 64 MB or higher
CD-ROM 4X speed CD ROM drive
HDD 20 MB hard disk space
USB port Available USB 1.1 port
System Requirements (Macintosh)
OS Mac OS 8.6 or higher, including OSX
CPU PowerPC 601 processor or higher
RAM 64 MB or higher
CD-ROM 4X speed CD ROM drive
HDD 20 MB hard disk space
USB port Available USB 1.1 port
Page 9
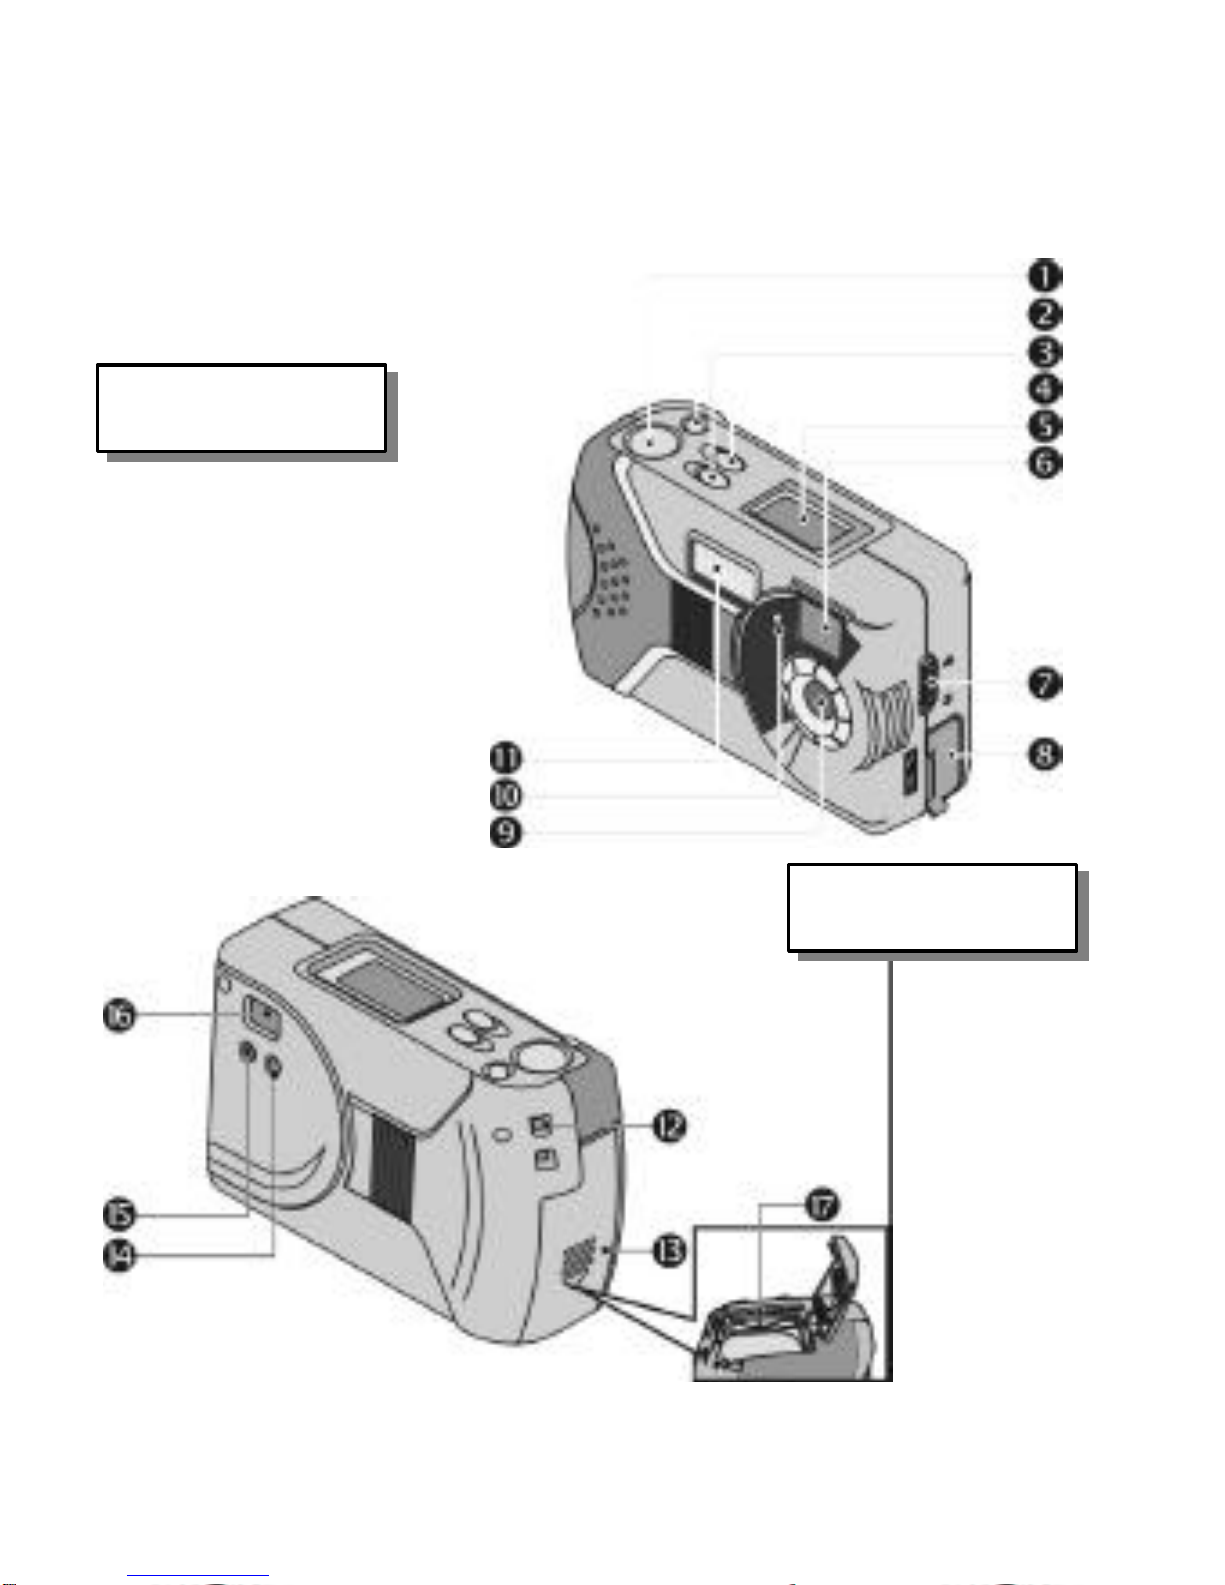
3. GETTING TO KNOW YOUR CAMERA
3.1 Identifying the Features:
Front View
Back View
(1) Shutter button
(2) Power button
(3) Mode button
(4) Select button
(5) LCD information display
(6) Viewfinder window
(7) Macro switch
(8) USB connector cover
(9) Lens
(10) Self-timer LED
(11) Flash
(12) Hand Strap eyelet
(13) Battery door
(14) Macro LED
(15) Status LED
(16) Viewfinder
(17) Memory Card Slot
(
SD/MMC
)
Page 10

Information and Status LCD
Flash:
: Off
: Auto
: Self-timer
Image Resolution:
: 640x480
: 1280x1024
: Memory Card
Indicator
White Balance:
: Tungsten : Sunny
: Fluorescent : Cloudy
: Auto
Page 11

Battery status
:
: Full battery power
: Medium battery power
: No/low battery power
: Images Number / Function Display
LED Indicators
There are two LEDs on the backside of the camera, below
the viewfinder window.
Their functions are described in the following table:
Indicator/Status Description
ON Camera is busy or the flash is
charging. Please wait until the
red LED goes off. (Note: if the
flash is set to OFF – the Red LED
will generally go off much
quicker.)
RED LED –
On/flashing
OFF Camera is ready
ON Your camera is switched to
macro mode for close-up shots.
GREEN
LED –
Macro
indicator
OFF Your camera is set to focus at
normal range (3 ft to infinity)
Page 12

3.4 Using an SD or MMC Memory Card (Optional card)
Your camera supports Secure Digital (SD) or Multi-media
Memory Cards (MMC). Using a memory card allows you to
take more images.
When a memory card is inserted into the camera memory
card slot, the camera will automatically use the card in
preference to the memory built-in to the camera itself.
To use your camera with a memory card, turn off the
camera and insert the SD/MMC card into the memory card
slot in the battery compartment.
• Your camera comes with 8MB of internal memory, of
which 4 MB are availale to store images and movies.
• Using a memory card will increase your image
storage capacity significantly
• When a memory card is inserted into the memory
expansion slot, it will be used as a primary storage
media.
Memory cards and memory card readers are available in
computer, photo, and electronics stores.
Page 13

4. GETTING STARTED
• Before using your camera insert two AA batteries into
the battery compartment. Note the proper
orientation.
• During operation, if the battery power gets very low,
a warning message “LOW” message will appear on
the Status LCD. Please replace the new batteries
immediately to ensure normal operation.
• Note: If you are NOT using a memory card your
images will be stored in the internal memory. If you
remove the batteries from your camera for more than
20 seconds your images will be lost because the
internal memory will be erased in the absence of
battery power. (Images stored on a memory card will
not be erased if power is removed.)
Power On/Power Off
• Power On: Press and hold the power button for three
seconds. As soon as you hear the audio tones
(greeting) you may release the power button.
• Power Off: Press and hold the power button for two to
three seconds until two beeps are heard and power is
off.
• Auto Power Off: To save power, the camera will
automatically turn off after 60 seconds if no buttons
are pressed.
Page 14

4.2 Taking Images
Power up the camera, locate a subject in the viewfinder and
you are ready to take images (pictures). Press the Shutter
button to take an image.
“CAP.” (short for Capture) will appear on the Status LCD and
the image will be stored in memory. In about four seconds
you will be able to take another image. (If you are using the
internal flash it may take 15 – 25 seconds to recharge the
flash capacitor.)
• If you are using a memory card, the icon will
appear in the Information/Status LCD and the image
will be stored on the memory card.
• For a best quality image, hold your camera firmly and
still. Do not move or shake while taking an image.
• If your memory card is full, a "Card Full" message will
appear on the Status LCD. You need to transfer
images from your memory card before you can use it
again.
• Note: All digital cameras exhibit a behavior known
as “shutter latency” - the amount of time between the
moment that you press the shutter button and the
time that the camera actually captures the image.
(While the camera determines exposure settings.)
The latency for your camera is about one (1) second.
Page 15

Operational Functions and Modes
Photo (FOTO) Function
Delete Function
Movie Mode
Setup Mode
Page 16

Functions and Modes
Your camera has two functions and two modes.
Functions include: 1) Taking images, 2) Deleting images.
Modes include: 1) Movie Mode, 2) Setup Mode.
Modes & functions are described in the following paragraphs.
Photo (FOTO) Function – Taking Images
1. Press the Mode button and “FOTO” will appear on the
Status LCD. Then, press the Shutter button to enter the
FOTO submenus.
2. Scroll through the FOTO submenus by pressing the
Select button. There are three FOTO submenus: FLASH
(STRB), WHITE BALANCE (W-B) and RESOLUTION (RES).
Press the Shutter button to enter a submenu.
3. FLASH (STRB) submenu. Use the Select button to
ENABLE or DISABLE the flash. Press the Shutter
button to confirm your selection.
4. WHITE BALANCE (W-B) submenu. Use the Select
button to select the desired white balance setting:
Auto Tungsten Cloudy Sunny Fluorescent
Press the Shutter button to make a selection.
Page 17

5. RESOLUTION (RES) submenu. Use the
Select
button to
set the still-image resolution to either Mid: 640x480 or
Fine: 1280x1024. Press the Shutter button to confirm
your selection. Note: Fine resolution will result in much
better images, whereas Mid resolution will allow you to
store more images in available memory space.
NOTE
• If you ENABLE the flash, the flash capacitor circuit will
be charged and the red (BUSY) LED will blink for 15 –
30 seconds. The time between images (shot-to-shot
time) will be longer, as well. (Weak batteries may
take longer.)
• Once you save your settings, they will be retained
even if the camera is powered o
ff. The settings will not
be changed until you change then again.
Delete Function – Deleting/Erasing Images
1. Press the Mode button twice and “DEL” will appear on
the Status LCD. Press the Shutter button to enter the
delete submenu.
2. Press the Select button to toggle (alternate) between
LAST and ALL. Press the Shutter button to confirm your
choice of LAST or ALL. (“All” will allow you to delete all of
your stored images, whereas “LAST” will allow you to
delete only the last image that you captured.)
3. Finally, a “Y” (for Yes) will appear in the status display.
Press the Shutter button to delete your image(s).
Alternatively, press the Select button change YES (Y) to
Page 18

– Capturing Silent Mo
vies
1. Press the Mode button three times and “MOV” will
appear on the Status LCD. Press the Shutter button to
set the camera to the Movie Mode.
2. When the camera is in the Movie Mode, “MOV” will be
displayed continuously on the Status LCD.
3. Press and hold the Shutter button to begin recording a
silent video clip (no audio). “REC” will appear on the Status
LCD during the capture (recording) process. Release the
Shutter
button to stop recording. If memory is full “MOV”
will blink continuously.
4. Press the Mode button to exit the Movie Mode and return
to normal camera operations. Note that the camera
• When recording a video clip, the maximum length of
a recording will depend on the available memory
space.
• The movie resolution will be 320 x 240 (CIF)
• Typically, you will be able to record about one minute
of silent video in 8MB of memory at CIF resolution.
• Flash is disabled
• Auto-Power off is disabled
• You may not be able to power-off the camera in MOV
mode. Press the Mode button to exit the Movie mode
in order to turn off the camera.
• Movies may be viewed on your computer using
Windows Media Player or Apple’s Quick Time Player.
Page 19

1. Press the Mode button four times and “SET.” will appear
on the Status LCD. Press the Shutter button to enter the
setup submenus.
2. Scroll through the Setup submenus by pressing the
Select button. There are three Setup submenus:
SELF-TIMER (TMR), FREQUENCY (FRQ), and USB (USB).
Press the Shutter button to enter a submenu.
3. SELF-TIMER (TMR) submenu. Press the Select button
to ENABLE or DISABLE the self-timer function. Press the
Shutter button to confirm your selection.
4. FREQUENCY (FRQ) submenu. Press the Select button
to select the appropriate local lighting frequency.
Choose either 50Hz and 60Hz. Press the Shutter button
to confirm your selection.
5. USB (USB) submenu. Press the Select button to specify
the USB connection mode to your computer. Choose
either HDD (HARD DISK DRIVE), or CAM (PC CAMERA).
Press the Shutter button to confirm your selection.
Notes about Setup Mode:
• PC camera mode does not apply to Mac OS.
• When using PC Cam mode, do not forget to switch
back to HDD mode to download images.
Page 20

INSTALLING DRIVERS AND SOFTWARE
5.1 Driver Installation – for PC users
Your camera will operate with your computer as a HARD
DISK DRIVE (HDD). PC users can enjoy the additional
feature of a PC CAMERA (CAM) for a direct (live) video feed
to your PC. Make sure to install the camera driver before
connecting the camera to your PC. Installation steps are
outlined in the following paragraphs:
1. Insert the V3340 CD-ROM into your CD drive.
2. The setup program should run automatically. The
autorun screen below appears. If the autorun program
does not run
automatically or if
autorun is disabled
double-click on “My
Computer” (on your
desktop), then
double click your CD
drive icon. Locate
the file “Setup.exe”
in the root directory
of your CD-ROM
drive and double-click on it to open this setup screen.
Page 21

Click “Next” to continue. Follow the instructions to
complete the camera driver installation. After the
installation is completed, the following message will
appear on the screen.
4. Click Finish to restart your PC and
complete
installation.
Page 22

• Note: Mac OS and Lycoris Desktop LX users will not be
using the PC/web camera feature. Therefore, no
driver is required. Your Mac OS or Lycoris Desktop LX
computer will automatically recognize the camera and
load its own USB mass-storage device driver.
• Mac and Lycoris users: Make sure the camera is set to
HDD (see section on Setup mode.)
• Use the included USB cable to connect your camera to
your computer.
Page 23

6. TRANSFERRING IMAGES TO A COMPUTER
6.1 Connecting Your Computer
Method 1: USB Mass Storage Device (all users) -
Your digital camera functions with your computer as if it
were a storage device (like a card reader, CD, or floppy
disk) device. Follow these steps to use your camera as a
mass storage device:
4. Install the driver (if required) as described in the
previous chapter.
5. Turn on the camera and make sure the USB mode is
set to “HDD”.
6. Use the USB cable included with the camera to
connect to your computer.
7. After your system completes the configuration, you
will find a “Removable Disk” drive under “My
Computer” icon on your desktop.
8. Double click on the removable disk drive icon and
then double click on subsequent folders to locate your
images and movies. You can drag & drop or cut &
paste the image files from the removable disk
(camera memory) to a folder in your hard disk.
Method 2: Using TWAIN (PC users only) -
PC users may also use a process known as TWAIN to
transfer images from camera to PC, as follows:
9. Set your camera to HDD mode and connect your
camera to your PC by USB cable.
Page 24

10.
Launch
any TWAIN compliant
imag
ing
application.
Click on TWAIN > Select Source > Camera
TWAIN DS (or V3340) option to invoke the TWAIN
interface. Arcsoft PhotoImpression on the V3340
CD-ROM supports TWAIN. For more information,
please refer to its respective on-line help.
11. The TWAIN program will automatically detect and
read the images from your camera and display
images indexes on the following screen.
If TWAIN cannot read images from your camera, make
sure the camera mode is set to Mass Storage (HDD)
mode, the USB cable is connected, and Camera Twain
DS or V3340 is selected from the list of sources.
Details of the Vivicam 3340 TWAIN User Interface are
explained in the following section:
Page 25

(1) Display TWAIN program information, version
number and copyright.
(2) Quit TWAIN program and return to the
imaging application.
(3) Save the selected images into a directory
(4) Select all images
(5) Unselect all images
(6) Delete the selected images
(7) Transfer the selected images to the
application
(8) Next page
(9) Previous page
(10) Images display area
12. When you move the cursor over an image, an
enlarged window will pop up for you to review.
Page 26

13. You may select one or more images. Then, press the
transfer button (7) to transfer the selected images to
a the imaging application. You can transfer the
images in either “Standard” or “Large” file size, as
shown below:
Page 27

14.
Standard and Large
files sizes for images:
Original Size
640x480(VGA)
1280X1024(1.3M)
15. You may select one or more images. Then, press the
Save button (3) to save the selected images into a
specific directory.
16. Using this dialog
box, you can
specify the
Directory,
Filename, Format
and Picture Size of
the images you are going to save.
Standard Size
Large Size
640x480(VGA)
640x480(VGA)
1280x1024(1.3M) 1280x1024(1.3M)
640x480(VGA)
1024x768(0.8M)
1280x1024(1.3M) 1600x1200(2.0M)
Page 28

USING YOUR CAMERA AS A PC CAMERA
7.1 Live Camera Video for PC Users -
In addition to capturing movies and images, your camera
can also act as a video camera for your PC. To use your
camera as a PC Camera:
1. Install the PC camera driver as described the previous
chapter “Driver Installation” section.
2. Turn on the camera and make sure the USB mode is set
to “CAM”.
3. Connect your camera to your PC using the USB cable.
4. After your system completes the configuration, you will
find a “Dual Mode Digital Camera 1.3M (Video)” in your
Software Video capture source list.
5. You can view live video from your camera using ArcSoft
Video Impression which is included on the V3340 CD
ROM. You may also use third-party video programs such
as MS NetMeeting and Windows Movie maker.
 Loading...