

Page 1
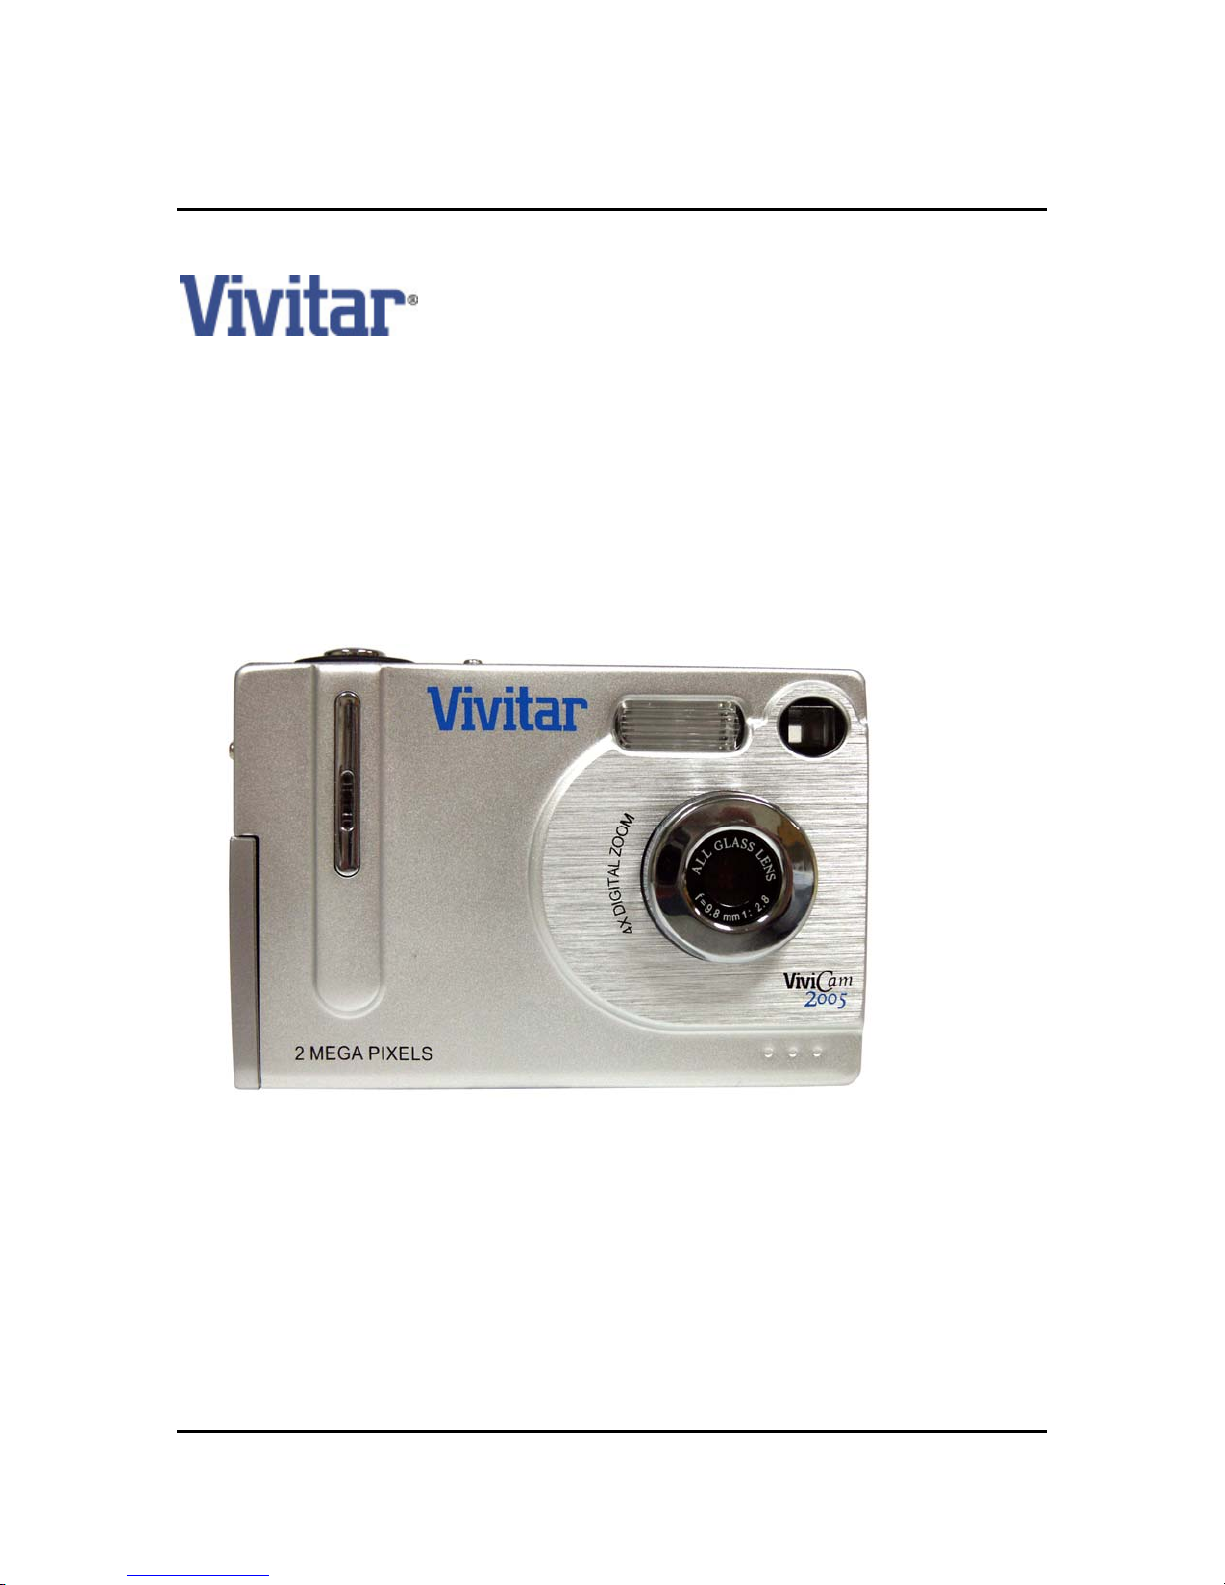
Vivicam 2005
User Manual
041227TP
1
Page 2

Preface
Thank you for purchasing the Vivicam 2005. Please read this manual carefully, it covers all
camera functions and operations.
FCC STATEMENT
This device complies with Part 15 of the FCC Rules. Operation is subject to the following two conditions:
(1) This device may not cause harmful interference, and
(2) This device must accept any interference received, including interference that may cause undesired operation
Note:
This equipment has been tested and found to comply with the limits for Class B digital devices, pursuant to Part 15 of the
FCC rules. These limits are designed to provide reasonable protection against harmful interference in a residential
installation. This equipment generates, uses and can radiate radio frequency energy and, if not installed and used in
accordance with the instructions, may cause harmful interference to radio communications. However, there is no
guarantee that interference will not occur in a particular installation. If this equipment does cause harmful interference to
radio or television reception, which can be determined by turning the equipment off and on, the user is encouraged to try to
correct the interference by one or more of the following measures:
Reorient or relocate the receiving antenna.
Increase the separation between the equipment and receiver.
Connect the equipment into an outlet on a circuit different from that to which the receiver is connected.
Consult the dealer or an experienced radio/TV technician for help.
Use of shielded cable is required to comply with Class B limits in Subpart B of Part 15 of the FCC rules.
Do not make any changes or modifications to the equipment unless otherwise specified in the manual. If such
changes or modifications should be made, you could be required to stop operation of the equipment.
TRADEMARK INFORMATION
Microsoft® and Windows® are U.S. registered trademarks of Microsoft Corporation.
Pentium® is a registered trademark of Intel Corporation. Macintosh is a trademark of Apple Computer, Inc.
SD is a trademark. Other names and products may be trademarks or registered trademarks of their respective owners.
READ THIS FIRST
Product design and specifications are subject to change without notice. This includes primary product specifications,
software, software drivers, and user’s manual. This User’s Manual is a general reference guide for the product. The
product and accessories that come with your camera may be different from those described in this manual. This is due to
the fact that different retailers often specify slightly different product inclusions and accessories to suit their market
requirements, customer demographics, and geographical preferences. Products vary between retailers especially with
accessories such as batteries, memory cards, cables, carrying cases/pouches, and language support. Occasionally a
retailer will specify a unique product color, appearance, and internal memory capacity. Contact your dealer for precise
product definition and included accessories. The manufacturer assumes no liability for any errors or discrepancies in this
user’s manual. For user manual and driver updates, refer to the Vivitar website or contact your dealer.
2
Page 3

SAFETY INSTRUCTIONS AND WARNINGS
Read and understand all Warnings and Cautions before using this product.
If foreign objects or water have entered the camera, turn the power OFF and remove the batteries. Continued
use in this state might cause fire or electric shock.
If the camera has fallen or its case has been damaged, turn the power OFF and remove the batteries. Continued
use in this state might cause fire or electric shock.
Do not disassemble, change or repair the camera. This might cause fire or electric shock. For repair or internal
inspection, consult customer service.
Do not use the camera in areas near water. This might cause fire or electric shock. Take special care during
rain, snow, on the beach, or near the shore.
Do not place the camera on inclined or unstable surfaces. This might cause the camera to fall, causing injury.
Keep the batteries out of the reach of children. Swallowing batteries might cause poisoning. If the battery is
accidentally swallowed, immediately consult a physician.
Do not use the camera while you are walking, driving, or riding a motorcycle. This might cause you to fall over or
result in traffic accident.
S
CAUTIONS
Do not fire the flash close to anyone’s eyes. This might cause damage to the person’s eyesight.
Do not subject the LCD monitor to impact. This might damage the glass on the screen or cause the internal fluid
to leak. If the internal fluid enters your eyes or comes into contact with your body or clothes, rinse with fresh
water. If the internal fluid has entered your eyes, consult a physician to receive treatment.
A camera is a precision instrument. Do not drop it, strike it or use excessive force when handling the camera.
This might cause damage to the camera.
Do not use the camera in humid, steamy, smoky, or dusty places. This might cause fire or electric shock.
Do not remove the battery immediately after long period of continuous use. The battery becomes hot during use.
Touching a hot battery might cause burns.
Do not wrap the camera or place it in cloth or blankets. This might cause heat to build up and deform the case,
resulting in fire. Use the camera in a well-ventilated place.
Do not leave the camera in places where the temperature may raise significantly, such as inside a car. This
might adversely affect the case or the parts inside, resulting in fire.
Before you move the camera, disconnect cords and cables. Failure to do this might damage cords and cables,
resulting in fire and electric shock.
WARNING: Handling the USB on this product may expose you to lead, a chemical known to the State of California
to cause birth defects or other reproductive harm. Wash hands after handling.
NOTES ON BA TTERY USAGE
Do not use batteries other than those specified for use with your Vivicam 2005. Use of unsuitable batteries may result in
the batteries splitting, or leaking and may cause a fire, injury, or soiling of the battery compartment. When placing the
batteries into the camera, check the polarity markings on the batteries ( - and + ) to ensure that the batteries are inserted
correctly. Incorrect battery polarity will result in inoperability and may result in the batteries splitting or leaking and causing a
fire, injury, or soiling of the battery compartment. Remove the batteries if the camera will not be used for an extended
3
Page 4

period of time. The batteries may leak and cause a fire, injury or soiling of the battery compartment. If the batteries leak,
clean and wipe the battery compartment carefully and install new batteries. Wash your hands carefully if you touch the
battery fluid. When using batteries, carefully read and strictly observe the Safety Instructions and the notes described
below:
Ni-MH rechargeable batteries are recommended. To maximize performance and lifetime, we recommend that
you fully charge the batteries and discharge them for at least one complete cycle before use.
Avoid using batteries in extremely cold environments as low temperatures can shorten the battery life and reduce
digital camera performance. Low temperature will adversely affect alkaline battery performance.
Using new rechargeable batteries or rechargeable batteries that have not been used for an extended period of
time will affect the number of images that can be captured.
If you will not be using the batteries for an extended period of time, remove them from the camera to prevent
leakage or corrosion.
Never use batteries of different types (together) or mix old and new batteries.
Never use manganese batteries.
Contents
1. Introduction ………………………………………………………… 5
1.1 Features
1.2 TFT Screen
1.3 Buttons
1.4 Using a Memory Card
2. Preparation for use ……………………………………………..… 7
2.1 Loading the Batteries
2.2 Inserting a Memory Card
3. V2005 Features …………………………………………………..… 7
3.1 Image / video clips
3.2 Setup Menu
3.3 Playback of Images and Video Clips
4. Camera Operations ……………………………………………….. 9
4.1 Power on / off
4.2 Battery Level
4.3 Capturing Images and Video Clips
4.4 Main (Setup) menu
5. Windows 98 Driver Installation …………………………………. 13
6. Transferring Images to your Computer………………………… 15
7. Specifications ……………………………………………………… 15
8. Maintenance ……………………………………………………..… 15
4
Page 5
1. Introduction
1.1 Features
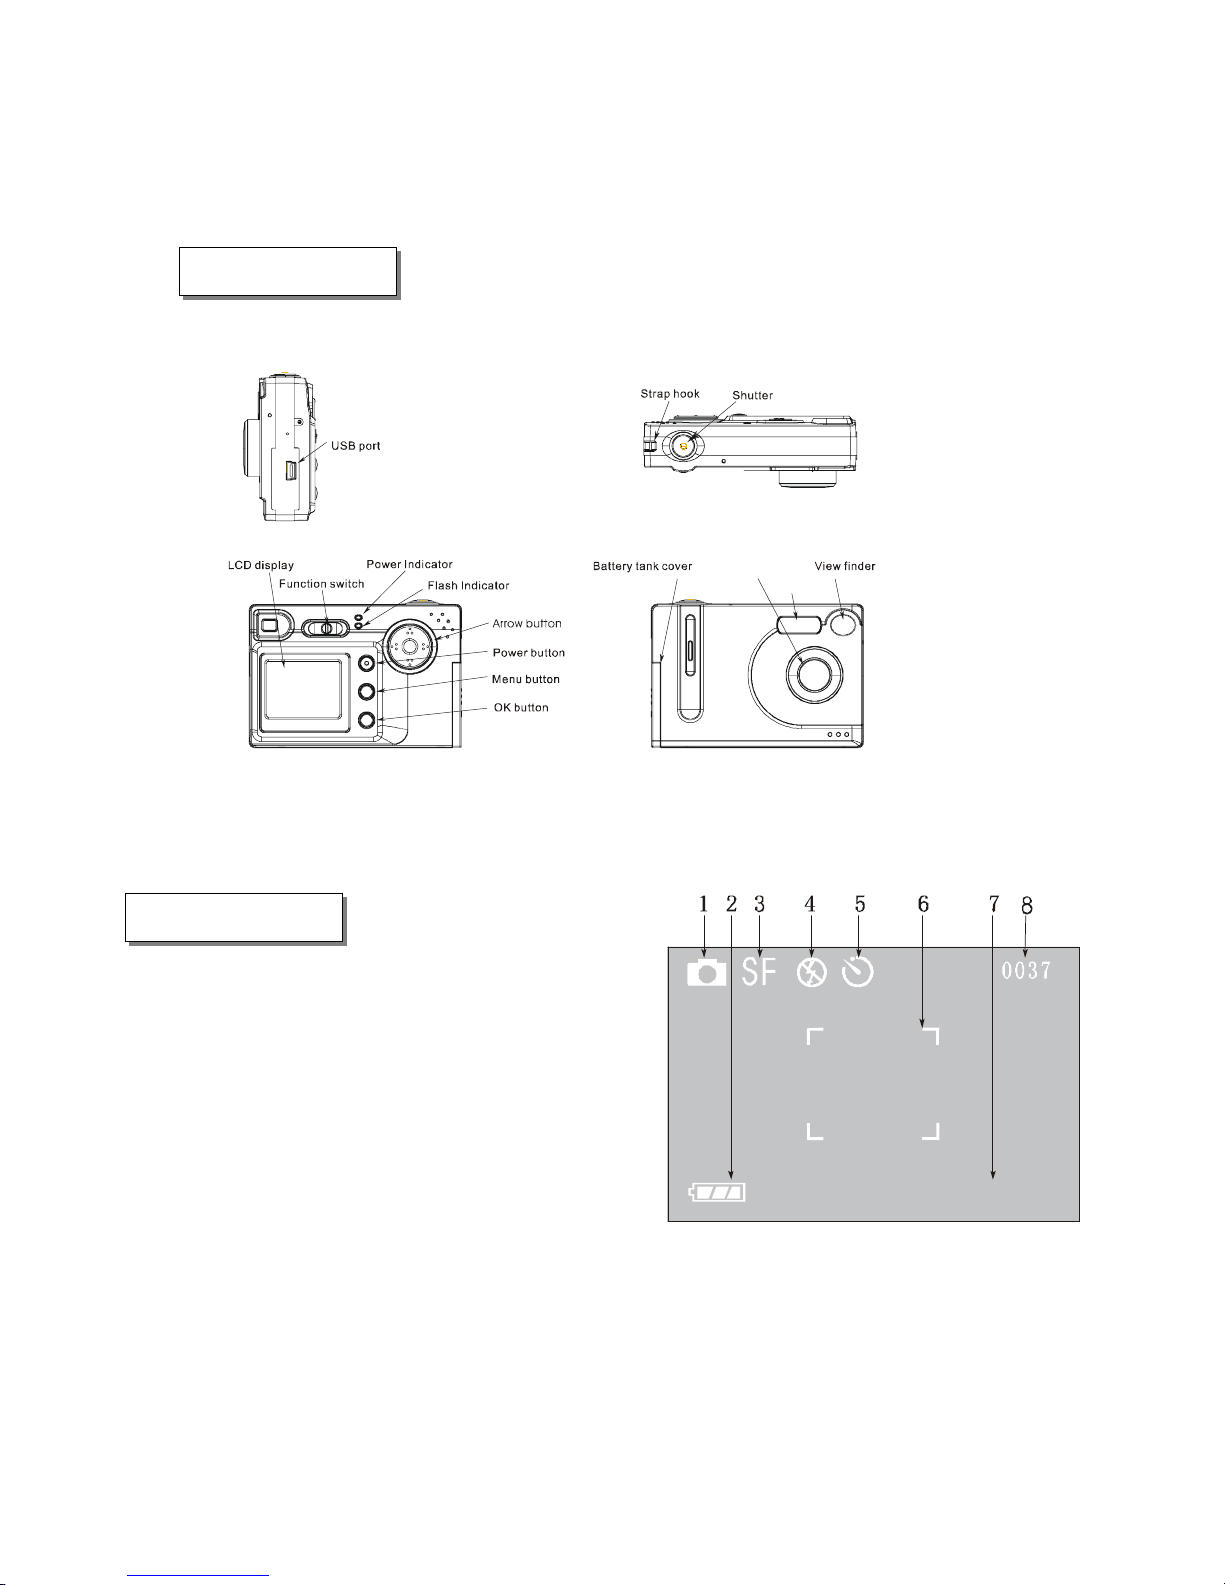
Figure 1 – Vivicam 2005 Features and Controls
1.2 Display
1) Capture mode (still, movie, burst)
2) Battery level Indicator
3) Image resolution (Super Fine, Fine, Economy)
4) Flash mode (Off, Auto, Auto/Red-eye, On)
5) Self-timer mode
6) Focus Frame
7) White balance selection (auto, sunny, cloudy,
fluorescent, tungsten)
8) Number of images remaining in available memory
Lens
Flash lamp
AWB
Figure 2 – Display Icons
5
Page 6

1.3 Control Buttons
1. Power button: On/Off
2. Function switch: To select Capture or Playback modes
3. Menu button: Start/close menu
4. OK button:
In capture mode: used to toggle flash mode
In playback mode: no function
In menu mode, it is used to confirm menu selections
5. Arrow buttons:
Left arrow (“
In capture mode: no function
In playback mode: used for viewing previous image
In menu mode: used for navigating/selecting menu icons
Right arrow (“
In capture mode: used to select white-balance setting
In playback mode: used for viewing next image
In menu mode: used for navigating/selecting menu icons
Up arrow (“
In capture mode: zoom in (digital zoom)
In playback mode: no function
In menu mode: used for navigating/selecting menu icons and functions
”) -
”) -
”) –
Down arrow (“ ”):
In capture mode: zoom out (digital zoom)
In playback mode: no function
In menu mode: used for navigating/selecting menu icons and functions
1.4 Memory Cards
The Vivicam 2005 includes approximately 14 MB of “built-in” internal storage memory. You may
wish to expand the memory capacity of your camera using a Secure Digital (SD) memory card.
Note: The Vivicam 2005, like most digital cameras will automatically use a memory card if it is
inserted into the memory card slot. When there is no memory card present in the camera, your
images and video clips (and files transferred to the camera through USB cable) are stored in the
internal memory. When a memory card is present in the camera, the camera will immediately
begin to use the card in preference to the internal memory. This is called “card preference”.
Data stored in internal memory will not be accessible if a memory card is present. To again
access your data stored in internal memory, simply remove the SD memory card.
6
Page 7

2. Preparation For Use
2.1 Loading batteries
1. Open the battery cover as shown in Figure 3.
2. As indicated inside the battery cover (“+/-”), load three AAA batteries into the compartment
with the polarity (orientation) as shown in Figure 4.
Note: Typically, the V2005 will come with alkaline batteries. Whereas alkaline batteries will
operate the camera, Nickel-Metal Hydride (Ni-MH) rechargeable batteries are highly
recommended because they offer superior performance. Rechargeable NiMH batteries are
both cost effective and reusable. To maximize performance and lifetime, it is recommended
that you fully charge the batteries and discharge them for at least one complete cycle before
use.
Battery
Compartment
Figure 3 – Battery Cover Door Figure 4 – Battery Orientation
3. Close the battery cover.
2.2 Inserting a Memory Card
1) Open the battery cover
2) Insert an SD memory card into the slot in the indicated direction
Insert contact pins first
Label-side of memory card facing towards the back (TFT side) of camera
Press the card gently into the slot – it will “click” into place
To remove a memory card press gently on the edge of the card to eject it
3) Close the battery cover
Memory card
Slot
7
Page 8

3. Camera Operations
3.1 Capturing Images and Video Clips
The Vivicam 2005 features three ways to capture images -
1) Single Shot mode. Single-shot mode is the most common mode used for capturing
individual still images. Single shot is also the default mode for the V2005. Whenever
the camera is turned on, it will be in single-shot mode.
2) Video mode. Capture short video clips. Note that after each video captured, the
camera will revert to single-shot mode.
3) Continuous (burst) Mode. Burst mode allows you to capture a sequence of four images
in succession. The V2005 will capture one frame (every 1.2 seconds) up to four frames.
Note that after each burst capture, the camera will revert to single-shot mode.
The Vivicam 2005 features an integral four-mode flash that can be used in single-shot mode.
The flash is not available in burst or video modes. The four flash modes are: automatic,
automatic with red-eye reduction, off, and on (also known as fill-flash.) Hint: for faster camera
operation and increased battery life set the flash to OFF if you will not be using it.
3.2 Setup Menu
1) White balance: Auto, Sunny, Cloudy, Fluorescent, Tungsten
2) Exposure mode: Automatic, with manual exposure compensation
Exposure compensation range: +/– 1.5 eV
(This allows you to manually under-expose, or over-expose an image)
3) Metering: Full field (100%), central portion (25%), central-spot (4%)
4) Self-timer: 10 second delay
5) Sounds: enable or disable camera tones (beeps)
6) Automatic power-off: You may specify the power-off time as one or three minutes, or
you may disable auto-power off completely
7) Multi-language: You may select a language for the on-screen display - English, French,
Italian, German, Spanish, Portuguese, or Chinese
3.3 Playback of images / video clips
1) Playback display: You may playback images individually, or in a matrix of nine
simultaneous images.
2) Delete and format: You may delete the current image, delete all images, or format
memory (internal memory or memory card.)
3) Display Brightness: Adjustment the LCD brightness level +/- 1 step.
(Also see section 4.4 for additional detail)
8
Page 9

4. Operations
–
–
4.1 Power on/off
Make sure that you have loaded the batteries correctly. Press and hold the power button for
two seconds. The camera will power up. The LEDs will illuminate and the LCD display
screen will turn on. Please press and hold the power button again for two seconds to power
off. (Note: If you will not use the camera for a long time remove the batteries to prevent
damage by potential battery leakage.)
4.2 Battery Level
The battery level indicator icon will display in the lower left-hand corner of the display screen when
the camera is on. The indicator is a three-segment gauge:
When the camera is out of power, it will power off automatically.
4.3 Capturing Images and Video clips
Press the Menu button to select capture mode:
Capture mode. Use left and right buttons (“
: Full battery capacity
: Low battery capacity
: Virtually out of power, camera will power off automatically soon
” and “ ”) to select
Capture mode icon
Figure 5
OFF
capture mode “
” (Figure 5). Press OK to open the submenu as shown in Figure 6.
: Single image capture
:Video clip mode
: Burst mode (4 images)
Note: the default mode is single image capture
Image resolution. “SF”,“F”and “E”indicate image resolution (quality.) You may
select image resolution from the setup menu.
SF (Super-Fine), 1600 x 1200 (2 megapixel)
F (Fine), 1280 x 960
E (Economy), 640 x 480
Note: The default setting is Super-Fine
OFF
Figure 6
Capture modes
9
Page 10

Flash Mode. Press the “OK/ ” button to select flash mode:
: Flash is turned Off.
: Automatic Flash – camera will determine if flash is to be used
: Automatic Flash, with Red-Eye Reduction
: Flash is On and will fire with every still-image. (Also known as Fill flash)
Note: The default mode is Off.
White Balance. Press the right-arrow button (“
”) to select white balance. White
balance allows you to adjust for best image color correction under different lighting
conditions:
AWB: Automatic White Balance
: Cloudy
: Sunny conditions
: Fluorescent
: Tungsten
Note: The default mode is automatic
4.4 Main (Setup) Menu
To access the main (setup) menu, power on the camera and press the
Menu button. Press the right-arrow button (“
”) to select the setup
SETUP
QUALITY
EXPOSURE
SOUND
AUTO OFF
LANGUAGE
DRIVER
EXIT
Figure 7
icon and press the OK button. The main setup menu will be displayed as shown in Figure 7.
Use the up/down buttons to navigate the setup selections. Press “OK” button to open any
advanced setting sub-menu.
Image resolution. “SF”,“F”and “E”indicate image resolution (quality.) Select
the desired image resolution:
Super-Fine, 1600 x 1200 (2 megapixel)
Fine, 1280 x 960
Economy, 640 x 480
Use up and down buttons to select the desired resolution. Press
OK to confirm and exit. Note: The default setting is Super-Fine.
Exposure compensation allows you to adjust the exposure of a scene
based upon scene conditions and experience. From the setup menu
Figure 8
select “Exposure Compensation.” Press OK to open the sub-menu as shown in Figure 8.
+ Compensation increases the exposure. This is used to brighten dark scenes.
0 Represents no exposure compensation and the cameras automatic exposure will
be used. (Default)
- Compensation decreases the exposure. This is used to darken bright scenes.
EXIT → Exit menu
Use the up and down buttons to select the desired compensation, and then press the
10
Page 11

OK button. The sub-menu is closed and the setting is saved.
–
r
Sound. You may enable or disable camera tones (beeps.) In
the setup menu, use up and down buttons to move the pointer to
“Sound.” Press OK to open the sub-menu (Figure 9):
ON → Enable system tones
OFF → Disable system tones
EXIT → Exit sub-menu
Use the up and down buttons to select the desired setting, and then press the OK button.
The sub-menu is closed and the setting is saved.
Auto power off. When the camera is idle for a period of time, it
will power off automatically to save battery power. Use the up
and down buttons to select “Auto Off.” Press OK to open the
sub-menu (Figure 10):
1 MIN → auto power off in 1 minute
3 MINS → auto power off in 3 minutes
OFF → Camera will not auto-power off
EXIT → Exit sub-menu
Use the up and down buttons to select the desired setting, and then press the OK button.
The sub-menu is closed and the setting is saved.
Language setting. You may select a language for the camera
display menus. From the main menu use up and down buttons to
move the pointer to “Language.” Press OK to open the sub-menu.
Use the up and down buttons to select a language (Figure 11.)
Use the up and down buttons to select the desired language, and then press the OK
button. Then the sub-menu is closed and the setting is saved.
Self-timer. Use“ ”or“ ” to select“ ”,and use “up” and
Figure 9
Figure 10
Figure 11
OFF
“down” button to select “self-timer” as shown in Figure 12.
:Start “Self-timer”
Use the up and down buttons to select the self-timer, and then press the OK button.
The sub-menu is closed and the setting is saved.
:Disable: Self-timer
Figure 12
Self-Time
11
Page 12

–
y
4.5 Playback
Figure 13
Single or Multiple Display. Slide the function key to“ ”to playback your
Multi-image displa
images. Most often you will display your images individually. You may also display images in
LCD
0
groups of nine. Press the Menu button. Use the “left” and/or “right” key to select“
”, as
shown in Figure 13.
:Display image picture :Nine image display
Default setting is single image playback.
Delete and Format. To delete images in the playback mode use “left” and “right” keys to select
“
”. Highlight the desired function as shown in Figure 14:
DELETE THIS → Delete the current image from
memory or SD card.
DELETE ALL → Delete all images from memory or SD
card.
FORMAT → Format memory or memory card.
Delete and Format
Figure 14 -
EXIT → Exit menu
Use the up and down buttons to make a selection, and press the OK button. The
sub-menu is closed and a confirmation message appears. Select “Yes”, and press OK.
LCD display screen light brightness:
Use “left” and “right” keys to select“
:Increase display brightness
:Default brightness (factory setting)
:Decrease display brightness
Use the up and down buttons to select the desired brightness, and then press the OK button.
The sub-menu is closed and the setting is saved.
”as shown in Figure 15:
LCD
0
LCD
+1
LCD
- 1
Figure 15 –
LCD Brightness
12
Page 13

5. Windows 98 Mass Storage Driver Installation
Windows 98 users will need to install a software “driver” before connecting their Vivicam 2005 to
their computer. It is important that Windows 98 users first install the driver from the CD ROM
before connecting the camera to their PC. Insert the product CD ROM and follow the on screen
instructions to install the driver for Win 98. Once the driver is installed you may transfer images
to your PC as outlined in the next section.
Windows ME, 2000, and XP as well as Mac OSX users do not need a driver. In fact, Win
Me/200/XP users should not install the Win 98 driver. Simply connect the Vivicam 2005 camera
to your PC or Mac and wait momentarily for the computer to initialize and recognize the camera as
a USB removable disk.
6. Transferring Images to your Computer
Downloading your images to your computer is easy.
Step 1: Connecting the Camera to Your Computer
Connect one end of the USB cable to an available USB port on your computer.
1.
2. Connect the other end of the USB cable to the USB connector on the camera.
3. Turn the camera on and allow the computer to recognize the camera.
4. From the Windows desktop double click on “My Computer”. (Often times a new window will
automatically open on your PC. If so, skip to step 7.)
5. Look for a new “removable disk” icon. This “removable disk” is actually the memory (or memory
card) in your camera. Typically, the camera will be assigned drive letter “e” or higher.
6. Double click on the removable disk and locate the DCIM folder.
7. Double click on the DCIM folder to open it to find more folders - your images and video clips will be
inside these folders
Mac users: double-click the “unlabeled” disk drive icon on our desktop. iPhoto may
automatically launch. The volume label may vary depending upon whether you use internal
camera memory, or a memory card.
Step 2: Transfer images to your computer.
When the camera is turned on and connected to your computer, it is considered to be a disk
drive, just like a floppy disk or CD. You can download (transfer) images by copying them
from the “removable disk” (“untitled” disk on a Macintosh) to your computers hard drive.
13
Page 14

Windows -
Open the “removable disk” and subsequent folders by double clicking on them. Double click
on the folder. Your images are inside these folder(s). Select the images that you want, and
then choose “Copy” from the “Edit” menu. Open the destination location (folder) and choose
“Paste” from the “Edit” menu. You may also drag and drop image files from the camera to a
desired location.
Macintosh and Desktop/LX –
Open the “unlabeled” disk icon, and the destination location on your hard disk. Drag and
drop from the camera to the desired destination.
Note: Memory card users may prefer to use a memory card reader (highly recommended).
Memory card readers are fast, simple, and self-powered. Your camera batteries will not be
used if you use a card reader.
14
Page 15

7. Features and Specifications
1. Still -Image Resolution: 1600 X 1200 (maximum), 1280 x 960, 640 x 480
2. Video resolution: 320 x 240
3. Color: 24 Bits
4. ISO: 100 - 400
5. Shutter speed: 1/10 to 1/1000 second
6. Self-timer: 10 seconds
7. Digital zoom: 4X
8. Flash index: Guide Number 4
9. Flash recharge time: Typically 5 seconds
10. Lens Focal length: 9.8 mm (35mm equivalent of 43 mm)
11. F number: F/2.8
12. Field of View: 55°
13. Range of focus: four feet to infinity
14. LCD field range: over 95% of the field
15. Still-Image file format: JPG
16. Move-clip file format: AVI
17. Internal Memory: 16 MB (approximately 14 MB available for image storage)
18. SD memory card capacity: up to 512MB
19. Power source: Three AAA batteries
20. Dimensions: 88 mm x 60 mm x 17.9 mm (3.5” x 2.4” x .7”)
21. Weight: 110 grams (3.9 ounces) without batteries
8. Maintenance
1. If the camera is to be stored remove all batteries when it is not in use.
2. Use the wrist strap to avoid dropping the camera.
3. Clean the lens, viewfinder, and LCD with damp cloth if required.
15
 Loading...