

Page 1
5 in 1 Bluetooth
Fitness Tracker
Instruction Manual
Item #TYL-5402
© 2017 Sakar International, Inc. All rights reserved.
Page 2

1
Introduction
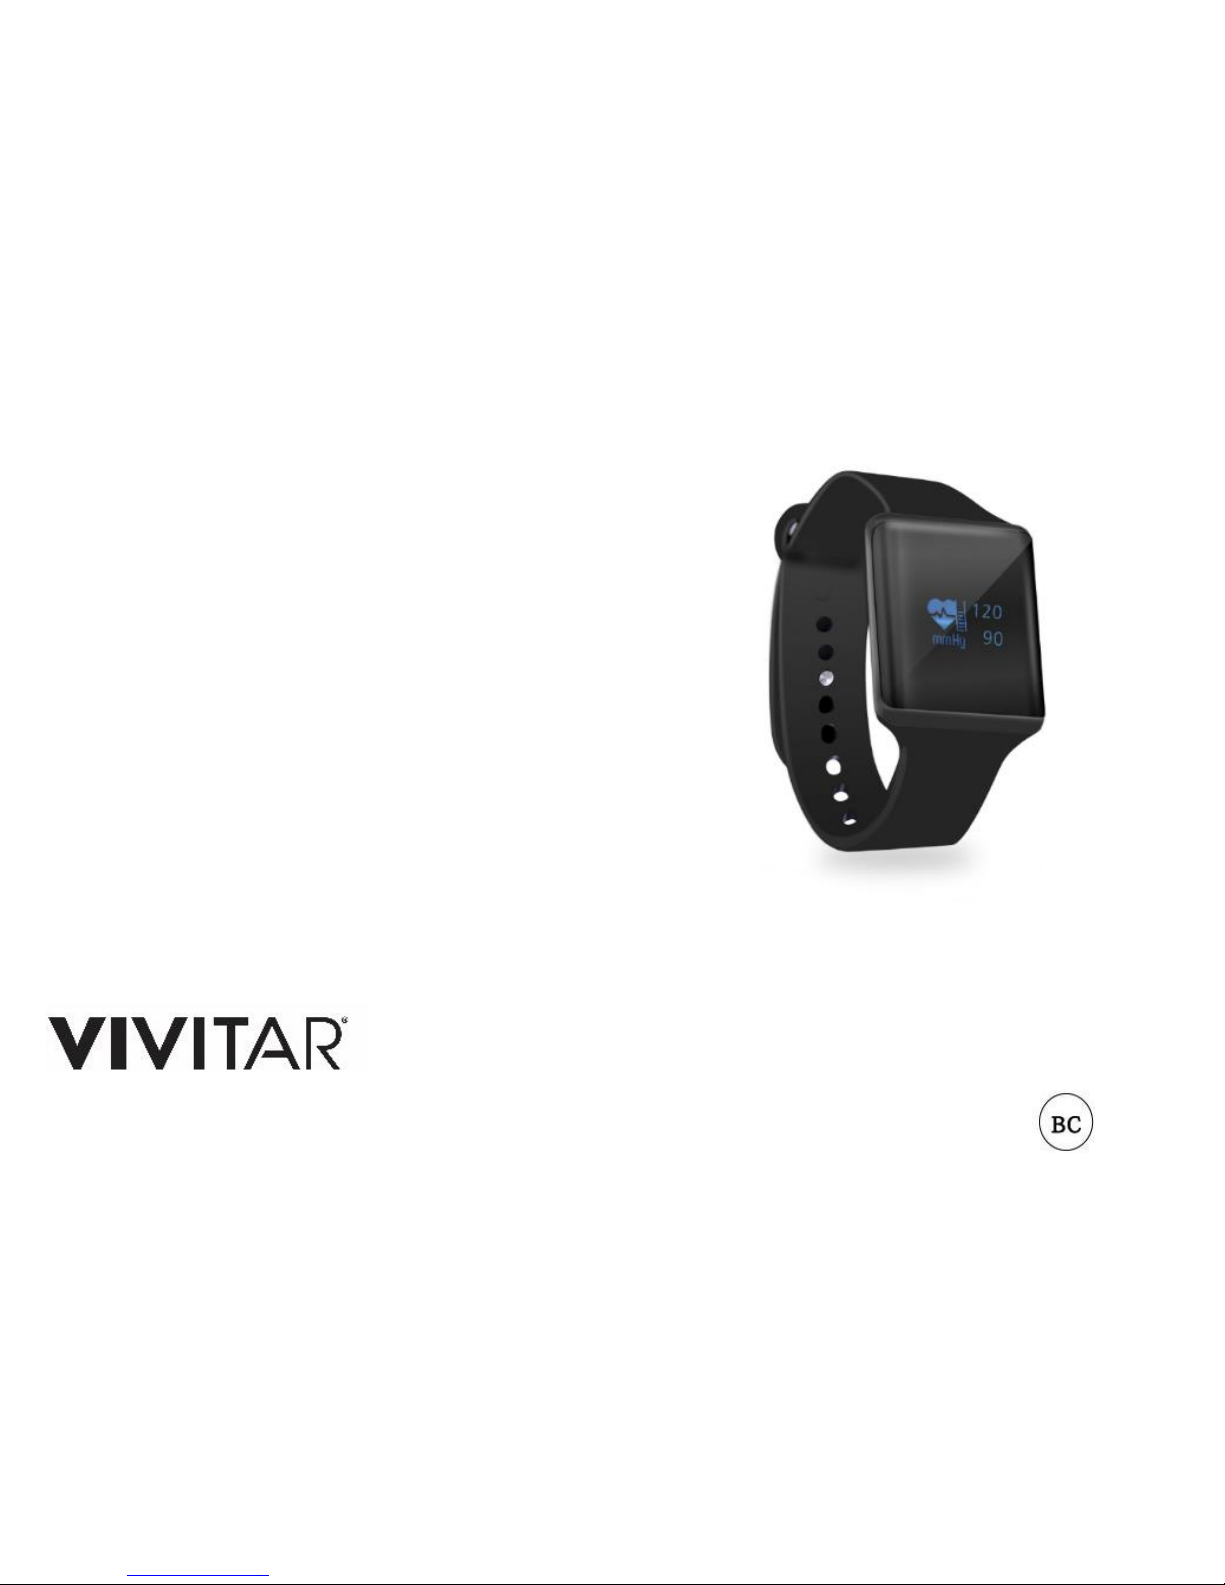
The Vivitar Fitness Tracker allows you to track your heart rate, blood pressure, steps,
distance, calories burned and quality of sleep. It features incoming caller ID, incoming
messaging and notifications. It also includes a GPS running locator. It is compatible with
iOS and Android devices so that you can track your data via the app on your mobile device.
Please read this manual first before using this device to get best results.
Intended Use
This product is a general wellness product intended to promote physical fitness by tracking
exercise and aerobic activity. It is NOT a medical device, nor is it intended or designed to
take the place of one. It is NOT designed to diagnose or help treat any specific condition
or disease.
Prior to beginning any fitness program please be sure to consult your doctor.
Page 3

2
Important Note
Your Vivitar Fitness Tracker can be used as a Bluetooth device so that you can monitor your
activity using iPhones and iPads which run iOS 8 and above, and Android devices running
Android 4.4 or above. In addition, your phone or tablet needs to support Bluetooth Low
Energy (Bluetooth 4.0). To use your Tracker with your smartphone or tablet, you must
make sure the Bluetooth function is enabled.
Package Contents
1. Vivitar 5 in 1 Fitness Tracker
2. Charging cable
3. Instruction manual with warranty information
Page 4

3
Features
• Wirelessly syncs data to smartphones and portable devices
• OLED touch screen
• Set sleep and activity goals
• Receive and display text messages and social media notifications from your smart
phone
• Tracks heart rate, blood pressure, steps, distance, calories burned and quality of sleep.
• GPS running locator
• Incoming Caller ID
• Incoming messages
• Rechargeable battery
• Magnetic charging system
• Bluetooth enabled
• Sweat proof material
• Shockproof anodized aluminum casing
Page 5
4
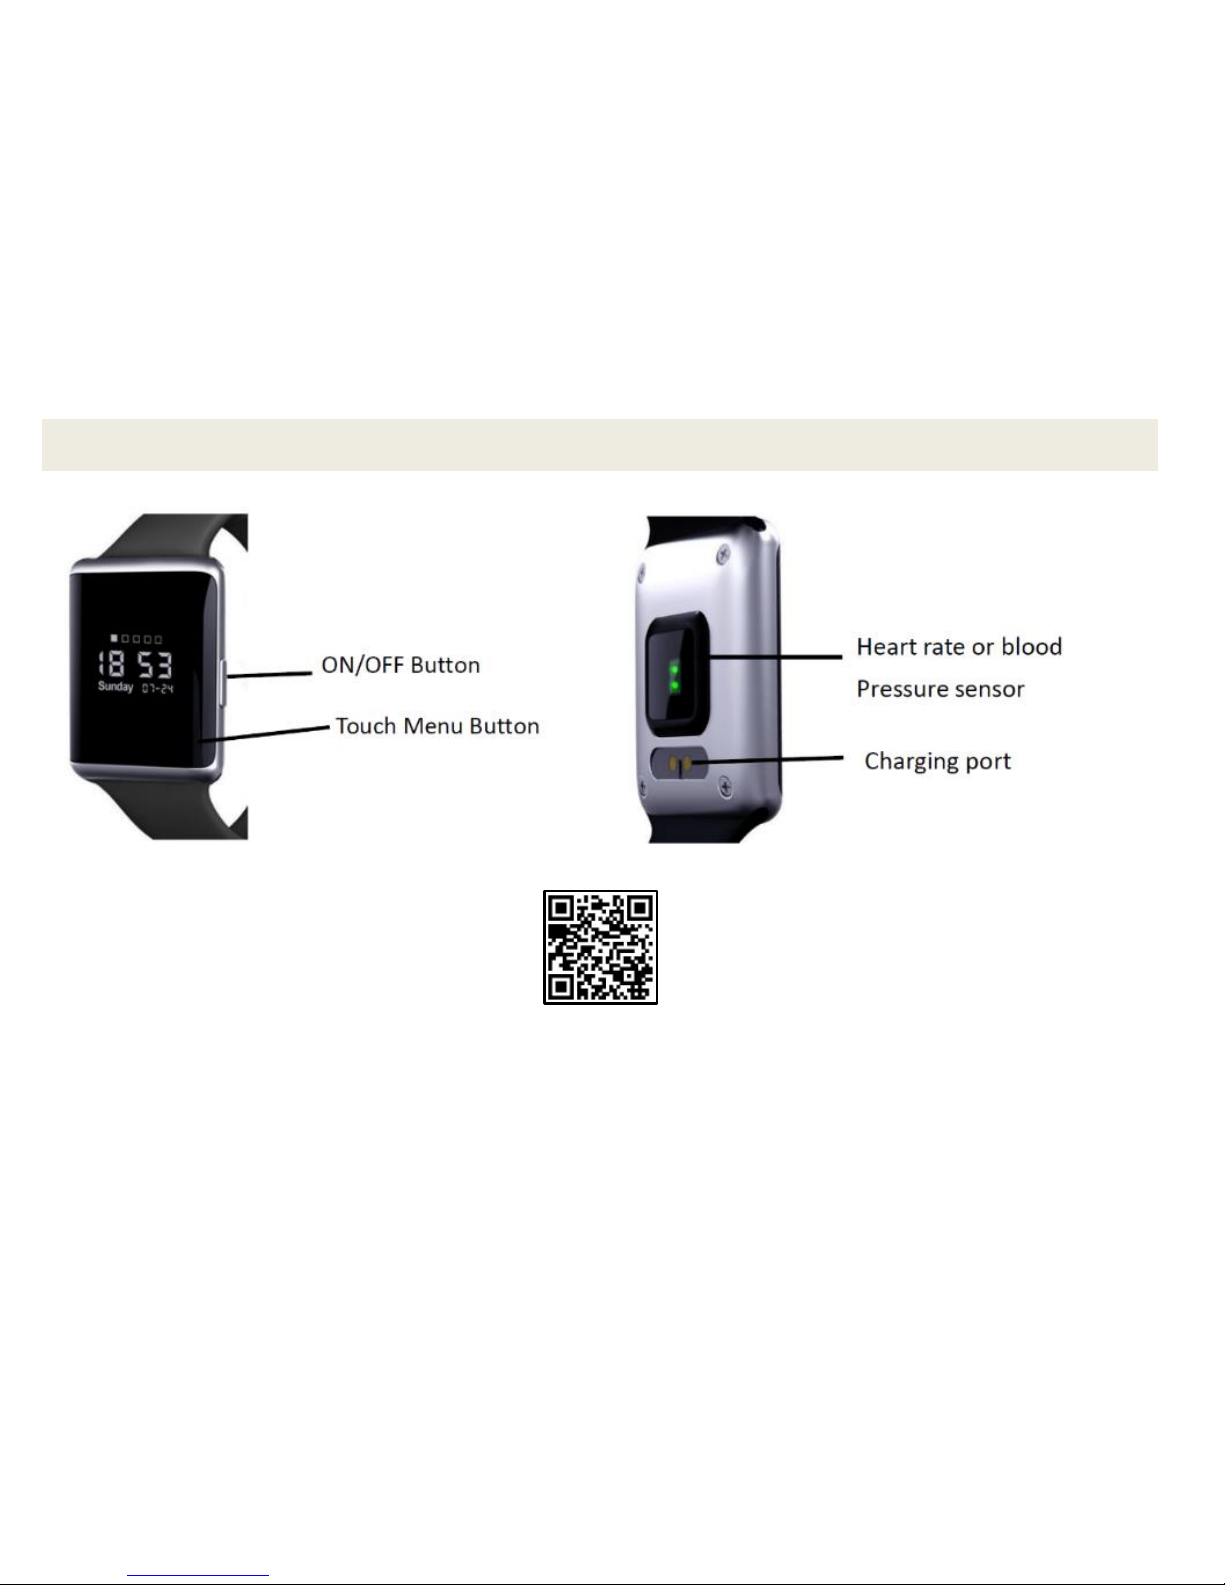
A Quick Look at Your Fitness Tracker
Scan in the QR code above to get a quick look at your Vivitar Tracker and Vivitar Get Fit app.
Page 6
5
Power On/Off:
Power On: First time use
Long press the On/Off button for 3 seconds.
The main watch interface is displayed.
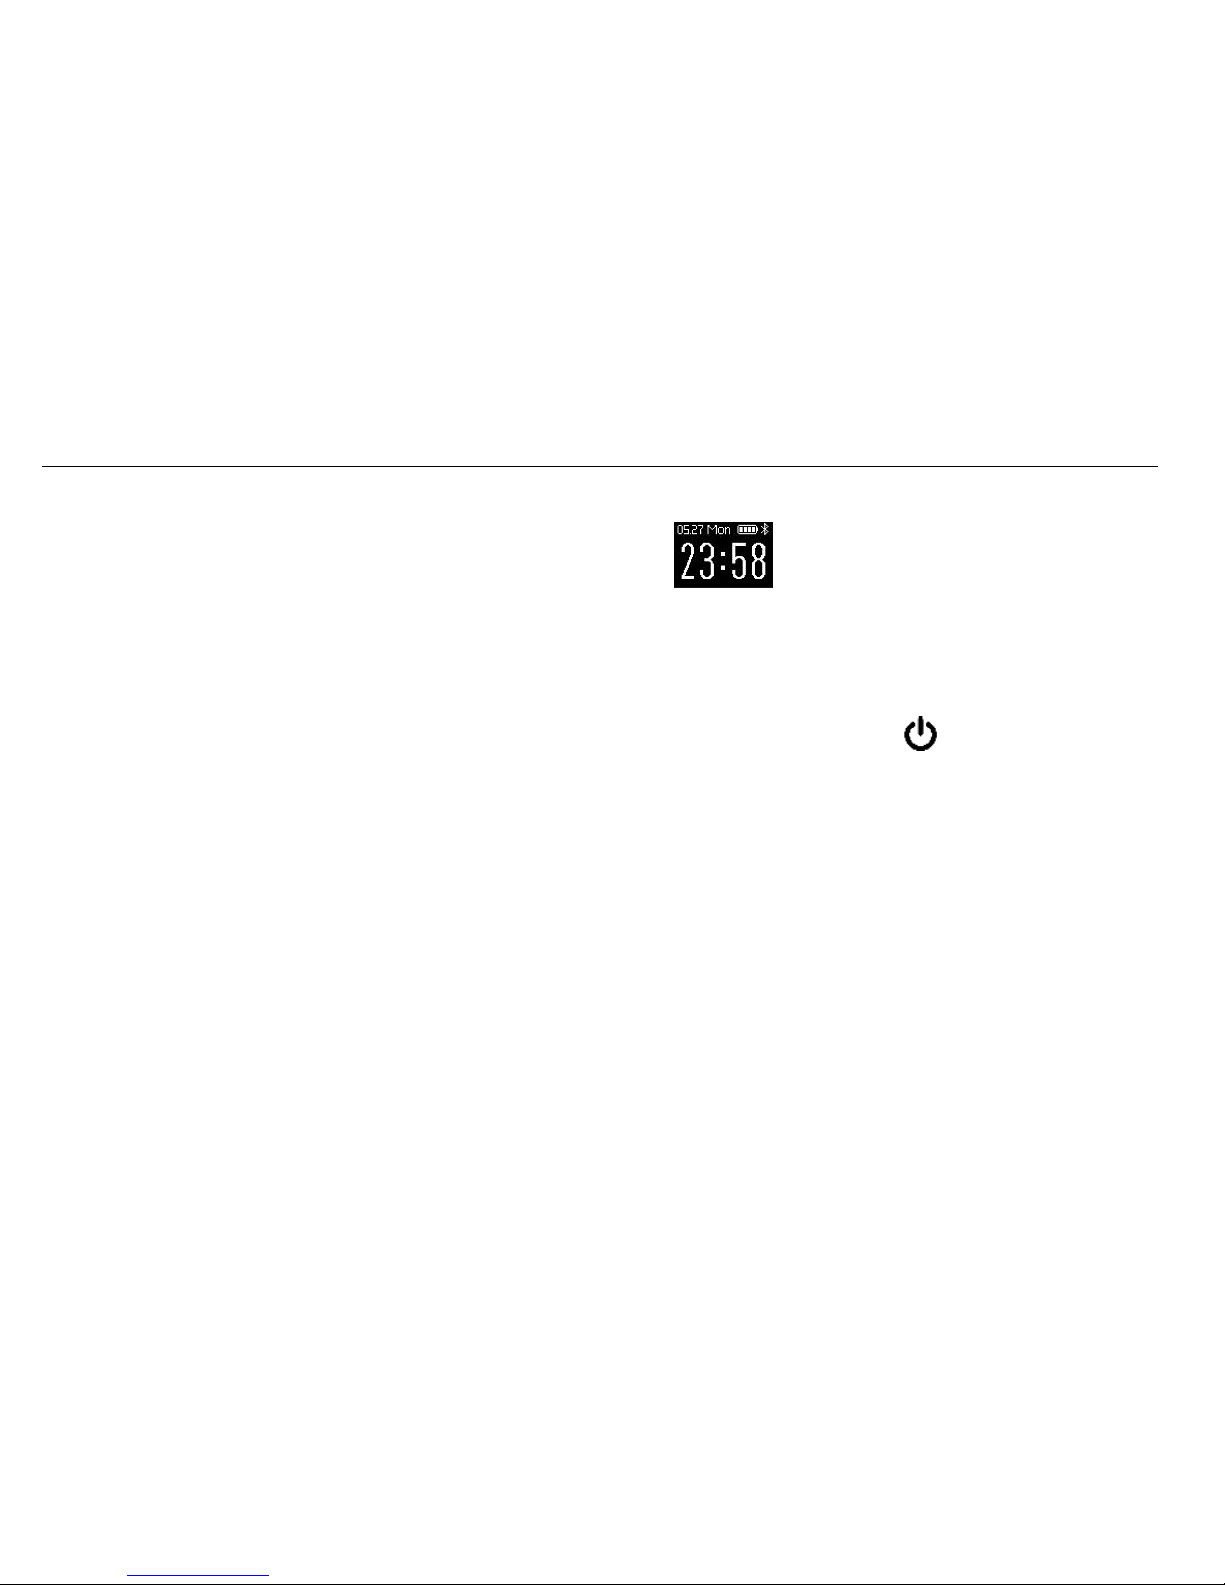
Power Off:
Once your tracker is powered on and in use, to power it off, tap the Touch Menu button (or
short press the On/Off button) until the screen displays the power icon:
Then long press the On/Off button for 3 seconds. The Vivitar Tracker’s screen powers off
and vibrates, indicating that the tracker has been successfully powered off.
To power on again, long press the On/Off button for 3 seconds.
Page 7

6
Charging Your Fitness Tracker
In order to charge, please follow the steps below:
1. Connect the charging end of the included charging cable onto the charging port on
the back side of the tracker. The magnetic connection will only allow the charger to
connect properly.
2. Insert the other end of the cable into an available USB port on your computer or USB
charging adapter.
3. The average time for recharging is 1-2 hours. Please allow up to 2 hours for an initial
charge before the first use.
The charging battery icon always displays while the tracker is charging. Tap the ON/Off
button for 1 second or the touch menu button on the screen while charging to display the
Time Mode. This shows the date and time as well as the battery and Bluetooth status.
Page 8

7
Setting Up the Vivitar Get Fit App
Mobile Device Requirements
Your Vivitar 5 in 1 Fitness Tracker can be used as a Bluetooth device, compatible with most
iPhone/iPad/Android phones or tablets which support Bluetooth 4.0 Low Energy.
IOS OPERATING SYSTEM
Compatible with iOS 8.0 or higher
• iPhone 4S, 5,5C, 5S, 6 or newer
• iPad Mini, Mini 2, or newer
• New iPad, iPad 4, or newer
ANDROID OPERATING SYSTEM
Compatible with Android 4.4 or higher
• Samsung S3, S4, S5 or newer
• Samsung Note 2, 3, or newer
• Google Nexus 5, or newer
• Many more Android devices
NOTE: Your mobile device requires Bluetooth LE (Bluetooth low energy) software or later.
Page 9
8
Installing the Vivitar Get Fit App
Automatically and wirelessly sync your Vivitar 5 in 1 Fitness Tracker with your mobile device
so you can view your latest stats, graphs and charts on your smartphone or tablet.
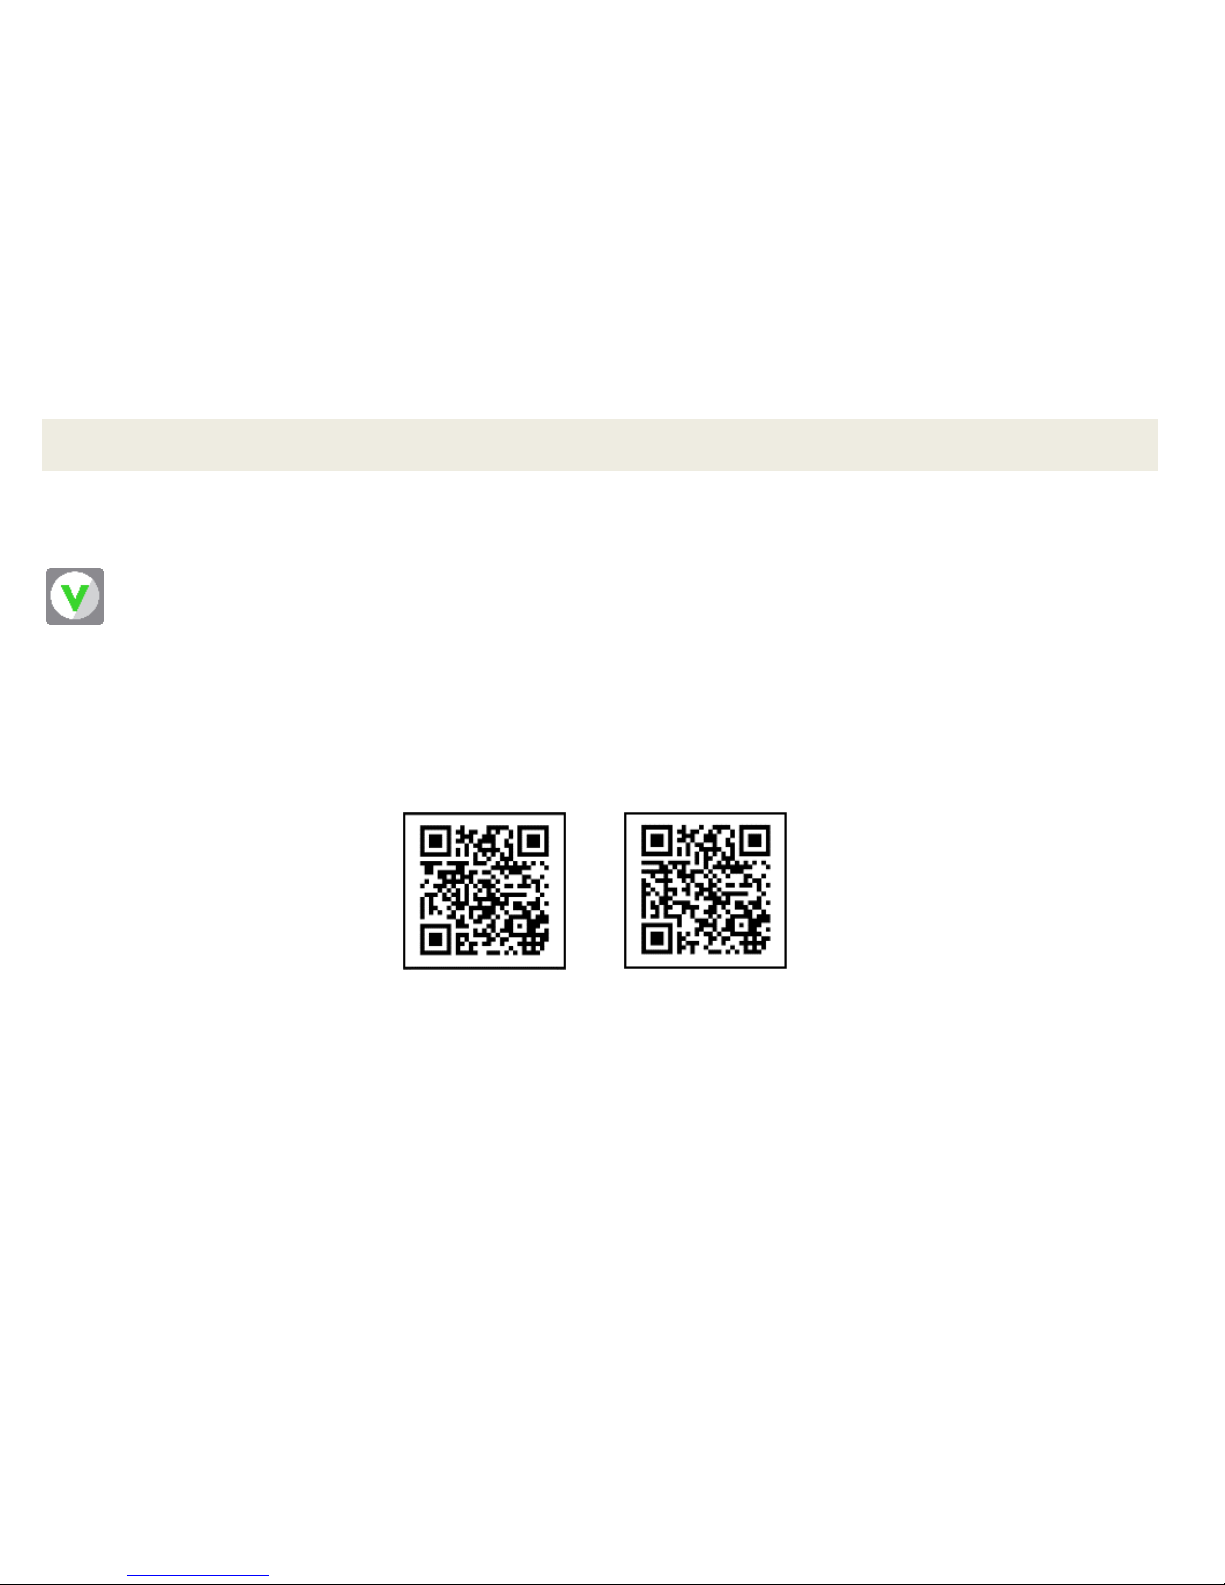
The Vivitar Get Fit app can be found on the iOS App store or Google Play store by
searching for ‘Vivitar Get Fit’.
Alternatively, scan in the below QR codes to install the Vivitar Get Fit app.
Android iOS
Page 10
9
In order to use your Vivitar Tracker, you must ensure the following:
1. Your smartphone or tablet must have Bluetooth turned ON.
2. You must have the Vivitar Get Fit app installed.
3. To view a video tutorial on setting up your tracker, please scan this QR code.
NOTE: If you already have installed the Vivitar Get Fit application, check for available
updates to make sure you have the latest version.
Page 11

10
Initial Vivitar Tracker Setup and Device Pairing
Your Vivitar 5 in 1 Fitness Tracker must be paired directly through the Vivitar
Get Fit App.
Getting Started
1. Power on your Vivitar 5 in 1 Fitness Tracker. It is recommended to make sure it is fully
charged.
2. Power on your smartphone or tablet. Make sure your smartphone or tablet is set to
Bluetooth ‘On’. Check your mobile device settings if needed.
3. Tap the ‘Vivitar Get Fit’ app from your mobile device to launch the app and begin the
initial setup.
Initial Setup Wizard
Upon first launch of the Vivitar Get Fit app, you will be prompted to setup your personal
and device settings.
1. PERSONAL SETTINGS
a. Skin Color Setting:
Please choose the skin tone that matches yours the best. This setting will increase
Page 12

11
the accuracy of the blood pressure mode of your tracker.
Tap the arrow to save your setting and continue the setup.
b. Personal Information Settings:
- Please select your gender by tapping on the Male or Female image to select it.
- Please select your date of birth (Year / Month / Day).
Tap the arrow to save your setting and continue the setup.
c. Personal Data:
- Please select your weight.
- Please select your height.
Tap the arrow to save your setting and continue the setup.
d. Setting Your Goals:
According to the personal information and data entered in the previous screens,
the suggested number of daily steps and hours of sleep are automatically
displayed.
- Please set your goal for the number of daily steps you wish to reach.
- Please set your goal for your desired number of hours of sleep.
Tap the arrow to save your setting and continue the setup.
Page 13

12
2. SELECT DEVICE: Device Pairing
a. The Dashboard, the main screen of the app, opens once you have set and saved
your personal settings.
b. On the Dashboard, tap on ‘Click to Connect’.
c. The Device Connection screen appears with a list of available tracker devices. Swipe
down on the screen to refresh the list if needed.
Tap on your Vivitar Tracker to select and connect.
NOTE: Your Vivitar Tracker’s time and date will sync to your mobile device
automatically after successful connection.
If you are having problems connecting your device, please call 1-877-397-8200 for
assistance.
Page 14

13
Using the Vivitar Get Fit App
IMPORTANT NOTE:
In order to maintain sufficient transmission range it is necessary to keep your Vivitar Tracker
within 30 feet of your smartphone/tablet. It is recommended to keep your
smartphone/tablet in front of you or in your pocket when syncing information or for caller
ID. The Vivitar Tracker will always be monitoring activity, even if your mobile device is not
with you.
If your Vivitar Tracker is not making a proper Bluetooth connection, check your
smartphone/tablet Bluetooth settings menu.
Getting Started
1. Make sure your Bluetooth tracker has been charged and placed properly on your wrist.
Power on your mobile device and launch the Vivitar Get Fit app.
2. Once you have completed the initial set up and paired your device, the Dashboard
screen appears.
Page 15

14
Navigation Bar
The bottom navigation bar includes buttons that allow you to quickly access data
measurements for your daily activity (Steps, Sleep, Heart Rate, Blood Pressure), running and
device and app settings.
• Tap the ‘Dashboard’ button to access the ‘Dashboard’ screen.
• Tap the ‘Running’ button to access the ‘Running’ screen.
• Tap the ‘Settings’ button to access the ‘Settings’ screen.
NOTE: The selected button appears highlighted.
Page 16

15
Dashboard
Tap on the ‘Dashboard’ button to view the Dashboard screen.
The following is displayed:
• Current Steps and latest hours of sleep
• Steps: today, yesterday, 2 days ago
• Sport: Displays a chart of your daily steps.
Tap the chart to view the Sports data screen which displays a
summary of your daily steps, distance and calories. Your steps
per every half hour of the day are also shown.
• Sleep: Displays a chart of your daily sleep.
Tap the chart to view the Sleep data screen which displays a
summary of your daily sleep duration, amount of times you
wake up, the time when you fall asleep and when you wake
up, as well as the amount of time you are in a deep sleep and
light sleep.
• Heart Rate: Displays a chart of your daily Heart Rate.
Tap the chart to view the Heart Rate data screen which
displays your daily Heart Rate along with the Heart Rate Zone.
Page 17

16
• Blood Pressure: Displays a chart of your Blood Pressure.
Tap the chart to view your daily Blood Pressure data which displays your lowest BP,
highest BP and measured time.
• Manual Heart Rate:
Tap the Heart Rate icon to open the Manual Heart Rate data screen, which monitors
your heart rate via the app. You can choose to save the data to the app. This is the only
way to save this data to your app.
• Manual Blood Pressure:
Tap the Blood Pressure icon to open the Manual Blood Pressure data screen, which
monitors your blood pressure via the app. You can choose to save the data to the app.
This is the only way to save this data to your app.
NOTE: Share your data to your social networks by tapping on the upload icon on the data
screens.
Page 18

17
DASHBOARD DATA SCREENS:
Page 19

18
Running
Tap on the ‘Running’ button to view the Running screen. Tap on ‘Start Running’ to open
the map screen. The following is displayed:
• Map View: Tracks your running locations as per the GPS
reading.
• Start button: Tap the ‘Start Sport/Running’ button to begin
recording your running data.
NOTE: GPS signal may be poor and the app may not
accurately track in maps if you are indoors.
• Current distance: The accumulate distance as you run.
• Active running time: The amount of time you are running
is displayed.
• Kilometers/Miles per hour: The distance run per hour is
displayed.
• Pace: Your running place is displayed.
• Calories: Number of calories burned while running is
displayed.
Page 20

19
Settings
Tap on the ‘Settings’ button to view the Settings screen.
The following is displayed:
1. Personal Settings
Tap on your profile icon or nickname to open the Profile
screen displaying your personal settings.
The following Profile settings are displayed and can be
changed by tapping the setting.
a. Profile Image:
Tap the profile icon and follow the prompts to change the
icon to a photo from your mobile device albums or to take a
picture using the mobile device’s camera. To return to the
Profile screen without changing the profile picture, tap
Cancel.
b. Nickname:
You can change the default nickname by tapping on it and
entering a new name. Then tap ‘Done’/’Confirm’ to save the
setting. To return to the Profile screen without changing the
Page 21

20
nickname, tap Cancel.
c. Gender:
Tap to change the gender setting. Select a setting: Male, Female.
Tap ‘Confirm’ to save the setting, or tap ‘Cancel’ to return to the Profile screen
without changing the setting.
d. Date of Birth:
Tap to change the date of birth setting. Scroll each part of the setting up or down
to adjust the date as per Year: Month: Day. Tap ‘Confirm’ to save the setting, or tap
‘Cancel’ to return to the Profile screen without changing the setting.
e. Weight:
Tap to change the weight setting. Scroll up or down to select your weight. Tap
‘Confirm’ to save the setting, or tap ‘Cancel’ to return to the Profile screen without
changing the setting.
f. Height:
Tap to change the height setting. Scroll up or down to select your height. Tap
‘Confirm’ to save the setting, or tap ‘Cancel’ to return to the Profile screen without
changing the setting.
g. BMI:
Your Body Mass Index is shown as per your personal information you have
Page 22

21
entered.
Tap the Back button to return to the Profile screen.
h. Skin Color:
Tap to change the skin color setting. A window displaying skin color options
appear. Tap on one of the options then tap ‘Confirm’ to save or tap ‘Cancel’ to
return to the Profile screen without changing the setting.
NOTE: Make sure to confirm each setting separately, and when completed tap ‘SAVE’ at
the bottom of the screen to save your updated personal settings. Tap the Back button
to return to the Settings screen.
2. My Device
My device displays the name and battery level of your Vivitar Tracker.
Tap the tracker name to open the My Device screen which shows your tracker current
settings and allows you to change the settings.
The following is displayed: Notifications and More
Notifications
a. Message Notification:
- Tap ‘Message Notification’ to view the current notification status or to change the
Page 23

22
notifications status for the following device functions and apps:
Phone call, Message, WeChat, QQ, Facebook, Twitter, WhatsApp
- Tap on the On/Off slider to change the status, then tap the Back button to save
and return to the My Device screen.
NOTE: To allow your mobile device to receive notifications, if needed, please check
the device’s settings and make sure the notification access is set to ON.
b. Alarm Setting:
- Tap ‘Alarm setting’ to open the Alarm Settings screen. There are up to 3 alarms
that can be set.
- Tap on an alarm to set the time.
- Tap on the slider to turn the selected alarm on or off.
When the alarm goes off, the tracker vibrates twice and the tracker displays the
alarm clock and time. You can tap on the tracker’s Touch Menu button to stop the
tracker’s alarm.
c. Sedentary Setting:
The Sedentary Settings allow you to set the status (on/off) and timing the
reminder when you are inactive.
- Tap the slider to activate or to turn off the Sedentary setting.
- Tap ‘Sedentary settings’ to open the Sedentary settings screen.
Page 24

23
- Tap ‘Start Time’ and ‘End Time’ to set the time schedule of when the tracker starts
and stops monitoring the lack of physical activity. The time must be set between
8am and 6pm.
- Tap ‘Length of inactivity before reminder’ to set the amount of time of inactivity
that needs to pass before the tracker’s reminder is activated.
d. Turn the Wrist:
Tap ‘Turn the Wrist’ to select the start time and end time when the turning of the
wrist activates the tracker.
More
a. Pair Device:
Tap the slider to pair or unpair your tracker and mobile device.
b. BP Private Mode:
Tap the slider to activate or deactivate the personal tailored BP Private Mode to
obtain more accurate data.
c. HR Setting
d. Brightness Adjustment:
- Tap ‘Brightness Adjustment’ to control the tracker’s screen brightness.
- Tap the slider to turn on or off the Automatic adjustment setting.
Page 25

24
- Tap and slide the circle to set the brightness index.
e. Reset Device Password:
Tap to password protect your Vivitar tracker. This allows you the option of
entering a password for your tracker, preventing others from connecting to your
device.
- Enter the default password: 0000.
- Choose a new password and enter it twice.
- Tap ‘Reset Password’ to save the device password.
IMPORTANT: Please make sure to write down your new password for safe keeping.
f. Firmware Upgrade:
Tap ‘Firmware upgrade’ to check if you have the latest version tracker firmware. If
there is a newer version, you will be prompted to update.
g. Disconnect:
Tap the ‘Disconnect’ button to unpair your tracker and mobile device.
NOTE: After the devices are disconnected, the My Device name appears in the
Settings screen as Device/Disconnected. To reconnect, tap the device name to
open the Device Connection screen, then tap on your Vivitar Tracker to select and
connect it.
Page 26

25
3. Setting Goal
a. Sport Goal:
The Sport Goal shows the current number of steps you have set to reach. Tap
‘Sport Goal’ to open the Sport Goal screen. The suggested number of daily steps is
shown above the option settings. To change the goal for your daily number of
steps to reach, scroll up or down, select the new goal and then tap ‘Save’ to
confirm and return to the Settings screen.
b. Sleep Goal:
The Sleep Goal shows the current hours of sleep you have set. Tap ‘Sleep Goal’ to
open the Sleep Goal screen. The suggested hours of sleep is shown above the
option settings. To change the goal for your number of hours of sleep, scroll up or
down, select the new goal and then tap ‘Save’ to confirm and return to the
Settings screen.
4. More
a. Unit Setting:
The Unit Setting shows the current unit of measure.
Tap ‘Unit Setting’ to change the unit to: Imperial (USA) or Metric.
b. About Us:
Tap ‘About Us’ to open the About Us screen. The app version is displayed. If there
is an updated version of the Vivitar Get Fit app, you will be prompted to update.
Page 27

26
Using Your 5 in 1 Fitness Tracker
The first time you use your Vivitar Tracker, long press and hold the ON/OFF button for 3
seconds to activate the tracker and enter time mode.
Your Vivitar Tracker includes the following modes: Time Mode, Steps Mode, Distance Mode,
Calories Mode, Heart Rate Monitor Mode, Blood Pressure Monitor Mode, Sleep Mode,
Power on/off Mode.
Tap the Mode button on your Bluetooth tracker to toggle through the different modes.
Wearing Your Vivitar Tracker
Place the band over your wrist. Pull the end of the band with the prong through the loop
and then insert the prong into the appropriate hole, so the tracker is secured and
comfortable on your wrist. Keep the heart rate/blood pressure sensor touching your skin,
but not too tight as to be uncomfortable. Make sure the tracker is placed on your forearm,
above the bones of your wrist.
Basic Functions
1. Powering On:
The first time you use your Vivitar Tracker, press the ON/OFF button for 3 seconds to
activate the tracker and to enter Time Mode.
Page 28

27
2. Switching Modes:
Tap the touch menu button on the screen or press the ON/OFF button for 1 second
while in Time Mode to scroll through and enter the tracker modes in the following
sequence: Steps Mode, Distance Mode, Calories Mode, Heart Rate Monitor Mode, Blood
Pressure Mode, Sleep Mode.
3. Power Save Mode:
After 5 seconds of inactivity, the tracker will automatically enter power save mode. The
LCD appears black. To reactivate the tracker, tap the touch menu button on the LCD or
short press the On/Off button.
Main Menu Mode
The following information is displayed on the Main Menu interface:
1. Battery level status: Full battery level, Low battery power level
2. Bluetooth status: Connected; Not Connected
3. Current Date.
4. Current Time. A = AM, P=PM
NOTE: Once your tracker is paired with your mobile device via the Vivitar Get Fit app, the
tracker’s time and date will sync according to what is shown on your mobile device.
Page 29

28
Steps Mode
1. From the Main Menu mode, tap once on the touch menu (or short press the power
button once) to enter the Steps interface.
2. The animated steps icon and number of current number of steps taken are displayed
on the LCD.
Distance Mode
1. From the Main Menu mode, tap twice on the touch menu (or short press the power
button twice) to enter the Distance interface.
2. The animated distance icon and distance amount are displayed on the LCD.
Page 30

29
Calories Mode
1. From the Main Menu mode, tap three times on the touch menu (or short press the
power button three times) to enter the Calories interface.
2. The animated calories icon and number of calories burned are displayed on the LCD.
Blood Pressure Mode
1. From the Main Menu mode, tap four times on the touch menu (or short press the
power button four times) to enter the Blood Pressure interface.
2. The bars by the heart move up and down as the blood pressure is being monitored.
After approximately 20 seconds, the LCD will display the real-time blood pressure, and
then after another approx. 5 seconds the tracker will go into Power Save mode.
3. To save your blood pressure data, you must use the manual blood pressure monitor in
the Vivitar Get Fit app.
Page 31

30
Heart Rate Mode
1. From the Main Menu mode, tap five times on the touch menu (or short press the power
button five times) to enter the Heart Rate interface.
2. The heart icon begins flashing as the heart rate is being monitored. After
approximately 5 seconds, the LCD will display the real-time heart rate. The real-time
data is displayed on the LCD for approximately 30 seconds, then the tracker goes into
Power Save Mode.
3. To save your heart rate data, you must use the manual heart rate monitor in the Vivitar
Get Fit app.
Sleep Mode
1. From the Main Menu mode, tap six times on the touch menu (or short press the power
button six times) to enter the Sleep interface.
2. The animated sleep icon and total time you have spent sleeping the previous night are
displayed on the LCD.
Page 32

31
Additional Functions
ALARM CLOCK
The alarm clock includes three alarm settings. When the alarm clock reminder appears, the
alarm clock interface and the preset time are displayed. When the alarm is activated the
tracker vibrates.
NOTE: The Alarm Clock can be set from the Vivitar Get Fit app settings.
CALL NOTIFICATION
The call notification/reminder displays the call interface and the name of the caller. If the
caller is included in your mobile device’s address book, the caller’s phone number will be
displayed and the tracker vibrates.
NOTE: Notification Access can be set from the Vivitar Get Fit app settings.
SMS NOTIFICATION
The SMS notification/reminder displays the message interface and the name of the person
who sent the message. If the message is from someone who is included in your mobile
device’s address book, the phone number is displayed and the remaining page shows the
message content feed.
NOTE: Notification Access can be set from the Vivitar Get Fit app settings.
Page 33

32
SEDENTARY REMINDER
The sedentary notification/reminder, as per the Vivitar Get Fit app settings, displays the
sedentary interface and the tracker vibrates once the sedentary time that was set is
reached.
NOTE: The Sedentary Reminder can be set from the Vivitar Get Fit app settings.
MESSAGE NOTIFICATION
The QQ, WeChat, Facebook, WhatsApp, or Twitter notifications are received on your mobile
device, the tracker will display the sender name and information content.
NOTE: Notification Access can be set from the Vivitar Get Fit app settings.
Page 34

33
FAQ
Q: How do I change my time/date?
A: The time/date on your tracker is synced from your mobile device, so you are unable to
change it in the app.
Q: How do I start/stop incoming message notifications?
A: In the Vivitar Get Fit app, go to Settings > TYL-5402 Settings. Select “Message
Notification”. Turn on/off the notifications you wish to receive.
Q: How do I measure my blood pressure?
A: From the Dashboard, scroll down and press the Blood Pressure icon to open the
Manual Blood Pressure data screen. Press the arrow to begin measuring. It will take
approximately 20 seconds to complete a reading.
You can also measure your blood pressure from your tracker. Press the Mode button 5
times to enter blood pressure mode. Your tracker will automatically begin measuring.
The only way to save your data is to measure your blood pressure through the Vivitar
Get Fit app.
Page 35

34
Q: How do I measure my heart rate?
A: From the Dashboard, scroll down and press Heart Rate icon to open the Manual Heart
Rate data screen. Press the arrow to begin measuring. It will take approximately 10
seconds to complete a reading.
You can also measure your heart rate from your tracker. Press the Mode button 6 times
to enter Heart Rate mode. Your tracker will automatically begin measuring.
The only way to save your data is to measure your heart rate through the Vivitar Get Fit
app.
Q: How do I password protect my device?
A: In the Vivitar Get Fit app, go to Settings > TYL-5402 Settings. Select “Reset password”.
Enter the old password of 0000, then enter your new password twice. Select “Reset
password” to save. Please write down this new password for safe keeping.
Q: How do I record my sleep?
A: Your sleep data is recorded automatically. To view your sleep data, select the Sleep
icon from the Dashboard of the Vivitar Get Fit app.
Page 36

35
Important Safety Instructions
1. Never attempt to disassemble or service your tracker.
2. Keep it clear when using. Please use a lightly moistened cloth to wipe the dirt on the
tracker. Do not expose the device to strong chemicals such as gasoline, clean solvents,
acetone, alcohol, insect repellents, as they may damage the unit's seal, case and finish.
3. Protect the unit from extreme heat, shocks and exposure to direct sunlight long time.
4. Do not swing the tracker.
5. Keep the tracker out the reach of children. If swallowed by mistake, please contact the
doctor immediately.
Page 37

36
Regulatory Notices
This device complies with the part 15 of the FCC rules. Operation is subject to the following
two conditions: (1) this device may not cause harmful interference, and (2) this device must
accept any interference received, including interference that may cause undesired
operation.
Caution: Changes or modifications not expressly approved by the party responsible for
compliance could void the user's authority to operate the equipment.
NOTE: This equipment has been tested and found to comply with the limits for a Class B
digital device, pursuant to Part 15 of the FCC Rules. These limits are designed to provide
reasonable protection against harmful interference in a residential installation. This
equipment may generate and radiate radio frequency energy, if not installed properly or
used in accordance with instructions. May cause harmful interference to radio or television
reception, which can be determined by turning the equipment off and on. The user is
encouraged to try to correct the interference by one or more of the following measures:
Page 38

37
Reorient or relocate the receiving antenna.
Increase the separation between the equipment and receiver.
Connect the equipment into an outlet on a circuit different from that to which the
receiver is connected.
Consult the dealer or experienced technician for help.
The product is made conforming with all the applicable European regulations.
Page 39

38
DISPOSAL
The device (including its removable parts and accessories) must not be disposed of together
with municipal waste at the end of its life, but in compliance with European Directive
2002/96/EC. Since it must be handled separately from household waste, either carry it to a
separately-collected waste disposal center for electrical and electronic appliances or give it
back to be retailer on purchasing a new device with the same purpose. Any infringement will
be severely prosecuted.
NOTE:
• Specifications and designs are based on the latest information available at the time of
printing and subject to change without prior notice.
• Do not use a substandard charging power supply, otherwise it will shorten the battery
life, and even may cause damage to the battery.
• This device’s button is a touch key, please don't stress it heavily. After entering any
function interface, please click on the touch key again, it will then display the next
interface.
Page 40

39
Implied Warranties
EXCEPT TO THE EXTENT PROHIBITED BY APPLICABLE LAW, ALL IMPLIED WARRANTIES
(INCLUDING, WITHOUT LIMITATION, WARRANTIES OF MERCHANTABILITY AND FITNESS FOR A
PARTICULAR PURPOSE) SHALL BE LIMITED IN DURATION TO THE DURATION OF THIS LIMITED
WARRANTY.
LIMITATION OF DAMAGES
EXCEPT TO THE EXTENT PROHIBITED BY APPLICABLE LAW, SAKAR SHALL NOT BE LIABLE FOR
ANY INCIDENTAL, INDIRECT, SPECIAL, OR CONSEQUENTIAL DAMAGES, INCLUDING, WITHOUT
LIMITATION, LOSS OF PROFITS, REVENUE OR DATA, RESULTING FROM ANY BREACH OF
EXPRESS OR IMPLIED WARRANTY OR CONDITION OR UNDER ANY OTHER LEGAL THEORY,
EVEN IF SAKAR HAS BEEN ADVISED OF THE POSSIBILITY OF SUCH DAMAGES. ADDITIONALLY,
EXCEPT TO THE EXTENT PROHIBITED BY APPLICABLE LAW, THE CONSUMER’s DAMAGES
SHALL BE LIMITED TO THE PURCHASE PRICE OF THE PRODUCT.
Page 41

40
GOVERNING LAW & JURISDICTION
This Limited Warranty shall be governed by the laws of the State of New York, USA, without
giving effect to any conflict of laws principles that may provide the application of the law of
another jurisdiction.
CAUTION: Consult your doctor before starting or changing any exercise program or regimen.
CAUTION: Consult your doctor before you begin using this product if you have any preexisting medical or other conditions that may, or could, be affected by your use of this
product.
CAUTION: Just as with any other electronic product, DO NOT check any notifications or other
applications on the product’s display in a location, or in a situation, such as driving or riding a
motorcycle or bicycle, where distractions could be hazardous to you or others in your
surroundings.
CAUTION: This product is not a toy, and has parts that may be deemed a choking hazard for
small children or pets.
This product is NOT a medical device, nor is intended to replace one. It is not intended to
diagnose, treat, cure, or prevent any disease. The accuracy of this device is not intended to
match medical devices or scientific measurement devices; rather, it is intended to give you
Page 42

41
the best information available in a wearable fitness tracker.
Any controversy or claim arising out of or relating to this product, shall be settled by
arbitration administered by the American Arbitration Association in accordance with its
Commercial Arbitration Rules, and judgment on the award rendered by the arbitrator(s) may
be entered in any court having jurisdiction thereof, with the arbitration to be held in New
York County, New York.
Additionally, and, except to the extent prohibited by applicable law, the parties agree that (i)
no arbitration proceeding hereunder - regardless of the nature of the dispute, whether a
consumer dispute, a business dispute or a claim involving injury - shall be certified as a class
action or proceed as a class action, or on a basis involving claims brought in a purported
representative capacity on behalf of the general public, other customers or potential
customers or Persons similarly situated, and (ii) no arbitration proceeding hereunder shall be
consolidated with, or joined in any way with, any other arbitration proceeding. THE PARTIES
AGREE TO ARBITRATE DISPUTES ON AN INDIVIDUAL BASIS AND EACH WAIVES THE RIGHT TO
PARTICIPATE IN A CLASS ACTION.
Page 43

42
Sakar Warranty Card
Sakar Warranty
This warranty covers the original consumer purchaser only and is not transferable. This
warranty covers products that fail to function properly UNDER NORMAL USAGE, due to defects
in material or workmanship. Your product will be repaired at no charge for parts or labor for a
period of one year.
What is Not Covered by Warranty
Damages or malfunctions not resulting from defects in material or workmanship and damages
or malfunctions from other than normal use, including but limited to, repair by unauthorized
parties, tampering, modification or accident.
What to Do When Service Is Required
When returning your defective product (postage pre-paid) for service, your package should
include:
1. Copy of original bill of sale.
2. A detailed written description of the problem.
3. Your return address and telephone number (daytime).
Page 44

43
Mail to the Address Below:
In the U.S. In the U.K.
Sakar International
Sakar UK
Attention: Service Department 2D Siskin Parkway East
195 Carter Drive CV3 4SU, UK
Edison, NJ 08817
You may also visit www.sakar.com for further assistance if necessary or call our
technical support department toll free at 1-877-397-8200 in the US, or 0-800-9174831 in the UK.
 Loading...