

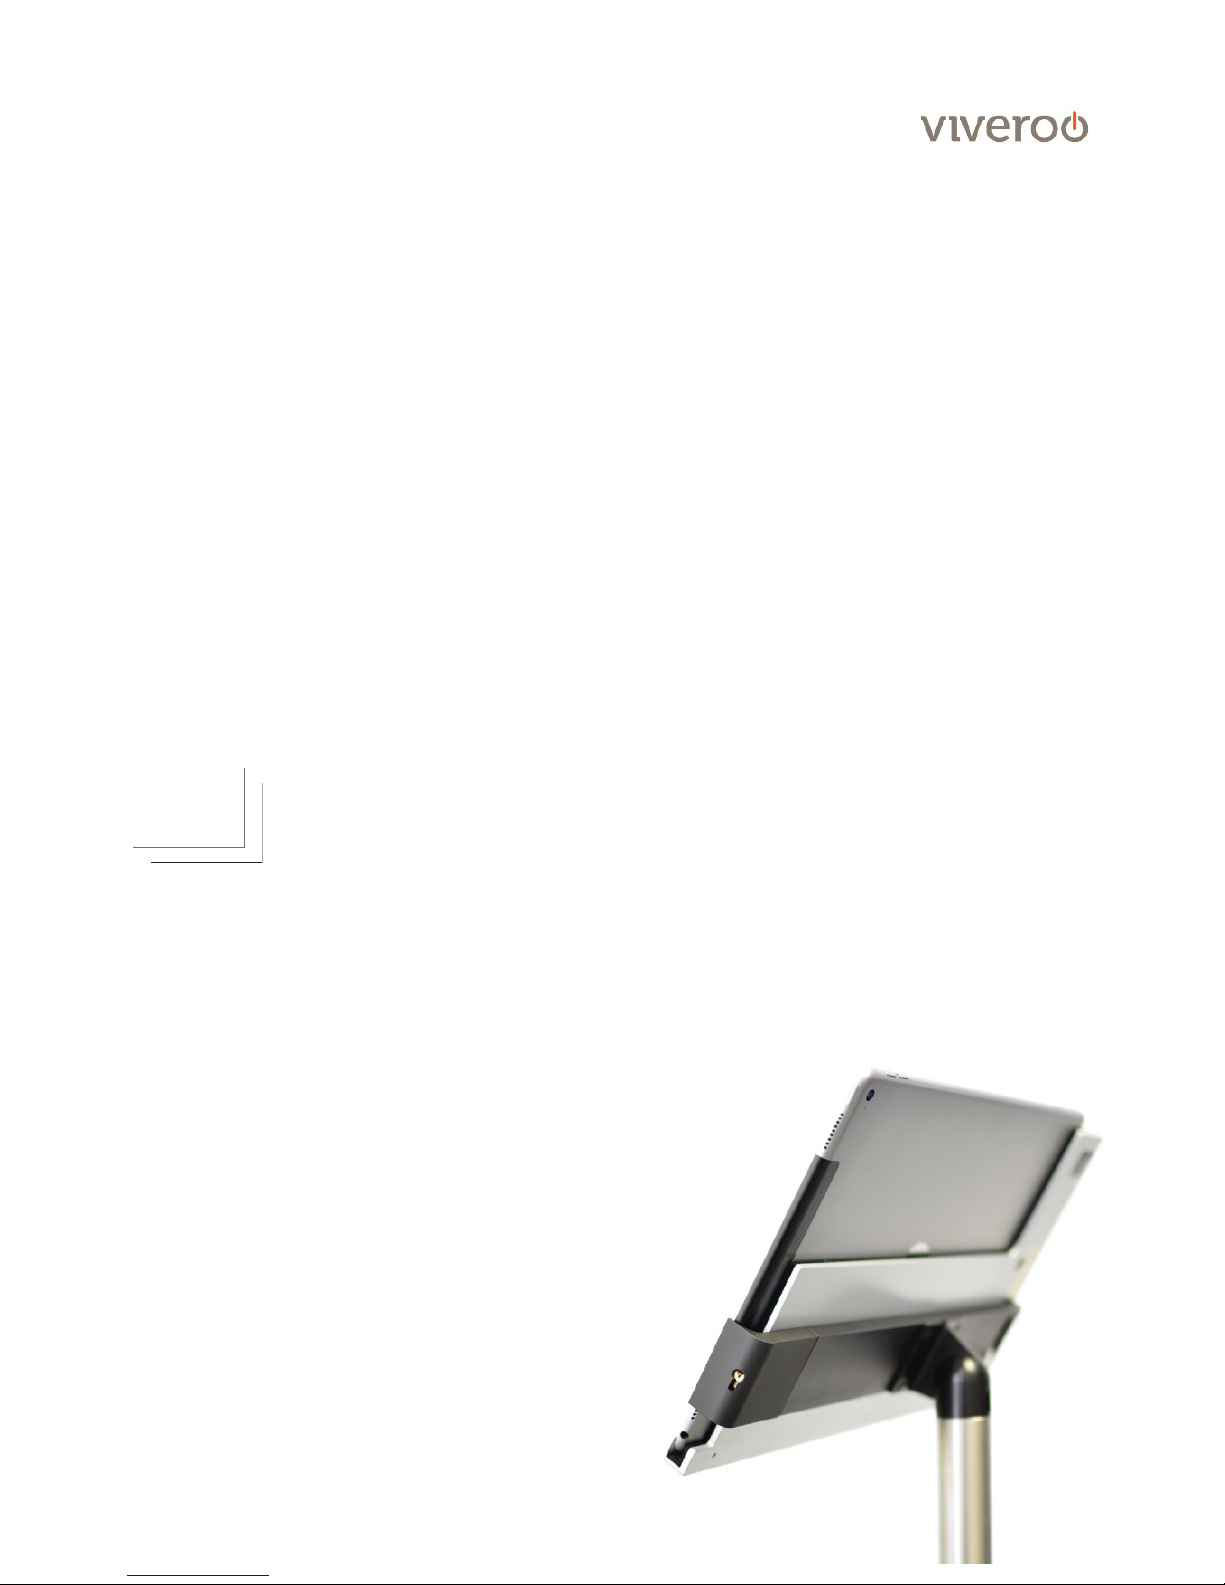
User manual & Installation guide
free flex
!
viveroo GmbH
Wewelsburger Straße 4
33154 Salzkotten
Germany
www.viveroo.com
REV20180317
free

Safety information!
free flex, User manual & Installation guide ! ! ! ! ! ! ! ! page von 2 11
! Warning
Please read the assembly instructions included carefully. Please read
this free flex user manual completely before using your free. Please
follow the instructions and recommendations to ensure proper use
and maximum enjoyment.
Safety
information
free flex is intended for use in enclosed and dry living spaces.
The following conditions must be provided:
-
Operating temperature between 0° C (32° F) and 35° C (95° F).
-
Relative humidity (during use): 20"% to 90"%, non-condensing.
-
No external environmental influences such as oil, chemicals, salt,
extensive dust, etc.
Installation, service or repairs, if necessary, may only be performed by
authorized persons.
The maximum altitude is 2.000m.
The installer is responsible for selecting the proper mounting location
and safe installation of free flex. This also applies to installation in
movable parts, such as doors. The installer is responsible for
performing and documenting all necessary safety tests.
All electrical installation work may only be conducted by authorized,
trained electricians, always adhering to the general rules and
regulations applying to electrical installation.
Should it become apparent that safe operation of free flex is not
assured, then free must immediately be taken out of service and
secured against potential misuse. If the free flex functions are limited,
blocked or disabled, if an unusual odor is present, if noises such as
scratching are audible or damage is visible, safe operation can no
longer be guaranteed.
Care and
Cleansing
Cleanse your free flex as needed with a soft micro fiber cloth and clear
water only. Dampen the micro fiber cloth and wipe the surfaces gently.
Use stainless steel cleaner to clean pipe and base.
! WARNING: The interior of the free flex must remain dry. To ensure
this, use only a damp cloth for cleansing.
! WARNING: Never scratch, scrape or scrub free flex surfaces with
abrasive materials.
!

Technical Data!
free flex, User manual & Installation guide ! ! ! ! ! ! ! ! page von 3 11
Measurements
in millimeter
Measurements free flex frame
… iPad Air and iPad (March 2017)
… iPad Pro 10.5 inch
… iPad Pro 12.9 inch
267 x 164"
278 x 173
332 x 214
Depth free flex frame
16
Diameter standpipe
35
size of plate/pedestal
207 x 142
Weight in gram
free flex frame, back plate, swivel joint
and standpipe
… iPad Air and iPad (March 2017)
… iPad Pro 10.5 inch
… iPad Pro 12.9 inch
plate/pedestal
1.060
1.153"
1.425
710
Electrical
connections
Power supply
5,2 Vdc via "
Lightning to USB-A cable
CE & Co.
All free flex have CE certification. free flex is quality "Made in Germany".
We use only high-quality parts and components produced by market
leaders. free flex customers are proud of their iPad Garage.
Removal from
power supply
free flex may be removed from the power supply via the circuit breaker
in the respective rooms.
Tech nica l ch ange s an d mi stak es a re e xcep ted.
Product
contents
- User manual & Installation guide free flex
- free flex frame made of one block of aluminium, painted
- back plate incl. swivel joint and stainless steel standpipe
- stainless steel plate/pedestal with rubber- and feltpads "
(optional upon request)
- locking system to prevent iPad from theft (optional upon request)
Compatability
Electrical operation of free is permitted only in connection with
viveroo or Apple power supply units. Operation of free without it will
lead to immediate loss of guarantee and warranty.
Operation
!
free flex, User manual & Installation guide ! ! ! ! ! ! ! ! page von 4 11
Functions
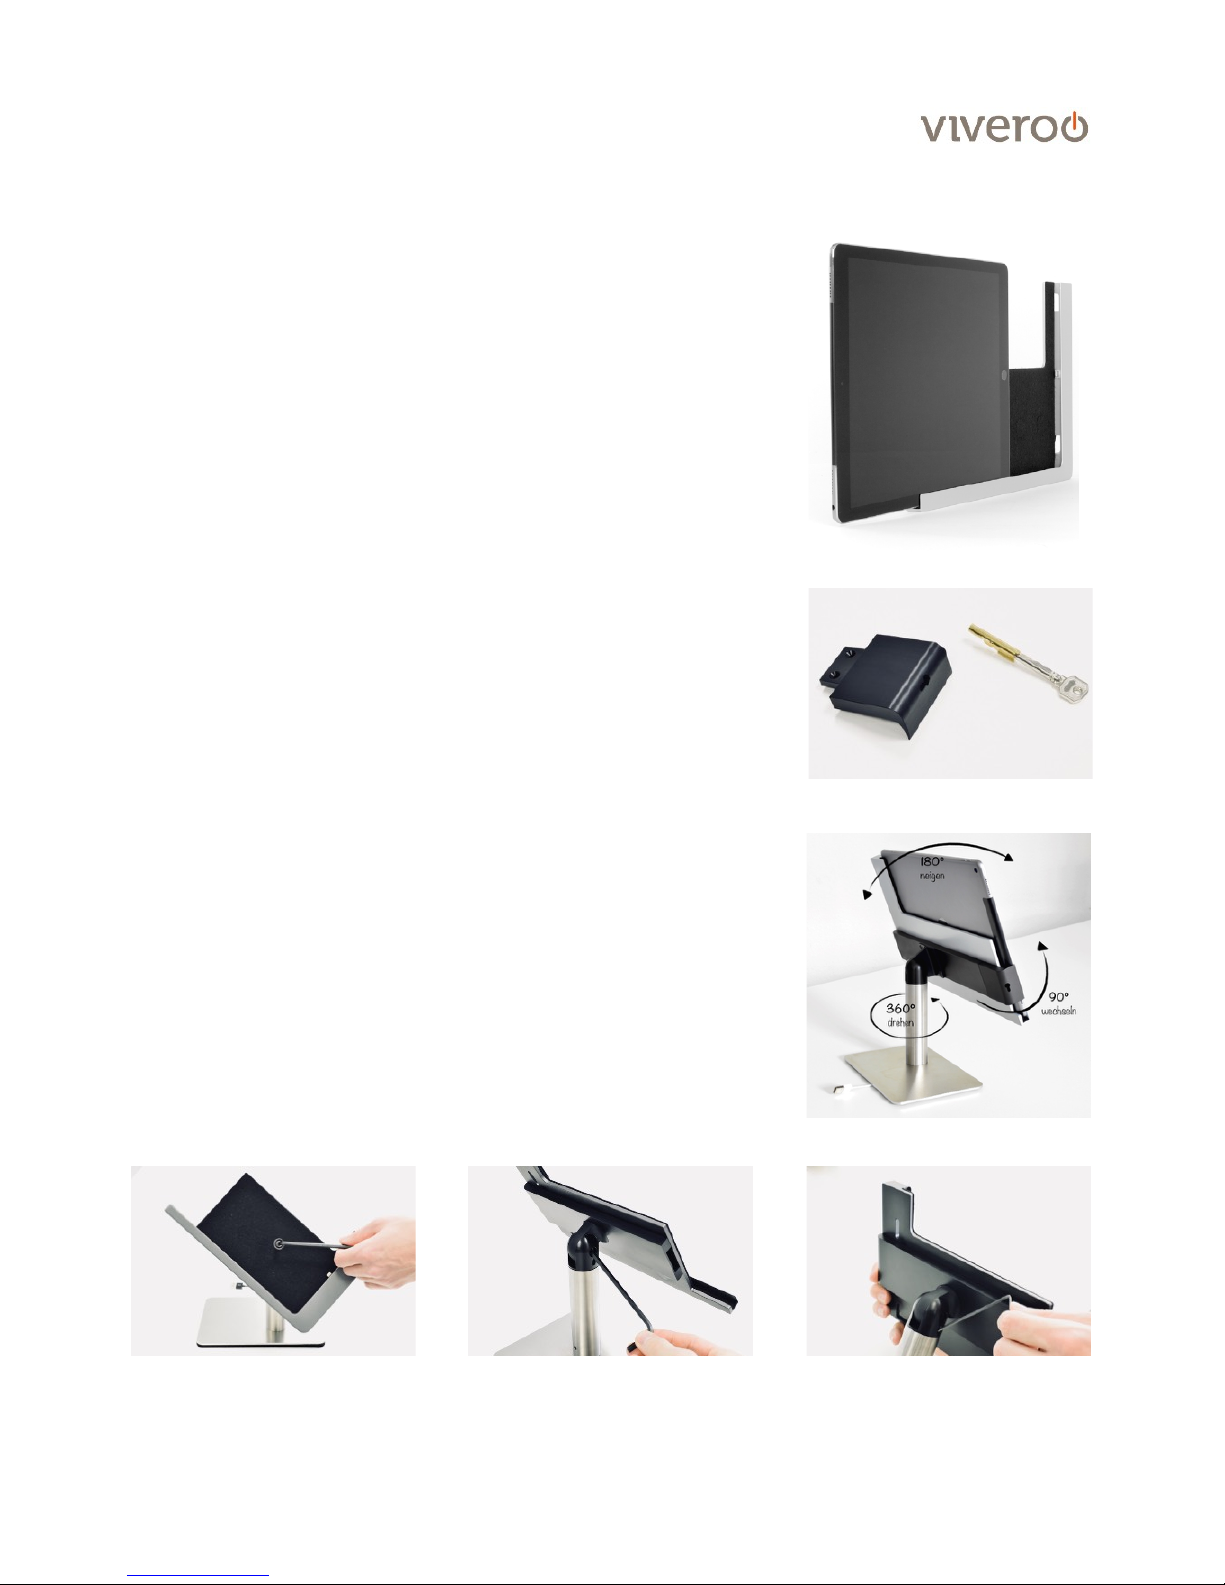
Remove and insert iPad
free flex can be either installed vertically or horizontally
free flex in landscape position: Put the iPad from the left on the
guide rail. Slide it to the right to the Lightning connector. Push it until
you hear a click tone that indicates the safe hold of the iPad.
free flex in portrait position: Put the iPad from the upper left on the
vertical guide rail. Slide it to the bottom to the Lightning connector.
Push it until you hear a click tone that indicates the safe hold of the
iPad.
All surfaces and edges are fitted with felt or slip tapes to protect your
iPad from scratches and damage.
free flex security options
The viveroo free has an optional locking system to prevent the iPad
from being stolen. The security option has a seperate operations
manual that is attached to a viveroo free element with the security
option. The locking system can be retrofitted autonomous.
Maximum freedom
The viveroo free flex gives the user maximum flexibility in its use.
flex tilt: Intensity adjustable with the 5mm Allen key
flex rotate: Intensity adjustable with the 2,5 mm Allen key
flex turn: Remove the upper middle felt cover point and loose the
screw with the help of the 5mm Allen key. It is now possible to change
between landscape and portrait mode. A 90 ° stop ensures the perfect
final position of the frame after turning. Tighten the screw again after
finding the correct postion for your use.
flex turn
flex tilt
flex rotate

Installation
Delivery contents!
free flex, User manual & Installation guide ! ! ! ! ! ! ! ! page von 5 11
Step 1
Place the swivel joint mechanism in the recess on the
back plate, which is pre-mounted on the back of the
viveroo free flex frame. Make sure that the Lightning USB
cable is routed in the cable channel and not squeezed.
Step 2
Secure the swivel to the back plate by inserting and
tightening the screw on the front of the frame. (Required
tool: 5mm Allen key)
! Note: The free flex frame can be changed from portrait
to landscape format at any time with the help of this
step. A 90° stop ensures the perfect final position of the
frame after turning.
free flex frame
Screw base and standpipe
base/pedestal (optional)
Locking system (optional)
back plate "
(pre-assembled on the frame)
swivel joint

Installation
free flex, User manual & Installation guide ! ! ! ! ! ! ! ! page von 6 11
Step 3
Run the USB Lightning Cable through the standpipe.
Please make sure that the hole of the tube points
downwards.
Step 4
Insert the swivel joint onto the standpipe and connect it
by turning the slanted screw in the swifel mechanism to
the right. (Required tool: 2,5mm Allen key)"
"
The swivel joint is now rotatable by 360° in the standpipe.
By tightening the screw you can control the ease of
stiffness of the rotation.

Installation
There are now two options for installation: The standard version includes a screw base to mount the free flex directly to a surface,
for example furniture or kitchen countertops. Steps 5.1 - 5.5 consider this path.
Furthermore, the free flex can be mounted on an optionally available base/pedestal and retains its mobility. The assembly shows
steps 6.1-6.3.
Direct screw connection with screw base
free flex, User manual & Installation guide ! ! ! ! ! ! ! ! page von 7 11
Step 5.1
Use the drilling template to drill the two mounting holes
for the screw base and the cable outlet into the carrier
material.
! Attention: The cutout of the screw base should point
away your direction, means the viewing direction. On
the opposite side of the recess there is a hole for
fixing, which will be visible. (Step 5.4)
Step 5.2
Pass the Lightning USB Cable through the cable outlet.
Step 5.3
Attach the screw base.
! Note for substrate wood: Use wood screws,
recommended size at least 4x40.
For optimum hold use use the recommended metric
screws (M5) with a counterpart nut.

Installation
free flex, User manual & Installation guide ! ! ! ! ! ! ! ! page von 8 11
Step 5.4
Place the standpipe on the screw base. Please make
sure that the hole in the standpipe is above the hole in
the screw base.
Step 5.5
Connect the standpipe to the screw base by turning the
screw to the right. (Required tool: 4mm Allen key)

Installation
Mounting on base/pedestal
free flex, User manual & Installation guide ! ! ! ! ! ! ! ! page von 9 11
Step 6.1
Attach the screw base to the base/pedestal. (Required
tool: 5mm Allen key)
Step 6.2
Put the Lightning USB Cable through the cable outlet
and place the standpipe on the screw base. Please
make sure that the hole in the standpipe is above the
hole in the screw base.
Step 6.3
Connect the standpipe to the screw base by turning the
screw to the right. (Required tool: 4mm Allen key)
Step 6.4
The free flex stands on rubber feet for optimal stability.
If necessary, felt points are included.
In addition, a cable clip is included to fix and guide the
USB cable.

Installation
Optional Security System
free flex, User manual & Installation guide ! ! ! ! ! ! ! ! page von 10 11
Step 7
The optional locking system provides optimal protection
against theft of the iPad. The locking rail is already
factory-assembled when ordered with the security
option, but can also be retrofitted at any time.
Disassemble the back plate of the free flex frame. The
three screw holes are accessible after removing the felt
covers. (Required tool: 2.5mm Allen key)
Step 7.1
Put on the locking rail. The side with the countersunk
screw holes point upwards. Fasten the locking rail with
the enclosed screws. (Required tool: 2mm Allen key)
Finally attach the back plate to the free flex frame.
Step 7.2
The lock plate can now be pushed on the locking rail.
Now you can insert the lock cylinder mechanism into
the hole, turn the key by 90° to the right to then pull/
remove it. The viveroo free flex is now locked.
You will also find the instructions and the drilling template digitally in
the download area of our website www.viveroo.com
If you have any questions about the installation of your free flex
please do not hesitate to contact us: "
by e-mail: info@viveroo.com "
by phone: +49 5258 220990
Greetings from Salzkotten,
Your viveroo team

Warranty
free flex, User manual & Installation guide ! ! ! ! ! ! ! ! page von 11 11
Warranty
free flex comes with a one year warranty from date of purchase by
the original end customer, unless the device was repaired or replaced
during the warranty period. In this case, the warranty is valid until the
end of the regular two year warranty or six months following the
repair/replacement, whichever comes first.
Warranty claims and
verification
Should your free flex for any reason not perform as expected, please
contact your dealer and provide the original invoice with serial
number as well as a brief description of your complaint.
Warranty claims and
verification
The following devices are excluded from the warranty
Devices with damages caused by:
-
acts of nature,
-
misuse, including but not limited to disregarding the user manual and
mounting instructions,
-
inappropriate handling,
-
connection to an incorrect power supply,
-
repairs or attempted repairs by unauthorized persons,
-
use of the device in connection with third party products,
devices on which the serial number of the producer has been changed,
deleted, removed or made illegible.
Apple, iPad and Lightning are registered trademarks of Apple Inc.
viveroo GmbH - Wewelsburger Str. 4 - 33154 Salzkotten, Deutschland - T +49 5258 220990 - info@viveroo.com - www.viveroo.com
 Loading...