

Page 1
US-1
VA028
RESET
Page 2

US-2
TABLE OF CONTENTS
- INTRODUCTION
- USING THE PEDOMETER
Tips To Use
How to Secure Your Pedometer
Mode
Power Saving
Getting Started
12/24HR Display
Time
Setting Units
Stride Length
Weight
Target Goal
Start Walking
Time Mode
Step Mode
ODO Step Mode
How to Active/Deactivate ODO Step
Distance Mode
Calories Mode
Exercise Time Mode
Total Data Mode
- CARE AND MAINTENANCE
- BATTERY REPLACEMENT
3
3
3
3
5
6
6
6
7
7
7
8
8
9
9
9
10
10
11
11
11
11
12
13
Page 3

US-3
INTRODUCTION
Thank you for choosing the Vitra Axis Digital
Pedometer, a precise device designed to
monitor your performance during exercise.
This Digital Pedometer features a big display
that shows time, steps and all other related
data (distance / calories / exercise timer).
USING THE PEDOMETER
Tips To Use
- Wear solid shoes.
- Walk or jog at a steady pace.
- Vertical body movements or vibrations
(such as in the car) can create an incorrect
reading.
How To Secure Your Pedometer
Place your pedometer securely in your front
pocket or hang it from your neck. For the
best accuracy, read the recommendation of
how to secure below:
Page 4

US-4
Pocket:
- Put the Pedometer in your front pocket
of your shirt, blouse, pants, shorts or skirt.
- Do not put the pedometer in your back
pocket.
- For best accuracy, make sure the
pedometer is secured tightly on your body
or clothes. If your pocket is too loose the
pedometer may jiggle around and cause
incorrect results.
Neck:
- Attach a lanyard to the pedometer and
hang it from your neck when walking.
- Do not hang the pedometer from your
neck during jogging.
Page 5
US-5
RESET
Mode
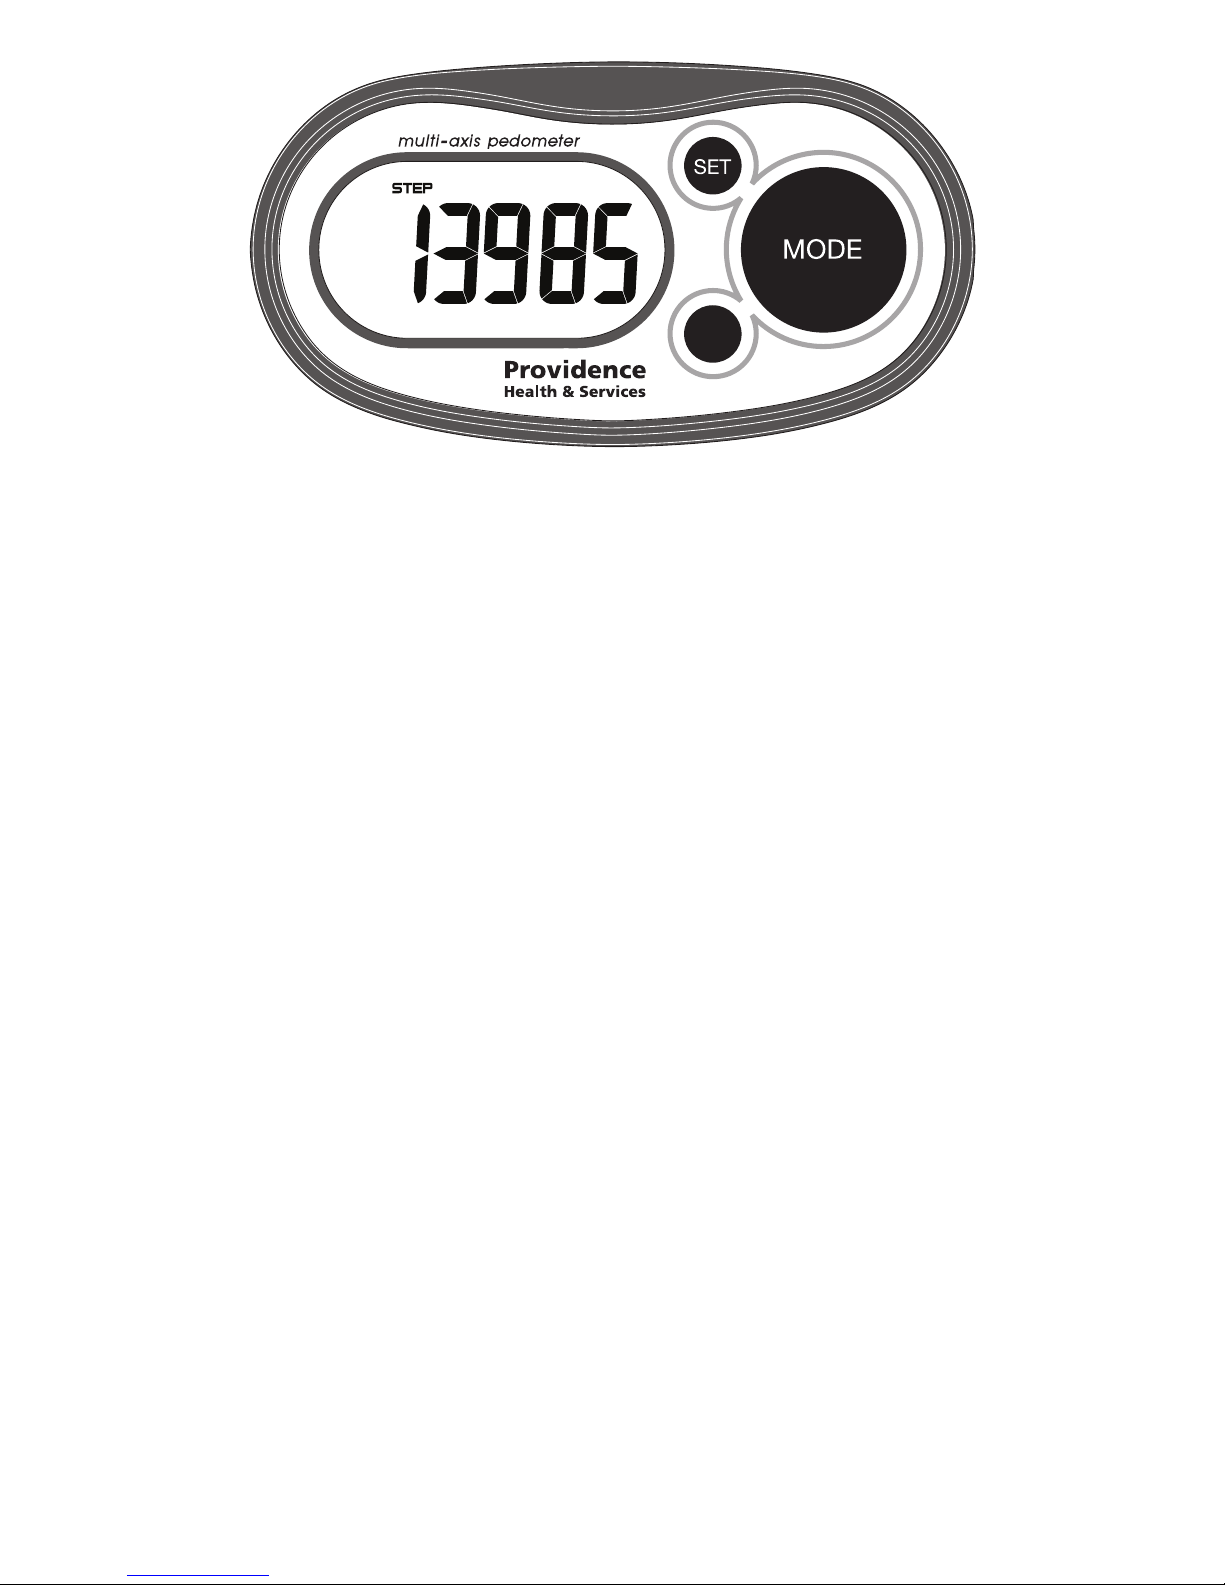
This pedometer has features with six
dierent modes:
- Time Mode
- Step Mode
- ODO Step Mode
- Distance Mode
- Calories Mode
- Exercise Timer Mode
- Total Data Mode
Press the MODE key to browse through
modes.
Page 6

US-6
Power Saving
LCD display will automatically turn o after
no step / key input for over three minutes.
The step counting will still be active but the
display will be o to preserve battery life.
Press any key to activate the display again.
Getting Started
You need to enter some personal data
before you start using your pedometer.
To set up your personal data rst scroll to
TIME mode. Press and hold the SET key for
two seconds.
The setting sequences are:
12/24HR Display > Time > Units > Stride
Length > Weight > Target Goal
12/24HR Display
First enter the 12/24HR Display selection.
Use the MODE key to select if you want the
time display format to be 12 or 24. Press the
SET key to conrm.
Page 7

US-7
Time
When you conrm the 12/24HR Display,
the Hours digit will start ashing. Press the
RESET key to increase the digit or press the
MODE key to decrease the digit. Press the
SET key to conrm and move to Minute
settings. Set Minutes using the same
directions. Press the SET key to conrm and
move to Units settings.
Units
You can press the RESET key or MODE key to
toggle Imperial or Metric Units for display.
Press the SET key to conrm and move to
Stride Length settings.
Stride Length
Correct Stride Length is dened from the tip
of one foot to the tip of your other foot. To
measure the correct average stride length,
divide the total distance of ten steps you’ve
walked or run by the number of steps (10).
Calculate your stride length in the following
way:
You walk 30 feet (total distance) / 10
(number of steps) = 3 feet x 12 inches =
36 inches.
Page 8

US-8
You need to measure the stride length for
both walking and running. To measure the
stride length for running, it is recommended
to take more steps (approx. 50 steps) to get
a more accurate stride length.
Input your Stride Length by pressing the
RESET key to increase the digit, and press
the MODE key to decrease the digit, press
the SET key to conrm and move to Weight
settings.
Weight
Input your Weight by pressing the RESET
key to increase the digit, and press the
MODE key to decrease the digit, press the
SET key to conrm and move to Target Goal
settings.
Target Goal
To keep your health and reduce chronic
disease risk, work towards taking 10,000
steps a day. For eective weight loss, work
towards 12,000 to 15,000 steps a day.
Input your Target Goal by pressing the
RESET key to increase the digit, and press
the MODE key to decrease the digit, press
the SET key to conrm.
Page 9

US-9
Note: Left of the pedometer’s display is
a status bar. It shows your percentage of
completed goal compared with the target
goal you set. If your workout exceeded
your target goal, the status bar will ash to
indicate this.
Start Walking
To avoid counting errors, the display of your
pedometer will not start showing the
number of steps taken until after the
tenth step. Then all the steps taken will be
counted and displayed.
Now your pedometer is ready for use. You
can browse the exercise data one by one by
pressing the MODE key.
Time mode
Displays the Current Time (enter Time settings from this mode).
Step Mode
Displays the steps you have taken today.
You can reset the Step Count Distance and
Calories information by pressing and holding the RESET key for two seconds.
Page 10

US-10
ODO Step Mode
Allows you to start a new, separate session
for step counting. The current steps will still
be retained while you monitor your new
session.
How To Activate/Deactivate ODO Step
Mode Function
To activate the ODO function to view your
new session of step counting, press the
MODE key to enter the ODO Step Mode and
you will see ODOSTEP on the top line of the
display. Press and hold the SET key for two
seconds to activate the function and the
“ODO” icon will keep ashing during the
ODO Step Mode.
To end the session, press and hold the SET
key for two seconds to deactivate the
function and the “ODO” icon will stop
ashing.
To clear the ODO step data, press and hold
the RESET button for two seconds. The Step,
Distance and Calorie data in the main Step
mode will remain.
Page 11

US-11
Distance Mode
Displays the Distance you have traveled.
Calories Mode
Displays the Calories you have burned
during exercise.
Exercise Time Mode
Displays in Minutes the total time spent
exercising.
Total Data Mode
Your pedometer will store your total
exercise data. You can reset the Total Data
Mode by pressing and holding the RESET
key for two seconds while in the Total Data
Mode. Press the SET key in this mode to
browse the total records you have achieved
including Steps, Distance, Calories and Time.
Page 12

US-12
CARE AND MAINTENANCE
Never attempt to disassemble or service
your unit.
Protect the electronic module from
extreme heat, shocks and long time
exposure to direct sunlight.
Unit can be wiped clean with a lightly
moistened cloth. Apply mild soap to the
area if there are stubborn stains or marks.
Do not expose the unit to strong
chemicals such as gasoline, solvents,
acetone, alcohol or insect repellents, as
they may damage the units seal, case
and nish.
Store the unit in a dry place when you are
not using it.
Keep the pedometer out of reach of
young children.
If a young child swallows battery, battery
cover or screw, immediately consult a
physician.
The operation environment of the
pedometer must be free from shocks,
magnetic elds, electrical noise and
strong vibrations.
Do not swing the pedometer.
Do not hang the pedometer from your
neck during jogging.
Do not drop or step on the pedometer.
Page 13
US-13
Do not put the pedometer in the back
pocket of your shorts, skirt or pants.
Do not wash the pedometer or touch it
with wet hands.
BATTERY REPLACEMENT
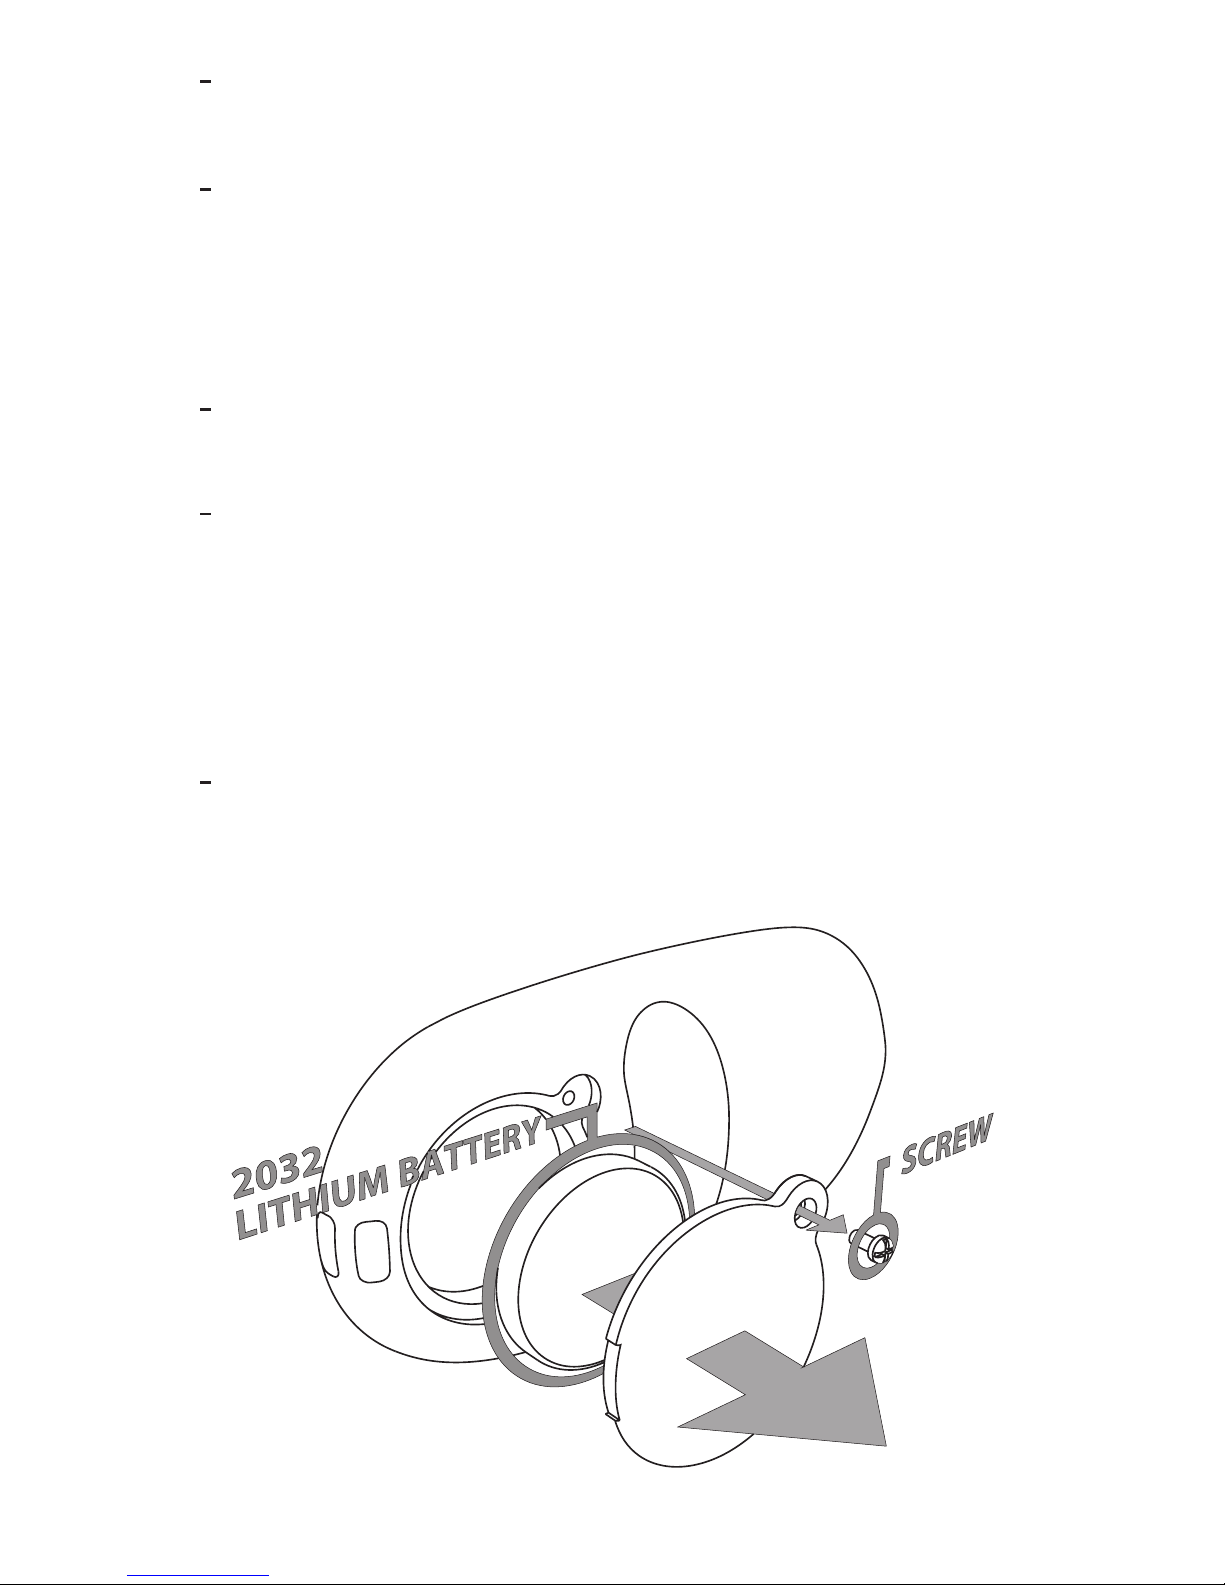
Use a screwdriver to unscrew the battery
cover at the back of the unit.
Use a thin stick to remove the exhausted
battery from the unit, and insert a new 3V
lithium battery type CR2032. Be sure to
place the positive (+) side of the battery
facing you.
Put the battery cover back on and screw
back tightly with a screwdriver.
+
Page 14

US-14
VA028
PPR028 - 03006
 Loading...